Perfect Vegan Cornbread

Nothing goes better with a hot bowl of soup, chili, or beans than some homemade cornbread. My mom has always used mayo in her cornbread in place of eggs, so swapping out for vegan mayo was an easy fix. Using oat milk will help you get a darker color…

Nothing goes better with a hot bowl of soup, chili, or beans than some homemade cornbread. My mom has always used mayo in her cornbread in place of eggs, so swapping out for vegan mayo was an easy fix. Using oat milk will help you get a darker color in vegan baked goods, but use whatever plant based milk you have on hand. You can easily bake these up in a muffin tin as well, if you prefer corn muffins to regular cornbread.

Ingredients:

  • 1 cup cornmeal

  • 1 cup all purpose flour

  • 2 teaspoons baking powder

  • 1 teaspoon salt

  • 1/4 cup sugar

  • 2 tablespoons melted vegan butter

  • 1/4 cup vegan mayo (the mayo acts as an egg replacer in this recipe)

  • 1 cup plant based milk

Cooking Instructions:

preheat oven to 425 degrees

  1. Mix together dry ingredient in a large bowl.

  2. Next, add in wet ingredients and mix well.

  3. Add a few teaspoons melted butter or oil to a small cast-iron skillet or baking pan before adding the batter. If using a cast iron skillet, place it in the oven as it preheats. Pouring the batter into a hot pan will help it form a nice crispy edge.

  4. Let cornbread bake for 20-25 minutes or until a toothpick poked in the middle comes out clean.

IMG_1034.jpg

Classic Vegan Sausage Balls

IMG_8572.jpg

Growing up in the south, sausage balls were a party staple.

Every baby shower, bridal shower, or family gathering had a tray of these tasty treats.

By simply swapping out the cheese and sausage in the original recipe for vegan versions, these yummy little bites will quickly become vegan party favorite!

Bisquick brand biscuit mix is in fact vegan! Hallelujah y’all, because that makes this recipe so super easy and what we always used in the original sausage ball recipe.

For the cheese you can use any vegan brand cheddar shreds you prefer or try your hand and making your own easy vegan cheddar cheese. I have almost 40 vegan cheese recipes on the site you can peruse! Even if you are up for making cheese for this recipe, trust me when I tell you homemade shreddable vegan cheese is so easy and affordable to make, that once you get brave enough to try your hand at it, you may never go back to buying store bought!

Fo the the sausage I like to use a package of lightlife Gimme lean, but you could also use something like the Beyond Brand links. You just cut away the casing and crumble up the sausage into the bisquick and cheese.

These vegan sausage balls make for a great snack, party appetizer, or even a nice side with a light dinner, or even as quick on the go breakfast. My kids beg me to make these all the time, so whenever we are craving them, we make a batch.

I really think these classic vegan sausage balls are perfect anytime and you don’t really need any excuse at all to make them other than you feel like it!!!!

Remember being vegan does not mean you have to give up the things you ate before you became vegan, you just have to learn how to substitute and make a few changes!!


Ingredients:

  • 2 cups Bisquick brand all purpose mix

  • 1 8oz bag of vegan cheddar shreds, or homemade cheddar

  • 1 14oz package vegan sausage (I used LightLife, Gimme lean), you can use homemade or even beyond links with the casings removed.

  • 1/4 - 1/3 cup water


Cooking Instructions:

Preheat oven to 350 degrees.

  1. In a large bowl, combine sausage, cheese, bisquick, and water.

  2. Mix up the ingredients using a large wooden spoon, or your hands. I find it much easier, and quicker to just use my hands to get it all mixed together.

  3. Once the mixture is ready, use a small cookie scoop or teaspoons to portion out the mixture. Roll the portions into balls, and place them on a parchment lined cookies sheet.

  4. Bake the sausage balls for 20 - 25 minutes. Let cool before serving.

Pumpkin Spice Vegan Cheese Ball

IMG_8556.jpg

Sweet vegan cheese ball you say?!? Well I say yes!

Even though most cheese balls are savory does not mean you can’t make them sweet.

The base is the same, the spices are just different. So why not think outside of the box and make some sweet versions for your next cheese board.

A sweet cheese ball is perfect for spreading on fruit, cookies, or sweet biscuits.

My all time favorite fall flavor is pumpkin spice and that includes in the form of a creamy sweet vegan cheese ball.

This cheese ball has the right amount of pumpkin pie spice, maple sweetness and of course pumpkin puree! We also gave it a little drizzle of maple icing because why not!

If you are serving a cheese board, or just need a quick fall dessert or snack, give this one a whirl. If you love all things pumpkin spice, I think you will LOVE this cheese ball.


INGREDIENTS:

  • 1 cup cashews soaked in hot water for a few hours or microwaved for 3 minutes then drained

  • 1/2 cup refined coconut oil

  • 1/4 cup canned pumpkin or pumpkin puree

  • 1 teaspoon vanilla extract

  • 3 tablespoons maple syrup or maple butter

  • 1/4 teaspoon salt

  • 1 teaspoon cinnamon

  • 1 teaspoon pumpkin pie spice

  • A few graham crackers (Nabisco brand is honey free)

Icing drizzle:

  • 1/4 cup powdered sugar

  • 1/2 teaspoon pumpkin pie spice

  • A few drops of maple syrup to thin out the icing


INSTRUCTIONS:

  1. Add all of the ingredients to a food processor, or high speed blender, and blend until the mixture becomes completely smooth.

  2. Crush the graham crackers into a fine crumb. I normally just put them in a zip lock bag use a rolling pin to crush them.

  3. Line 2 small bowls, or ramekins, with a pieces of plastic wrap. You want a piece big enough that it will hang a good bit over the sides. Sprinkle some of the crushed graham crackers on the bottom of the bowls.

  4. Divide mixture evenly into the bowls. Now take the plastic wrap hanging over the edges, bring together and twist to seal up the cheese. Allow to harden in the fridge for 3 - 4 hours to firm up.

  5. Once cheese is ready, whisk together the icing ingredients. If the mixute gets too thin, add some more powdered sugar.

  6. Remove both cheese balls from the bowls, and plastic wrap. Drizzle tops with icing.

  7. Put cheese balls in an airtight container and store in the fridge for up to 5 days.

    Serve with fruit or graham crackers

Pumpkin Spice Vegan Pop-Tarts

IMG_8501.jpg

I LOVE pop tarts! Love them. Over the years I have tried several variations of dough and filling.

I settled on this dough because the little bit of extra butter gives them a nice flakey crust, somewhere between a pop tart, and a toaster strudel.

I make all kinds of pop-tarts, but around September I am all in for all things pumpkin spice. I know, I know, she’s so “basic” or whatever the kids are saying these days. But y’all, I love pumpkin everything. Pumpkin pie being my all time fave, and these are a close second and an acceptable breakfast pie, if you will.

If you are in the “I hate all things pumpkin camp” I am baffled BUT accept your personal taste and can offer you other vegan pop- tart flavors on the site. I have chocolate, strawberry, and even lemon lavender. Something for maybe everyone?!

Just know that however you deiced to make them, they are surprising easy to make, and so good that you will probably want to just go ahead and make a double batch!

We have a family of 6 so these do not last!!! They keep well and will reheat nicely, too.

So if you have never made a homemade vegan pop-tart before, nows the time!


INGREDIENTS:

  • 1 cup whole wheat flour

  • 1 cup all purpose flour

  • 3/4 cup vegan butter

  • a pinch of salt

  • 3 - 4 tablespoons ice water

  • 3 tablespoons Pumpkin Butter

  • 1/4 cup powdered sugar

  • a drizzle of maple syrup

  • 1/4 teaspoon pumpkin pie spice


INSTRUCTIONS:

  1. Preheat oven to 350.

  2. Add both cups of flour, butter, and salt to a food processor and pulse until well combined.

  3. Add in the water, one tablespoon at a time until a soft dough has formed.

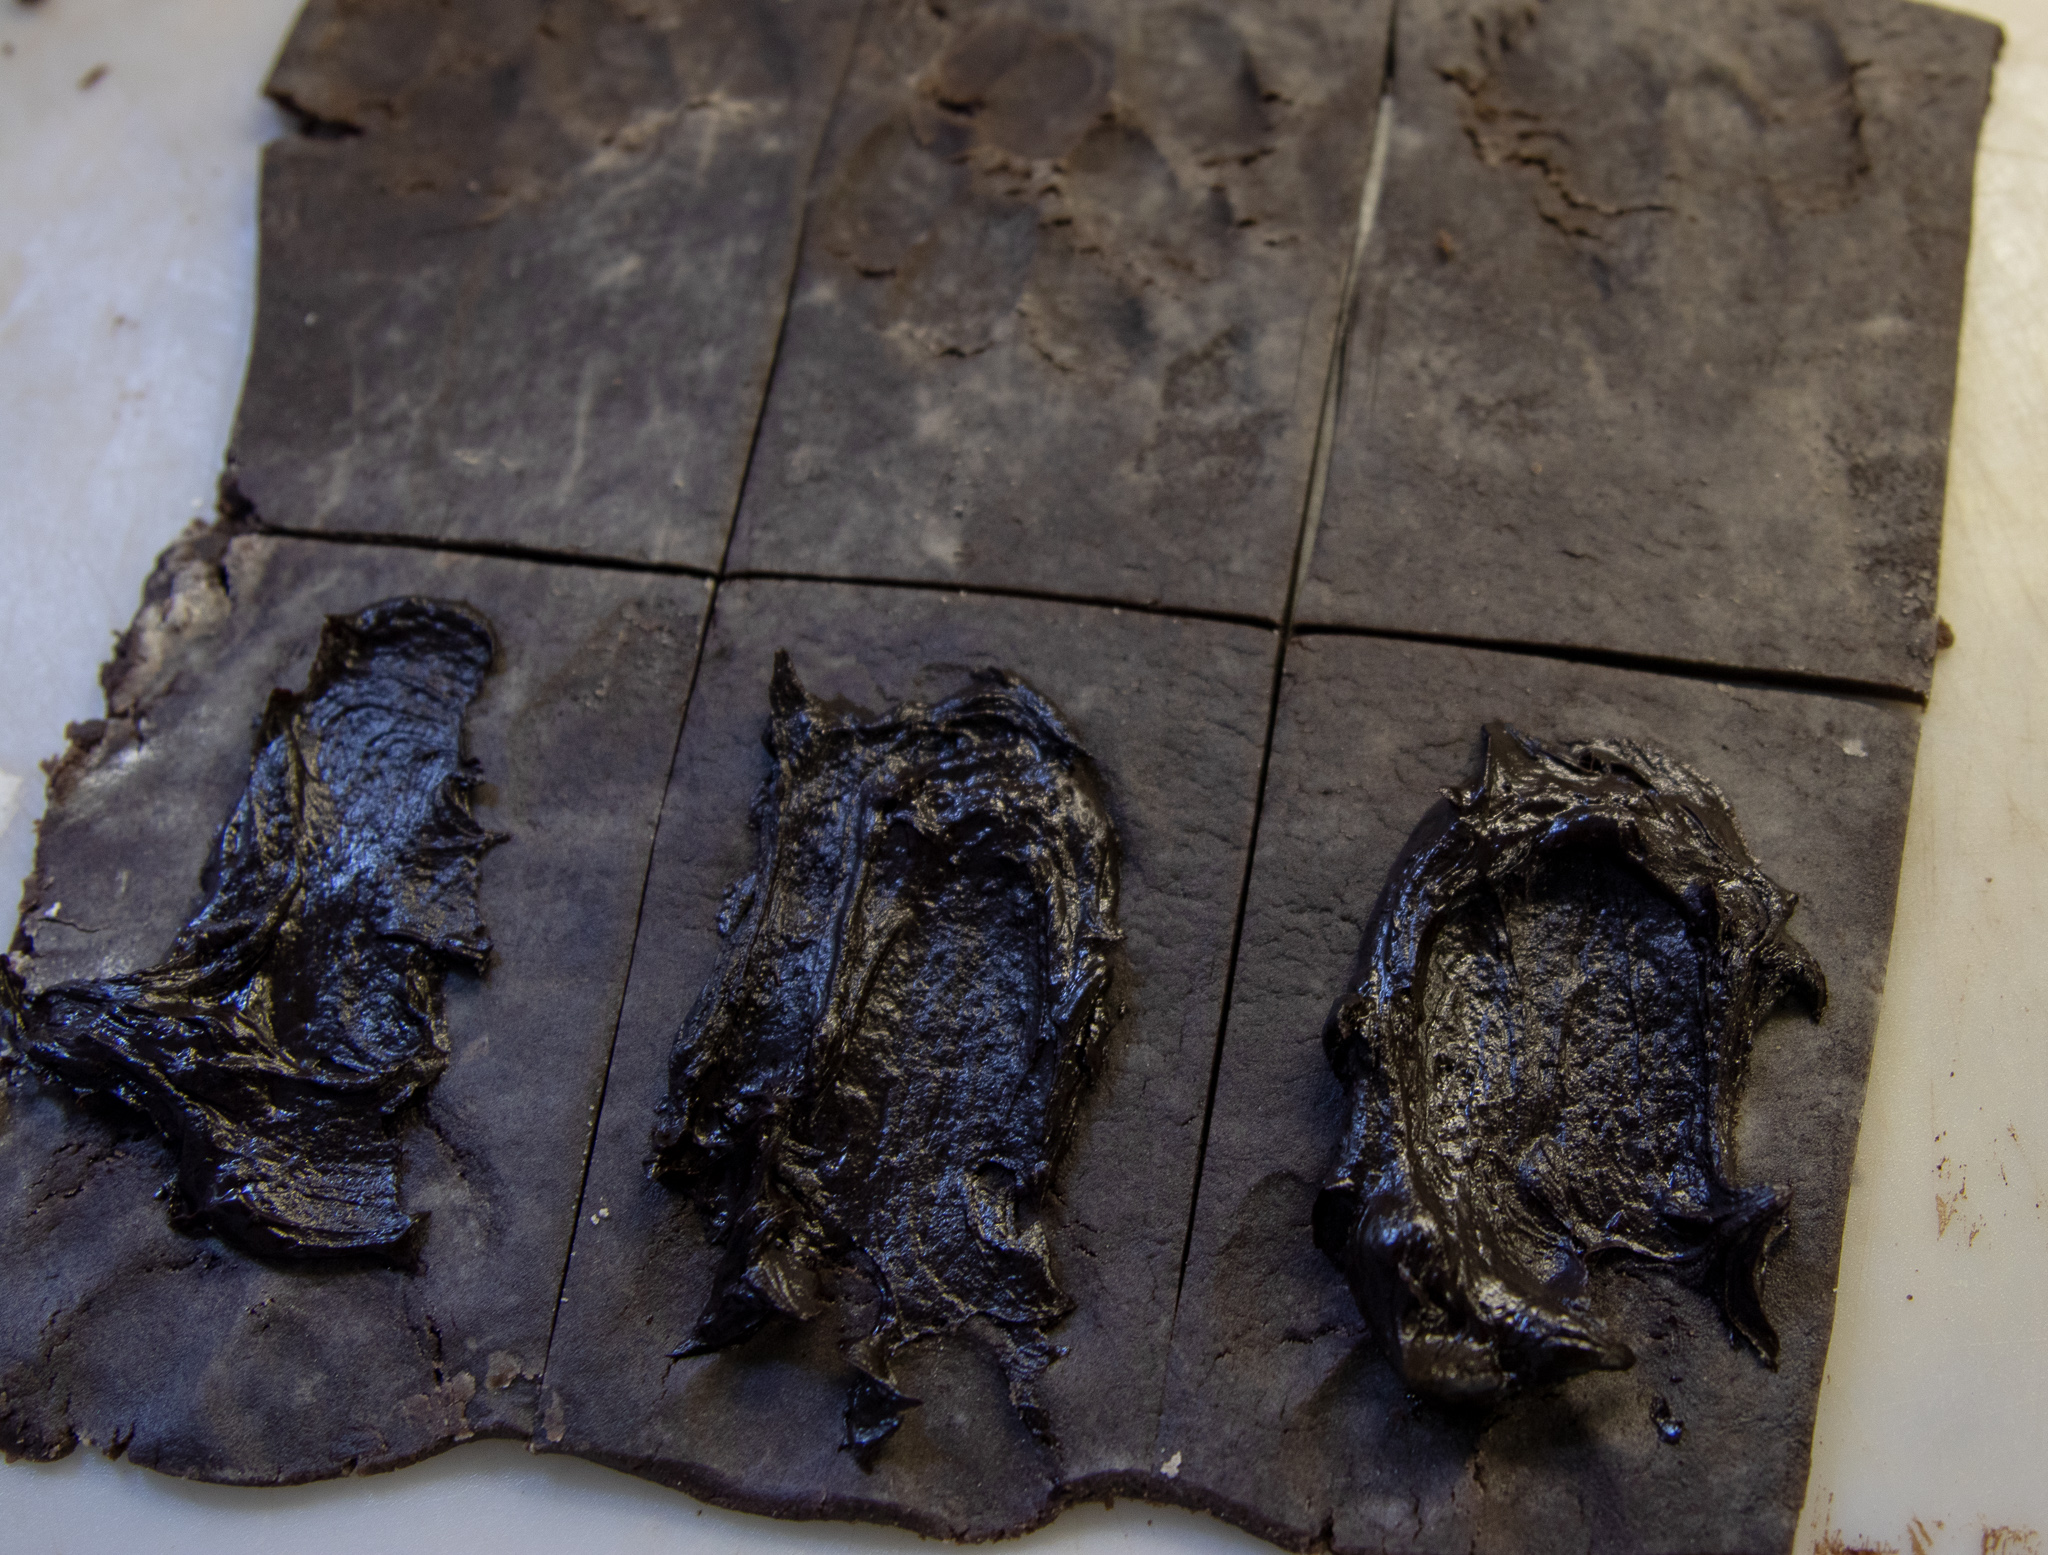
  4. Roll the dough out on a flour dusted, smooth surface to a 1/8 of an inch thick rectangle. You can trim up the edges with a sharp knife and save the scrap dough.

  5. Once the dough is trimmed and even, cut 3 inch by 5 inch rectangles from the dough, give or take. Be sure when you are calculating how many you can cut, to have a even number. Each pop tart needs 2 rectangles. Roll out any scrap dough and repeat the process.

  6. Scoop a teaspoon of pumpkin butter onto a rectangle, and smear it around a bit in the middle, carefully to not get too close to the edges.

  7. Top the pumpkin butter covered piece of dough with another rectangle of dough, and use a fork to press, and seal the edges. (for step by step pictures of the process, check out our Strawberry Pop-Tart recipe)

  8. Place pop tarts on a parchment lined baking sheet, or lightly spray one with cooking oil and bake for 20 - 25 minutes.

  9. While pop tarts are baking, mix together the powdered sugar with just a few drops of maple syrup, just enough to thin it out. Add the pumpkin pie spice and stir. If it is too thin, you can add a little more powdered sugar to thicken it back up. You want a spreadable consistency.

  10. Once pop tarts have cooled a bit, spread the icing and serve.

Yields 8 pop tarts.

IMG_8513.jpg

Pumpkin Butter

IMG_8530.jpg

INGREDIENTS:

  • 1 15oz can of pumpkin 
  • 1/2 cup brown sugar
  • 1/4 cup water
  • 2 teaspoons pumpkin pie spice 
  • 2- 3 tablespoons maple syrup

COOKING INSTRUCTIONS:

  1. Add all ingredients to a medium sized pot, and whisk together. 

  2. Turn pot on med/low heat and allow pumpkin butter to simmer for about 30 minutes, stirring regularly. The Pumpkin butter will begin to thicken a bit as some of the liquid cooks out, and the sugars melt. 

  3. Once finished, store in mason jars, or an air tight container in the fridge. 

Southwest Salad with Crispy Potatoes

IMG_8382.jpg

INGREDIENTS:

  • 1 head romain lettuce
  • 1 small bag mixed greens
  • 1 tomato
  • 1 cucumber
  • 1 avocado 
  • 1/2 - 1 yellow or red bell pepper
  • 1/2 cup crispy french fried onions (most brands are vegan, but be sure to check)
  • 2 medium to large red potatoes 
  • 1 can black beans, drained and rinsed

Southwest Dressimg

  • 1/2 cup vegan mayo
  • 1 tablespoon apple cider vinegar
  • 1 teaspoon dijon mustard
  • 1 teaspoon each, smoked paprika, garlic powder, onion powder
  • 1/2 teaspoon each, salt, and chili powder 

InstrucTions:

  1. Wash potatoes but don't peel them. Dice into cubes. Heat a medium sized skillet on medium heat with a few teaspoons of oil. Add the potatoes and a few shakes of salt, and cook until they begin to brown, and crisp. This takes anywhere between 10 and 15 minutes, depending on the pan you use. I have learned over time that they will cook, and crisp much faster in a cast iron skillet. Once potatoes are done, set aside.
  2. Wash and chop all of the veggies, and lettuce.
  3. In a large salad bowl, toss the lettuce, chopped veggies, rinsed black beans, crispy onions, and potatoes.
  4. In a small bowl, combine all of the ingredients for the dressing, and stir well.
  5. Serve salad topped with southwest dressing.

serves 4-6

Pumpkin Spice Vegan Cream Cheese

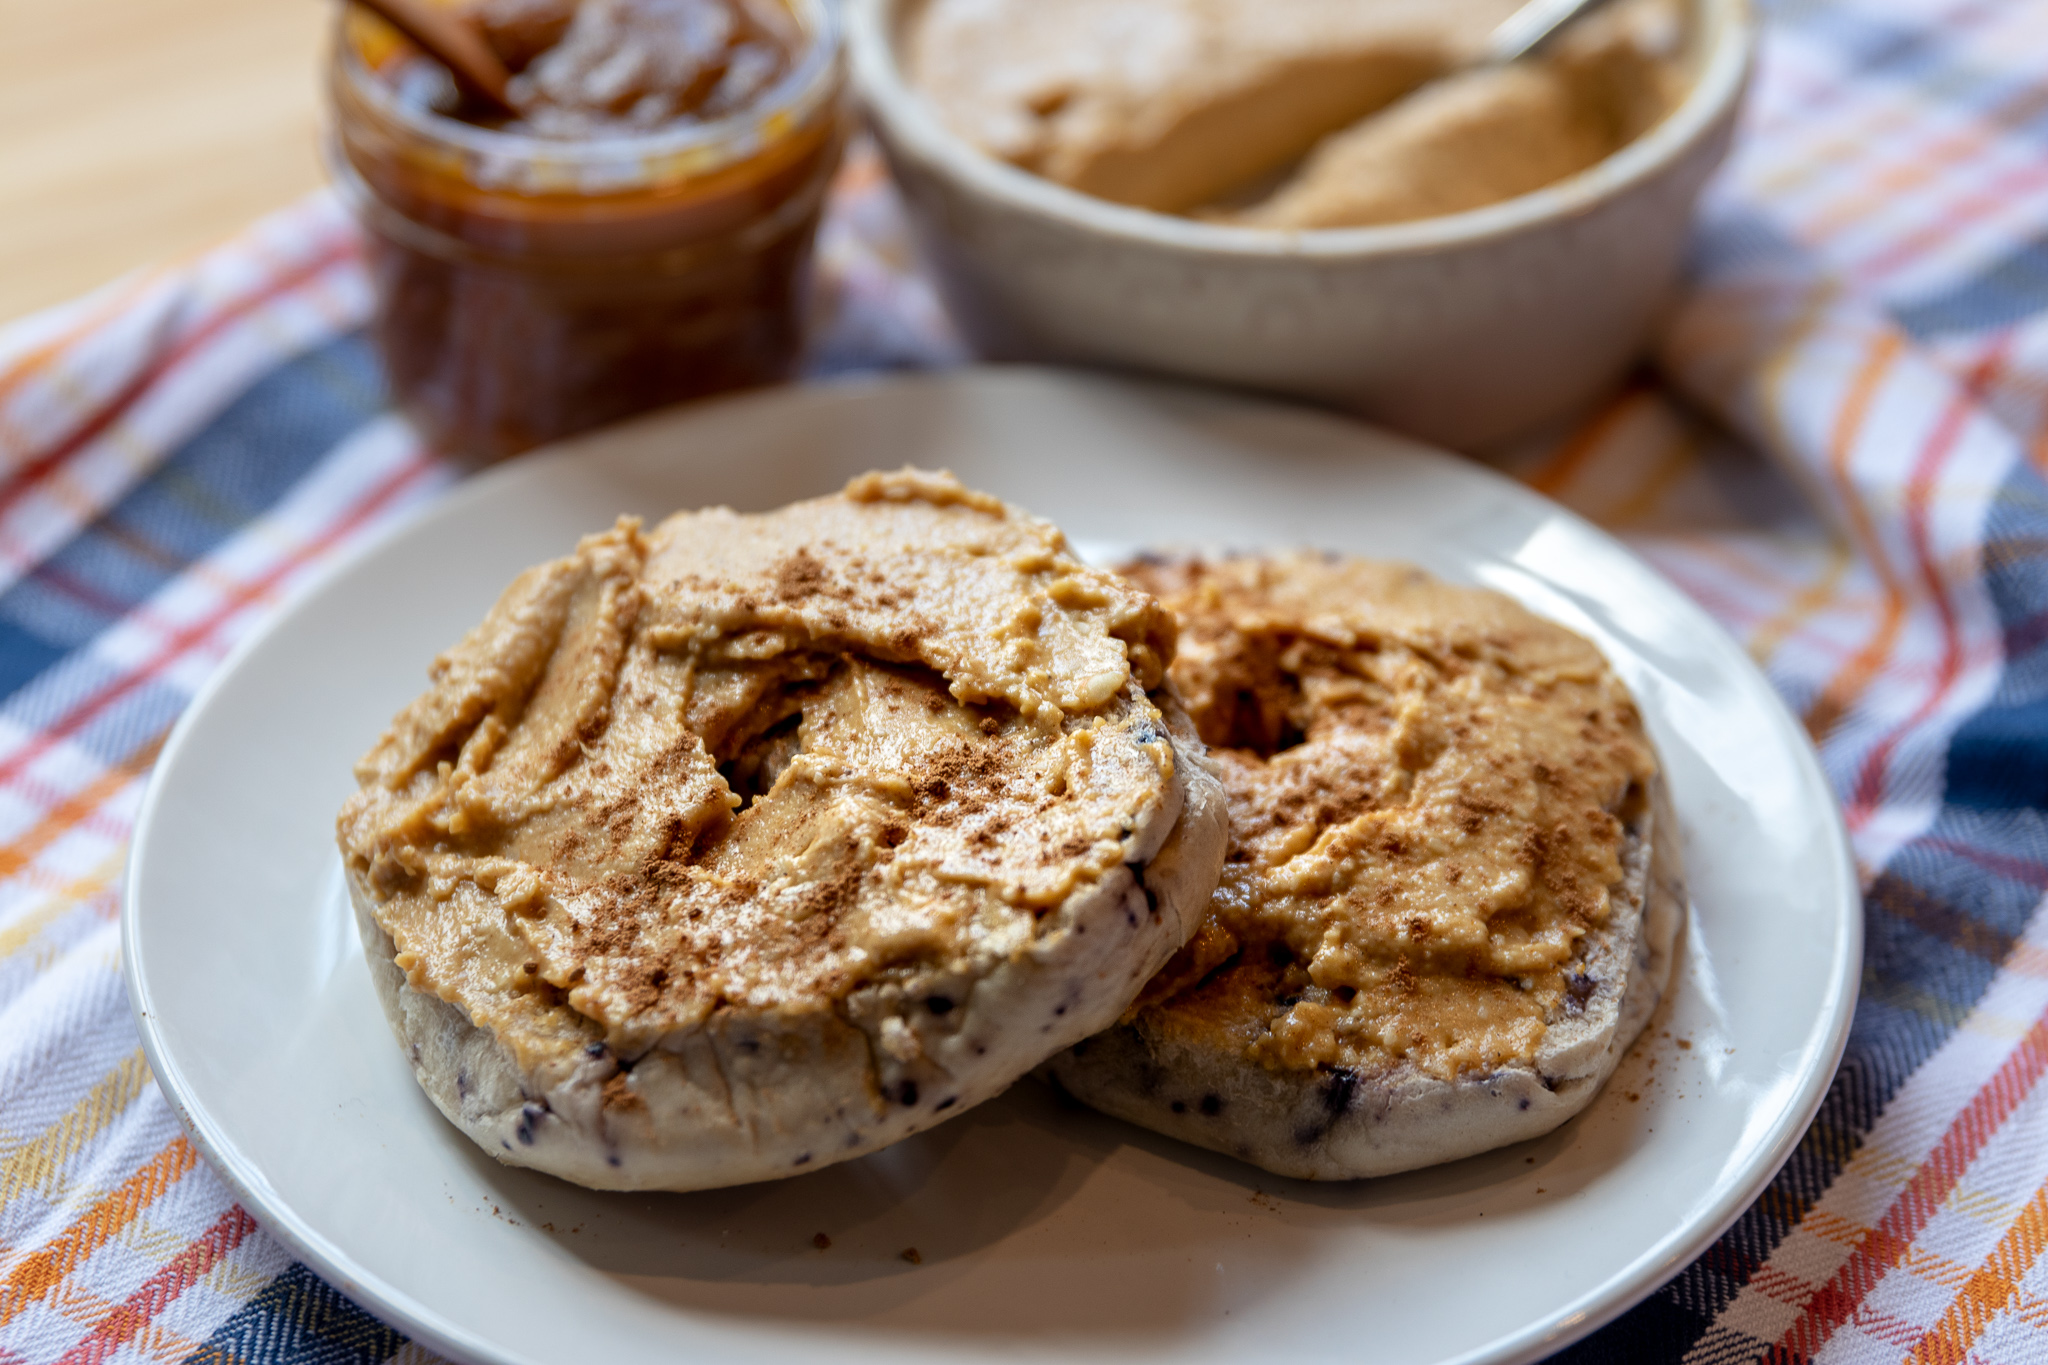
IMG_8538.jpg

Once October hits (ok, ok, we all know its more like September) the pumpkin spice craze is upon us.

I am guilty of loving all things pumpkin and cream cheese is no exception.

Just the right amount of pumpkin spice and sweet maple syrup make this cream cheese a fall favorite, and staple in this house.

If you are not into bagels ( we may need to have a chat, because I truly just can’t understand anything but an intense love for any bread) then you can always spread some of this magic on some apple slices or graham crackers.

You could eat it right out of the bowl with a spoon and I wouldn’t judge you! If you do love bagels as much as I do, then check out our easy homemade bagel recipe.

I really can not think of a better breakfast this fall than a homemade cinnamon bagel with this delicious cream cheese all over it.


INGREDIENTS:

  • 1 cup unsalted cashews

  • 3 tablespoons canned pumpkin

  • 1/4 cup coconut cream ( from a can of full fat coconut milk)

  • 2 tablespoons refined coconut oil

  • 1 teaspoon lemon juice

  • 2 teaspoons pumpkin pie spice

  • pinch of salt

  • 2 tablespoons maple syrup


INSTRUCTIONS:

  1. Soak cashews overnight, or cover with water and microwave for three minutes. Drain water.

  2. Refrigerate one can of full fat coconut milk for a few hours. Once it is good and cold, the cream will separate from the liquid in the can. Open and use 1/4 cup of just the cream.

  3. Add cashews, coconut cream, and remaining ingredients in a high speed blender or food processor.

  4. Blend until the nuts are completely broken down, and the mixture is creamy smooth.

  5. Put the cream cheese in a shallow bowl, or a few ramekins, and refrigerate for several hours until the cream cheese sets.

If you like this recipe, try these:

Pumpkin Spice Vegan Cheese Ball

Pumpkin Butter

Pumpkin Spice Cashew Creamer

easy vegan cashew pumpkin spice cream cheese

Vegan Buffalo "Chicken" Bites

IMG_8315.jpg


Before I went vegan, I think I ate my weight in Publix pre-made buffalo dip .

If you don’t know what Publix is, its a grocery store here in Florida and their buffalo dip is delicious.

So once going vegan we set out to create a vegan version of that beloved dip! We used jackfruit in place of the chicken and loaded it with vegan cheese, cream cheese, mayo, and Franks buffalo sauce. You can also use our easy vegan chicken breast recipe if you have a little more time on your hands (but seriously, they are pretty quick to make too!)

It is sooooo good!

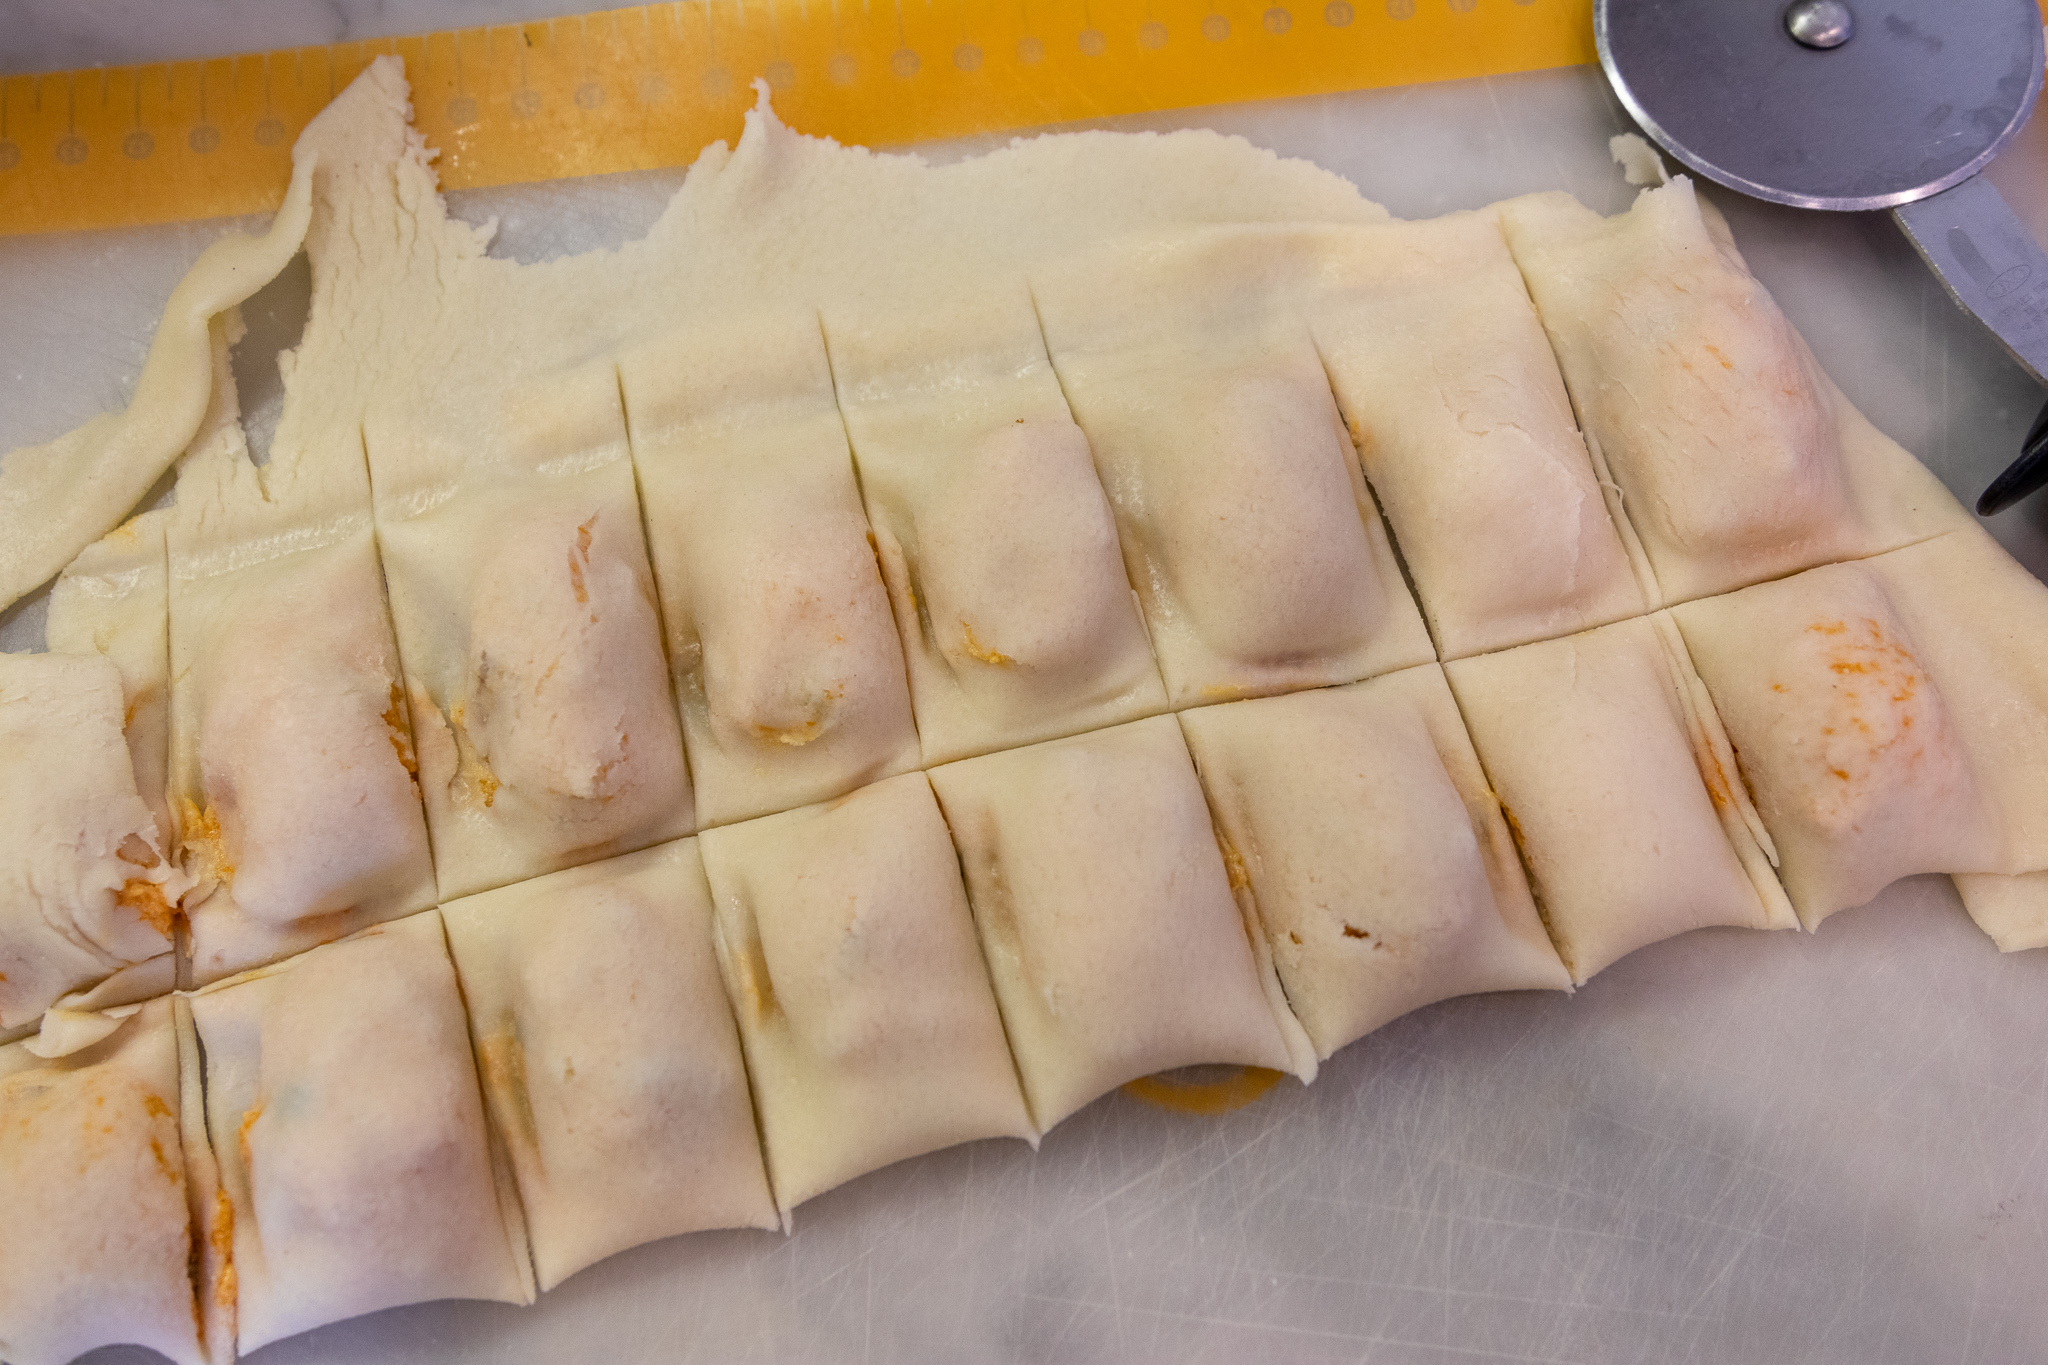
So when I saw on the internet somewhere a video of ice cube tray hacks and I happened to have some dip in my fridge, I knew what I was gong to do with it! Within minutes I had rolled out some pie crust and got to work.

These little bites are perfect for snacking or parties. They are so delicious and the perfect use of some leftover vegan buffalo dip.

I mean they are super cute, right?!?! And how easy, you literally roll out dough, drape it over the tray, fill, and bake!! These are my favorite types of recipes! Creative, easy, and delicious!


INGREDIENTS:

You will need one ice cube tray for this recipe

  • 1 can jackfruit in brine or 3-4 Easy Vegan Chicken Chicken Breast

  • 1 8oz container vegan cream cheese, or homemade

  • 3/4 cups of buffalo sauce (I use Franks)

  • 1/2 cup vegan mayo

  • Pinch of salt

  • 1/4 teaspoon pepper

  • 2 tablespoons corn or tapioca starch

  • 1 plus 1/2 cups vegan cheddar shreds (like Follow Your Heart), or homemade

  • 1 pie crust, you can use a homemade or store bought if vegan

INSTRUCTIONS:

Pre-heat oven to 350 degrees.

  1. If using jackfruit, drain and chop the pieces, or shred them using you fingers into a medium sized bowl. The fruit pulls apart easily, and I find using my fingers easier than chopping. I using the vegan chicken, follow directions and dice into very small pieces after the seitan has rested.

  2. Add the remaining ingredients, except 1/2 cup of cheese to the bowl, and mix well.

  3. Transfer mixture to a small baking dish and top with remaining 1/2 cup of cheese.

  4. Bake for 20 - 25 minutes or until cheese on top is melty.

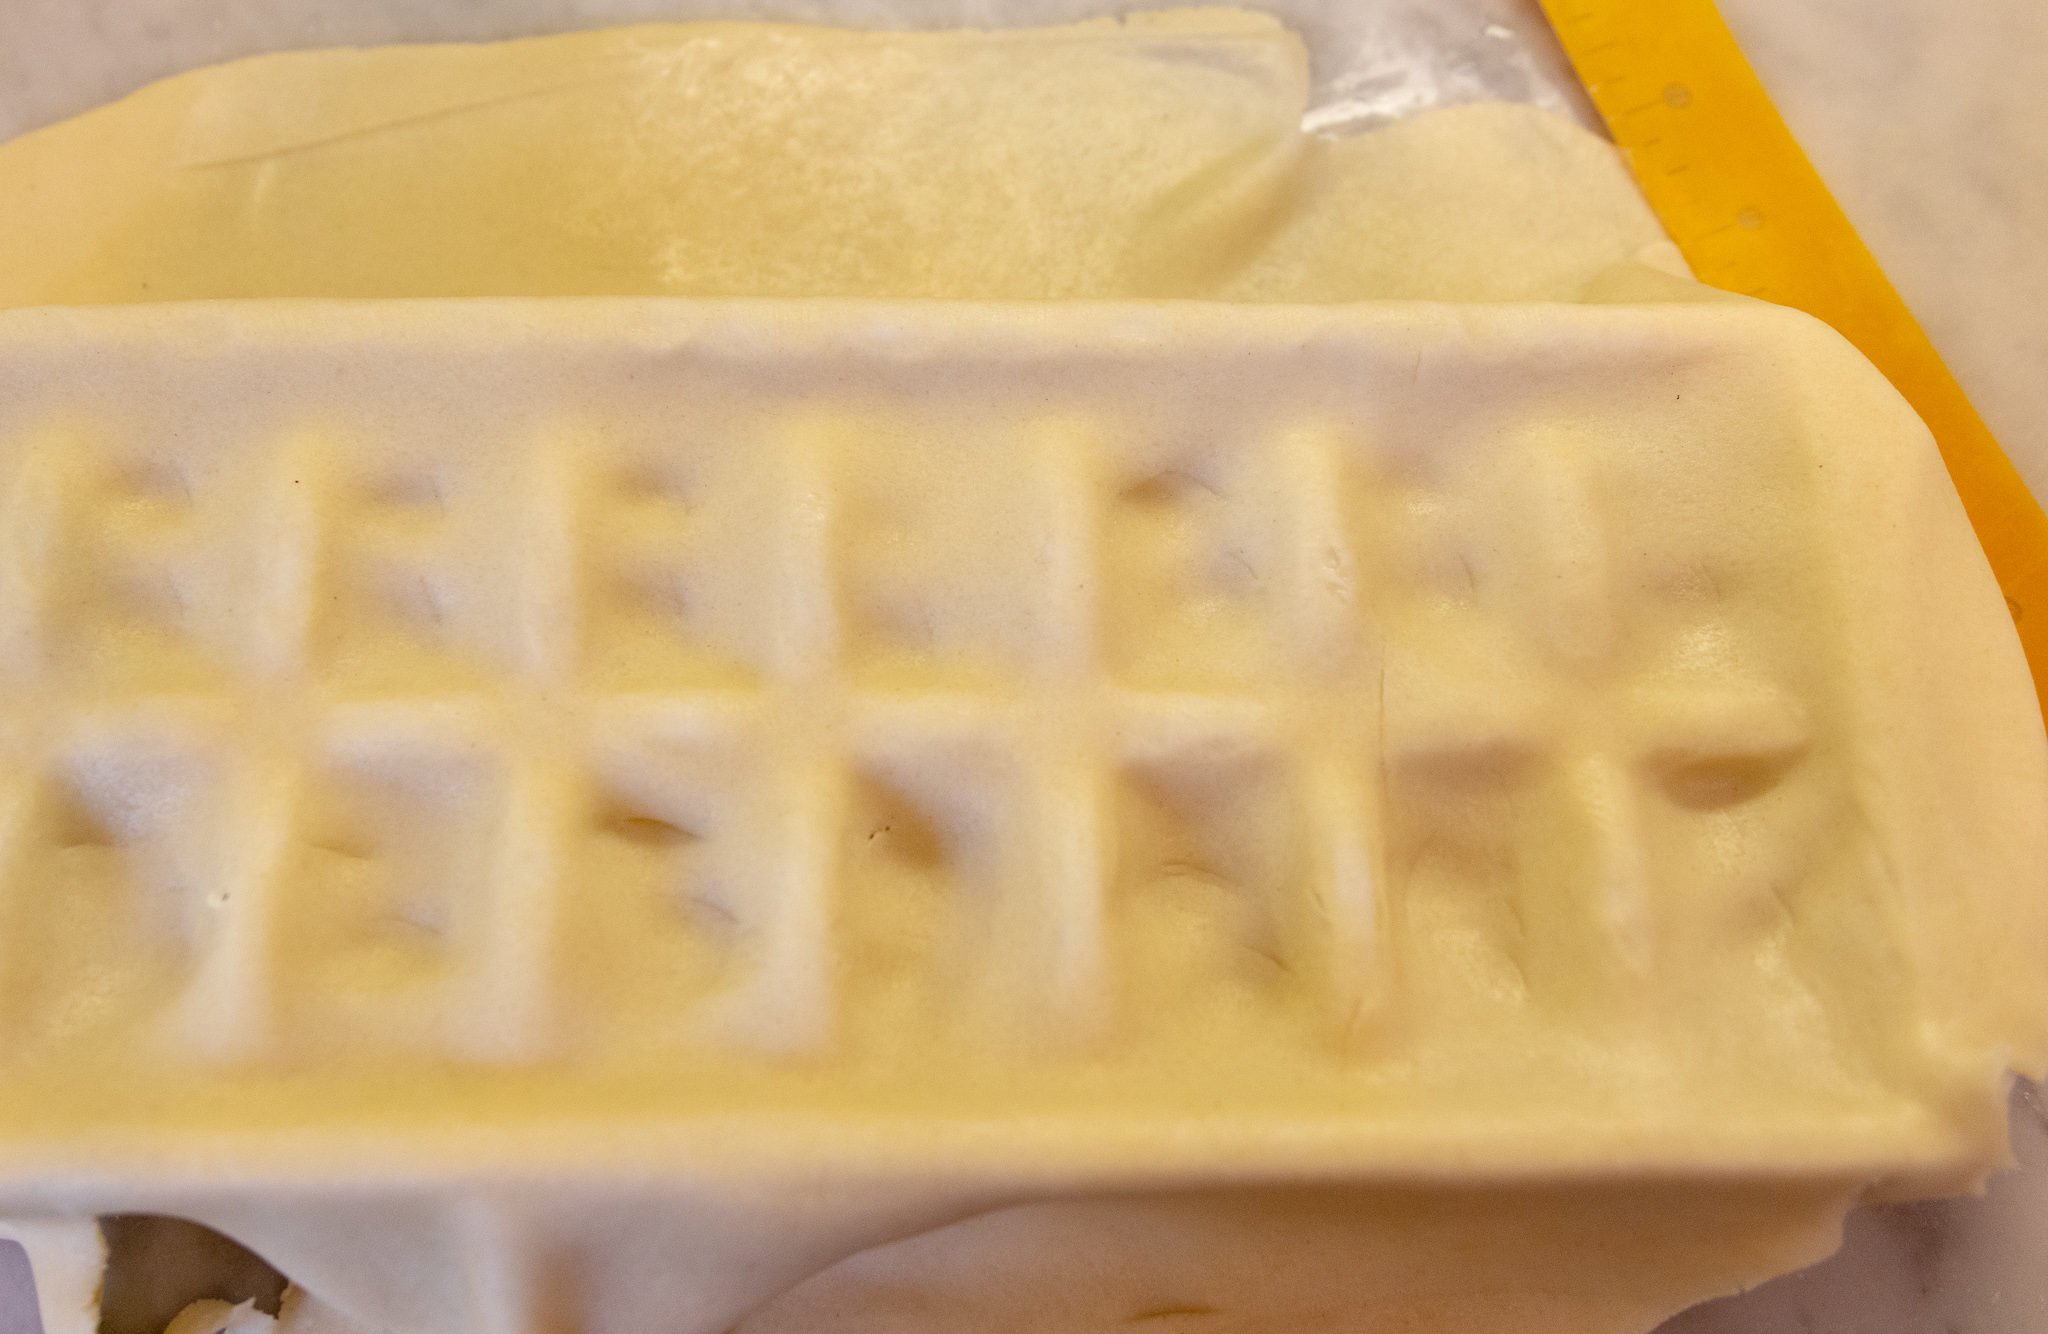
  5. Roll out pre-made pie crust until it is big enough to drape over an ice cube tray, and there is enough excess hanging over the edge to fold back over the top. (check out the photo above for an example)

  6. Drape dough over the ice cube tray, leaving a good amount hanging over one side, and lightly press dough down to create dips where the ice would go.

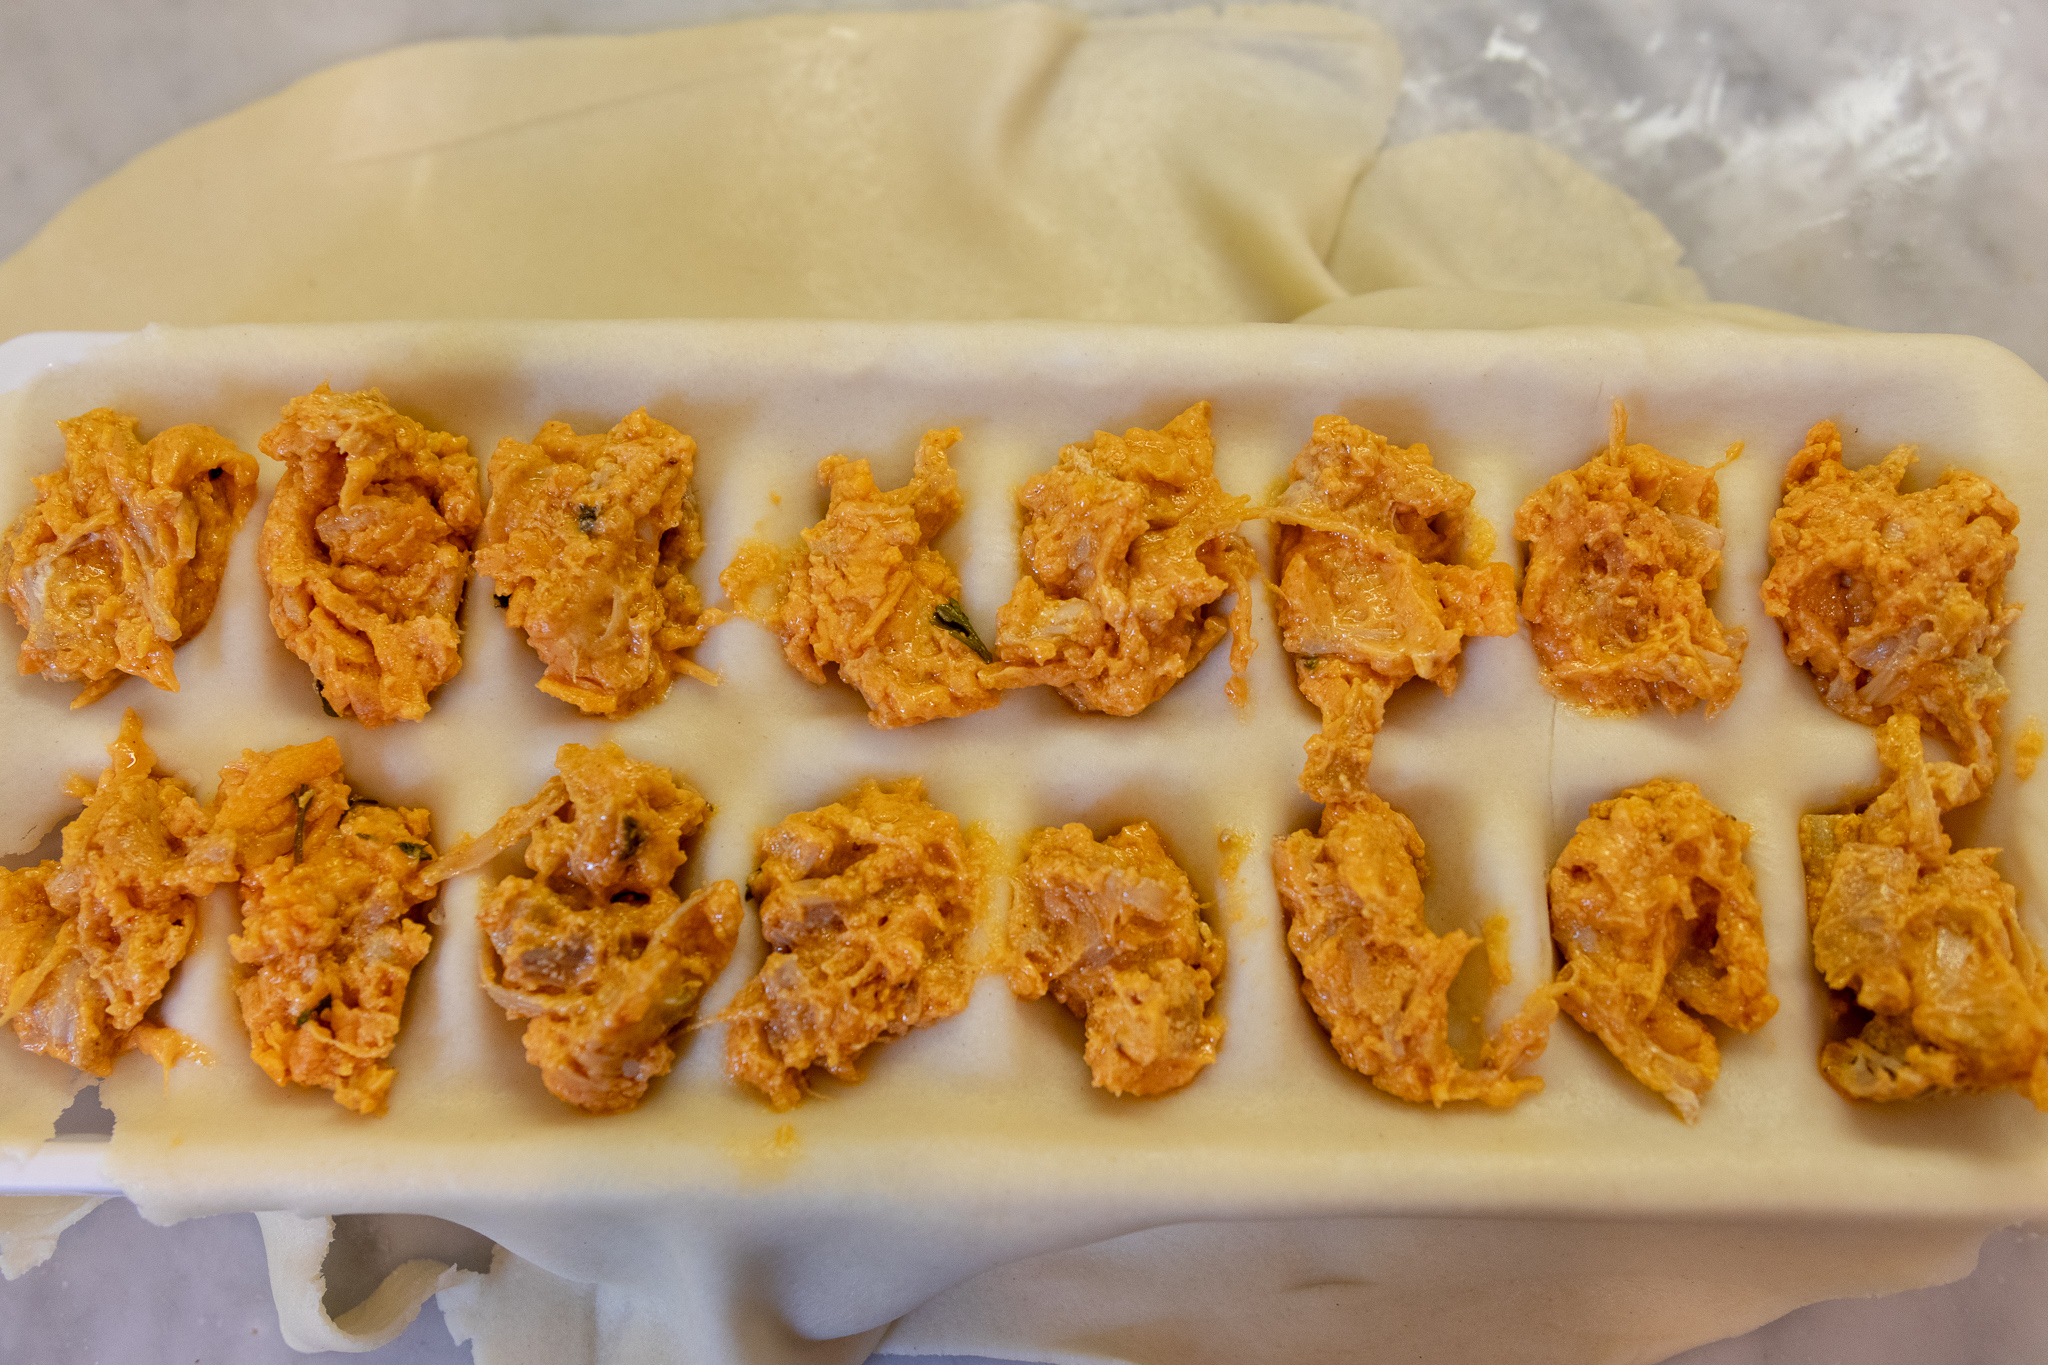
  7. Scoop a few teaspoons of buffalo dip into each divot, then fold the excess dough back over to cover the tray. Press lightly on the dough until you can see the lines from the tray, and the edges seem sealed.

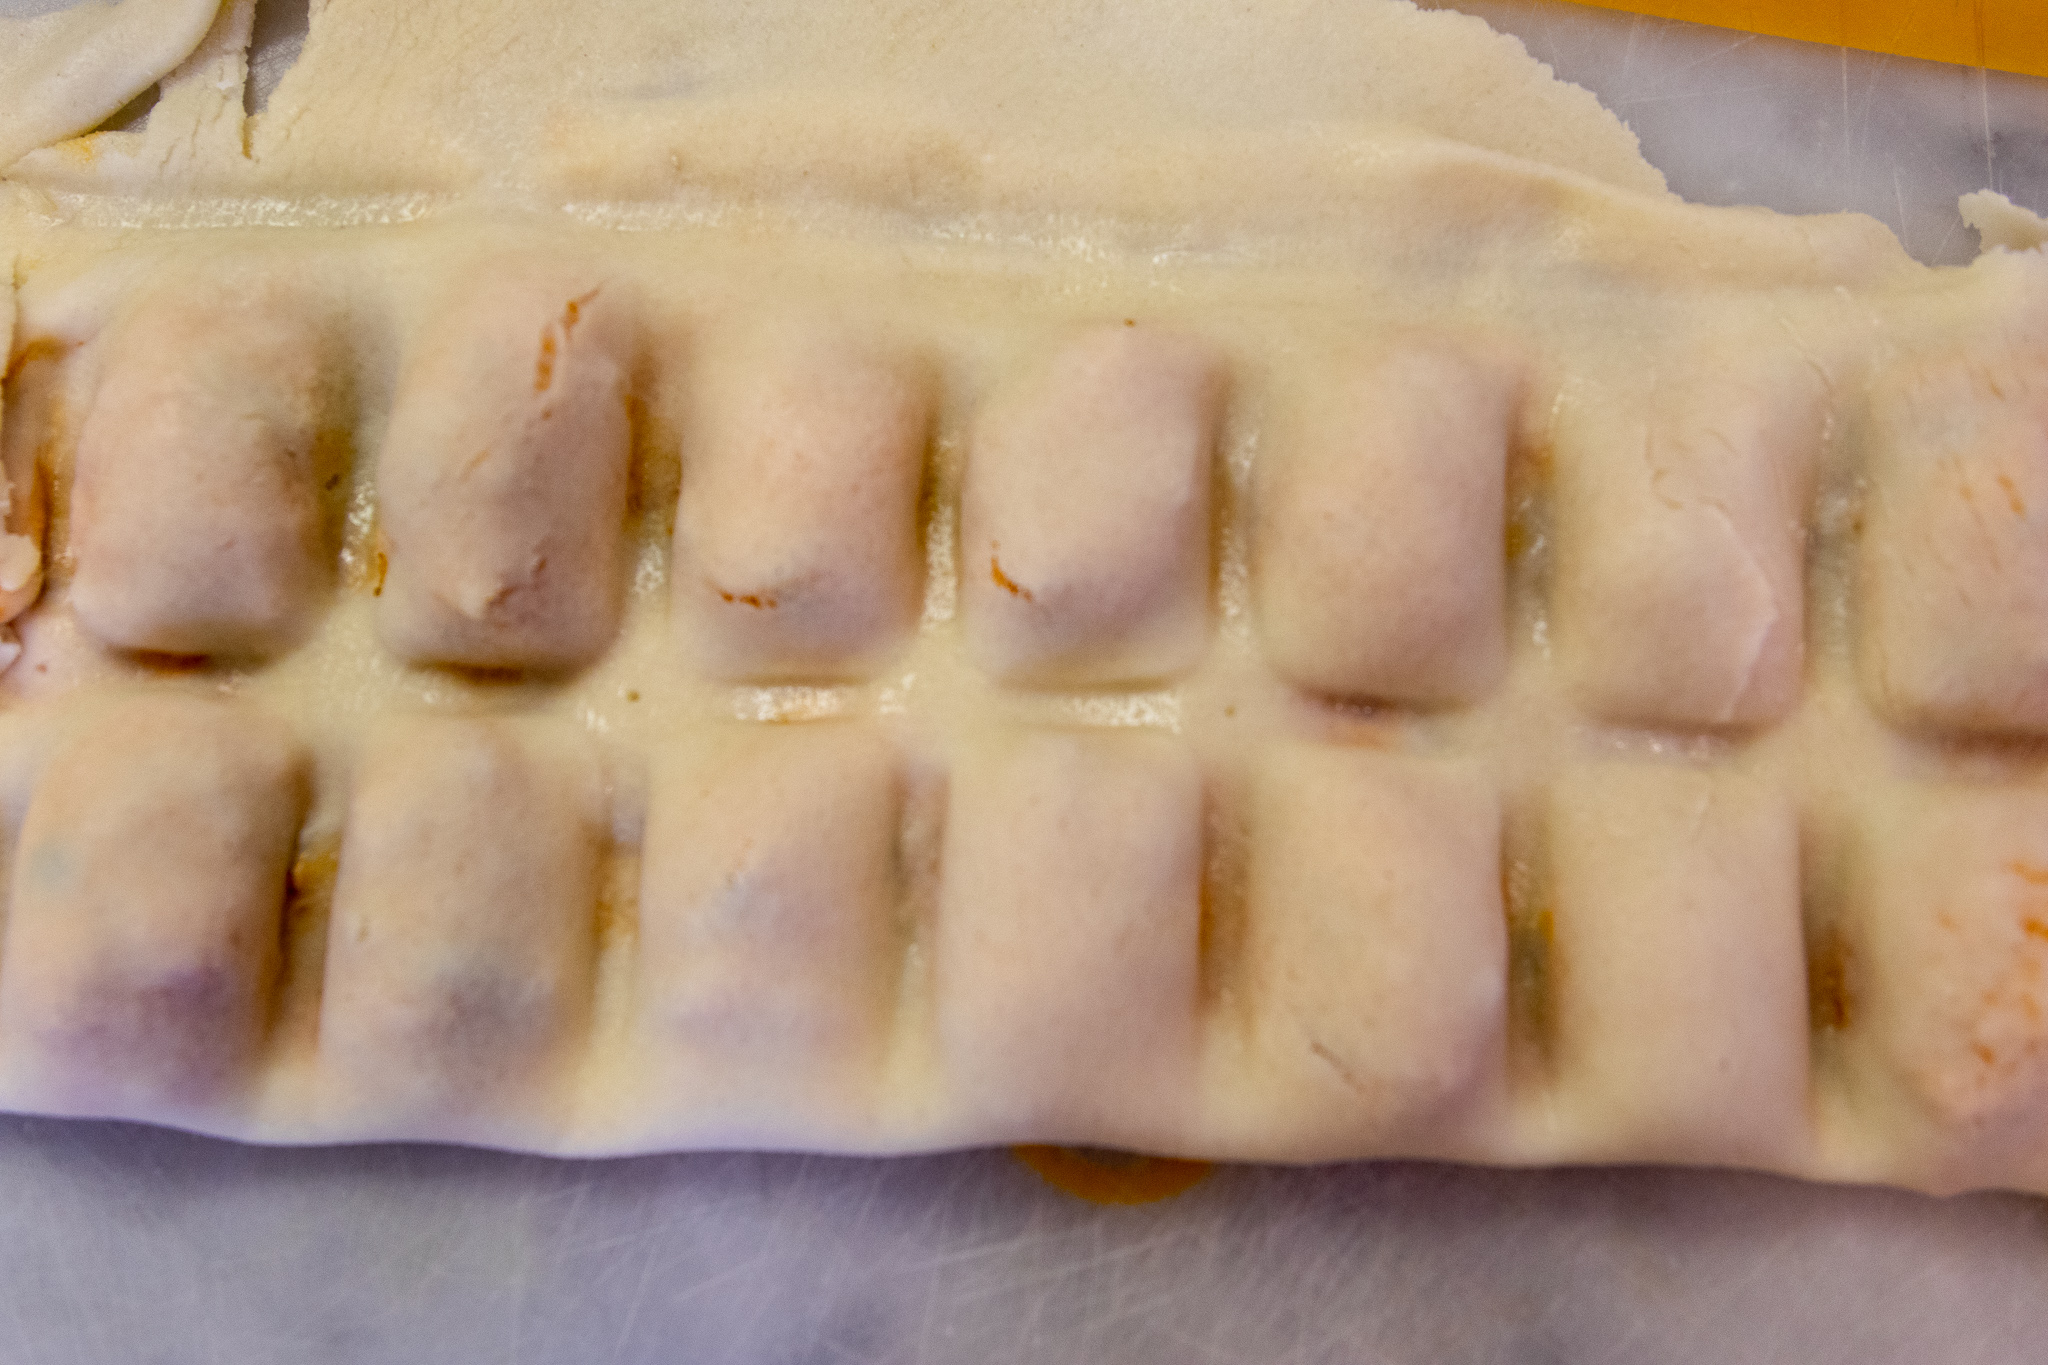
  8. Carefully flip the tray upside down onto a lightly floured surface. If the dough rips or cracks, just use your fingers to pinch it back together the best you can.

  9. Using a pizza cutter, or sharp knife, cut out the bites, using the lines between the bites as your guide.

  10. Place bites on a parchment paper lined baking sheet, and bake at 350 degrees for about 20 minutes.

  11. Serve with vegan blue cheese dressing.

Vegan Blue Cheese Dressing

IMG_8303.jpg

INGREDIENTS:

  • 1 cup vegan mayo

  • 2 teaspoons dijon mustard

  • 2 teaspoons light miso paste

  • 2 tablespoons vegan sour cream, or plain vegan yogurt

  • 1 tablespoon apple cider vinegar

  • 1 teaspoon onion powder

  • 1 tablespoon nutritional yeast

  • 1 teaspoon dried dill

  • 1/2-1 teaspoon salt

  • 1/4 block firm tofu


INSTRUCTIONS:

  1. Mix together all of the ingredients except tofu.

  2. Once all of the ingredients are well combined, crumble the tofu and fold in.

  3. Store in an air tight container in the fridge for up to week.

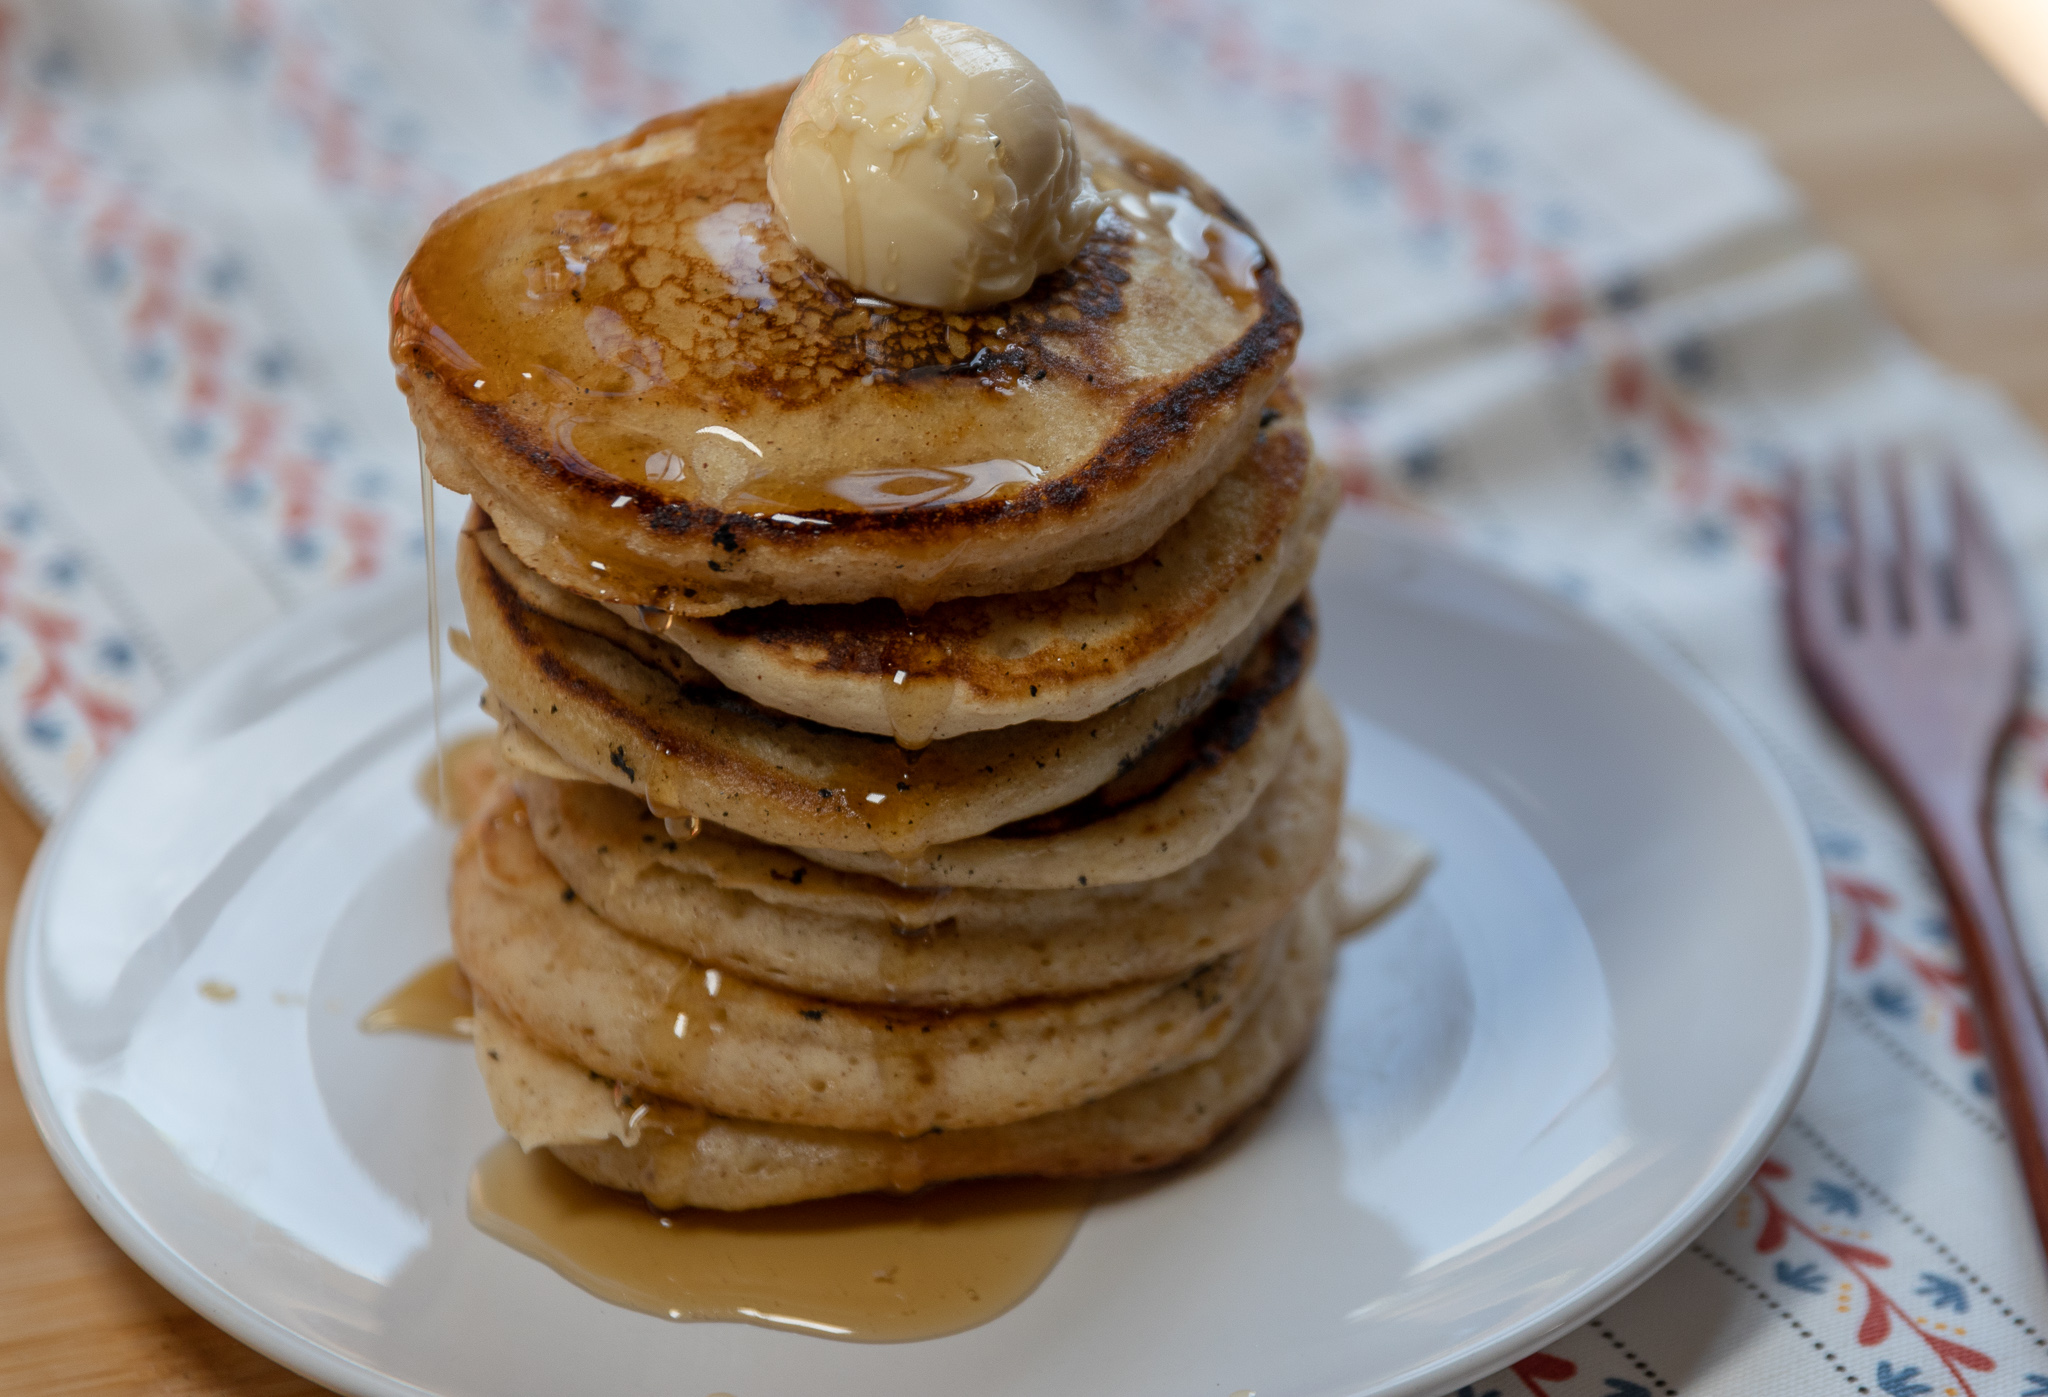
Light and Fluffy Vegan Pancakes

Light and Fluffy Vegan Pancakes

Pancakes shouldn’t be rocker science, vegan or otherwise.

So why is it that I have made and eaten some really awful pancakes in my time?

When I was. a kid I thought Bisquick was the only way one made a pancake, because that was the only way we made them…that or frozen pancakes.

I remember once I moved out going and buying a box of Bisquick to make pancakes for my roommates and having to call my mom and ask her how to actually make them. Like why are they falling apart, what am I doing wrong…ITS JUST A PANCAKE. That was the day I learned you had to wait of the batter to bubble and those bubbles to pop before you could flip them. Thanks mom!

I have probably googled and made 100 different pancake recipes in my life, and two thirds of those recipes were mostly garbage. Too dense, not fluffy, too flat, too gummy and so on.

So why is it so hard to make a decent vegan pancake? Well, its really not, actually. And once you find a good recipe, take my advice and just stick to it!

A decent vegan pancake in my opinion is light, fluffy, and buttery. Not too sweet, and can hold an add in (blueberries, chocolate chips, nuts, and so on) no problem.

So here we are all these years later and I have, in my opinion, made a pretty darn good, and easy vegan pancake to meet all the above criteria. No Bisquick required.. You can sprinkle in a chocolate chips, or berries, you can top them, or just drowned them in melted butter and maple syrup.

This recipe is simple and works every time I have ever made them. Just make sure not to flip these vegan pancakes until you see tiny bubbles form and pop! Some wise motherly pancake advice form Joanie that I am sure others needed to hear, too.


INGREDIENTS:

  • 1 1/4 cups all purpose flour

  • 2 tablespoons white sugar (If vegan, not plant based, make sure the brand you use is in fact vegan, not all white sugars are. I use Florida Crystals)

  • 2 teaspoons baking powder

  • 1/4 teaspoon salt

  • 1/2 teaspoon cinnamon

  • 1/2 teaspoon vanilla extract

  • 1 1/4 cup plant based milk

  • 1 tablespoon melted vegan butter


COOKING INSTRUCTIONS:

  1. Whisk all dry ingredients in a large bowl.

  2. Add in the melted butter, plant based milk, vanilla, and stir well.

  3. Heat a large skillet on medium heat. Add a teaspoon of vegan butter or spray the pan with cooking oil. Using a 1/4 cup measuring cup, scoop out batter into the skillet, 2 or 3 pancakes at time.

  4. Let pancakes cook until tiny bubbles begin to form and pop, once this happens they are ready to flip. Cook on the other side for another minute or two, until cooked through.

  5. Repeat, adding more butter or oil to the pan as needed, until all batter is used.

Serves 3 - 4

Vegan Buffalo "Chicken" Dip

IMG_8233.jpg

Every time I make this buffalo “chicken” dip for a party, there is not a single bite left.

Non vegans can not believe this dip is actually vegan and aways marvel at how well the jackfruit mimics the texture of chicken. Jackfruit is the great meat mimicker, especially when trying to replace shredded meat in recipe. It has little taste on it’s own when its picked green and packed in brine. Once its drained and shredded it looks and feels like meat. It easy takes on the flavors you are cooking with, making it great for this recipe!

You can use any vegan cheddar you like. You can use store bough or even try your hand at one of our many cheddar style cheeses on the site.

We also use Franks buffalo sauce in this recipe because it is in fact vegan. The butter “flavor” in the sauce contains no dairy!! Hooray for small miracles, because I am an official Frank’s sauce groupie if that is even a thing!?! If not I am happy to head up an official fan club! You can use any vegan buffalo sauce you like, though!

This classic dip is spicy, cheesy, gooey, and always a crowd pleaser. I also like to whip up a batch of this tasty dip for sandwiches or for my Vegan Buffalo “chicken” bites, Buffalo Mac and Cheese, or Buffalo Stuffed Challah!!

So go make yourself a batch and try to make a few other thing with it too!! Those are my favorite kinds of recipes. The ones that just giving you some love in all kinds of new ways.


NGREDIENTS:

  • 1 can jackfruit in brine or 4 easy vegan chicken breast finely diced

  • 1 8oz container vegan cream cheese

  • 3/4 cups of buffalo sauce (I use Franks)

  • 1/2 cup vegan mayo

  • Pinch of salt

  • 1/4 teaspoon pepper

  • 2 tablespoons corn or tapioca starch

  • 1 plus 1/2 cups vegan cheddar shreds (like Follow Your Heart)


INSTRUCTIONS:

Pre-heat oven to 350 degrees.

  1. If using jackfruit, drain and chop the pieces, or shred them using you fingers into a medium sized bowl. The fruit pulls apart easily, and I find using my fingers easier than chopping. If using chicken prepare following instructions and dice after the seitan has rested.

  2. Add the remaining ingredients, except 1/2 cup of cheese, to the bowl and mix well.

  3. Transfer mixture to a small baking dish and top with remaining 1/2 cup of cheese.

  4. Bake for 20 - 25 minutes or until cheese on top is melty.

  5. Serve with bread, crackers, carrots, or celery sticks.


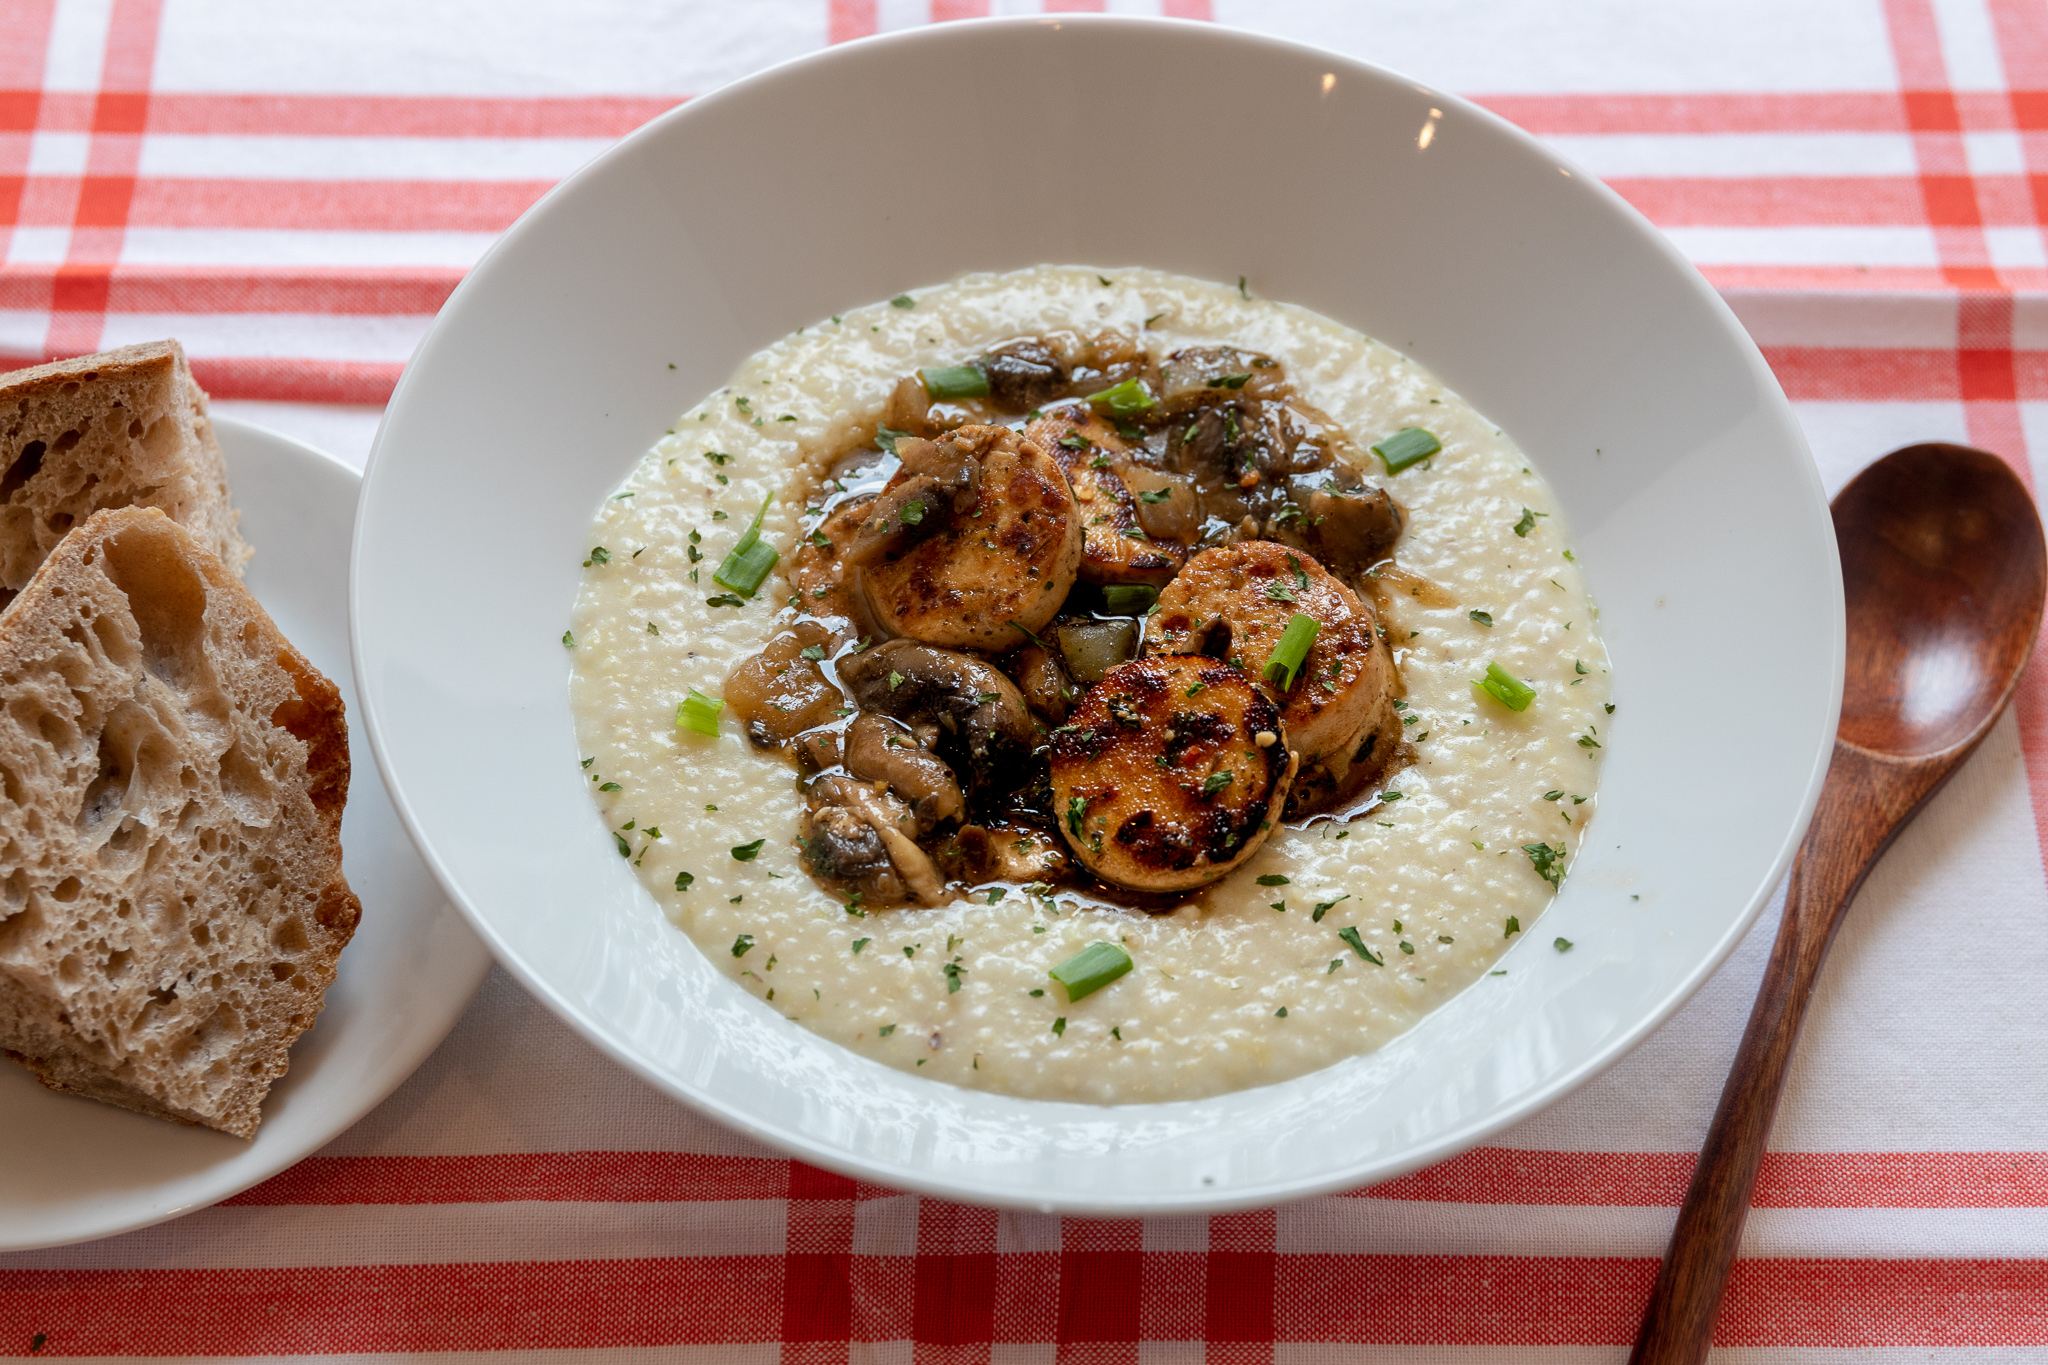
Southern Tofu Scallops and Grits

IMG_7883.jpg

Growing up, shrimp and grits were a favorite of mine. I am from the south and in the south we eat grits with just about anything!

Once we went vegan I longed for a bowl of delicious shrimps and grits and knew there had to be a way to mimic the classic without the shrimp or other animal products.

I quickly learned tofu makes a great scallop substitute and decided tofu scallops would be a close enough second for my favorite dish!

Well it worked well enough to satisfy my craving and now its my husband and oldest daughters favorite dish! It cooks up pretty quick and is the perfect comfort food any time of year!

The tofu scallops are savory with a kick of citrus. The grits are prefectly creamy with a zest of lemon. We add cream cheese to the grits because cheese grits reign supreme over any other grit ever!!

So if you have had a hankering for some shrimp and grits since going vegan, maybe this dish will hit the spot. If you have never had a grit, my sincerest apologies, and may I urge you to try them! I am pretty sure if you eat them this way, you are gonea love them!


INGREDIENTS:

  • 1 Package extra firm tofu

  • 2 cups sliced mushrooms

  • 1 small diced onion

  • 1 teaspoon minced garlic

  • 3 tablespoons butter

  • 1 teaspoon Better Than Bouillon

  • 2 tablespoons water water

  • 1/3 cup plus 2 tablespoons white wine, like chardonnay

  • 1 tablespoon vegan Worcestershire sauce

  • 1 tablespoon coconut aminos

  • Juice from 1 lemon

  • 1 teaspoon parsley

  • 1 teaspoon all purpose seasoning, I use Trader Joes 21 season salute

  • 1-2 green onions or chives for garnish.

The Grits

  • 1 cups of dried grits (not instant)

  • 2 cups plant based milk

  • 3 cups water

  • 1 tablespoon vegan butter

  • 1/2 teaspoon salt

  • 1/4 cup vegan cream cheese

  • 1-2 teaspoons lemon zest

  • pepper to taste


COOKING INSTRUCTIONS:

  1. Drain tofu, and wrap up in a clean kitchen towel, or some paper towels. Place a few books on top and let sit for 5 minutes to press out the excess liquid.

  2. Cut tofu in half length wise, and using an 1 inch circle cutter, cut scallops from the 2 pieces tofu. You can use the scraps as well or save them to make something else later, like tofu ricotta.

  3. In a shallow dish mix 2 tablespoons of wine, Worcestershire sauce, and aminos. Add the tofu and let marinade for 15 mintues.

  4. In a large pot or dutch oven, bring the milk and water to a boil for the grits. Once the liquid is boiling, add in the grits, salt, and butter. Lower the heat to low, and allow the grits to simmer until thickened, stirring occasionally to avoid sticking. This takes about 15- 20 minutes. The grits can cook and thicken while you prepare the tofu.  Once the grits are thick, stir in the cream cheese, pepper, and lemon zest.

  5. In large high side skillet, melt 1 tablespoon of butter on medium heat. Add the tofu scallops along with marinade and cook on each side for 3-5 minutes, or until they begin to brown and crisp, and all of the liquid is absorbed. Once tofu is done, remove from the pan and set aside. Add 2 tablespoons of butter back to the pan, along with the mushrooms, and onions. Cook until the onions become translucent, then add the wine, Better Than Bouillon, water, lemon juice, minced garlic, and seasoning. Allow the wine to cook down for several minutes, then add the tofu back to the pan. Let the tofu simmer on low heat in the sauce for 10-15 minutes.

  6. To serve, scoop some grits into each bowl and top with tofu scallops and sauce. Garnish with chopped green onions or chives.

serves 4-6

Cinnamon Apple Vegan Pancakes with Candied Pecans

IMG_8007.jpg

INGREDIENTS:

Pancakes:

  • 1 1/4 cups all purpose flour

  • 2 tablespoons white sugar (Fl Crystals are vegan)

  • 2 teaspoons baking powder

  • 1/4 teaspoon salt

  • 1/2 teaspoon cinnamon

  • 1/2 teaspoon vanilla extract

  • 1 1/4 cup plant based milk

  • 1 tablespoon melted vegan butter

Apples:

  • 2-3 granny smith apples, peeled and thinly sliced

  • 2 teaspoons vegan butter

  • 2 tablespoons brown sugar

  • 1 tablespoon maple syrup

  • 1 teaspoon cinnamon

  • a pinch of salt

Candied Pecans:

  • 1/2 cup pecan halves

  • 1 1/2 teaspoons vegan butter

  • 1 tablespoon brown sugar

  • 1/4 teaspoon cinnamon

  • 1 teaspoon maple syrup

COOKING INSTRUCTIONS:

  1. For the apples, heat a small to medium skillet on medium heat and add butter. Once butter has melted, add apples, brown sugar, cinnamon, maple syrup, and salt and reduce heat to low. Allow apples to simmer, and soften while you prepare the pancakes, and pecans. Once apples are soft and a syrup has formed, this takes about 15 minutes, remove from heat and set aside.

  2. For the pecans, heat a small skillet on medium heat. Melt the butter, next adding the pecans, brown sugar, maple syrup, cinnamon, and salt. Lower the heat a bit and continue moving the pecans around the pan with a spoon while the sugar melts, and begins to get sticky. The nuts and sugar can burn quickly, so be sure to keep the pecans moving until the sugar becomes fully melted and looks like caramel. This can take between 5 and 10 minutes depending on the pan. Once pecans are done, pour them out onto a plastic cutting board or a piece of wax paper allowing them to cool, and the sugar to harden. Once they have cooled you can break them apart and into pieces.

  3. For the pancakes, whisk all dry ingredients in a large bowl.

  4. Add in the melted butter, and plant based milk and stir well.

  5. Heat a large skillet on medium heat. Add a 1/4- 1/2 teaspoon of vegan butter or spray the pan with cooking oil.

  6. Using a 1/4 cup measuring cup, scoop out batter into the skillet, 2 or 3 pancakes at time.

  7. Let pancakes cook until tiny bubbles begin to form and pop. Once this happens they are ready to flip. Cook on the other side for a few minutes, or until the pancakes seem cooked through.

  8. Repeat, adding more butter or oil to the pan as needed until all batter is used.

  9. Top finished pancakes with cinnamon apples, candied pecans, and maple syrup to serve.

serves 3-4, You can easily double the recipe for more servings

Vegan No Rise Hamburger Buns

IMG_7853.jpg

I am not sure why it is so hard to find vegan buns at the grocery store but it is!

Either they have egg or dairy in them, or if they are vegan, they are full of not so healthy ingredients.

It’s pretty frustrating to be perfectly honest!

So I adapted a no rise bun recipe that I used to make all the time, and made it vegan.

These buns take hardly any time and are so delicious. you can easily shape them into hot dog buns as well or even make them smaller and use them as dinner rolls!

They do not require a ton of ingredients, and you will know exactly what is going into your bread!! I am always amazed at just how many ingredients are in store bought bread and buns!!

These vegan no rise hamburger buns are cheap and easy to make, and freeze well, too! And for me, thats a perfect recipe!


INGREDIENTS:

  • 3 1/2 cups of all purpose flour

  • 2 tablespoons active dry yeast

  • 1 cup plus 3 tablespoons warm water (110 to 115 degrees)

  • 1/4 cup white sugar

  • 1 teapsoon salt

  • 1/3 cup neutral oil. I use refined coconut.

  • 1 flax egg


COOKING INSTRUCTIONS:

  1. In a glass bowl, add yeast, water, and 1 tablespoon of sugar. Let sit for 10 minutes until the yeast becomes foamy.

  2. If using a stand mixer, add flour, salt, and remaining sugar to the mixer bowl. Once yeast is ready, mix in flax egg, and oil to the the yeast mixture. Add the wet ingredients to the dry ingredients.

  3. Mix on medium speed for 5 minutes. If the mixture is too dry, you can add a tablespoon more of water. If it seems too wet add a tablespoon more flour. The dough should be soft but not sticking to the sides of the mixer.

  4. If mixing by hand, follow above instructions for combining ingredients. Once the dough is mixed, pour out on a clean counter top. and kneed by hand for 5 minutes.

  5. Once dough is ready, divide into 9 equal pieces. If you want smaller buns, divide into 12 equal pieces. Form a disk shape with each piece of dough, but do not flatten them out. Place on a parchment lined cookie sheet.

  6. Allow buns to rest for 10 minutes while you pre heat the oven to 425 degrees. Once the oven is ready, place buns inside and bake for 10 - 15 minutes. If the buns are not browning evenly, you can rotate the baking sheet halfway through baking. You can also brush them with some vegan butter to help them brown.

  7. Once buns are finished baking, allow to cool before serving.

  8. You can freeze any left over buns in a freezer zip lock bag for up to a month

yields 9-12 buns 

If you liked this recipe, try these:

Vegan Pretzel Buns

Vegan Garlic Challah Rolls

Easy Vegan Sandwich Bread


Triple Chocolate Vegan Pop-Tarts

When I was a kid, I lived off of pop-tarts. Cherry or chocolate being my faves, blueberry being the only one I never liked but would eat anyways.

It was the 80s-90s and pop-tarts were THE breakfast food, until Toaster Strudel came along and tried to steal pop-tart’s thunder.

We will just say my dad was a couponing, economical man, and there was no way he was going to buy us a box of 4 toaster strudels for the price of two boxes of pop-tarts, no matter how hard we begged! So we remained a loyal pop-tart eating and loving family forever more.

Then I grew up and had kids of my own and became semi health conscience. Even before we were vegan, I rarely bought my kids pop-tarts because “they are bad for you.” I mean its not a lie, but lets just say I have loosened the reigns over the years where letting my kids eat “junk” food is concerned.

That said I still prefer to make them homemade version of that junk food because I still want them eating the best possible version of the junk food they can. For starters it has to be free of animal products, high fructose corn syrup, and as many preservatives I can avoid. I won’t withhold sugar from my kids. You get one life and you have to live it! I feel like moderate sugar is ok and pop-tarts need to be consumed because they are delicious and sprinkles make everyone fricking happy! They already can’t eat so many things that they wish they could because we are vegan. Everything in moderation and all of that.

It is actually really easy to make a healthier, vegan version of pop-tarts at home and fill them with whatever you like, even if you like blueberries ( but seriously, there are way better choices than blueberry!) The dough is easy to make and work with, and they bake up really fast! If you have ever made easy pie dough, it’s basically that!

So if you have been without pop-tarts for far too long, the wait is over. And if you grew up eating them every day like I did, these will surely bring a smile to your face. I mean come on, who doesn’t want an excuse to eat chocolate for breakfast every now and again!


INGREDIENTS:

The Dough

  • 1 3/4 cups all purpose flour

  • 1/2 cup cocoa powder

  • 2/3 cups vegan butter

  • a pinch of salt

  • 2 tablespoons white sugar

  • 3 - 4 tablespoons ice water

  • sprinkles for topping (optional)

The Filling

  • 3 tablespoons brown sugar

  • 2 tablespoons cocoa powder

  • 1/3 cup of plant based milk

  • 3 oz vegan chocolate chips or chopped chocolate

  • pinch of salt

The Glaze

  • 1/4 cup powdered sugar

  • 1 teaspoon cocoa powder

  • a few drops of plant based milk

COOKING INSTRUCTIONS:

  1. Preheat oven to 350.

  2. Prepare your filling adding half of the chopped chocolate, and the remaining ingredients to a small sauce pan. Bring to a boil, then reduce heat to simmer. Cook for 5 minutes to allow sauce to thicken. Remove from heat, and stir in the remaining chopped chocolate. Set aside to cool.

  3. To make the dough, add flour, cocoa, butter, and salt to a food processor. Pulse until well combined.

  4. Add in the water one tablespoon at a time until a soft dough has formed. Pop dough in the fridge for 10-15 minutes.

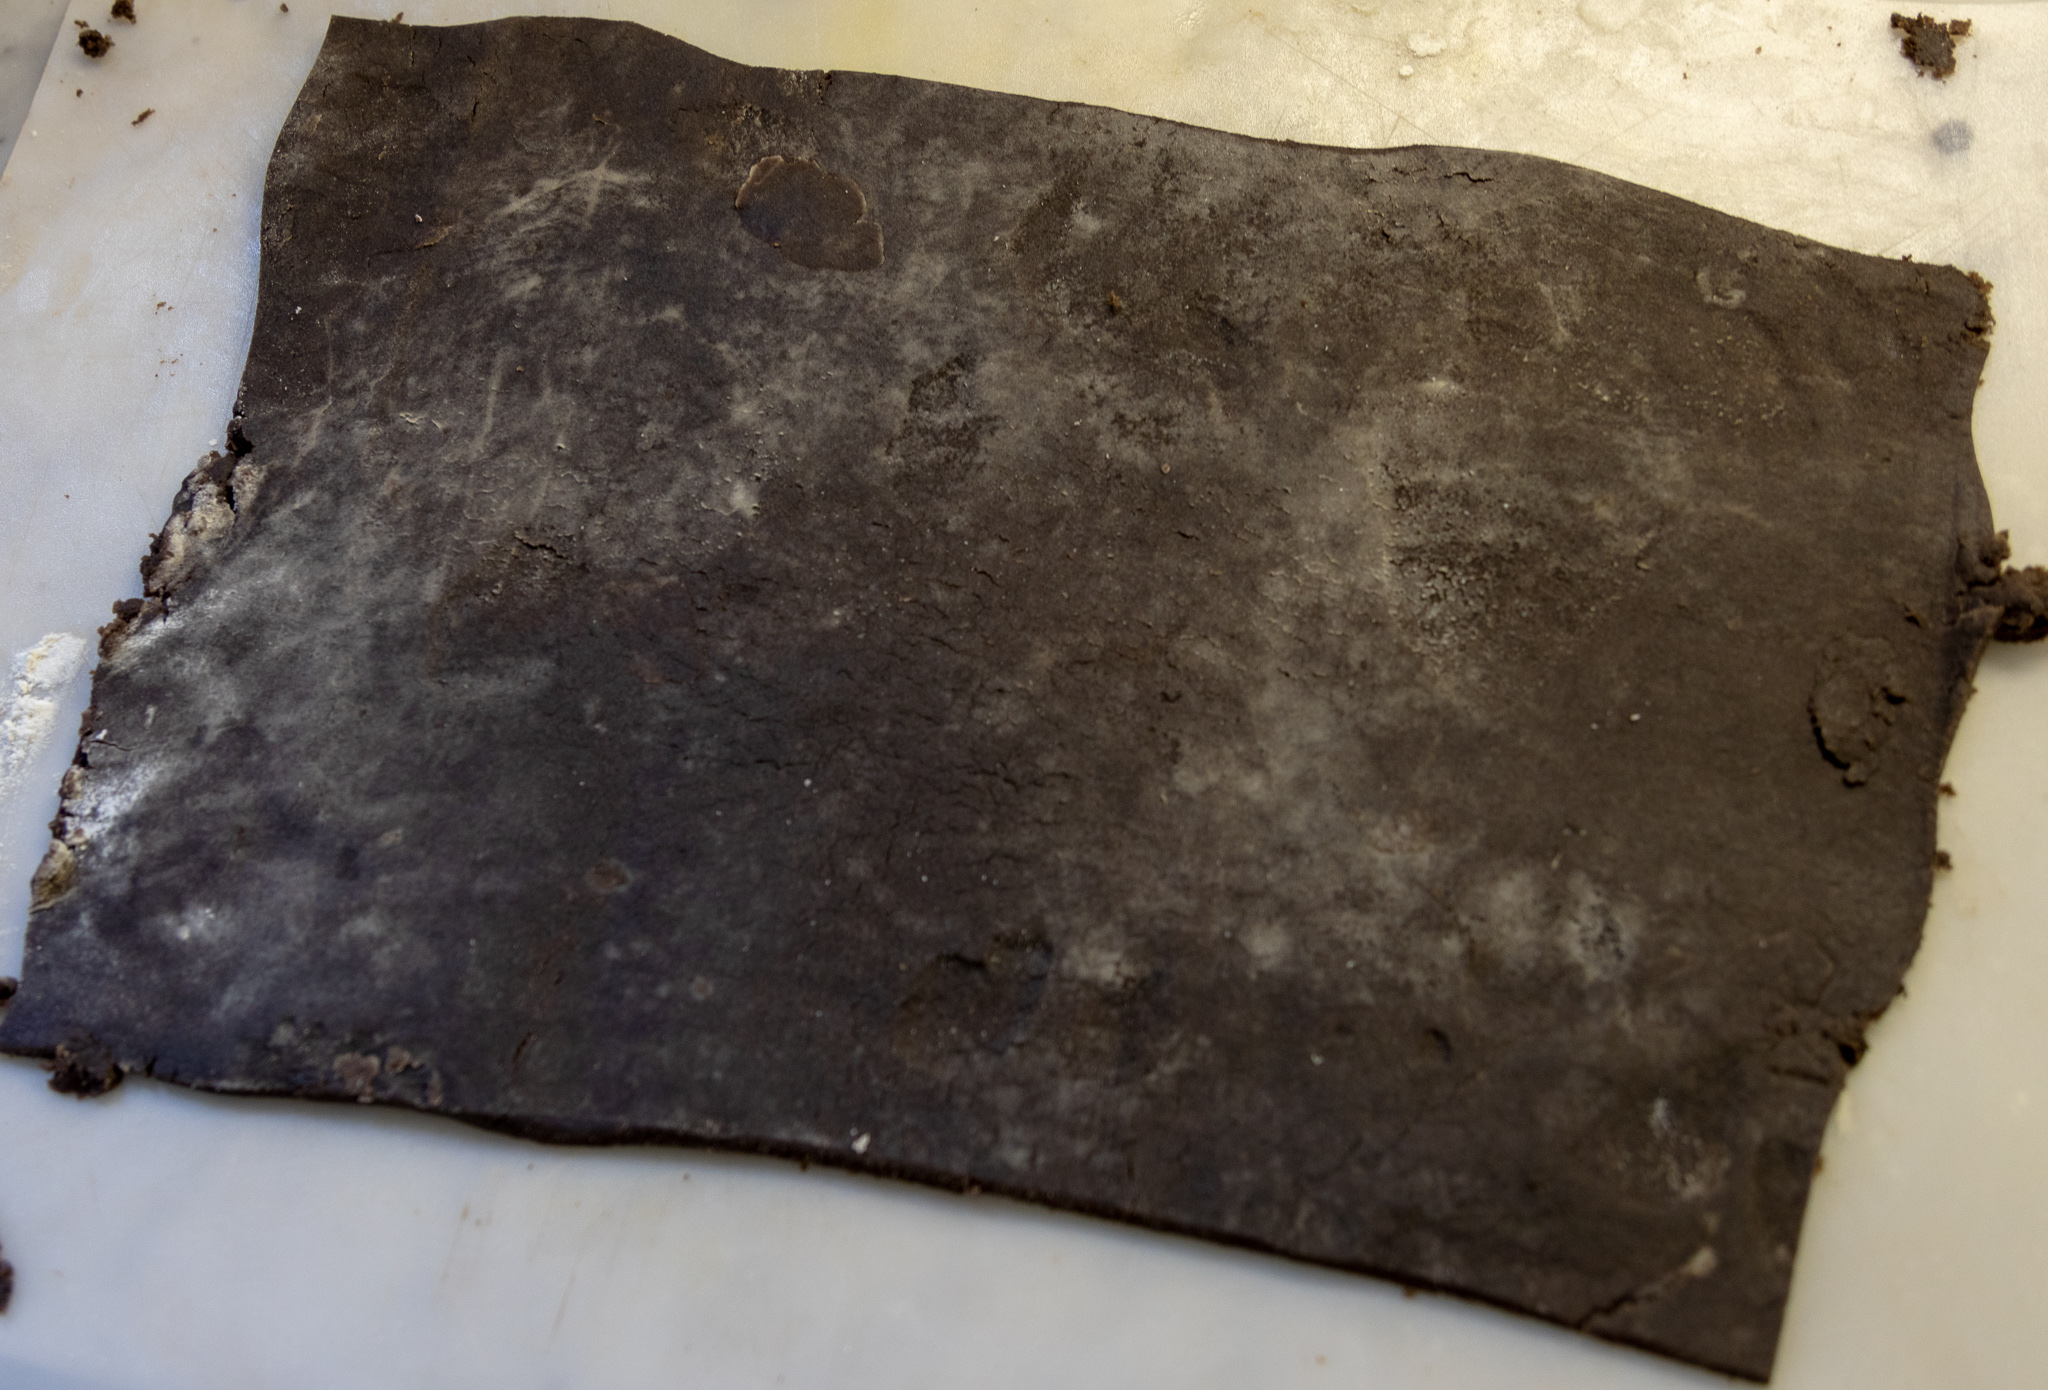
  5. Roll the dough out on a flour dusted, smooth surface to a 1/8 of an inch thick rectangle. You can trim up the edges with a sharp knife, and save the scrap dough.

  6. Once the dough is trimmed and even, cut 3 inch by 5 inch rectangles from the dough, give or take. Be sure when you are calculating how many you can cut, to have a even number. Each pop-tart needs 2 rectangles. Roll out any scrap dough and repeat the process.

  7. Scoop a teaspoon of chocolate filling onto a rectangle, and smear it around a bit in the middle, careful to not get too close to the edges.

  8. Top the chocolate filled piece of dough with another rectangle of dough. I use a spatula to lift the rectangle and place on top. Use a fork to press, and seal the edges.

  9. Place pop-tarts on a parchment lined baking sheet, or lightly spray one with cooking oil and bake for 20 - 25 minutes.

  10. While pop-tarts are baking, mix together the glaze. If it is too thin you can add a little more powdered sugar to thicken it back up. You want a spreadable consistency.

  11. Once pop-tarts have cooled a bit, spread the icing and serve. You can also top with sprinkles.

Yields 8-10 pop-tarts

IMG_7870.jpg

Spicy Vegan Queso (nut free, allergy friendly)

IMG_2143.jpg

INGREDIENTS:

  • 1/2 cup raw sunflower seeds, and 1/2 cup pumpkin seeds, soaked in hot water for one hour, or microwaved covered in water for three minutes
  • 2 tablespoons nutritional yeast
  • 2 teaspoons of light miso paste (if you have a soy allergy skip the miso)
  • 1 tablespoon apple cider vinegar
  • 1 teaspoon salt
  • 4 tablespoons of tapioca starch, corn starch, or arrow root powder
  • 2 cups of water
  • 1 small can of green chili peppers
  • A few shakes of your favorite hot sauce

COOKING INSTRUCTIONS:

  1. Once seeds are done microwaving, drain and rinse with cold water.
  2. Add all ingredients, except the chilis and hot sauce, to a high speed blender or food processor.
  3. Process and blend on high until the mixture is completely smooth (no lumps at all).
  4. Transfer the mixture to a medium size pot and cook on medium heat, stirring with a whisk continually until the mixture thickens. This only takes a few minutes.
  5. Once the queso gets to a pudding like texture, remove it from the heat, and mix in the chilis and hot sauce. If you feel like it is too think, you can add a little more water to thin it out. 
  6. Store in the fridge for up to a week.


Vegan Chili and Cheese Loaded Baked Potatoes

IMG_0248.jpg

We eat a lot of baked potatoes in our house!

They are cheap, filling, and tasty. I mean after all carbs are my love language, and potatoes and bread top the list of favorite carbs!

So the only thing better than a buttery baked potato, is a baked potato covered the THE BEST VEGAN CHILI, a perfect vegan cheddar queso, sour cream, and onions!

Y’all!! This is one of my all time favorite easy comfort foods to throw together on a busy week night. I try and always freeze any leftover chili so I will have some on hand for an occasion such as this. I also like to bake up some potatoes on a weekend so they are ready to go on busy weeknights! Just reheat and top!!! Easy peasy.

So if loaded baked potatoes are your jam, you gotta make this loaded baked potato. Just know you are gonna want to pour that vegan cheddar queso on just about everything, so you might want to double the batch.


NGREDIENTS:

  • 4 - 6 russet potatoes

  • 2 cups The Best Vegan Chili

  • 2 -3 teaspoons vegan butter

  • salt and pepper to taste

  • garlic powder to taste

  • vegan cheddar queso

  • optional toppings, vegan sour cream, diced onions, chives

Vegan Cheddar Queso:

  • 1/2 cups cashews soaked overnight or covered in water and microwaved for 3 minutes, then drained

  • 1 cup water

  • 2 tablespoons corn starch or tapioca starch

  • 1 teaspoon light miso paste

  • 1/2 tablespoon apple cider vinegar

  • 2 tablespoons nutritional yeast

  • 1/2 teaspoon tumeric

  • 1 teaspoon smoke paprika

  • 1/2 teaspoon salt

  • 1/2 small can of green chilis

INSTRUCTIONS:

Preheat oven to 400 degrees

  1. Wash potatoes. You will also need 4 - 6 pieces of aluminum foil large enough to wrap around each potato.

  2. Add 1/2 teaspoon of butter to the middle of each piece of foil. Place potato on top of butter, and poke a sharp knife into each potato a few times. Sprinkle with garlic powder, salt and pepper, and tightly wrap foil around the potatoes.

  3. Place potatoes on a baking sheet, and bake for about 30-40 minutes, depending on size of potatoes. When you can easily poke a knife into the potatoes, they are done.

  4. While potatoes are baking, make the cheese sauce by adding all of the ingredients except the chilis to high speed blender or food processor, and blend until completely smooth.

  5. Transfer the cheese mixture to a medium pot, and heat on medium/ low heat, whisking continuously until the cheese begins to thicken to a queso constancy. This only takes a few minutes. If it gets too thick, you can add a little more water to thin it back out. Add the chilis and stir.

  6. Allow potatoes to cool a little before carefully unwrapping the foil (careful not to burn yourself.)

  7. Top the potatoes with 1/4- 1/2 cup vegan chili, some cheddar queso, and whatever toppings you like to serve.

serves 4-6


Coconut Milk Cheddar Cheese Shapes

IMG_0286.jpg

I love experimenting with different vegan cheese flavors and bases. I really love using coconut milk because it’s easy and affordable.

I am often asked if these cheeses have a strong coconut flavor and the answer is, not really. I always used refined coconut oil which has little to no coconut flavor at all, and all of the spices and other ingredients in the cheese mask the flavor of the milk very well.

I also love making my kids easy and healthy snacks that are a allergy friendly alternative.

What kid doesn’t love to get to play with their food, and with these vegan cheddar shapes it 100% encouraged.

You can make any shape you like using whatever cookie cutters you happen to have on hand.

You can also easily mold this cheese in small bowls and slice or shred it for any recipe calling for cheddar cheese.

Agar powder is simply a vegan gelatin made from seaweed and can be found at Asian markets or online.

It sets up once it cools off but will melt once you heat it.

So don’t be afraid to make your own dairy free cheese!! it’s so easy , cheap and actually really delicious. And in this case, pretty fun too!


INGREDIENTS:

  • 1 can full fat coconut milk

  • 2 tablespoons agar powder

  • 2 teaspoons light miso paste

  • 2 tablespoons lemon juice

  • 1 teaspoon salt

  • 1/4 cup plus 1 tablespoon nutritional yeast

  • 3 tablespoons tapioca starch

  • 1 teaspoon turmeric

  • 2 teaspoons smoked paprika

  • 1/4 cup refined coconut oil


COOKING INSTRUCTIONS:

  1. In a food processor or high speed blender, add all of the ingredients EXCEPT the milk, and agar.

  2. Pulse a few times to mix it all up.

  3. Now add the milk, and agar to a medium sauce pan and bring to a boil. Reduce heat and simmer until mixture thickens to the constancy of a thin pudding. This only takes a few minutes.

  4. Add the milk mixture to the ingredients in the food processor, and mix for about a minute. The mixture will quickly begin to thicken as agar begins to solidify at room temperature.

  5. Transfer to the mixture to a 9x13 pan, or high sided baking pan.

  6. Allow the cheese to harden in the refrigerator uncovered for about an hour.

  7. Once the cheese is set, cut shapes using your favorite cookie cutters. You use the scrap pieces for tacos, soups and chili, on salads, whatever! It will also remelt, so you could use it in quesadillas, nachos, or any other recipe that calls for melty cheese.

  8. Store in an airtight container in the fridge for up to a week.

Vegan Chili Cheese Fries

IMG_0273.jpg

How do I love fries, let me count the ways….

I love them any way you give them to me!! I love them plain, I love them waffled, curly, seasoned, and most of all, I love them loaded with chili and cheese.

I don’t mean to toot my own horn, but I make a mean chili! My mom makes the best non vegan chili so once I became vegan I just swapped the meat for cauliflower and really changed nothing else. (ok that’s a lie, I added cocoa powder, but thats it, I swear!)

I also make a crazy good cheddar cheese sauce using cashews. It’s great as a dip, a filling for quesadillas, or a grilled cheese, and 100% the best cheese for chili cheese fries. So flipping good!

You can buy frozen fries and I won’t judge you. You can normally find a few bags of Trader Joe’s frozen fries in my freezer. But for this recipe, I always make my own. If I am going to eat chili cheese fries, I want THE BEST chili cheese fries, so the requires homemade fries in my mind. They are really not hard to make and far superior to frozen every single time!!!

I also suggest making chili and freezing any leftovers specifically for future fries. I will make for a quick dinner! Just thaw the chili, reheat, whip up a batch of cheese and fry some potatoes! TA-DA, dinner is ready!! I always have leftover chili and freeze with visions of future chili cheese fries.

I love comfort food and fries are my favorite of all the foods!


INGREDIENTS:

  • 4 russet potatoes

  • 2 cups of The Best Vegan Chili

  • 2 cups vegan cheddar queso

  • vegan sour cream, diced onion, or green onions (optional toppings)

  • oil for frying, OR you can oven bake them

Vegan Cheddar Queso:

  • 1/2 cups cashews soaked overnight, or covered in water and microwaved for 3 minutes then drained

  • 1 cup water

  • 2 tablespoons corn starch or tapioca starch

  • 1 teaspoon light miso paste

  • 1/2 tablespoon apple cider vinegar

  • 2 tablespoons nutritional yeast

  • 1/2 teaspoon tumeric

  • 1 teaspoon smoke paprika

  • 1/2 teaspoon salt

  • 1/2 small can of green chilis


INSTRUCTIONS:

  1. Wash the potatoes, peels on.

  2. Cut potatoes into fries.

  3. FOR FRYING THE POTATOES, heat a few inches of oil in a deep skillet (I use a cast iron skillet)on medium heat.Once the oil is nice and hot, start adding small batches of the fries to the oil. Allow them to fry until nice a crisp, about 5 minutes. Once they are done frying, remove from oil and place on a wire cooking rack with some paper towels underneath. This will help them stay crispy while you finish frying the rest.

  4. FOR OVEN BAKING, preheat oven to 400 degrees, Lightly coat fries in a few teaspoons of oil and place them on a cookies sheet lined with parchment paper. Make sure the fries are not over crowded. Sprinkle with salt and bake for about 15 minutes or until the fries seem crispy on one side. Take the cookie sheet out of the oven, and turn the fries with a spatula or a pair of metal tongs. Put the fires back in the oven for another 15 minutes, or until the fries seem fully crisp.

  5. TO MAKE THE CHEESE SAUCE add all of the ingredients except the chilis to a high speed blender or food processor, and blend until completely smooth.

  6. Transfer the cheese mixture to a medium pot and heat on medium/ low heat, whisking continuously until the cheese begins to thicken to a queso consistency. If it gets too thick, you can add a little more water to thin it back out. Add the chilis and stir.

  7. Portion fries between 4 - 6 plates, top with chili, cheese sauce, and whatever toppings you like.

serves 4-6


The Best Vegan Chili

IMG_0211.jpg

Everybody claims to have the “best” chili, but I promise they are liars! They have to be, because this is hands down the best vegan chili you will ever eat!

I know, I know. I know. That is a lofty claim, but I stand by it.

My mom always has made the best chili. Like award winning quality chili. So when we went vegan I needed to find a way to veaganize her chili without changing too much about.

Well I did, and the only thing I did differently was add cauliflower in the place of ground meat to imitate the texture, and add cocoa powder because its my favorite secret ingredient in any chili!

This chili is packed with flavor, it’s easy to make and comes together quickly. It also freezes well making it perfect for meal prep!

Eat it on its own, on a baked potato, on some fries, over some chip, or on a carrot dog. I will eat chili any day of the week, any time of year! It has always been my favorite and I promise again you will be hard pressed to find a better version than this one!


INGREDIENTS:

  • 1 large 12 oz can crushed tomoatoes

  • 1 small can diced tomatoes, drained

  • 1 small can green chilis

  • 2 cans red kidney beans, drained and rinsed

  • 1 small to medium onion

  • 1 small head of cauliflower

  • 2 teaspoons minced garlic

  • 2 teaspoons chili powder

  • 2 teaspoons cumin

  • 1-2 teaspoons salt

  • 1/4 cup dark cocoa powder

  • 1-2 teaspoons liquid smoke (optional)

  • 1 teaspoon vegetable low sodium Better Than Bouillon

  • 1/2 to 1 can of beer, or 1/2 to 1 cup veggie broth ( this just depends on how thick you like your chili)


INSTRUCTIONS:

  1. Chop cauliflower to a fine chop, or put it in your food processor and pules until its good and broken down. We are using the cauliflower in place of ground meat, and are trying to get that sort of texture.

  2. Dice the onion into a fine dice.

  3. Heat a dutch oven or large pot on medium heat. Add a few teaspoons of oil. Once the oil is nice and hot, add the onion and cauliflower. Heat the onion and cauliflower until the onion becomes translucent.

  4. Next, add in the remaining ingredients. Add more or less of the beer or broth depending on how thick you like your chili. You can alway add more if it thickens up too much for your liking. Give it a good stir and reduce heat to simmer.

  5. A side not about the cocoa powder. I know for some people it will seem like an odd ingredient, but it really does make this chili special. I highly recommend you don't skip adding it! I promise you will never want to make chili without it again.

  6. Allow chili to simmer with a lid on for at least an hour, stirring occasionally. I typically start my chili in late afternoon and just let it simmer until dinner.

  7. CROCKPOT OPTION: You an easily make this chili in a crock pot. I normally just saute the onion and cauliflower first before adding it. Set your crock pot to medium heat, and allow to cook for 6-8 hours.

  8. This recipe makes a large pot of chili. If you are a small family, or single, you can freeze the leftovers for several months. I typically portion the cooled chili in freezer bags, in smaller portions. I will thaw the smaller bags of chili to use for toppings on loaded baked potatoes, chili cheese fries, carrot dogs, latkes, or nachos.