Appetizers

Nut Free Vegan Queso with Rotel

Nut Free Vegan Queso with Rotel

Making cheese dip with velveeta cheese and a can of Rotel is common place where I come from. Like every “taco” night include that queso. Every pot luck had it simmering away in a crock pot.

It is easy, and back in the day I thought it was delicious.

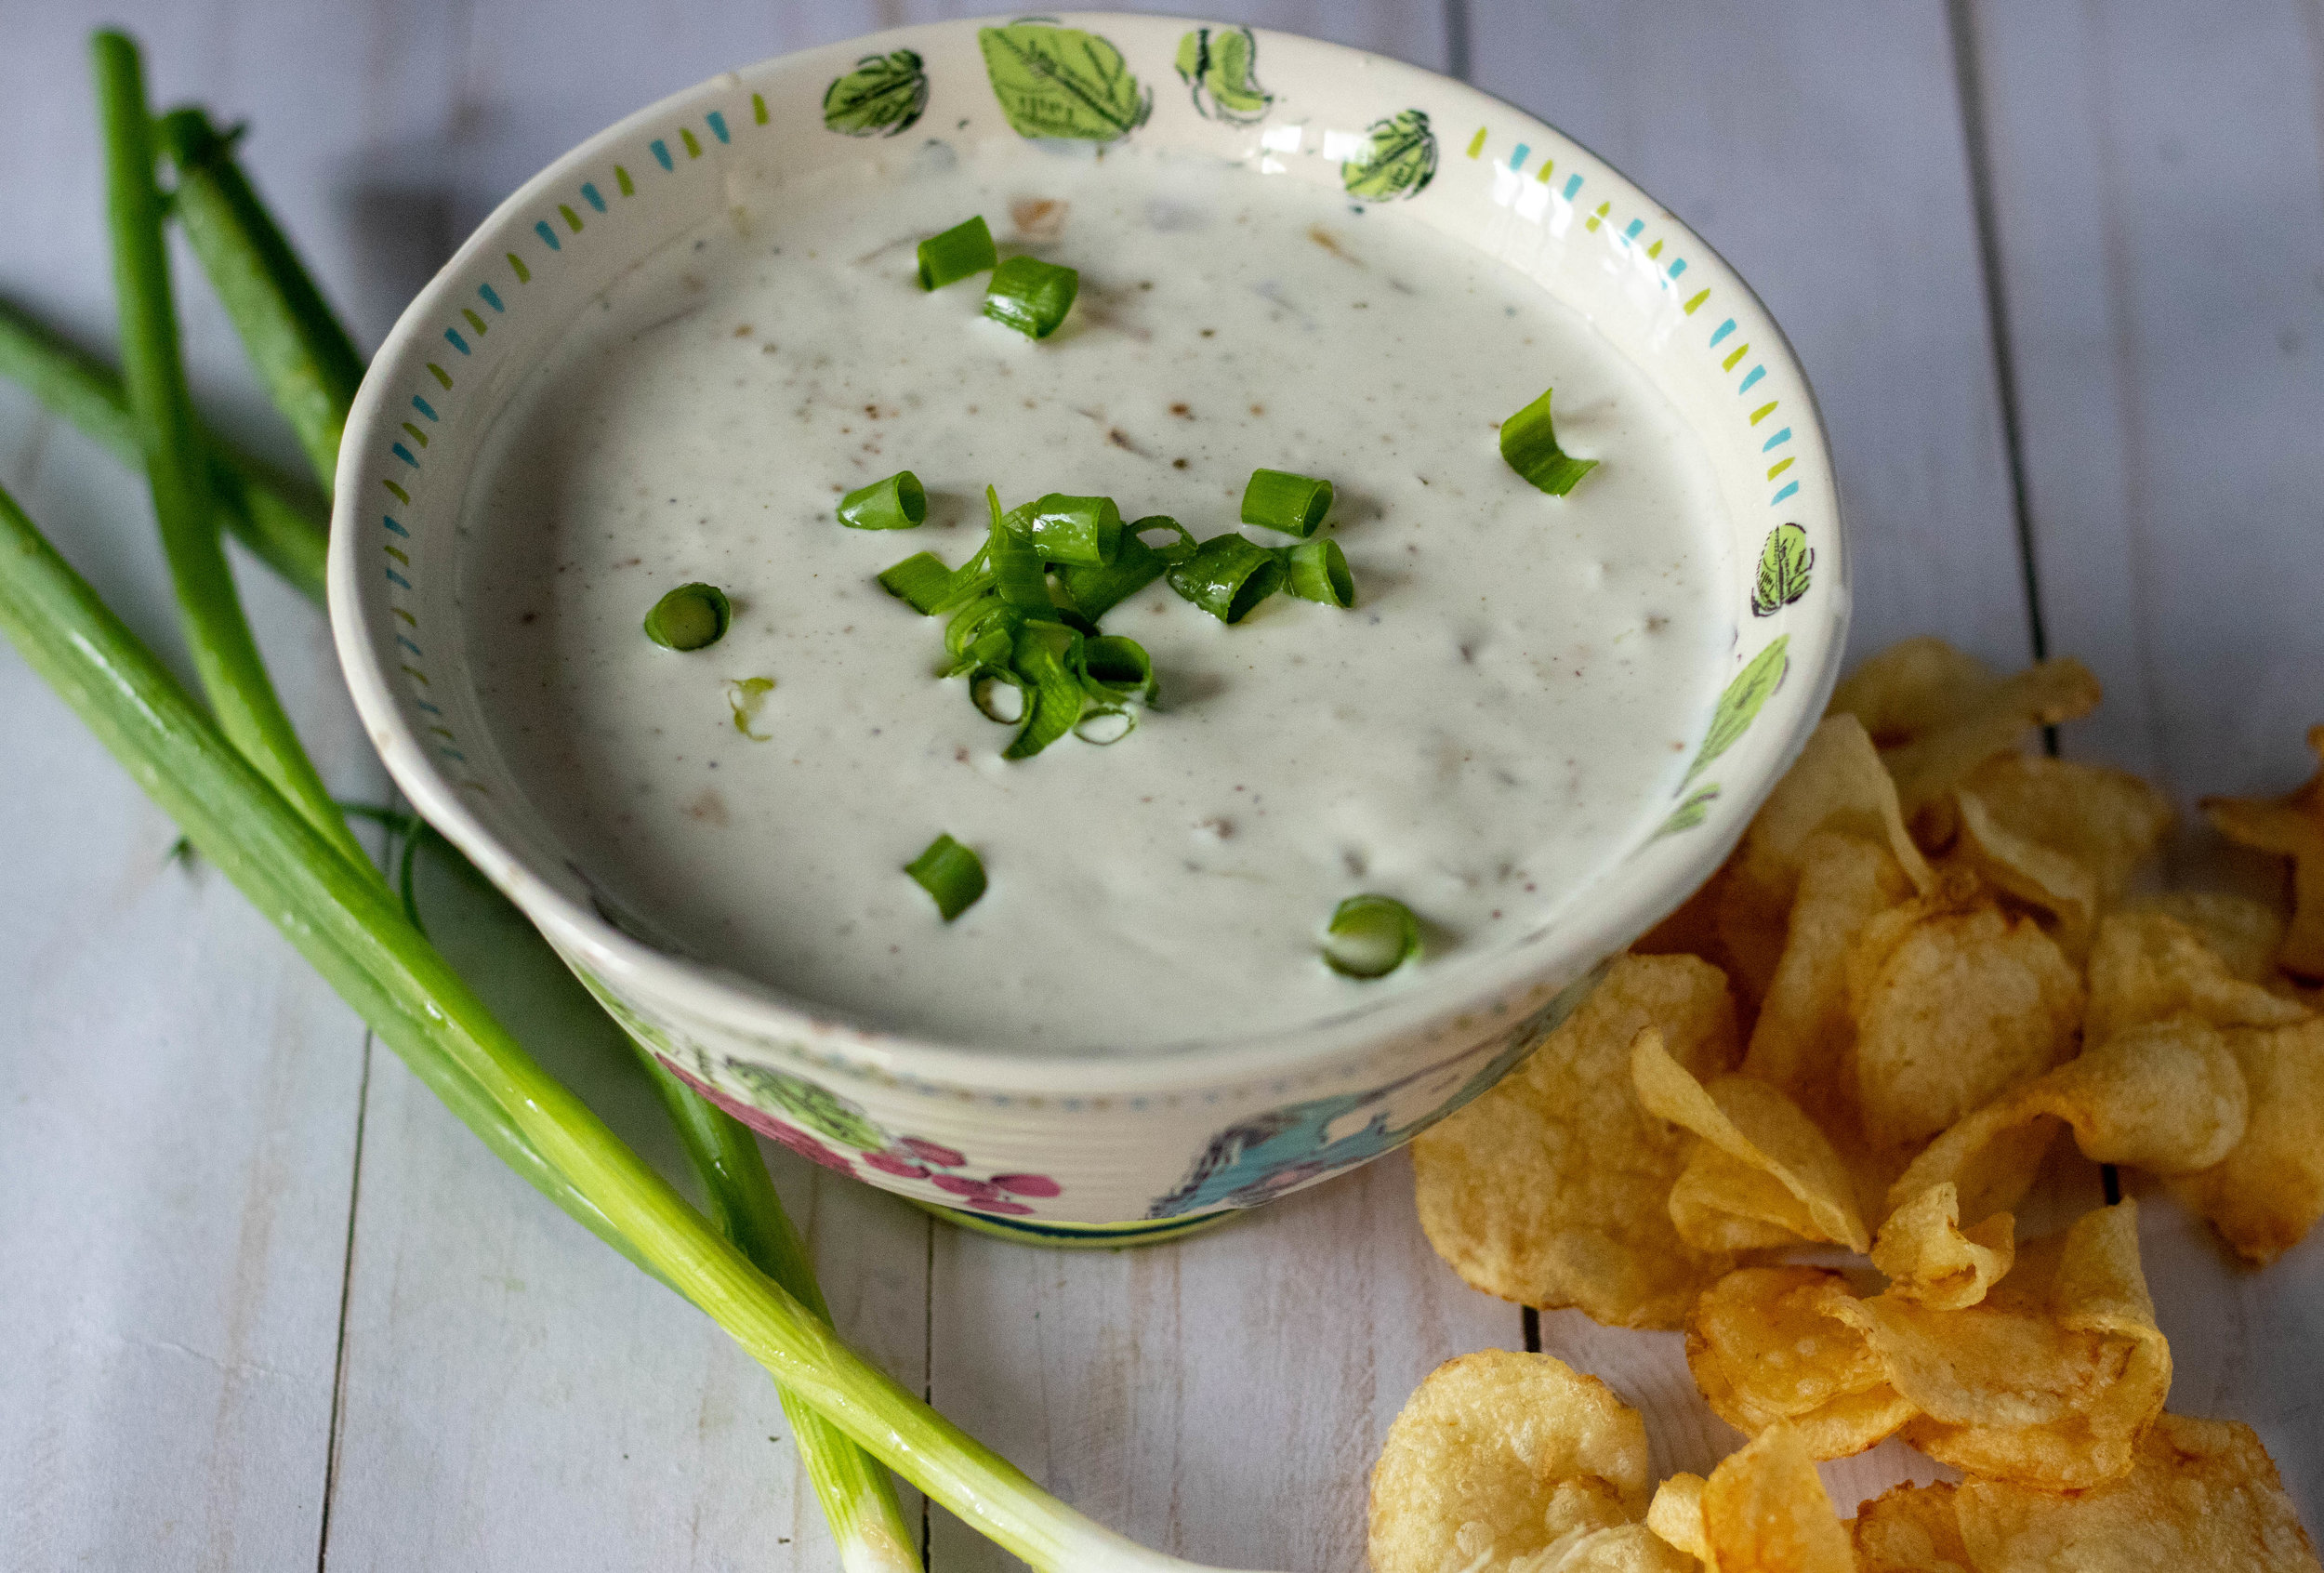
This vegan queso isn’ that…but it does have a can of Rotel in it, and it is delicious!

Rotel, diced tomatoes and chilies

Rotel, diced tomatoes and chilies

If you are not familiar with Rotel, its basically just canned tomatoes and chilies. It comes in a variety of spicy heat levels, from mild to habaneros. So you can choose which level of spice you like!

I keep a few cans of rotel in my pantry mostly out of habit, but also because it is delicious and easily adds that spicy zip to queso, chili, enchiladas, and more! You could use a can of diced tomatoes and a small can of diced chilis if that is all you can find! It would work as well.

I make a lot of varieties of vegan queso, cashew being my base staple, and even already have a white “cheese” sunflower queso recipe on the site, but I wanted to make something more cheddar like, with some kick and some bite.

So I pulled out a can of Rotel and decide to use some sunflower seeds to make this vegan queso more affordable, allergy friendly, and super easy!

As much as I adore my original cashew queso recipe , I think this is a new family favorite. I like that it is a little spicier than my other quesos, but just as creamy, cheesy gooey, and delicious! Even my husband who normally isn’t a fan of spicy stuff, loved this queso….so if it’s Dave tested and approved, then trust me (errr him,) its good!!!

So give this vegan sunflower seed queso a try! I think you will be happy you did!

Nut Free Vegan Queso with Rotel

INGREDIENTS:

  • 1/2 cup sunflower seeds, plus water for soaking

  • 1 can of Rotel

  • 1 Rotel cans worth of water (just fill the can after you dump out the tomatoes)

  • 2 tablespoon tapioca starch

  • 2 tablespoons nutritional yeast

  • 2 tablespoons sauerkraut, no liquid (you can sub wit 2 teaspoons miso paste as well)

  • 1 tablespoon apple cider vinegar or lemon juice

  • 1 teaspoons salt

  • 1 teaspoon turmeric

  • 1 and 1/2 teaspoons smoke paprika

INSTRUCTIONS:

  1. Place sunflower seeds in a microwave safe container and cover with water. Microwave for 3 minutes. You can also soak the seeds in hot water for a few hours if you do not own a microwave.

  2. Drain the water from the seeds. Add the seeds and remaining ingredients to a high speed blender or food processor .

  3. Blend until completely smooth and liquefied, with no bits of seeds still visible.

  4. Transfer the mixture to a medium sized pot and heat over med /low heat, whisking continuously, until the mixture thickens to a queso consistency. Remove from heat once it has reached desired consistency. It will continue to thicken as it heats. if you get it too thick you can add a bit more water to thin it back out.

  5. Store any leftovers in an airtight container in the fridge for up to a week. You can reheat this queso a microwave, or on the stove top. Once again, if it seems too thick when you reheat, you can add a splash of water or plant milk to thin it back out.

Nut Free Vegan Queso with Rotel

If you like this recipe, then try these:

Vegan Fried Mac and Cheese Balls

Dipping Vegan Fried Mac and Cheese in marinara sauce

What’s better than creamy, gooey, perfect vegan mac and cheese? Fried vegan mac and cheese, obviously!

I mean, when I said before that I can and will try and fry everything, that was not a lie. I do adore my air fryer and it has been a game changer in my life, but from time to time you gotta bust out a pot of hot oil and make magic happen! Some things just want to be fried in a vat of hot oil and there is not a drag thing any of us can do about that!


There was once a time in our lives when we thought the Cheese Cake Factory was the bees knees. Never mind that the wait at our local outdoor mall location was always 7,500 hours long, or that you basically have to sit in a strangers lap once seated, or that the menu is so long that you might turn 100 before you ever finish reading it. Like I have never had so much ordering anxiety and decision remorse in my life as I have at a Cheese Cake Factory ordering dinner. Does anyone else feel this way?!?! I feel like I am not alone here.


Once we went vegan I have never been back. Do I miss it?!?! Well their happy hour was pretty awesome with tasty drinks and cheap apps, but I am not sure in my semi old age I could handle the stress of it all, and I’m pretty sure there is very little there for me to eat these days. But what I really truly miss is their fried mac and cheese balls!

Seriously, if you have never, I am so sorry! But I am only here to help, and I think I have done just that with this recipe.

I have tried my hand at frying Vegan Mac and Cheese pretty unsuccessfully serval times. Until this time!!!

Vegan Fried Mac and Cheese

The trick to getting these Fried Vegan Mac and Cheese Balls nice and creamy once you fry them, is making sure they the Mac is EXTRA creamy and cheesy before you freeze them. Lucky for all of us I have the perfect creamy vegan mac and cheese recipe to make this much easier . You need a creamy element, but you also need the shredded cheese mixed in so it melts and adds extra goo when you fry them.

The breading is also important. You need a thick batter to hold on the dry coating since the fried mac and cheese balls need to be nice and solid before you try and coat them. These ingredients are non negotiable if you want an successful final product. So if you go fussing with the ingredients, and are disappointed with the creaminess of the inside, or the coating on the outside, you were fairly warned.

This recipe makes a lot of fried mac and cheese so I often leave half the batch in my freezer in a large sealed zip lock for another day. If you do this, just half breading and batter amounts. Or fry up the whole batch and reheat the leftovers throughout the week. They reheat well in the oven or an air fryer.

Vegan Fried Mac and Cheese

Finally, make sure to have a side of marinara on hand for dipping. These Vegan Fried Mac and Cheese balls are a meal in themselves and sooooo much better if you dip them in the sauce! I mean Cheese Cake Factory would be so disappointed in us if we didn’t!! It’s just how you are suppose to eat them. Serve these with a salad and you have made a full dinner that is sure to make your whole house happy!

INGREDIENTS:

  • 1 batch Creamy Vegan Mac and Cheese

  • 1/4 cup vegan mayo

  • 1 cup shredded vegan cheddar cheese , homemade or store bought

  • 1 cup vegan plain yogurt or sour cream

  • 1 cup unsweetened vegan plant milk

  • 1/2 cup tapioca or corn starch

  • 2 cups vegan bread crumbs, plain or panko

  • 2 teaspoon garlic powder

  • 1 teaspoon salt

  • Oil for frying

  • Marinara sauce for dipping

INSTRUCTIONS:

  1. Begin by preparing the mac and cheese according to the instructions. Add in 1/4 cup vegan mayo and 1 cup shredded vegan cheddar to the Mac and cheese. Mix well, and allow to cool.

  2. Using a large kitchen scoop, scoop out Mac and cheese and form a ball. Place the ball into a muffin tin and continue with remaining Mac and cheese. If you do not have a muffin tin you can form a ball with the mac and cheese and place it on a parchment lined cookie sheet.

  3. Place the muffin tin or cookie sheet into the freezer and allow the mac and cheese to freeze. You need the mac and cheese to be solid before you batter and bread it.

  4. Once the vegan mac and cheese balls are frozen, prepare the batter and breading by combining the yogurt and milk in a medium sized bowl, and combining the bread crumbs, starch, salt, and garlic in a separate bowl.

    *this recipe will yield about 2 dozen Vegan Mac and Cheese balls. I often only choose to fry half a batch at a time. If you wish to do this, you will need to half the ingredients in the batter and breading and leave the other half of the Mac and Cheese in the freezer in an airtight container for up to one month.

  5. Remove the Mac and Cheese from the muffin tin. The balls my be a bit stuck but you can pry them out easily using a fork. Begin by dipping each Mac and Cheese ball into the yogurt/milk mixture and fully coating. Next dip them into the breadcrumb and starch mixture, again making sure they are fully coated. Place the coated Macs and Cheese balls onto a baking sheet or back into the muffin tin.

  6. Fill a medium sized pot half way with an oil suitable for frying, I use grapeseed or canola oil. Heat the pot over medium heat until the oil reaches 350-375 degrees. If you do not have a kitchen thermometer you can place a wooden chopstick or wooden skewer into the oil touching the bottom of the pot once the oil seems good and hot. If tiny bubbles form around the chopstick, the oil is ready.

  7. Prepare a baking pan by lining it in paper towels and placing a wire cooling rack on top.

  8. Add a few mac and cheese balls into the hot oil and allow them to fry for 3-5 minutes. Since the mac and cheese is frozen, you have to make sure they are cooked through without allowing the outside to burn. If the oil seems too hot and the outside is getting too brown, you can reduce the heat at bit. You may have to test one after it has fried for about 3 minutes to see if the inside is done. This will help you gauge how long you will have to let them cook.

  9. Continue until all vegan mac and cheese balls have been fried, placing the finished balls on the cooling rack.

  10. Serve with warmed marinara sauce.

  11. If you wish to reheat leftover fried vegan mac and cheese balls, you can do so in an air fryer at 350 for about 5 minutes, or in a preheated, 350 degree oven for 5-10 minutes.

Vegan Fried Mac and Cheese

If you like this recipe, then try these:

Vegan Chorizo and Cream Cheese Stuffed Jalapeños

Vegan Chorizo and Cream Cheese Stuffed Jalapenos

My oldest daughter recently asked me to make jalapeño poppers.

I have eaten plenty in my life, but never once made a stuffed jalapeño.

My next question was if she wanted them stuffed with cheddar or cream cheese. I have had both and personally prefer cream cheese, but would not turn down a pepper stuffed with cheddar. All cheese is created delicious in my mind, and I do not discriminate.

She has personally NEVER had a stuffed jalapeño, vegan or otherwise. Because we are vegan, they are not something she has ever been able to order out, and again I never thought to make them. I am not sure how long in her 17 years she has been dreaming of eating a stuffed jalapeño popper, but this was the first mention of it, so obviously I would need to try and make her pepper craving dreams a reality.

But here is the thing, I didn’t really want to go to all that work , trying to get them hallowed out and stuffed and battered and fried, knowing she was the only one in the house other than me that was going to eat them. It was going to be a lot of work. I love fried food, but if I can be honest here, I HATE the act of deep frying food. I makes a mess that I do not enjoy cleaning up, especially if its not a food my whole family is going to want to eat. So I kept putting it off.

Vegan Chorizo Cream Cheese Stuffed Jalapeno Peppers

Then one day, my friend Aunterial texted to let me know she had a LOAD of veggies for me. I had not idea just the amount she was talking about until she dropped the crate on my porch. SO MANY JALEPENOS!! So I had no more excuse. Later that week I saw on Facebook that Aunterial had made peppers too, but stuffed them with cream cheese and baked them! She is a fricking genius y’all!!! BAKED THEM!!! What?!?!?

So to solve the cheddar vs cream cheese debate, I decide to mix both. I actually used our homemade kimcheese shredded and mixed with the cream cheese because thats what I had on hand. But the kimcheese works because it has a kick to it, too. I also decided I wanted extra spice and bite, so cooked up some soy chorizo and mixed that in. To add some crunch, I sprinkled the tops with some panko and popped them into the oven!!

Y’ALL!! These might be my new favorite easy appetizer! I shared them with my non vegan neighbors to get a unbiased review and they all loved them! But most importantly, my daughter loved them. Spicy, creamy, crunchy, and I didn’t have to fry anything thanks to Aunterial’s brilliant idea! Don’t worry I probably turned around the next day and fried a thing. But these vegan chorizo and cream cheese jalapeños are officially a bake only, no frying required snack!!

So if you have been craving an jalapeño poppers but don’t want to go to the trouble of stuffing, battering, and fying them, maybe this is the solution you have been looking for! Quick, easy, and soooo good!

Vegan Chorizo and Cream Cheese Stuffed Jalapenos

INGREDIENTS:

  • 6-8 large jalapeño peppers

  • 1/2 container, or 4 oz of vegan cream cheese, or homemade cream cheese

  • 1/2 package or 6 oz vegan soy chorizo ( we used Trader Joe’s)

  • 1/3 cup shredded vegan cheddar or any shredded vegan cheese you may like

  • 1 teaspoon minced garlic

  • 1/2 teaspoon chili powder

  • 1/4 cup panko bread crumbs

INSTRUCTIONS:

Preheat oven to 400 degrees

  1. Wash peppers. Cut the peppers in half lengthwise and remove seeds, and ribs. Place peppers on a parchment lined cookies sheet. Give them a spray or light brushing with some cooking oil.

  2. In a medium sized skillet, cook the soy chorizo until it has cooked through. Allow it too cool.

  3. In a medium sized bowl mix the cream cheese, shredded cheese, cooled chorizo, garlic, and chili powder.

  4. Fill the peppers evenly with the cream cheese chorizo mixture, and sprinkle the tops with panko. I like to sprinkle some chili powder on top of the bread crumbs as well, but it’s optional.

  5. Give the peppers one more spray with some cooking oil and place them on the middle rack of your preheated oven. Let them cook for about 20-25 minutes. You want the pepper to soften some but not become really mushy. If the tops seem to be browning too quickly you can move the tray to the bottom oven rack and bump the heat down to 350.

  6. Serve with a side of vegan ranch or sour cream if you like.

Vegan Chorizo and Cream Cheese Stuffed Jalapenos

If you like this recipe, then try these:

Easy Candied Cranberries

Easy Candied Cranberries

Cranberry season makes me happy.

I love cranberry everything and these pretty little jeweled or candied cranberries are no exception.

These little beauties are so easy to make and add a little fancy sparkle and burst of flavor to so many holiday recipes. You can add them garnish cocktails, top desserts, or just snack on them.

They are sweet, and super tart, and pretty to look at. They store well in the fridge so if you are like me, once you make a batch, you will find as many ways as you can to use them. They are too pretty, and too tasty to let go to waste!

And if you are concerned about white sugar being vegan, just give the brand you use a quick google, or check this list . I use Florida Crystals brand and know they are for sure vegan but give the list a look and check your brand!


INGREDIENTS:

  • 12 oz fresh cranberries

  • 1/2 cup water

  • 1 1/2 cup sugar divided

  • optional, 2 large pieces of orange peel

INSTRUCTIONS:

  1. Bring 1/2 cup sugar, 1/2 cup water, and orange peel to a boil in a medium pot over medium heat, until sugar has dissolved. Remove from heat. Stir in the cranberries.

  2. Place a wire cooling rack on top of a cookie sheet. Transfer cranberries to the wire rack to dry for about an hour. Fill a large bowl with 1/2 to 1 cups of sugar and toss the cranberries in the sugar to coat. Transfer the cranberries back to to the cooling rack to dry for another half hour before storing in an airtight container in the fridge. You can optionally add half 1/2 orange worth of zest to the sugar for an extra citrus pop.

  3. Use cranberries as a garnish for cocktails, or desserts, or just as a tasty snack!

If you like this recipe, try these:

 
Easy Candied Cranberries

Baked Vegan Brie in Puff Pastry with Cranberries and Almonds

Baked Vegan Brie in Puff Pastry with Cranberries and Almonds

Brie baked in bread, or Brie En Croute, is one of my favorite ways to eat vegan brie! I mean seriously, it’s cheese baked inside of flakey puff pastry.

Carbs and cheese are my love languages, so this recipe speaks to me on all the levels. The vegan brie is cashew based and comes together rather quickly. It does however take some time to firm up in the fridge, so I suggest making the brie a day or two in advance if you are planning on making and serving this dish.

I used raspberry jam in this recipe but you can use whatever jam you like or even cranberry sauce.

This dish is beautiful and so tasty. This brie gets rather creamy and gooey once baked inside or the pastry and is delicious served with fruit or crackers. I like to just eat it with a fork, but maybe that would be frowned upon if serving at a party. Bwahahhaha, I’ll try to keep my manners in check.

I think this recipe would be beautiful and impressive for any holiday party or any gathering, or you can just make it for yourself, fork in hand and zero judgment!


INGREDIENTS:

VEGAN BRIE:

  • 1 cup unsalted, unroasted cashews (plus water for soaking)

  • 1 cup water

  • 1/3 cup refined coconut oil

  • 1/3 cup sauerkraut, without the juice

  • 1 tablespoon apple cider vinegar

  • 2 tablespoons tapioca starch

  • 2 teaspoons agar powder

  • 1 teaspoon salt

  • 2 tablespoons nutritional yeast

  • cheese cloth

BRIE IN PUFF PASTRY:

  • 1 puff pasty, Pepperidge Farm brand is vegan

  • 1 six inch round of vegan brie

  • 3 tablespoons raspberry jam

  • 1/4 cup dried cranberries

  • 1/4-1/3 cup sliced almonds

  • 2 tablespoons plant milk mixed with 1 tablespoon maple syrup

Baked Vegan Brie in Puff Pastry with Cranberries and Almonds

INSTRUCTIONS:

  1. For the Brie: Place cashews in a microwave safe container and cover in water. Microwave for 3 minutes. You can also cover in hot water, and let them soak for a few hours if you do not have a microwave.

  2. Drain cashews, and add them along with remaining ingredients to a high speed blender or food processor. Blend until COMPLETELY smooth. If you are using a food processor, add the nuts first and try to break them down a bit before adding everything else.

  3. Transfer mixture to a medium size sauce pan, over medium heat, and stir continuously until the mixture becomes thick and bubbly. This will only take a few minutes.

  4. Line a 6 inch cake pan, or similarly sized shallow bowl, with a piece of cheese cloth that is large enough that it hangs a good bit over the sides of the bowl. Pour the mixture into the bowl and cover with the excess cheese cloth that is hanging over the sides. Place in the refrigerate for at least 4 - 5 hours to allow cheese to firm up.

  5. Once the Brie is done, thaw puff pastry according to package instructions.

  6. Preheat oven to 350 degrees

  7. Roll puff pastry out into a 12 inch x 12 inch square on a floured surface.

  8. Smear the jam in the middle of the puff pastry square and place the wheel of brie on top of the jam.

  9. Place the dried cranberries and almonds piled up on top of the brie.

  10. Carefully take each corner of the puff pastry dough and fold it over the top of the brie. Just one corner at a time until the cheese is covered. Brush the top with the milk/maple mixture. This will help the puff pastry to brown. You could also just give it a light spray with some cooking oil.

  11. Place the brie on a baking sheet and into the preheated oven for about 25 minutes or until the pastry is golden brown and flakey.

  12. Allow the the brie to cool some before cutting into it . Serve with crackers and or fruit.

If you like this recipe, try these:

 
Baked Vegan Brie in Puff Pastry with Cranberries and Almonds

Vegan Bacon Butter Brown Sugar Bites

Vegan Bacon Butter Crackers

Ok, ok, ok….hear me out if you think this is a weird idea. Also try and say Vegan Bacon Butter Brown Sugar Bites threes times fast!

These are basically crunchy candied vegan bacon crackers. They are sweet, smoky, salty and perfectly crunchy.

They are SO easy to make and really kind of addictive.

My sister in law’s sister, Heather, who is as good as family to me, posted a non vegan version of this the other day. It popped up in my Face Book feed and I literally JUMPED out of my seat and had these babies in my oven within 10 minutes.

It’s the holiday season so I am always looking for new, EASY, recipes for taking to parties, or dinners, or whatever. These are them!

The recipe you needed when you are too busy ( that would be all of us, am I right) to do much else. These vegan bacon butter bites are just the recipe we all needed! You could use whatever vegan bacon you prefer. I like Lightlife smart bacon and it worked very well for this recipe and oddly enough Ritz cracker are actually vegan.

Hooray who would have thought?!?!. So go ahead and bake yourself up a batch of these first, just so you can, you know “quality control” taste test them, then bake up a batch the next time you need a super quick and easy party snack to share.


INGREDIENTS:

  • 1 sleeve vegan butter crackers. You can use round or rectangle crackers

  • 1 package vegan bacon, we used Lightlife

  • Brown sugar, 1 teaspoon per cracker

  • A pinch of salt

INSTRUCTIONS:

preheat oven to 350 degrees.

  1. Line a baking sheet with parchment paper. Place the cracker on the sheep spaced out so they are not crowded.

  2. Cut uncooked bacon slices to fit whatever size cracker you are using. I cut my bacon into thirds for the round crackers and the pieces fit nicely. Place one piece of bacon on each cracker.

  3. Spread 1 teaspoon of brown sugar over each cracker. Sprinkle a little salt over the tops of all the crackers.

  4. Bake for 20-25 minutes, or until all of the brown sugar has melted and is bubbly. Allow crackers to cool completely before serving. Store in an airtight container at room temperature.

If you like this recipe, try these:

Vegan Bacon Butter Crackers

Super easy vegan bacon butter brown sugar crakers

Vegan Clam Strips (Soy Curls)

Vegan Clam Strips (Soy Curls)

I used to love fried seafood. Again, I was raised in Georgia by parents from Alabama so I was born eating fried chicken and drinking sweet tea, no questions asked.

I don’t even know the first time I ate a non fried seafood item, or even knew that it was an option! So after giving up all other meats, and even dairy, the one animal food I still found myself really missing and craving was fried seafood!

Recently my friend Lane accidentally bought 6 bags of soy curls, thinking she had just ordered one. So she asked me if I had any recipes on the site using them. I did not. I have had soy curls in various preparations here and there but had not made them myself. I also recently had the most delicious vegan clam strips from a food truck that is not in town very often and had been craving more ever since. They used mushrooms in theirs, but I decided after Lane dropped off a bag of curls, there was no reason not to try and make a clam strip out of them!

They had the basic shape, and a chewy enough texture, and logic said it would work. And work it did! These vegan clam strip are crispy, chewy, and delicious! The best part is how darn easy they are to make. Just soak, coat, fry and eat!

So If you have a bag of soy curls laying around and have never fried some up, I can not suggest it enough. Lane was super happy with the outcome and I will now be making soy curls a pantry staple in my house! I have also added an air fryer option at the bottom of the page if you are into that kind of thing!


INGREDIENTS:

  • 8 oz bag soy curls

  • 3 cups hot water

  • 1 teaspoon Vegetable Better Than Bouillon

  • 1 cup all purpose flour (or you favorite gluten free flour)

  • 2/3 cups tapioca starch

  • 1/3 cup corn meal

  • 1 1/2 teaspoon salt

  • 1 teaspoon onion powder

  • 1/2 teaspoon black pepper

  • 2 teaspoons Old Bay Seasoning

  • 1/4 teaspoon cayenne pepper

  • oil for frying (I use grapeseed or canola)

Vegan Extra Dilly Tatar Sauce:

  • 1 cup vegan mayo

  • 2 tablespoons finely diced dill pickles

  • juice from one small lemon

  • 1/2 teaspoon salt

  • 1/2 teaspoon black pepper

  • 1 teaspoon dried dill

  • 1/2-1 teaspoon vegan Worcestershire sauce

INSTRUCTIONS:

  1. Pour hot water along with Better than Bouillon into a large bowl, whisking in the bouillon until it has dissolved. Add the soy curls and let them soak for 10 minutes.

  2. While the curls are soaking, whisk together the flour, starch, corn meal, and seasoning in a large bowl.

  3. Drain the soy curls in a colander over the sink, return the curls to the bowl they were soaking in.

  4. Begin adding a handful of curls at a time to the flour mixture, making sure to fully coat the curls. Place coated curls on a baking sheet pan, and repeat with remaining curls.

  5. Line another baking sheet pan with paper towels and place a wire cooling rack on top.

  6. Heat a large deep skillet or dutch oven with a few inches of oil, over medium heat. You can poke a chop stick or wooden skewer into the pan, if small bubbles form around the stick the oil is ready. Once the oil is nice and hot begin adding batches of curls to the pan, making sure not to over crowd them. Using a pair of metal tongs, keep the curls moving around in the pan so they cook evenly. Allow the curls to fry for several minutes until golden brown and crispy. Place finished curls on the wire rack and repeat with remaining curls. I like to sprinkle a little extra salt and old bay on the finished curls.

  7. To make the tartar sauce, whisk all ingredients together in a medium sized bowl. Adjust seasoning to taste.

  8. Server “clam” strips while still hot with homemade tarter sauce.

* To air fry clam strips; lightly spray with oil, set the air fryer to 375 degrees and fry for about 10 minutes, checking halfway through and giving the basket a shake. My fryer is pretty small and it seems to take longer for things to cook. So cooking times may vary depending on fryer size and amount of strips being fried.

If you like this recipe, try these:

Vegan Clam Strips (Soy Curls)

Crispy vegan fried clam strips using soy curls

Crispy Bang Bang Tofu

Vegan Crispy Bang Bang Shrimp

So my friend Lane had been asking me for a while to make a vegan version on Bang Bang shrimp. It has probably been 10 or more years since I have eaten any and had no idea what the sauce was made of.

So imagine my surprise when I googled it and realized it was actually only 3 little ingredients that I always have in my pantry.

I have been playing around with a vegan shrimp recipe after having the best vegan fried shrimp from a local food truck recently, but still haven’t totally figured it out. But then it dawned on me!! I should just use our popcorn tofu recipe!

The trick to making something like crispy bang bang “shrimp” is keeping the “shrimp” really ,really crispy so it doest go super soggy super quickly once it is coated in sauce.

Well our popcorn tofu is REALLY CRISPY and actually made the perfect “shrimp” for this recipe! This recipe is perfect on its own as kind of a snack or appetizer, but would also be delicious served with a side of rice and quick and easy pickled veggies ( I will eat a pickled veggie on the side of almost any meal!)

This Bang Bang tofu is crispy, sweet, creamy, and spicy. It’s perfect really, and we can all thank Lane for the idea! I promise I would have never thought to make this if she would not have asked! So thanks Lane, keep the request coming and I’ll keep knocking on your door with plates of food :)


Ingredients:

  • 1 block extra firm tofu

  • 3/4 cups corn or tapioca starch

  • 2 cups bread crumbs

  • 1/2 cup vegan plain yogurt (I use Kite Hill)

  • 1/2 cup non dairy milk

  • 1 teaspoons salt

  • 1 1/2 teaspoons each, smoked paprika, and all purpose seasoning (we use a greek seasoning)

  • 1/2 teaspoon each chili powder, black pepper, salt

  • 2 teaspoons minced garlic

  • oil for frying

  • garnish: 2 green onions, finely chopped (the green ends only)

Bang Bang Sauce:

  • 3/4 cup vegan mayo

  • 2-3 teaspoons sriracha

  • 1/4 cup sweet chili sauce

  • 1/2 teaspoon minced garlic

Vegan Crispy Bang Bang Shrimp

Instructions:

  1. Remove tofu from package and drain. Wrap the tofu in a clean kitchen towel or some paper towels and place a few books, or a heavy pan on top. Let the tofu sit for 15 minutes to press out any extra water.

  2. Cut the tofu block in half, then cut halves into 1/2 inch strips. Using your hands, break off pieces of the strips to form little tofu nuggets.

  3. In a medium bowl, whisk together the yogurt, minced garlic, and milk.

  4. In another, bowl whisk 1/2 cups of the starch and all of the seasonings.

  5. In another bowl, add the bread crumbs.

  6. First toss the tofu into the starch and seasoning mixture

  7. Next add the tofu to the milk and yogurt and stir. All of the liquid should be absorbed by the tofu, although it will be a sticky mess. Now sprinkle the remaining 1/4 cup of starch over the tofu and toss.

  8. Using your hands (I promise, it’s just easier) pick up a small handful of tofu and toss it around in the breadcrumbs until fully coated. You can use your hands to separate any tofu that got clumped together, sifting it though your fingers. Place coated tofu into a dish, and repeat until all of the tofu is coated.

  9. Heat a few inches of oil in a high sided skillet. I use my cast iron for this. While the oil is heating, place a wire cooling rack on top of a paper towel lined baking sheet. This is where you will place the finished tofu to cool.

  10. Once the oil is nice and hot, carefully add the tofu in small batches to the pan (you can poke a chopstick into the oil, and if tiny bubbles form around the stick, the oil is ready). Using a slotted spoon, keep the tofu moving around for a few minutes to make sure all of the sides get Nice and CRISPY. Once tofu is browned and crispy, remove and place on a wire cooling rack. Repeat with remaining tofu.

  11. Mix all the ingredients together for the bang bang sauce. In large bowl toss finished tofu with all of the sauce. Sprinkle with finely chopped green onions and serve immediately.

If you like this recipe, try these:

Vegan Po-Boy with Popcorn Tofu

Crispy Coconut Tofu with Tropical Rice

Tofu Banh Mi Rice Cups

Vegan Crispy Bang Bang Shrimp

Vegan Chorizo Empanadas

Vegan Chorizo Empinadas

So I don’t even pretend not to love all Beyond Meat products, along with a lot of other faux meats. I loved the taste of meat before going vegan, so I personally have been more than excited with all the progress these products have been making over the years.

So when my neighbor asked if I had posted a recipe for empanadas yet, I knew I needed to create one, and I knew the needed to be filled with vegan ground meat and chorizo!

I am also a super fan of Trader Joe’s vegan chorizo. It is SO GOOD!

I actually had never made an empanada before this recipe, but had eaten a plenty. I mean it’s a total meal in the palm of my hand. I am a big supporter of delicious food I can eat on the go, because I am ALWAYS on the go.

I was torn between using just chorizo or just vegan ground beef so decided to split the difference and use an equal amount of both. You could just use one or the other if you want, but I like them just they way they are.

I also prefer a fried empanada to a baked one because the south runs deep in my veins and we are born loving all fried foods.

These vegan empanadas are a little spicy but the cool, tangy, yogurt based dip helps to cut the spice. My only regret is not making a double batch…because thanks to the teenagers, these were gone before I even knew what happened. At least I know they liked them.


INGREDIENTS:

  • Oil for frying, I use grapeseed oil

The Filling:

  • 1/2 lb vegan ground chuck like Beyond Brand or Impossible “meat” (you can also thaw 2 beyond burgers and if you can’t find vegan ground chuck")

  • 1/2 pound vegan chorizo, we used Trader Joe’s brand

  • 1 red or yellow bell pepper, finely diced

  • 1 small yellow onion, finely diced

  • 1 teaspoon minced garlic

  • 2 teaspoons cumin

  • 2 teaspoons dried oregano

  • 1 teaspoon chili powder

  • salt and pepper to taste

The Dough:

  • 3 cups all purpose flour

  • 1 teaspoon salt

  • 1 teaspoon apple cider vinegar

  • 1/2 cup cold vegan butter

  • 1 tablespoon tapioca starch plus 3 tablespoons water (a starch egg)

  • 3/4 cups ice water

Dipping Sauce:

  • 1/2 cup plain unsweetened vegan yogurt or sour cream

  • 2 tablespoons salsa verde

  • 1 teaspoon chili lime seasoning or just chili powder

  • 1/2 teaspoon minced garlic

  • salt and pepper to taste

Vegan Chorizo Empinadas

INSTRUCTIONS:

  1. Prepare the dough by first mixing the starch and water together. Next add the flour and salt to a food processor. Pulse a few times, then add the cold vegan butter. Pulse again to break up the butter into the flour. Add the vinegar, and starch egg mixture, then begin streaming in the water a little at a time until the dough has formed. We used all of the water for our dough, but just add a little at a time until the dough has formed. It will not be crumbly, but a solid dough that you can easily handle. If you do not have a food processor, follow the same instructions but using a bowl and mixing by hand. Wrap the finished dough in some plastic wrap and place in the fridge for at least and hour.

  2. While the dough is chilling, begin preparing the filling. In a large skillet over medium heat, add a few teaspoons of oil along with the diced onions, garlic, and peppers. Cook unit the onions are translucent. Add the vegan ground beef, and chorizo, using a spatula to crumble it up in the pan. Add the remaining ingredients and cook until the vegan “meat” has cooked though. Set the filling aside and allow it to cool.

  3. Once the dough has chilled, remove it from the fridge. Divide the dough in half. Place half back in the fridge. Roll out half of the dough to about 1/4 inch thick on a clean floured surface. Using a small bowl cut 3 inch circles from the dough. I use a soufflé cup tuned upside down and a sharp knife to trace around the edge. Use whatever you have that is about that size.

  4. Place about 2 tablespoons of filling into the center of the circles. Fold the dough over forming a half moon shape. Press the edges of the dough to seal them up, then use a fork to crimp around the edges. Place finished empanadas into the fridge and repeat with remaining dough.

  5. Fill a deep cast iron, or other skillet with serval inches of oil and heat over medium/ high heat on the stove top. You will know the oil is ready if you poke a chop stick or wooden skewer into the oil and small bubbles form around it. Once oil is ready, reduce heat to medium.

  6. Line a cookie sheet with some paper towels and place a wire cooling rack on top.

  7. Begin frying empanadas in batches, a few minutes per side, carefully turning them with some metal kitchen tongs until they are golden brown on both sides. Place finished empanadas on the wire cooling rack while you repeat with the remaining process with remaining empanadas.

  8. Prepare dipping sauce by mixing all of the ingredients in a small bowl.

  9. Sever empanadas with dipping sauce or sauce of your choice.

  10. Leftovers can be stored in the fridge and reheated in the oven or air fryer. They can also be reheated in the microwave but will not remain crispy.

    If you like this recipe, try these:

    Vegan Buffalo Chicken Bites

    Vegan Meaty Cheddar Queso

    Vegan Po’Boy with Popcorn Tofu

Vegan Chorizo Empinadas

vegan chorizo empanadas wtih vegan chorizo and beyond ground meat

Tofu Buffalo Wings

Tofu Buffalo Wings

If I can find a way to use buffalo sauce, trust me, I will. Tofu buffalo “wings” may be one of my favorite quick and easy meals. They make a great snack, perfect sandwich, or a delicious salad topping. My pantry is never without a bottle of Franks buffalo sauce because it is vegan, and I always have plenty of tofu on hand making this recipe a regular.

I learned early on making tofu, the best and easiest way to get super crispy tofu is to use starch mixed with flour. No matter if you pan fry it in oil, or toss into your air fryer you will get super crispy, perfect tofu every time!!

You can serve these tofu wings with vegan ranch or blue cheese dressing if you like, and big side of celery. You can dice it into cubes and use it to top your favorite salad. You can slice it into a square and use it for a delicious buffalo tofu sandwich!

So if you love buffalo everything too, this recipe could not be easier, crispier, or more delicious! Buffalo tofu might become one of your quick and easy go to recipes as well!


INGREDIENTS:

  • 1 block extra firm tofu (I use the high protein tofu that is vacuum sealed in very little liquid. It is extra super firm, and has the best chewy texture of any I have tried)

  • 1/4 cup tapioca starch

  • 1/4 cup white flour

  • 1 teaspoon onion salt

  • 1 teaspoon garlic powder

  • oil for frying

  • 1/3 cup buffalo sauce. We use Franks.

  • 1 teaspoon vegan butter


INSTRUCTIONS

  1. Drain tofu and wrap in a few paper towels or clean kitchen towel. Place a few cookbooks or heavy pan on top and let tofu press for about 10 minutes. This helps remove some of the moisture from the tofu.

  2. Cut tofu into strips.

  3. Whisk together the flour, starch, garlic and onion salt.

  4. Dredge the tofu strips into the mixture until they are fully coated.

  5. Heat a skillet over medium heat with a few inches of oil. Allow the oil to get nice and hot.

  6. Line a baking sheet with a few paper towels and place a wire cooling rack on top. Place next to the stove.

  7. Fry the tofu on each side for several minutes or until they seem nice and crispy. Remove finished tofu and place on the wire cooling rack.

  8. In a small bowl, microwave the buffalo sauce with the butter for about a minute. Toss the tofu in the heated sauce and serve immediately.

  9. Serve with vegan ranch or blue cheese dressing. (side note: these “wings” reheat really well in an air fryer or in the oven)

If you like this recipe, try these:

Vegan Buffalo Mac n Cheese

Vegan Buffalo “Chicken” Dip

Vegan Buffalo “Chicken” Bites

Tofu Buffalo Wings

Tofu Buffalo Wings

Crispy tofu buffalo wings

Vegan French Onion Dip

Vegan French Onion Dip

Who doesn’t love a good french onion dip with potato chips, or a veggie plate.

Vegan french onion dip is super quick, and easy to throw together, and is the perfect dip for snacking.

We used almond milk plain yogurt to make this dip, but use your favorite brand of vegan plain yogurt or sour cream. I often use plain vegan yogurt in the place of sour cream because for me, its easier to find, and works great in place of sour cream.

I also prefer to use an almond milk yogurt to a coconut yogurt, but that is just my preference. Use whatever you like! Just make sure you have enough chips on hand because this dip is addictive!


INGREDIENTS:

  • 1 cup finely diced yellow onion

  • 1/3 cup vegan mayo

  • 1/3 cup plain vegan yogurt or sour cream (we used Kite Hill yogurt)

  • 1 teaspoon onion salt

  • 1 teaspoon garlic powder

  • 1/2 teaspoon black pepper

  • garnish with diced green onions, chives, or fresh chopped parsley

INSTRUCTIONS:

  1. Make sure the onions are diced super fine. Heat a medium skillet over medium heat. Add 1/2 teaspoon of oil or vegan butter and the onions. Cook until the onions are soft, and beginning to brown. Allow onions to cool.

  2. Mix mayo, yogurt, or sour cream, spices and cooled onions together. Sprinkle with garnish. Pop the dip back in the fridge to thicken. Store in an airtight container in the fridge for 3-4 days.

  3. Serve with chips or veggies.

If you like this recipe, try these:

Vegan Ranch

Vegan Alabama White Sauce

Cashew Queso

Dipping a chip into a bowl of vegan french onion dip

Vegan french onion dip

Vegan Cheez-Its

Vegan Cheezits

I have actually only ever met one person who hates a cheez-it (I’m looking at you Dustin.) Its baffling to me, honestly. I think 20% of my diet in high school may have been cheez-its.

My kids also loved them before we went vegan, and my 13 year old daughter suggested we try and make a vegan version. Done and done, kid. This recipe could not be easier. The hardest part is trying to evenly cut the crackers, which I 100% failed at doing. My personality is pretty haphazard so who cares about evenly cut crackers, just put them in my mouth. My sincerest apologies to all of y’all that need each cracker to be the exact same size. Hats off to ya, and the precision you bring to the world, you are needed!

We actually used Follow You Heart brand cheddar in this recipe because I had a bag on hand and it made it fast and easy. But if you are feeling especially extra, you can whip up a batch of your own vegan cheddar and use that. We linked are few of our cheddar recipes at bottom of this page!

Make sure to get the dough rolled out thin enough or these crackers will stay on the chewy side. If you get the dough thin, they come out nice and crispy and just as good as an original, if not better because these are vegan! Even Dustin ate a handful, and thats saying something!


INGREDIENTS:

  • 1 cup all purpose flour

  • 8 ounces of vegan cheddar shreds, store bought or homemade

  • 2 tablespoons nutritional yeast

  • 3 tablespoons ice water

  • 1/4 cup cold vegan butter

  • 1-2 teaspoons of salt ( to sprinkle on the crackers)


INSTRUCTIONS:

Preheat oven to 375 degrees (when ready to bake)

  1. Add the cheese, flour, butter, and nutritional yeast to a food processor. Pulse until the cheese is nice and minced up. Add in the ice water and process until a ball of dough forms. If you want to make these without a food processor, place cheese in a blender to get it good and chopped up. Add the cheese with the flour, nutritional yeast, and butter to a bowl. Using your hands mix in the butter. Once butter is incorporated, add in the ice water. Dump out on to a clean floured surface and knead just until you have a ball of dough. Do not over knead because it will cause the dough to be tough.

  2. Wrap up the dough in some plastic wrap and pop it in the fridge for about an hour.

  3. Lightly flour a clean surface. Divide dough in half. Pop the half you are not using back in the fridge. Roll out one half of the dough into a about a 10x12 inch rectangle that is about 1/8 of an inch thick. Any thicker and it is hard to get them crispy. Wrap up any scrap dough and refrigerate until you are ready to use it.

  4. Using a pastry cutter or pizza cutter, cut small squares, about 1/2 inch by 1/2 inch. Place them on a parchment lined baking sheet and sprinkle with a little salt if you like. If you want to make a classic cheez-it hole in the middle of each cracker you can use the small end of a chopstick or a skewer. Bake for 18-22 minutes on the middle oven rack. Watch the first batch of crackers closely. You want to leave them in until they are nice and crispy but you don’t want them to brown to much. You will know how long to bake the remaining batches for after the first batch.

  5. Repeat with remaining dough. Store crackers in an airtight container. You can also store leftover dough for a few days in the fridge and bake later.

If you like this recipe, try these:

Smokey Cashew Cheddar

Smokey Coconut Milk Chile Cheese

Classic Vegan Sausage Balls

Vegan Cheezits

Vegan Fried Green Tomatoes

Delicious fried green tomatoes with non dairy goat cheese

Every spring I eagerly wait for tomato season to start, simply so I can make fried green tomatoes! Seriously, I could eat them every single day.

Actually in Florida, we can grown tomatoes again in the winter months. This is one more reason I adore living here. Double grow season for tons of veggies.

I love all tomatoes actually, but fried green tomatoes are a whole different level of love for me. Growing up in the south, fried green tomatoes are a staple. Again, we will fry just about anything down here!

For this recipe, we paired vegan fried green tomatoes with a perfect roasted red pepper and garlic remoulade and vegan feta. The sauce is not hard to make and super delicious not only on this recipe but on lots of things.

You can either buy a vegan feta or make your own from tofu. We linked the recipe and if you have time to make a batch, its totally worth the effort!

These vegan fried green tomatoes make th perfect light side or meal. So if you are growing tomatoes, go ahead and pick some green ones and fry them up.

You can also normally find green tomatoes (in the south anyways) in grocery stores in the summer months, as well. Fingers crossed you find some, and love this easy southern staple as much as we do!


INGREDIENTS:

  • 2 - 3 green tomatoes

  • 1/3 cup all purpose flour

  • 1/3 cup panko bread crumbs (many are not vegans so be sure to check)

  • 1/3 - 1 cup plain unsweet non dairy yogurt

  • 1 teaspoon garlic powder

  • 1 teaspoon onion powder

  • 1 teaspoon smoked paprika

  • 1 teaspoon salt

  • 1/2 teaspoon black pepper

  • 1 teaspoon dried parsley

  • 1/2 cup Roasted Red Pepper and Garlic Remoulade (if refrigerated, allow it to come to room temperature)

  • vegan feta cheese, homemade or store bought

  • 1/4 cup fresh basil

  • neutral oil for frying, like grassed or canola


INSTRUCTIONS:

  1. Slice tomatoes about 1/4 of an inch thick. Sprinkle with a little salt.

  2. Add the yogurt to a shallow dish. In a separate shallow dish, add the bread crumbs, flour and seasonings and given them it a stir.

  3. Start by dipping and coating the tomatoes slices in the yogurt. Next dip them into the flour and bread crumb mixture, making sure they are fully coated.

  4. Line a baking sheet with a few paper towels and place a wire cooling rack on top.

  5. Heat a large skillet over medium heat with an inch or so of oil. Once the oil is nice and hot, add 3 or 4 tomato slices at a time. Allow them to fry on each side for a few minutes or until they are crispy and golden brown.

  6. Let tomatoes cool on the wire rack for a few minutes. This helps extra oil drip off as well.

  7. Repeat with remaining tomatoes.

  8. To serve, add a few spoon fulls of remoulade on a plate. Stack 3 tomatoes on top and sprinkle with feta and some fresh basil.


Vegan Fried Cheese Grits

IMG_2820.jpg

In the south, we eat grits.

In the south we also love to fry all kinds of things that were not originally intended to be fried! So cheese grits are no exception to that rule!

These grits are crispy on the outside, and cheesy creamy perfection on the inside.

We dipped ours in vegan ranch, but I think they would be super delicious dipped in some marinara sauce as well.

They are perfect a tasty snack, party food, or even a creative brunch side! I have not attempted to air fry these treats, but I think it would work just fine if you gave them a spray of oil and cooked them for 10-15 minutes or so on 375 degrees.

And if you are one of those people in the sweet grit camp, I urge you to step over to the other side and give these a try. I promise you don’t have to be an absolute convert..just a little open minded..although I will never put sugar on my grits..like, never :)


INGREDIENTS:

  • 1 cup dry old fashioned grits

  • 2 cups plant milk ( we used almond)

  • 2 cups water

  • 1 teaspoon Vegetable Better Than Bouillon

  • 1 cup vegan cheddar shreds, homemade or store bought

  • 2 tablespoons vegan cream cheese

  • 2 green onions, finely diced

  • 1/2 teaspoon salt

  • 1/2 teaspoon pepper

  • 3 cups panko bread crumbs, regular or gluten free (make sure they are vegan, many brands are not)

  • 1/2 cup plant based milk

  • 2 tablespoons vegan plain yogurt or sour cream ( we used kite hill plain yogurt)

  • 1 and 1/4 cups all purpose flour, or gluten free flour blend

  • oil for frying ( we use grapeseed)

IMG_2800.jpg

INSTRUCTIONS:

  1. Bring milk, water, and Better Than Bouillon to a boil in a medium/ large pot over medium heat.

  2. Once the liquid is boiling, add in the grits and stir. Reduce heat to low, and allow the grits to cook and thicken for about 15 minutes Be sure to stir the grits several times to avoid them sticking to the bottom of the pot.

  3. Once grits are done, stir in the cheddar, cream cheese, salt pepper, and green onions.

  4. Spray a 9 inch baking pan with some oil and transfer the grits to the pan. Place pan in the fridge for about 4 hours or until the grits seem firm. You can also do this the day before you want to make these. They will be fine hanging out in the fridge for a day or so.

  5. Once grits are firm, turn the pan over onto a cutting board. You may have to tap the pan on the counter to get the grits out, but if you sprayed the pan well, they should come right out.

  6. Cut the grits into sticks that are about 1/2 inch thick and 4 inches long. They will be a little soft still so just handle them gently to avoid them breaking.

  7. Place flour in a shallow dish. In a separate dish wish the milk with the yogurt. In another dish, add the panko.

  8. Start by dipping the grit sticks first into the flour, next the milk yogurt mixture, and finally into the panko. Repeat with all of the grits sticks.

  9. Heat a large deep skillet with about an inch of oil over medium heat. Once the oil is nice and hot, fry the grits sticks 3 or 4 at a time, turning them with tongs to make sure they get crispy on all sides. They only need a few minutes in the oil to get them nice and crisp. Line a baking sheet with some paper towels and place a cooling rack on top. Place finished grits on the cooling rack while you finish frying the rest.

  10. Serve fried cheese grits with vegan ranch or marinara sauce.

Reheat fried cheese grits in a 350 degree oven until crisp

If you like this recipe, then try these:

Southern Tofu Scallops and Grits

Fried Vegan Mozzarella Bites

Vegan Gorgonzola Fried Brussels Sprouts

IMG_2798.jpg

Tofu Banh Mi Style Rice Cups

IMG_2666-2.jpg

Tofu Banh Mi sandwiches are on constant rotation in our house. Everyone loves them, even the kids. What’s not to love about perfectly seasoned tofu, crispy pickled veggies,and spicy Sriracha mayo. In a recent effort to change things up , I decided to pile up tofu Banh Mi filling into these easy little rice cups.

I know that banh mi literally means bread or wheat but wanted to make something familiar for our gluten free friends and family that was a little different and fun! I love a banh mi, but my favorite part is the filling! It gets tricky to name a thing so people understand the origin and not cause disrespect to the culture from which it came. I wanted everyone to understand that this is all the parts of a tofu banh mi, but technically without the banh mi….so for lack of a better idea of how to have people identify what this is, I named it Tofu Banh Mi Rice Cups.

A local sushi place we frequent makes a tofu banh mi sushi roll that we love, so I decided to create a play on that. Just more rice and way more delicious filling!

I often make these for parties or potlucks and they are always such a hit. They cute, handheld, and delicious.

These light and fresh tofu Bahn Mi rice cups also work work great for meal prep because they keep well in the fridge for several days.

Who knows, you may end up loving these as much as we do, and may find yourself making them more often than a Bahn Mi sandwich!


INGREDIENTS:

You will need a muffin tin for this recipe. This recipe yields around 2 dozen cups. You can easily half the recipe for less cups.

  • 3 cups sushi rice (follow package cooking instructions)

  • 1 package extra firm tofu

  • 1/4 cup soy sauce or coconut aminos

  • 2 teaspoons sriracha

  • juice from 1 lime

  • 3/4 cups quick pickled veggies

  • 1/2 cup chopped cilantro

Sriracha Mayo:

  • 1/2 cup vegan mayo

  • 2 tablespoon Sriracha

  • 1 teaspoon lime juice


INSTRUCTIONS:

  1. Cook rice according to package instructions. I use my rice cooker and use 3 actual cups of rice, not the scoop that comes with the rice cooker, and fill the water to the 4 cup line. Again you can half this amount if making less cups. Allow the rice to cool. It’s gonna be kind of sticky and thats what you need. Once the rice has cooled enough to handle, scoop about 1/4 cup of rice into each muffin cup and press the rice to form the shape of the cup. I keep a cup of water on the counter to dip my fingers in. If your hands are wet it will be easier to press the rice down. You will get around 24 cups, give or take. Pop the muffin tin in the fridge and for 30 minutes.

  2. Drain tofu and wrap it in either a clean kitchen towel or a few paper towels. Place a few books on top to allow the excess liquid to press out for 10-15 minutes.

  3. Cut the tofu into 1/4 inch cubes. Whisk together soy sauce, Sriracha, and lime juice in a shallow dish and add the tofu. Allow it to marinate for 10-15 minutes.

  4. Heat a large skillet with a little oil over medium heat. Add the the tofu along with the marinade to the pan. Let the tofu cook until all of the liquid has absorbed and the tofu has began to get a little crisp and brown around the edges.

  5. Whisk the mayo, Sriracha, and lime juice together in a small bowl. If you like it spicy, add a little more Sriracha!

  6. Carefully remove the rice cups from the muffin tin. They should just peel out. Divide the tofu among the cups, and top with some pickled veggies and chopped cilantro. Add a little of the Sriracha Mayo to each cup to serve.

  7. Store leftovers in an airtight container in the fridge for serval days.

IMG_2676.jpg

Bitesize Vegan Taco Dip Cups

IMG_2289.jpg

I love party food, and I love to host parties!!!

7 layer taco dip being one of my favorite party foods. I mean it’s a bowl full of all the the most delicious taco-y things all stacked up together!

What is not to love there? Recently I found these adorable little street taco tortillas and my oldest daughter suggested we use them to make little taco dip cups.

I am so proud of our genius offspring and their brilliant ideas!! We have raised them well!!

So as she requested, we made these bitesize vegan taco dip cups! Not only are they super tasty, they are so super cute…I mean if a food can be cute, then I am standing by these being the cutest!

Make them for a snack, make them for a party, make them because eating tiny food is normally more fun to eat!

I made them for lunch and our family plowed through them! But I am still rooting for another party in the near future to show off these adorable little bites.


INGREDIENTS:

*You will need a muffin tin for this recipe.

  • 24 (1 package) corn street taco tortillas

  • 1 can refried beans

  • 1/3 cup vegan cream cheese

  • 1/4 cup vegan cheddar shreds (homemade or store bought)

  • 2 avocados

  • 1 lime

  • 1 teaspoon cumin powder, divided

  • 1 teaspoon chili powder, divided

  • salt and pepper to taste

  • Handful of chopped lettuce

  • 1/4 cup diced bell pepper

  • 1/4 cup diced tomatoes

  • 1/4 cup diced red onion

  • 1/4 cup chopped cilantro

  • optional: hot sauce

IMG_2299.jpg
IMG_2285.jpg

INSTRUCTIONS:

Preheat over to 350 degrees

  1. Spray the inside of a cupcake tin lightly with some cooking oil. Take a tortilla and press it into the muffin tin so that it forms to the shape of the cup. You will have to overlap it some to make it fit. Corn tortillas tend to tear when you are trying to press them into the pan.No big deal, just overlap at the tear if that happens. Repeat with remaining tortillas. If you only have a 12 cup muffin tin, then you will have to do this in batches.

  2. Place the pan in the preheated oven and allow the tortillas to bake for 10-15 minutes. Just make sure they are crisp around the edges and down the sides before removing from the oven. Once they are done remove from oven and allow to cool for 5 to 10 minutes.

  3. Mix cream cheese and cheddar shreds together with 1/2 teaspoon of cumin and 1/2 teaspoon of chili powder. Set aside.

  4. For the guacamole, remove avocado from peels and add them to a medium size bowl. Mash the avocados with a fork until they are relatively smooth. Add 1/2 teaspoon of cumin, 1/2 teaspoon of chili powder, juice from the lime, and salt and pepper to taste. Stir well and set aside.

  5. Remove the tortillas from the muffin tin and place them on a platter.

  6. Begin layering each tortilla by first adding a few teaspoons of refried beans, then the cheese mixture, lettuce, tomato, onions, peppers, and guacamole. Top each on with a sprinkle of cilantro and a drop of hot sauce if you like a spicy kick!

If you like this recipe, try these!

Grilled Watermelon Tofu Tacos

Alabama White Sauce Tempeh Tacos

Vegan Beer Battered Fish Tacos

Vegan Matzah Oven Nachos

IMG_2402.jpg

Matzah Matzah Matzah…You can actually do a lot with matzah if you are forced to eat it for a week!

But even if you don’t celebrate passover, matzah still makes a nice crunchy base for vegan nachos.

I actually get really excited about these nachos! Sometimes its just fun to change it up!

These nachos are covered in our gooey spicy, cashew queso, and topped with the yummiest tofu!

I love this recipe most because you built the nachos on a giant sheet pan, making them great for dinner parties or easy weeknight dinners!

They also make a great quick snack if your teenager comes home with a gaggle of hungry friends, and I might be speaking from personal experience here. I mean, who doesn’t want to dig in to a GIANT pan of nachos? Its literally the stuff of my dreams.


INGREDIENTS:

  • 5-6 sheets of matzah

  • 1/2 batch vegan cashew queso (If you are celebrating passover, substitute with a passover appropriate option or omit the nutritional yeast in the recipe. It will still be tasty)

  • A handful of shredded lettuce

  • 1/2 cup diced tomatoes

  • 1/4 cup sliced olives

  • A few tablespoon sliced green onions

  • 1 can refried beans

  • 2 avocados

  • Juice from 1/2 lime

  • 1/2 teaspoon chili powder

  • 1/2 teaspoon cumin


MARINATED TOFU:

  • 1 block of extra firm tofu

  • 1/4 cup soy sauce or coconut aminos

  • 1 teaspoons onion powder

  • 1 teaspoon garlic powder

  • 1/2 teaspoon chili powder

  • 1-2 teaspoons agave or maple syrup


INSTRUCTIONS:

Preheat oven to 350 degrees

  1. Drain tofu and wrap in a few paper towels or a clean kitchen towel. Place a few books on top and let sit for 10 minutes to press out any excess liquid.

  2. Dice the tofu into small 1/2 inch cubes. Whisk the ingredients for the marinade in a shallow baking dish and add the tofu. Allow the tofu to marinate for 10-15 minutes.

  3. For the guacamole, scoop the avocados from the peel into a small bowl. Mash the avocado using a fork until they are relatively smooth. Add the lime juice, cumin, and chili powder and stir. Add salt and pepper to taste. Set aside.

  4. While tofu is marinating prepare a cookie sheet by lining it with foil or parchment paper. Break up the pieces of matzah and scatter them on the pan. Dollop the beans over the matzah. Set aside.

  5. Heat a large skillet over medium heat. Add the tofu along with the marinade to the pan and cook until all of the liquid is absorbed and the tofu begins to brown and and crisp.

  6. Scatter the tofu over the matzah and drizzle with the queso cheese sauce. Place the pan in the oven for about 10 minutes. The nachos just need to say in long enough to heat the beans and warm the queso.

  7. Remove from oven and top with lettuce, tomatoes, olives, onions, and guacamole to serve.

IMG_2408.jpg

Vegan Pepperoni

IMG_1910.jpg

I just want to let y’all know how super easy making a batch of vegan pepperoni can actually be. Seriously! Mix the ingredients, roll it up in some foil, bake, and you are eating delicious homemade vegan pepperoni before you know it! Put it on a cracker, put it on a pizza, eat it all by itself because its that good!!

Don’t be intimidated by making seitan if you have never tried you hand at it. Working with vital wheat gluten is as easy as working with regular flour. Making seitan is really just making dough! You can steam it, boil it, or bake it. For this recipe we are steaming it in foil to achieve a pepperoni like texture!

I often make vegan pepperoni when making a cheese plate for parties, or for just snaking on with vegan cheese and crackers for my kids. I have over 30 cheese recipes on the site, so find one you love and make up a batch to go along with your vegan pepperoni!

This recipe makes two logs of pepperoni, so if you don’t think you will use both very quickly, you can freeze the second for up to a a few months. Just drop it in a freezer bag and thaw when you are ready to use it.

I often top our vegan stuffed crust pizza with this pepperoni! Its made with an easy vegan homemade mozzarella cheese sauce and is so easy and so tasty!! Its one of my kids favorite dinners.

INGREDIENTS:

  • 1 cup vital wheat gluten

  • 1/4 cup nutritional yeast

  • 2 teaspoons minced garlic

  • 2 teaspoons smoked paprika

  • 2 teaspoons onion powder

  • 2 teaspoons dijon mustard

  • 2 teaspoons fennel seeds

  • 1 teaspoon oregano

  • 1/2 teaspoon salt

  • 1/2 teaspoon black pepper

  • 1 teaspoon red pepper flakes

  • 1/4 cup tapioca or corn starch

  • 1 tablespoon soy sauce or amnios

  • 1 teaspoon liquid smoke

  • 2 teaspoon light miso paste

  • 1 teaspoon vegetable Better than Bouillon

  • 3/4-1 cup water


INSTRUCTIONS:

Preheat oven to 350 degrees

  1. Food processor instructions: Add all ingredients to the food processor and mix for about a minute to allow a dough to form and knead.

  2. Hand mixing instructions: Add all ingredients to a bowl and mix until a ball of dough has formed. Transfer the mixture to a clean countertop or cutting board and knead the dough for a few minutes. Start with 3/4 cups water but If the dough seems too dry or isn’t coming together, add a few tablespoons more until you have a soft, but well formed dough.

  3. Divide the dough in half and form each half into a 10 inch log shape.

  4. Spray a good sized piece of foil, maybe 7 tot 8 inches long, with some cooking spray. Place a log of pepperoni at one end and begin rolling the pepperoni into the foil. Twist the ends and repeat with a second piece of foil. You need the foil nice and tightly wrapped and the ends good and sealed. The pepperoni will bake in a water bath so you don’t want any liquid getting in.

  5. Repeat the same processes with the second pepperoni.

  6. Fill baking dish with about a half inch of water and place both foil wrapped pepperonis into the water.

  7. Bake for 30 minutes then turn each pepperoni and bake for another 30 minutes.

  8. Carefully remove foil wrapped pepperonis from the baking pan and transfer to a plate. Leave pepperonis wrapped in foil and allow to cool for about 20 minutes before attempting to unwrap them. Once they have cooled and you can handle them, unwrap the foil and let pepperoni cool uncovered in the fridge for an hour. The pepperoni will firm up more and slice easier if you leave it over night to rest! I typically make a batch the day before I want to use it! But it can be eaten as soon as it cools.

  9. Store in an airtight container or zip lock bag in the fridge.

  10. Serve on pizza, with vegan cheese and crackers, or by itself!

*giving credit where credit is due…Pepperoni was the first vegan meat I ever made using the recipe by Robin Robertson from Veganize It! cook book. I have adapted and changed the recipe over the years to suit my taste and pantry staples, as most seitan pepperoni recipes are pretty similar…but I woulnd’t know know the first thing about most things vegan cooking if not for this particular woman’s cookbooks when we first became vegan. I can not recommend her cookbooks enough! She’s a vegan genius.

IMG_1915.jpg

Tarragon Almond "Chicken" Salad with Jackfruit

IMG_1657-2.jpg

Jackfruit is an easy and popular substitute for shredded meat. It mimics the texture of any shredded meat, and takes on the flavor of whatever you season it with. It is also low in fat and high in fiber making it a win win.

You can find jackfruit at a lot of regular super markets now, at Asian markets, and online retailers like Amazon. It is also really inexpensive, which is awesome! Just be sure to find young jackfruit packed in brine. It often comes canned in syrup as well and that is not what you want for this recipe!

It works especially well in this chicken salad substitute, and is perfect for this tarragon and almond “chicken” salad recipe.

This jackfruit salad is savory, creamy, and has just the right amount of crunch from the onion and almonds.

I love it on crackers, or on top of a nice green salad, but it also makes a pretty tasty sandwich!

It also works well as a party appetizer severed with fresh cut veggies, vegan coconut milk gouda and crackers.


INGREDIENTS:

  • 1 can jackfruit in brine, drained and rinsed

  • 1/4 small yellow onion, finely diced

  • 1/4 cup vegan mayo

  • 2 teaspoons dried tarragon

  • 1 teaspoon onion salt

  • 1/2 teaspoon black pepper

  • 1 teaspoon fresh or dried parsley

  • 1/2 teaspoon garlic powder

  • 2-4 tablespoons sliced almonds


INSTRUCTIONS:

  1. Drain the jackfruit and rinse well. Shred the pieces of jackfruit over a medium sized bowl using your fingers. You can also chop the jackfruit, but I find it easier to just use my hands.

  2. Add the remaining ingredients to the bowl with the jackfruit and mix well.

  3. Serve with crackers, veggies, on a salad, or sandwich. Store leftovers in an airtight container in the fridge for 2 to 3 days.

IMG_1660.jpg

Savory Vegan Goat Cheese and Tomato Hamantaschen

IMG_1557.jpg

Meet the unsung hero of the Hamantaschen cookie! The savory Hamantaschen!

Hamantaschen are made to celebrate the Jewish holiday of Purim, which celebrates the bravery of Esther against the evil, Haman. Although the cookies are typically sweet and filled with things like poppy seeds, jam, or chocolate, I decided this year to try a savory Hamantaschen using our alomond herb goat cheese, rosemary, and tomato.

We left the dough a little sweet with a hint of lemon, but y'all, it works! Nobody in my house was booing these cookies.

They are delicious!

I did have some trouble at first convincing some friends to try these. After all, who makes savory Hamantaschen? But once I talked them into it, they were pleasantly surprised!

So if you are ready to change up your regular Hamantaschen game, give these a go. Even if you have never heard of a Hamantaschen cookie, you don’t have to celebrate Purim to bake up a batch of these tasty treats!

Vegan Hamantaschen for everyone!


INGREDEINTS:

The Dough

  • 3/4 cups vegan butter, room temperature

  • 1/3 cup sugar

  • 2 1/2 cups all purpose flour

  • 1 egg replacement, we used Bobs

  • 1 teaspoon lemon zest

  • 1/2 teaspoon salt

  • 1-2 tablespoons water

The Filling


INSTRUCITONS:

  1. In large bowl, cream together the sugar and butter until light and fluffy

  2. Next , mix in the lemon zest and egg replacer with the butter and sugar.

  3. Finally add the flour and the salt, and mix until a soft dough forms. If the dough seems crumbly, add in a tablespoon or two of water.

  4. Knead the dough on a lightly floured counter top for a few minutes. You do not want to over knead the dough, you just want to make sure all of the ingredients and well incorporated.

  5. Wrap the dough in plastic wrap and chill for 2-3 hours in the fridge. The dough is really soft and needs to be pretty cold to roll out.

  6. Once dough is ready, roll it out on a large, clean, floured surface. I like to split my dough in half and only roll out one half at a time, leaving the other half in the fridge so it does not soften back up. I find it easier to manage. Roll the dough out to around 1/8 of an inch thick.

  7. preheat oven to 350 degrees

  8. Using a 3 inch circle cookie cutter or biscuit cutter (or the rim of a small glass) cut circle in dough. Carefully transfer the circles to a parchment paper lined cookie sheet. Take about a 1/3 teaspoon of the almond herb goat cheese and place in the center of the circle. Top the cheese with a ring of cherry tomato and a few springs of fresh rosemary.

  9. Form the cookie into a triangle by pinching the top to a point. Fold up the bottom half of the circle, and pinch the two bottom corners together all well. Make sure all three corners are pinched well so the triangles do not come open while baking. Continue with remaining dough, leaving about an inch of space between each cookie.

  10. Bake cookies for about 20 minutes. Once cookies are done, transfer to a wire rack to cool.

    Yields about 2 and 1/2 dozen cookies


IMG_1551.jpg