I make a lot of vegan cheese. It’s easier than most people think, fairly quick, and really affordable to make your own.
All you need are some basic ingredients that you can find at your local super market, plus some agar agar powder. Agar is a vegan gelatin make from seaweed and what is used to solidify the cheese. You can find agar on amazon, or your local Asian food store. It is also pretty inexpensive for the amount of cheese you will get from one bag!
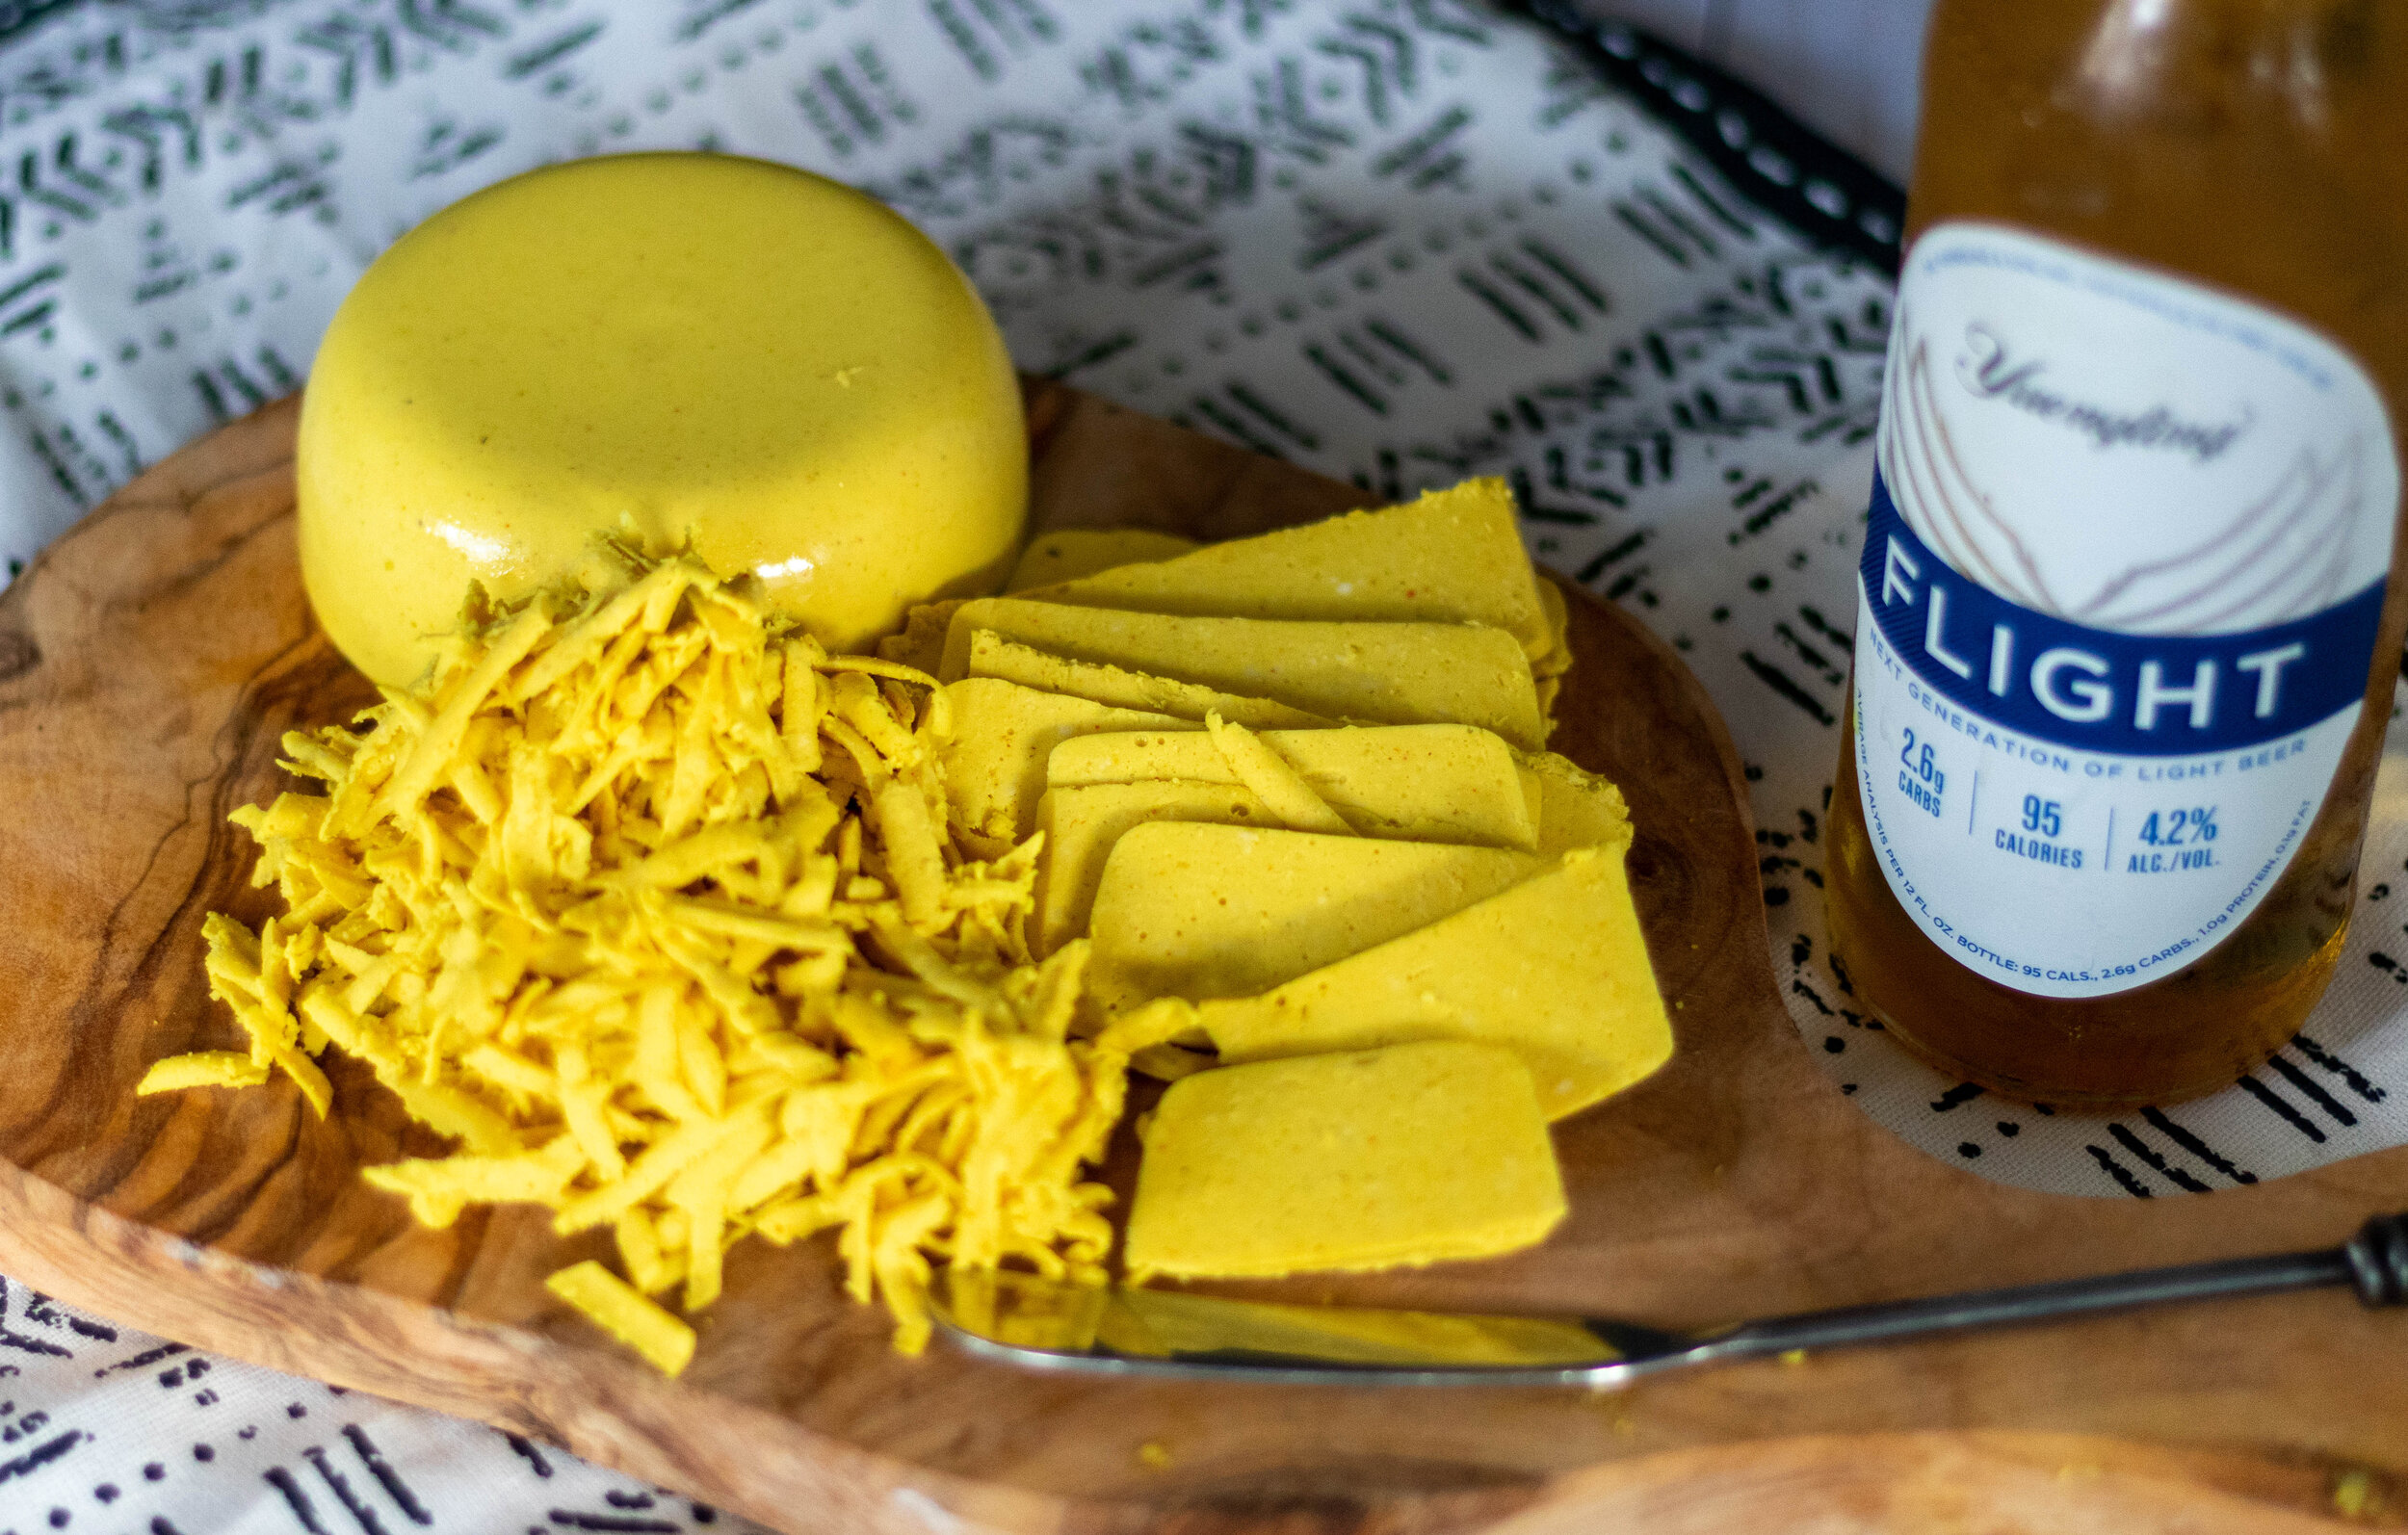
Although vegan cheese options have come a long way over the years in super markets, I can still only find flavors like cheddar, mozzarella, and a few varieties of cheese slices.

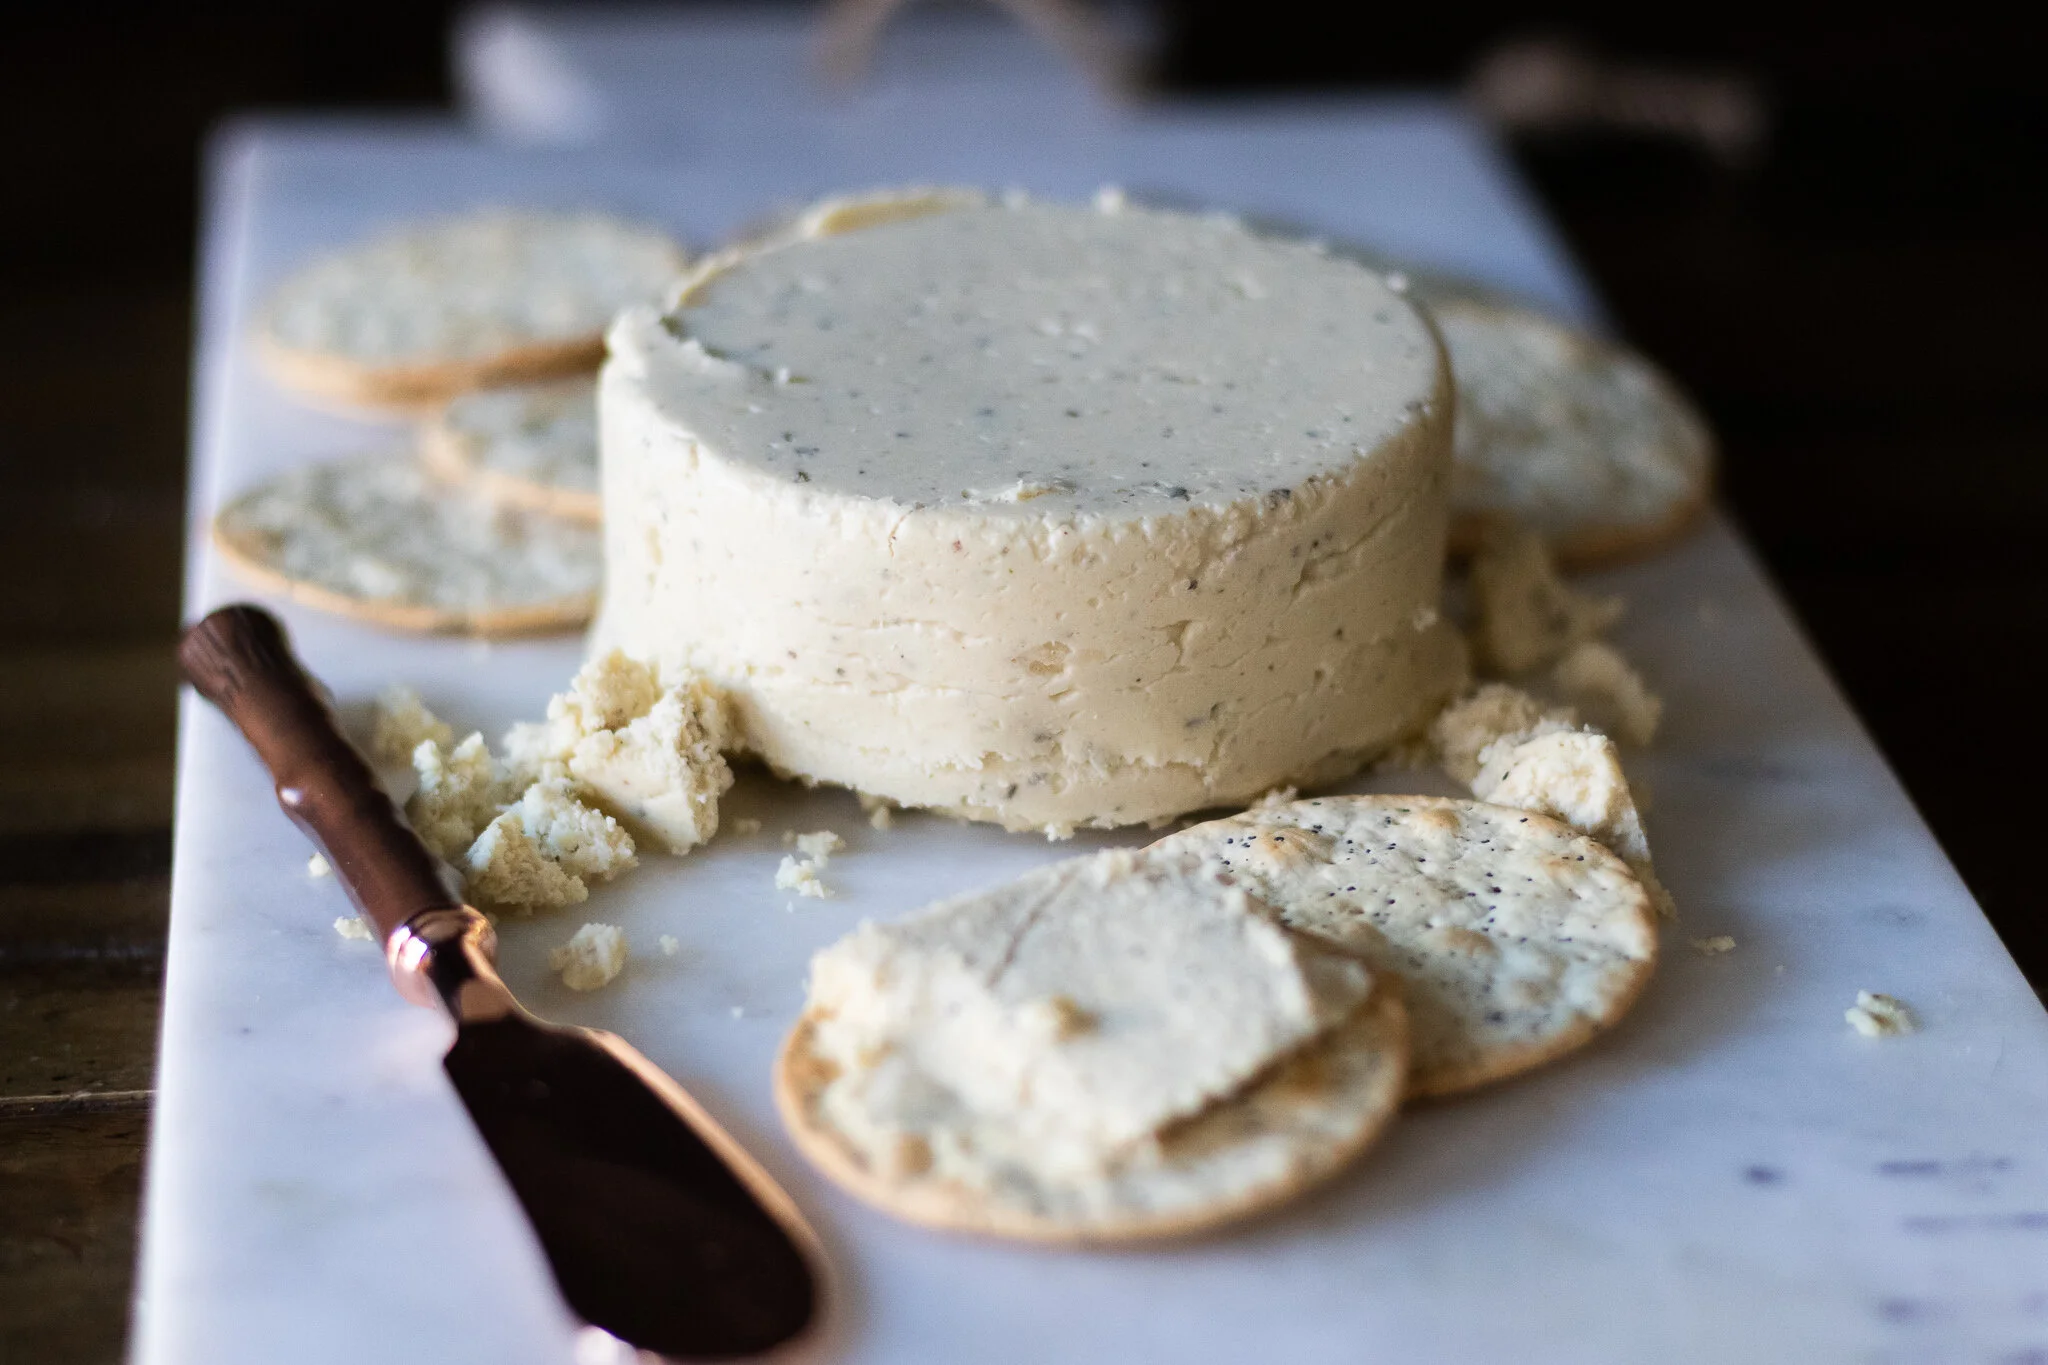
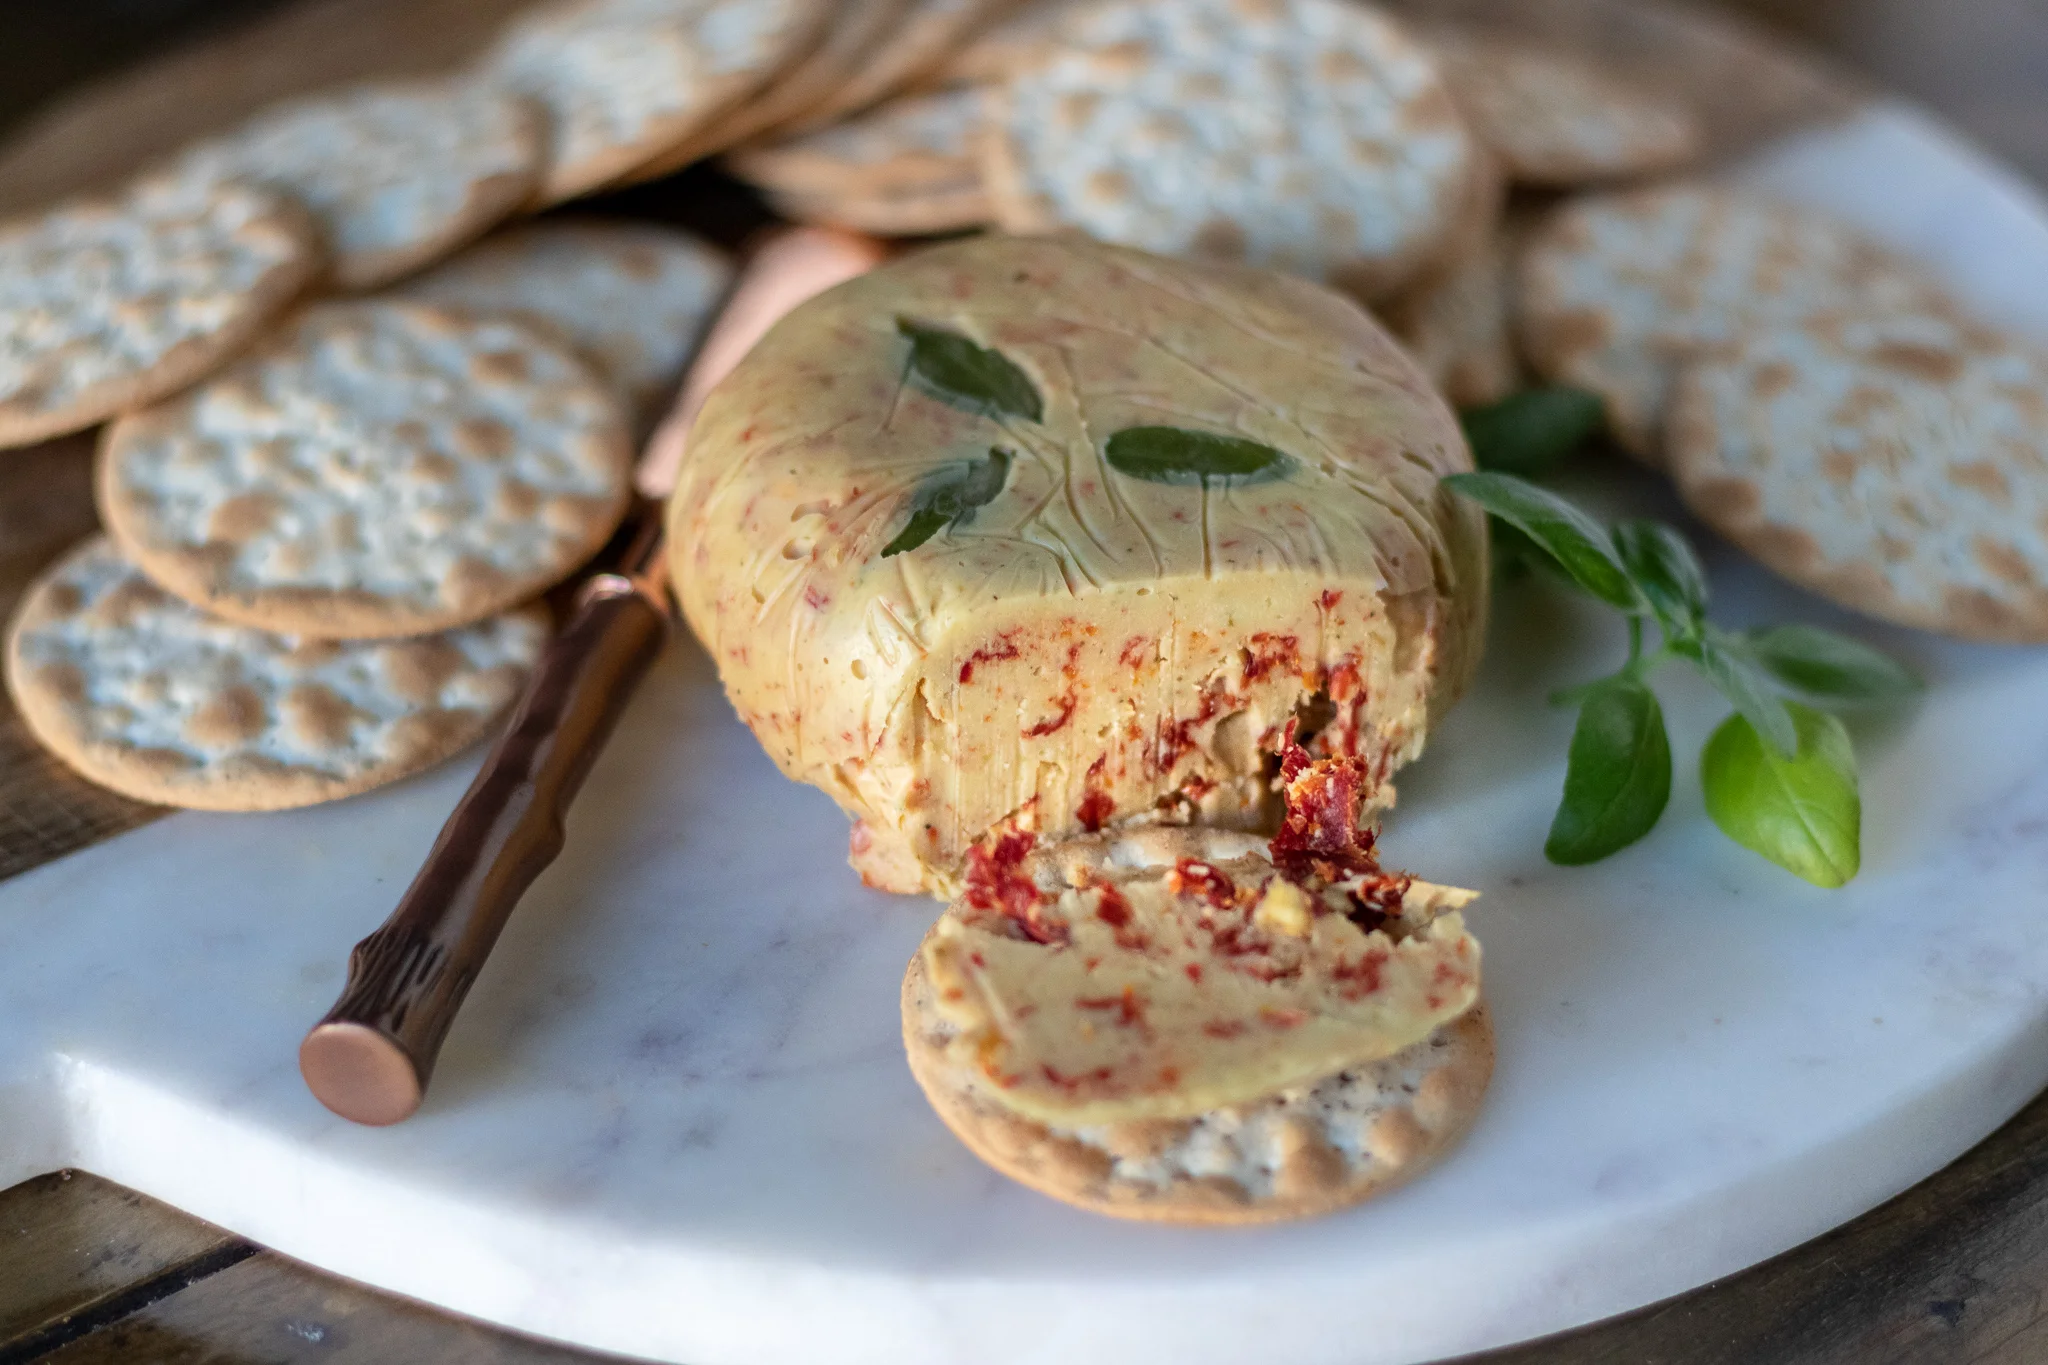
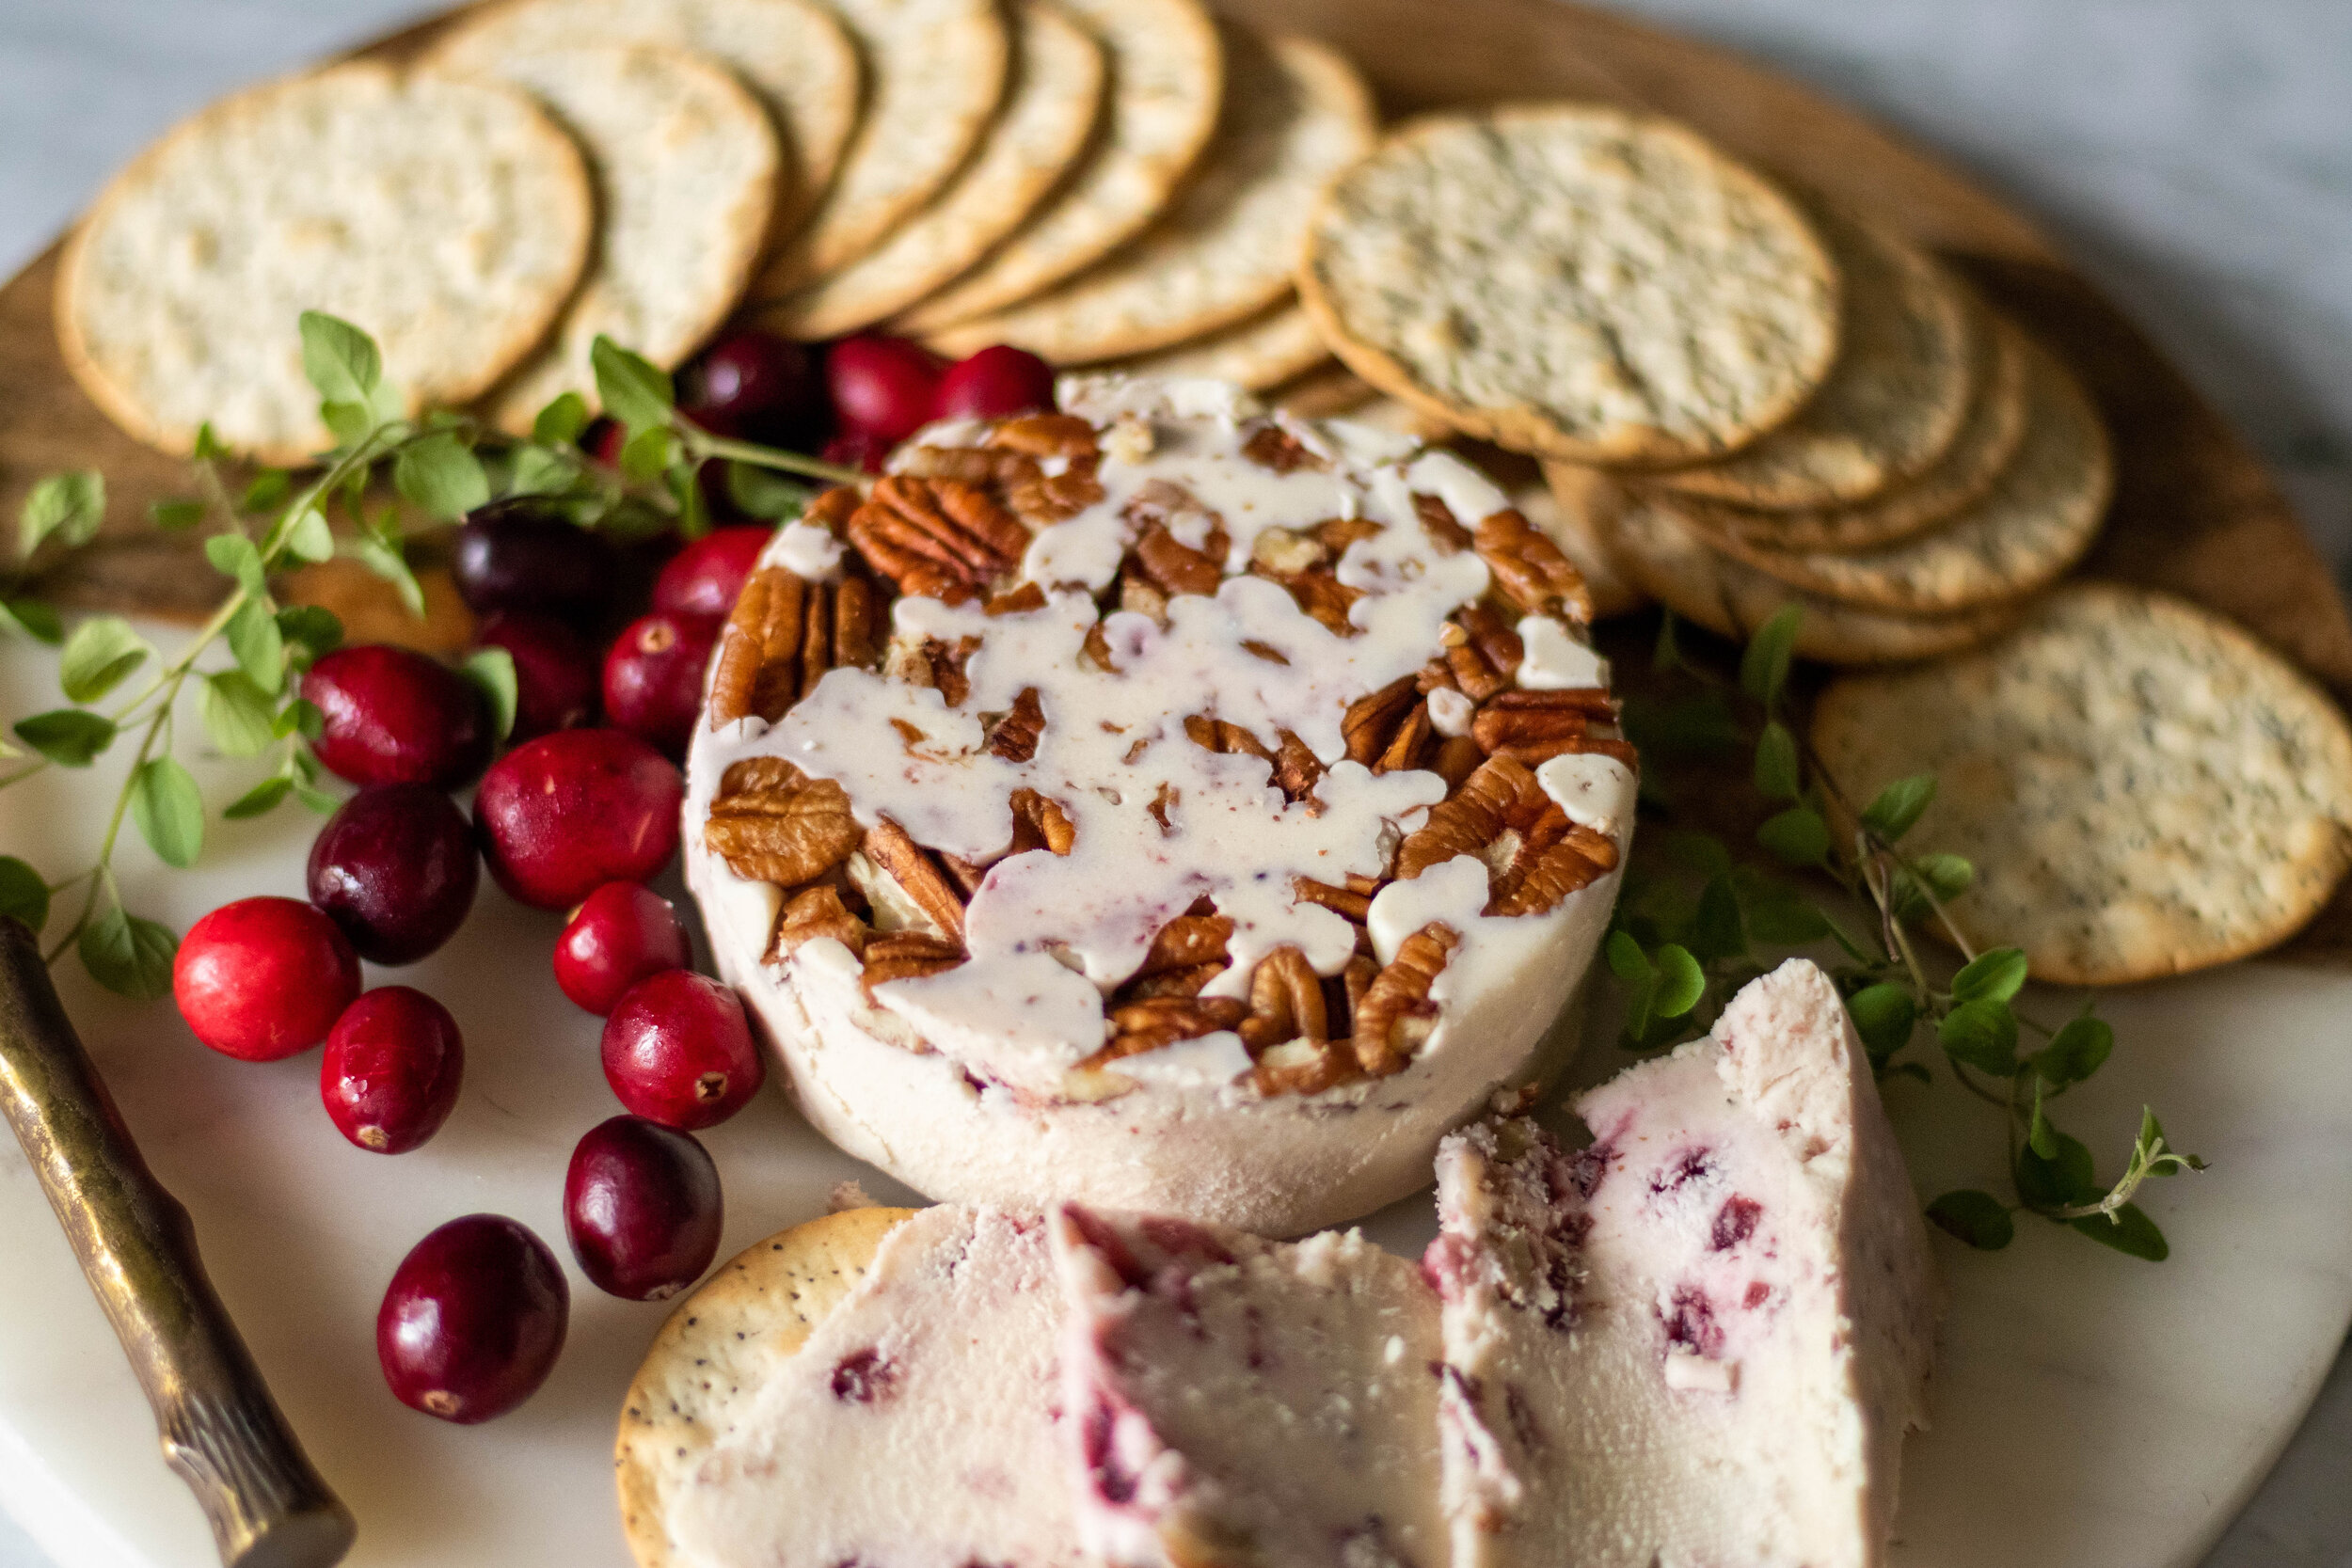
If you are like me and miss more artisan style cheeses, you best bet is to start making your own! Like this vegan cranberry and pecan stilton!! I used to impatiently wait for Trader Joe’s to put out their seasonal stilton’s. Traditional Stilton is a milder cheese and a little crumbly. It often is made with different fruits. I can think of no better fruit to toss into a cheese around the holidays than cranberries!!!
I love cranberries!! Cranberry sauce, cranberry desserts, I even love snacking on fresh raw cranberries!! I impatiently wait each year for fresh cranberries to come into season and to be available at my local super markets!
But for this cheese, you don’t need fresh cranberries unless you are wanting to make your own cranberry sauce, which who can blame you. I make it every single year!! But you can 100% use cranberry sauce from a jar or can for this recipe and don’t have to wait for the holiday season to make it! It is delicious year round!
Listen, don’t let a new or unfamiliar ingredient intimate you! This cheese is so quick and easy to make and pretty fool proof! You will be so amazed at how easy it was to make and how delicious home made vegan cheese is! And if you are on the fence about making a fruity cheese, don’t be. It is soooooo good!! Hooray for Stilton and thanks Trader Joe’s for your never ending inspiration!

INGREDIENTS:
1 can of full fat coconut milk or cream
2 tablespoons agar agar powder
2 teaspoons lemon juice or apple cider vinegar
2 teaspoons miso paste
2 tablespoons tapioca starch
1 teaspoons of salt
3 tablespoons sauerkraut (cabbage only, no juice)
1/4 cup nutritional yeast
1/4 melted cup refined coconut oil
3 heaping tablespoons of whole cranberry sauce, homemade or store-bought
1/4-1/3 cup chopped pecans (optional)
INSTRUCTIONS:
In a food processor or high speed blender, add all of the ingredients EXCEPT the milk, agar, and cranberry sauce .
Pulse a few times to mix it all up.
Now add the milk and agar to a medium sauce pan and bring to a boil. Reduce heat and simmer until mixture thickens to the consistency of a thin pudding.
Add the milk mixture to the ingredients in the food processor, and mix for about a minute. The mixture will quickly begin to thicken as agar begins to solidify at room temperature.
Using a rubber spatula, gently fold in the cranberry sauce into the cheese mixture, so it’s kind of a marble swirl.
Sprinkle a tablespoons or so of nuts in the bottoms of 2-3 ramekins or small bowls. Transfer the cheese mixture to the ramekins or small bowls. You should be able to fill 2 or 3 small bowls.
Place bowls uncovered in the fridge for a few hours, or until the cheese has fully hardened and is a sliceable consistency.
If you like this recipe, then try these:


vegan flank steak