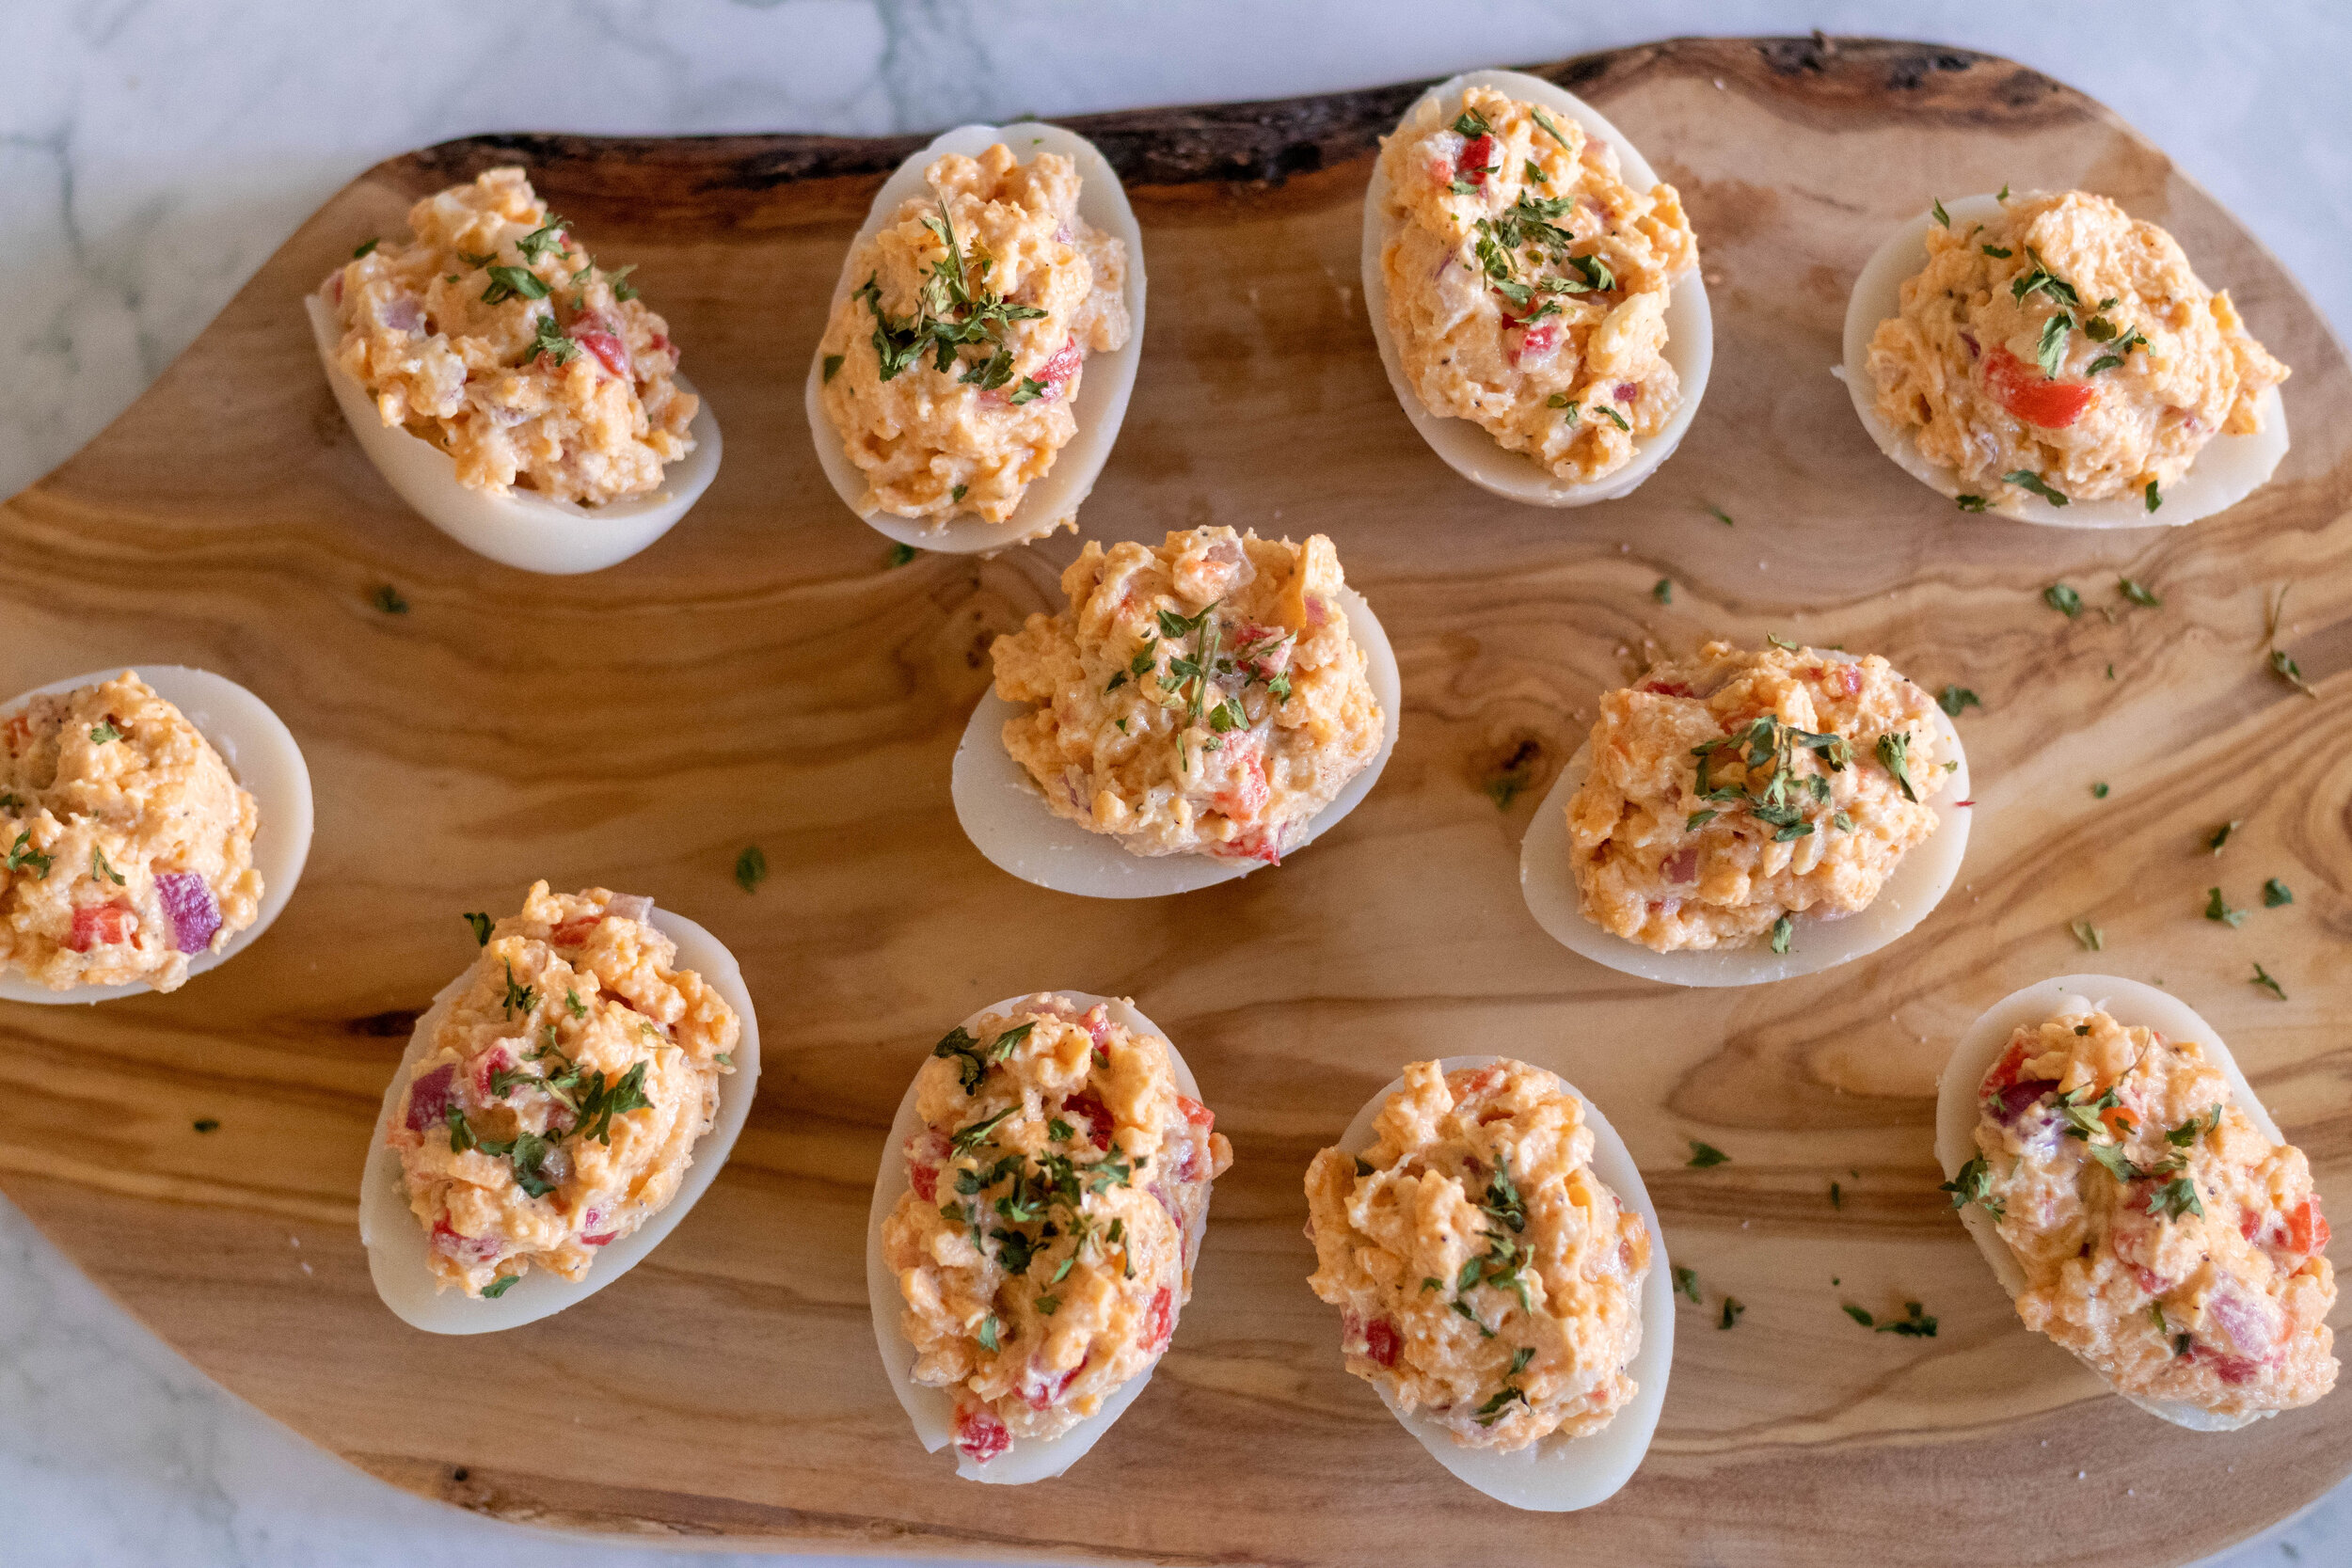
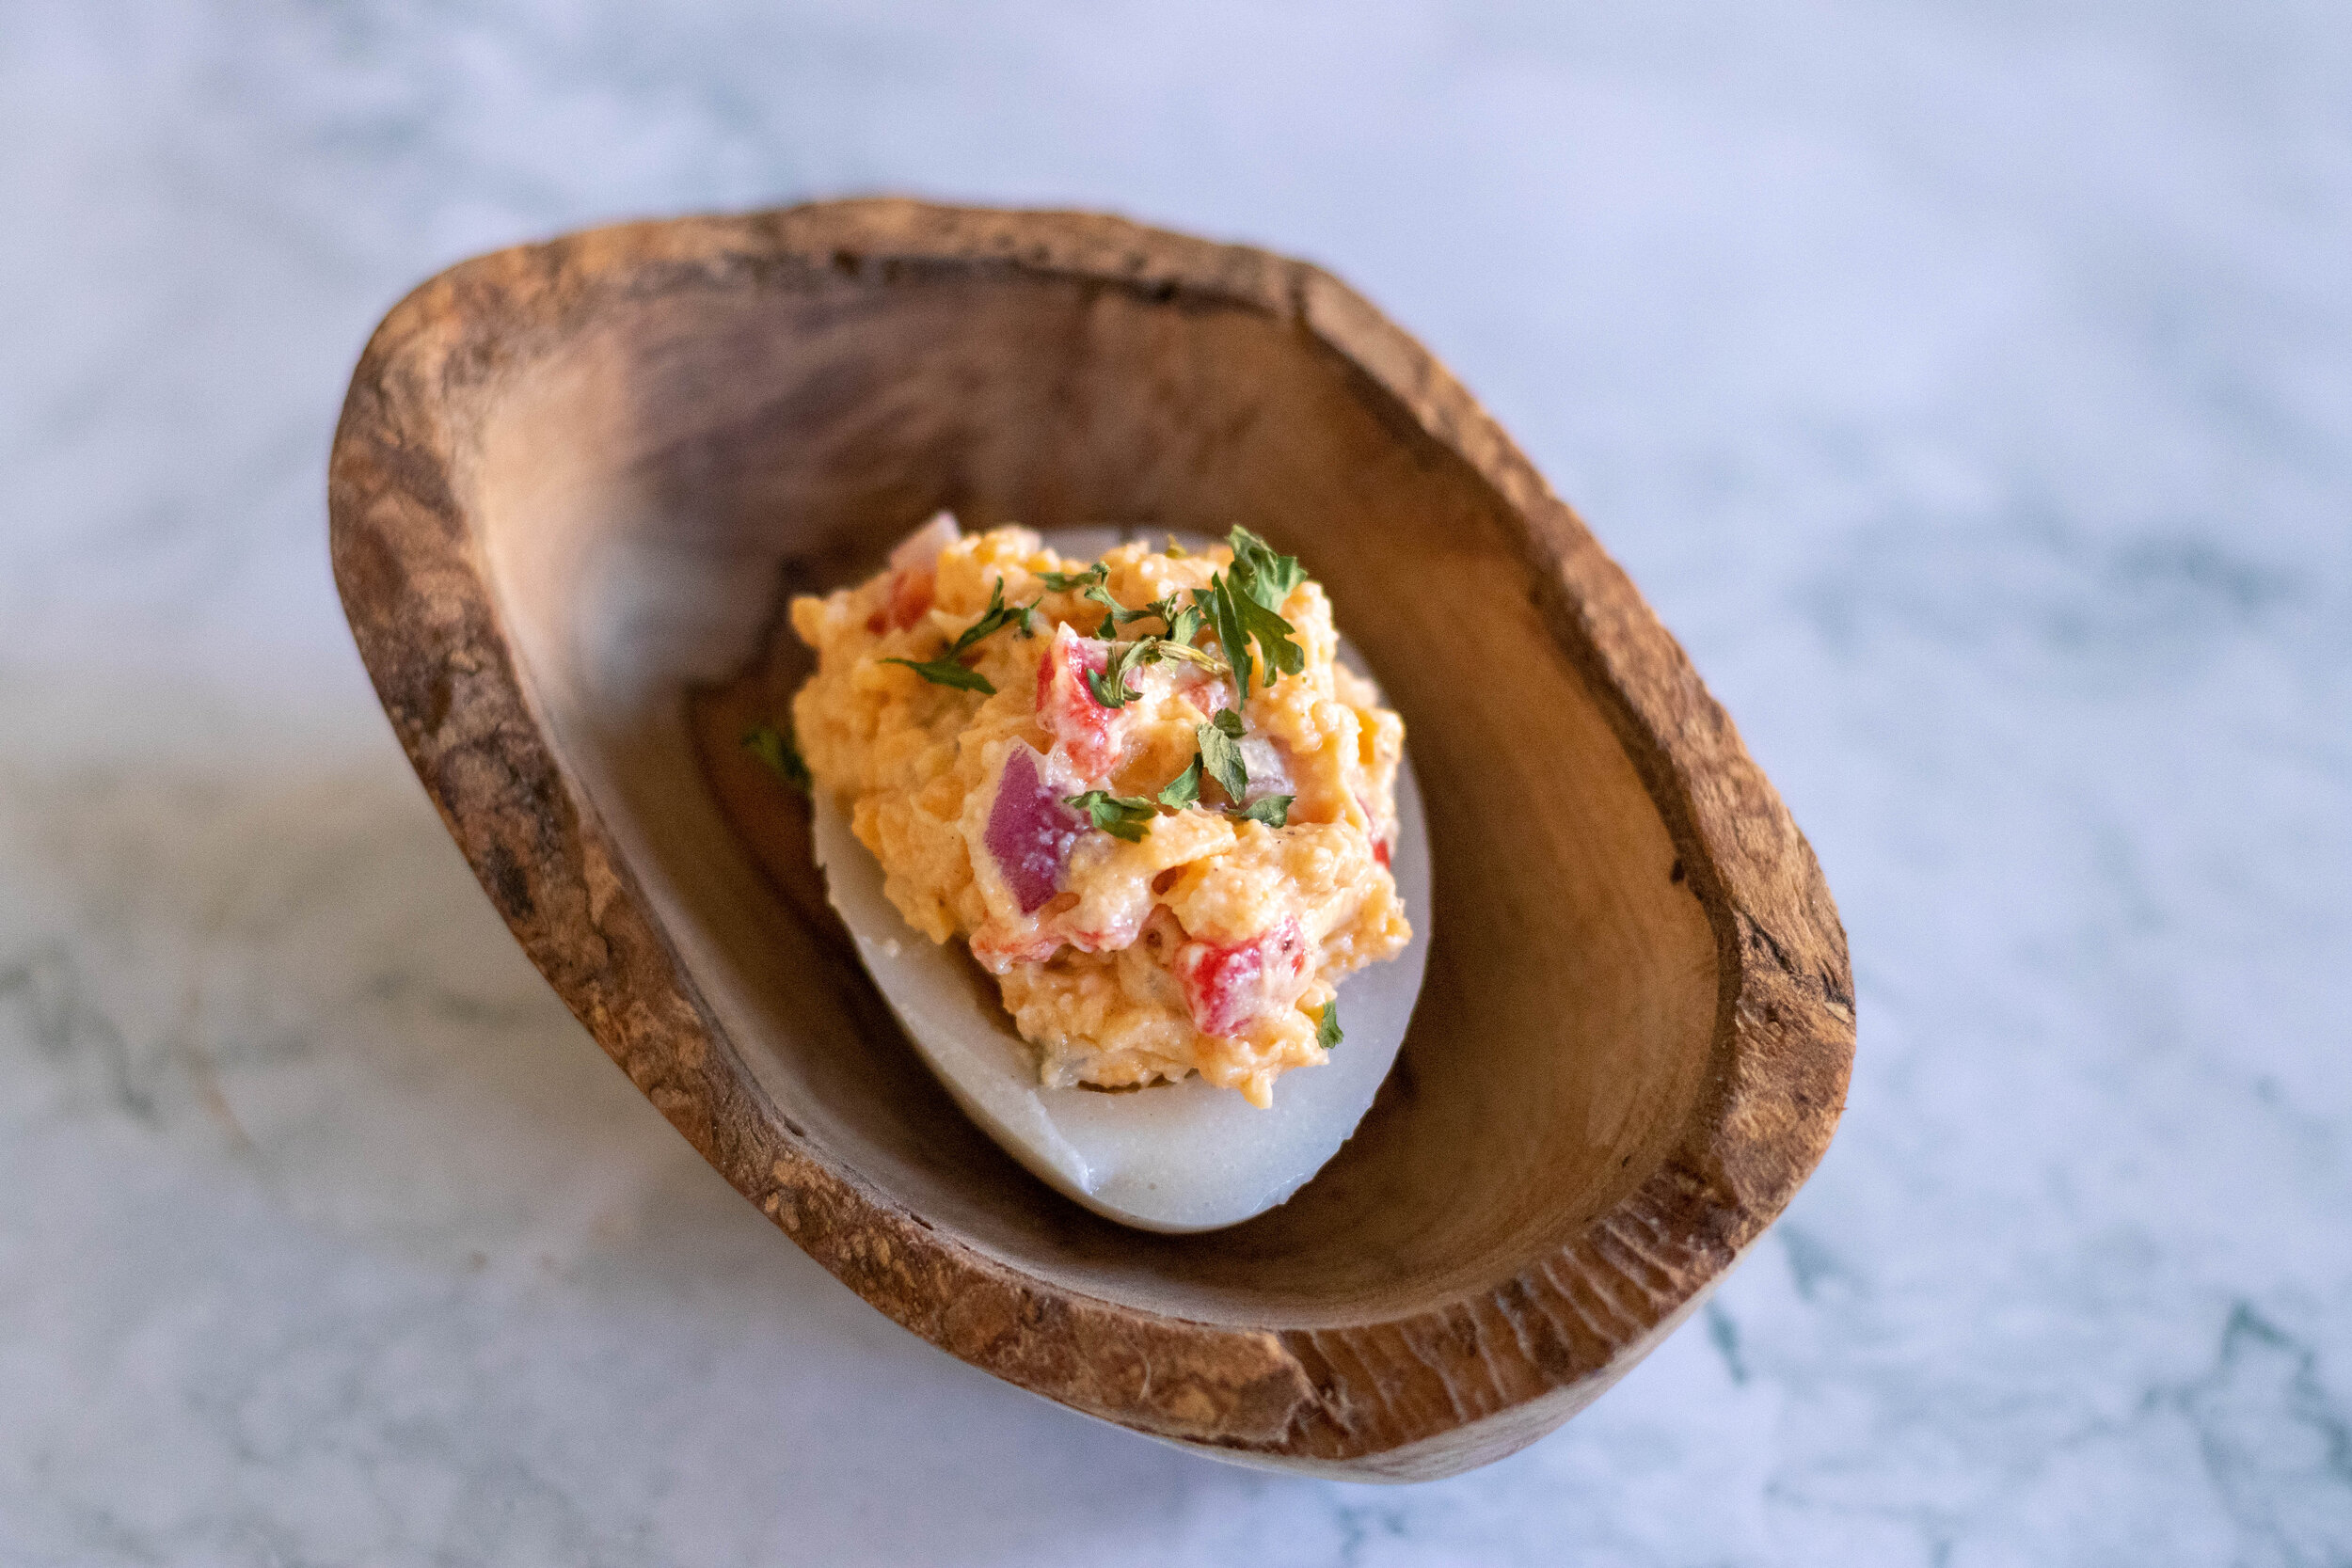
Vegan Pimento Cheese Deviled Eggs

vegan pimento cheese deviled eggs 1

I love deviled eggs.

Pre vegan they were seriously one of my most favorite things.

And, I am pretty sure my mom or aunts could win any deviled egg making contest there ever was.

I can not remember a single family holiday or get together that did not include a plate of deviled eggs.

Pretty early on in our crossover to a vegan diet, I discovered the magic of agar agar powder, and the mind blowing magic of vegan deviled eggs.

vegan pimento cheese deviled eggs 2

Just about all recipes out there use the same base. Vegan milk, agar, and Kala Namak, sulfur salt. The salt and agar come together to make a realistic looking, tasting, and even smelling egg!! Kitchen science at its finest!!!

Before you ask if you can skip the salt, let me tell you it is the ingredient that makes these vegan eggs taste and smell like eggs. I strongly recommend you find some at a local spice shop, or click the link I provided and order some online. It is a vegan egg game changer. I use it in my tofu egg salad, tofu scramble and even sprinkle it on my Just Eggs.

To make a traditional vegan deviled egg I use tofu as the filling and it works amazingly. I have served vegan deviled eggs to so many non vegan friends and family who truly could not believe they were not a real egg!! And that is exactly what you want when veganizing/replicating any classic recipe!

In the south, pimento cheese is just as much of a pot luck staple as a deviled egg is.

I whip up a batch of vegan pimento cheese just about every week for sandwiches, or snacking with crackers and raw veggies.

vegan pimento cheese

Vegan pimento cheese deviled eggs are also an already pretty popular southern staple, so I am not sure why this one took me so long!!

When I decided to make these I was a little stumped on the filling. Did I want to add some of my original deviled egg filling to the pimento cheese mix or just the cheese?

I decided nope to the original filling, it didn’t need it. I could just add some Kala Namak to the pimento cheese mixture to give it a nice eggy kick, and be done with it!

vegan pimento cheese deviled eggs 3

These vegan pimento cheese deviled eggs are delicious, actually really easy to make, pretty, and once again would probably fool even a non vegan.

I mean talk about party tricks! Bring a tray of these to your next party, or pot luck and you will quickly be known as everyones favorite vegan magician!


INGREDIENTS:

EGG WHITES:

  • 2 cups unsweetened almond or soy milk

  • 1 tablespoon agar powder ( we use this brand)

  • 1/4 teaspoon Kala Namak

PIMENTO CHEESE:

  • 1/3 cup vegan cream cheese, homemade or store-bought

  • 2 tablespoons of vegan mayo

  • 2-3 table spoons diced pimentos, drained

  • 1/4 of a small onion diced

  • 1/2 teaspoon garlic powder

  • 1 teaspoon all purpose greek seasoning (optional)

  • 1/2 teaspoon dried mustard

  • 1/2 to 1 teaspoon Kala Namak salt (add a little at time and give it taste to make sure the flavor is not over powering. A little goes a long way)

  • salt and pepper to taste

vegan pimento cheese deviled eggs 4

INSTRUCTIONS:

You will either need a silicon egg mold or a deviled egg serving tray, the kind with egg shaped divots, to form the egg whites. If you use the serving tray the eggs will be pretty shallow, but it still works.

  1. Prepare the pimento cheese by mixing all of the ingredients in a medium bowl until well combined. Give it a little taste and add more Kala Namak if you feel like it needs it.

  2. In a small sauce pan, whisk together almond milk, agar, and Indian black salt. Heat the mixture over medium heat until it comes to a simmer, then remove from the heat.

  3. Transfer the mixture to a pyrex, or glass bowl, and allow to cool on the counter top. Let the mixture sit until it appears to be thickening but is still liquid, and pourable, stirring occasionally. I have found if you pour the mixture into the molds too soon, while it is still very hot, the milk solids will separate and sink to the bottom, and the water will be left at the top. This is not an appetizing egg!

  4. Once the mixture is ready, pour it into the eggs molds and pop them in the fridge for about half an hour, or until they are nice and solid.

  5. Once the vegan egg whites are solid they should pop right out of the mold. Take a little spoon and carefully scoop out a divot from the center or the egg. This creates a little spot for extra pimento cheese to sit in.

  6. Fill each vegan egg white with a few teaspoons of vegan pimento cheese. Garnish with a little dried parsley or dill to serve.

  7. Store leftovers in the refrigerator for about 3-4 days in an airtight container.

If you like this recipe, then try these:

vegan pimento cheese deviled eggs 5

Vegan Cranberry Bliss Bars

vegan cranberry bliss bar

I won’t even pretend I did not rush to Starbucks before we were vegan to grab one of their Holiday Cranberry Bliss Bars.

Back when we were vegetarian I eagerly awaited the holidays to get one of those delicious nutty, cranberry filled blondies topped with cream cheese frosting.

I never once thought to make my own until we were vegan, and it was no longer something I could stop in a grab.

Now I actually had to work for it. But I tell you what, these vegan cranberry bliss bars are worth the work, and actually not too much work at all.

I mean baking anything homemade is some work, but recreating a vegan version of a cranberry bliss bar isn’t rocket science or anything and as far as baked goods go, blondies are about as easy if not easier than a brownie!

vegan cranberry bliss bart 2

Whipping up a batch of vegan cream cheese frosting is easy enough so that actually makes these dangerous from a diet perspective. I mean when a baked good I love is TOO easy, then that means I am going to make the thing more than I should, and I need the pants I currently own to keep fitting…self control….I am working on it y’all, but man these things are good!

This recipe makes a 9x13 pan of vegan cranberry bliss bars so there are PLENTY to share or gift to those you love or just moderately like…I personally would reserve them for those you love and give those you just sorta like something less delicious. But you do what you want.

These bars keep pretty well, and are also kinda pretty, making them a good choice for holiday gifting.

So if you even know what these bars are and have been missing them since going vegan or plant based, your holidays maybe just got a little better. If you are clueless to what these are but love blondies, cranberries and cream cheese….then you will likely adore them as well.

vegan cranberry bliss bar 3

INGREDIENTS:

  • 1 and 1/2 cups vegan butter (room temperature)

  • 1 and 1/2 cups granulated sugar

  • 1/2 cup brown sugar

  • 2 flax eggs (2 tablespoons ground flax and 6 tablespoons water mixed, let sit unit goopy)

  • 2 starch eggs (2 tablespoons corn or tapioca starch and 6 tablespoons water mixed)

  • 3 cups all purpose flour

  • 1 teaspoon baking powder

  • 1 teaspoon salt

  • 1/3 cup oat or almond milk

  • 1 teaspoon vanilla

  • 1/2 cup chopped dried cranberries

  • 1/2 cup chopped pecans

CREAM CHEESE FROSTING:

  • 1/2 cup vegan cream cheese

  • 1/3 cup vegan shortening (I used Spectrum brand)

  • 3 cups powdered sugar (you may need more depending on the cream cheese you use to get the right consistency)

  • zest from 1/2-1 whole orange ( just depends on how much orange you like)

  • 1-2 teaspoons apple cider vinegar (if you don’t want an extra zippy cream cheese you can use plant milk)

  • Dried Cranberries for topping

INSTRUCTIONS:

Preheat oven to 350 degrees Fahrenheit

  1. In the bowl of a stand mixer or in a medium bowl using an electric hand mixer, mix the starch and flax eggs with both sugars.

  2. Add the butter and mix on high for a for a minute.

  3. In another bowl wisk the flour, baking powder, and salt together.

  4. Add the dry flour mixture to the wet mixture and mix just until all of the ingredients are combined

  5. Mix in the milk, and vanilla until well combined,

  6. Fold in the cranberries and nuts.

  7. Line a 9x13 pan with parchment paper allowing it to hang over the sides some, and spray with a little oil. Pour in the batter and bake on the middle oven rack for 45-55 minutes or until tooth pick inserted in the middle comes out clean.

  8. Remove from oven and allow bars to cool completely still in the pan.

  9. To make the frosting beat the cream cheese and shortening together. Slowly add in the sugar, vanilla, and orange zest. Add a teaspoon or so of apple cider vinegar deepening on taste. I like my frosting a little more on the tangy side. Beat all of the ingredients together. You may need to add a little more powdered sugar depending on the cream cheese you used. Some brands are thicker than others.

  10. While the bars are cool but still in the pan, cover with the vegan cream cheese frosting. Sprinkle with 1/4- 1/2 cup chopped dried cranberries. Pop the pan in the fridge and let the frosting cool unit it is good and stiff. This will make cutting the bars much easier.

  11. Remove from the fridge pull the bars from the pan using the edges of the parchment paper.

  12. Cut vertical strips 2-3 inches apart depending on how big you want the bars, then cut the strips on a diagonal to make little triangle shapes.

  13. Store bars in an airtight container at room temperature or in the fridge.

If you like this recipe, then try these:
cranberry bliss bar

cranberry bliss bar

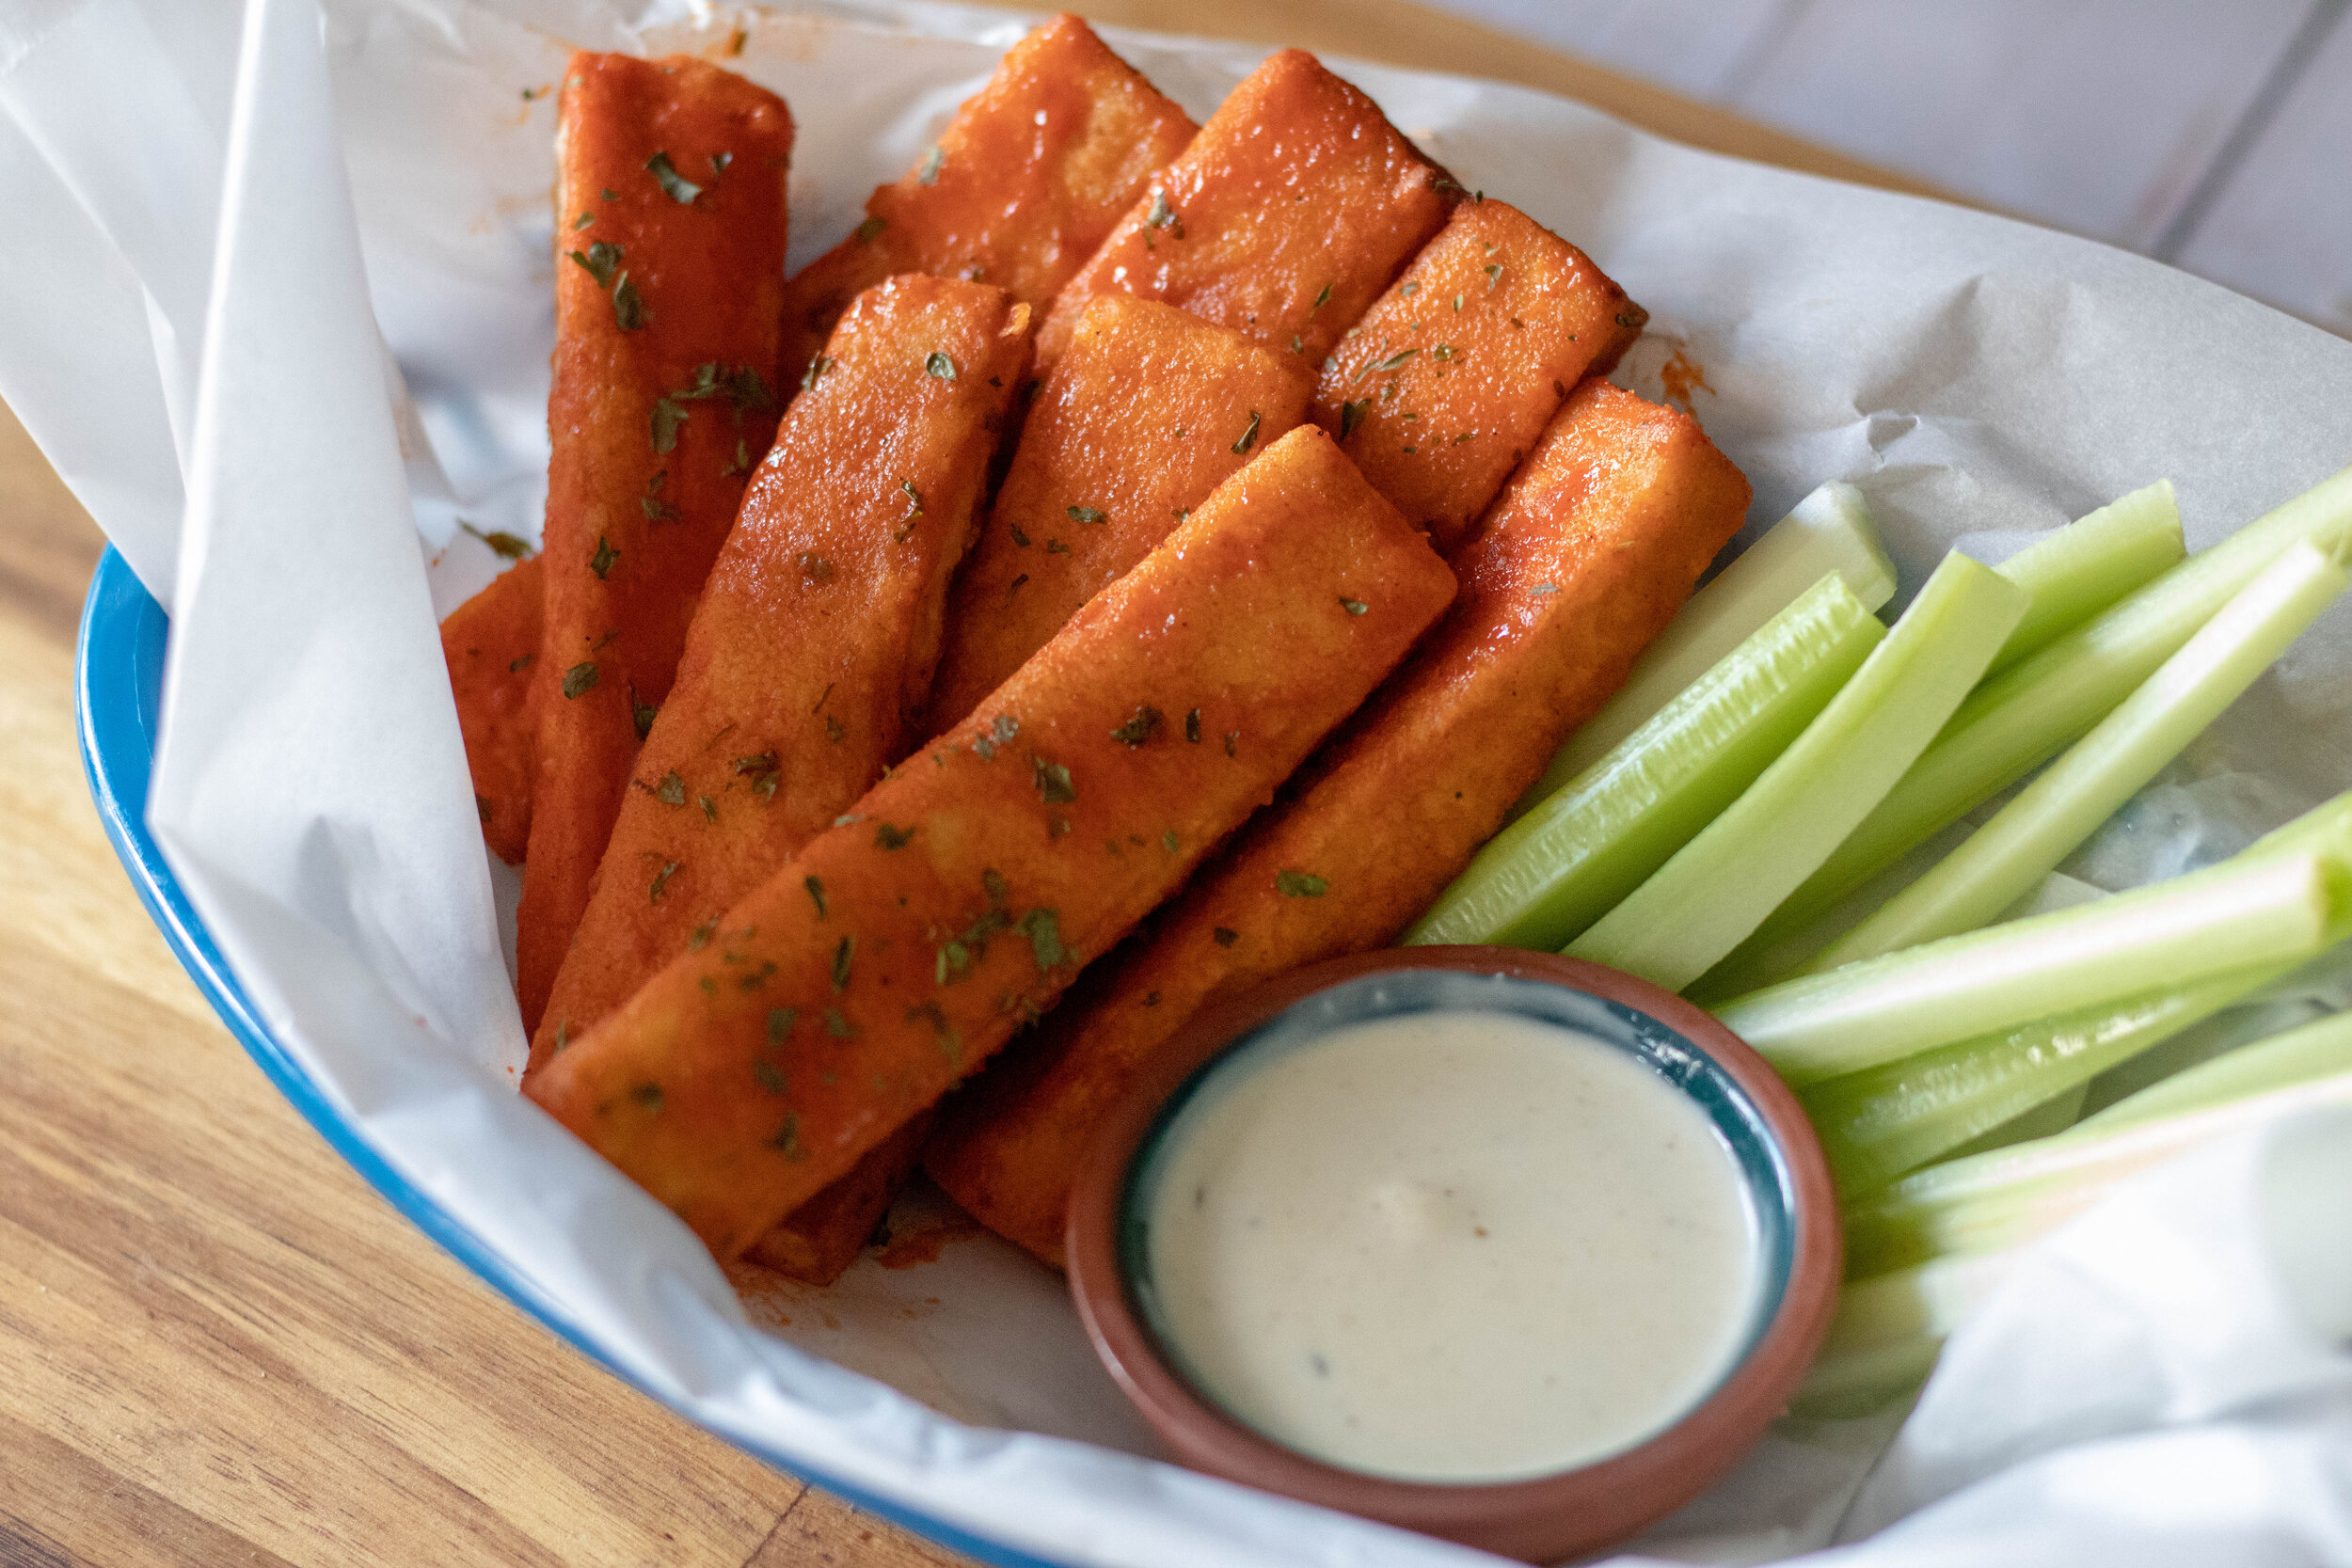
Vegan Boneless Buffalo Wings (seitan wings)

IMG_9635.jpg

I have always been a fan of all things buffalo.

Pre-vegan and pre-vegetarian, boneless wings were my go to when we went out to eat.

I love, love, loved boneless buffalo wings with a big side of ranch dressing.

Over the years I have made different vegan variations of wings using an easy basic seitan recipe, and often crispy tofu.

None of the variations have been bad, but none have been and tasty as this version.

IMG_9655.jpg

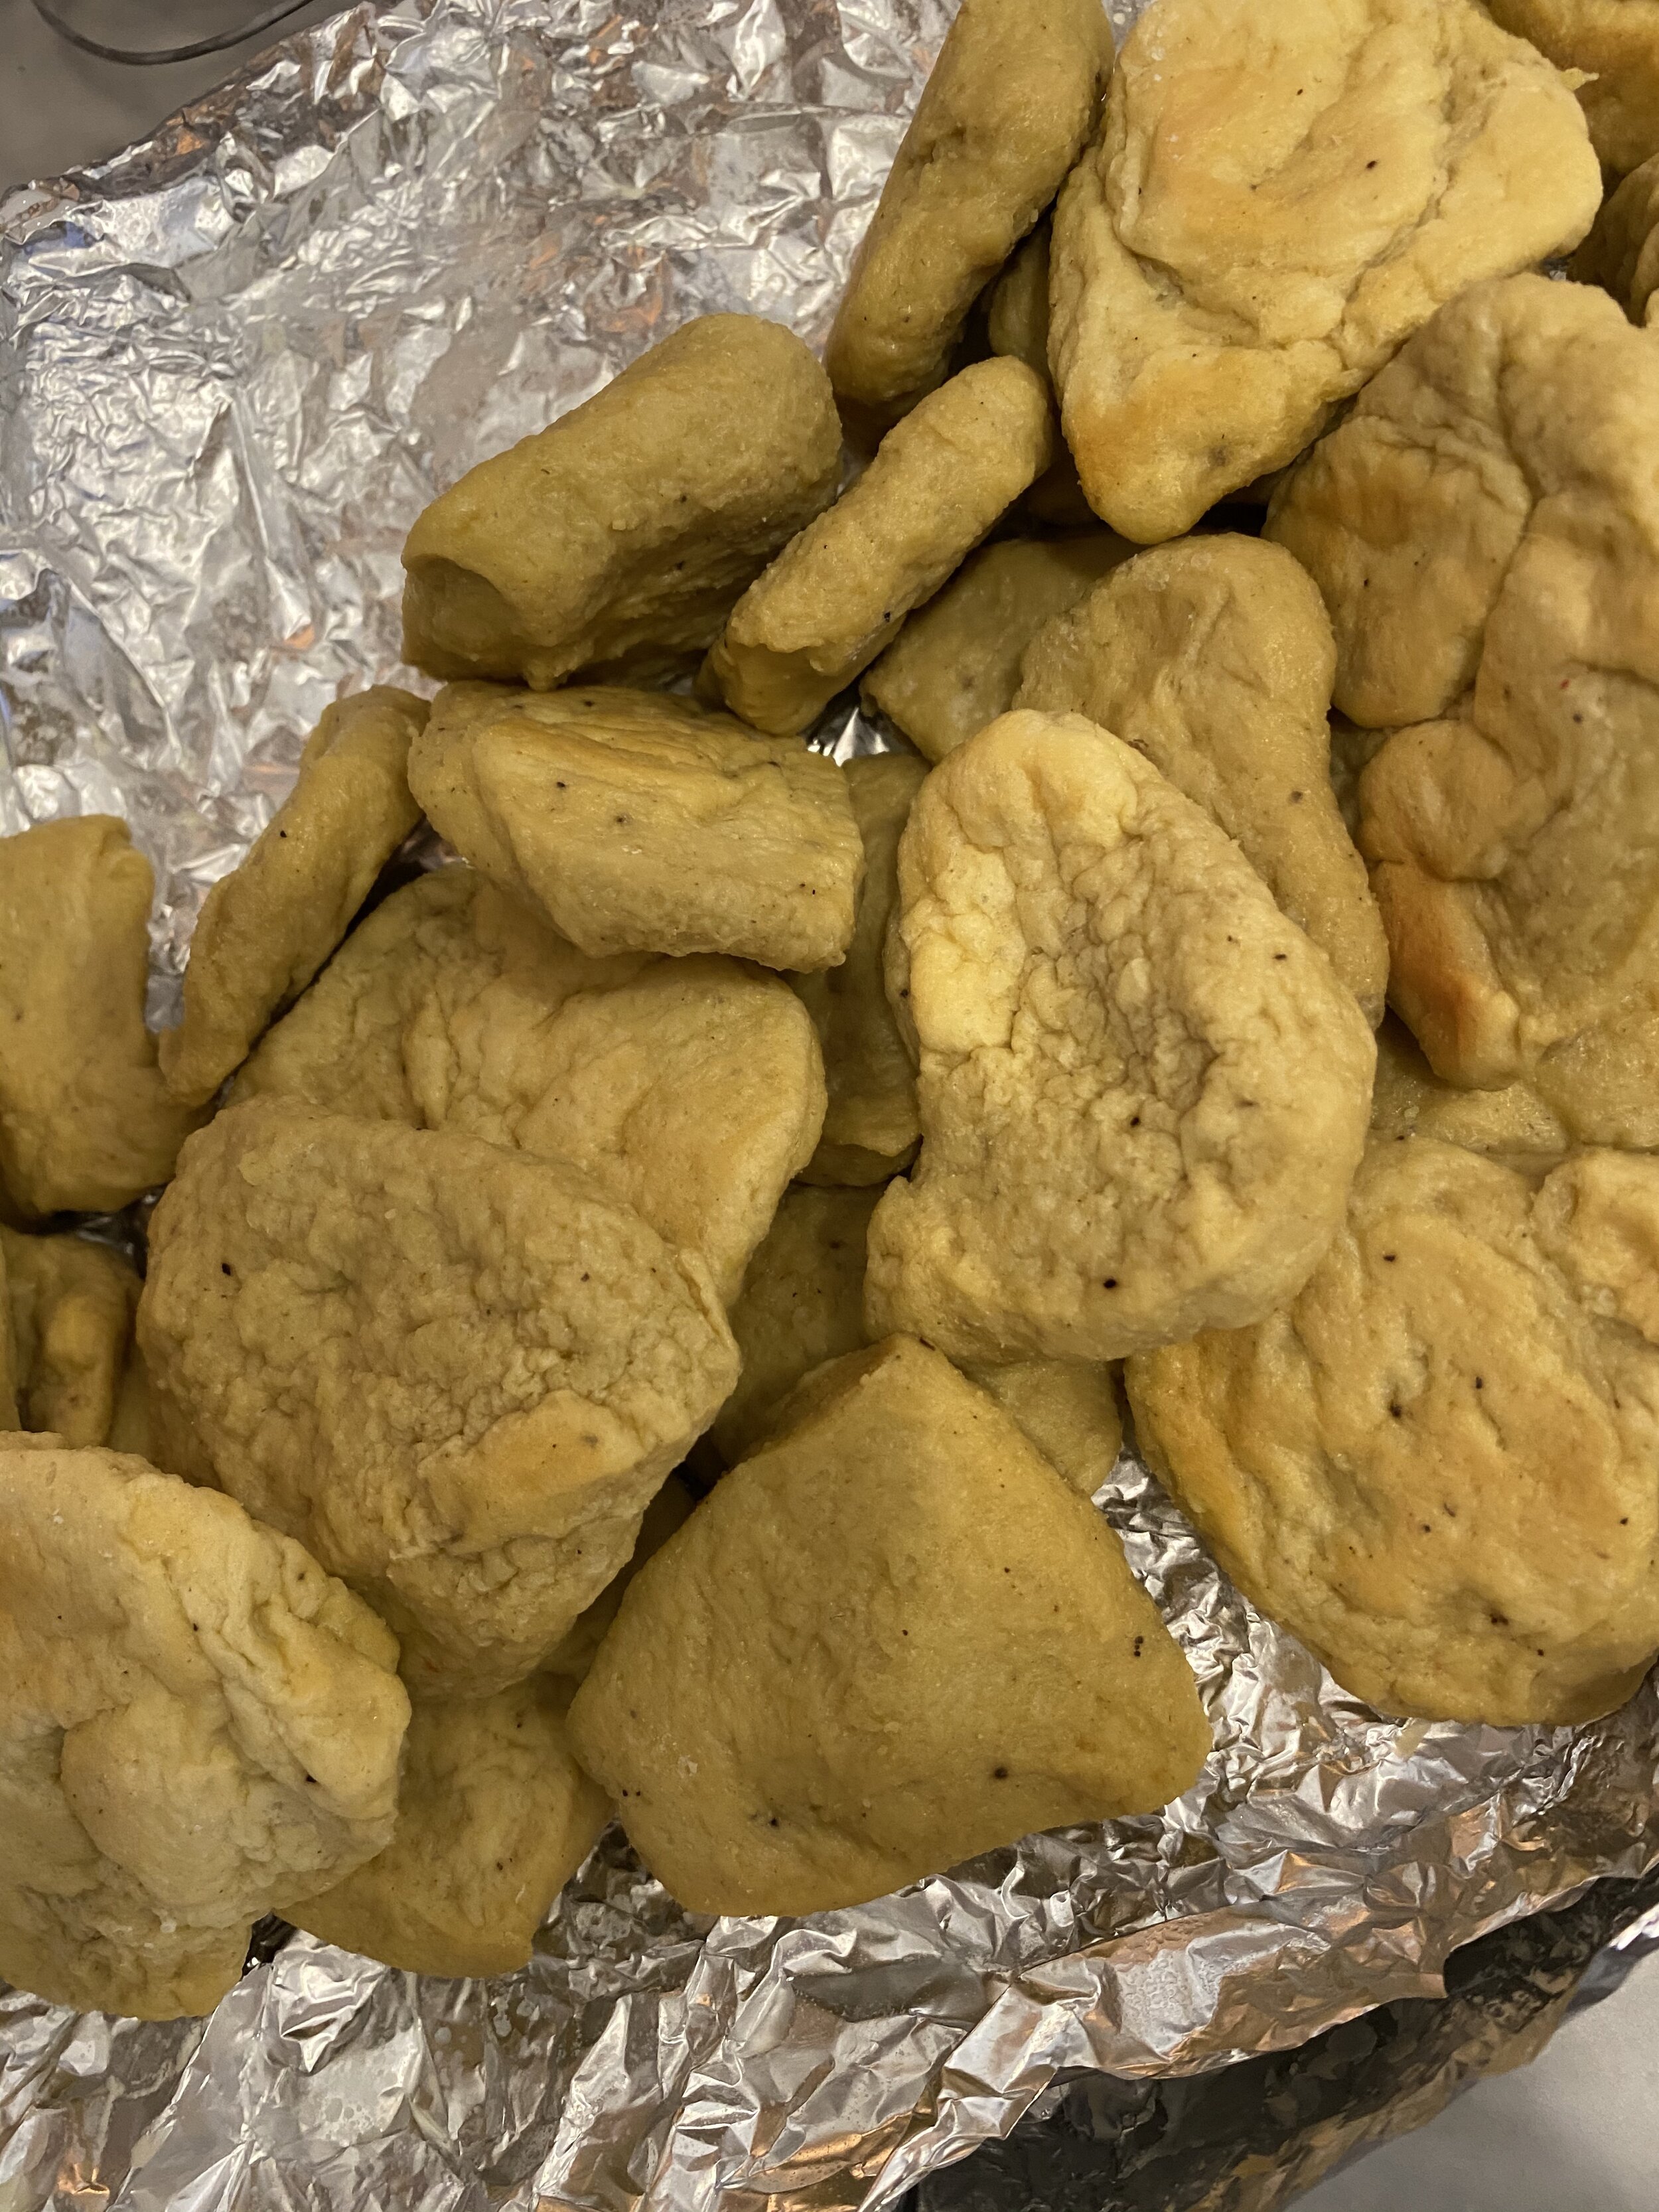
A while back I kind of perfected an easy vital wheat gluten/tofu chicken. By perfected, I just mean its perfect for me. You may disagree or have a recipe you like better, but this one is so super quick and easy, the texture is spot on, and the flavor is well, chicken like. So to me that is the perfect seitan chicken.

I has already used the recipe to make my kids fun shaped nuggets but hadn’t made wings with it yet.

I am often on autopilot so I had just kept making crispy tofu wings and never really thought to use the seitan chicken in its place, until recently.

Man am I a dummy sometime.

These vegan boneless wings are SOOOOOO FLIPPING GOOD!!!!!

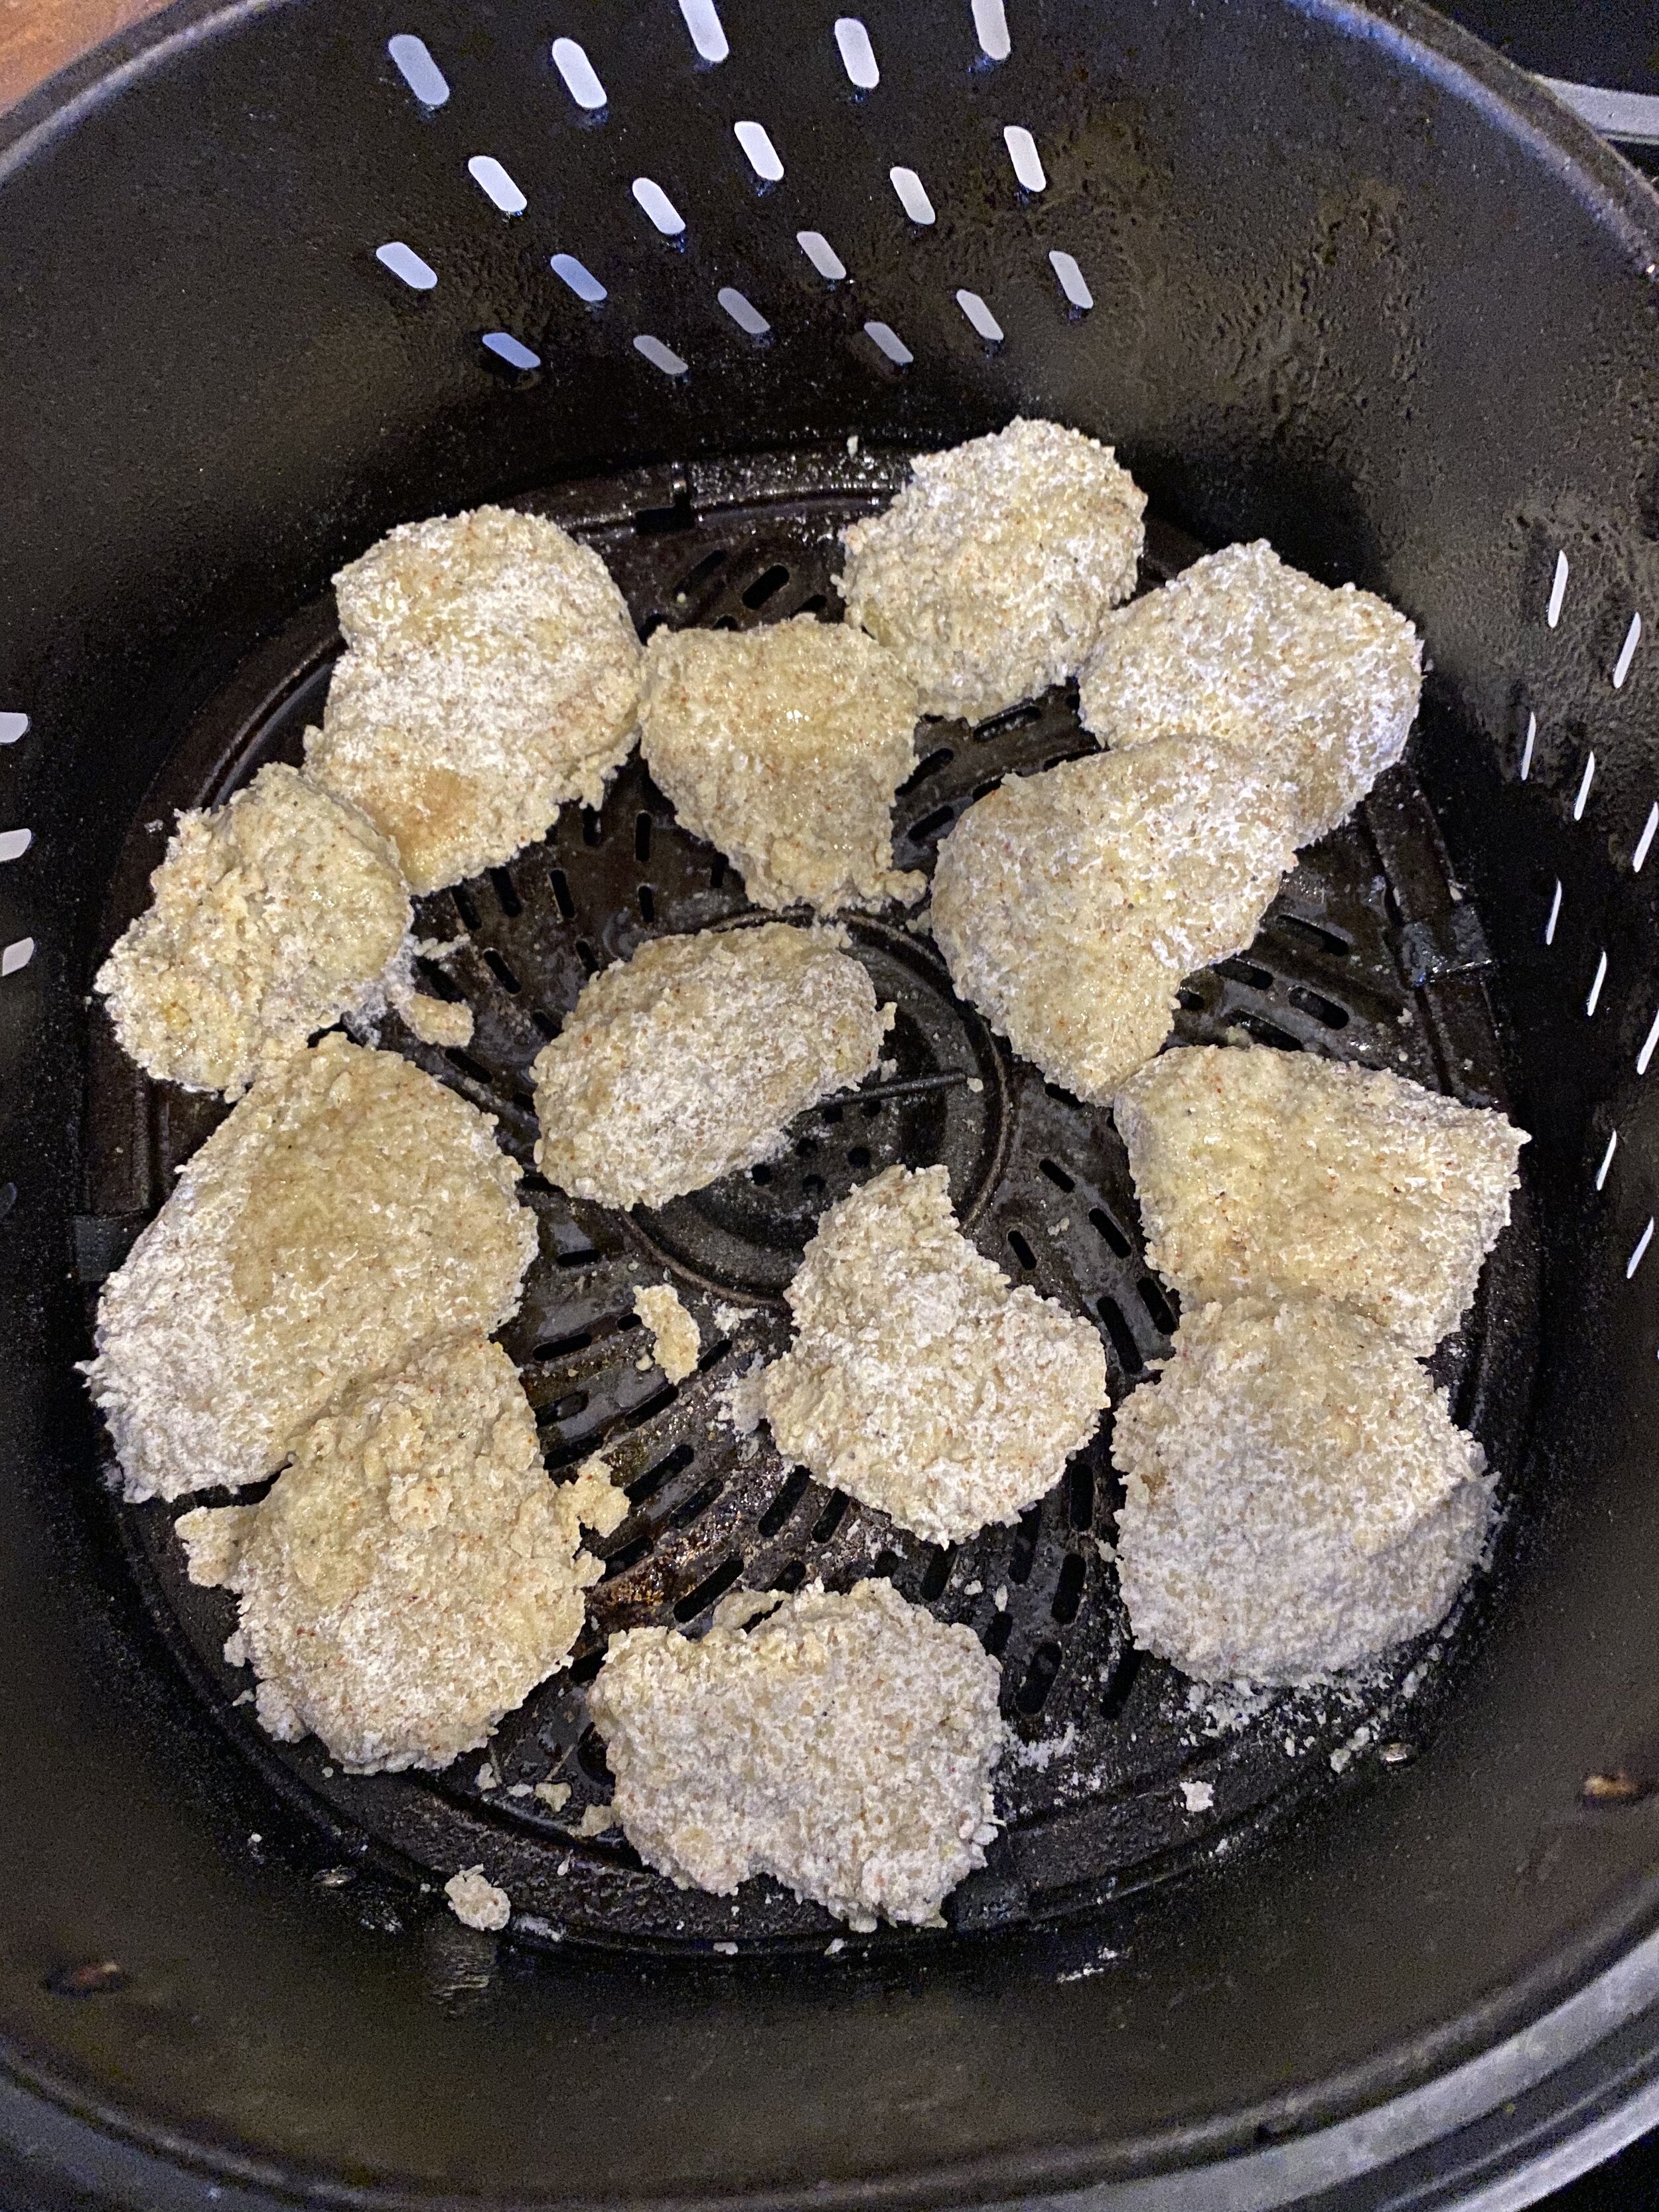
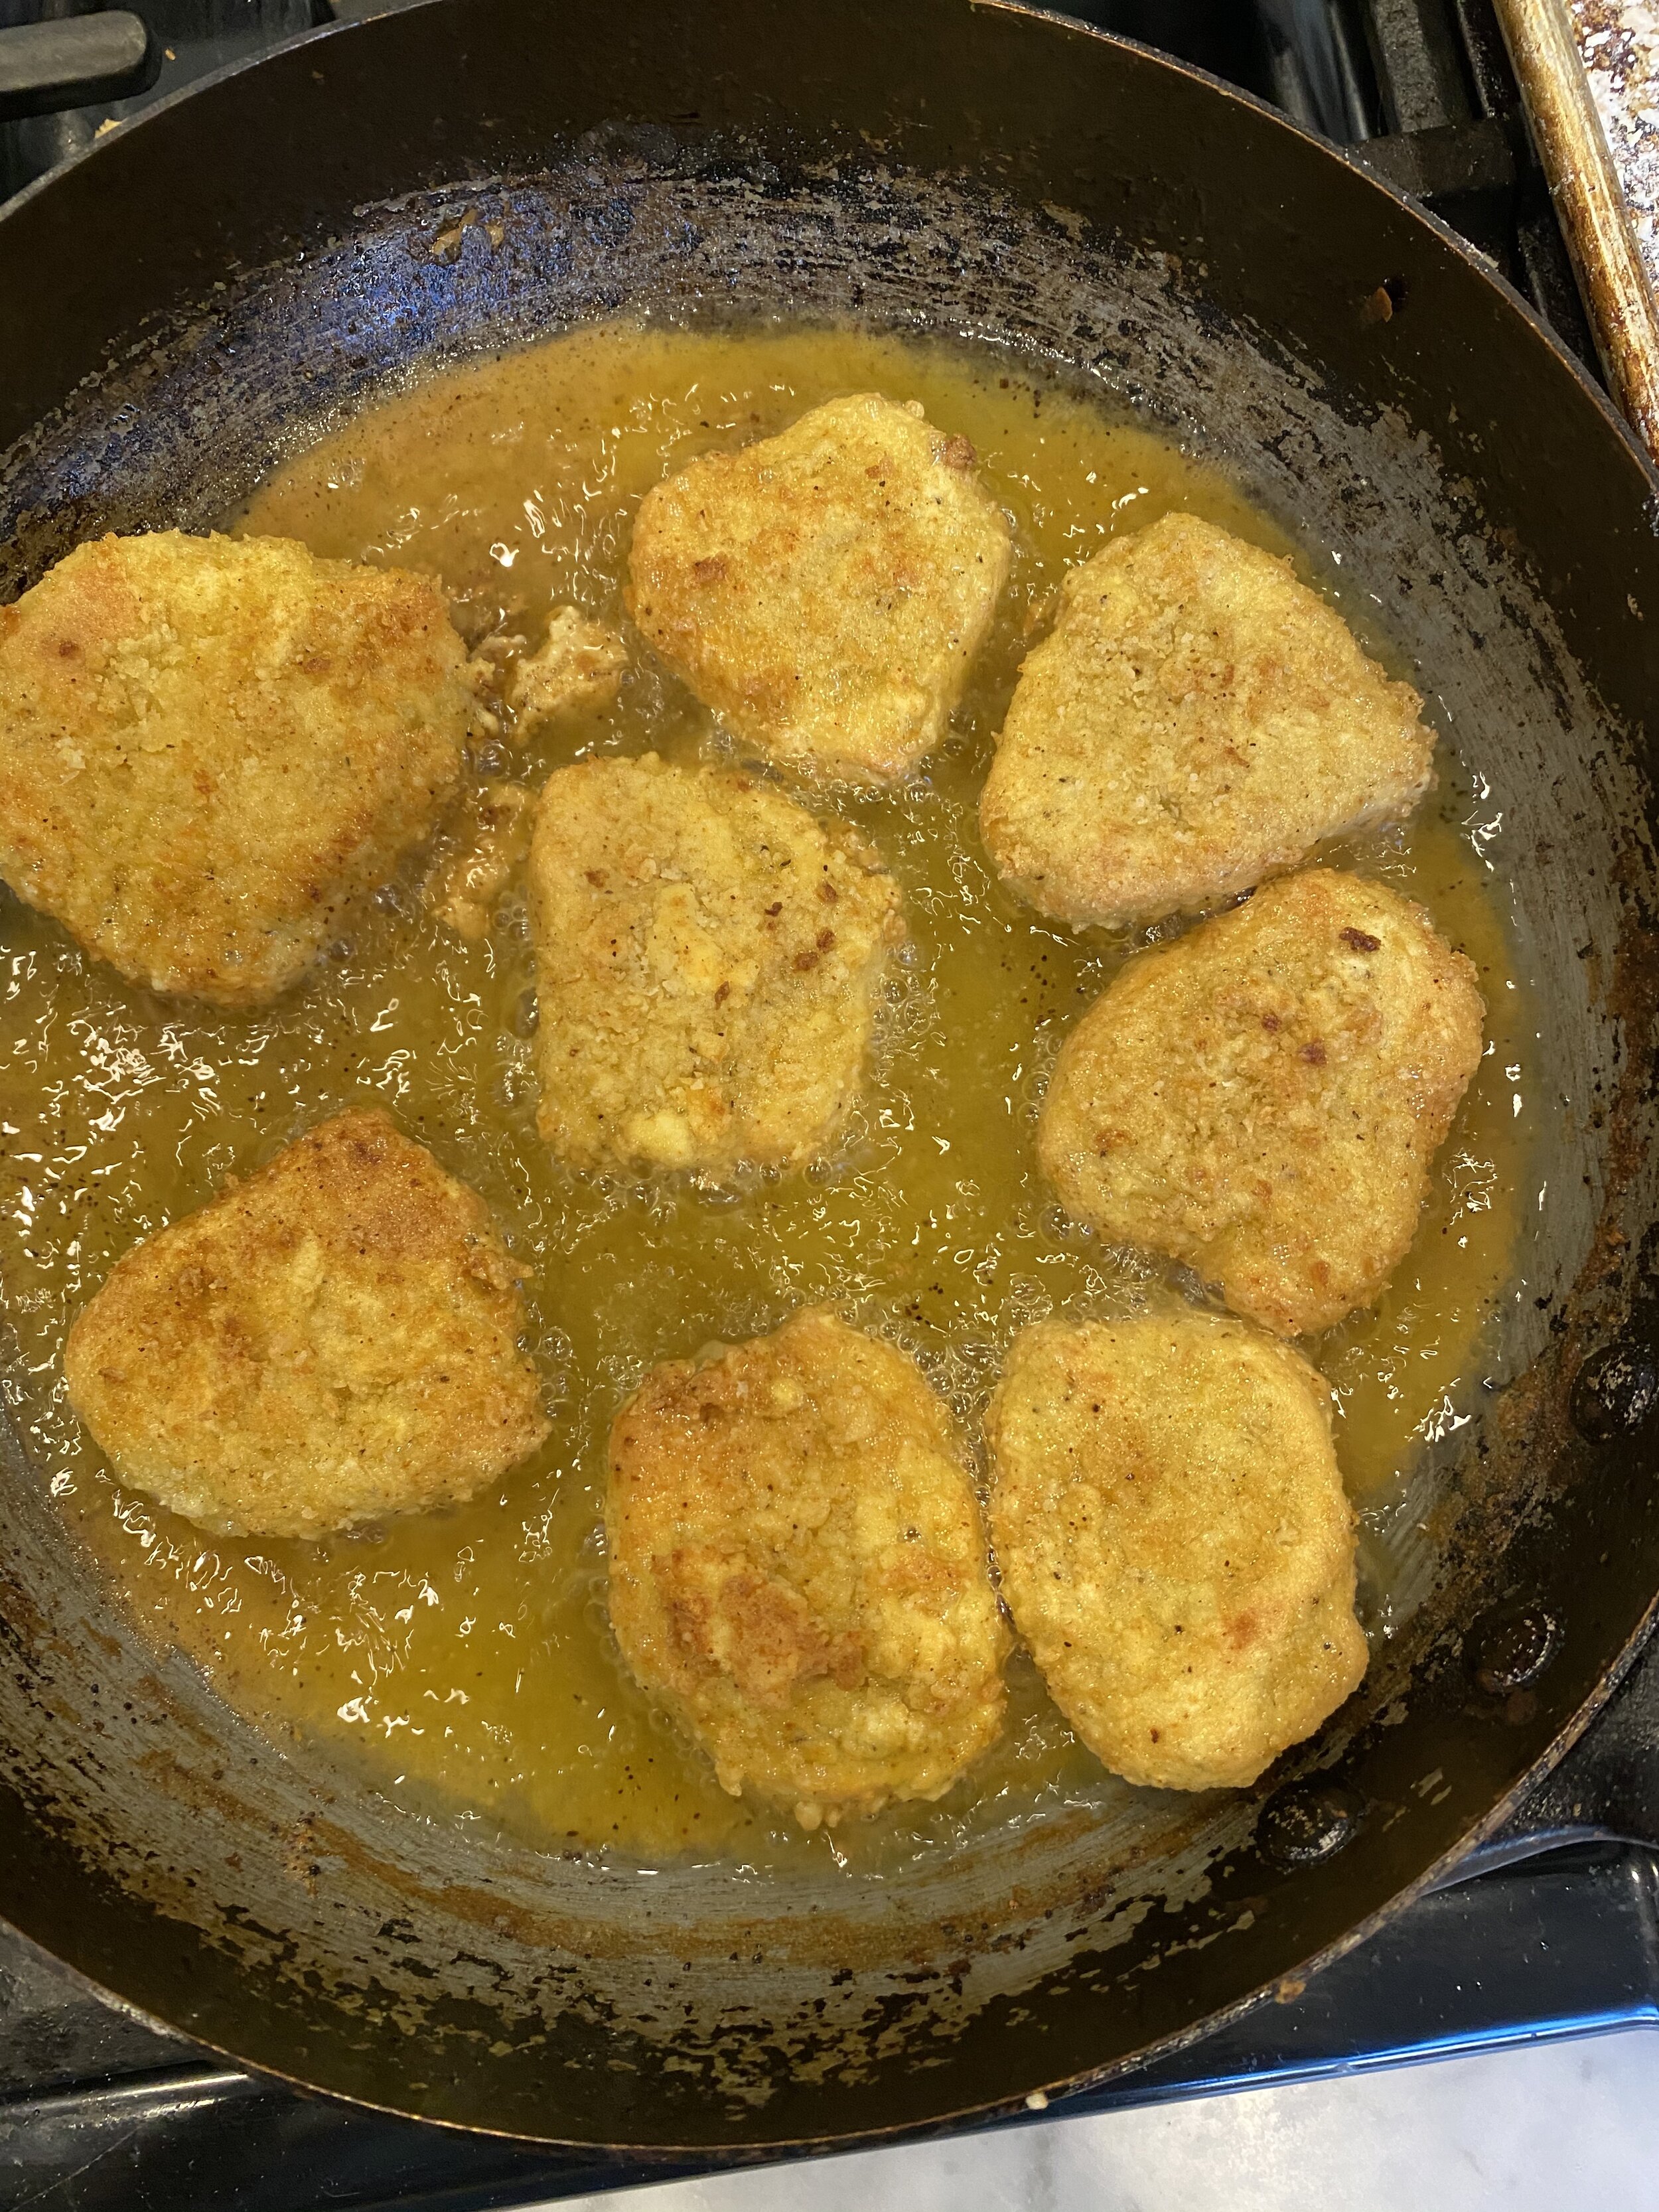
I have given instructions for oil frying and air frying. Depending on the day and my mood, determines how I cook mine. Sometimes I pan fry them oil to free up my air fryer for French fries. Other times I don’t want to deal with the mess of the oil so forgo the fries and just make the wings in my air fryer.

If you choose to air fry them you will need to at least give them a spray of oil so they don’t stick to the fryer. If they stick the coating will rip off and nobody wants a naked wing..am I right?!?!

People often as if my oil fried recipes can be made in the air fryer so I just decided to try and give instructions for both methods.

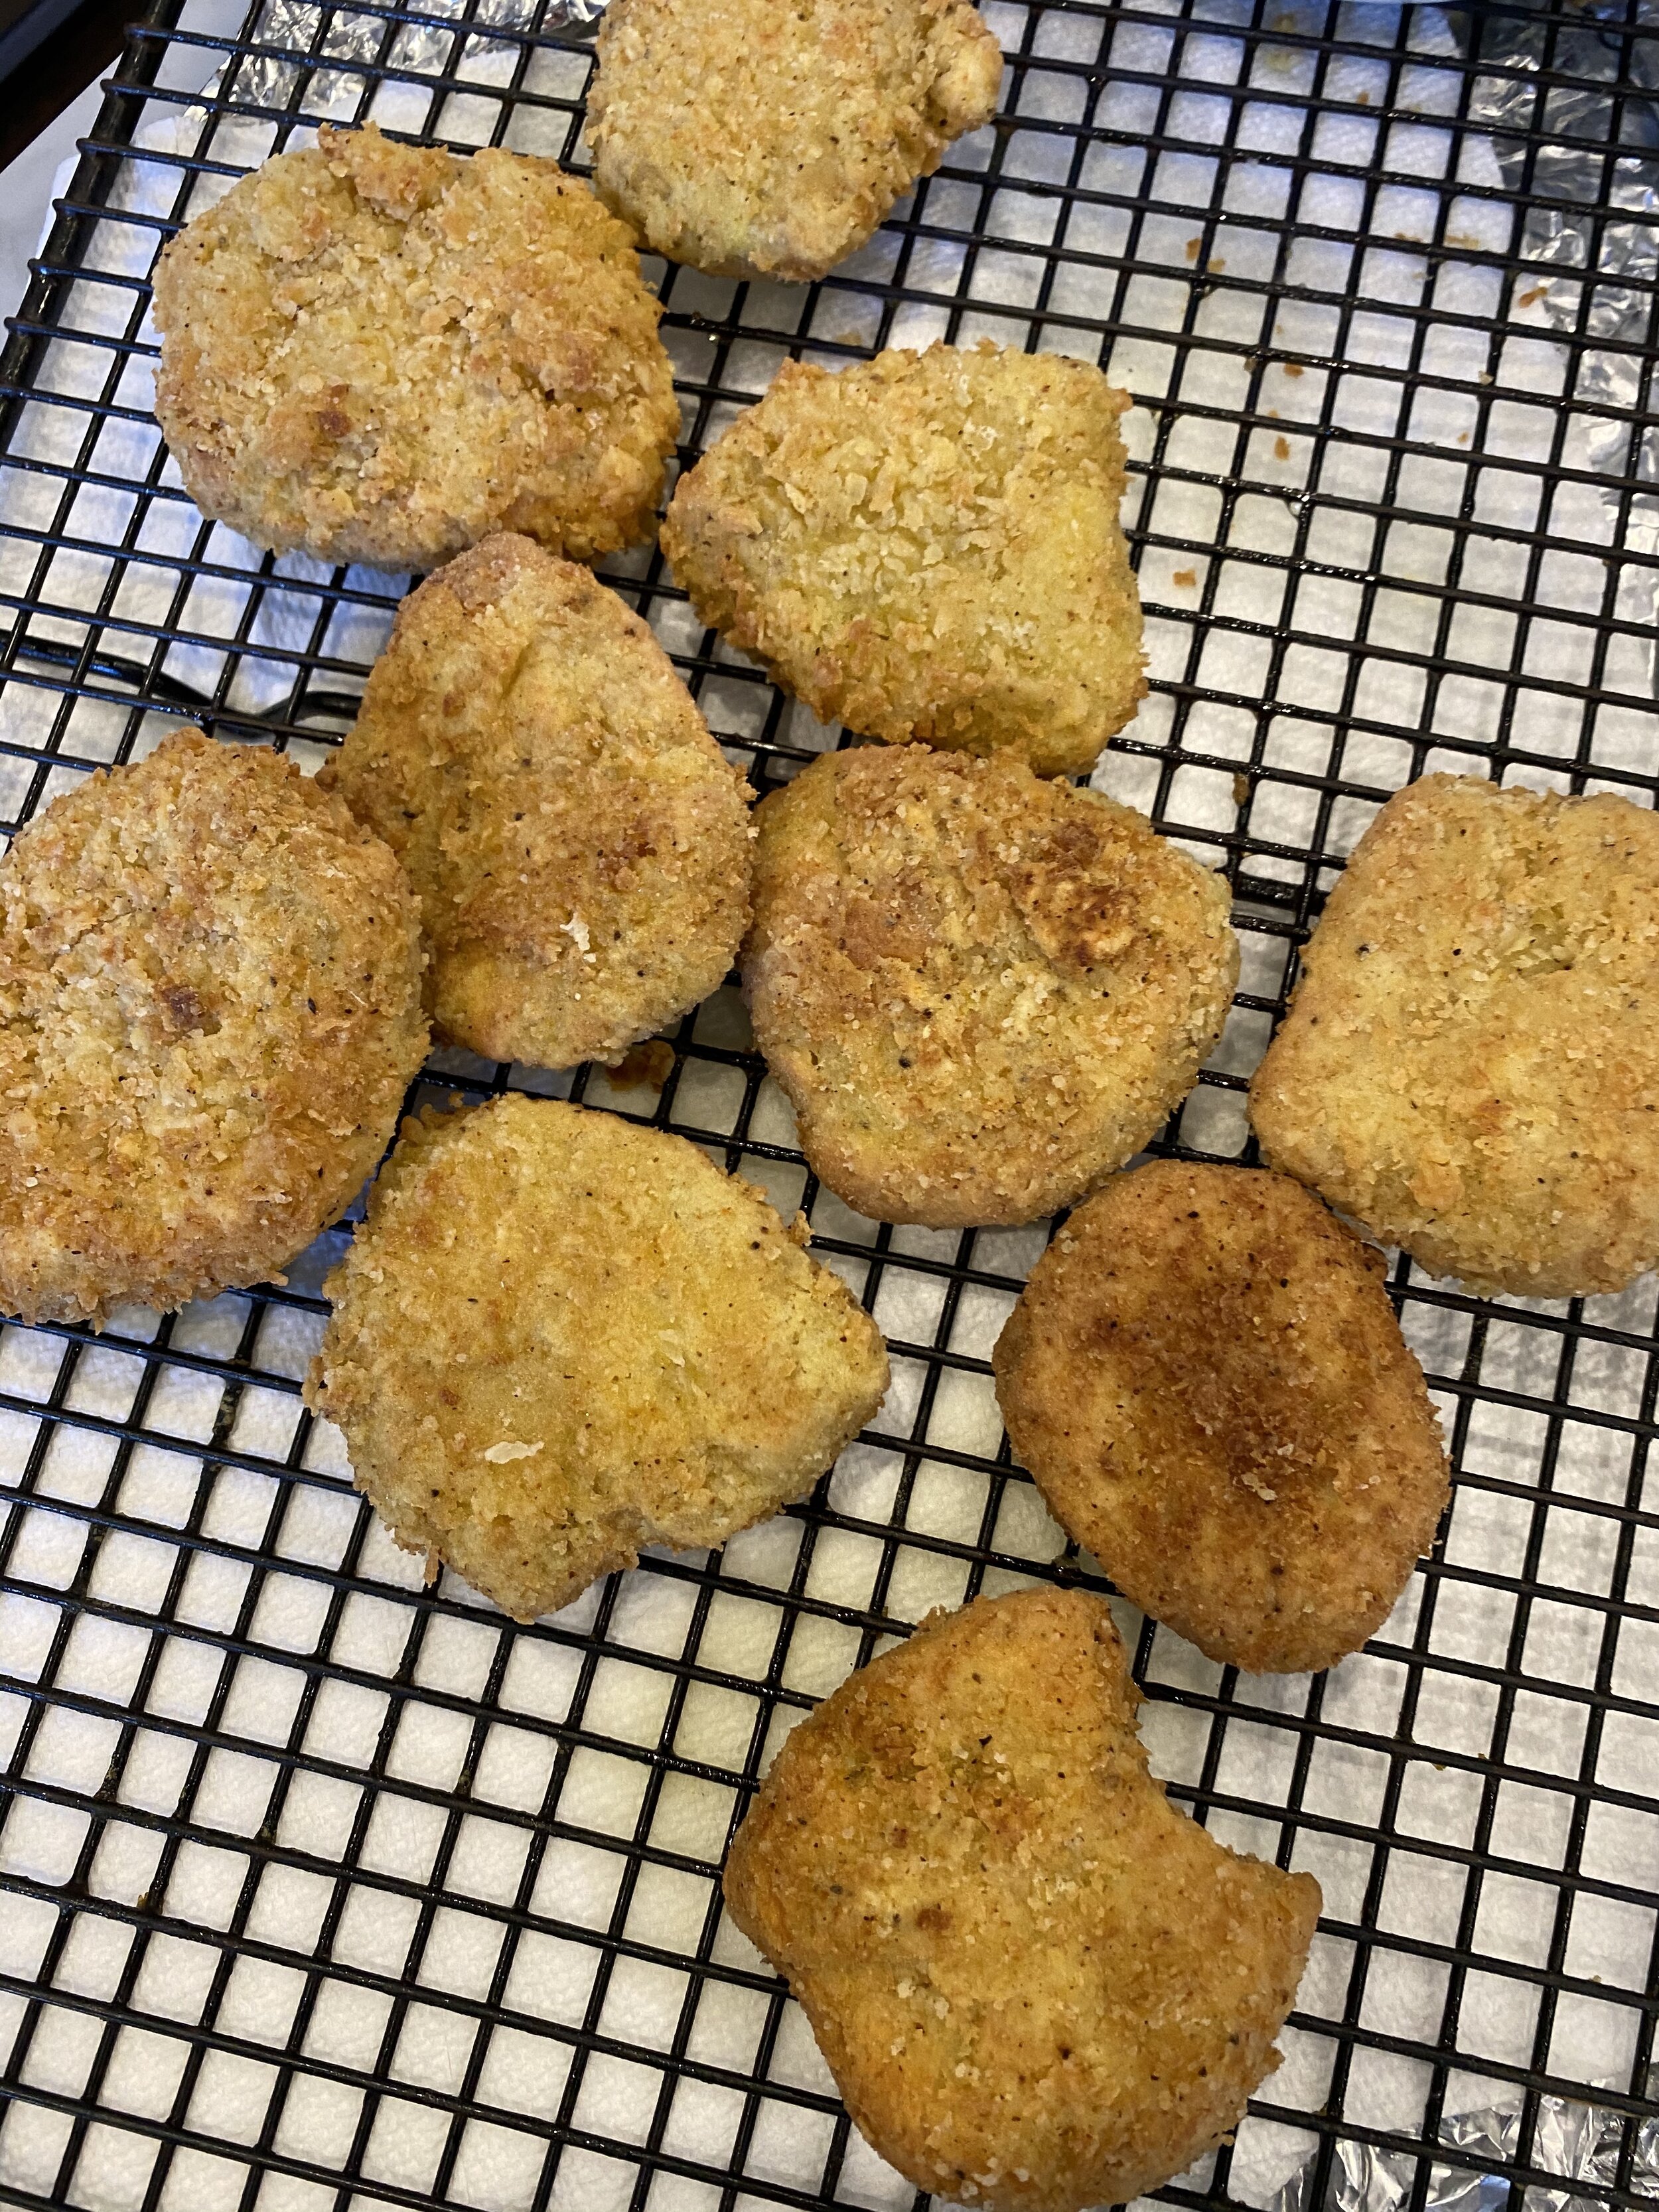
No matter how you choose to fry these vegan buffalo wings, both methods will yield a super crispy, dippable, delicious wing! And really that was all I was ever looking in a vegan boneless wing.

IMG_9644.jpg

INGREDIENTS:

  • 1 cup vital wheat gluten

  • 1 block super firm tofu (16 oz) the kind that is vacuum sealed in not much water

  • 2 -3 teaspoons No Chicken Better Than Bouillon, or any vegan chicken flavored bouillon powder or seasoning

  • 1 teaspoon garlic powder

  • 1-2 teaspoons onion powder

  • 1 teaspoon all purpose greek seasoning or any all purpose seasoning you like

  • 1/2 teaspoon smoked paprika

  • 2 teaspoons liquid smoke

  • 2 tablespoons tapioca or corn starch

  • 1/4 cup nutritional yeast

  • 2 tablespoon neural flavored oil

  • 1/2 to 3/4 cups water (you might not need much water at all. Add a little at a time just until the dough comes together and is smooth)

  • 1 teaspoons salt

COATING:

  • 1 cup all purpose flour

  • 1 cup panko bread crumbs

  • 1/2 cup tapioca or corn starch

  • 1 teaspoon garlic powder

  • 1 teaspoon onion powder

  • 1 teaspoon smoked paprika

  • 1 teaspoon salt

  • 1/2 cup vegan yogurt or sour cream

  • 1 cup unsweetened plant milk

  • 1 and 1/2 cups vegan buffalo sauce (we used Franks) plus 2 teaspoons vegan butter

  • Oil if you are choosing the pan fry method

INSTRUCTIONS:

Preheat oven to 350 degrees Fahrenheit

  1. Break up the tofu and place it into a food processor with the regular metal blade. Run the processor for around a minute until the tofu is broken down.

  2. Add all of the remaining ingredients and let the food processor run for a couple of minutes. You want the mixture to form a dough. Letting the processor run will help knead the dough. We want this seitan to be firm so we need it to knead for a bit. If you dough seems a bit too dry, you can add another few tablespoons of water, just don’t add too much more! I start at 1/2 cup and work from there.

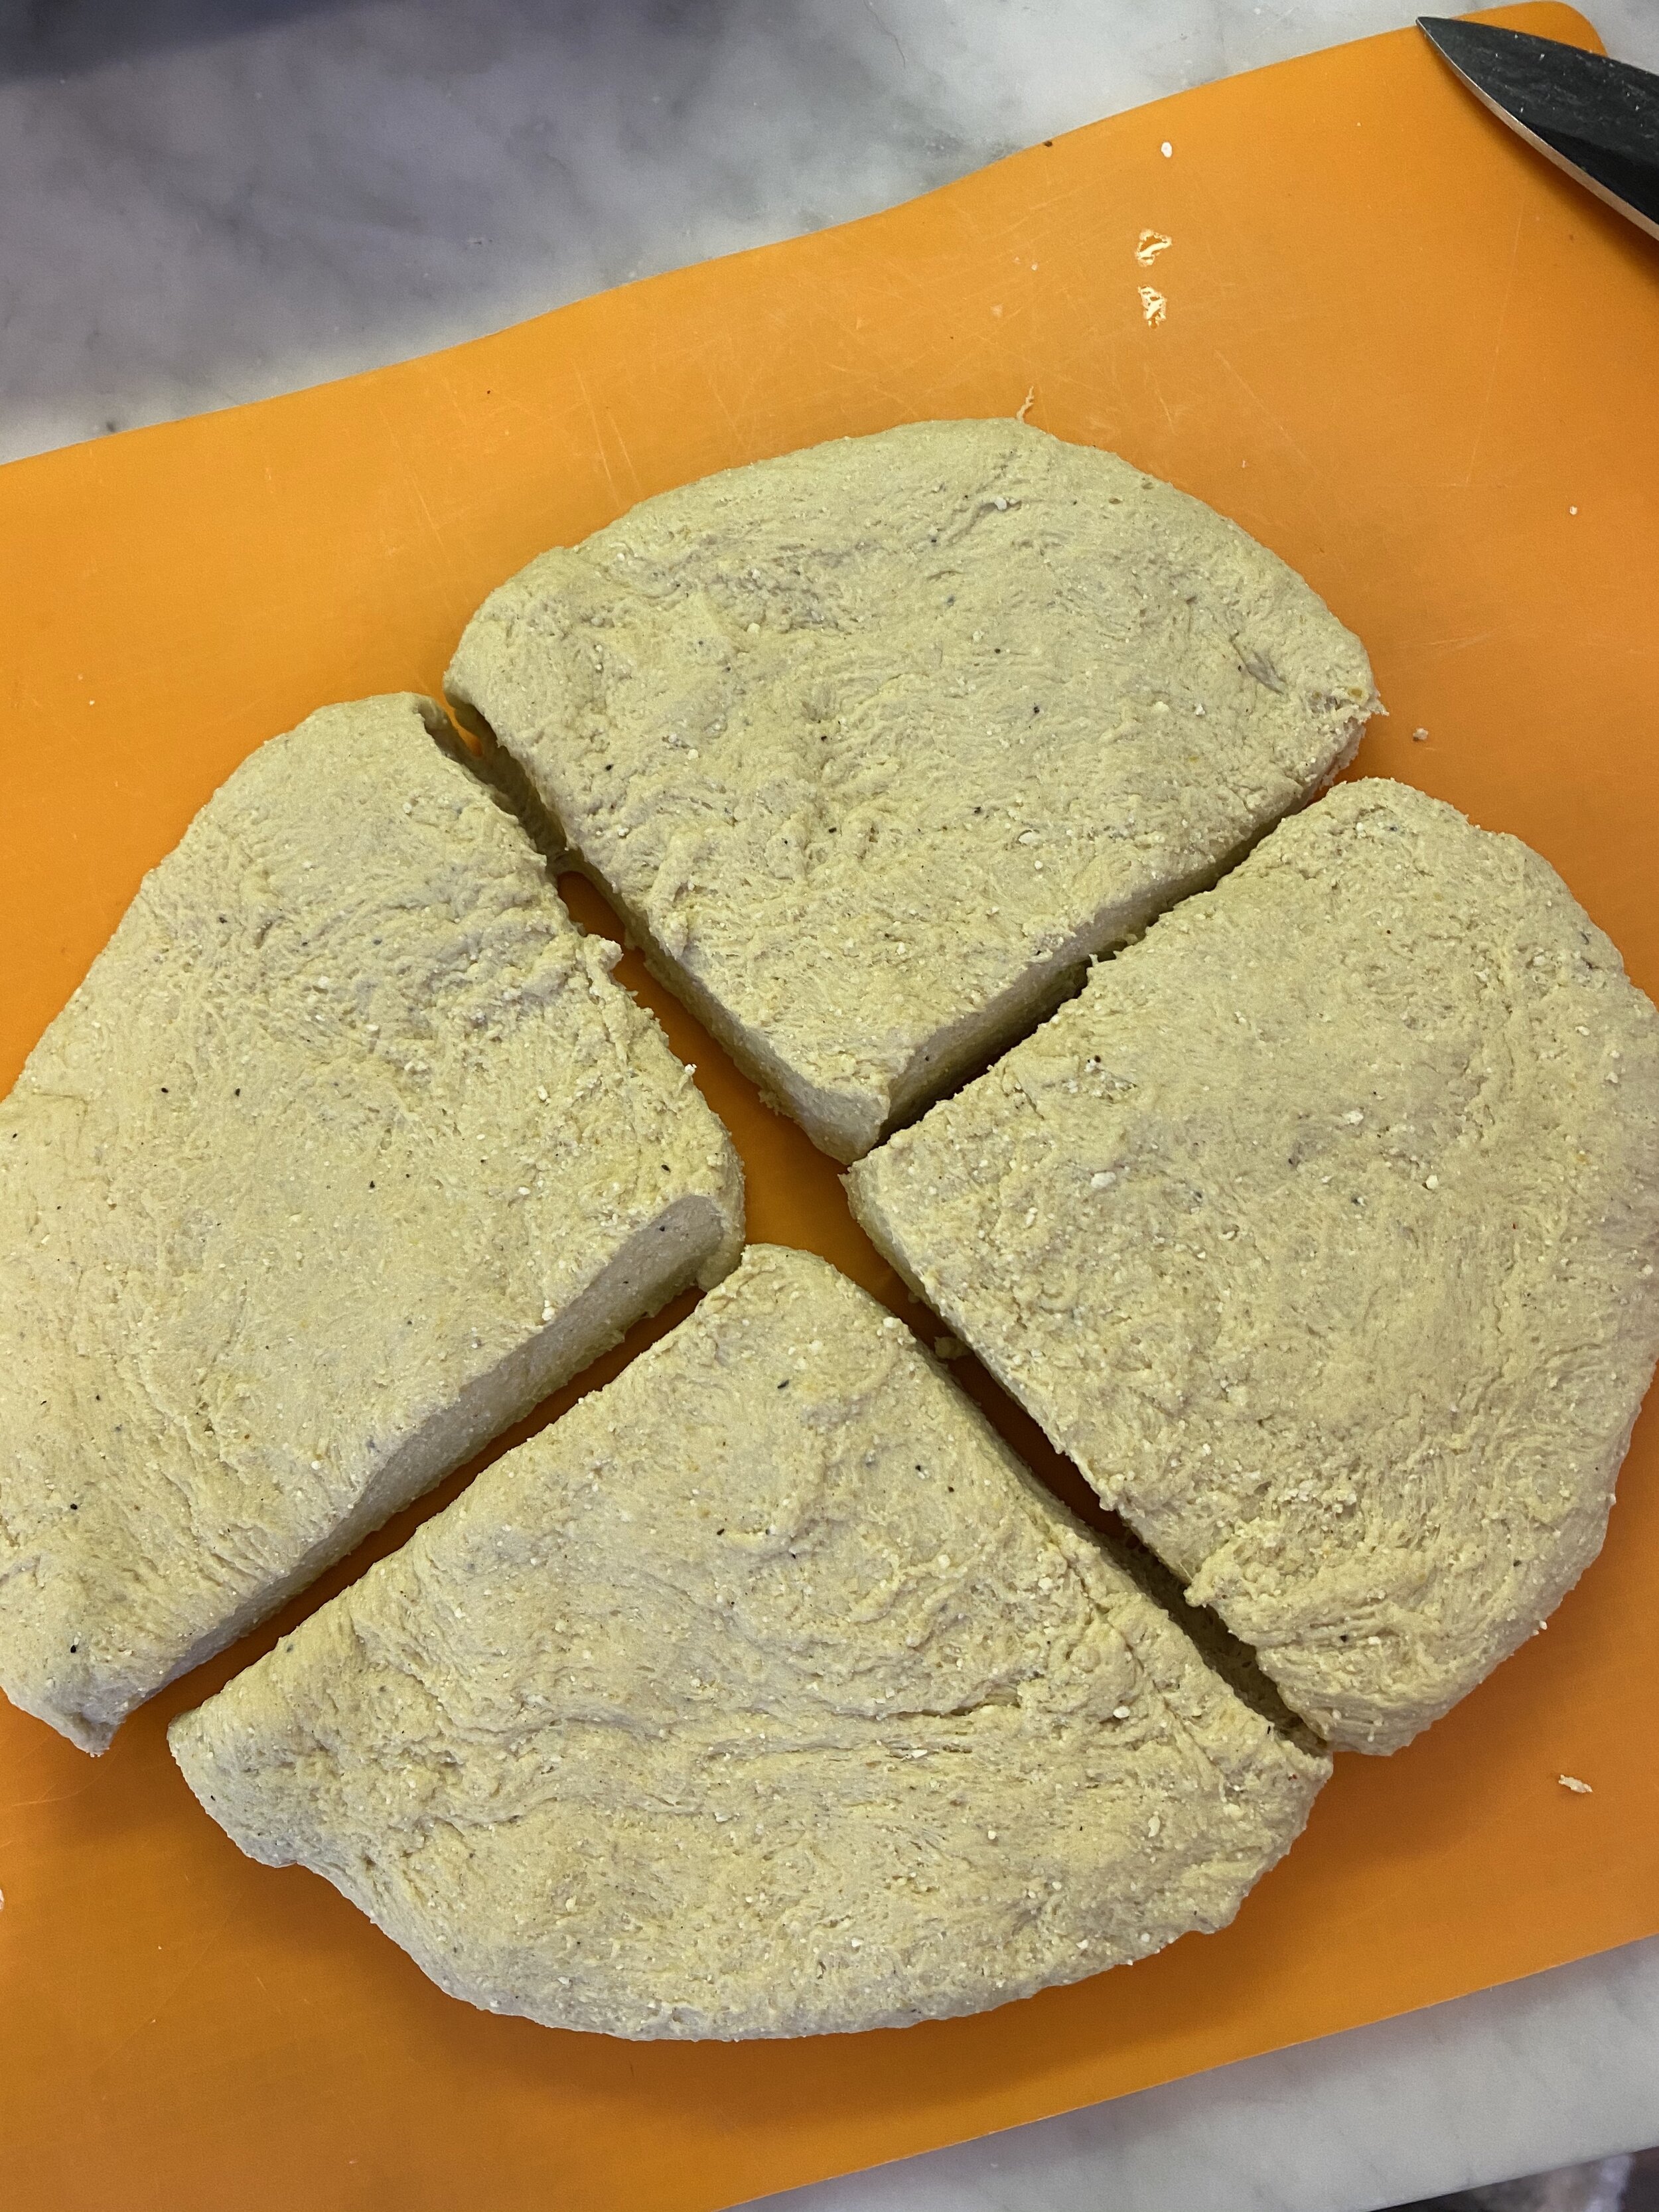
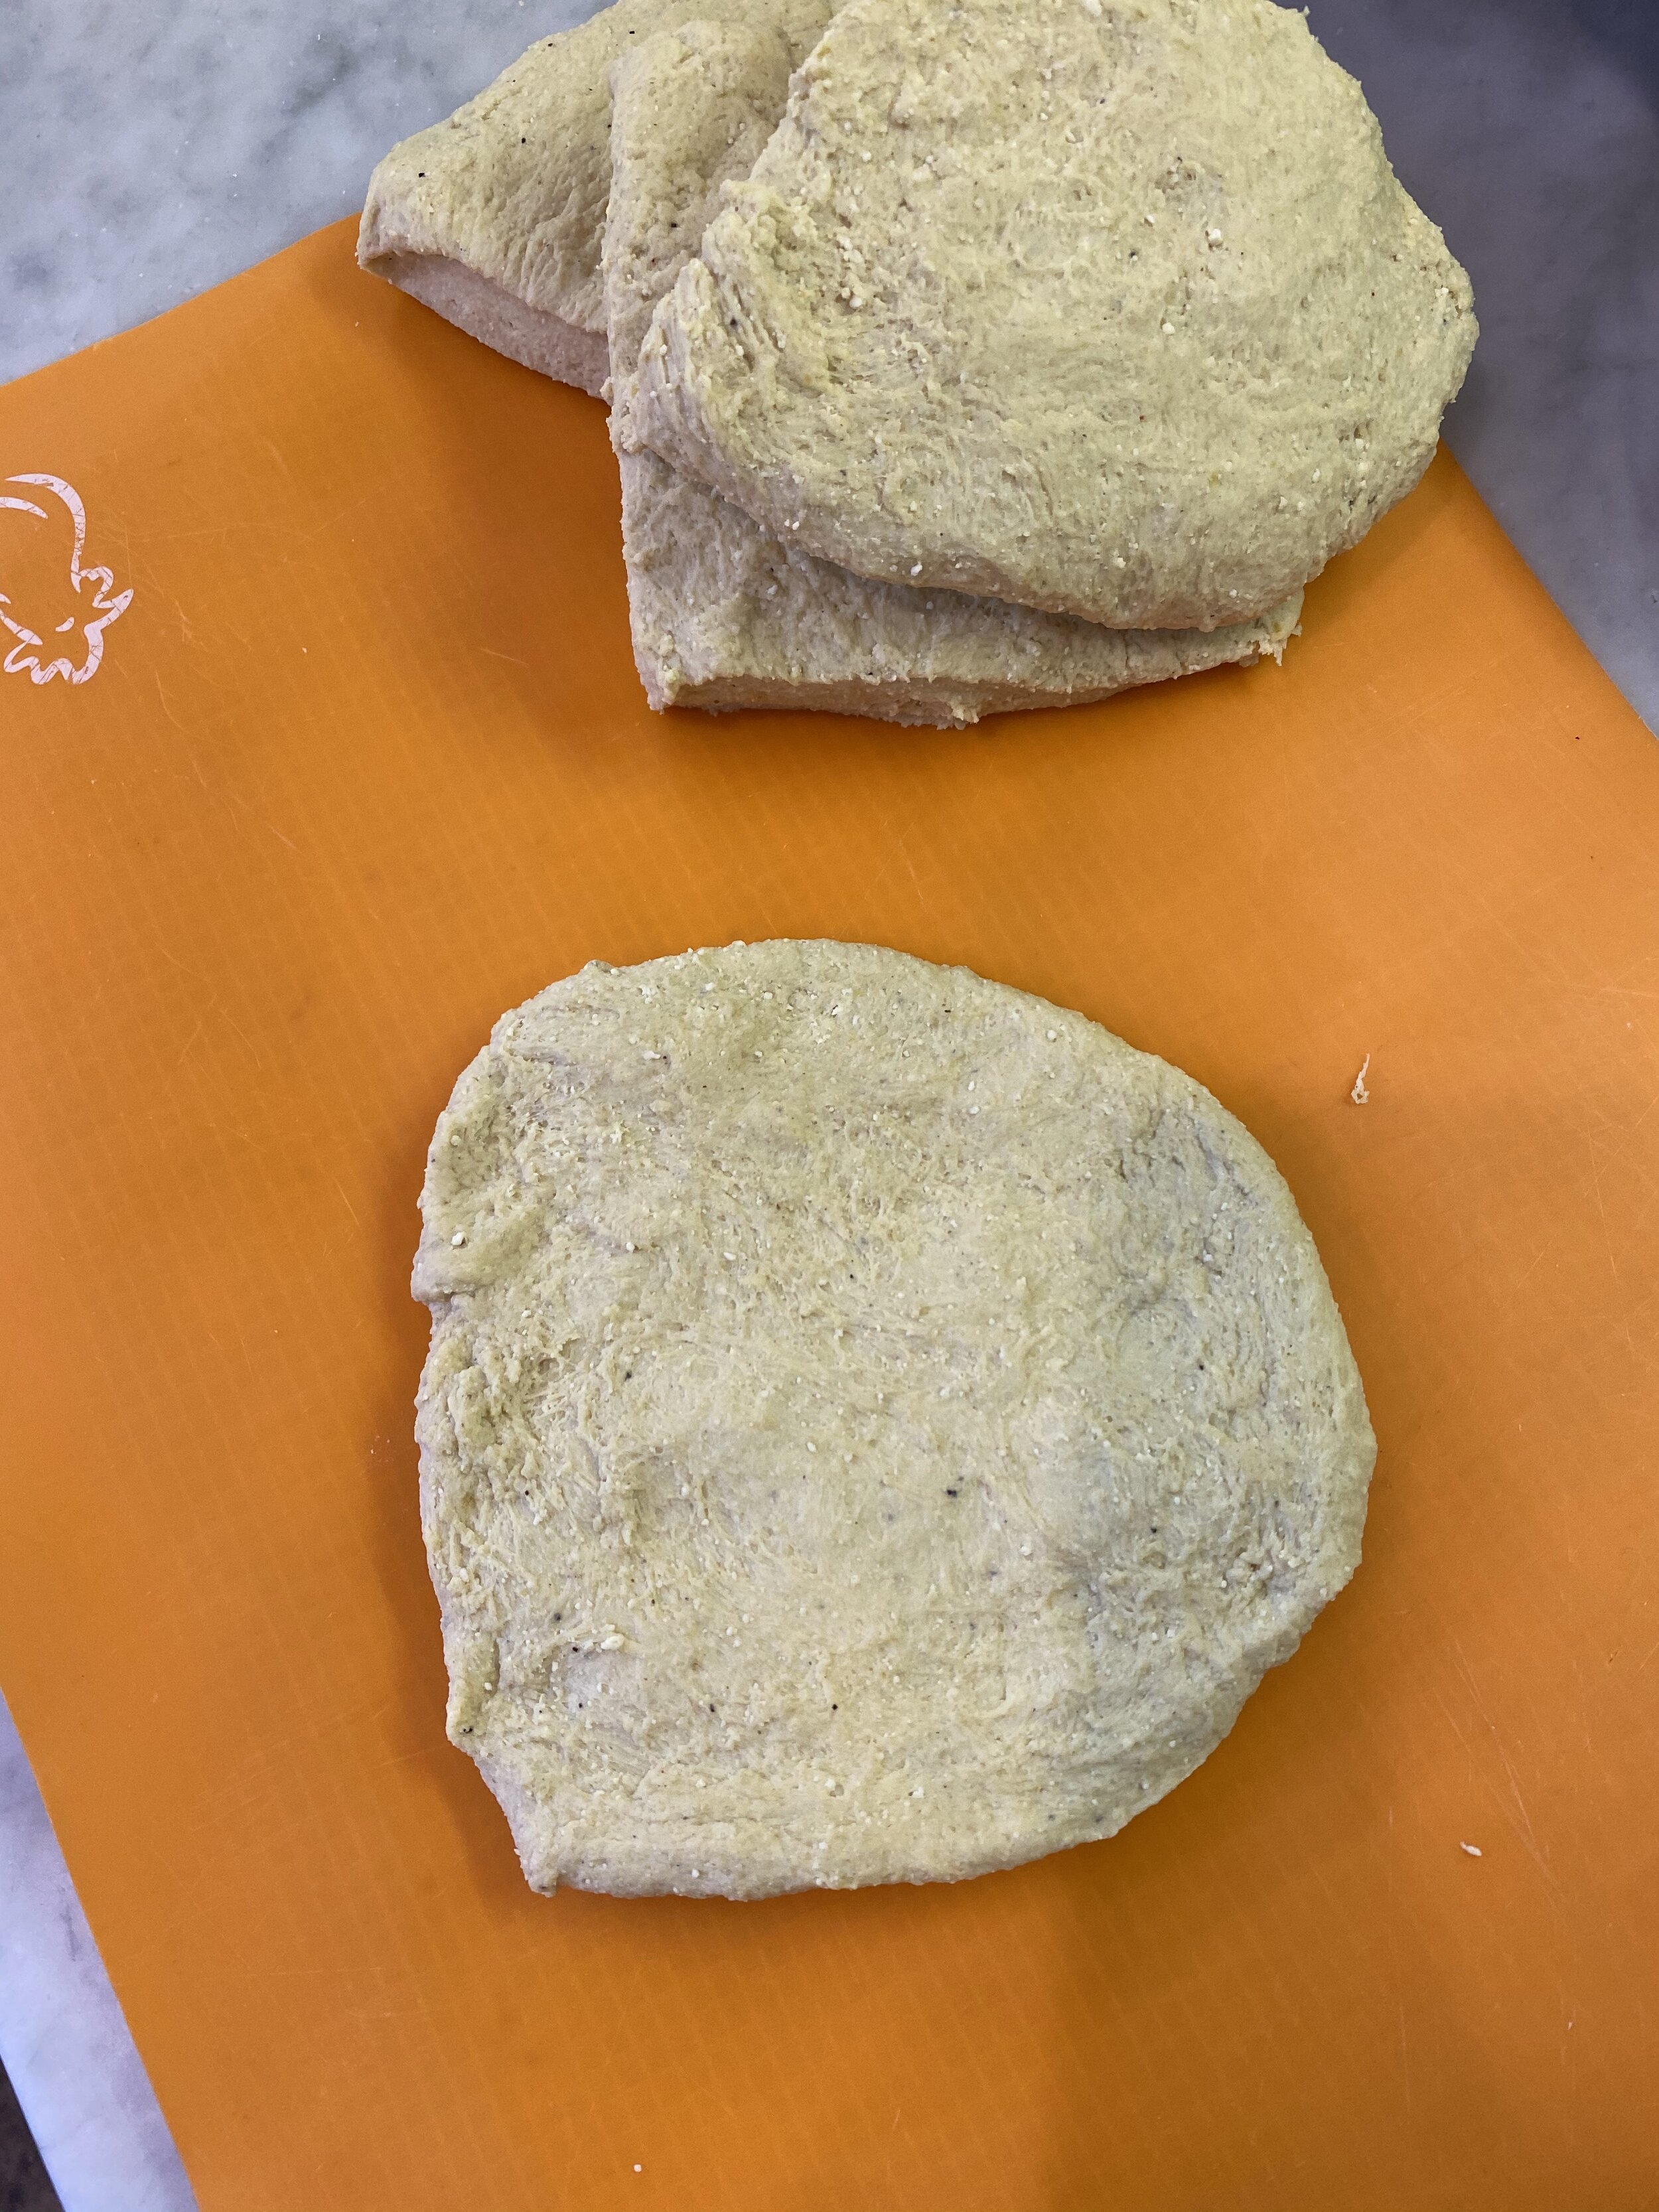
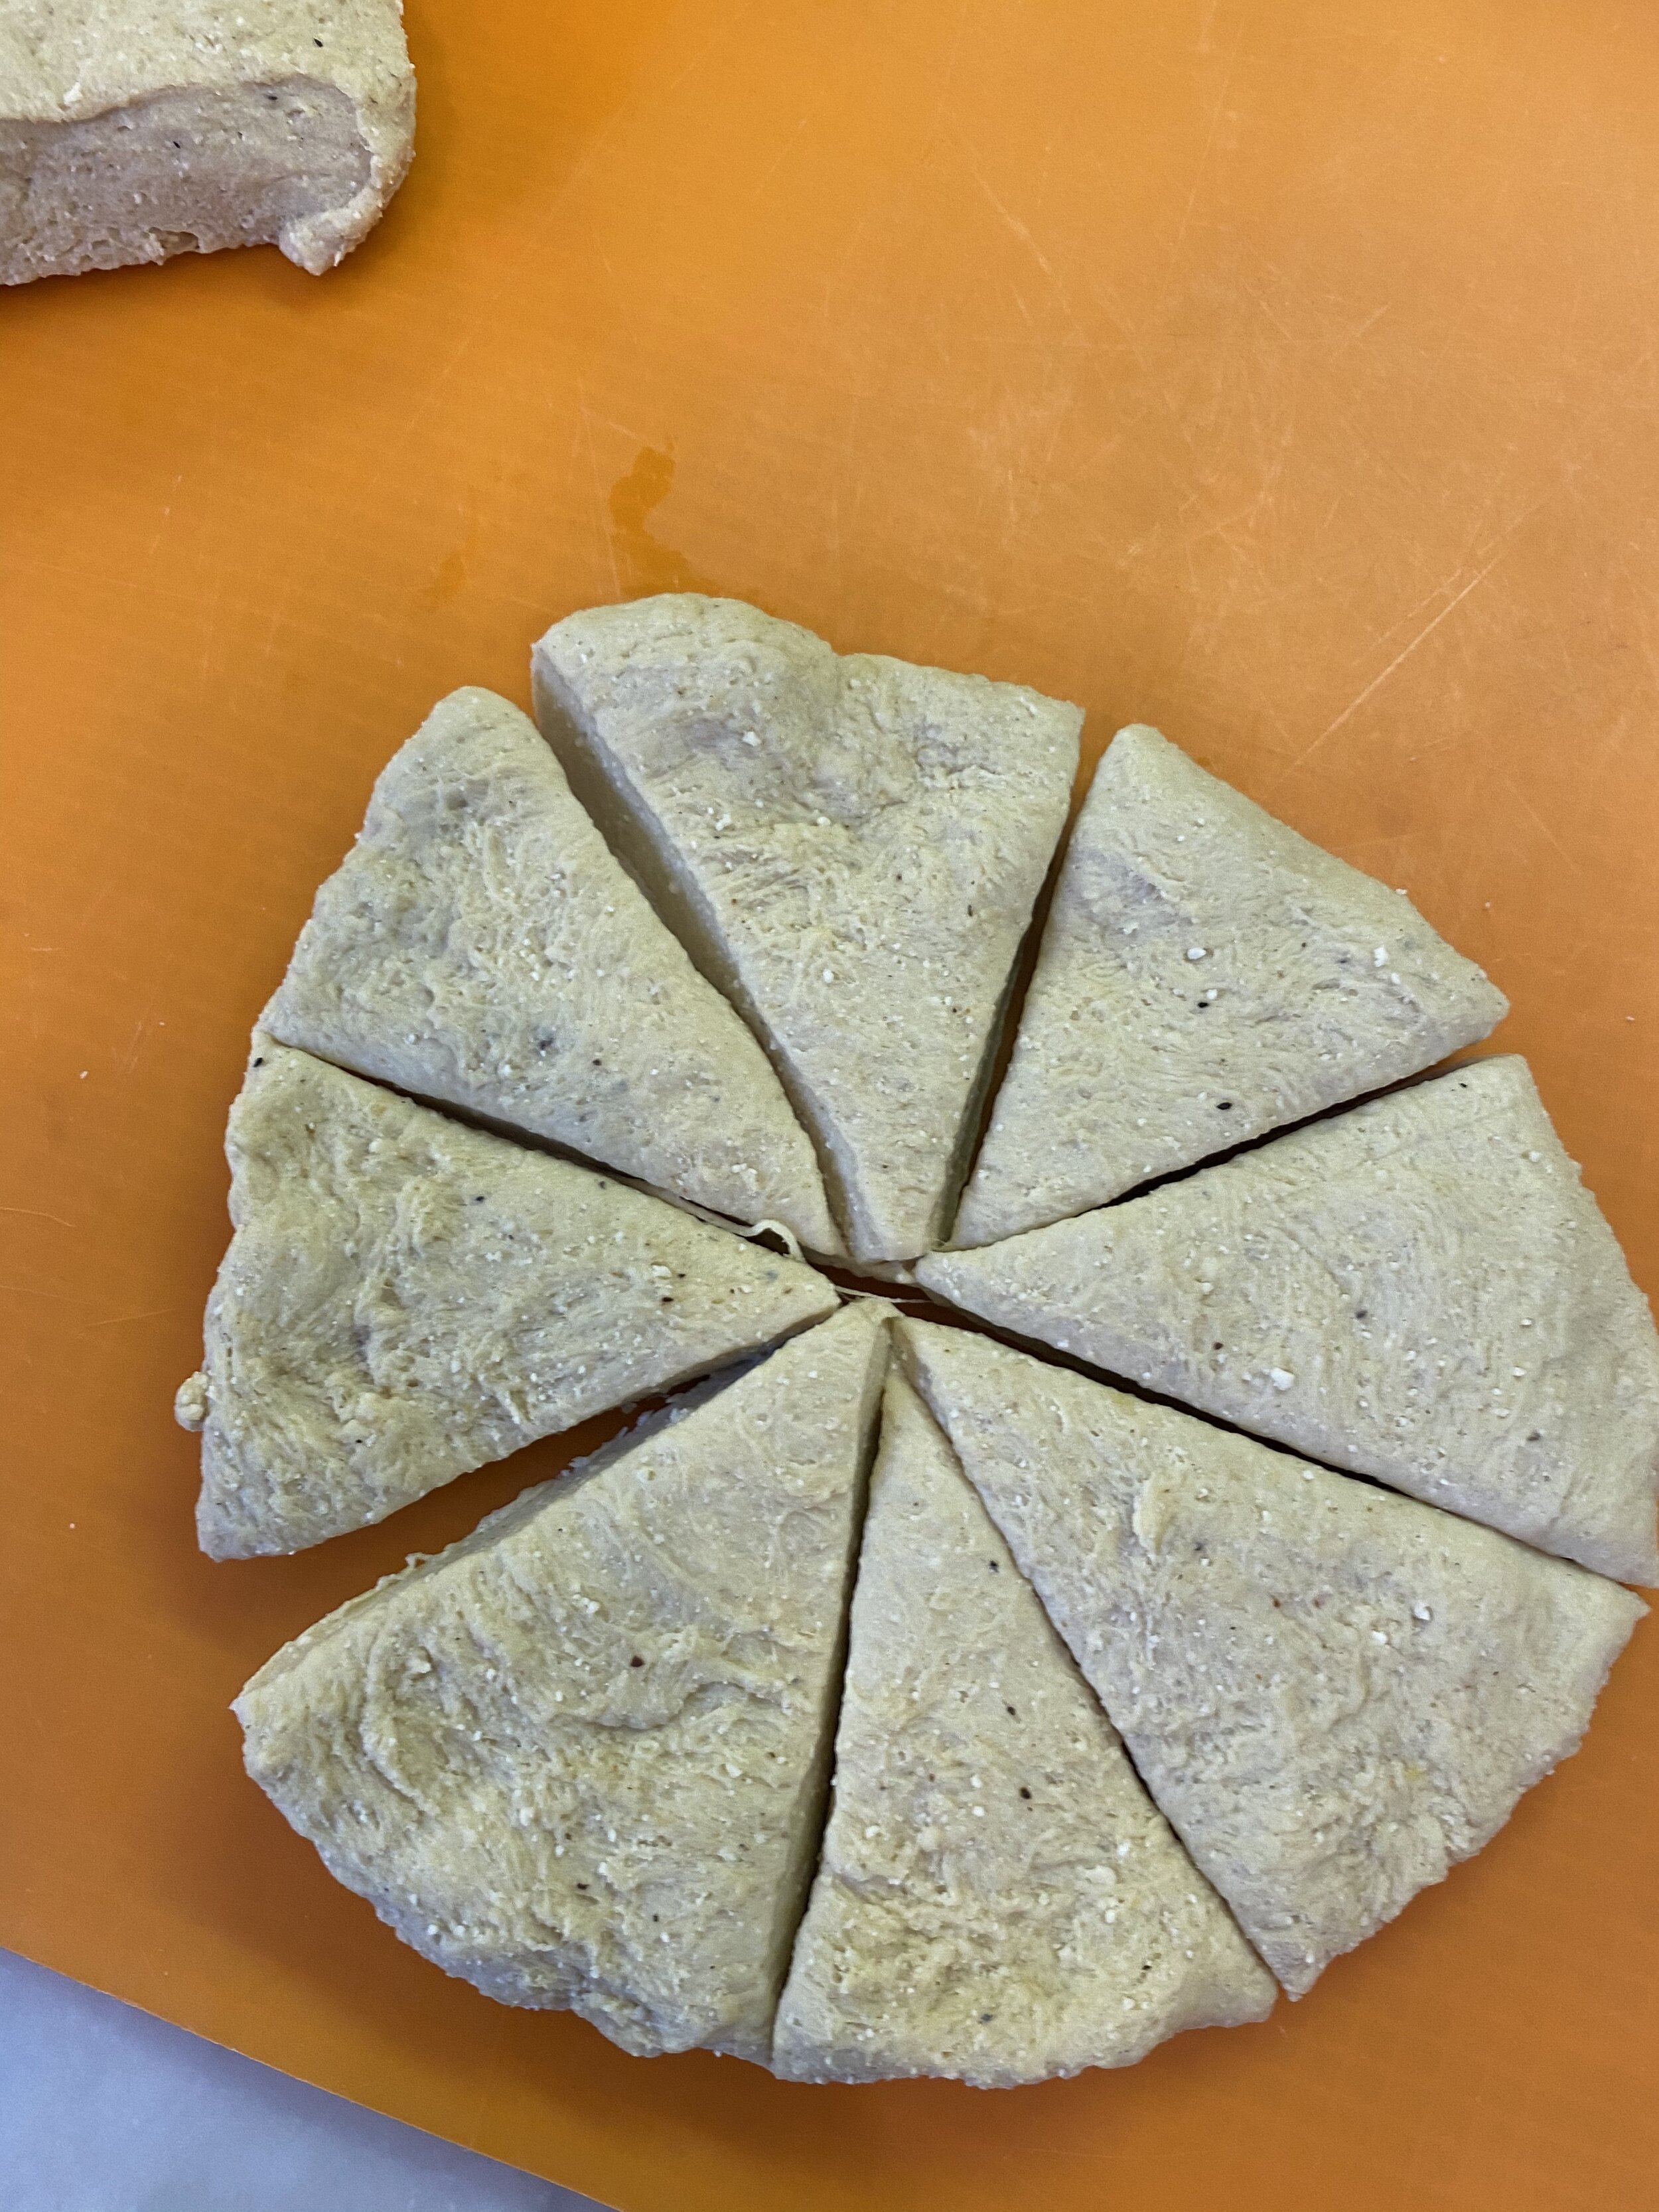
  3. Once dough has come together, transfer to a clean counter top or cutting board. Press the dough out to a large 1/4 inch thick circle. Divide the circle into 4 pieces. Divide each of the 4 pieces into 8 pieces. You will get 32 nice sized vegan wings from the dough.

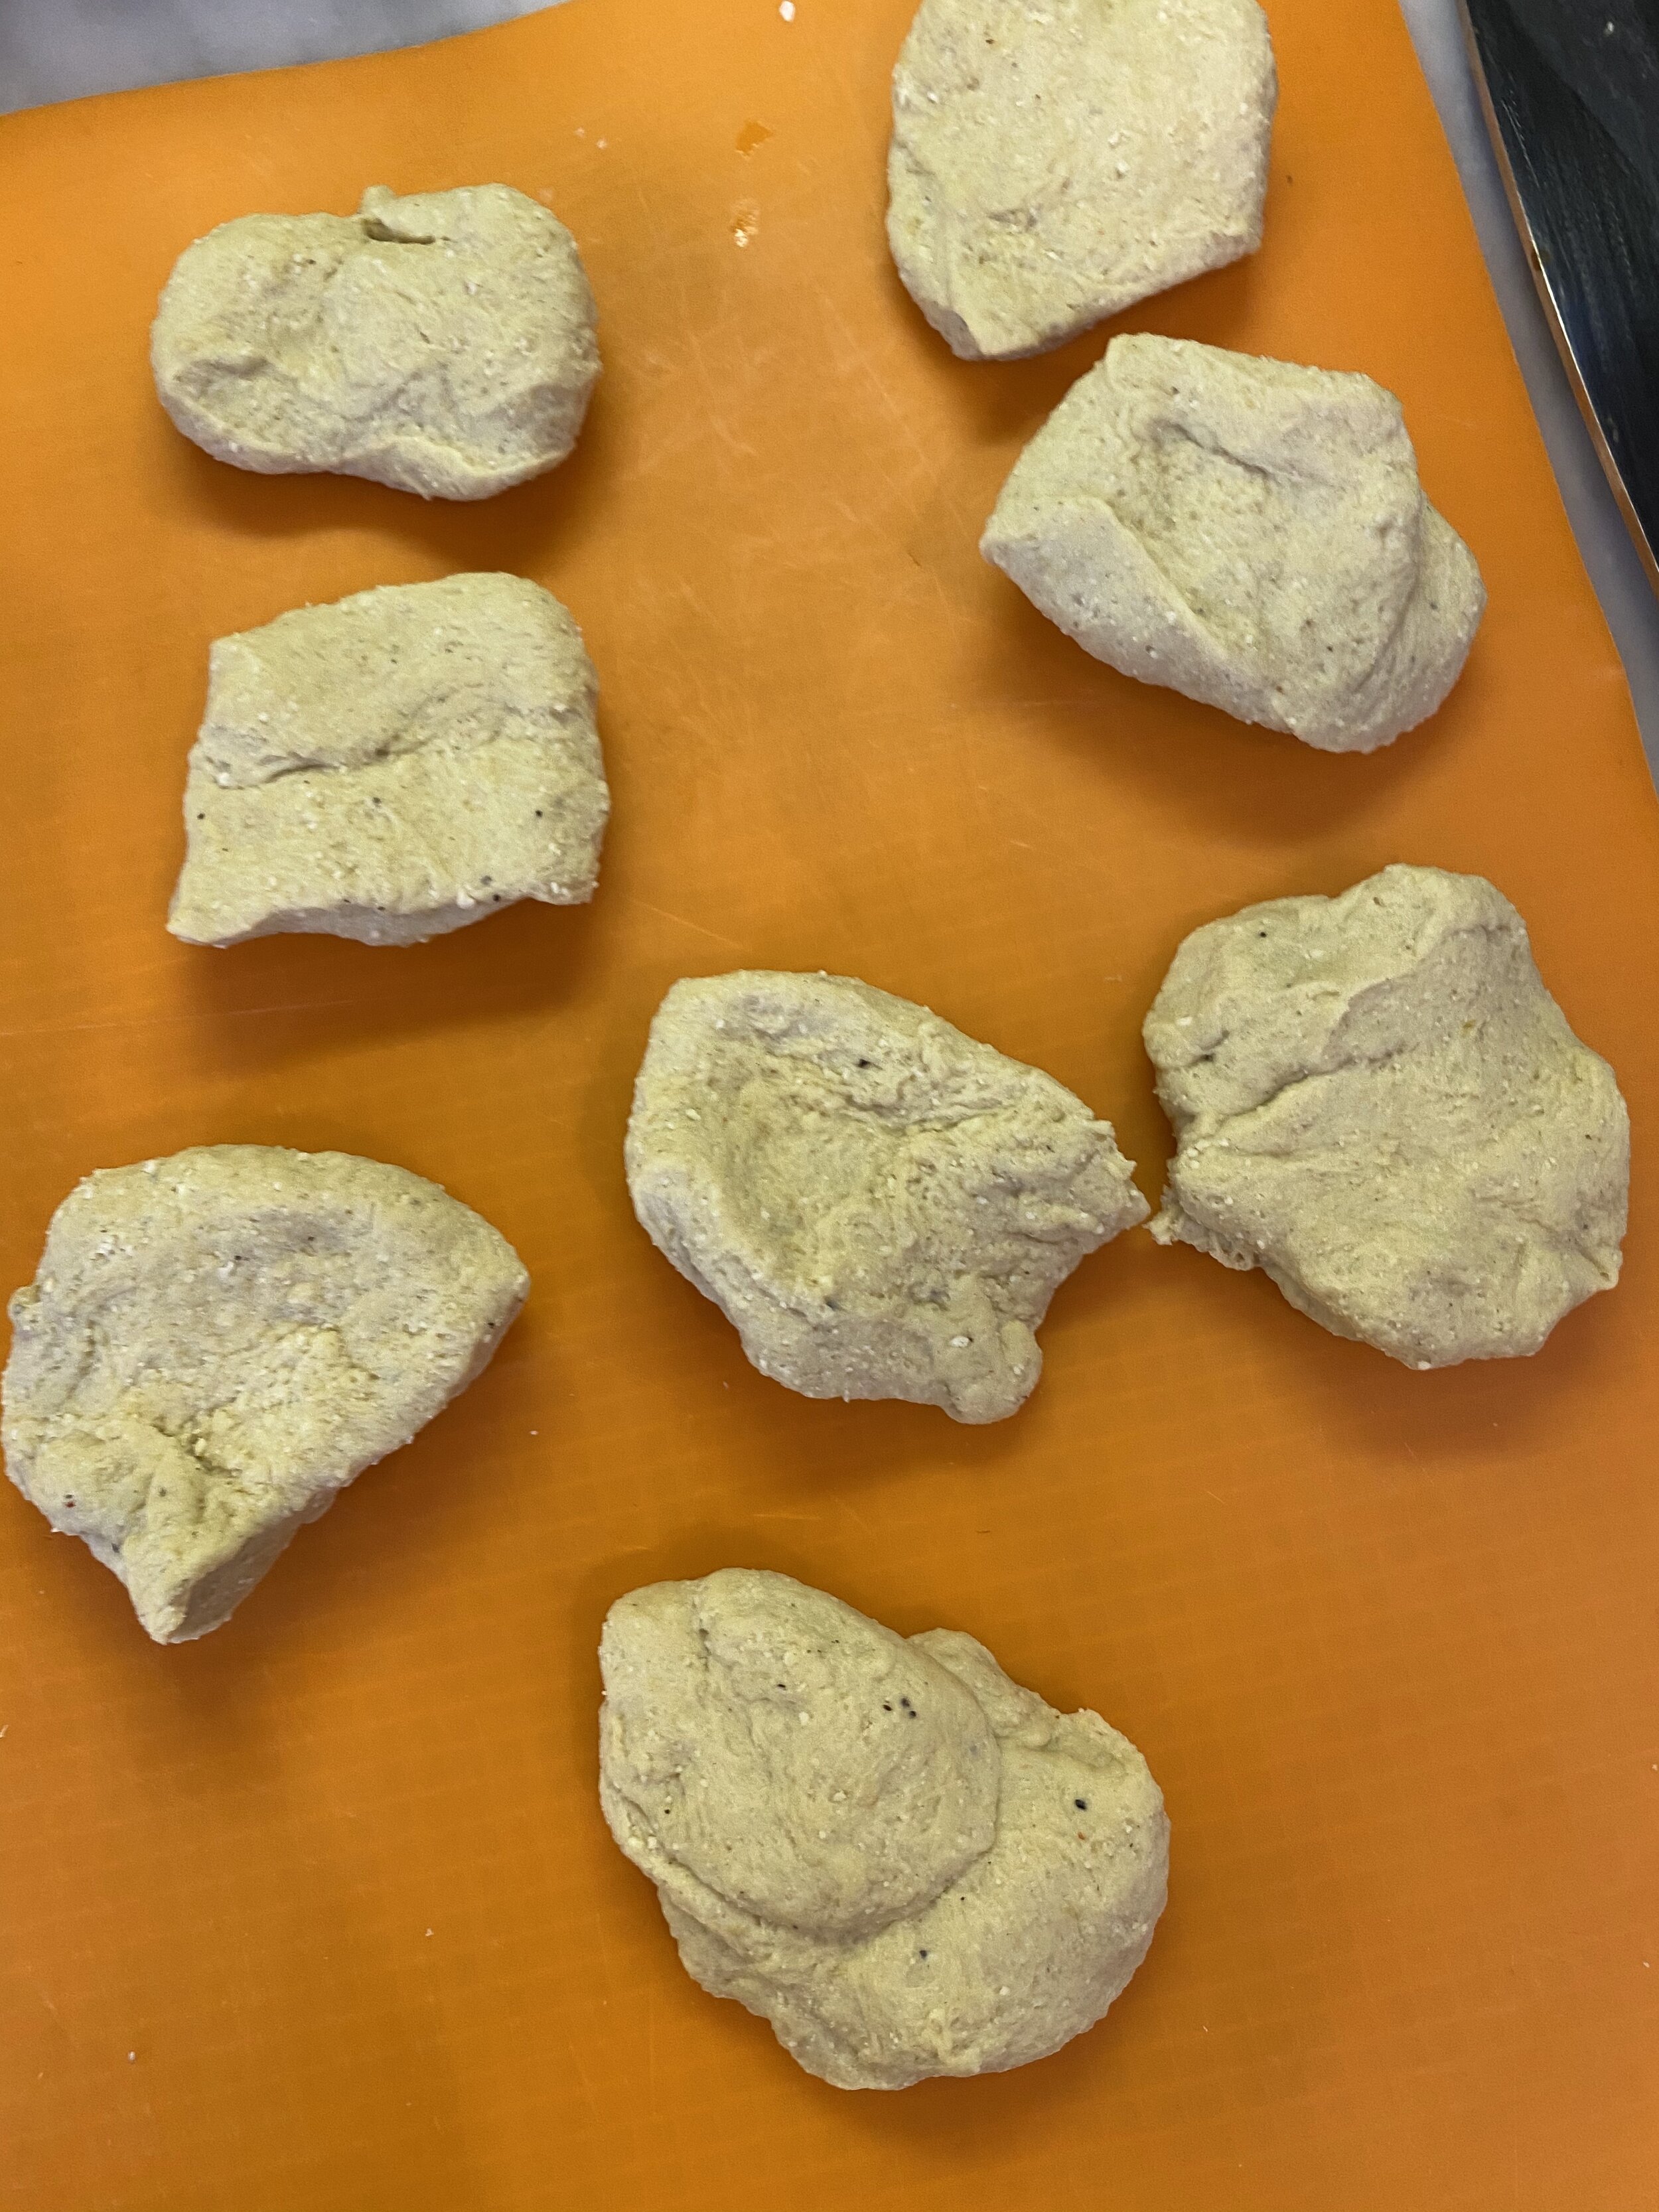
  4. Shape the seitan pieces into a nugget shape. Just any ol blob like nugget shape will do. Don’t think too much about it!

  5. Line 2 baking sheets with parchment paper. Spread the vegan wings out on the 2 pans and give them a spray or brush with some oil. Tightly cover each pan with foil. You need to make sure the pan is all sealed up so the seitan can steam inside will baking.

  6. Bake the vegan wings for 25 minuets. Remove from oven and allow to cool some at room temperature before transferring to the fridge to rest for AT LEAST 3 HOURS. Seitan needs to rest for the texture to improve. Trust me, let those wings rest y’all!

COOKING INSTRUCTIONS:

  1. To coat wings, whisk the vegan sour cream or yogurt with 1 cup of plant milk in a medium sized bowl.

  2. In another medium sized bowl, whisk the flour, starch, panko, and seasoning.

  3. Begin by dipping the wings one at a time in the wet mixture then pressing them into the flour mixture making sure all sides are well coated.

  4. Once all of the vegan wings are coated you can pan fry them in oil or air fry them.

  5. Air frying instructions: To air fry, place the wings in the air fryer basket. Depending on the size of your fryer, you will need to work in batches. Place a single layer of wings on the tray and give them a spray with oil so the coating doesn’t stick. Fry at 375 for 5-10 minutes (this just depends on how big your fryer is, and how many wings you crammed in there). I always open up my fryer a few times and give it a shake to make sure nothing is sticking. They are done once the coating is crispy and begging to brown.

  6. Pan frying instructions: Add a couple of inches of a neutral flavored oil that is good for frying to a medium sized high sided skillet. I use a cast iron. Heat the oil over medium heat until it is good and hot. You can tell if the oil is ready by poking a chop stick or wooden skewer into the oil and touching the bottom of the pan. If little bubbles form around the chop stick the oil is ready. Line a baking sheet with paper towels and place a wire cooling rack on top. Fry the wings in batches for several minutes on each side until crispy and browned. Place the nuggets on the wire cooling rack to allow the excess oil to drip off.

  7. Fill a microwave safe bowl the wing sauce and butter. Microwave for 2 minutes or until the butter has melted and the sauce is warm.

  8. Toss the wings in the sauce and serve with vegan ranch or blue cheese dressing and celery.

If you like this recipe, then try these:

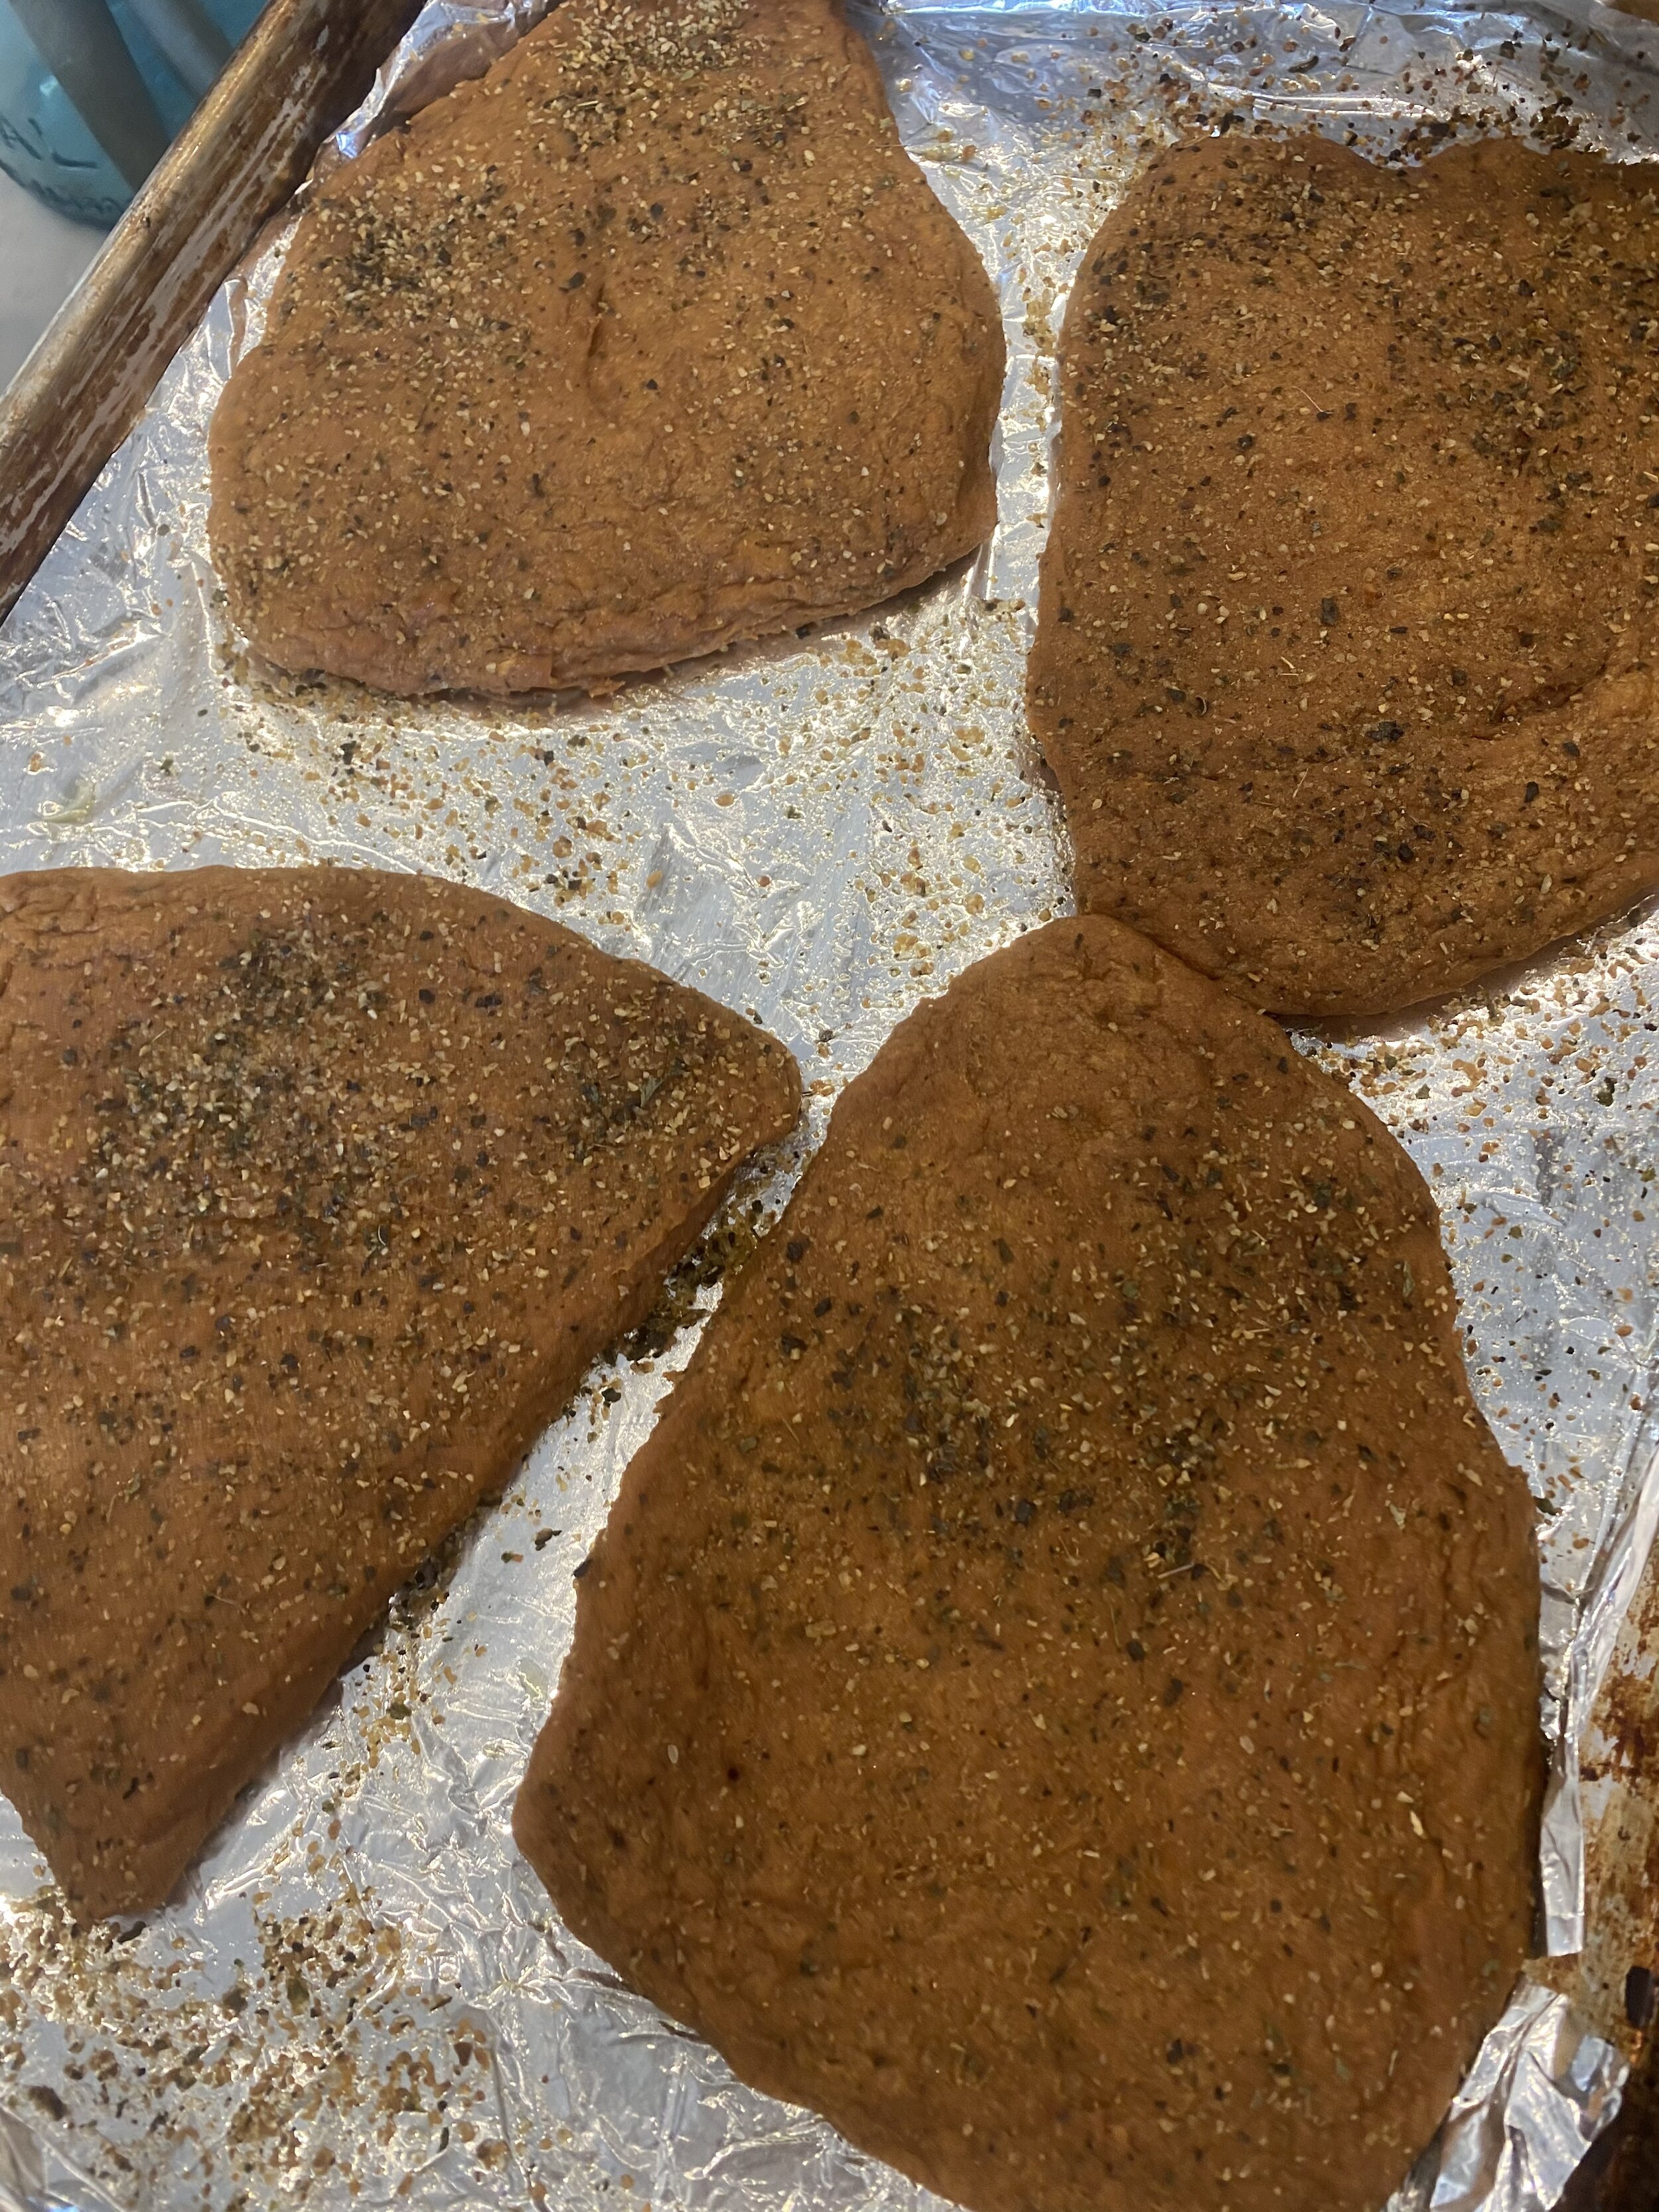
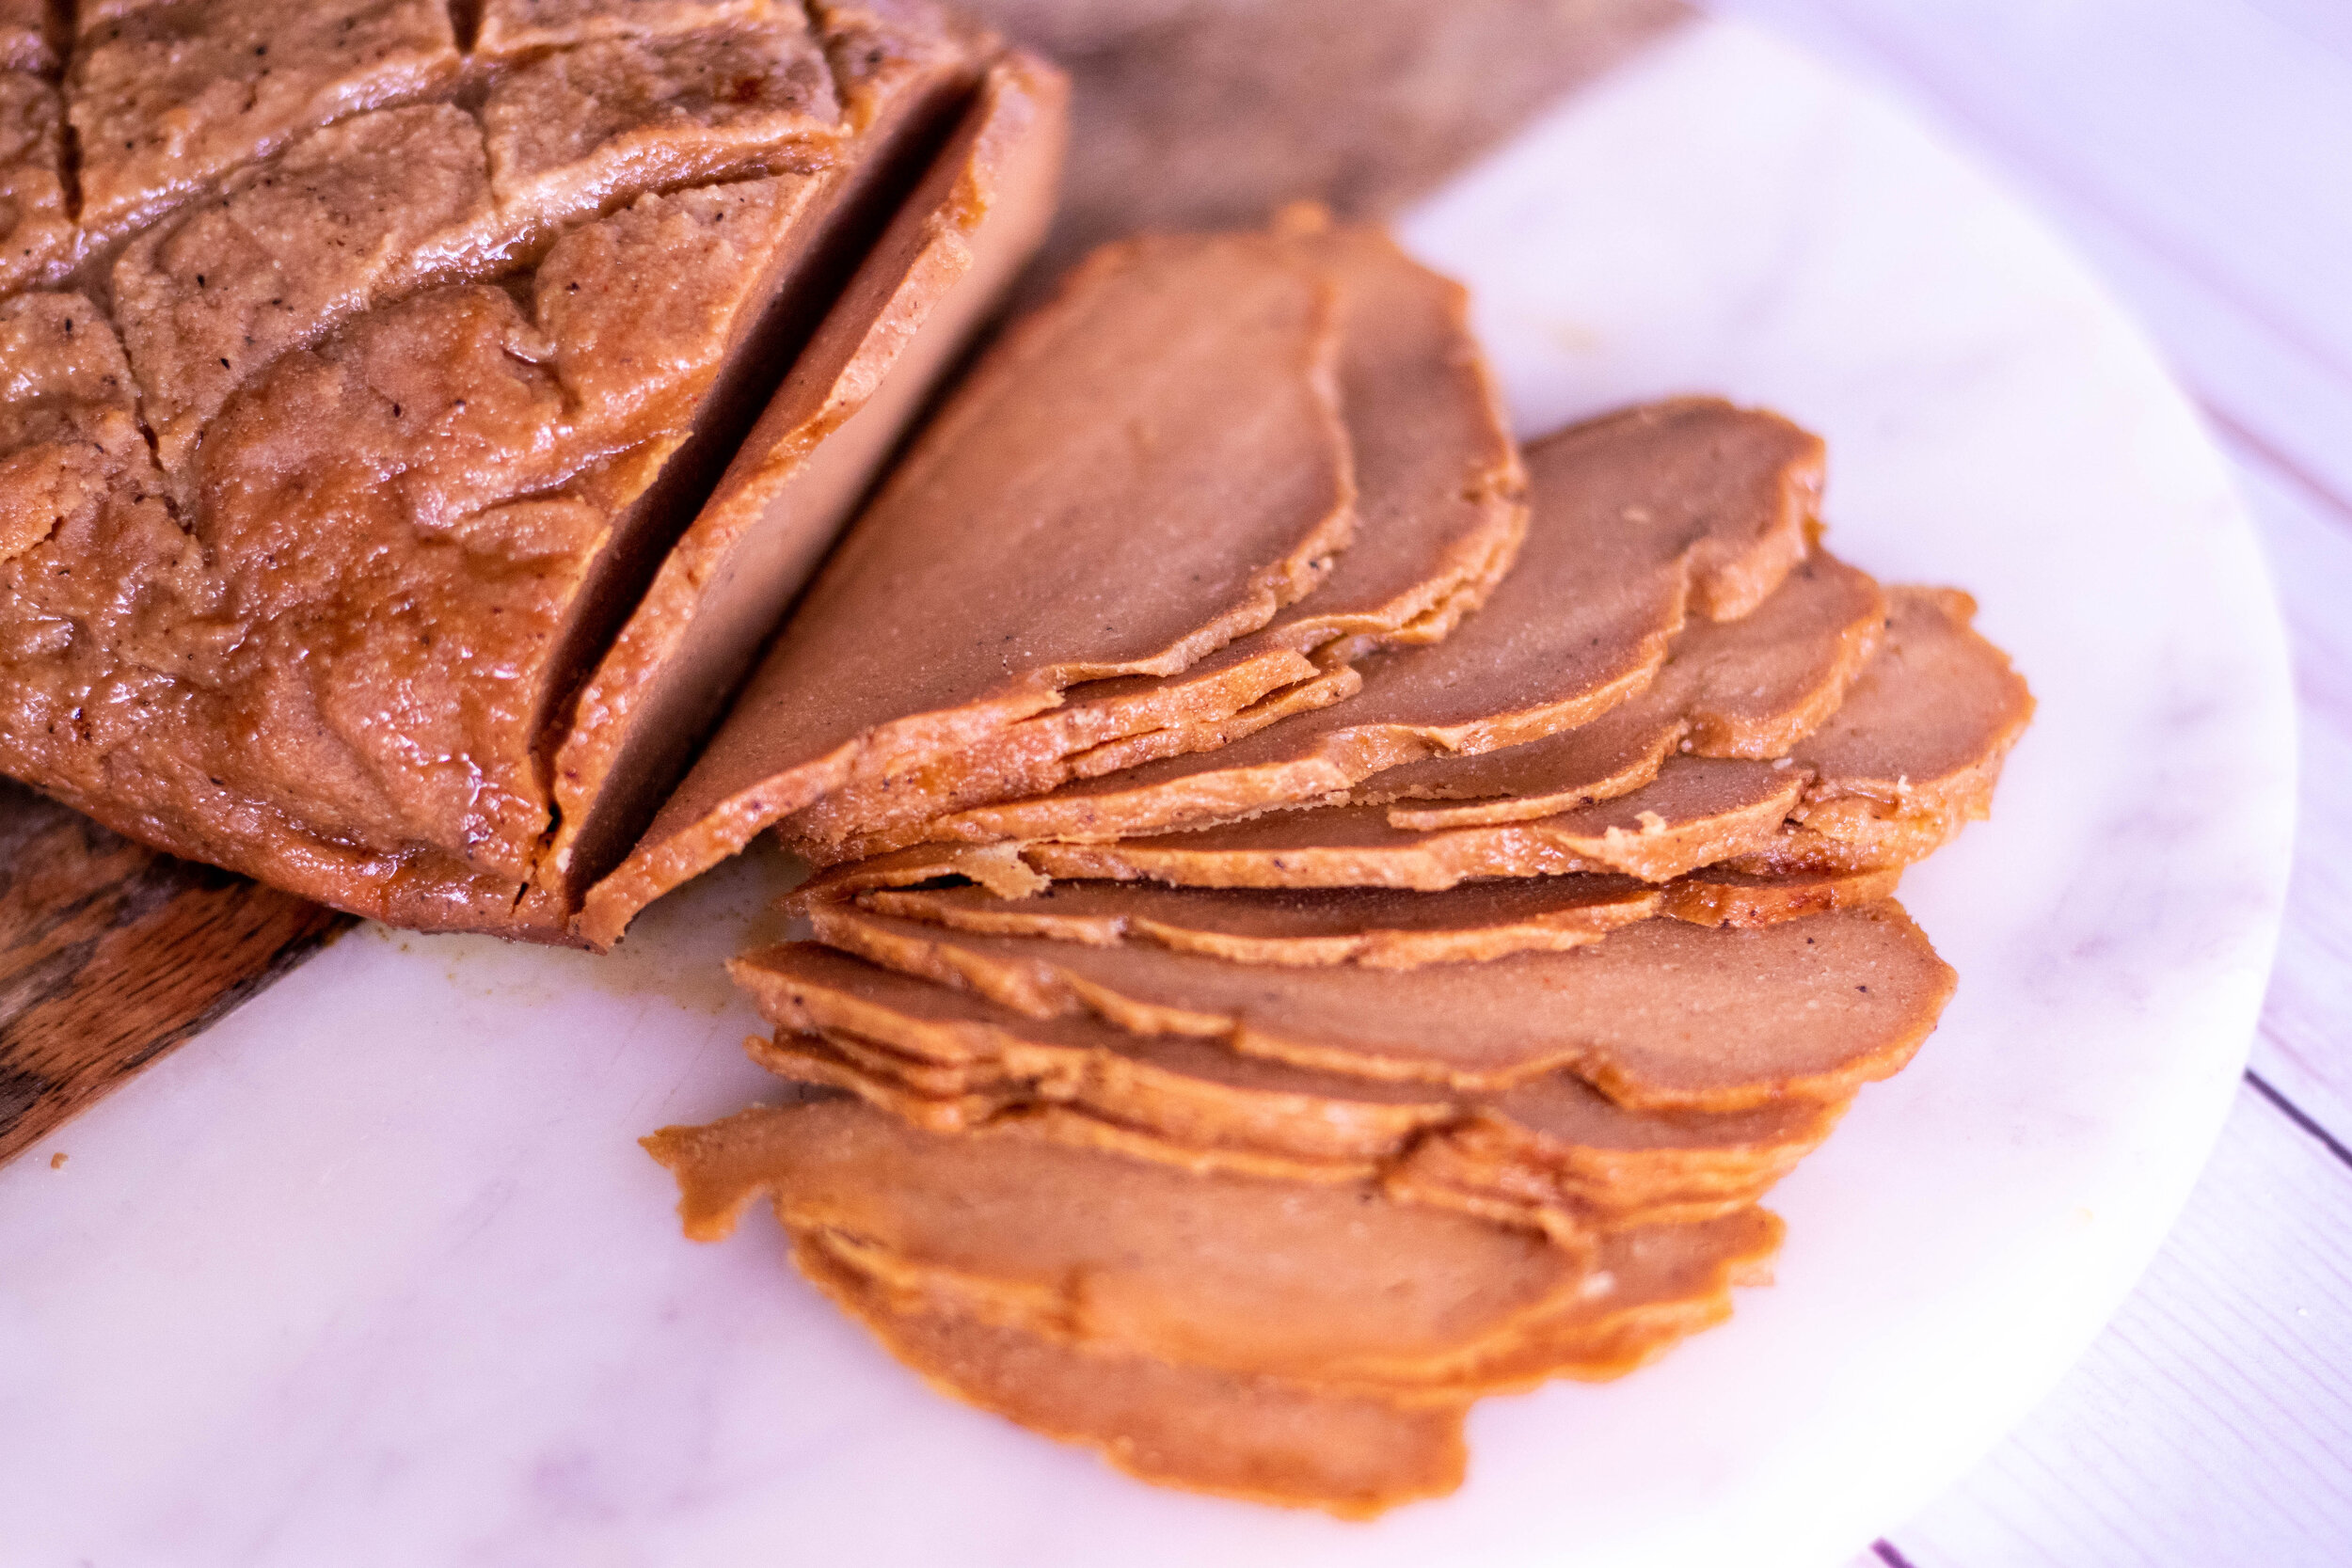
vegan flank steak

vegan flank steak

The Old Fashioned Gelt Digger

old fashioned gelt digger 1

I love the holidays, and from time to time I enjoy a nice cocktail!

My all time favorite cocktail is an old fashioned.

Bourbon is my drink of choice, and an old fashioned is my favorite way to partake.

Recently I learned that chocolate whisky is a thing! And I got really, really, really excited….oh the possibilities!

I had to track some down in our town but found some Ballottin Original Chocolate Whisky at Total Wine.

I had been wanting to create a signature Hanukkah cocktail for a while and was racking my brain for an idea. Blue was the obvious choice but truth be told I am not a blue cocktail kind of gal. I really don’t like overly sweet drinks and pretty much steer clear of all unnaturally colored cocktails.

Like I said, I am a bourbon girl.

old fashioned gelt digger 2

So my next thought because we are taking Hanukkah here, went to gelt. Which then went to chocolate, which led me to this new amazing discovery of chocolate whisky, and a lightbulb went off!!

And that my friends is how the Old Fashioned Gelt Digger was born.

I have a big love for all things chocolate orange and so it only made sense to add chocolate to and old fashioned.

This drink is also pretty. I like pretty drinks, and since this is in honor or Hanukkah, it needed to be sparkly! And because we are talking gelt here, it needed to have some shiny gold in it as well. After all it is called a gold, I mean GELT digger. It’s in the name.

There are lots of brands of vegan sprinkles out there these days. I am a fan of Fancy Sprinkles has going on with lots of fun vegan metallics! They have gold and silver hex shapes, stars, and prism dusts, and so many other fun sprinkles. Wiltons peal dust (except pink) is always a safe choice as well. Also, coarse raw vegan cane sugar could work just as well or vegan sanding sugar for a bit of sparkle.

I used Ovation Dark Chocolate Orange slices (found them at Walmart) for my garnish because I could not track down vegan gelt. It does exists! Just not locally for us. But you can order vegan or allergy friendly gelt from several places online!

Would I still drink this old fashioned sans the glitter and gold? Yes, yes I would. Thank you for asking. Would I dare serve it at Hanukkah or even New Years Eve without some sparkle? No, absolutely not! I am a fancy souther lady after all, and have my standards.

So if you are looking for a fun Hanukkah cocktail, or even a tasty New Years Eve or “anytime really” cocktail, and you love bourbon, you must try and Old Fashioned Gelt Digger..and if you don’t Hanukkah and want to call it an Old Fashioned Gold digger, I won’t be made at you. But it’s way less funny!

Cheers y’all!

old fashioned gelt digger 3

INGREDIENTS:

  • 1 oz chocolate whisky (we used Ballotin Original Chocolate)

  • 1 oz rye bourbon (we used Bulleit Rye)

  • 2 teaspoons simple syrup ( 1 cup sugar and 1 cup water boiled until sugar has dissolved. Allow to cool and store in fridge)

  • 3 shakes orange bitters

  • Orange peel and Vegan Chocolate orange slice or chocolate gelt coin to garnish

  • Gold or silver vegan luster dust/pearl dust , sprinkles or sugar for the rim

old fashioned gelt digger 4

INSTRUCTIONS:

  1. Fill a shallow bowl with a little simple syrup. Add some sprinkles, and sugar to a small plate.

  2. Dip the rim of a whisky glass in the simple syrup, shake off the excess. Dip the rim of the glass in the plate of sprinkles/ sugar to coat.

  3. Add ice to the glass then pour the chocolate whisky and bourbon over the ice.

  4. Shake in some orange bitter and stir in simple syrup.

  5. Add a twist of orange peel.

  6. If you want to add a chocolate orange slice or vegan chocolate gelt to the rim, run a sharp knife under really hot water for minute. Once the knife blade has heated up, wipe the water from the blade and carefully sort of saw into the chocolate making a wedge large enough to sit on the rim of the glass. The hot knife will melt the chocolate as you cut into it. Be careful not to saw in too hard, it will break the chocolate.

If you like this recipe, then try these:

old fashioned gelt digger 6

Vegan Burnt Sugar Bourbon Gingerbread Cookies with Orange Buttercream

vegan burnt sugar bourbon gingerbread cookies

vegan burnt sugar bourbon gingerbread cookies

Bourbon, soft vegan gingerbread cookies, orange anything, these are a few of my favorite things.

So what if you take all of those things and roll them into one delicious very grown up vegan cookie.

Well, that is exactly what I just did.

I recently saw a recipe in Bake From Scratch, by Brian Hart Hoffman, for a burnt sugar bourbon gingerbread cookies, and I was instantly intrigued. I had never made a burnt sugar cookie and all of the sudden it was top of my list of to-dos.

I love soft ginger bread and well, bourbon. So this seemed like a winner. And that burnt sugar…I needed this in my life and I mean like the instant I saw it. Hats off to the genius that decided to put this magic inside a cookie. I am not that genius, and am giving credit to the one who did.

IMG_9696.jpg

I am a fan of all things orange and especially when holiday baking. Orange and cranberry, orange all by itself, and orange with gingerbread. Orange and gingerbread spices are a delicious combination that screams “HOLIDAY TIME '“so I decide to make an orange bourbon buttercream and turn these cookies into little vegan sandwich cookies.

And before you question burnt sugar, its not really burnt. More candied/ caramelized. Its quick and easy to do and is what makes these cookies really special.

These cookies are 100% for adults. There is bourbon in the dough, the burnt sugar, and the frosting. If you don’t like bourbon then this is not your cookie. If you love bourbon, then I have high hopes for you loving this vegan soft ginger bread cookie as much and my husband and I did!

These cookies are also beautiful, which makes them a terrific idea for holiday gifting. Since the recipe makes about 3 dozen cookies, more than a few of my neighbors just received these as an early holiday treat. I don’t think any of them were mad about this either!

Although these cookies take a little time to make and put together, they are worth it!!! I mean honestly the holidays only roll around once a year, and these are worth the work to celebrate! They are also so flipping good that I will probably be making serval more batches to share with family later this month.

vegan bourbon gingerbread 2

INGERDIENTS:

  • 1 and 2/3 cups granulated sugar ( I use Florida Crystals, they are vegan)

  • 4 tablespoon bourbon, divided

  • 1 cup vegan butter (I like to use Earth Balance)

  • 2 cups brown sugar

  • 2 starch eggs (2 tablespoons corn or tapioca starch plus 6 tablespoons water)

  • 1/3 cup molasses

  • 4 cups all purpose flour

  • 2 teaspoons baking soda

  • 1 tablespoon each cinnamon, and ground ginger

  • 1 teaspoon each cardamon, allspice

  • 1/2 teaspoon of ground cloves

  • zest form 1/2 of an orange

  • 1/2 teaspoon salt

  • 1/2 teaspoon black pepper (no this is not a mistake, trust me here)

  • 1/2 cup granulated sugar for rolling the dough

ORANGE BOURBON BUTTER CREAM:

  • 1/2 cup vegan butter (I used Earth Balance)

  • 2 tablespoons shortening (I used Spectrum)

  • 3 cups powdered sugar

  • zest from one orange

  • 1 teaspoon bourbon

vegan bourbon gingerbread cookie 3

INSTRUCTIONS:

  1. Line a cookie sheet in parchment paper or with a silicone mat.

  2. In a medium sized pot add 1 and 2/3 cups sugar over medium low heat. Allow the sugar to melt completely, stirring continuously as it does, until ALL of the sugar has melted and is liquified. It will golden brown. Carefully and slowly add 1 tablespoon of bourbon to the melted sugar. This will cause the sugar to seize up but keep stirring and it remelt and mix in.

  3. Carefully pour the melted sugar over the parchment lined cookie sheet. Spread the mixture out to a thinnish layer. Maybe 1/4 to 1/8 inch thick. Allow the mixture to cool completely.

  4. Mix the starch with the 6 tablespoons of water in a small bowl.

  5. In a large bowl using an electric hand mixer or in the bowl of a stand mixer add the butter, orange zest, and brown sugar. Beat on medium speed for a minute or two. Add the molasses and mix until well incorporated. Beat in the starch eggs, and finally the 3 tablespoons of bourbon.

  6. Preheat oven to 350 degrees Fahrenheit.

  7. In a medium bowl whisk together the flour, baking powder, and spices. Slowly mix the flour mixture into the butter and sugar mixture, adding a little flour at a time, beating on a low speed just until all the flour is mixed in.

  8. Break up the hardened burnt sugar into small pieces. It will break pretty easily, and you want the pieces no bigger than a chocolate chip. I fold the parchment in half and use a kitchen mallet to break it up. Reserve 1/4 cup of the sugar piece. You will end up with sort of a sugar dust and that along with the super tiny pieces are what I reserve for dipping the cookie edges in.

  9. Fold the burnt sugar pieces into the cookie batter.

  10. Using a small 1 tablespoon kitchen scoop, scoop the cookie dough and roll into small balls. Pour 1/2 cup granulated sugar onto a plate and roll the dough balls in the sugar to coat.

  11. Place the cookies a few inches apart on a parchment lined cookie sheet. They will need room to spread. Bake for 12 minutes. Allow the cookies to cool a bit on the pan before transferring them to a wire cooling rack.

  12. Prepare the buttercream by beating the butter and shortening together in a large bowl or in the bowl of your stand mixer. Add the orange zest, powdered sugar and bourbon. Beat until all ingredients are incorporated. If the frosting is too thick you can add a few more drops of bourbon. If it seems to thin to pipe, add a bit more powdered sugar.

  13. To assemble the cookies, fill a piping bag with any tip you like with butter cream. Pipe a thin layer of butter cream on one cookie and sandwich another on top. Dip one side of the cookie in the reversed burnt sugar dust/pieces for garnish.

If you like this recipe, then try these:

IMG_9710.jpg

Vegan Patty Melt

patty melt

In college I waited tables. I mean I guess that is pretty typical.

I worked a few places actually, and one of those places was Steak n Shake.

I took mostly night classes in college and I worked third shift at Steak n Shake and had plenty of idle time to get homework done and papers written. It worked out really well, actually.

I also got to eat half price and that is always a perk when you are a broke college student.

One of my favorite things ever at Steak n Shake was the Frisco melt. I was basically a patty melt with 1,000 island dressing.

Is it good for you? Well no. Is it delicious? Heck yes. Is it vegan? Absolutely not. Can you make it vegan. Well yes, you can!

IMG_9628.jpg

I used Beyond beef patties for this recipe. I am not here to debate Beyond vs Impossible meat. I am an equal fan of both. But Costco sells Beyond meat burgers, and now the meatballs as well, and the price is better than anywhere else I have found. I actually just buy the burgers at Costco and thaw them to use in place of the 1 lb ground because it is the most affordable option!

Also, I personally love Beyond meat! So its a win win.

You could use any vegan hamburger patty you like, store-bought or homemade. Grinding up failed seitan often makes a decent burger patty if that is something you are into.

Add any cheese you like. We are family divided, and with this sandwich are split between being fans of vegan American cheese, or Gouda! You any cheese you like, store bought or homemade. I have about 40 cheese recipes on the site, so check some of those out if you are feeling adventurous! They are all really really easy so don’t be afraid to give it a go!

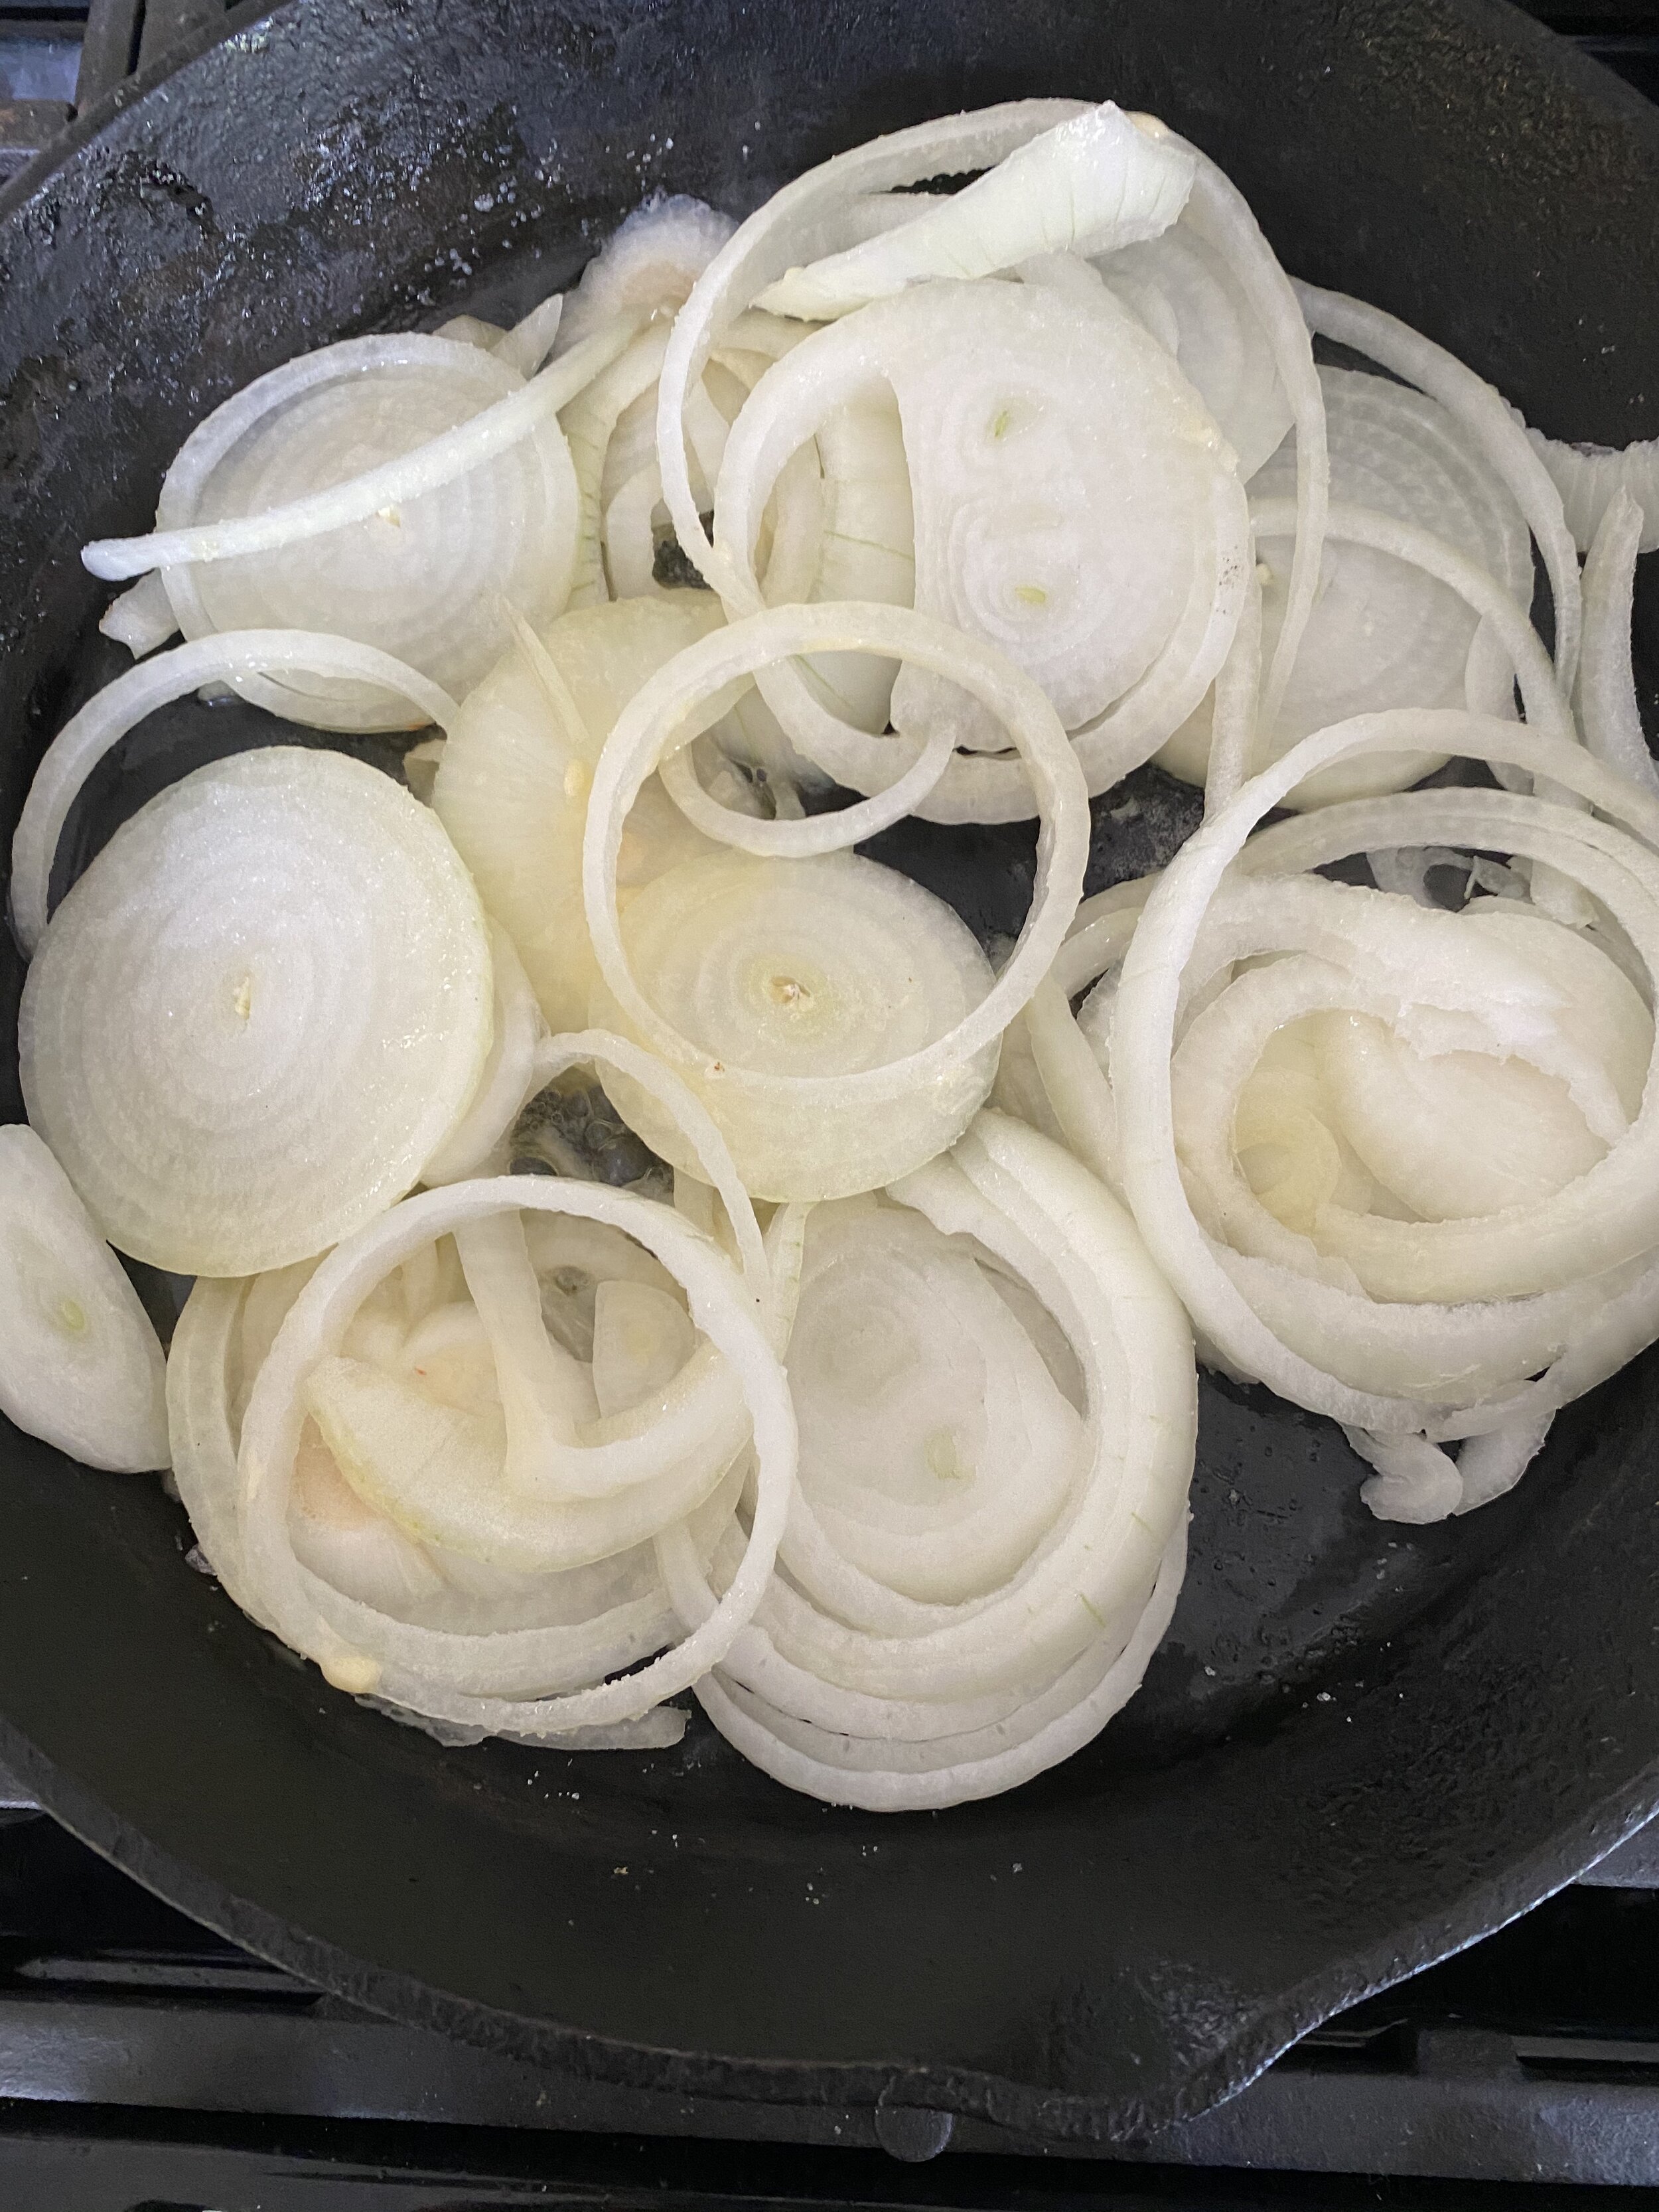
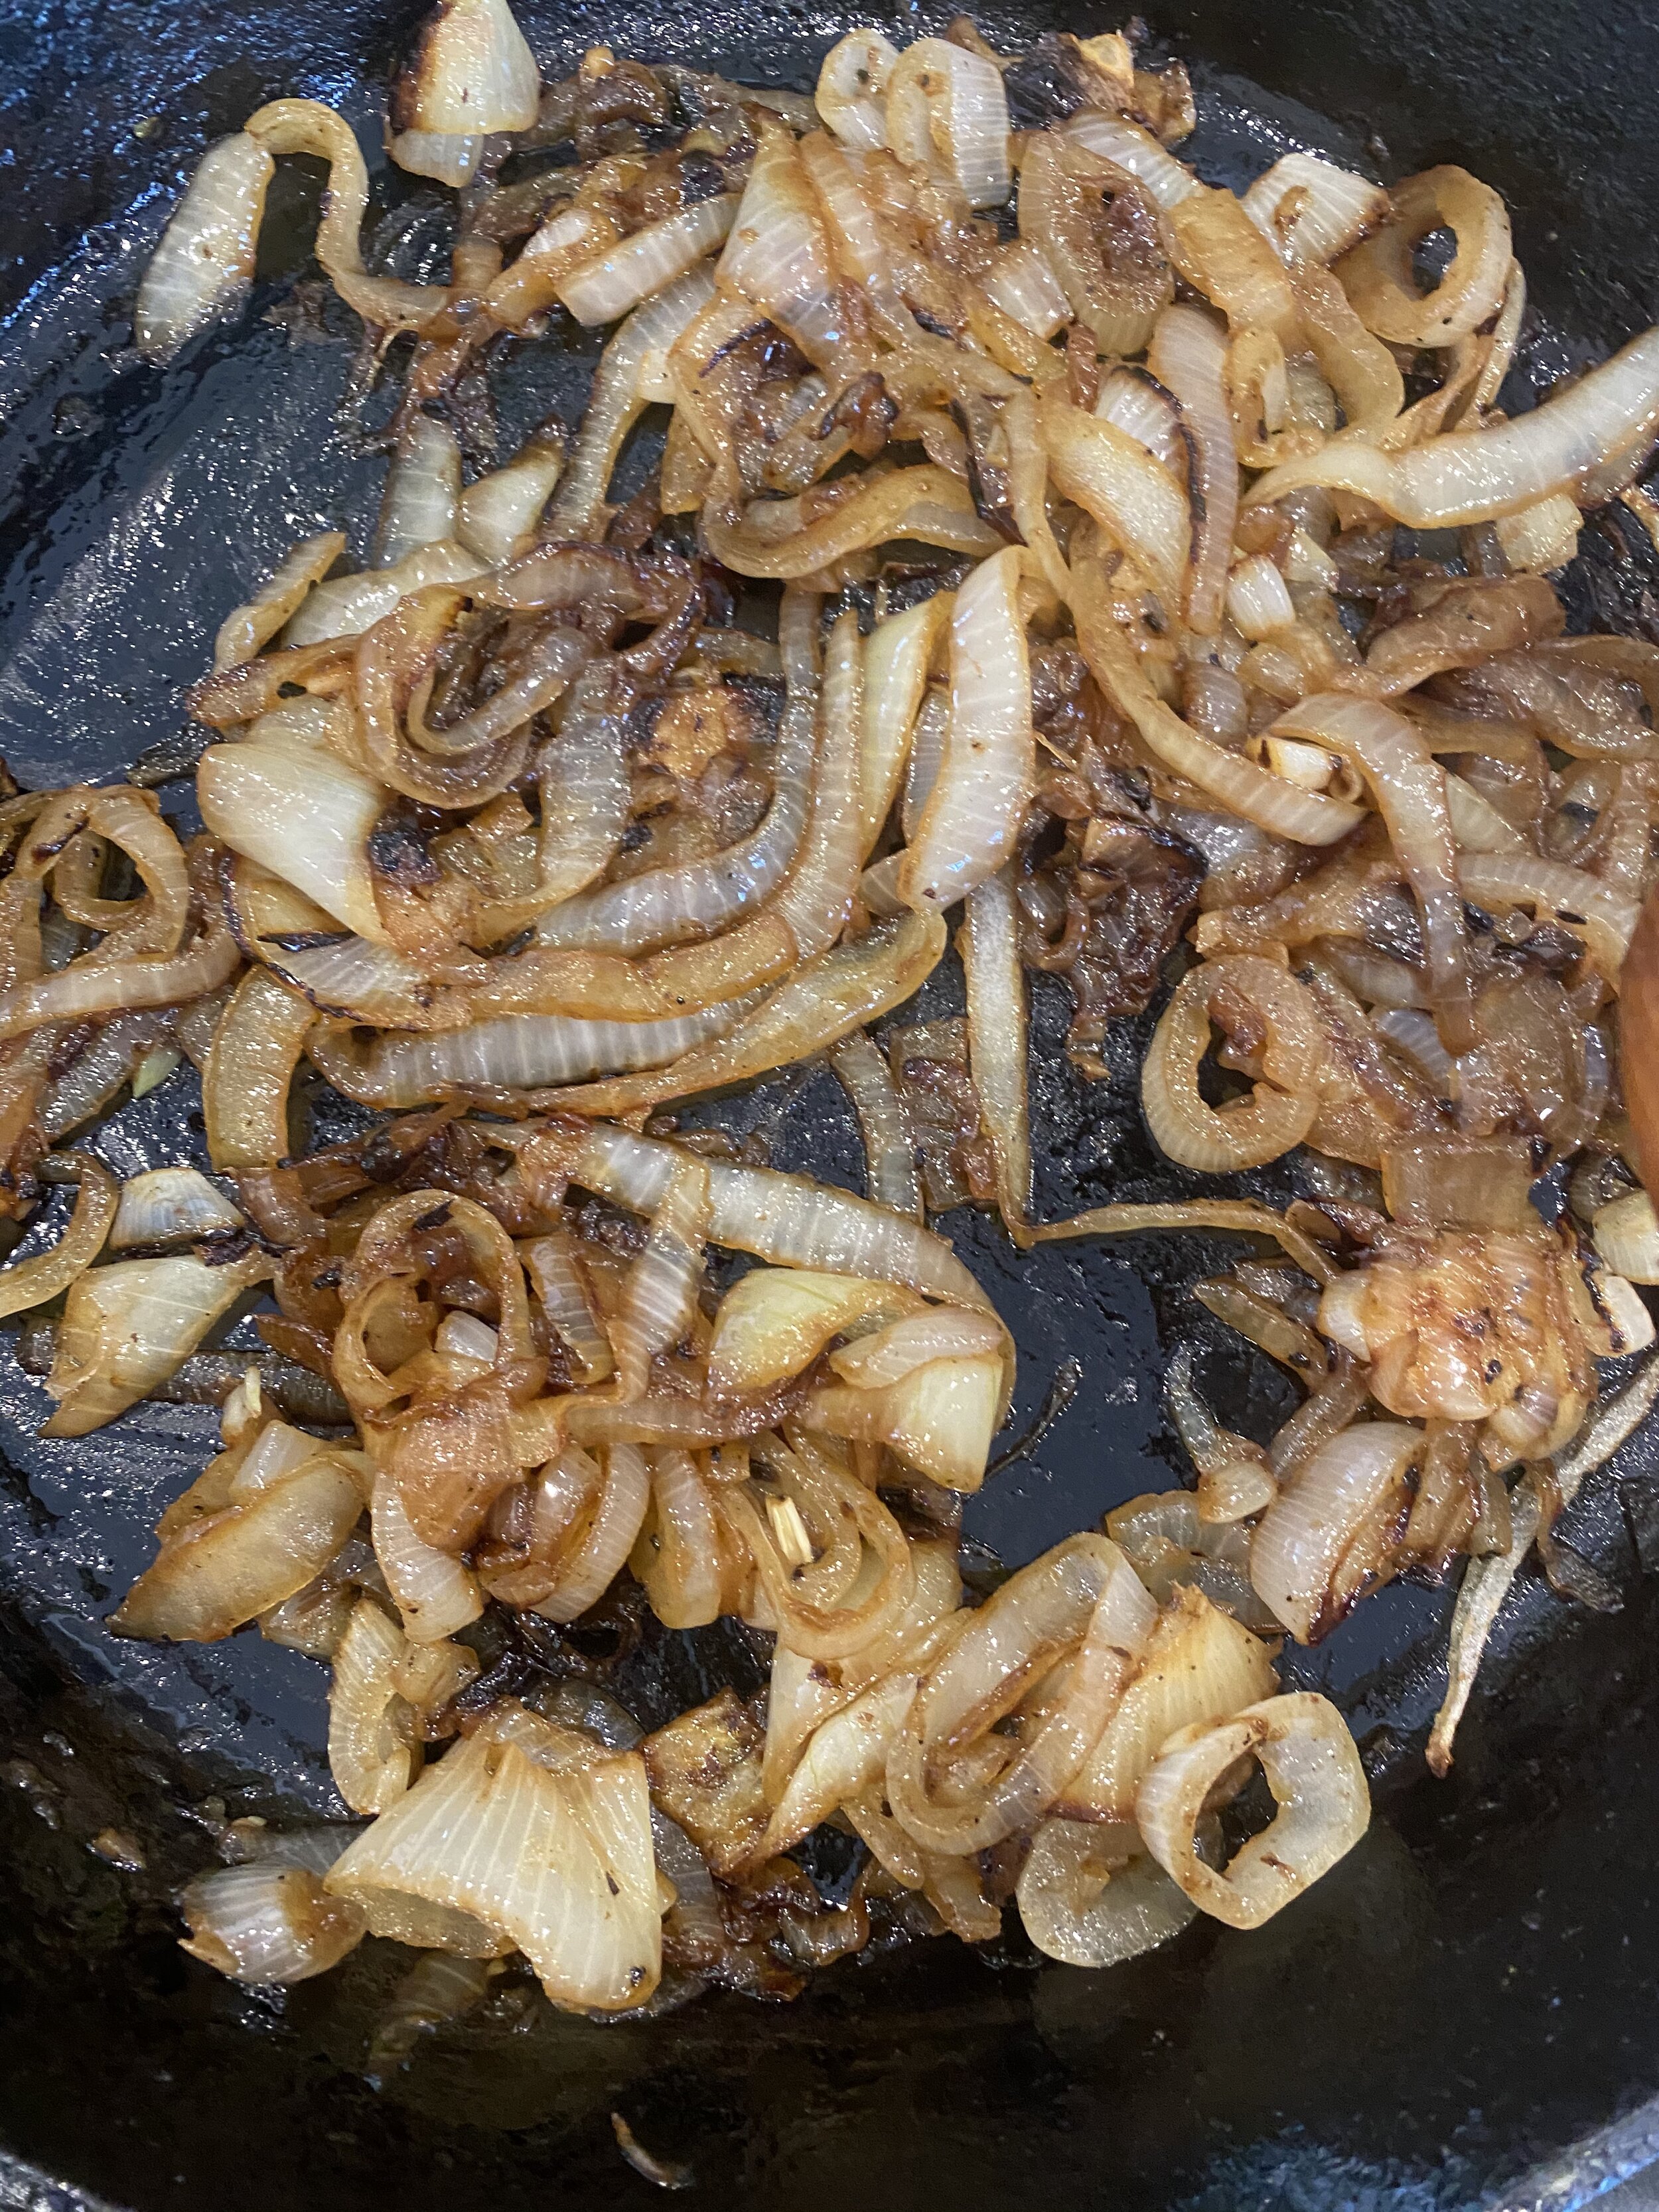
The next step is caramelizing onions. This is not a hard task by any means, it just takes a little while. So be patient. They are worth it!!! If you are especially impatient and just want to sauté your onions and not caramelize them, I’ll forgive you, but trusts me when I say the sandwich won’t be as tasty.

Next slather that baby with a whole lot of 1,000 island dressing and you are on you way to sandwich heaven. Seriously my love for 1,000 island runs deep and wide. Its one of my favorite salad dressings and also dips for fires or tater tots. If you hate 1,000 island then I am not sure we can be friends, but you can use whatever less exciting condiment you like. Mayo, ketchup, whatever…I am out of suggestions because the only right answer is 1,000 island.

Ok, so go make yourself a vegan patty melt. A gooey, cheesy, greasy, 1,000 dripping vegan. patty melt, and be happy!!!


INGREDIENTS:

  • 4 vegan burger patties ( we used Beyond Meat Patties)

  • 8 pieces of any vegan sandwich bread you prefer

  • 4 slices of vegan American, Cheddar, Gouda, or Swiss cheese.

  • Vegan butter

  • 2 larger yellow onions

  • 1 teaspoon salt

  • 1 teaspoon sugar

IMG_5712.jpeg

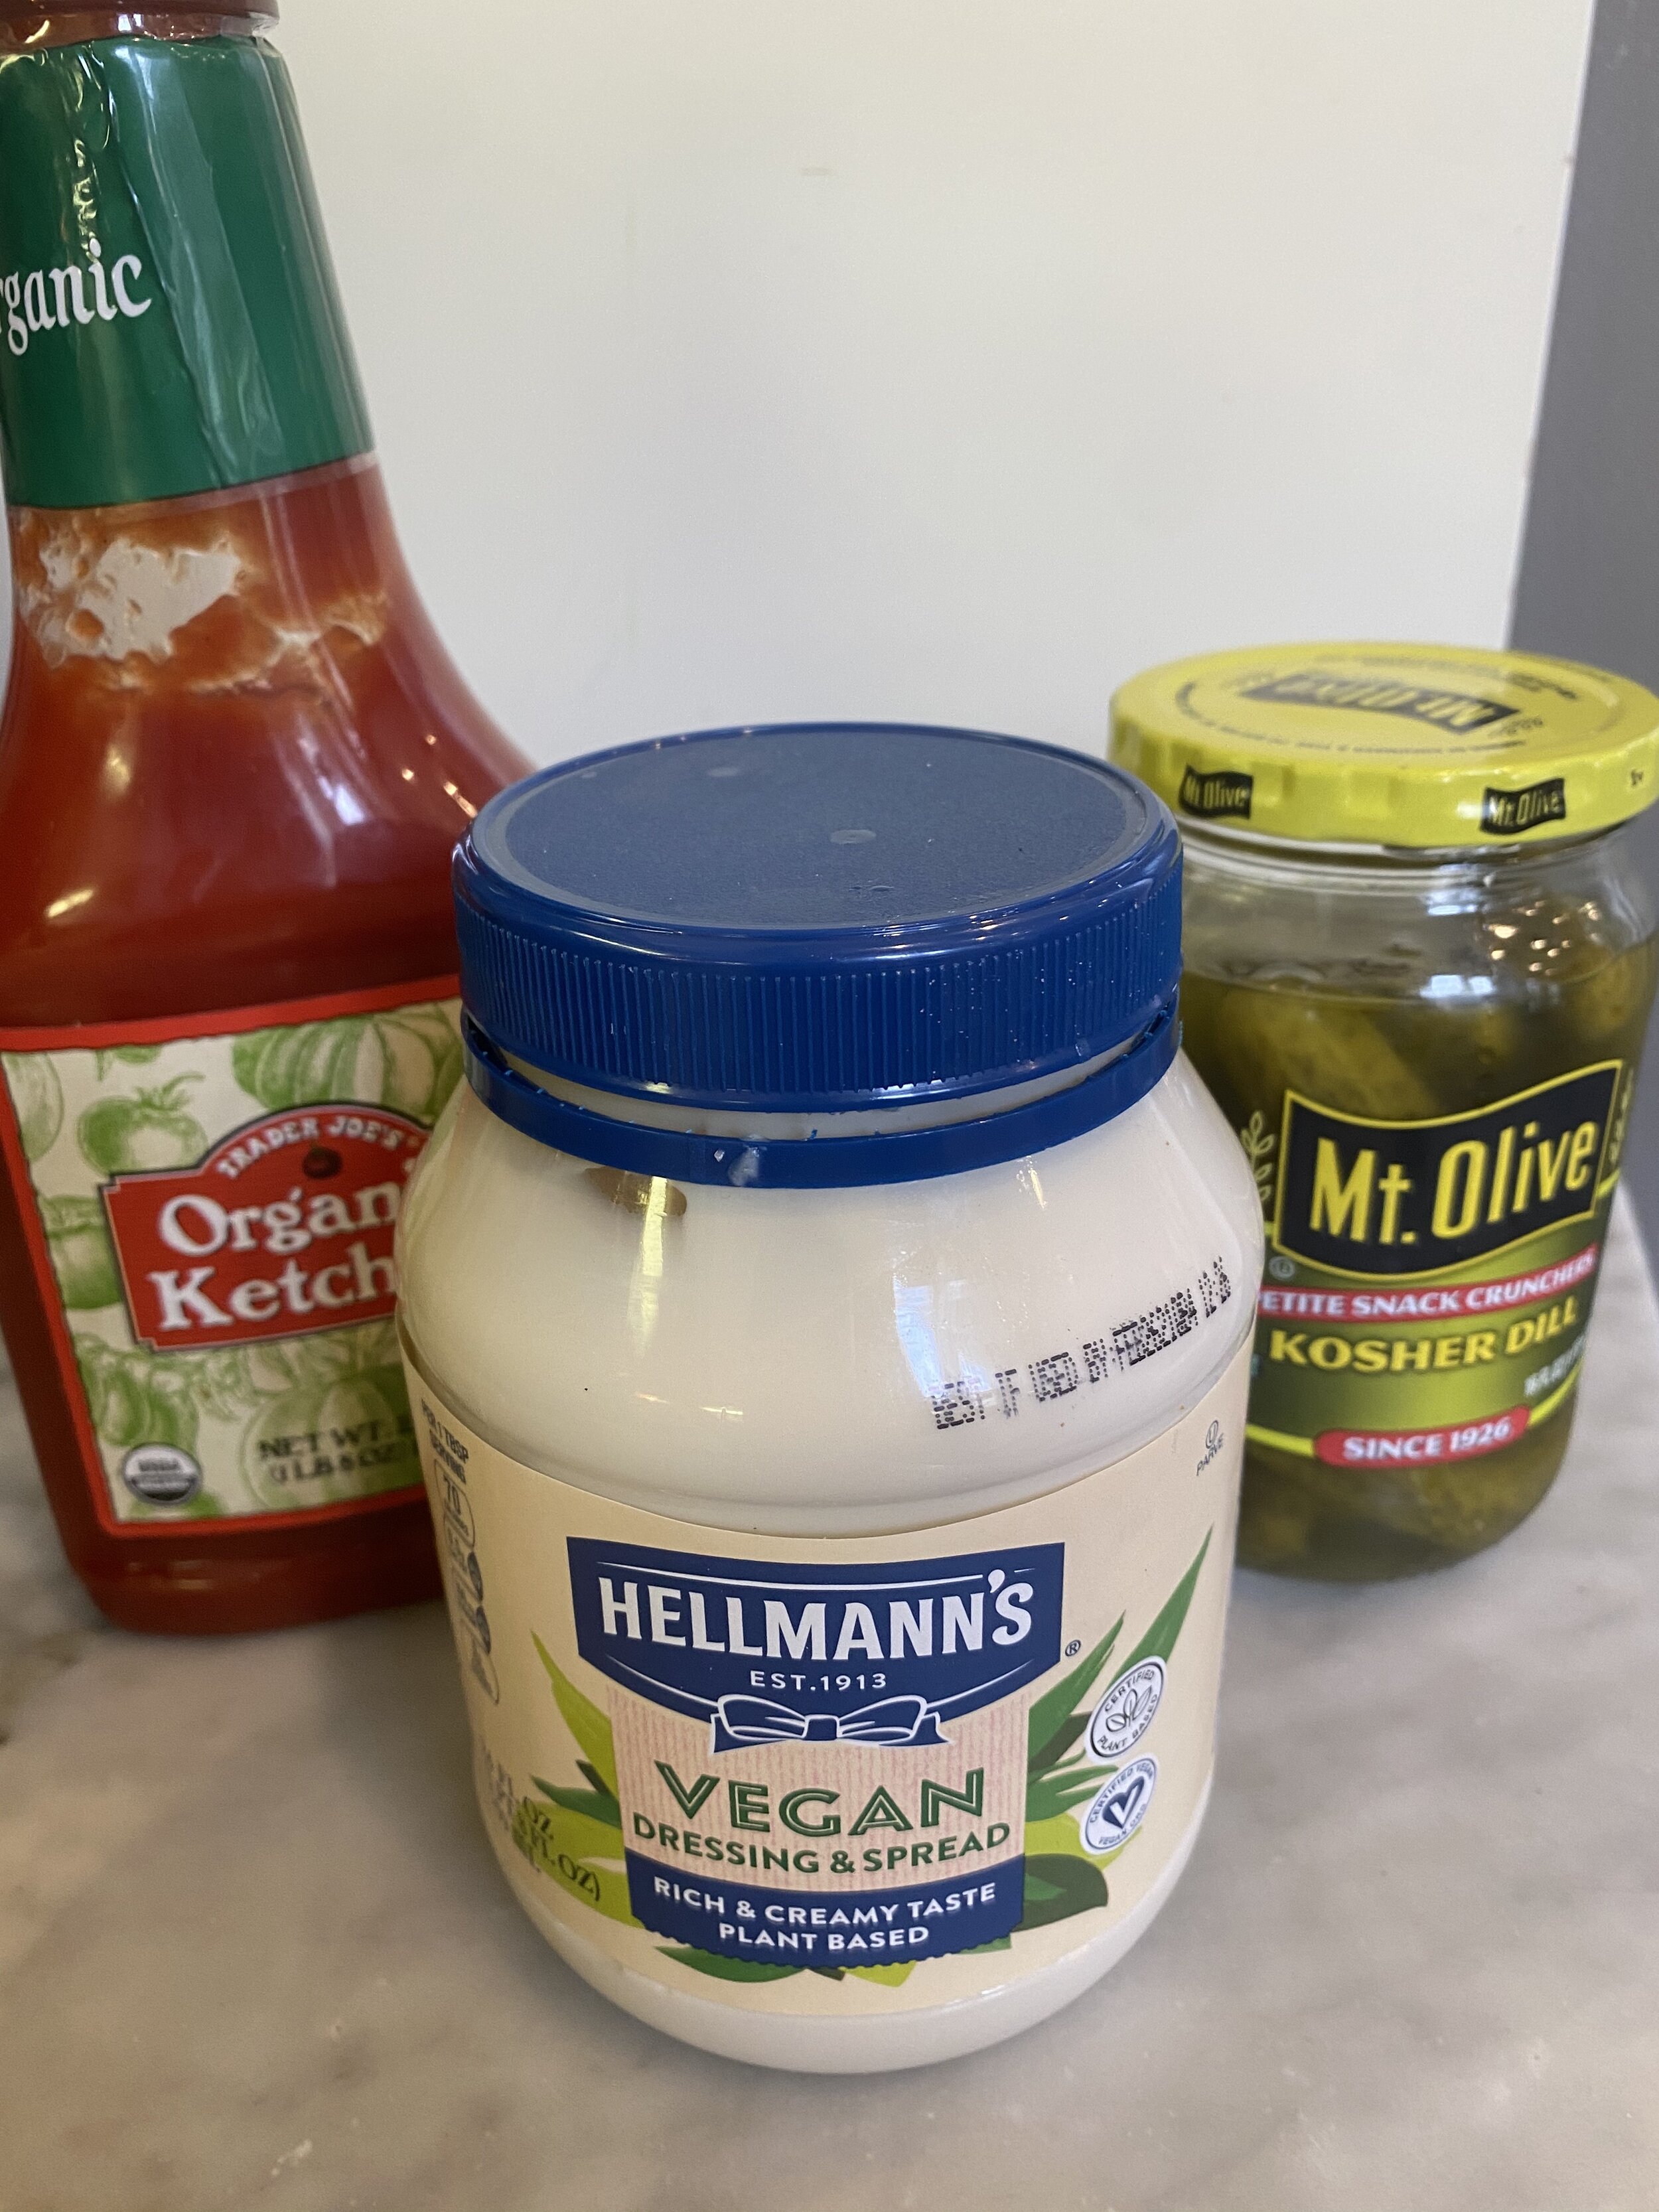
Vegan 1000 Island Dressing:

  • 3/4 cups vegan mayo

  • 3 tablespoons ketchup

  • 2-3 tablespoons diced dill pickles

  • 1-2 teaspoons pickle juice

  • salt and pepper to taste

INSTRUCTIONS:

  1. Thinly slice both onions. In a large iron skillet or other large skillet, add a few teaspoons of vegan butter over medium/low heat. Add the onion and sprinkle with the salt. Allow the onions to cook for about 10 minutes with out really moving them around. After 10 minutes give them a good stir and allow another 10 minutes not really messing with them too much. If they seem to be burning reduce the heat to low. Sprinkle with the sugar and stir again. Let the onions cook another 10-15 minutes or until they are browned and caramelized. Set aside.

  2. In a small bowl mix the mayo, pickles, ketchup, salt and pepper to taste. I add a few teaspoons of pickle juice just to thin it out a bit and add a vinegar kick.

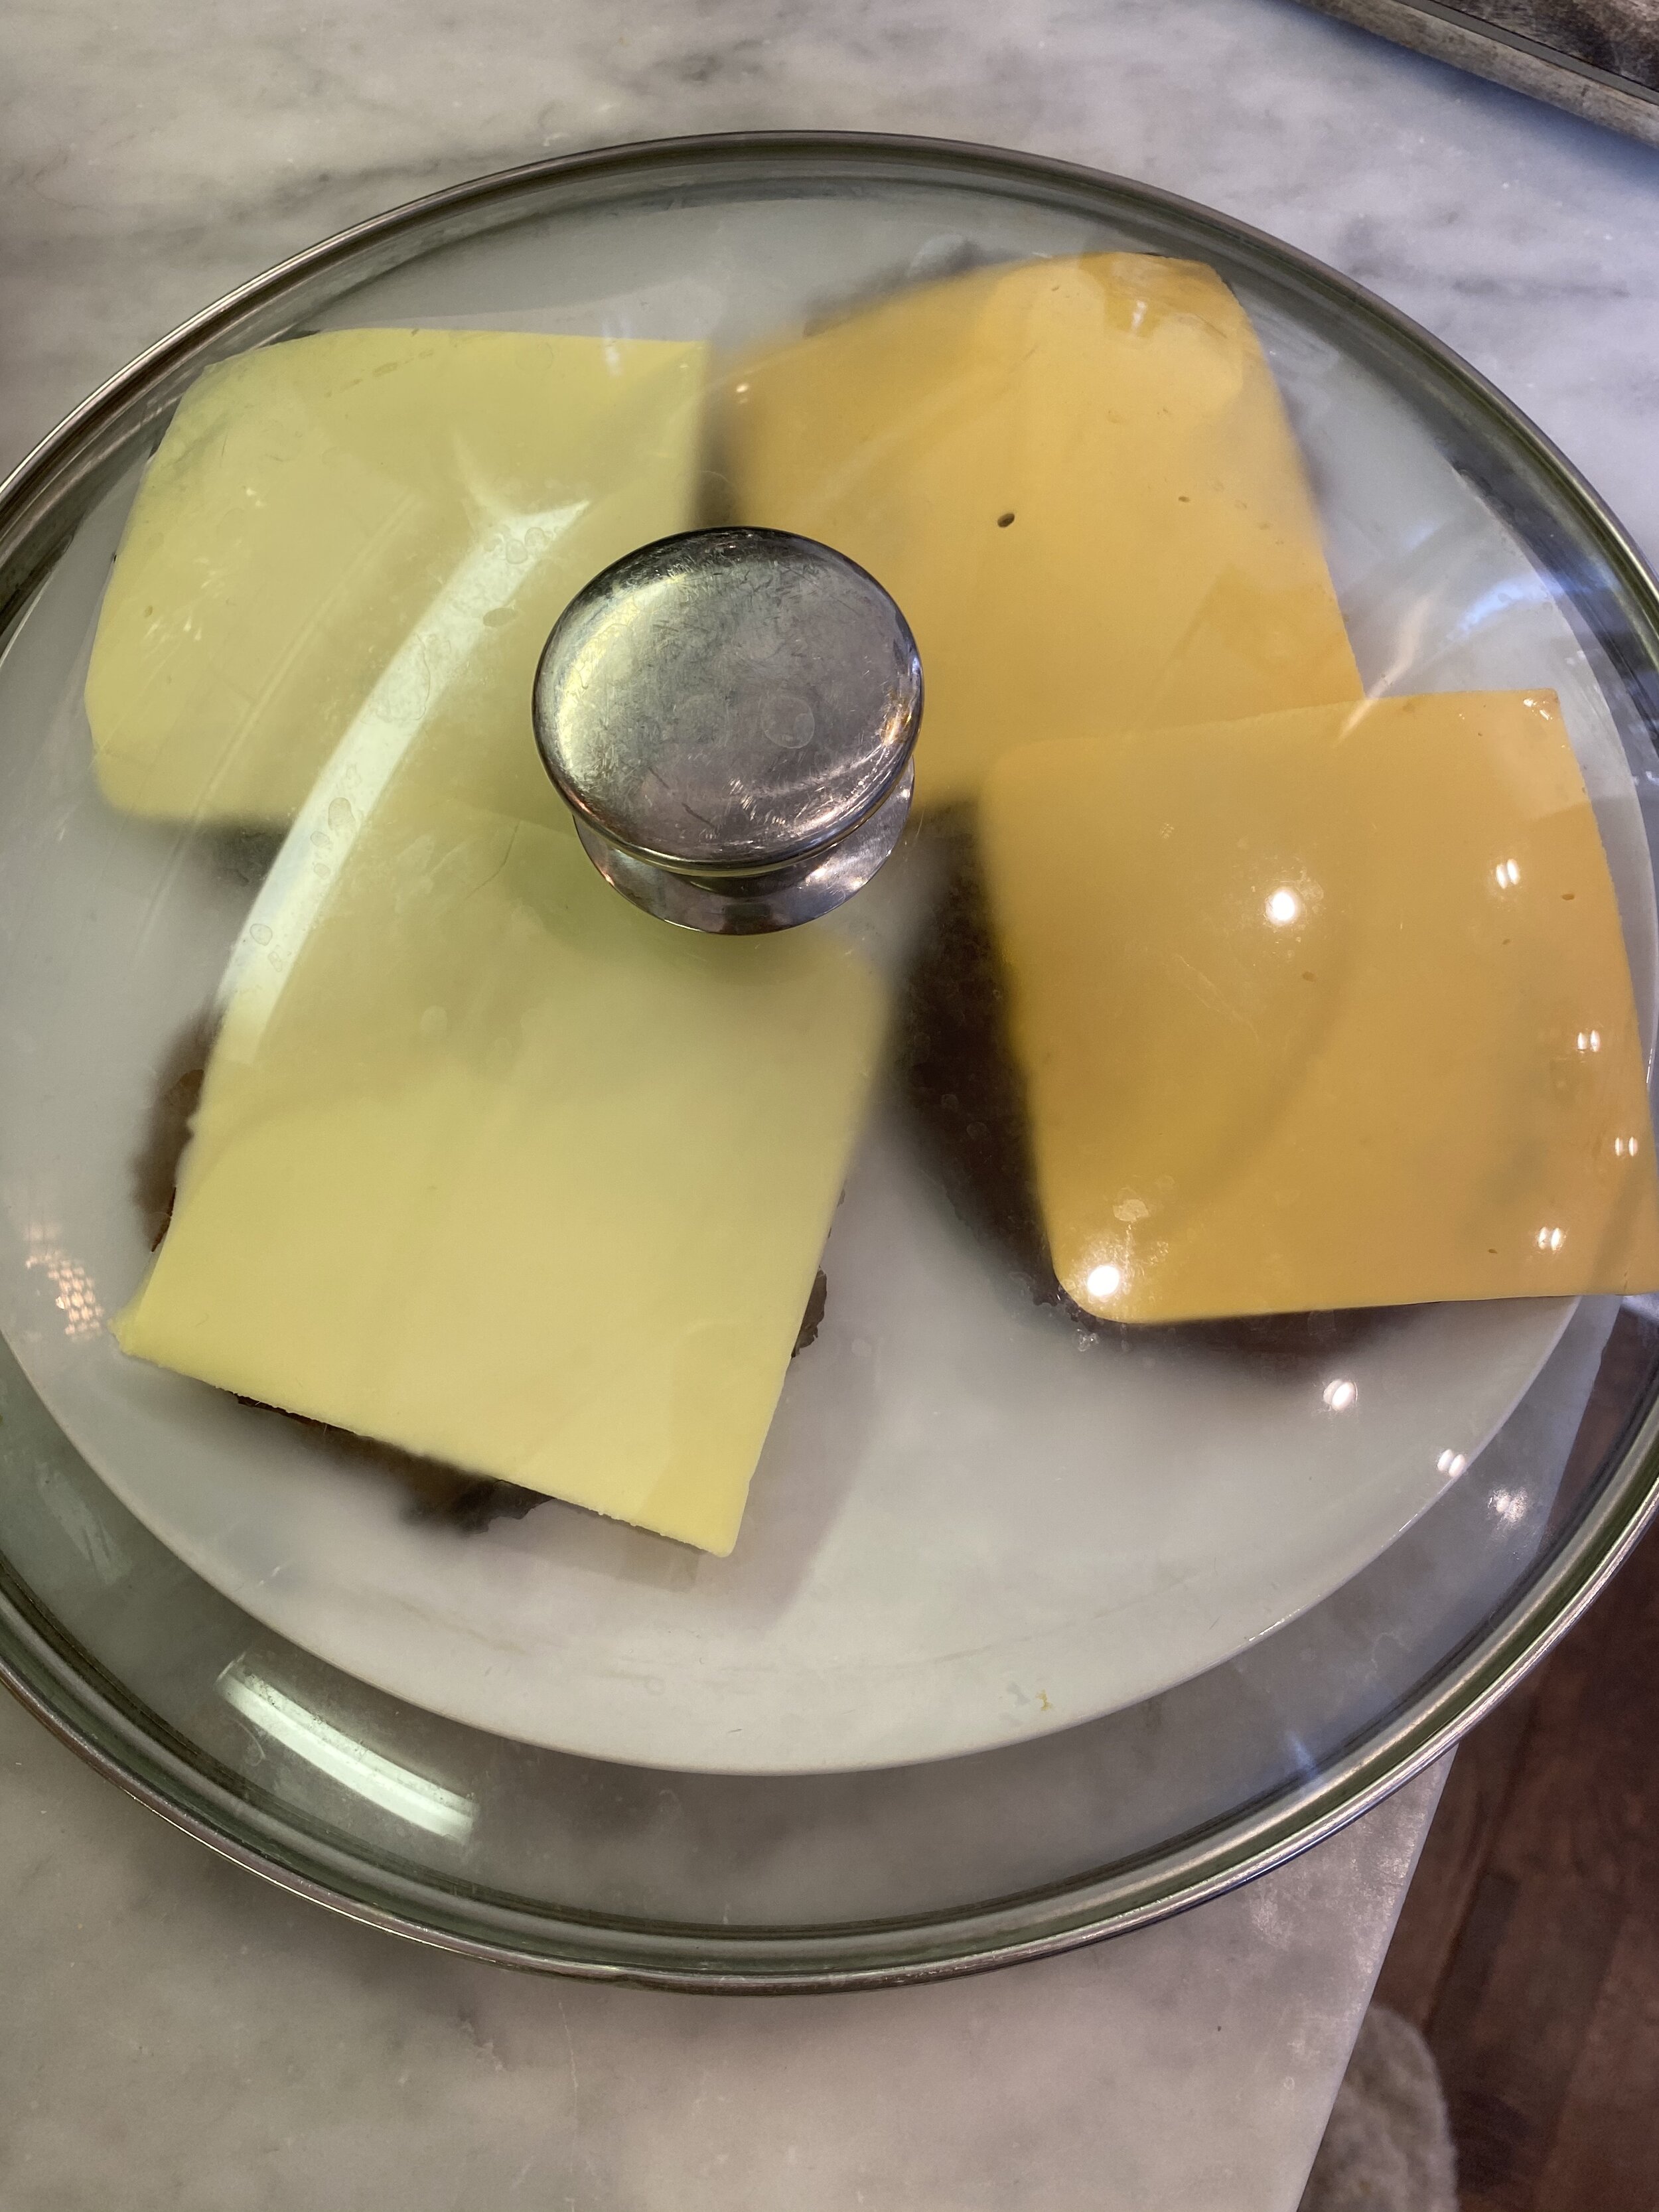
  3. Fry the burger patties, trying to get them pretty flattened out while frying. You don’t want a big thick patty for a patty melt, but rather a nice thin patty. I like to get mine flattened out and a little crispy around the edges. Place finished burgers on a plate. I like to add the cheese slices to the burgers hot out of the pan. I then put a large skillet lid over the plate so the cheese can steam and melt some before I grill the sandwiches. Vegan cheese doesn’t always melt super well and this step helps.

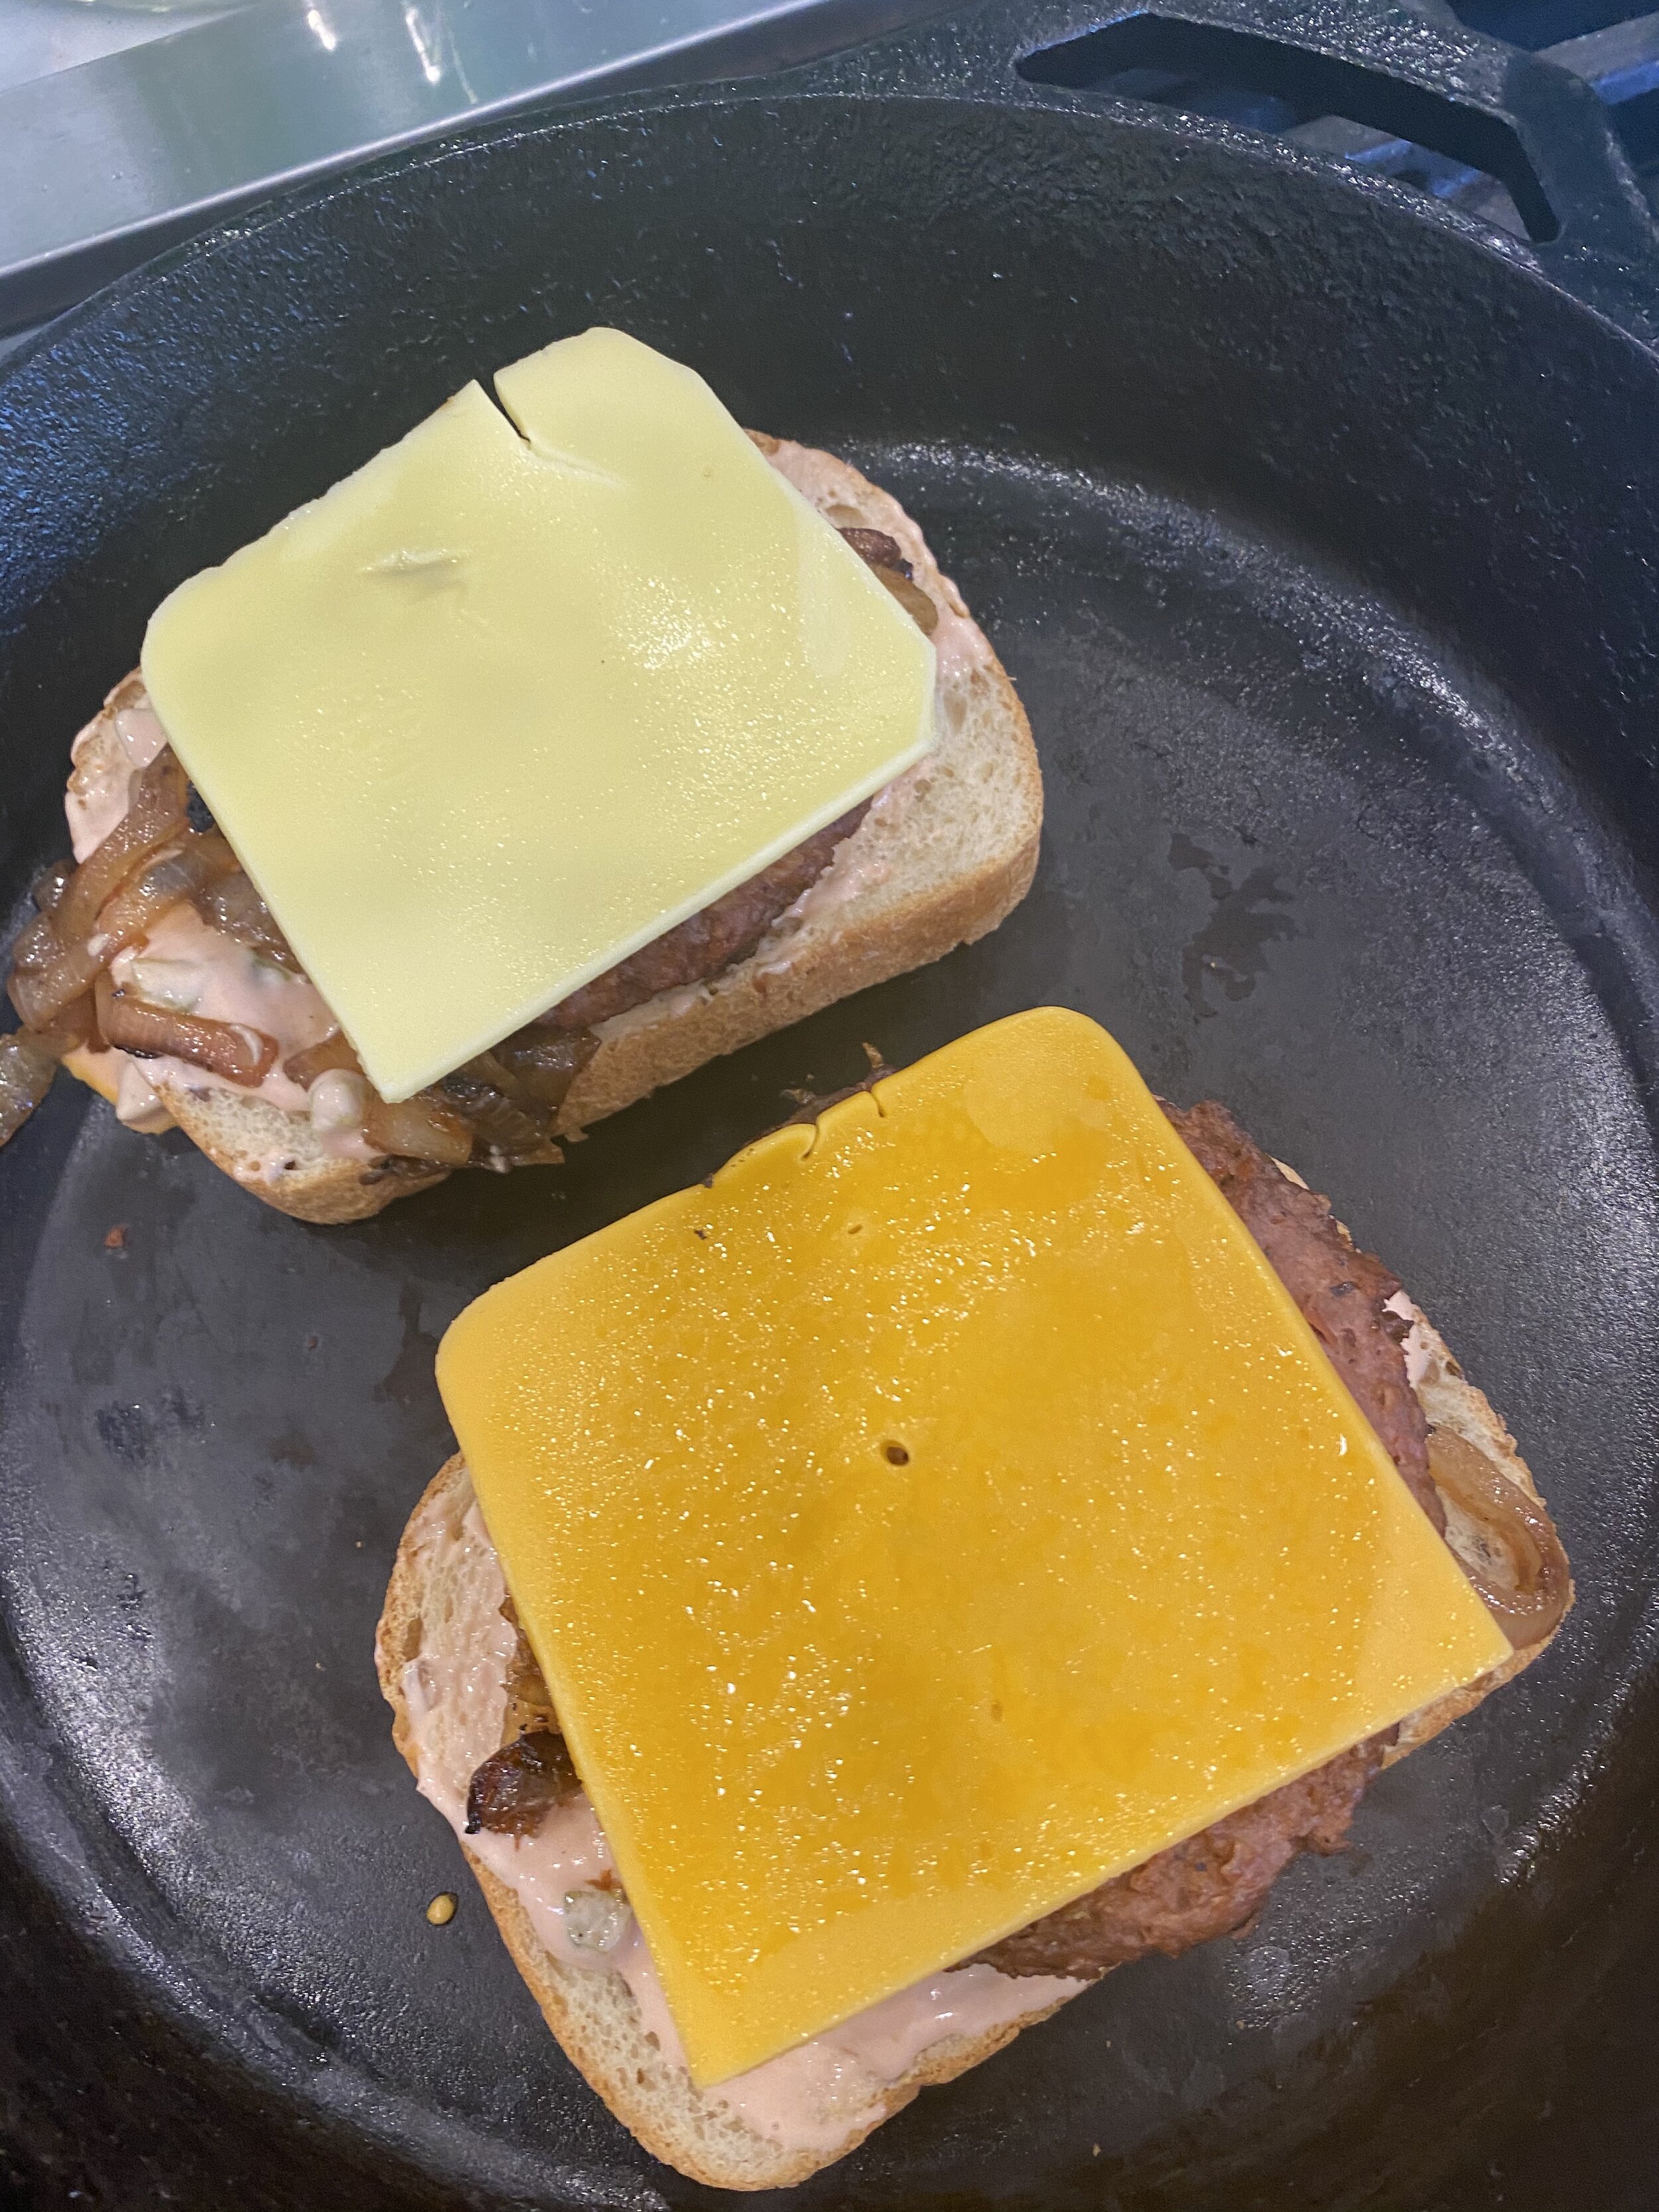
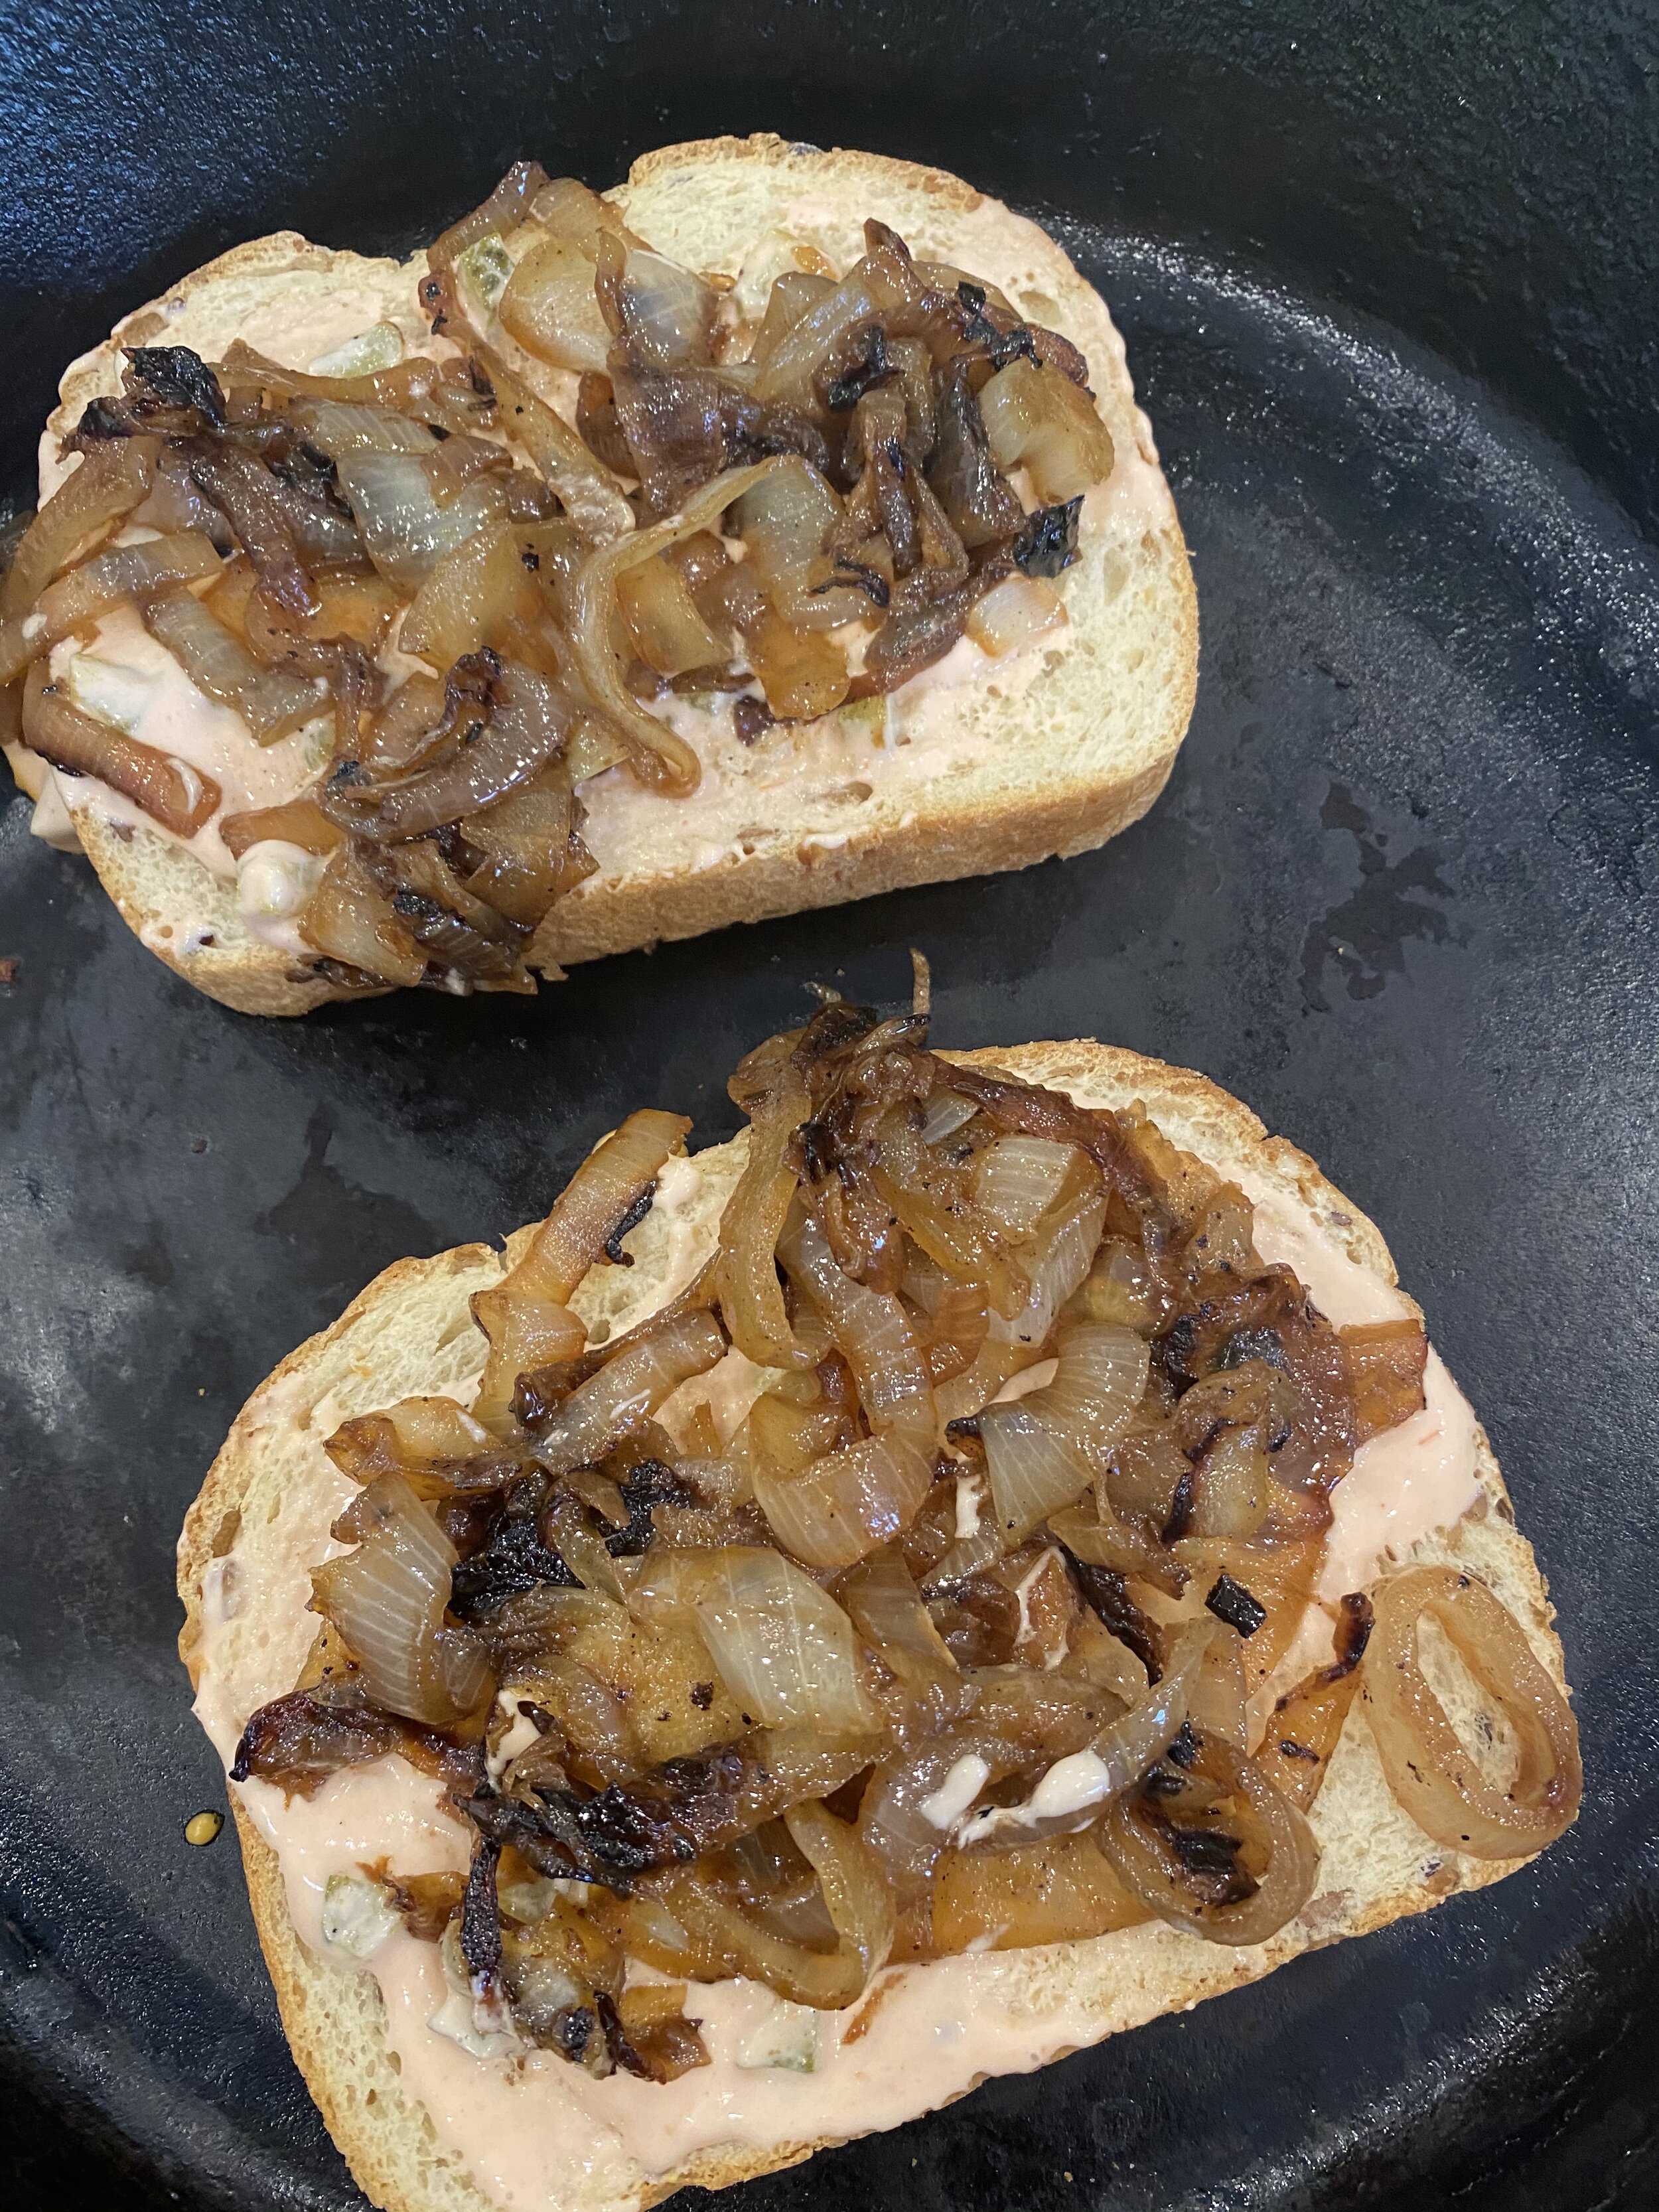
  4. Butter one side of each slice of bread. Lay them butter side down in a large skillet over medium heat (I normally make 2 at a time.) Smear some 1000 island on the the bread, add the burgers, cheese, and 1/4 of the caramelized onions to each sandwich. Heat the sandwiches on each side long enough to get the bread toasty and the cheese good and melted.

  5. Serve as is or with a side of fries or chips.

If you like this recipe, then try these:
Vegan Big Beef and Cheddar

Vegan Big Beef and Cheddar

Vegan Buffalo Chicken Sandwich

Vegan Buffalo Chicken Sandwich

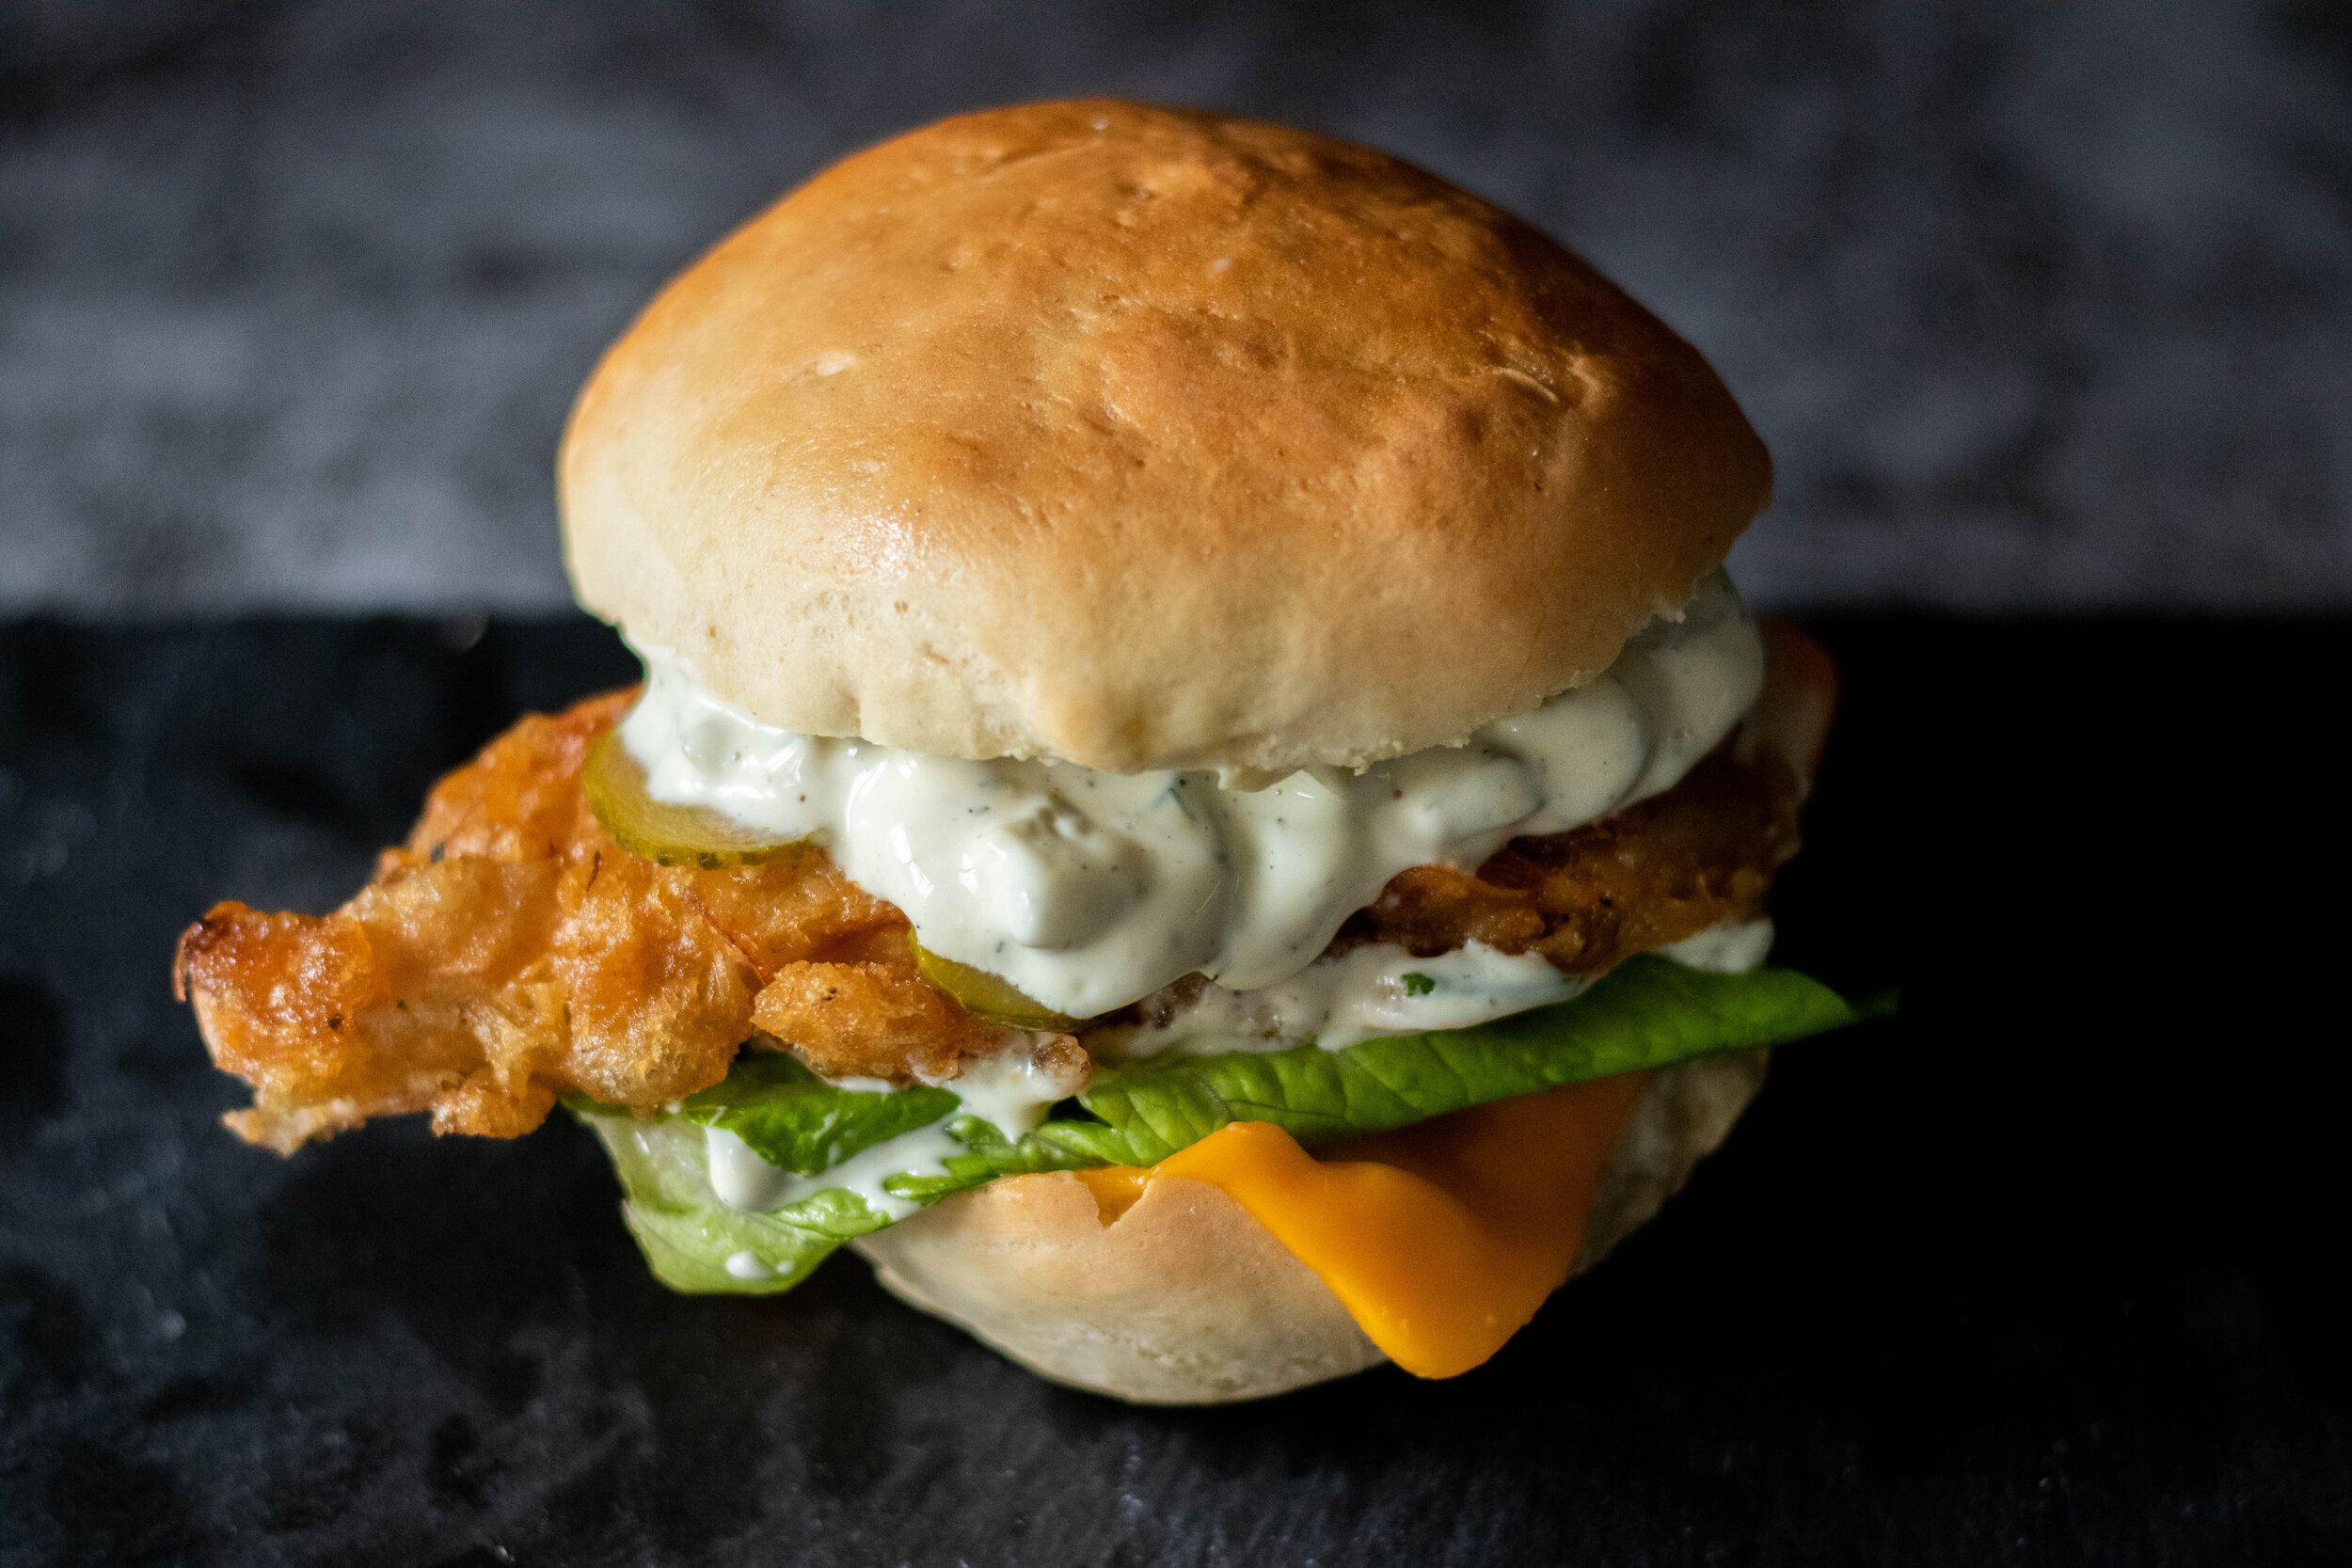
Vegan Fish Fillet Sandwich

Vegan Fish Fillet Sandwich

patty melt

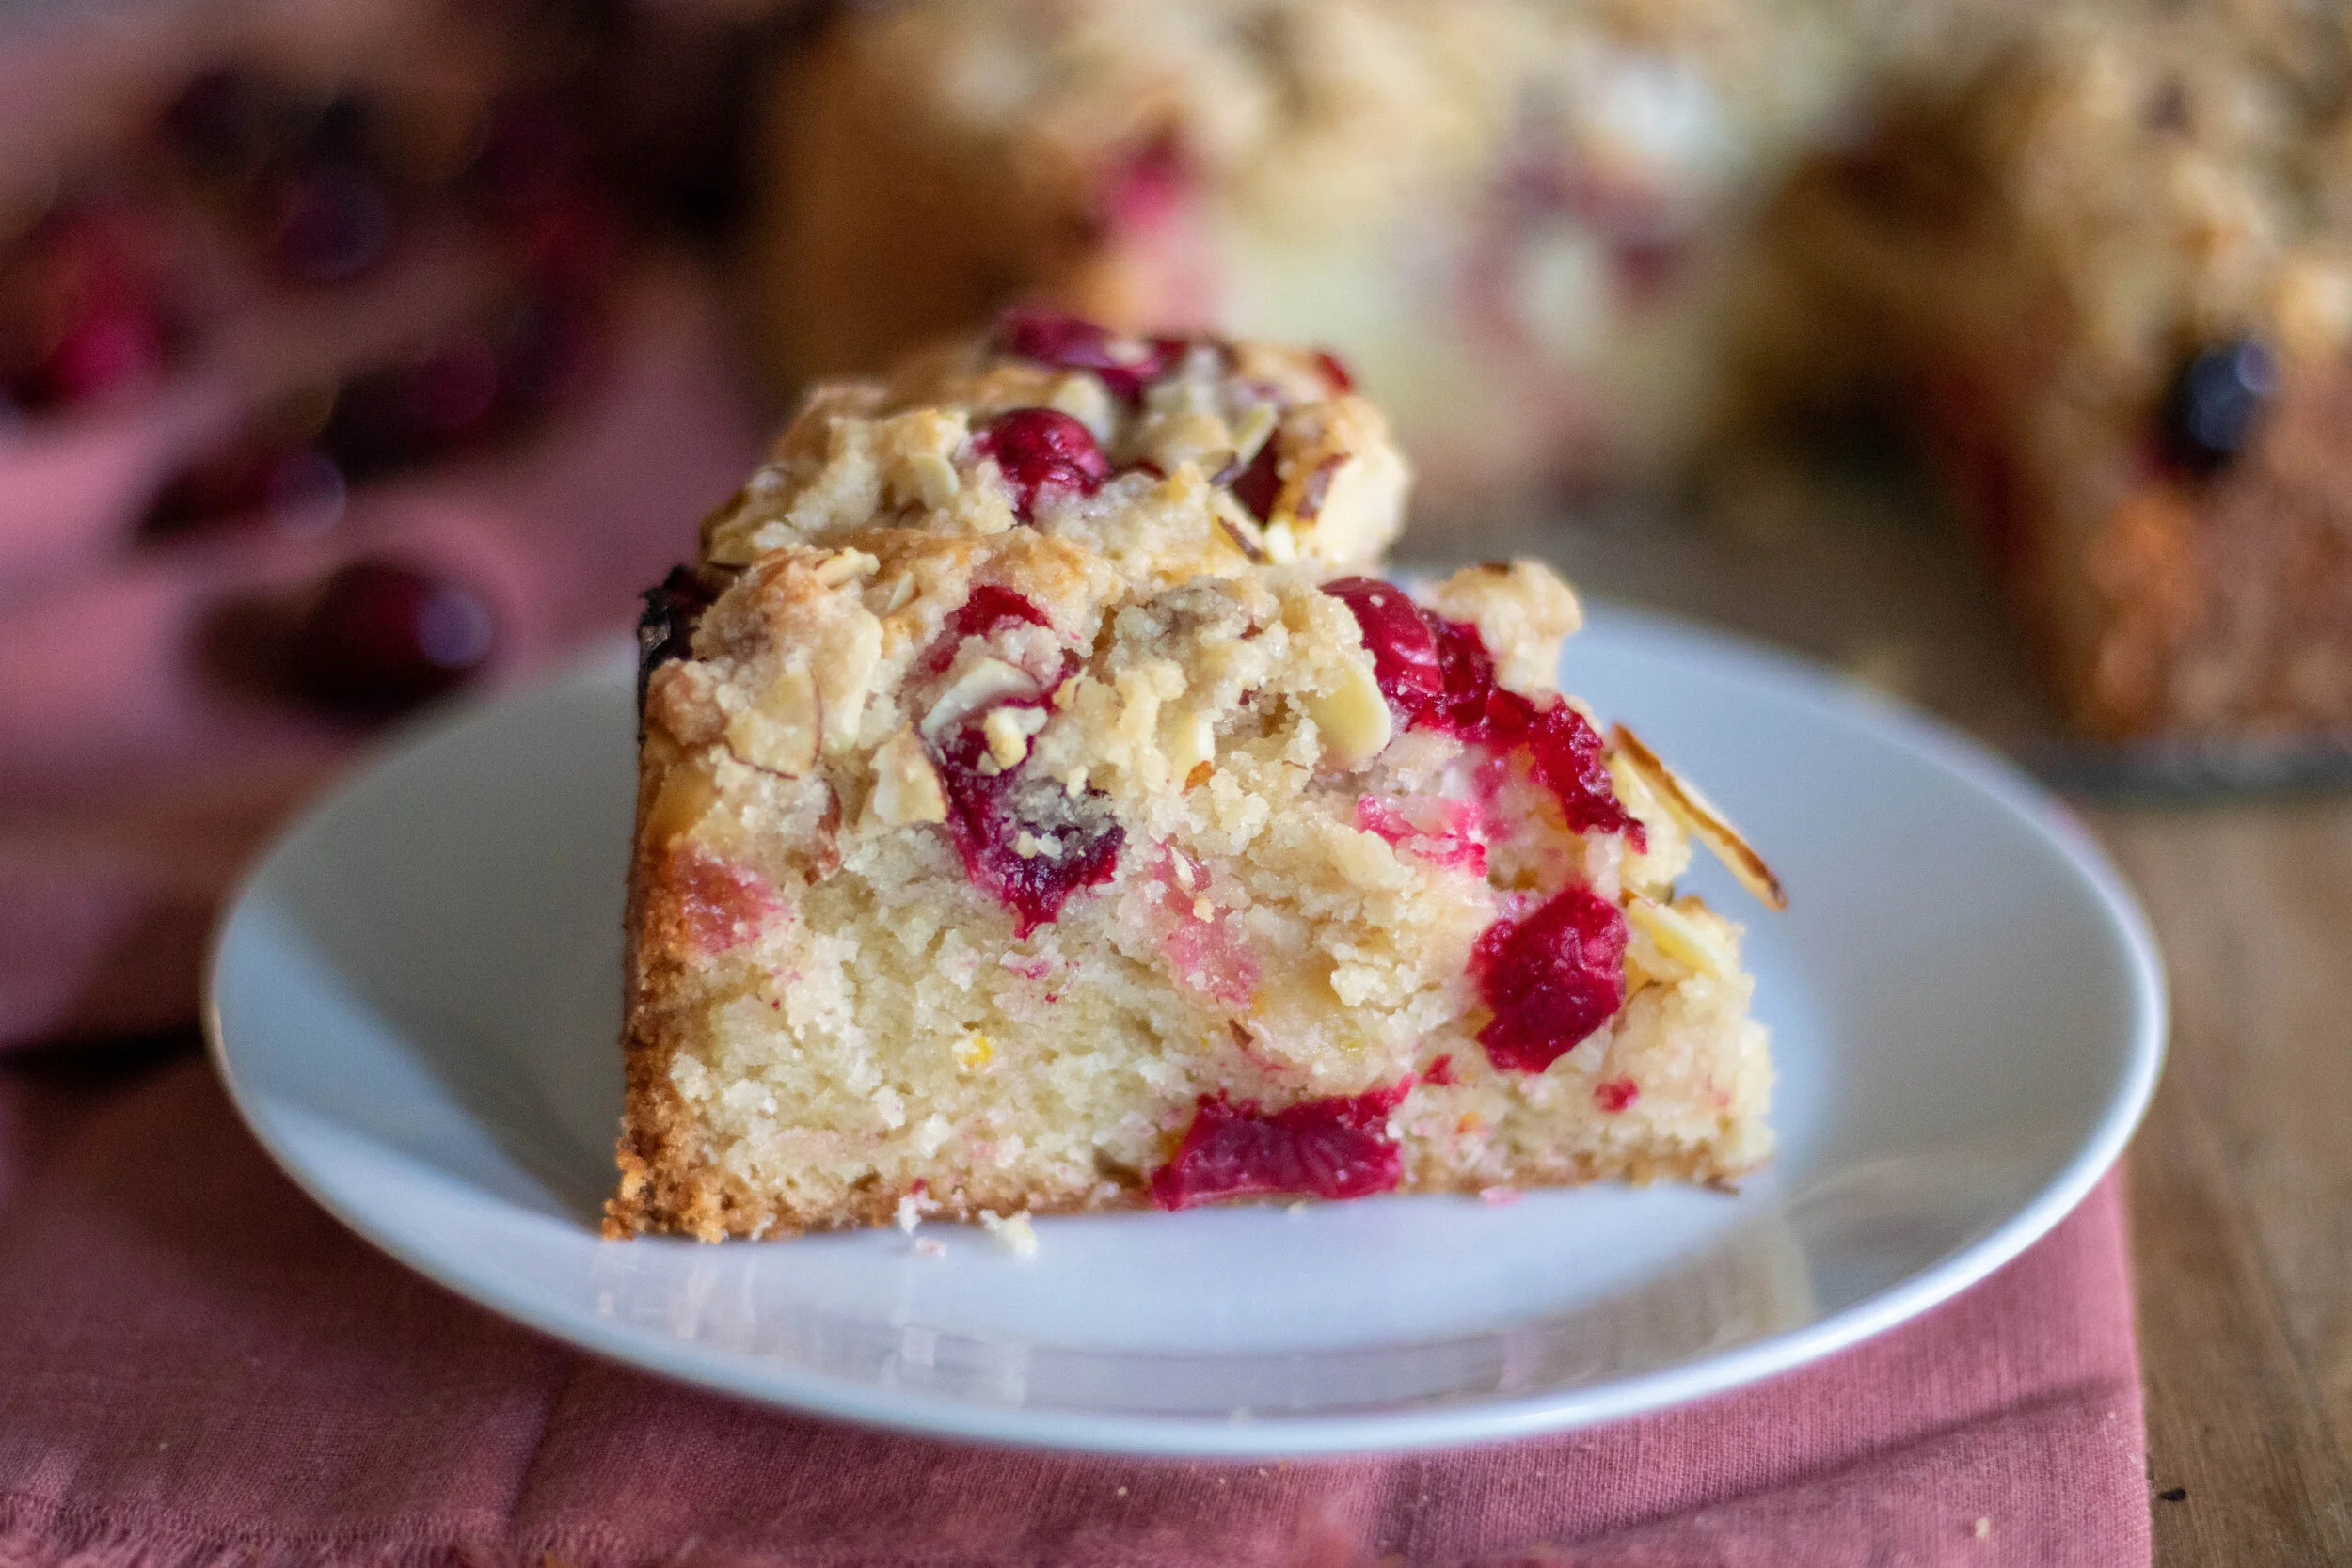
Vegan Cranberry Almond Coffee Cake

IMG_9492.jpg

This time of year I am always going on, and on, and on for my love of cranberries.

I mean it’s an exciting time of year since we can only find fresh cranberries for a few months.

So, in the winter I try and make the best of using one of my most favorite fruits and winter recipe ingredients!

I recently found a recipe in a cookbook for a cranberry citrus coffee cake that I knew I wanted to try and veganize.

I made some flavor changes and deiced I wanted to use almonds in my topping because I love cranberries and almonds together. I also wanted to add some citrus but not too much. Just a hint. Cranberries and oranges are a match made in heaven so we for sure needed to add some orange zest!

IMG_9527.jpg

I also wanted a coffee cake that would work for breakfast, or dessert for the holidays.

The original recipe had a glaze poured over that I was not very interested in. I wanted the cake to last and not get gooey and weird after a day or two. I wanted to savor this vegan coffee cake for as many days as I could with a hot cup of coffee and not see a single piece go to waste!

I was also delighted to find another use for my spring form pan that normally only sees some action when I make a cheese cake, which being perfectly honest is a rare occasion.

IMG_9514.jpg

This vegan cranberry coffee cake actually mixes up pretty quick and easy. Mine had to bake for a full hour, but keep an eye yours and check it around the 45 minute mark since everyones oven is different!

So grab some fresh cranberries while the gettin is good and bake yourself up one or 10 of these delicious vegan cranberry coffee cakes before cranberry season is over and we are all swearing off sweets for the new year!!!

I was also delighted to find another use for my spring form pan that normally only sees some action when I make a cheese cake, which being perfectly honest is a rare occasion.

This vegan cranberry coffee cake actually mixes up pretty quick and easy. Mine had to bake for a full hour, but keep an eye yours and check it around the 45 minute mark since everyones oven is different!

So grab some fresh cranberries while the gettin is good and bake yourself up one or 10 of these delicious vegan cranberry coffee cakes before cranberry season is over and we are all swearing off sweets for the new year!!!

IMG_9499.jpg

iNGREDIENTS:

You will need a 9 inch spring form pan for this recipe

  • 1 1/2 cups all purpose flour

  • 2 teaspoons baking powder

  • 1/2 teaspoon salt

  • 1 cup granulated sugar

  • 1/2 cup vegan butter, melted and cooled

  • 2 starch eggs (2 tablespoons tapioca or corn starch mixed with 6 tablespoons water)

  • 1/2 cup vegan cream cheese, or sour cream ( I used Trader Joe’s cream cheese since its not very thick)

  • 1/4 cup oat milk

  • 1 1/4 cup fresh cranberries

  • zest from one orange (you can use less if you are not a fan of citrus)

  • zest from 1/2 lemon

  • 1 teaspoon vanilla extract

ALMOND STRUSSLE TOPPING:

  • 1/2 cup all purpose flour

  • 1/4 cup granulated sugar

  • zest from the other half of the lemon

  • 1/2 cup sliced almonds

  • 3 tablespoon softened vegan butter

INSTRUCTIONS:

Preheat oven to 350 degrees Fahrenheit

  1. Prepare starch egg by mixing starch and water. Let it sit for a minute.

  2. In a small bowl whisk together the sugar, zest, butter, starch eggs, and vanilla.

  3. In a medium bowl whisk the flour, baking powder, and salt. Pour sugar and butter mixture into the bowl with the flour and mix together.

  4. Mix in the cream cheese or sour cream, and milk. Mix just until everything is well combined.

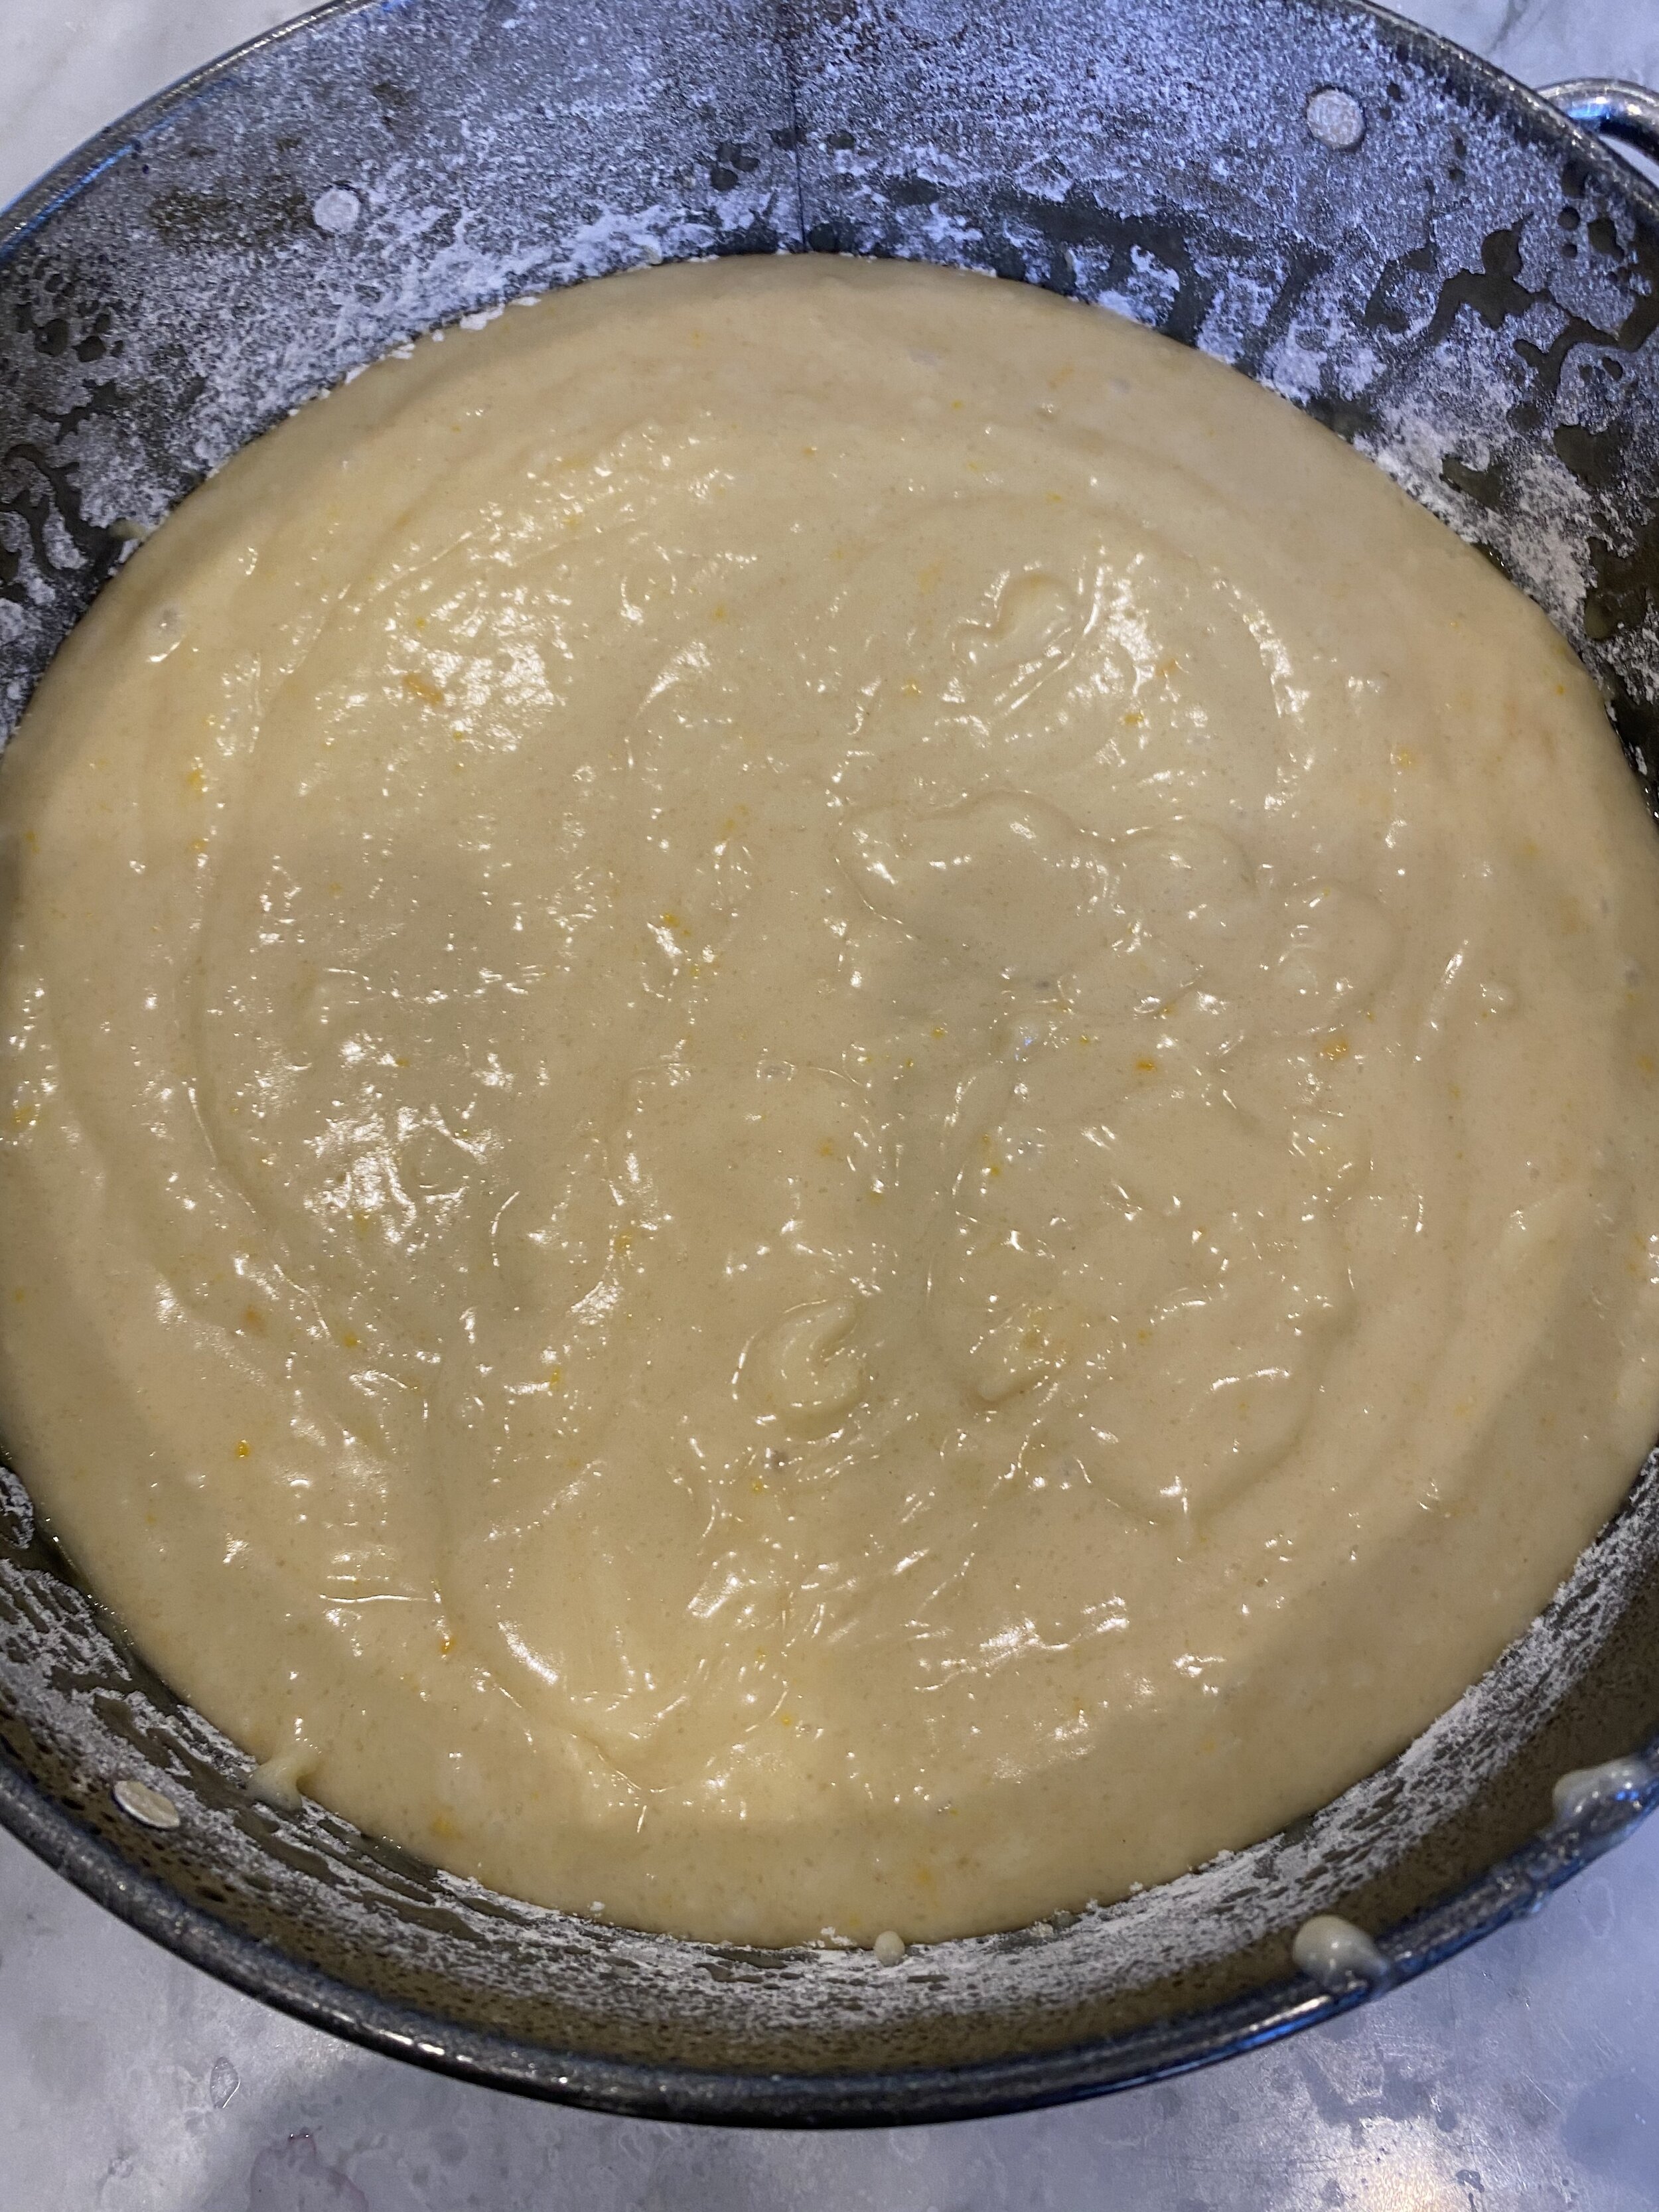
  5. Prepare your spring form pan by giving it a light spray with cooking oil ir rub it down with some vegan butter on a paper towel. Shake a few teaspoons of four around the pan until its coated and dump the excess flour.

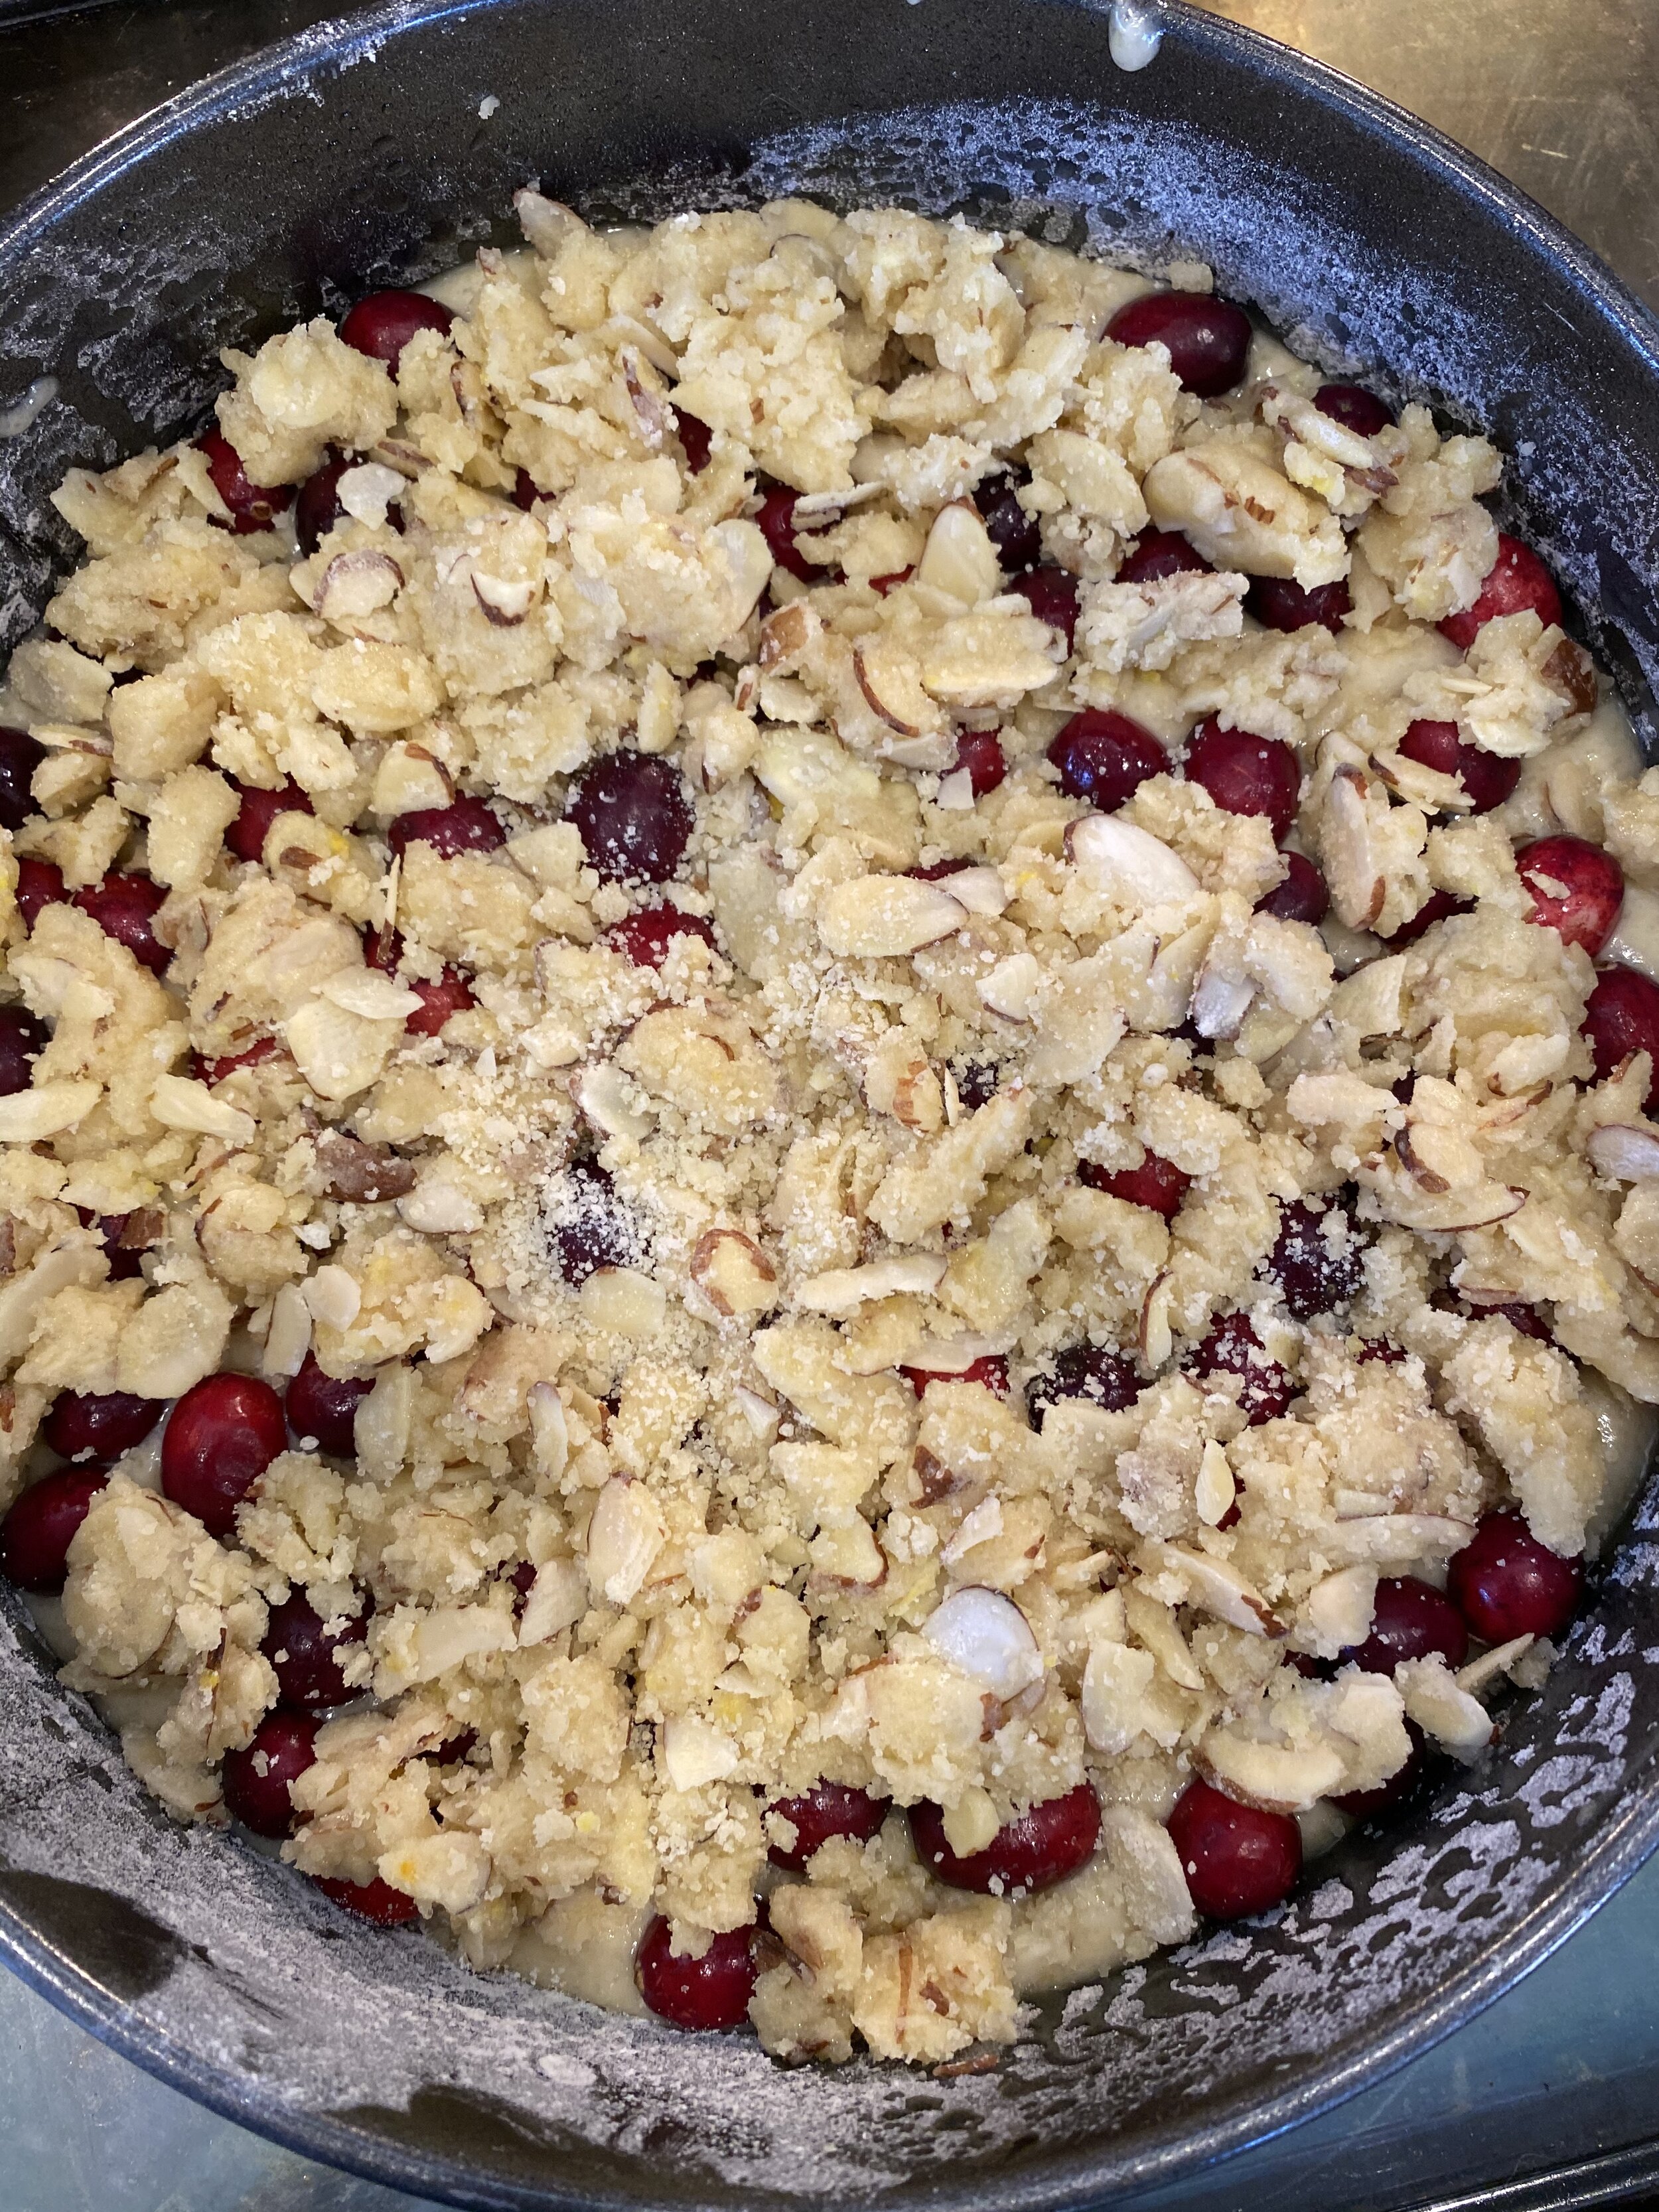
  6. In a medium sized bowl mix the flour and sugar for the streusel topping. Stir in the almonds and add the butter, stirring until the mixture is crumbly. Its easiest to just use your hands to work in the butter and crumble the mixture up.

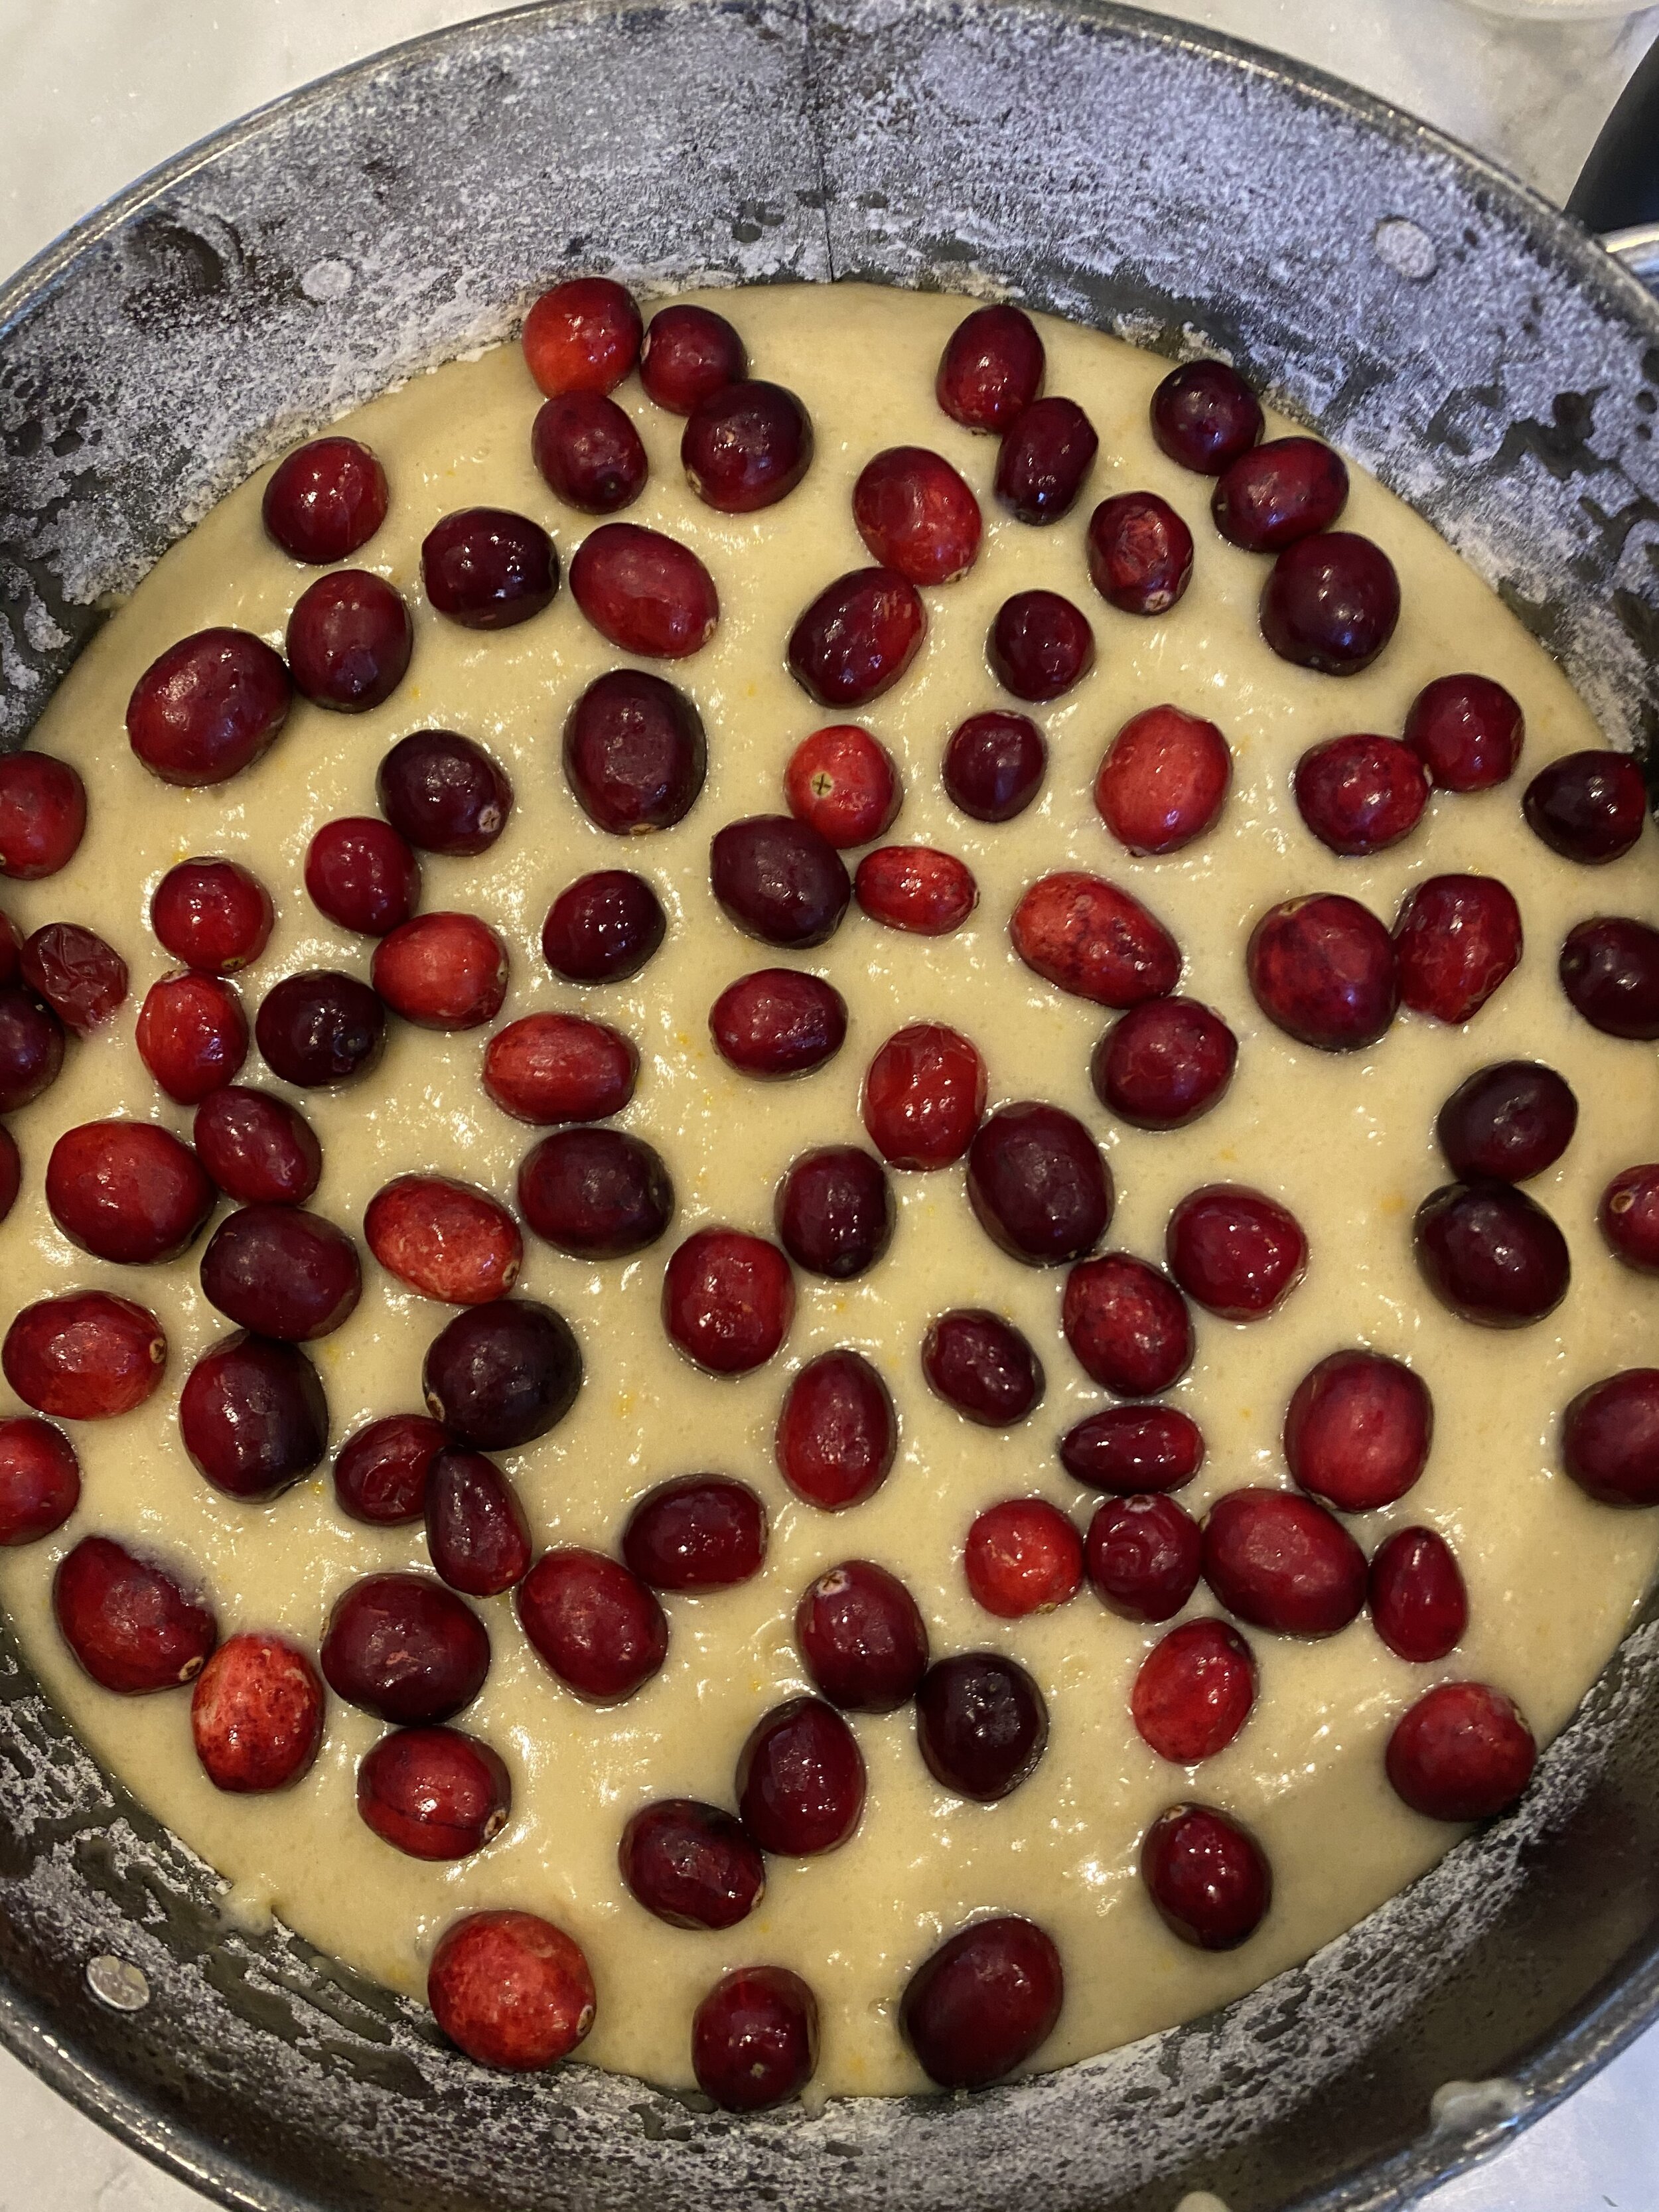
  7. Pour the cake batter into the prepared pan. Sprinkle the cranberries evenly over the top of the batter. Top with streusel mixture.

  8. Place the pan on the center rack of the oven and cook for 50 to 60 minutes, or until a tooth pick or cake tester inserted into the center comes out clean.

  9. Allow the cake to cook a bit before releasing the ring on the spring form pan.

  10. Serve warm or room temperature. Store in an air tight container at room temperature for 3 or 4 days.

If you like this recipe, then try these:

vegan flank steak

vegan flank steak

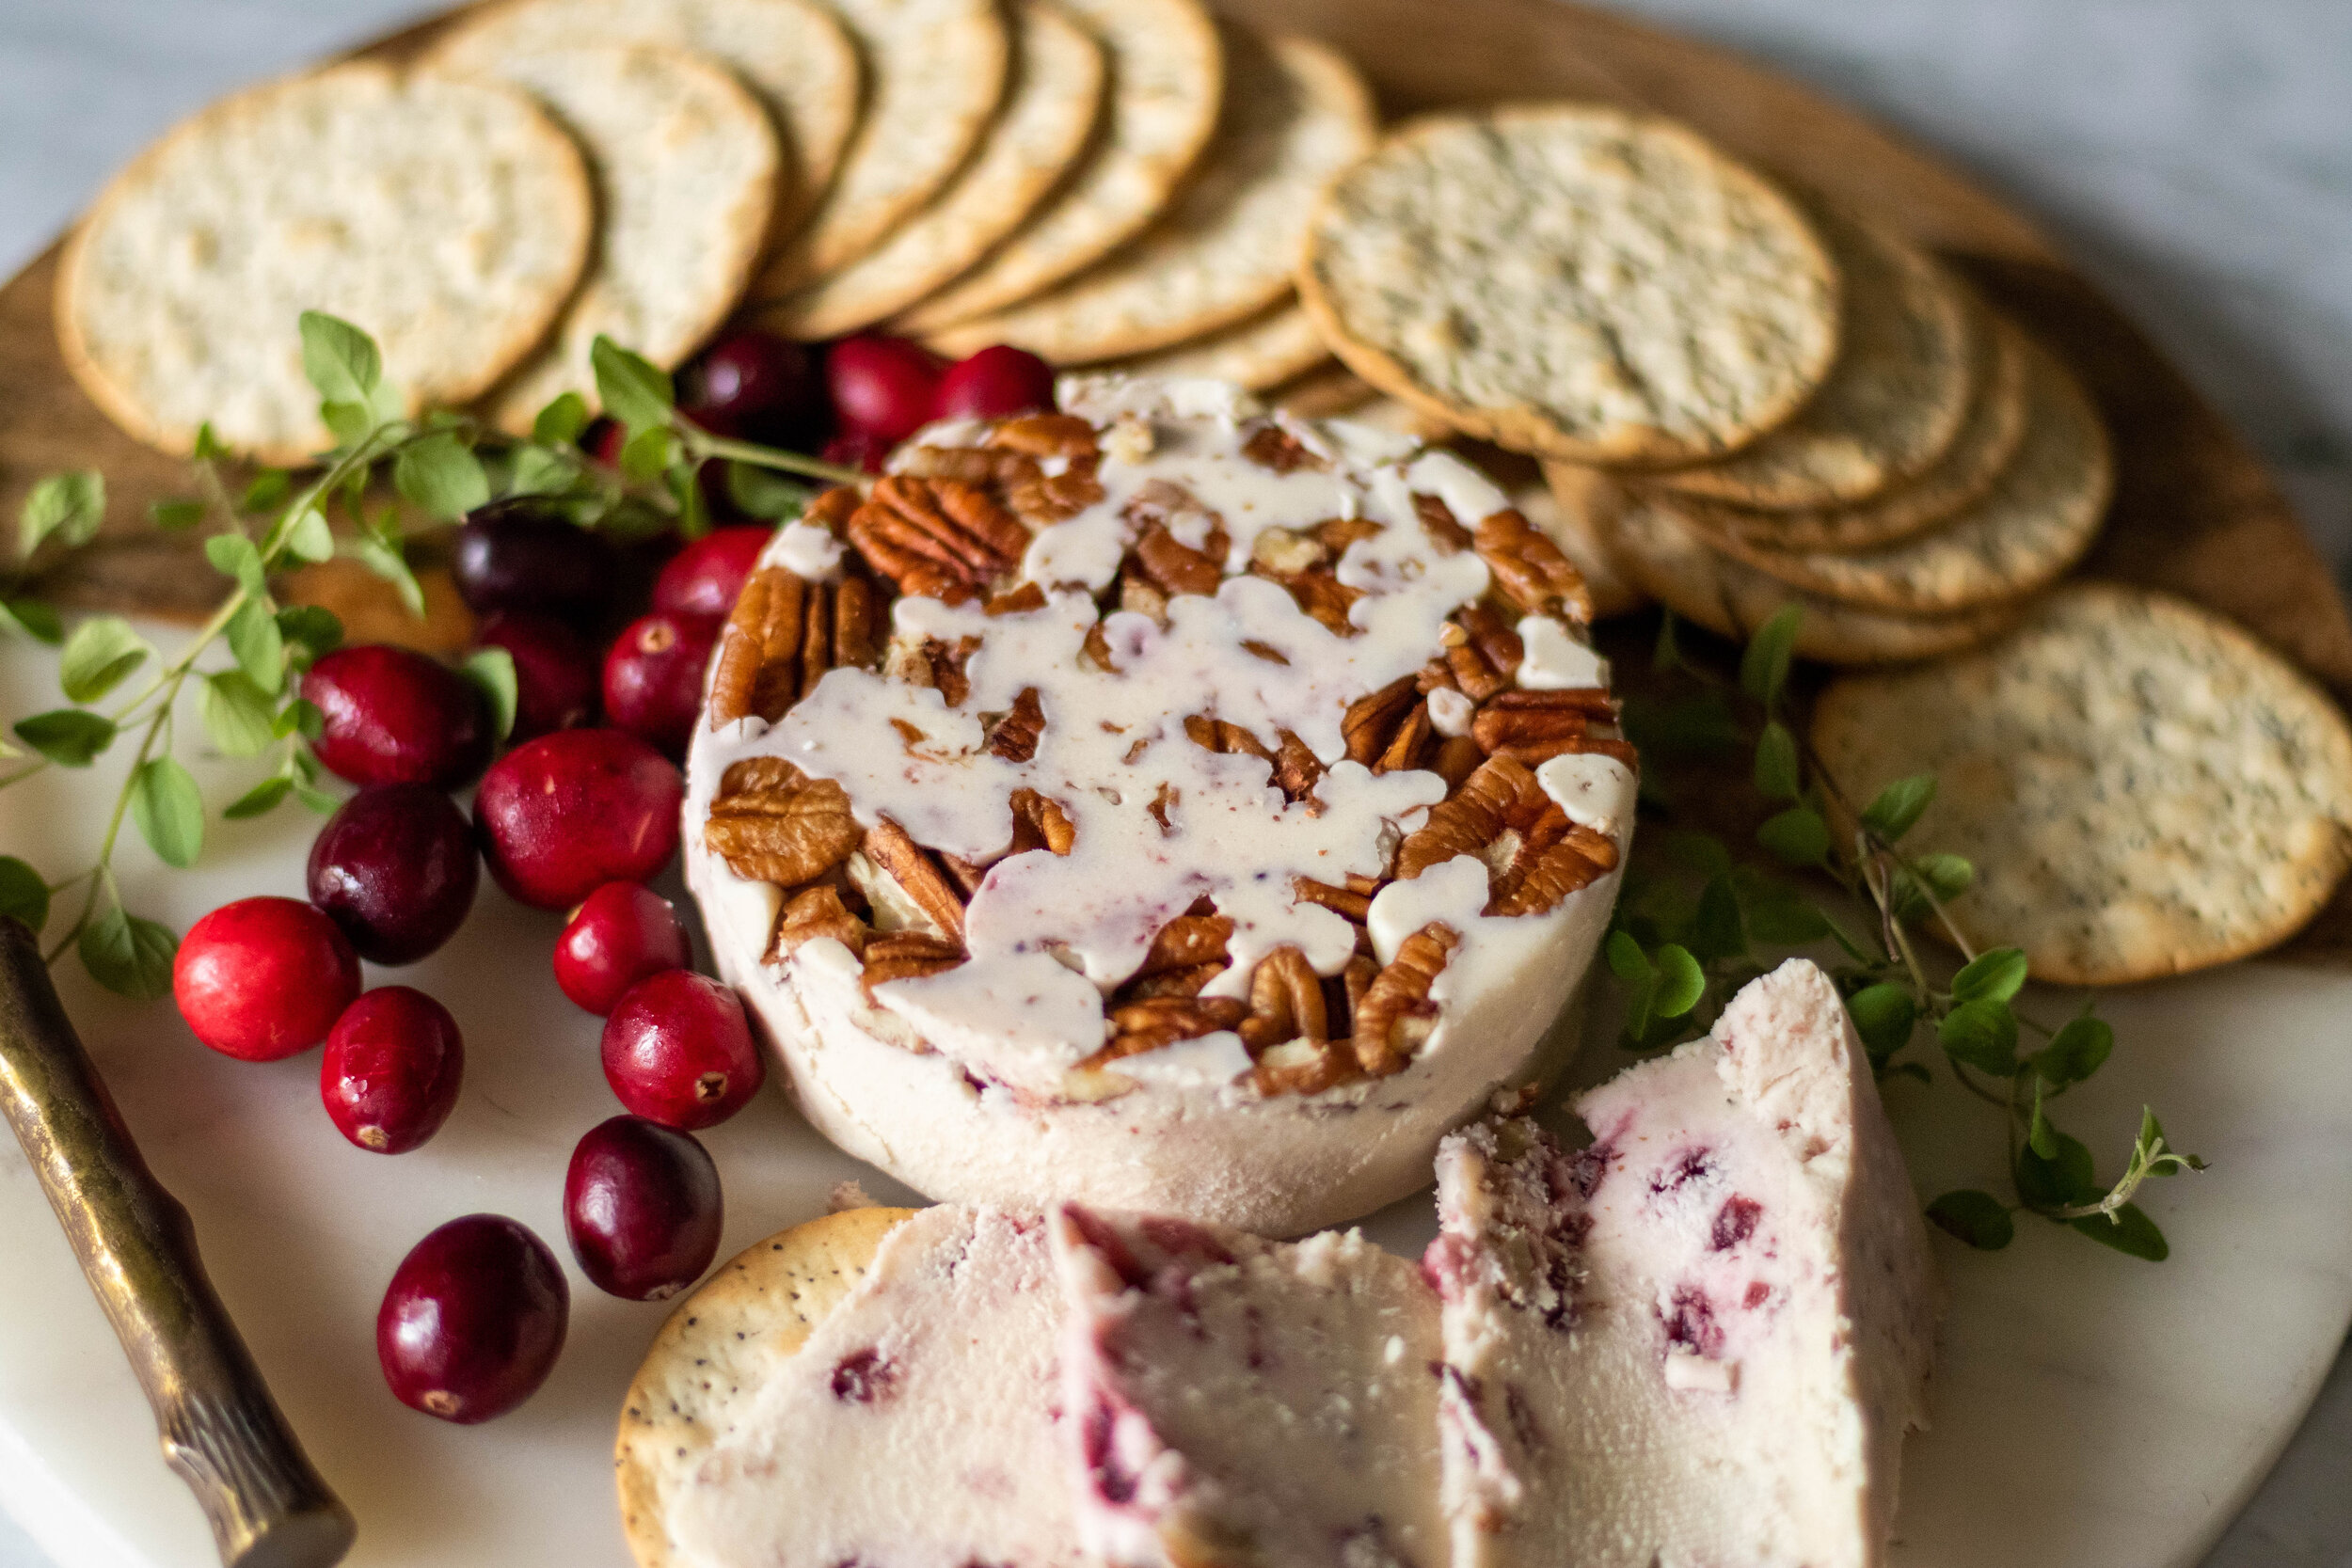
Vegan White Stilton with Cranberries and Pecans

IMG_9453.jpg

I make a lot of vegan cheese. It’s easier than most people think, fairly quick, and really affordable to make your own.

All you need are some basic ingredients that you can find at your local super market, plus some agar agar powder. Agar is a vegan gelatin make from seaweed and what is used to solidify the cheese. You can find agar on amazon, or your local Asian food store. It is also pretty inexpensive for the amount of cheese you will get from one bag!

Although vegan cheese options have come a long way over the years in super markets, I can still only find flavors like cheddar, mozzarella, and a few varieties of cheese slices.

IMG_9460.jpg

If you are like me and miss more artisan style cheeses, you best bet is to start making your own! Like this vegan cranberry and pecan stilton!! I used to impatiently wait for Trader Joe’s to put out their seasonal stilton’s. Traditional Stilton is a milder cheese and a little crumbly. It often is made with different fruits. I can think of no better fruit to toss into a cheese around the holidays than cranberries!!!

I love cranberries!! Cranberry sauce, cranberry desserts, I even love snacking on fresh raw cranberries!! I impatiently wait each year for fresh cranberries to come into season and to be available at my local super markets!


But for this cheese, you don’t need fresh cranberries unless you are wanting to make your own cranberry sauce, which who can blame you. I make it every single year!! But you can 100% use cranberry sauce from a jar or can for this recipe and don’t have to wait for the holiday season to make it! It is delicious year round!

Listen, don’t let a new or unfamiliar ingredient intimate you! This cheese is so quick and easy to make and pretty fool proof! You will be so amazed at how easy it was to make and how delicious home made vegan cheese is! And if you are on the fence about making a fruity cheese, don’t be. It is soooooo good!! Hooray for Stilton and thanks Trader Joe’s for your never ending inspiration!

IMG_9459.jpg

INGREDIENTS:

  • 1 can of full fat coconut milk or cream

  • 2 tablespoons agar agar powder

  • 2 teaspoons lemon juice or apple cider vinegar

  • 2 teaspoons miso paste

  • 2 tablespoons tapioca starch

  • 1 teaspoons of salt

  • 3 tablespoons sauerkraut (cabbage only, no juice)

  • 1/4 cup nutritional yeast

  • 1/4 melted cup refined coconut oil

  • 3 heaping tablespoons of whole cranberry sauce, homemade or store-bought

  • 1/4-1/3 cup chopped pecans (optional)

IMG_9455.jpg

INSTRUCTIONS:

  1. In a food processor or high speed blender, add all of the ingredients EXCEPT the milk, agar, and cranberry sauce .

  2. Pulse a few times to mix it all up.

  3. Now add the milk and agar to a medium sauce pan and bring to a boil. Reduce heat and simmer until mixture thickens to the consistency of a thin pudding.

  4. Add the milk mixture to the ingredients in the food processor, and mix for about a minute. The mixture will quickly begin to thicken as agar begins to solidify at room temperature.

  5. Using a rubber spatula, gently fold in the cranberry sauce into the cheese mixture, so it’s kind of a marble swirl.

  6. Sprinkle a tablespoons or so of nuts in the bottoms of 2-3 ramekins or small bowls. Transfer the cheese mixture to the ramekins or small bowls. You should be able to fill 2 or 3 small bowls.

  7. Place bowls uncovered in the fridge for a few hours, or until the cheese has fully hardened and is a sliceable consistency.

If you like this recipe, then try these:

vegan flank steak

vegan flank steak

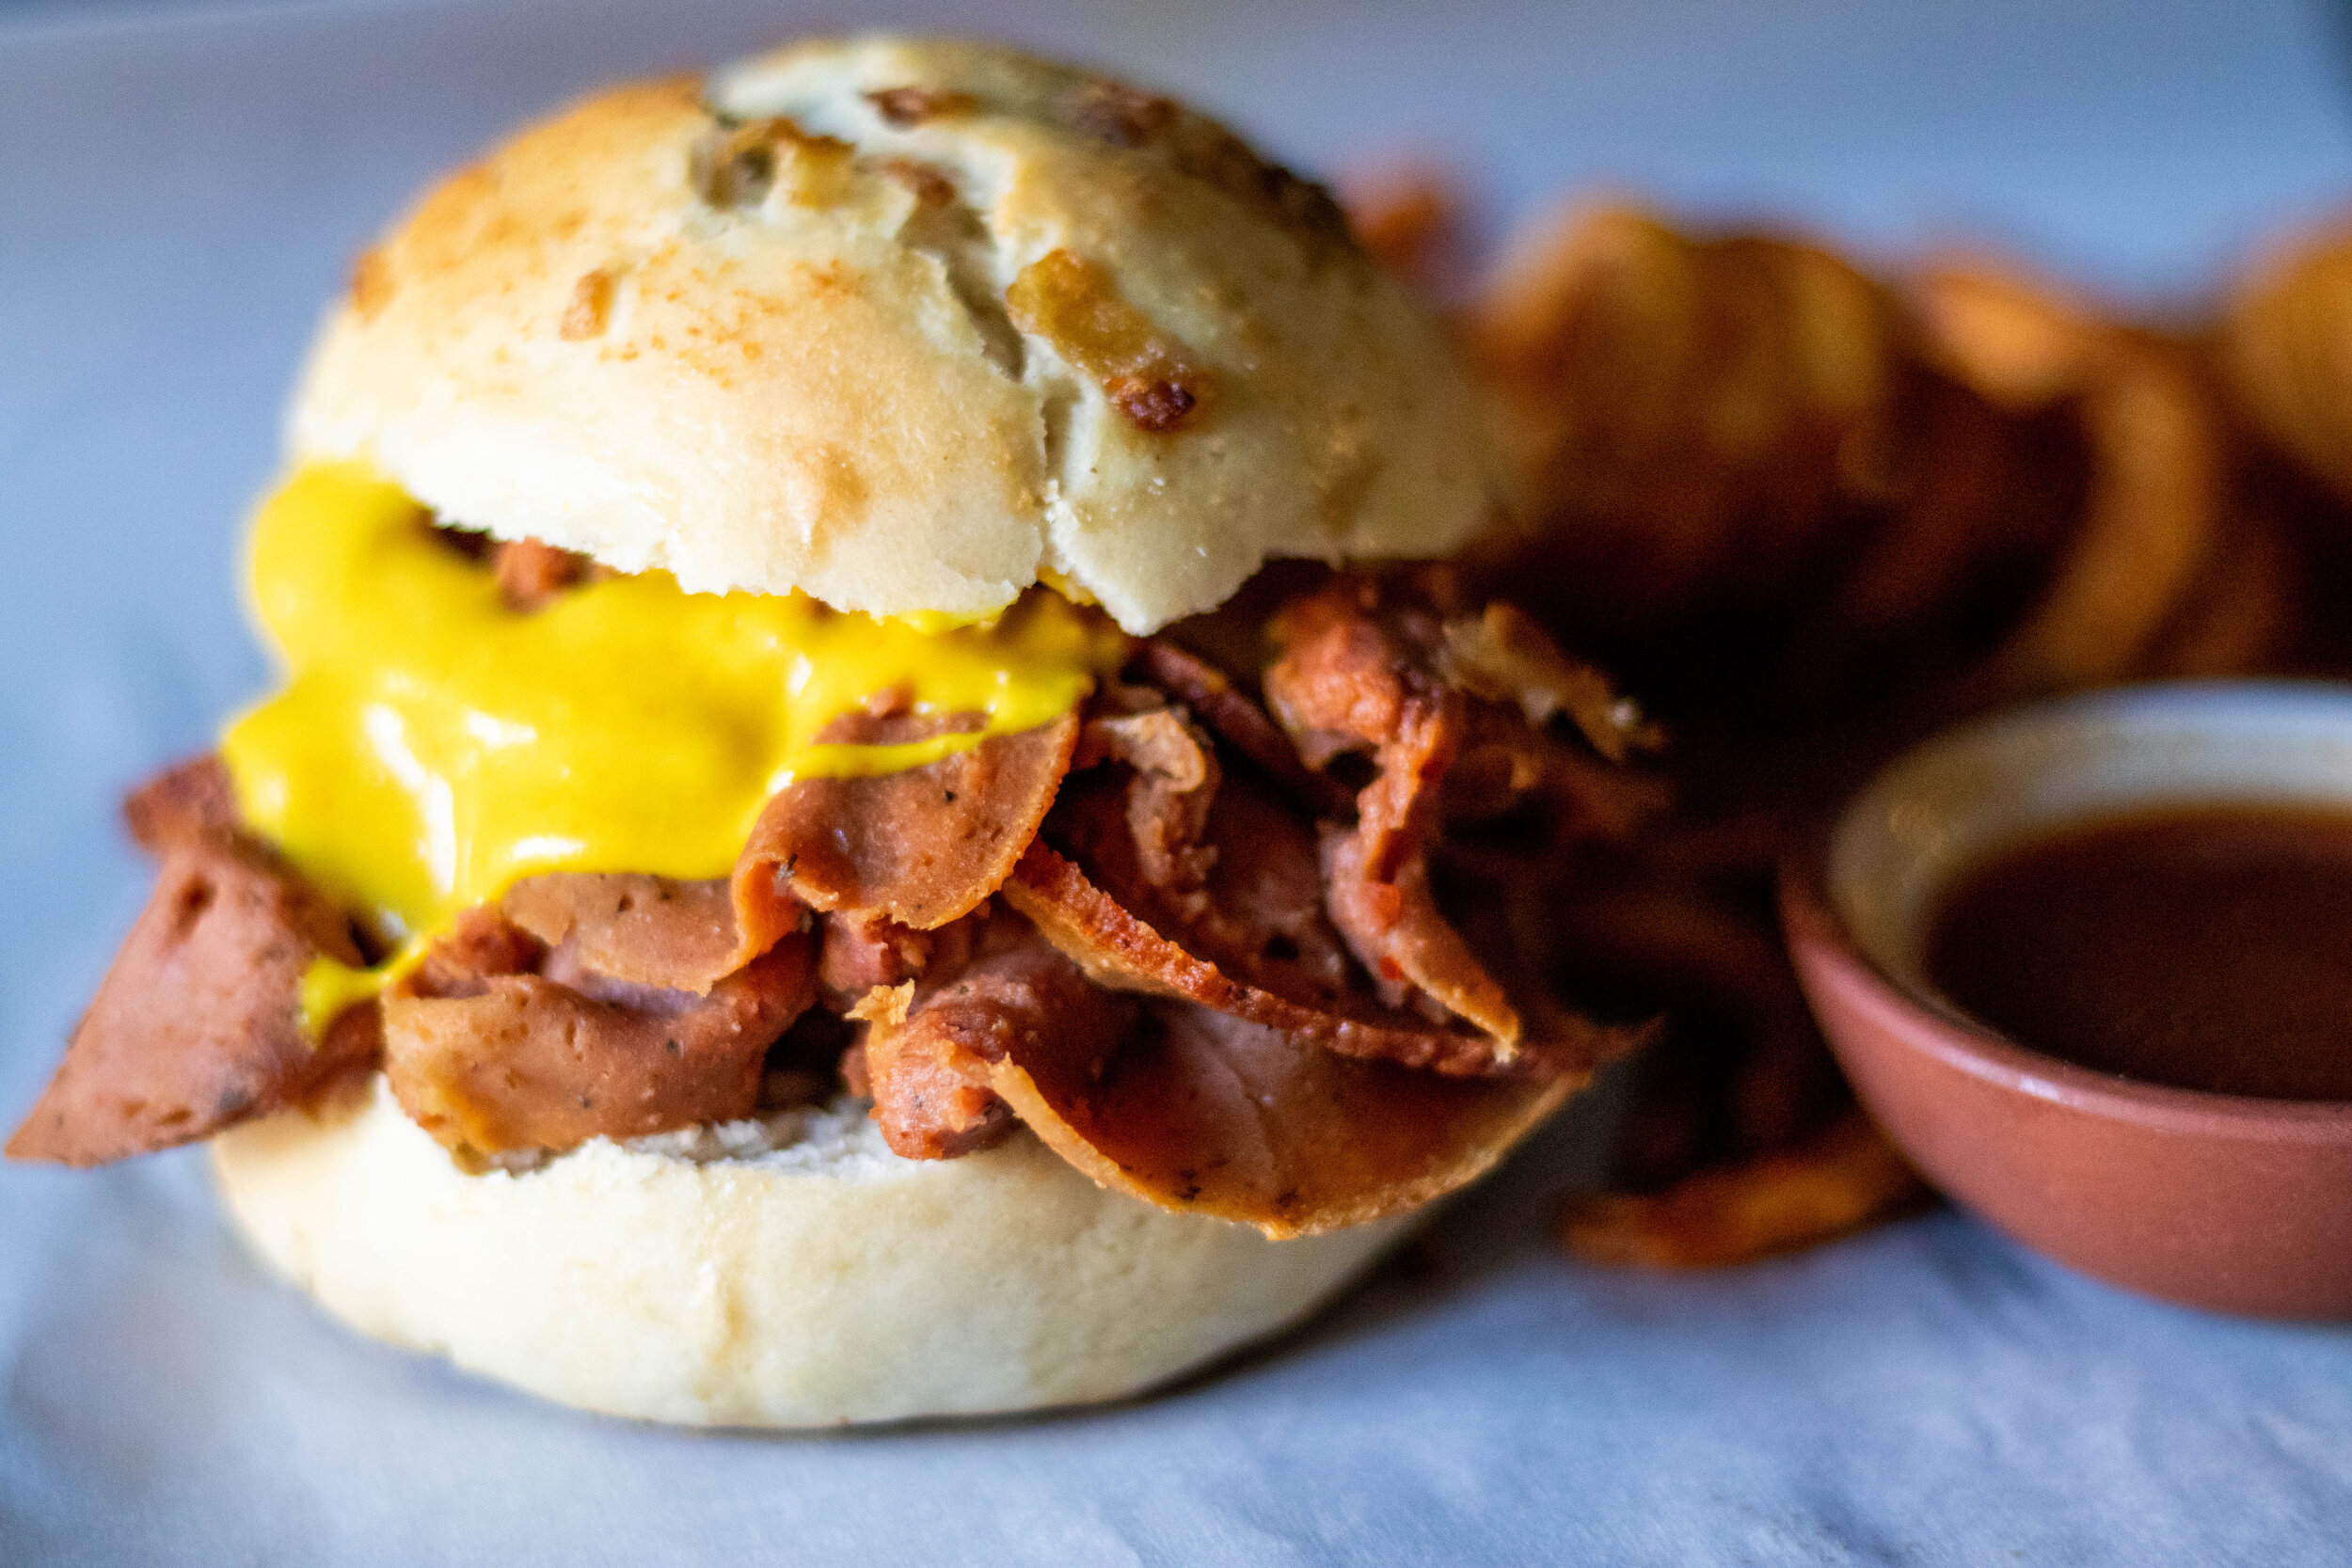
Vegan Big Beef and Cheddar Sandwich (Vegan Roast Beef)

IMG_9383.jpg

What is an Arby’s big beef and cheddar you might ask? ( you would ask if you have no clue what Arby’s is or have never eaten there pre-vegan.) Well its a thinly sliced, warm roast beef sandwich, with cheddar cheese sauce, on an onion bun from Arby’s fast food restaurant ! And it my friends was DELICIOUS! The big beef and cheddar is more pricey than an original roast beef and most often did not fit into my high school, stolen change, budget.

When I was in high school, you could get 5 classic Arby’s roast beef sandwiches for $5. My friend Jessica and I would raid my step sisters giant jar of change for $5 so we could split 5 roast beef sandwiches between us. And let me tell you, we both could EASILY pound 2 and half classic roast beefs in one sitting, no problem. Not that I would advise anyone do that now that I am a grown up and realized nobody “needs” 2 and half sandwiches of any kind at one time.

IMG_9362.jpg

My kids have never had real roast beef let alone an Arby’s roast beef sandwich or Arby’s sauce. My southern family would say, “bless their little hearts!” So recently when someone made and posted the 86eats roast beef to mimic an Arby’s big beef and cheddar, I realized how crazy it was that I had not done that yet and shared it with my own kids.

So, I already had a solid vegan roast beef recipe, and my good friend Mike has just loaned me a deli slicer, and I also have a solid vegan cheddar cheese sauce recipe, so all I need was to veganize the Arby’s sauce and an onion roll! Easy enough, y’all.

For the sauce, I just googled all the other copy cat Arby’s sauces, married a few together and used vegan ingredients. For the bun, I used our no rise hamburger bun recipe and changed up a few things to get a super tasty onion roll!

IMG_7398.jpg

These buns are the quickest yeast buns ever, so easy to make and pretty much fail proof. I loved onion rolls as as kid, and often made my turkey sandwiches on one, so now that I have an easy vegan version, and the best vegan deli turkey lunch meat recipe, I am making these vegan onion rolls ALL THE TIME!

Heads up if you need to have the famous fries with your vegan big beef and cheddar, most chain grocery stores sell them in the freezer section! The actual Arby’s brand curly fries!! And they crisp up great in my air fryer!

Oh and if you were a fan of the famous Jamocha shake, I added my recipe at the bottom of this page. Quick, easy and worthy or dipping your fries right in there!

So without further ado, I present to you the 86eats vegan version of an Arby’s Big Beef and Cheddar!

IMG_9395.jpg

INGREDIENTS:

Vegan Cheddar Cheese Sauce:

  • 1/2 cup cashews or sunflower seeds, covered in water and microwave 3 minutes

  • 1 and 1/4 cup water (in addition to the water used to microwave the nuts)

  • 2 tablespoons tapioca starch

  • 2 tablespoons nutritional yeast

  • 1 teaspoons turmeric

  • 1 and 1/2 teaspoons smoked paprika

  • 2 tablespoons sauerkraut without the juice (you can sub with 2 teaspoons light miso and a dash or apple cider vinegar)

  • 1 teaspoon salt

IMG_9365.jpg

INSTRUCTIONS:

  1. Prepare the vegan deli roast beef according to instructions. You will need to make it either in the morning if you wish to slice it in the evening or the day before. It requires at least a 6 hour rest in the fridge in order for it to firm up enough to slice thinly. You can slice the vegan roast beef with a super sharp knife or with an electric deli slicer for extra thin, Arby’s worthy slices.

  2. Prepare the onion rolls according to the instructions. These onion rolls are a quick yeast roll, meaning they do not require a rise time. So start to finish they are done in about an hour. Or use any vegan store-bought bun you prefer.

  3. You can make homemade Arby’s sauce or if you have some sauce packets laying around, use them, they are vegan.

  4. Prepare the cheese sauce by adding the microwaved and drained nuts or seeds to high speed blende or food processor, along with the remaining ingredients. Blend until COMPLETELY SMOOTH! You don’t want any bits of nuts or seeds left.

  5. Pour the cheese mixture into a medium size sauce pan and cook over medium heat stirring continuously until the cheese has thickens to a thin pudding consistency. If the sauce gets too thick you whisk in some extra water and thin it back out! You can easily reheat this sauce in a pan, agin adding a little water to help thin it back out. I normally have a batch of this in my fridge for nachos, tacos, sandwiches or dip for fries.

  6. I like to slice and microwave the vegan roast beef wrapped in some wax paper to warm it through for about 30 seconds. I also like to heat the bun, not toast it, steam it to warm through.

  7. Add heated vegan roast beef, along with cheese sauce, and Arby’s sauce to the buns to serve.

  8. Serve with Arby’s brand curly fries and a homemade vegan Jamocha shake to complete your veganized Arby’s experience! Y’all have to know I did not go to all this trouble without making that shake and sharing the recipe!! Cause I love you all that much ;)

BONUS REICPE (VEGAN JAMOCAH SHAKE)

  • Blend 3 cups vegan chocolate ice cream with 1 cup cold, strong coffee, and 1 cup plant milk! It’s that easy and sooooo good!!!

If you like this recipe, then try these:

Quick Vegan Onion Rolls

IMG_9405.jpg

I love bread. I love all carbs really, but I really love bread.

Yeast bread is not always quick to make, but these rolls are!! Glory glory!

Most yeast dough requires at least an hour to rise, and then normally another half hour to full hour for a second rise.

These vegan onion rolls only require a 10 minute rest and they are in the oven!!

This means you can have homemade onion rolls start to finish in less than an hour.

Truth be told I made these rolls because I was attempting to veganize an Arby’s big beef and cheddar and that my friends required and onion bun! Because the big beef and cheddar is served on an onion bun I had not choice but to make my own, because all of the ones I have found at the bakery are not vegan.

When I was a kid my favorite sandwich was a turkey and cheeses with mayo on an onion roll. So now I plan on making these rolls on a regular basis! My sandwich game just got sooooo good, y’all!!!

So if you are new to bread making or have been doing it for eons, these rolls are so easy and really tasty. And if you have been missing eating an Arby’s big beef and cheddar on an onion bun, I am only here to help!!


INGREDIENTS:

  • 3 1/2 cups all purpose flour

  • 2 tablespoons active dry yeast

  • 1 cup plus 3 tablespoons hot water, around 100-110 degrees

  • 1/3 cup sugar

  • 1-2 teaspoons salt

  • 2 teaspoons onion powder

  • 1 flax egg or starch egg (1 tablespoon flax meal or starch, 3 tablespoons water mixed)

  • 1/3 cup neutral flavored oil, I used grape seed oil

  • 1/2 a medium yellow onion, very finely diced


INSTRUCTIONS:

  1. In a medium sized skillet, add the onions with a teaspoon oil. Sprinkle a little salt and sauté the onions over medium heat until the are soft and begin to brown. Allow to cool.

  2. In a glass bowl, add yeast, water, and 1 tablespoon of sugar. Let sit for 10 minutes until the yeast becomes foamy. If the yeast does not bubble and foam you may have killed the yeast. The water must be warm but if its too hot it kills the yeast. I use hot tap water from the faucet.

  3. If using a stand mixer, add flour, salt, and remaining sugar to the mixer bowl. Once yeast is ready, mix in flax egg, and oil to the the yeast mixture. Add the wet ingredients to the dry ingredients.

  4. Mix on medium speed for 5 minutes. If the mixture is too dry, you can add a tablespoon more of water. If it seems too wet add a tablespoon more flour. The dough should be soft but not sticking to the sides of the mixer.

  5. If mixing by hand, follow above instructions for combining ingredients. Once the dough is mixed, pour out on a clean counter top. and kneed by hand for 5 minutes.

  6. Once dough is ready, divide into 9 equal pieces. If you want smaller buns, divide into 12 equal pieces. Form a disk shape with each piece of dough, but do not flatten them out. Place on a parchment lined cookie sheet. Divide the onions equally between the rolls, pressing them into the tops. You can brush the tops with 1 teaspoons of maple syrup mixed with 1/4 cup of milk to help the rolls brown.

  7. Allow buns to rest for 10 minutes while you pre heat the oven to 425 degrees. Once the oven is ready, place buns inside and bake for 10 - 15 minutes. If the buns are not browning evenly, you can rotate the baking sheet halfway through baking.

  8. Once buns are finished baking, allow to cool before serving.

  9. You can freeze any left over buns in a freezer zip lock bag for up to a month.

If you like this recipe, then try these:

Vegan Copycat Arby's Sauce

IMG_9383.jpg

Abry’s sauce. Like liquid gold when I was growing up.

We, like most families I knew, had a kitchen drawer dedicated to “junk” and extra fast food restaurant sauce packets. Ours was normally full of ketchup packets, malt vinegar packets, and Arby’s sauce.

If you an unfamiliar with said sauce, imagine a ketchup with a kick, like you are not too sure what gives it that tangy spice, but you really don’t care because it is magic on roast beef and those famous Arby’s curly fries!!

Arby’s was hands down my favorite fast food restaurant back in the day.

When I was in high school, you could get 5 classic Arby’s roast beef sandwiches for $5. Me and my friend Jessica would raid my step sisters giant jar of change for $5 so we could split 5 roast beef sandwiches between us. And let me tell you, we both could EASILY pound 2 and half classic roast beefs in one sitting, no problem. Not that I would advise anyone do that now that I am a grown up and realized nobody “needs” 2 and half sandwiches of any kind at one time.

My kids have never had real roast beef let alone an Arby’s roast beef sandwich or Arby’s sauce. My southern family would say, “bless their little hearts!” So recently when someone made and posted the 86eats roast beef to mimic an Arby’s big beef and cheddar, I realized how crazy it was that I had not done that yet and shared it with my own kids.

So I made the sauce to add to my favorite old sandwich and now I will always have a jar in my fridge for dipping fires, or adding to sandwiches. Because its delicious, and so super duper easy to make.

Arby’s sauce is in fact vegan according to their website, but being that not much else is at an Arby’s other than the fries, it is much easier to make this sauce by the jar full at home!

And just like that, vegan kitchen’s “junk” drawers are already less cluttered than the ones of those who went before us!


INGREDIENTS:

  • 1 cup water

  • 1/2 cup ketchup

  • 2 tablespoons brown sugar

  • 3 tablespoons vegan Worcestershire sauce

  • 1 teaspoon onion powder

  • 1 teaspoon garlic powder

  • 1/2 teaspoon smoked paprika

  • 2 tablespoons apple cider vinegar

  • 1/4 teaspoon salt

  • a few shakes of hot sauce (you really just need a tiny amount)

  • 1 tablespoon corn starch mixed with 3 tablespoons cold water


INSTRUCTIONS:

  1. Add all of the ingredients except for the starch and water mixture to a medium sized pot over medium/low heat. Whisk well, and allow the mixture to simmer for about 5 minutes.

  2. Add the starch and water mixture to the pot and whisk well. Allow the mixture to simmer another 5 minutes so it begins to thicken.

  3. Remove from heat and allow the mixture to cool before transferring to a glass jar or other airtight container. Store in the fridge for 1 to 2 weeks.

If you like this recipe, then try these:

Vegan Cranberry Stuffed Turkey Roast

IMG_9346.jpg

Thanksgiving is my most favorite holiday. Hands down.

I love everything about it. The family and friends, the weather, and alllllllll of the food.

I have made many seitan roast over the years for the holidays. Some stuffed, some not, some with crispy skin, some without. But never yet had I made a vegan holiday roast that was stuffed with crispy skin.

I have no idea why not, but I knew this year it was exactly what we needed and what I was going to make. A vegan stuffed turkey roast with crispy skin!

And trust me, making your own vegan holiday roast is probably WAY easier than you may think. Making seitan is actually pretty easy and super affordable!

IMG_9349.jpg

You can stuff a seitan roast with just about anything, but one of my favorite foods in the whole word is cranberry sauce.

I can not imagine a holiday meal without a side of whole cranberry sauce, so that is what I deiced I would use in my vegan turkey stuffing this year.

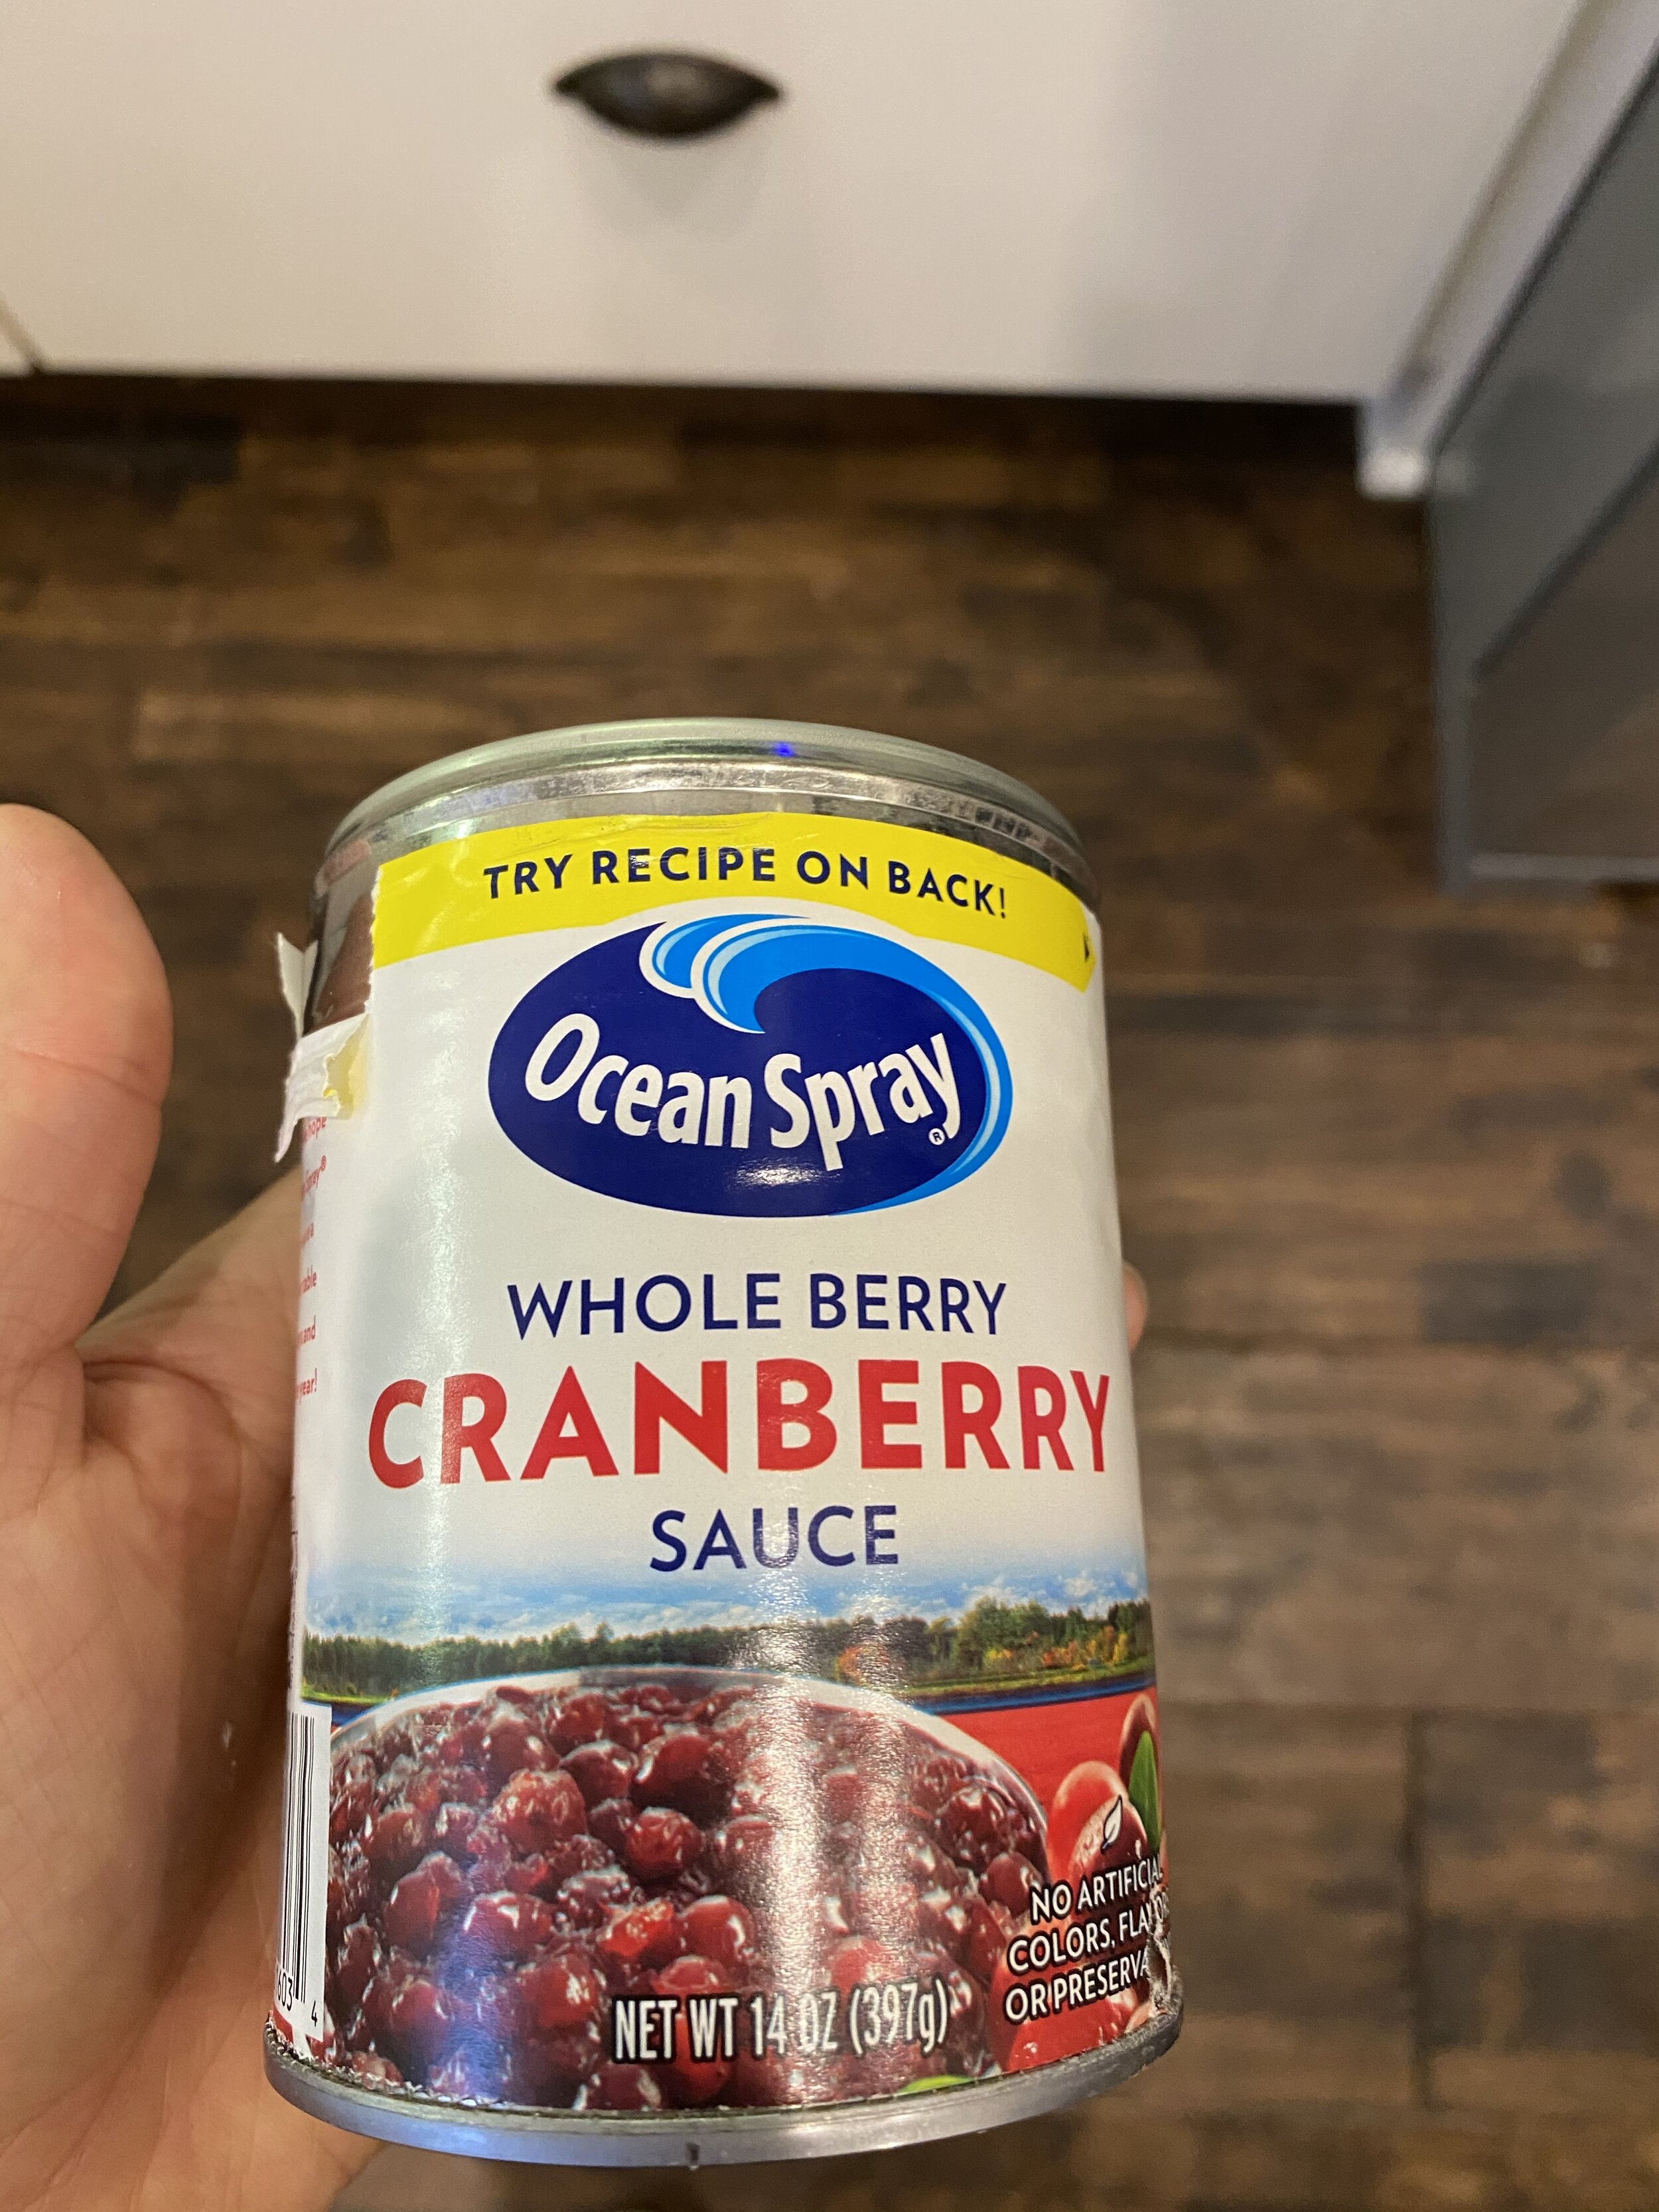
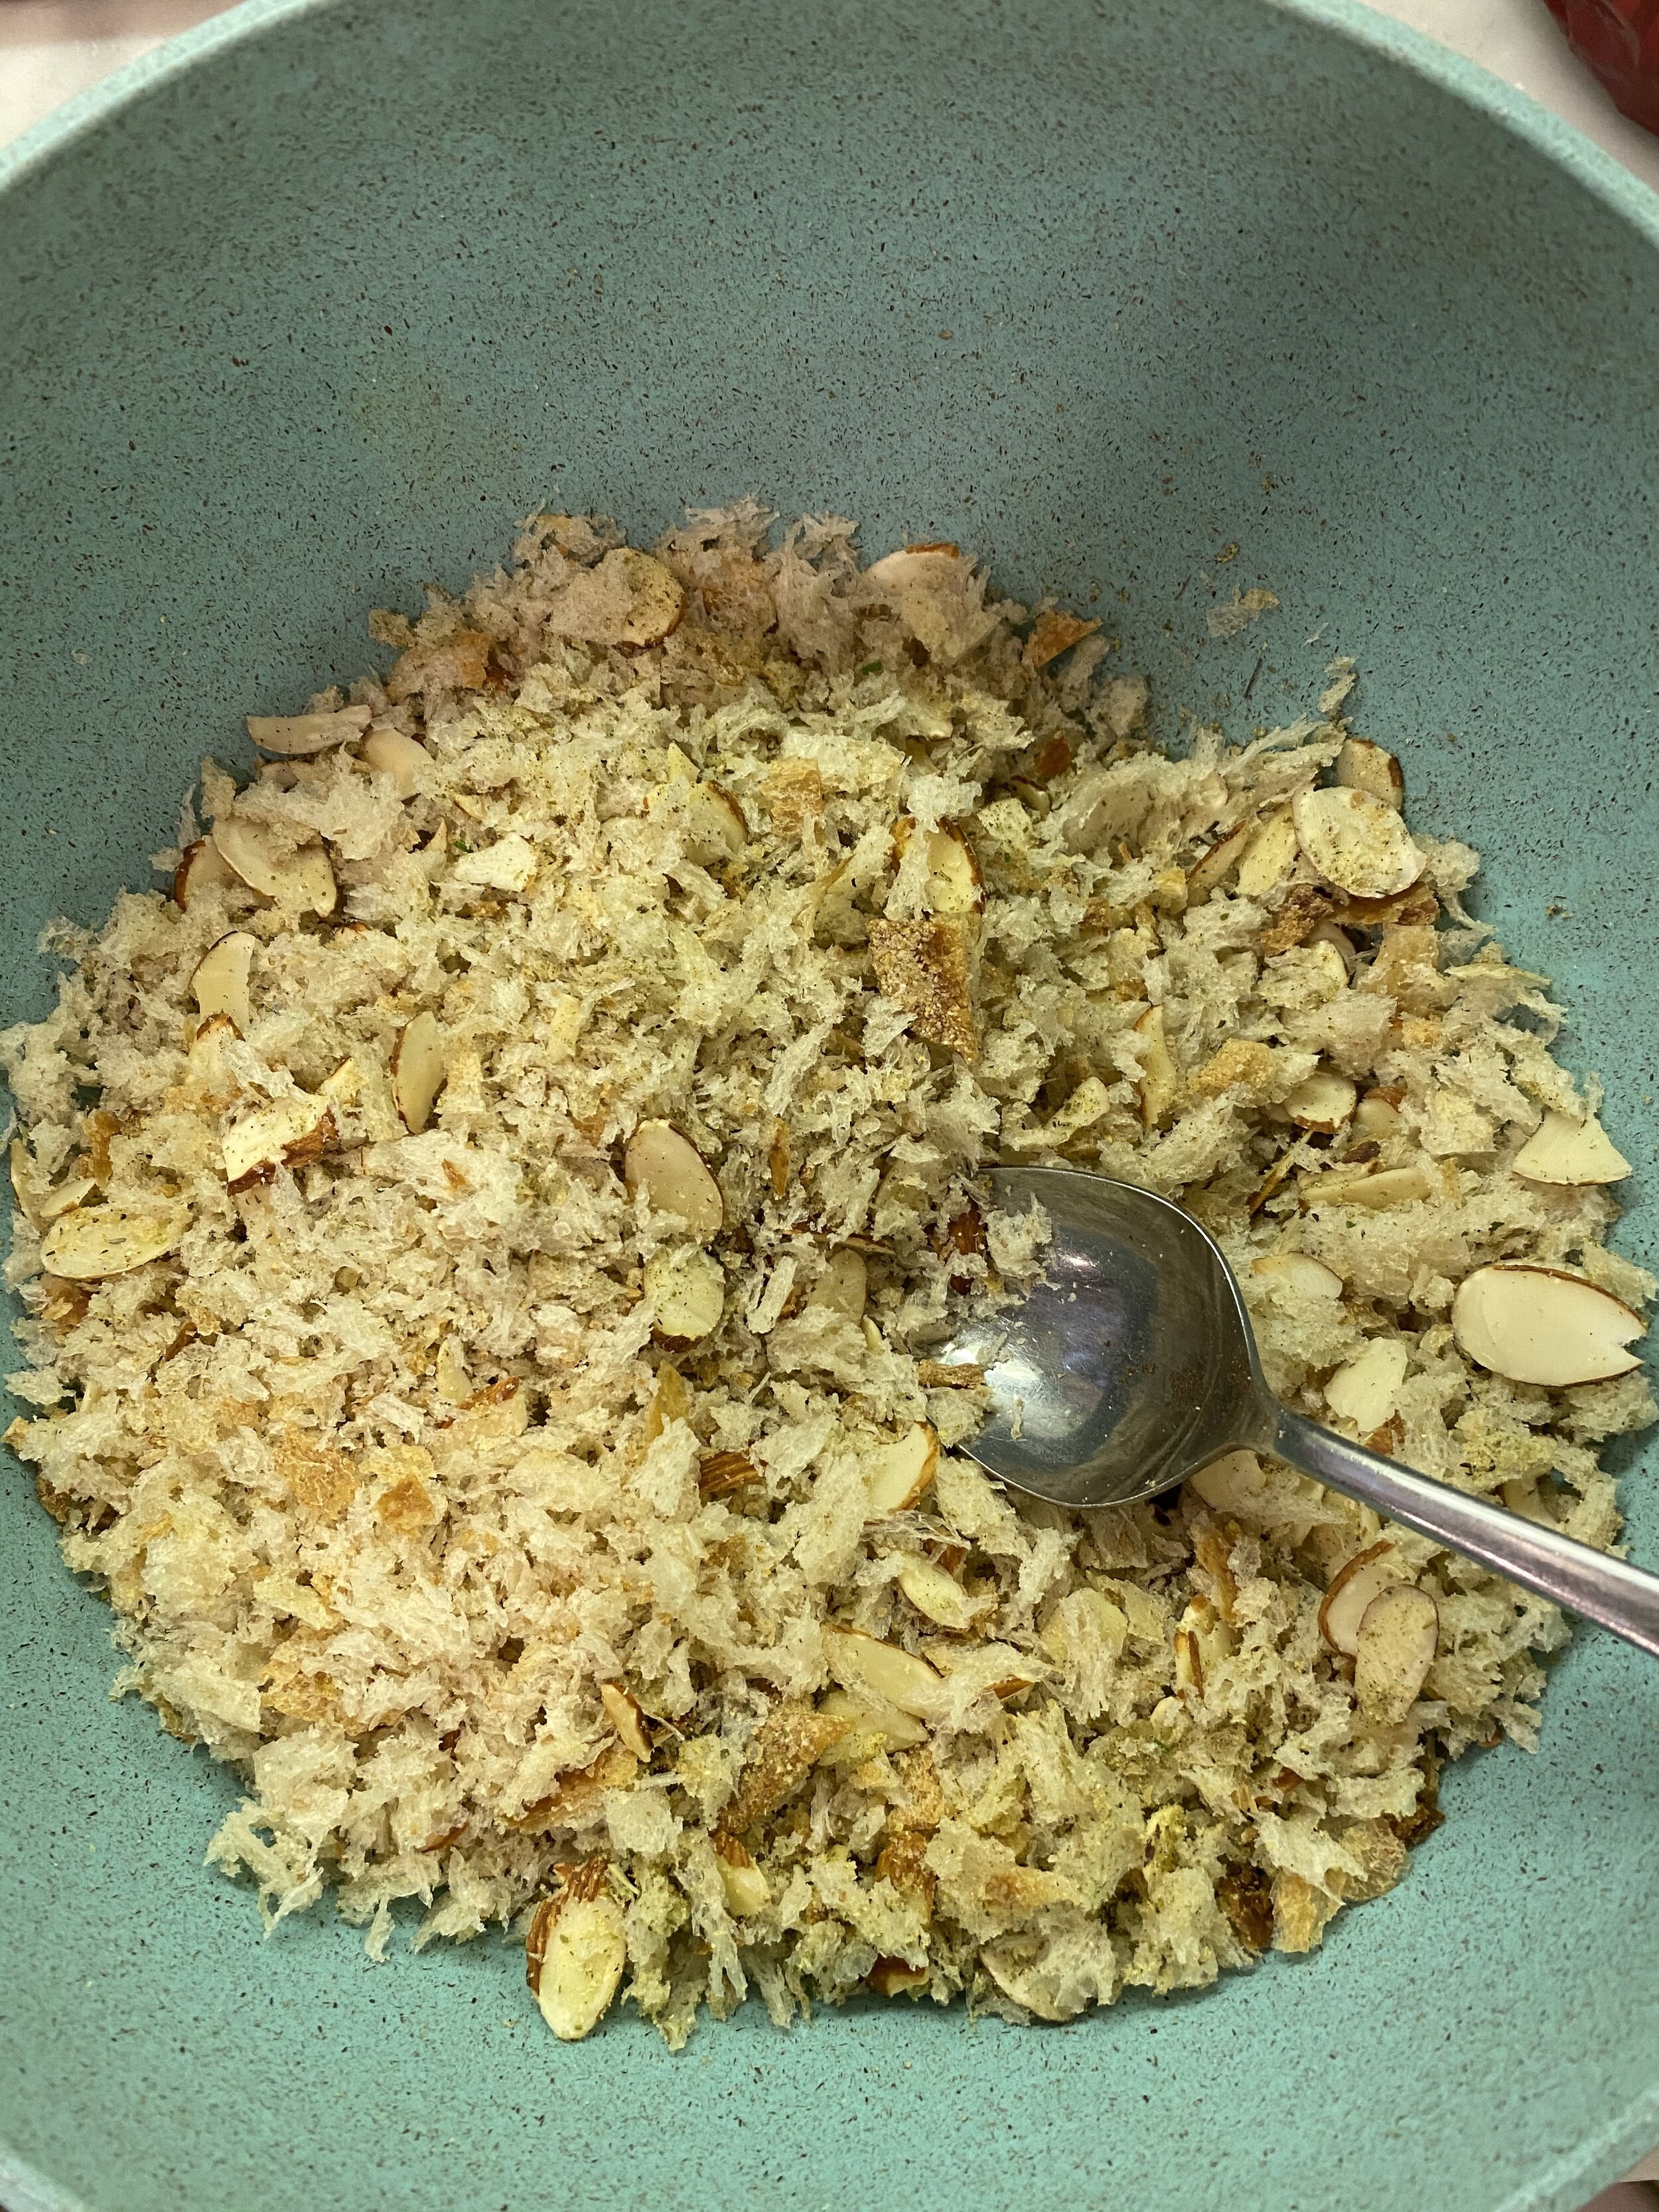
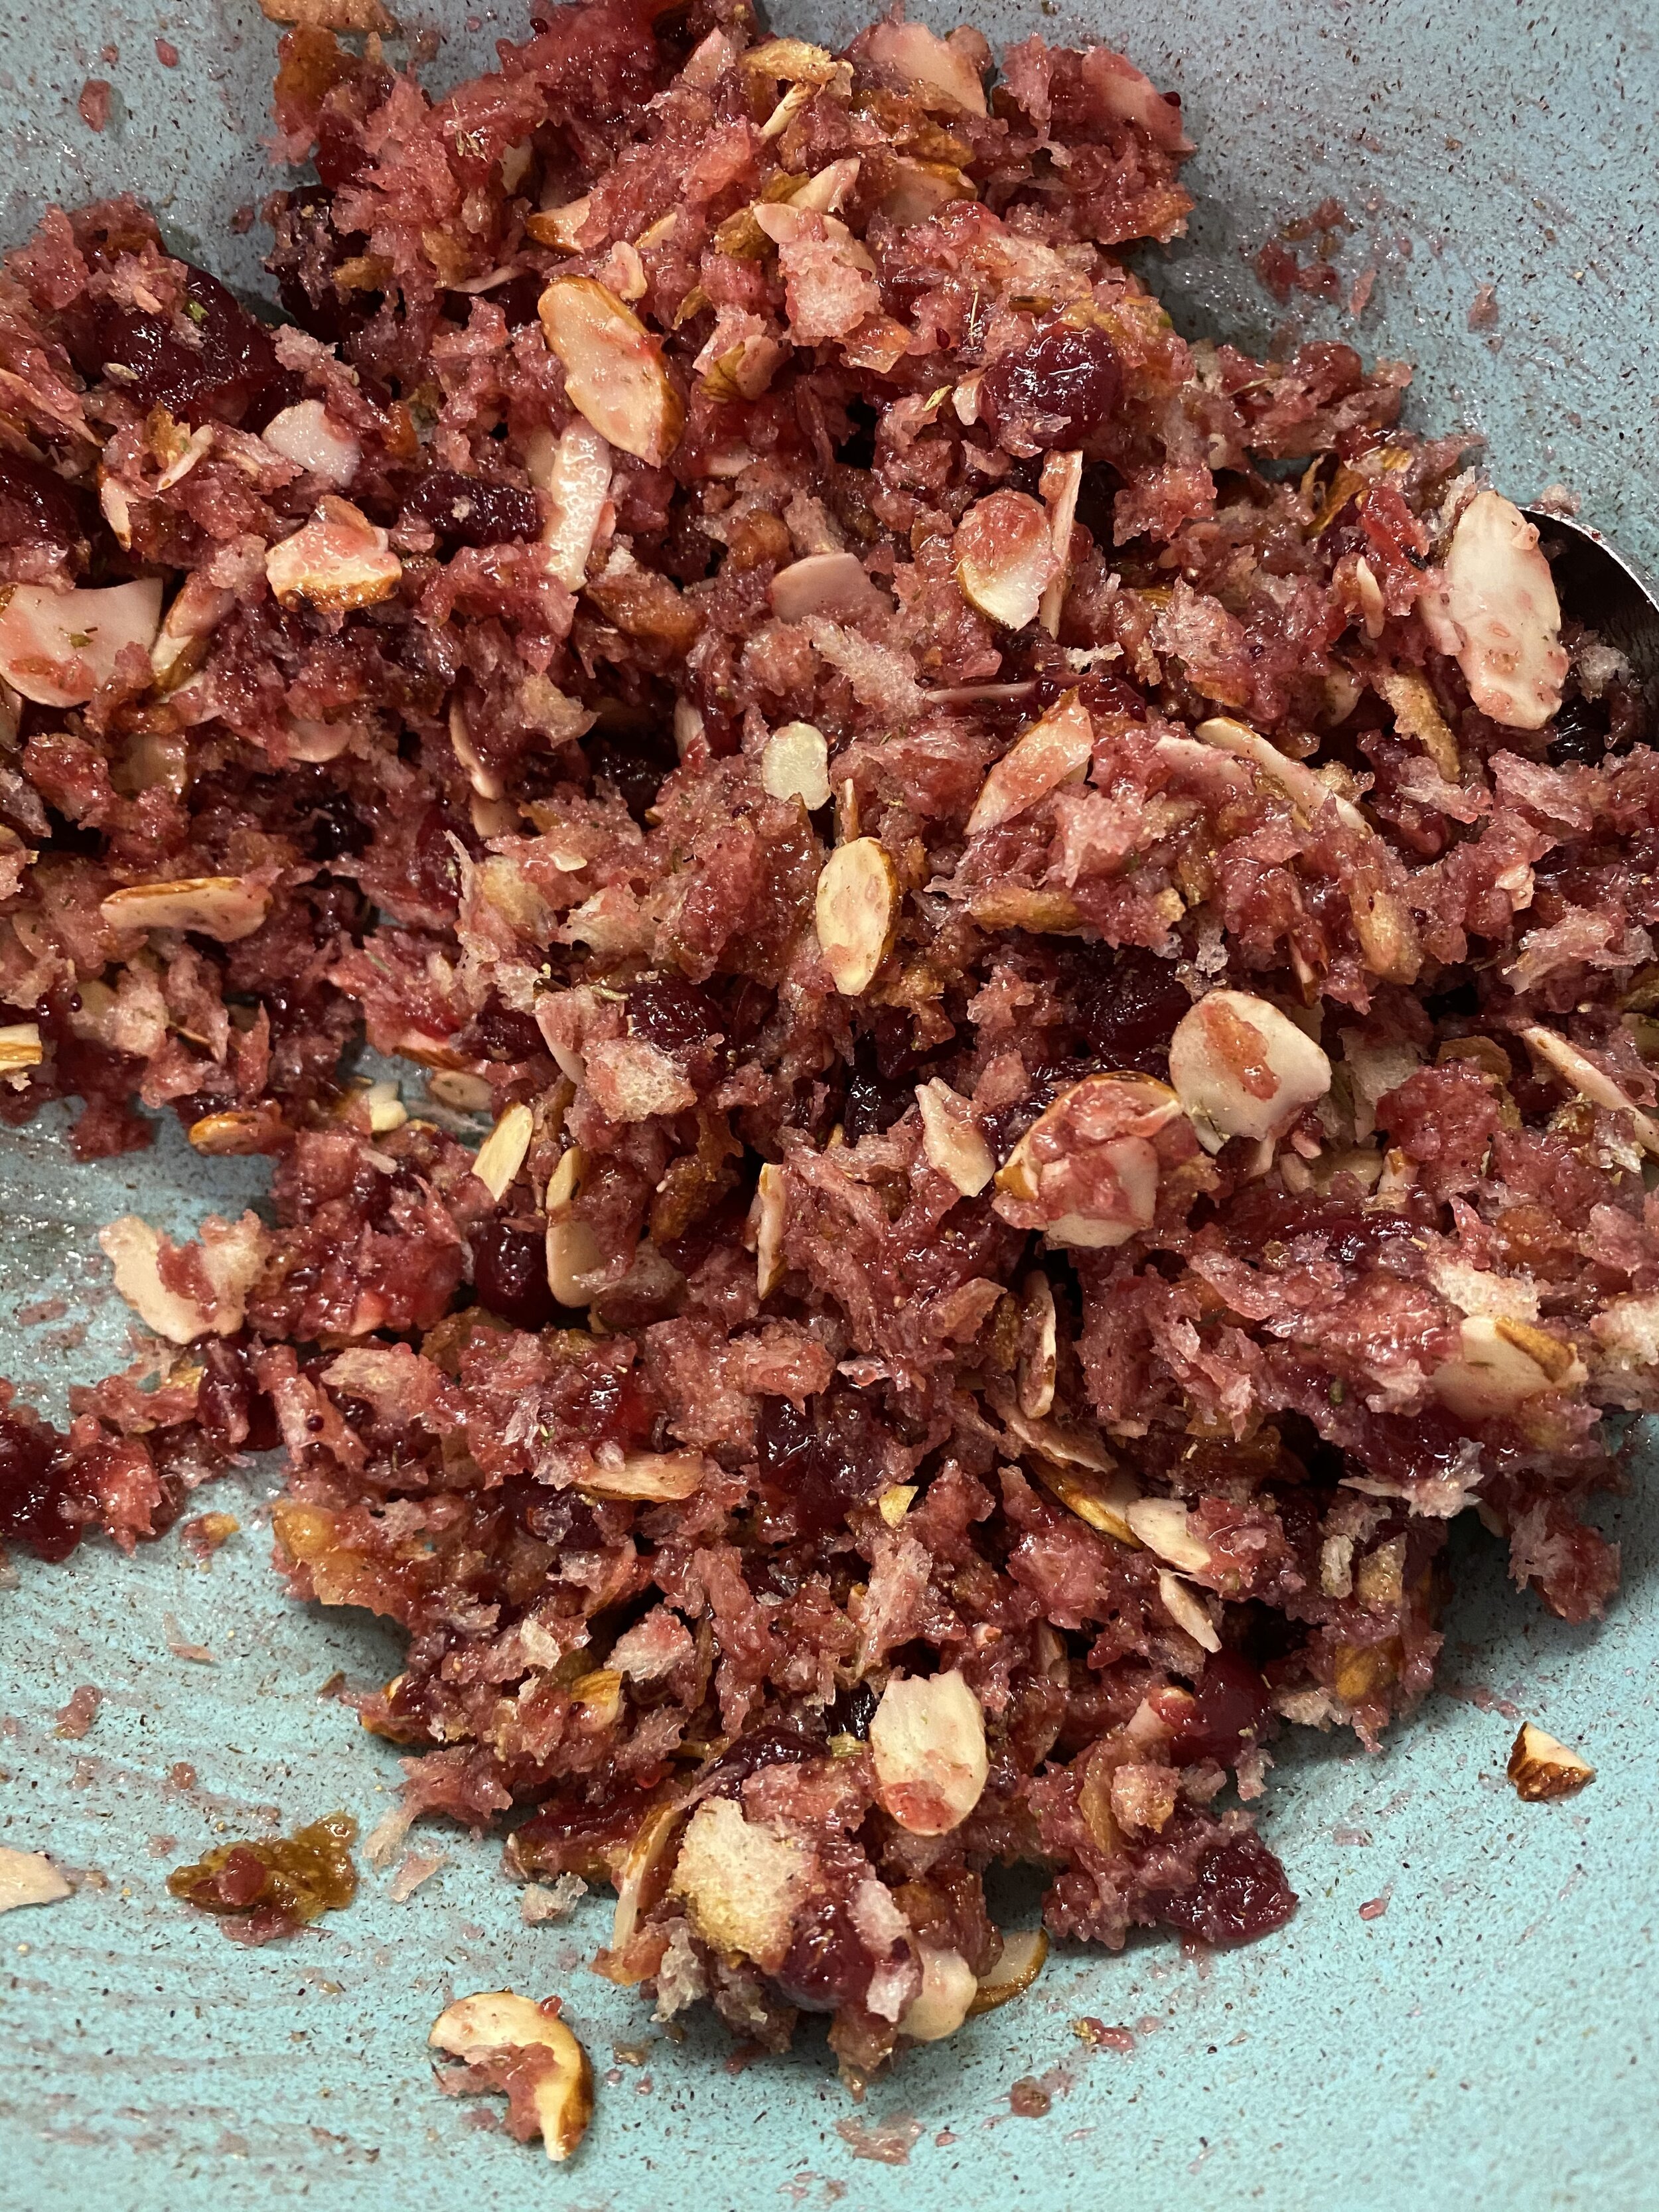
I started with some stale, few day old sourdough slices, added some onion, almonds, herbs, and to make things simple, whole cranberry sauce from a can. There is no shame in using canned cranberry sauce, especially when you can not find fresh cranberries.

In October, in Florida (when I was testing this recipe) there were no fresh cranberries to be found. If it is cranberry season when you are making this, then I have a super easy recipe for some fresh homemade cranberry sauce! By all means do whichever you like or is readily available at the time.

IMG_9329.jpg

Adding a crispy skin to your seitan breast is as easy as soaking a few sheets of rice paper and draping them over before you bake. They make such a nice thin, convincing skin on you vegan turkey and are so easy to work with! You can skip the skin part if you don’t have any rice paper or just are not into that. If you do, just mist the dough with some oil and sprinkle with your favorite seasoning before wrapping in foil and baking. The method for baking otherwise would remain the same as if you were adding the skin!

If you can not have tofu or are soy free you can check out another easy vegan turkey breast with jackfruit on our site. You could easily make that seitan recipe and stuff it with this stuffing, or make it as is and not stuff it!

There are so many other vegan meat options that would suit any holiday dinner on our website if this one does not appeal to you. Just check the meat substitute category for lots of options or even our Fall and Winter Holiday Menu E-Book. It is a full holiday meal menu start to finish! A main dish, side, deserts, and even cocktaisl. It is also loaded with video content to help you along while you are cooking!

Just know that you don’t have to settle on an overpriced, not very tasty, store bought roast this holiday season. You can make your own, super affordable, vegan stuffed turkey holiday roast right at home, and it is actually pretty easy to do! Don’t let seitan making intimidate you because it is actually really, really, easy to make!

So go, stuff a vegan turkey roast, and have the very best homemade holiday season!

Happy Holidays, Y’all!1

IMG_9358.jpg

INGREDIENTS:

  • 16oz block super firm tofu (the kind that is vacuum sealed in little water)

  • 1 cup vital wheat gluten

  • 1/2-3/4 cups water

  • 1/4 cup nutritional yeast

  • 2 tablespoons neutral flavored oil ( you can replace with water if you are oil free)

  • 2 tablespoons tapioca starch or corn starch

  • 2 teaspoons onion powder

  • 1-2 teaspoons garlic powder

  • 1/2 teaspoon sage

  • 1 teaspoon rosemary

  • 1 tablespoon No Chicken Better Than Bouillon

  • 1 teaspoon liquid smoke

  • 1 teaspoon salt optional if you feel like the bouillon is not salty enough

STUFFING:

  • 1 can whole cranberry sauce

  • 3 large slices stale bread (I used sour dough)

  • 1/3 cup sliced almonds or any chopped nut your prefer.

  • 1 small yellow onion finely diced

  • 2 teaspoons minced garlic

  • 1-2 teaspoons No Chicken Better Than Bouillon

  • 2 teaspoons dried sage

  • 2 teaspoons onion powder

  • 1 teaspoon black pepper

  • 1-2 teaspoons dried thyme

  • 1-2 teaspoons dried rosemary

Rice Paper Skin:

  • 2 tablespoons white wine (or water if you don’t want to use wine)

  • 3 tablespoons water

  • 2 teaspoons Herbs de Provence or you can use a mix of rosemary, thyme and some sage.

  • 1 teaspoon Vegetable Better than Bouillon

  • 3 sheets rice paper

*I used high protein tofu in a vacuum sealed package and this what I strongly advise using. It is much firmer than regular firm tofu and has less moisture and a more chewy texture. If you opt to use regular firm tofu you will need to press it first and remove as much liquid as possible. You may need to adjust the amount of water in the recipet as well. Add the water last, adding just enough to accomplish a firm dough.

INSTRUCTIONS:

Preheat oven to 350 degrees

  1. The Stuffing: Take the stale bread and place it in a food processor or blender and bread it down to a crumb.

  2. Finely dice the onion and give it a sauté in a pan with a little oil. Cook until translucent. Add it along with the bread crumbs, all of the seasoning, and the full can of cranberry sauce to a medium size bowl, and mix well. You can taste the filling after you mix it up and add more seasoning if you feel like you need it. Set aside.

  3. The Turkey Breast: Break up the tofu and place it into a food processor with the regular metal blade. Run the processor for around a minute until the tofu is broken down.

  4. Add all of the remaining ingredients and let the food processor run for a couple of minutes. You want the mixture to form a dough. Letting the processor run will help knead the dough. We want this seitan to be firm so we need it to knead for a bit. If you dough seems a bit too dry, you can add another few tablespoons of water, just don’t add too much more! I start at 1/2 cup and work from there.

  5. If you do not have a food processor you can break down the tofu in a blender, then mix the remaining ingredient together by hand in a bowl. You will have knead the dough very well by hand on a clean surface for several minutes.

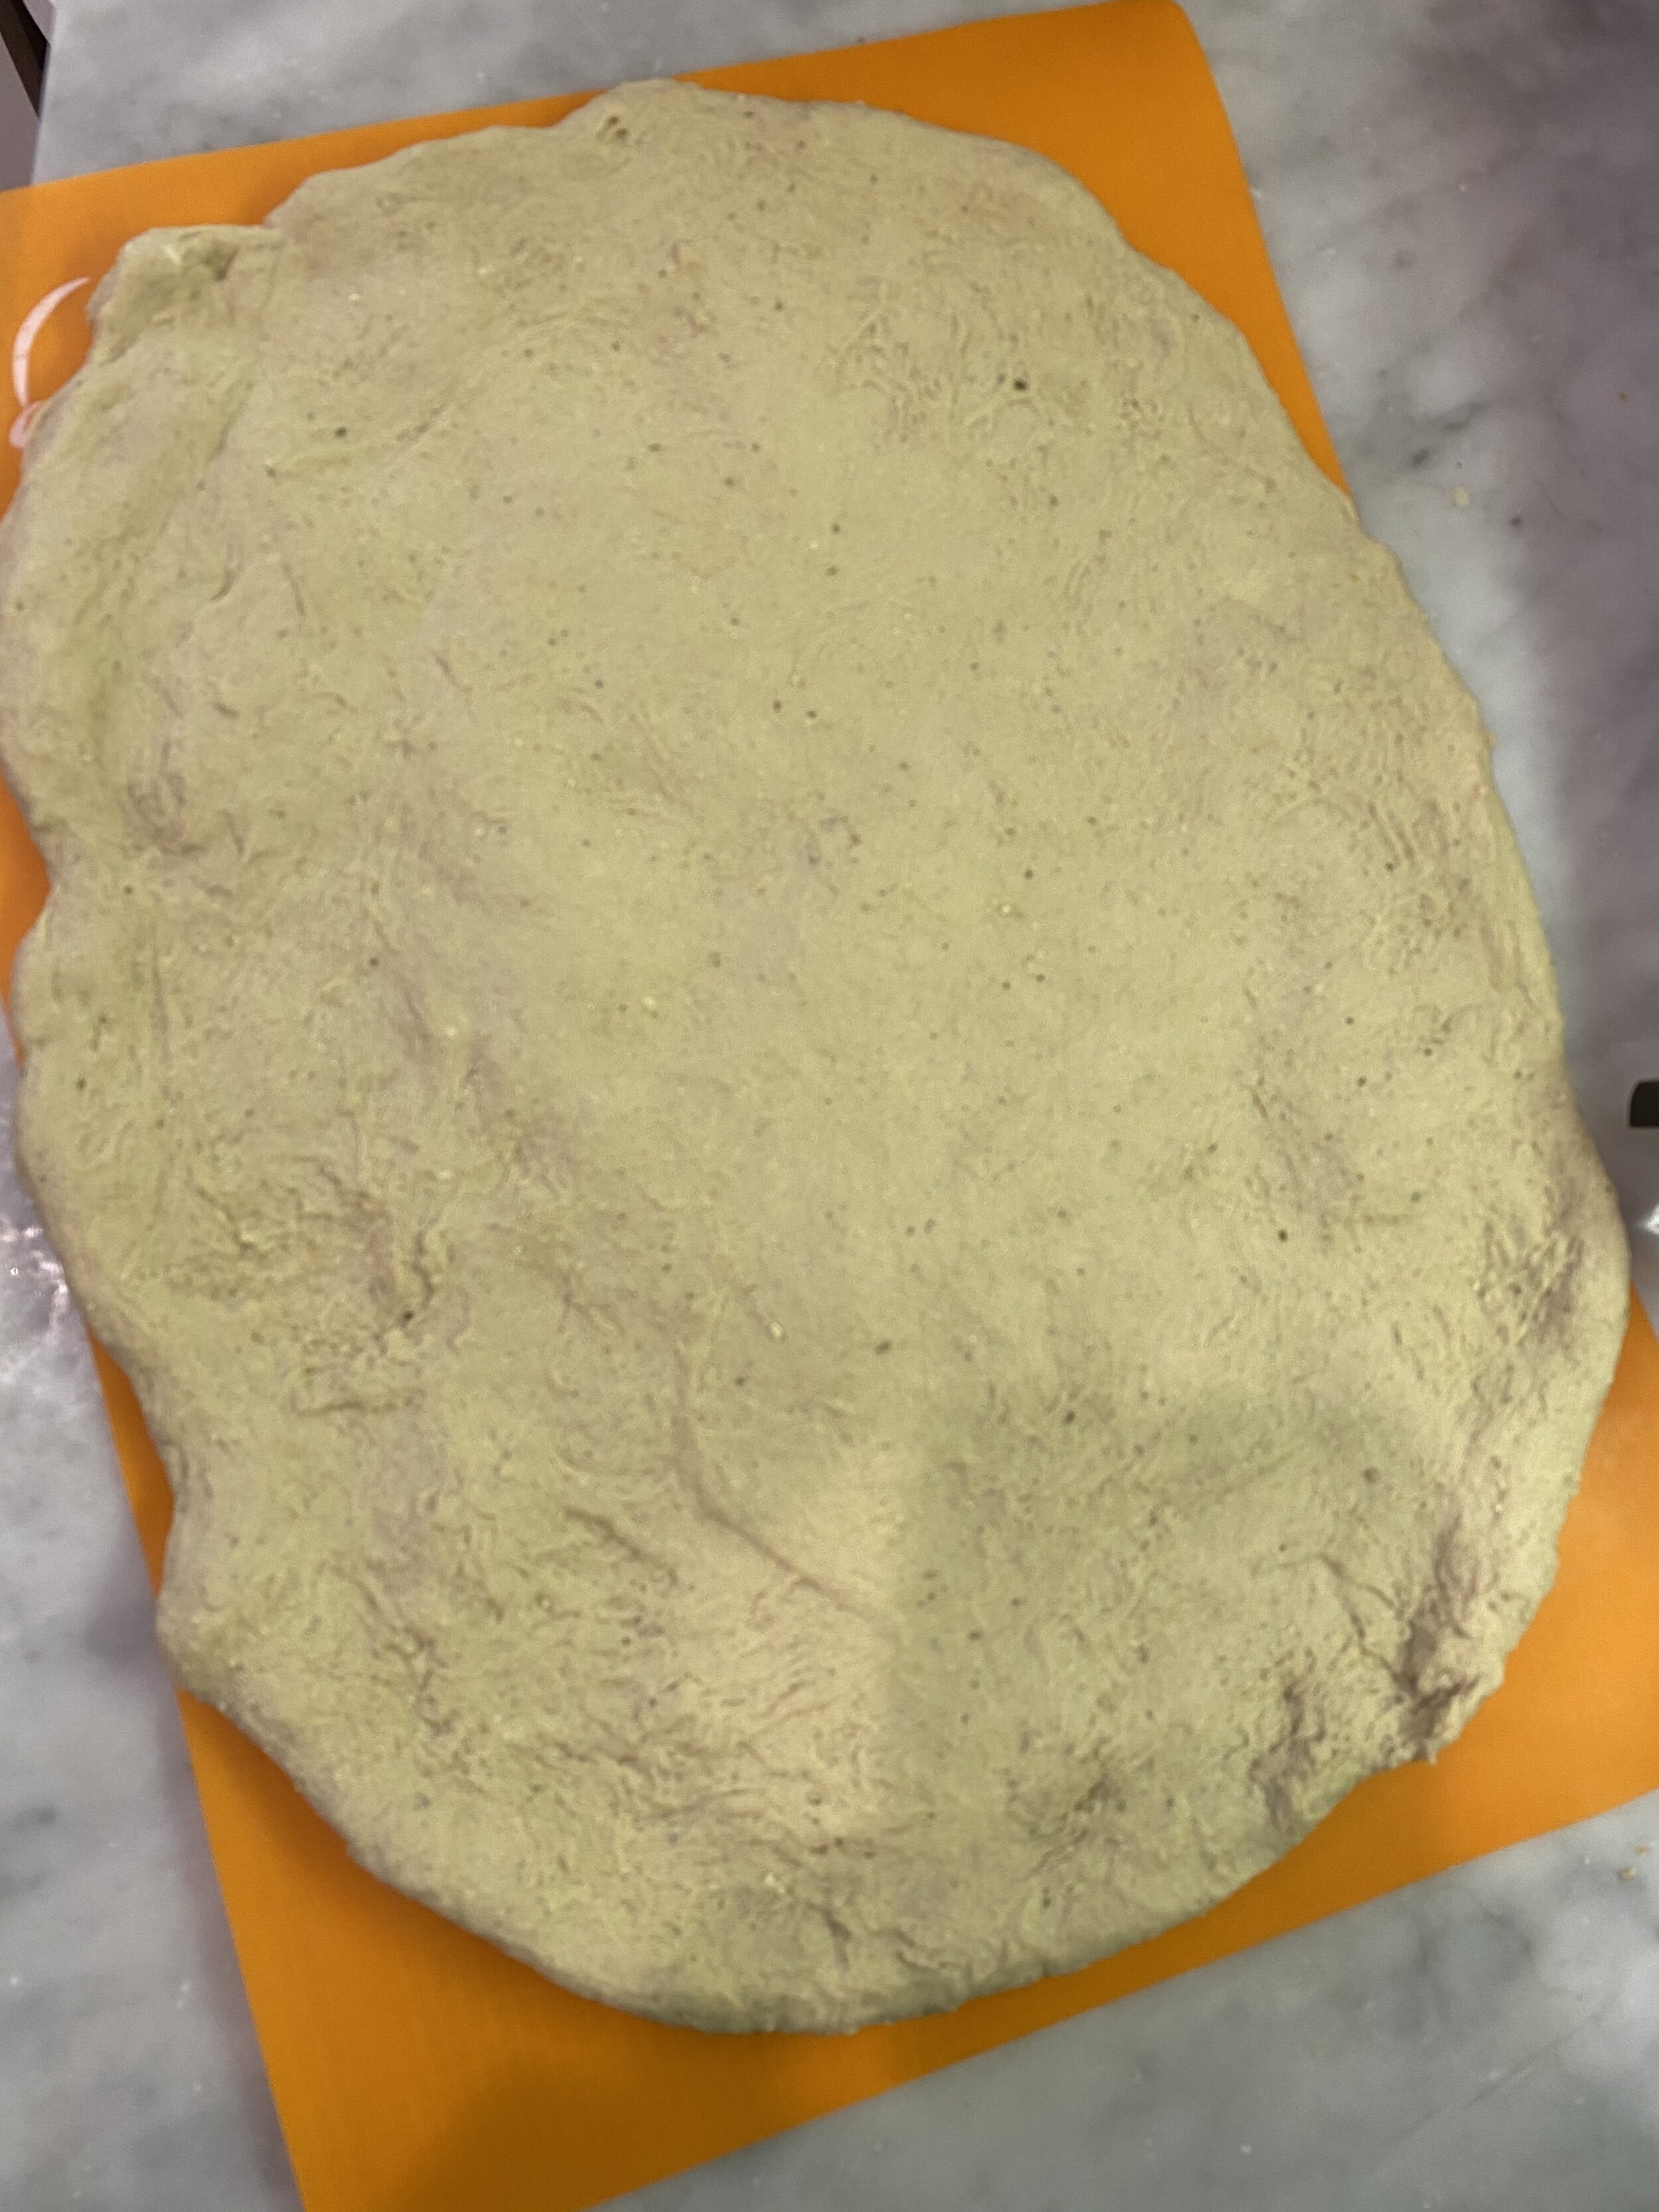
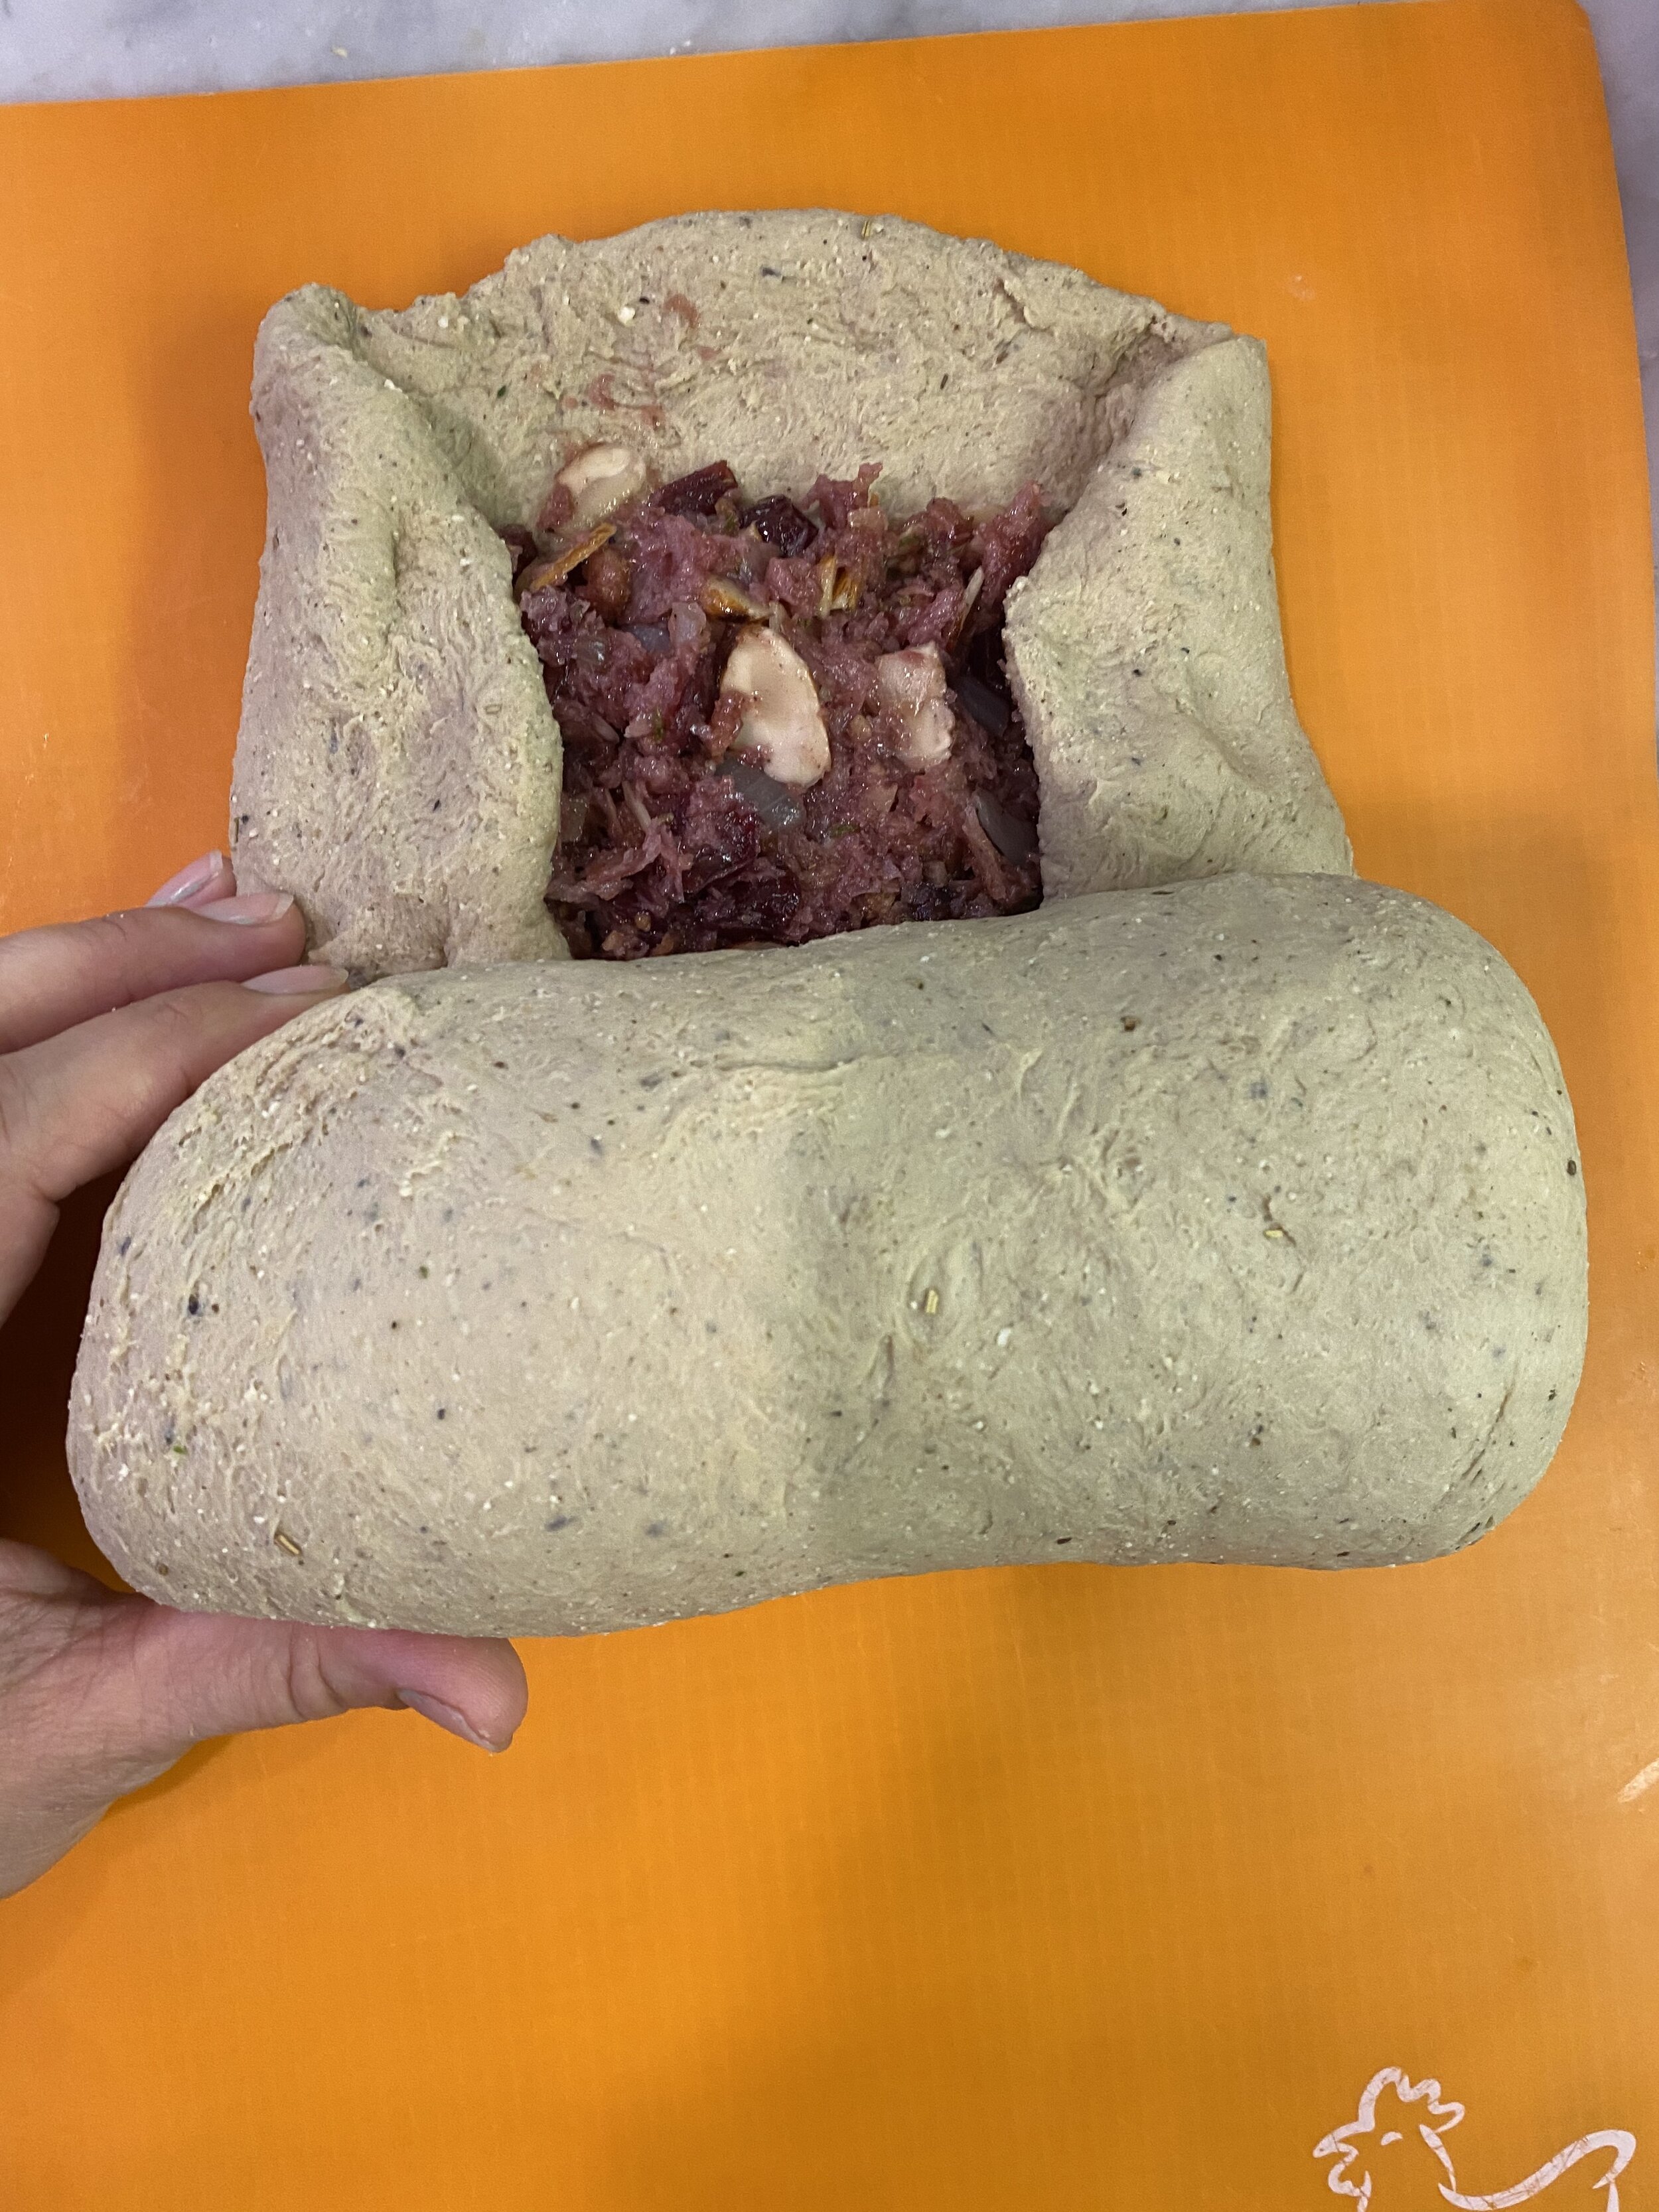
  6. Once you have a smooth but firm dough, remove it from the food processor and place on a clean counter. Knead the dough with your hands for about a minute, forming a large rectangle shaped the dough (see above picture.)

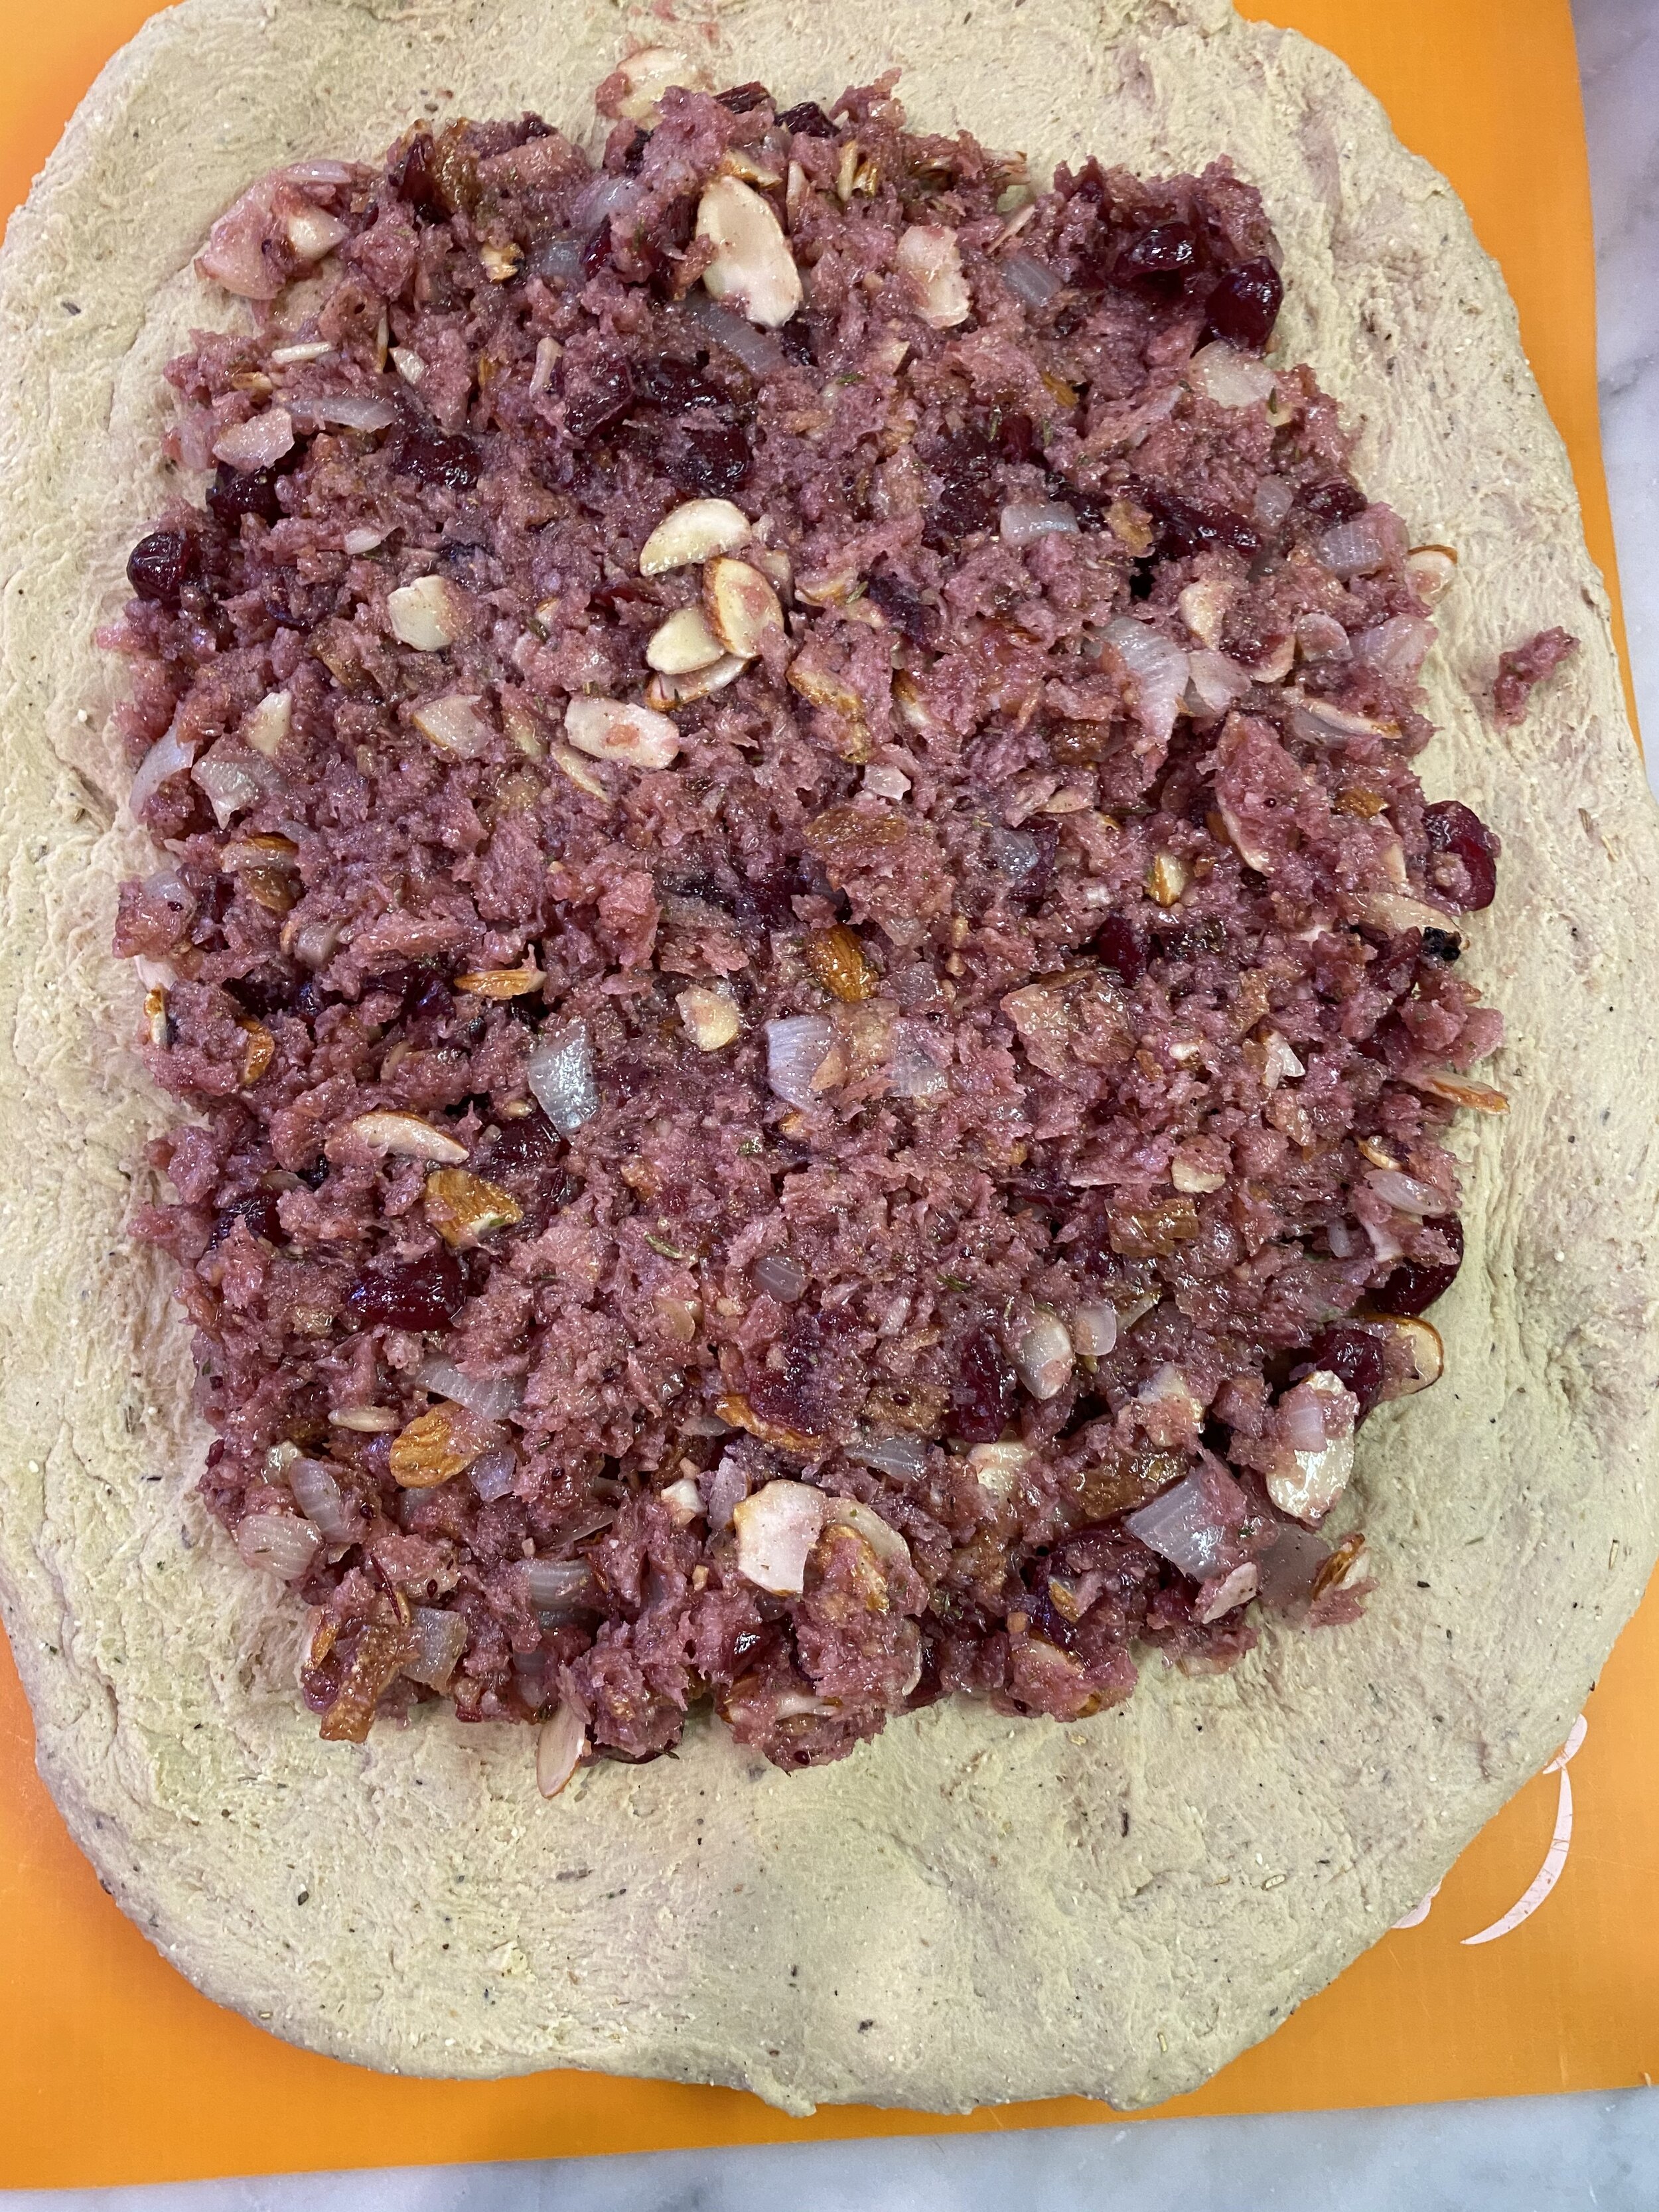
  7. Scoop the stuffing into the center of the dough and spread it out in an even layer leaving an inch or so border around the edge of the rectangle untouched by the filling. It is important to not let the stuffing touch that outside edge of dough! Wet dough does not like to stick together and tends to rip!! If you fill like you have too much stuffing then take a bit out. This will vary deepening on the size of bread slices you used You don’t want to overstuff the roast.

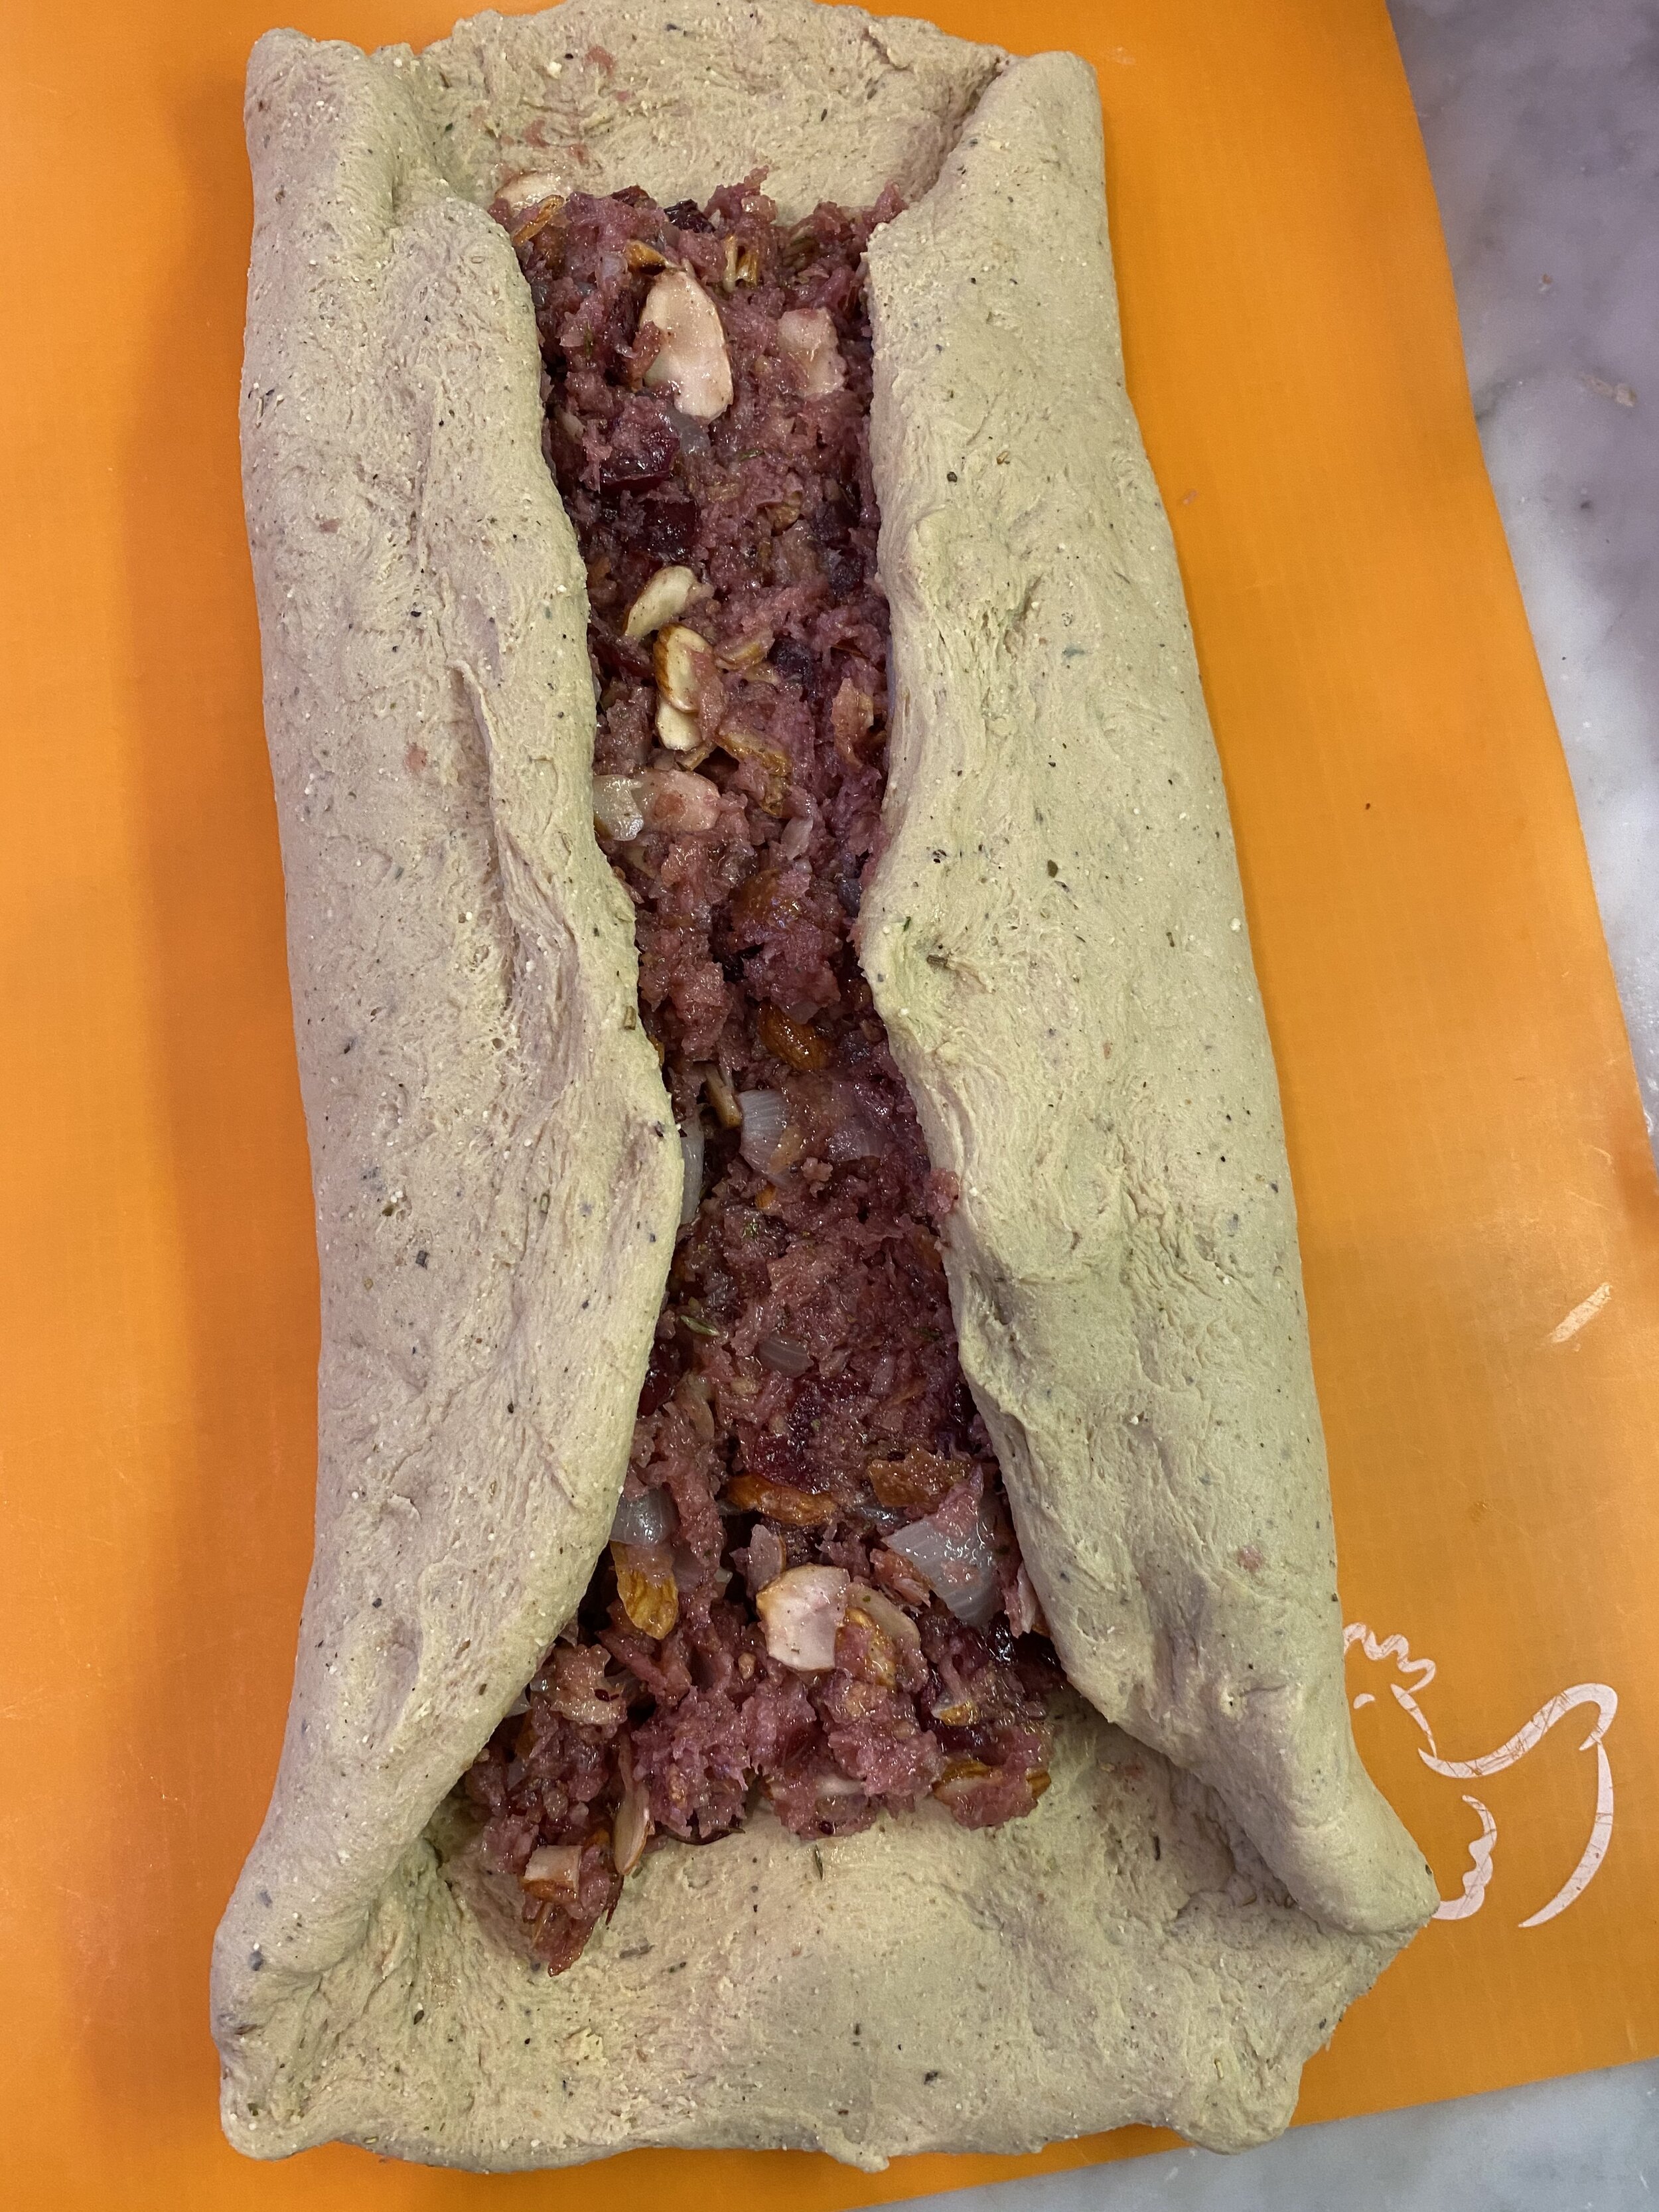
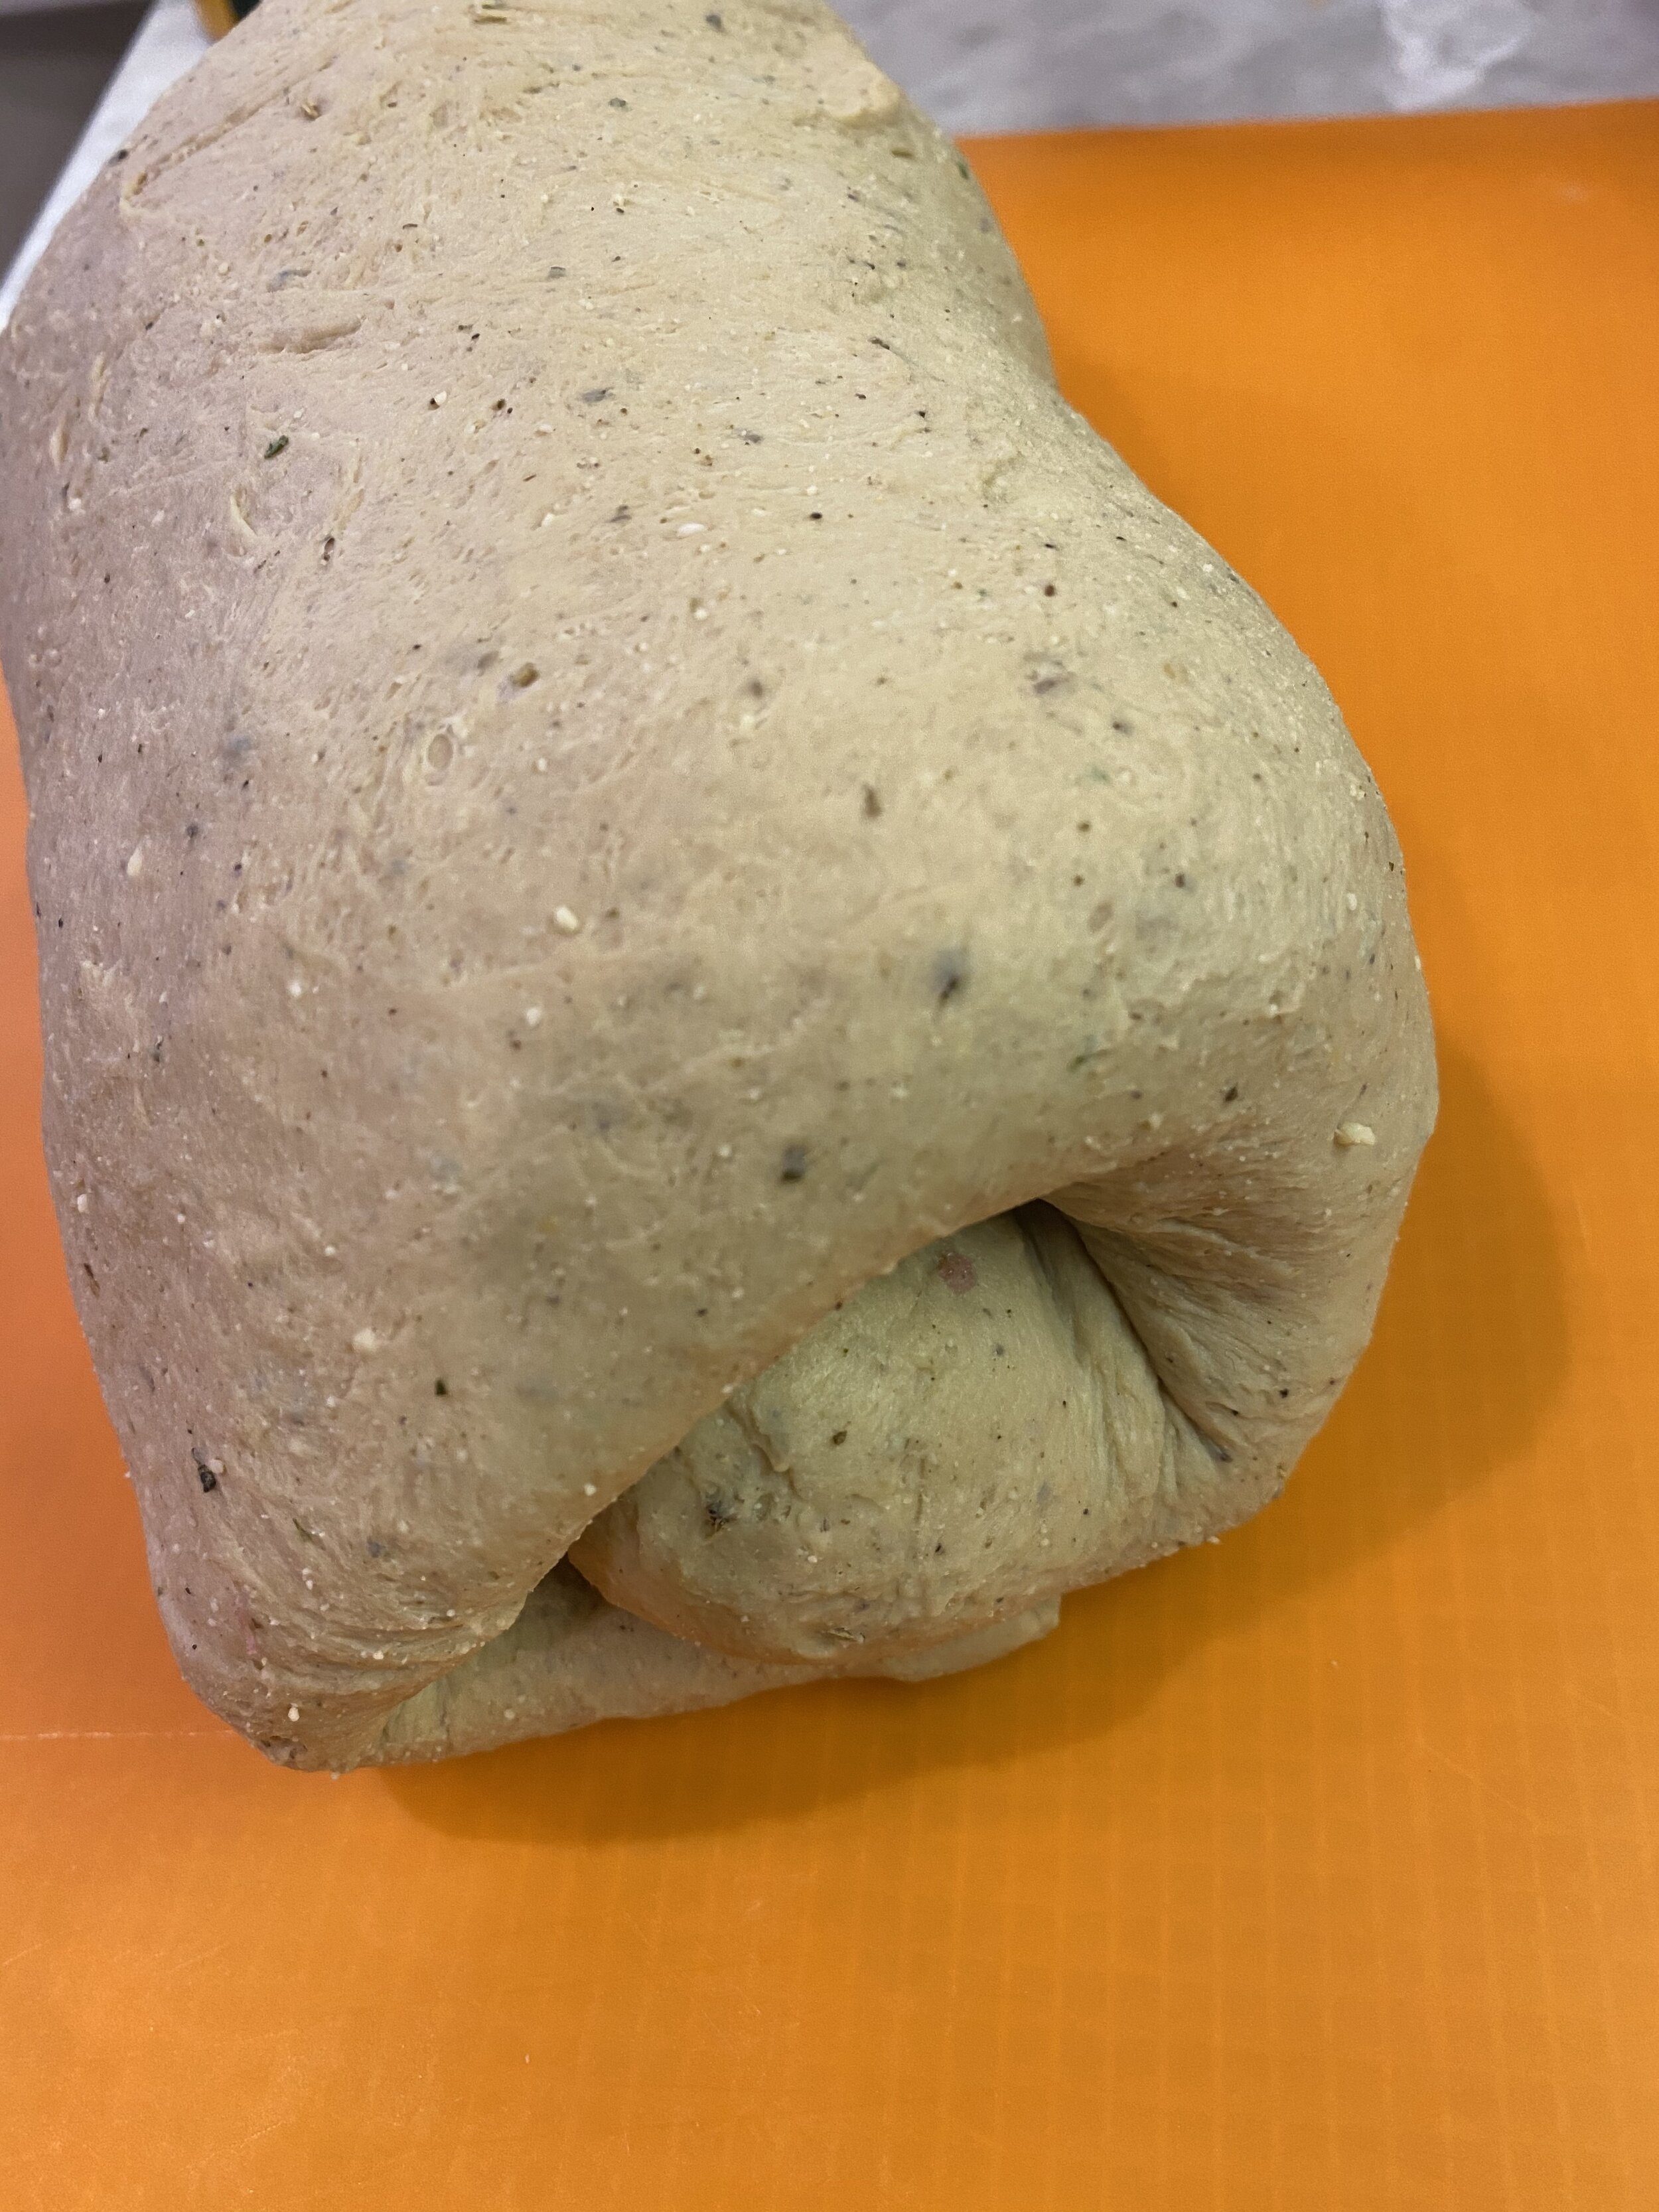
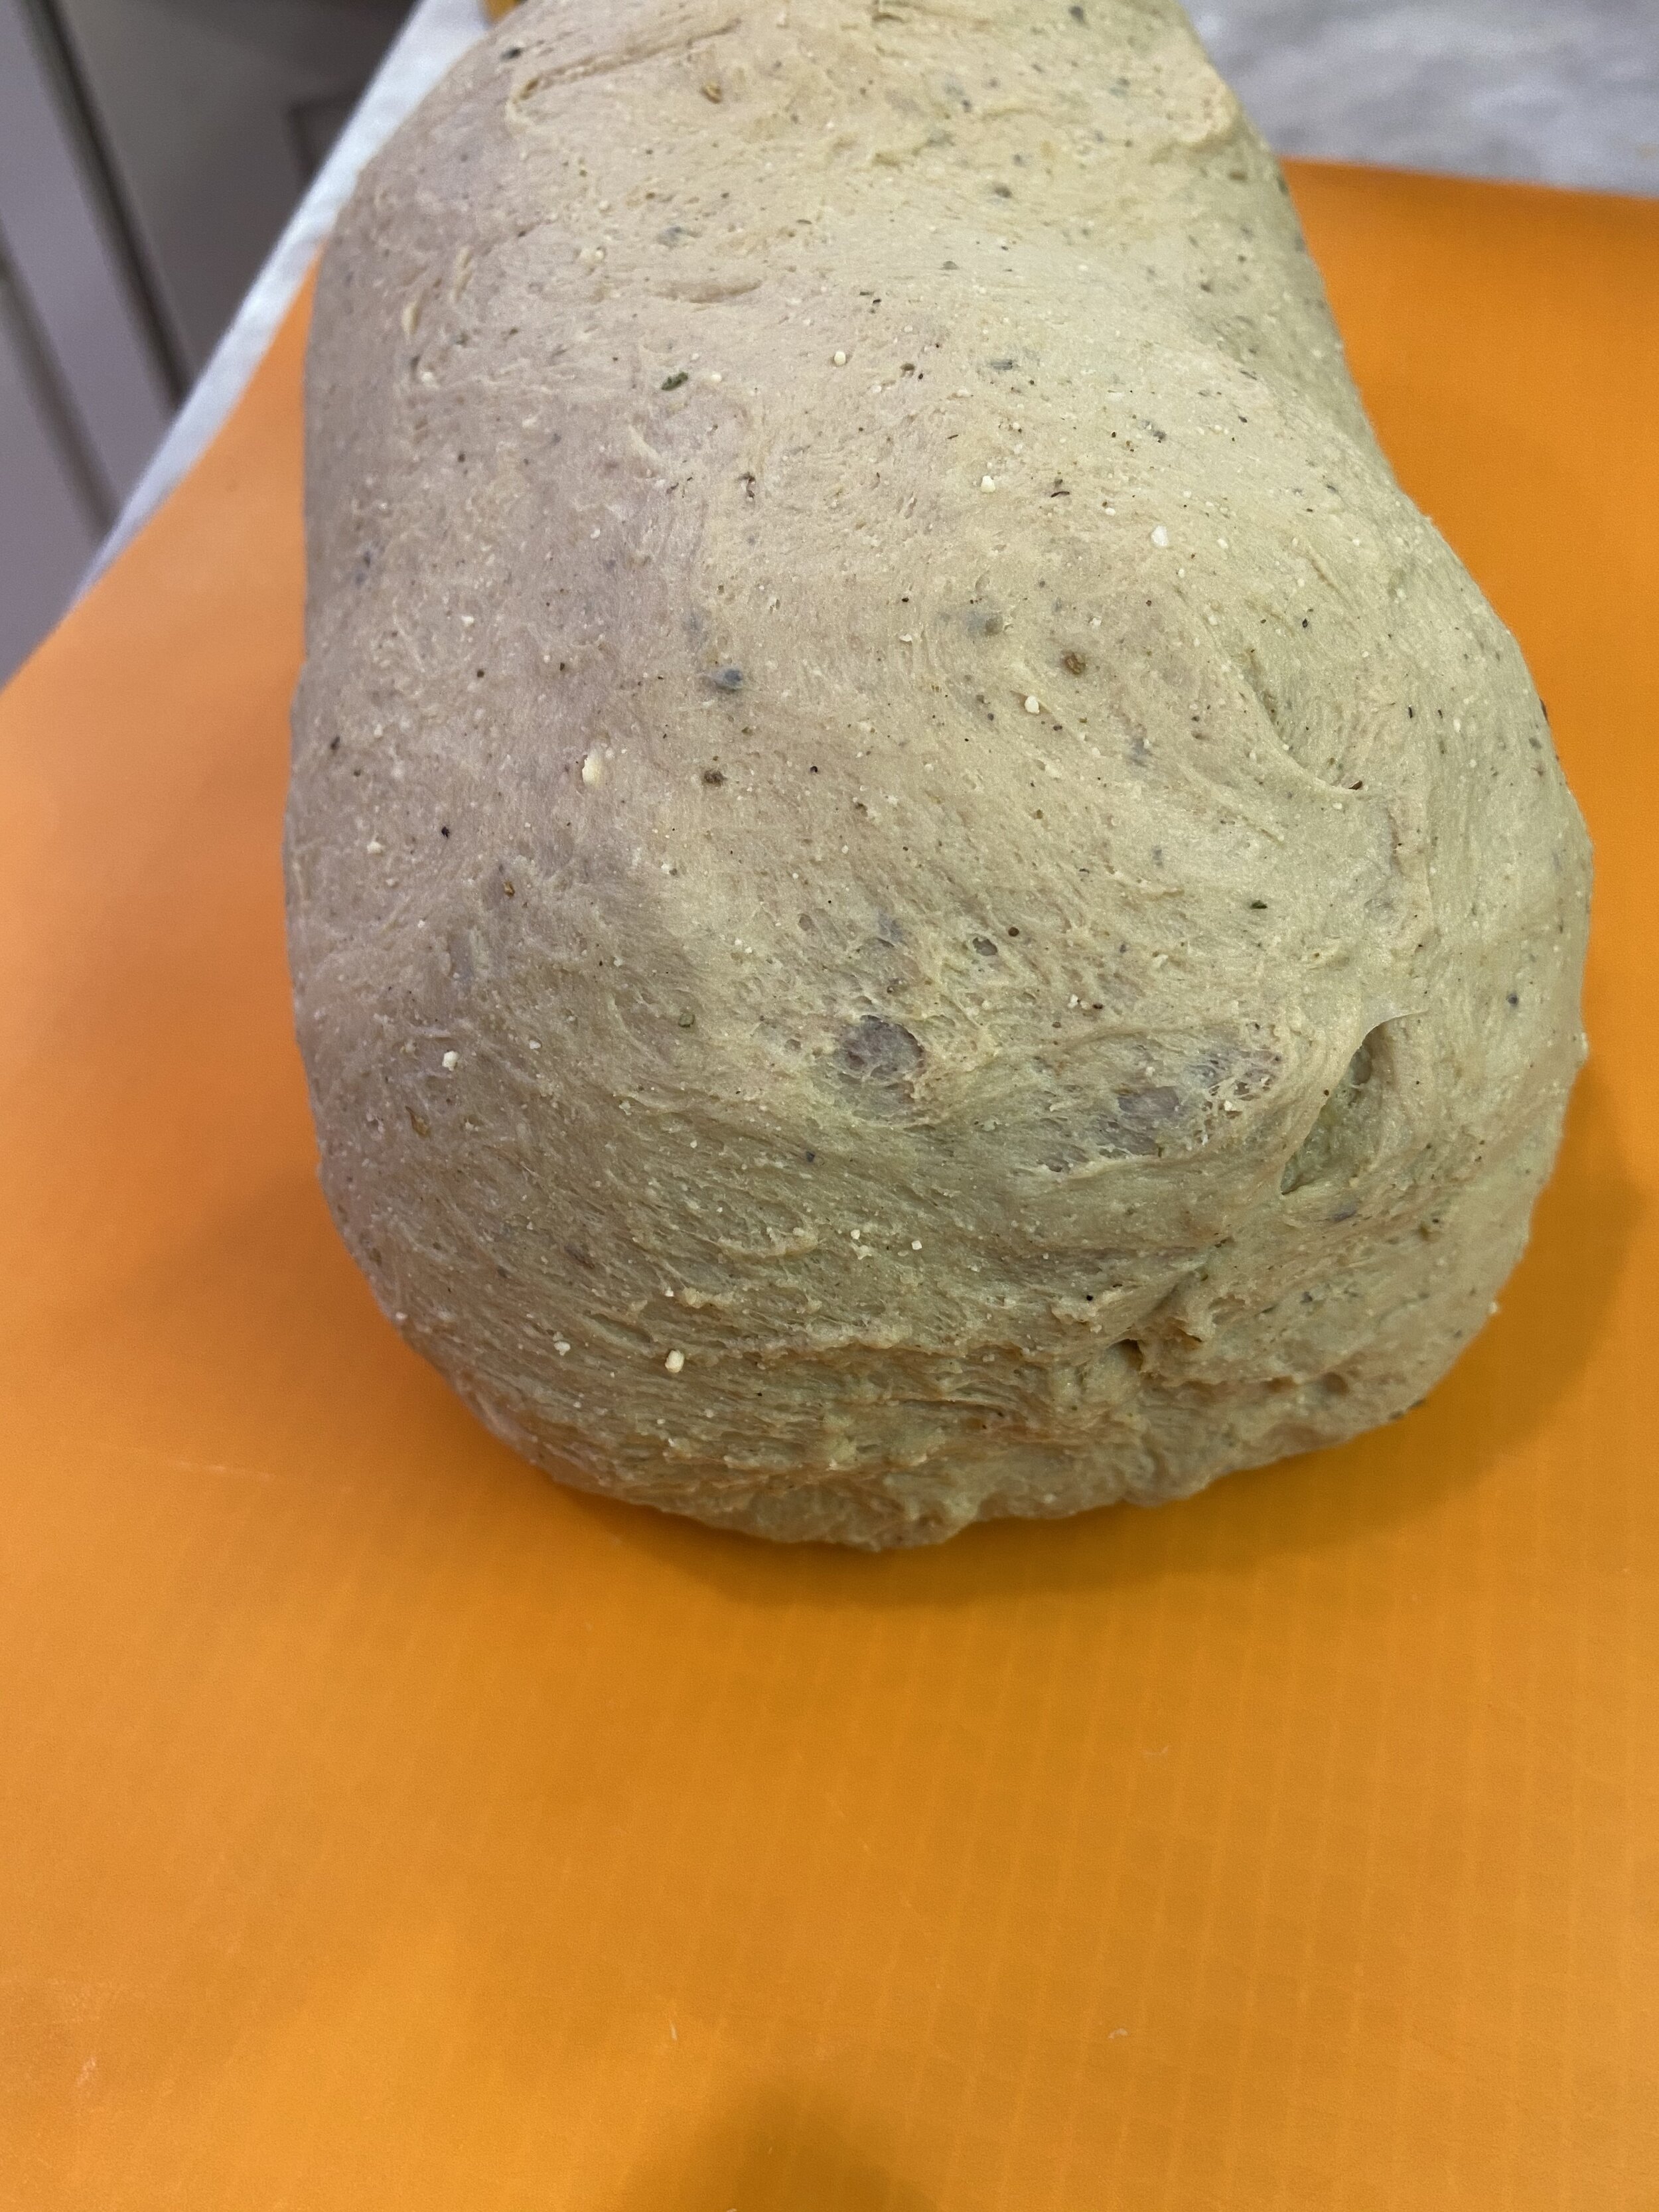
  8. Fold up the longer sides over the filling, then begin rolling the vegan turkey roast from one of the short ends as tightly as you can while keeping the filling from all squishing out! Once the roast is all rolled up, use your fingers to pinch and smooth out the ends and the underside seam. Just be careful not to rip any holes in the dough while pinching it!

  9. Take a piece of aluminum foil about 3 times the size of your roast. Spray or brush it well with some oil.

  10. Add all of the ingredients for the rice paper skin, except the rice paper, to a shallow dish or pie pan and whisk. Place one sheet of rice paper into the liquid and let it sit there until it becomes completely soft. This takes several minutes. Gently lift the rice paper from the dish and place it in the middle of the foil repeat with a second piece of rice paper and kind of overlap it a bit on the first piece. Place the “turkey” roast on top of the paper and fold the edges of the rice paper up around the roast. Continue with the other 2 pieces of rice paper just the same as the first, draping each one over the top of the roast and tucking or pressing the edges of the paper around the roast. The paper should be very soft and sticky, and cling well to the roast.

  11. Spray the top of the vegan turkey, and all over the rice paper with some oil or you can brush it. This step is needed to help prevent the rice paper from sticking to the foil.

  12. Fold up the foil around the roast making a nice tight pouch Place the pouch on a cookie sheet and into the oven on the middle rack.

  13. Allow the vegan turkey roast to bake wrapped in the foil for 30 minutes. After 30 minutes CAREFULLY open up the foil. The rice paper may have stuck a little, just gently pull the foil back. If it sticking a lot you can spray a little oil into the foil pouch as you are pulling it back and tends to help it pull away. Some rips in the skin is ok, it won’t really be noticeable! Just smooth it back down with a spoon in any spots it ripped. Allow the vegan turkey roast to bake an additional 30 minutes unwrapped.

  14. Remove the roast from the oven and let cool a bit at room temperature. Loosly recover the roast and place into the fridge to rest for AT LEAST 6 HOURS. THE BREAST MUST REST!!! Seitan requires a rest to firm up and get that meat like texture we are trying to accomplish. If you do not allow the breast to rest you will likely not be pleased with the texture!

  15. After you have allowed the vegan turkey roast to REST, you can reheat it in the oven at 350 degrees. Place the roast on a baking sheet with a piece of foil lightly draped over the top. Let the roast heat for about 20 mintues or so to heat through. After about 20 minutes uncover the roast and brush the skin with some vegan butter. Let it bake for another 10 minutes or until the top is golden brown and crispy.

  16. Slice to serve with your favorite side dishes and extra cranberry sauce!!

TROUBLE SHOOTING:

  • If your turkey roast comes out looking bready once you slice it, and has little holes throughout it, you likely have an oven baking hotter than it is registering. You can get an over thermometer to check the temp, or knock the temp back 20 degrees the next time you bake it. You can also let it bake for 40 minutes wrapped up, and unwrapped for 20 minutes.

  • You may have also not kneaded the dough long enough. Make sure you let it knead for a minute or two. The longer seitan knead the firmer it will be and we want a rather firm seitan for this recipe.

  • If your roast forms a “skin bubble” that defates after you have let it rest, then you likely did not wrap the foil tightly enough. Make sure it is wrapped tightly!

  • If the rice paper is sticking too badly to your foil you can first wrap the roast in parchment paper sprayed with oil then in the foil. I have always just wrapped it right in the foil but have had people claim this is their method and that it works well.

If you like this recipe, then try these:

vegan flank steak

vegan flank steak

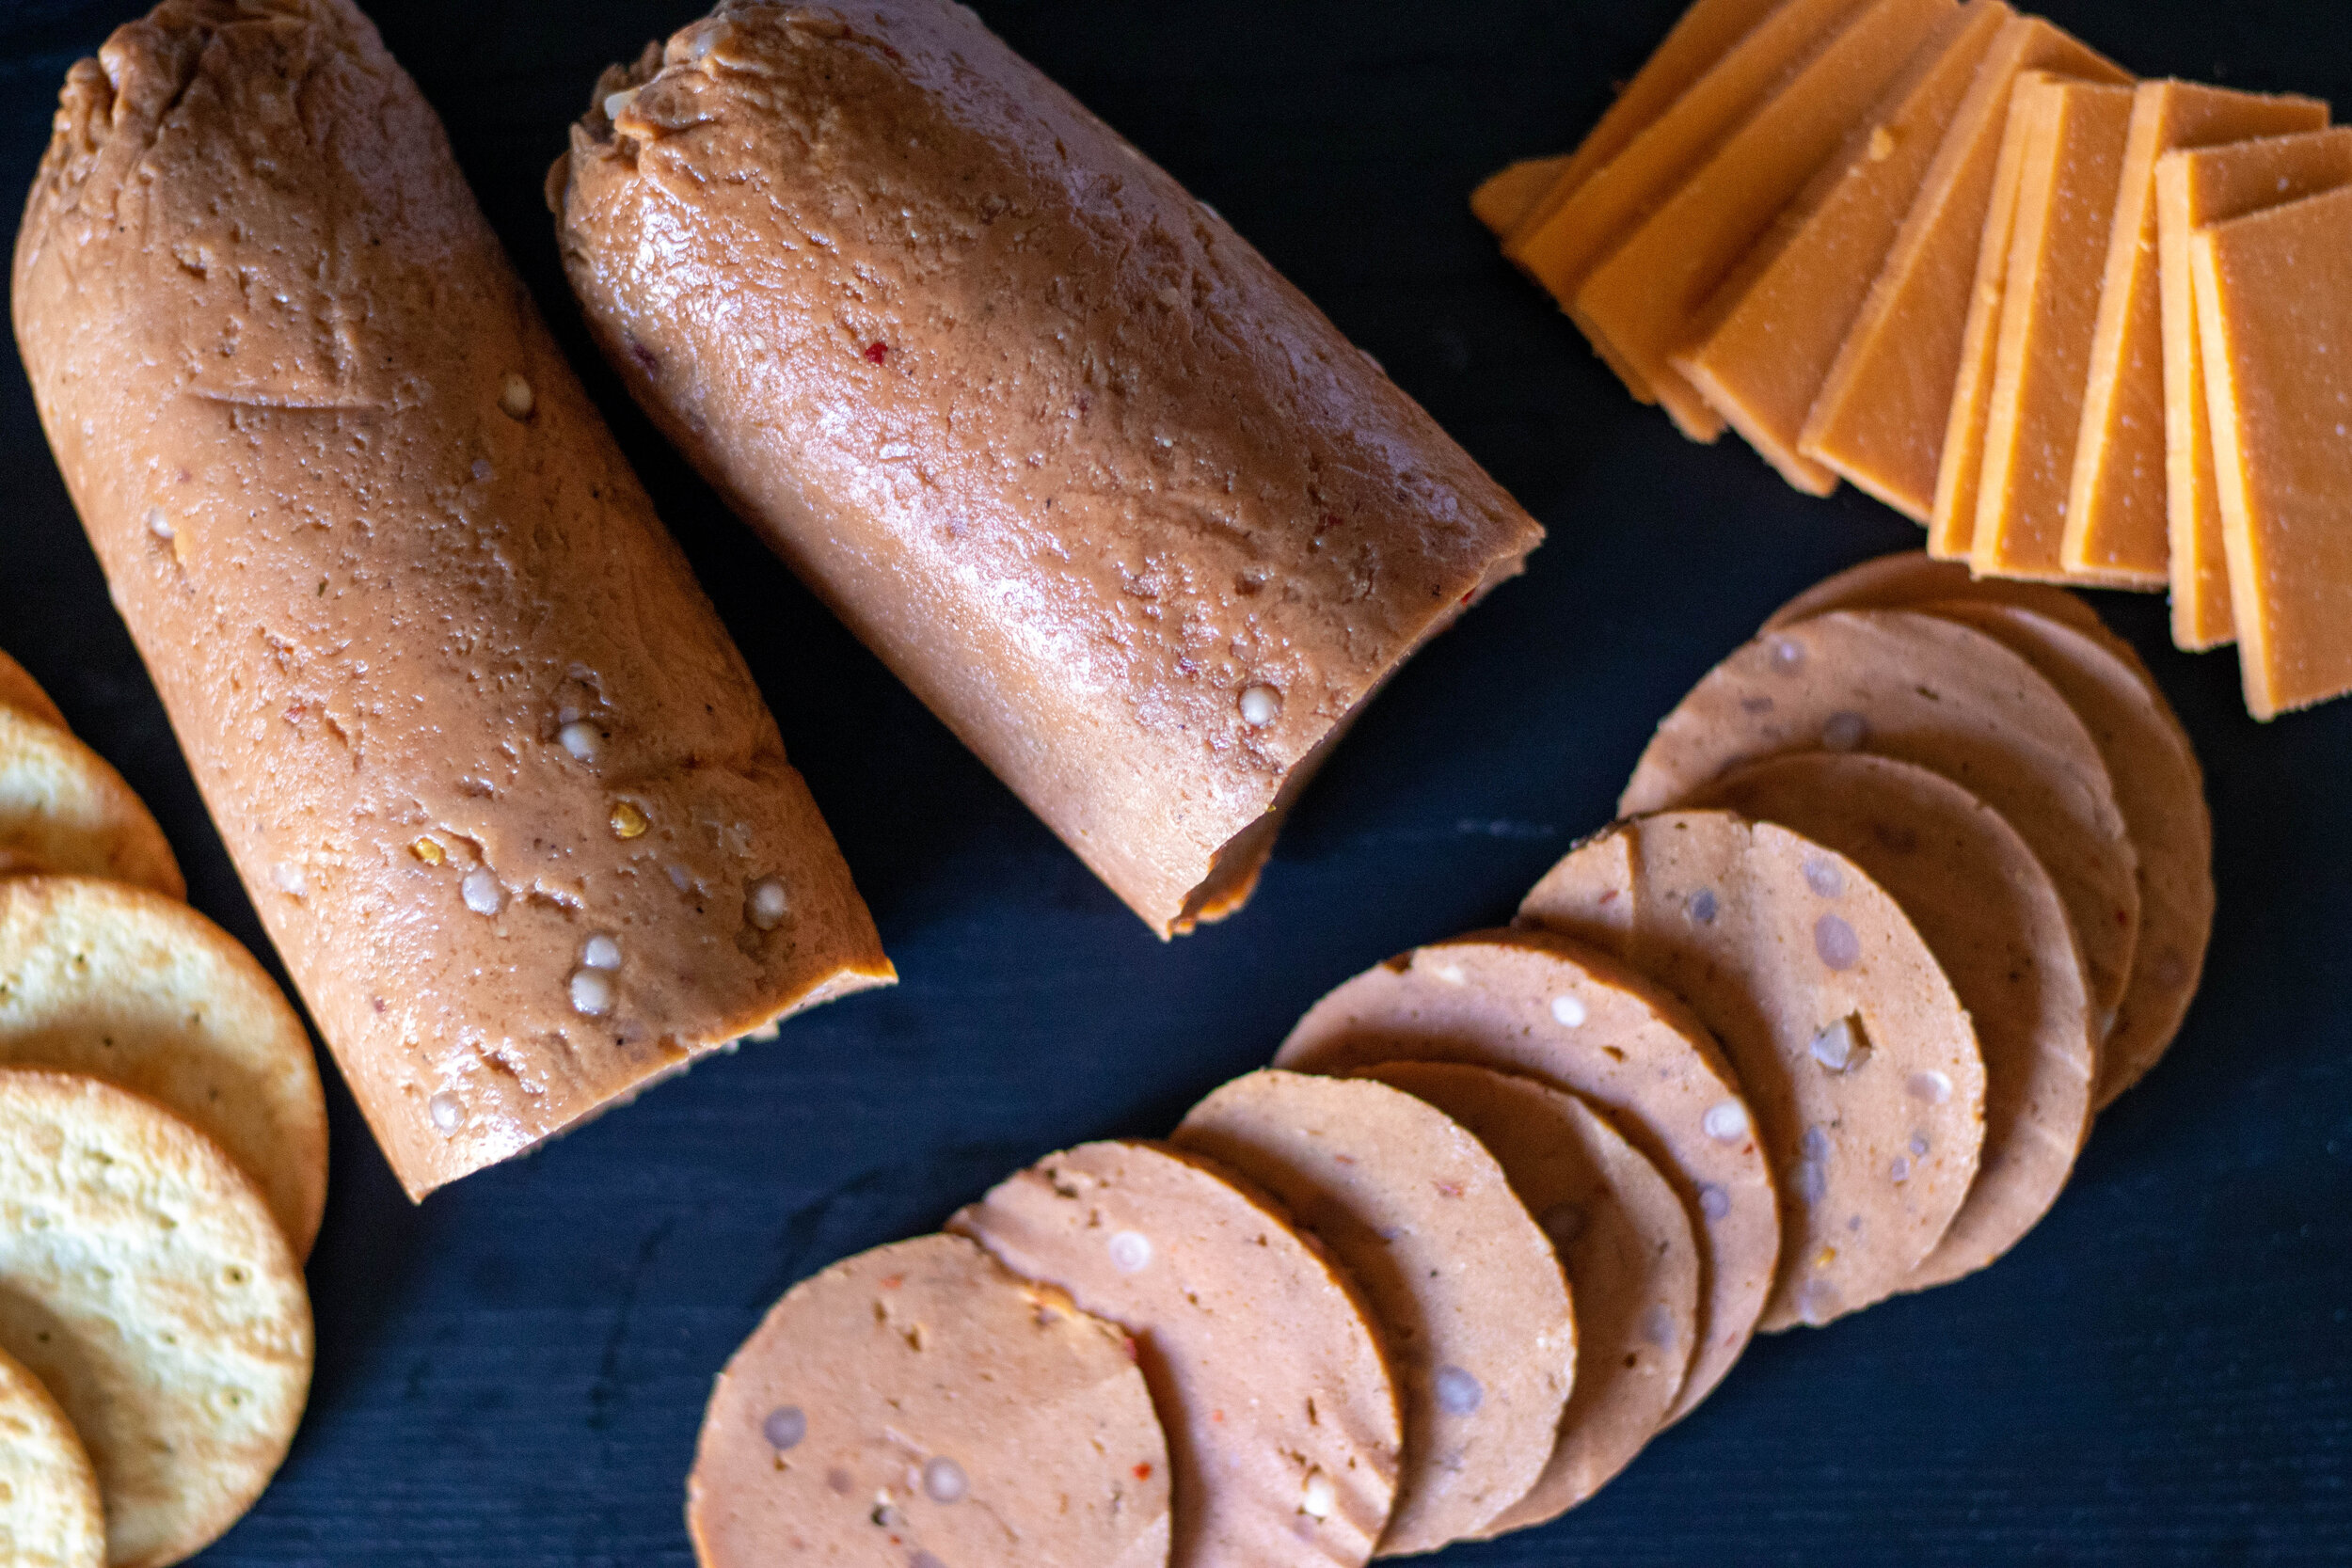
Vegan Salami

IMG_9306.jpg

Many, many, many, months ago my friend Rosemary Kate sent me a text asking if I had made a vegan salami yet.

I had not. I had, however, thought about it, but had not tried it at that point. So I got right to work.

Guys, some things just don’t come that easily. Like you may try a recipe 5 times before it works out, or doesn’t.

In this case I think I made 5 or 6 salamis and was just not really satisfied with how it looked.

I mean I know looks are not what counts in life, but where food is concerned, they kind of do matter. And when you are trying to mimic a classic meat, you want people to look at it and say, “oh is that vegan salami”, so I just kept on trying.

IMG_9325.jpg

After attempting to mimic the fat bits with white seitan and it always failing, I tired small tapioca pearls.

My daughter and I have been mulling over the idea of using tapioca when I saw a fellow recipe creator and Facebook friend, Aleksandra (go join her Facebook group Creative Vegan Cooking! You will find so much inspiration there, I promise) make a beautiful seitan with tapioca!! And our suspicions were confirmed about using tapioca as the fat bits! She is a genius. I knew that already, but this sealed the deal.

I only had small pearls on hand so I tried that at first. And at first, that seemed like it was going to work. But once the salami baked up, the pearls were lost! Sigh…attempt number 5, at least.

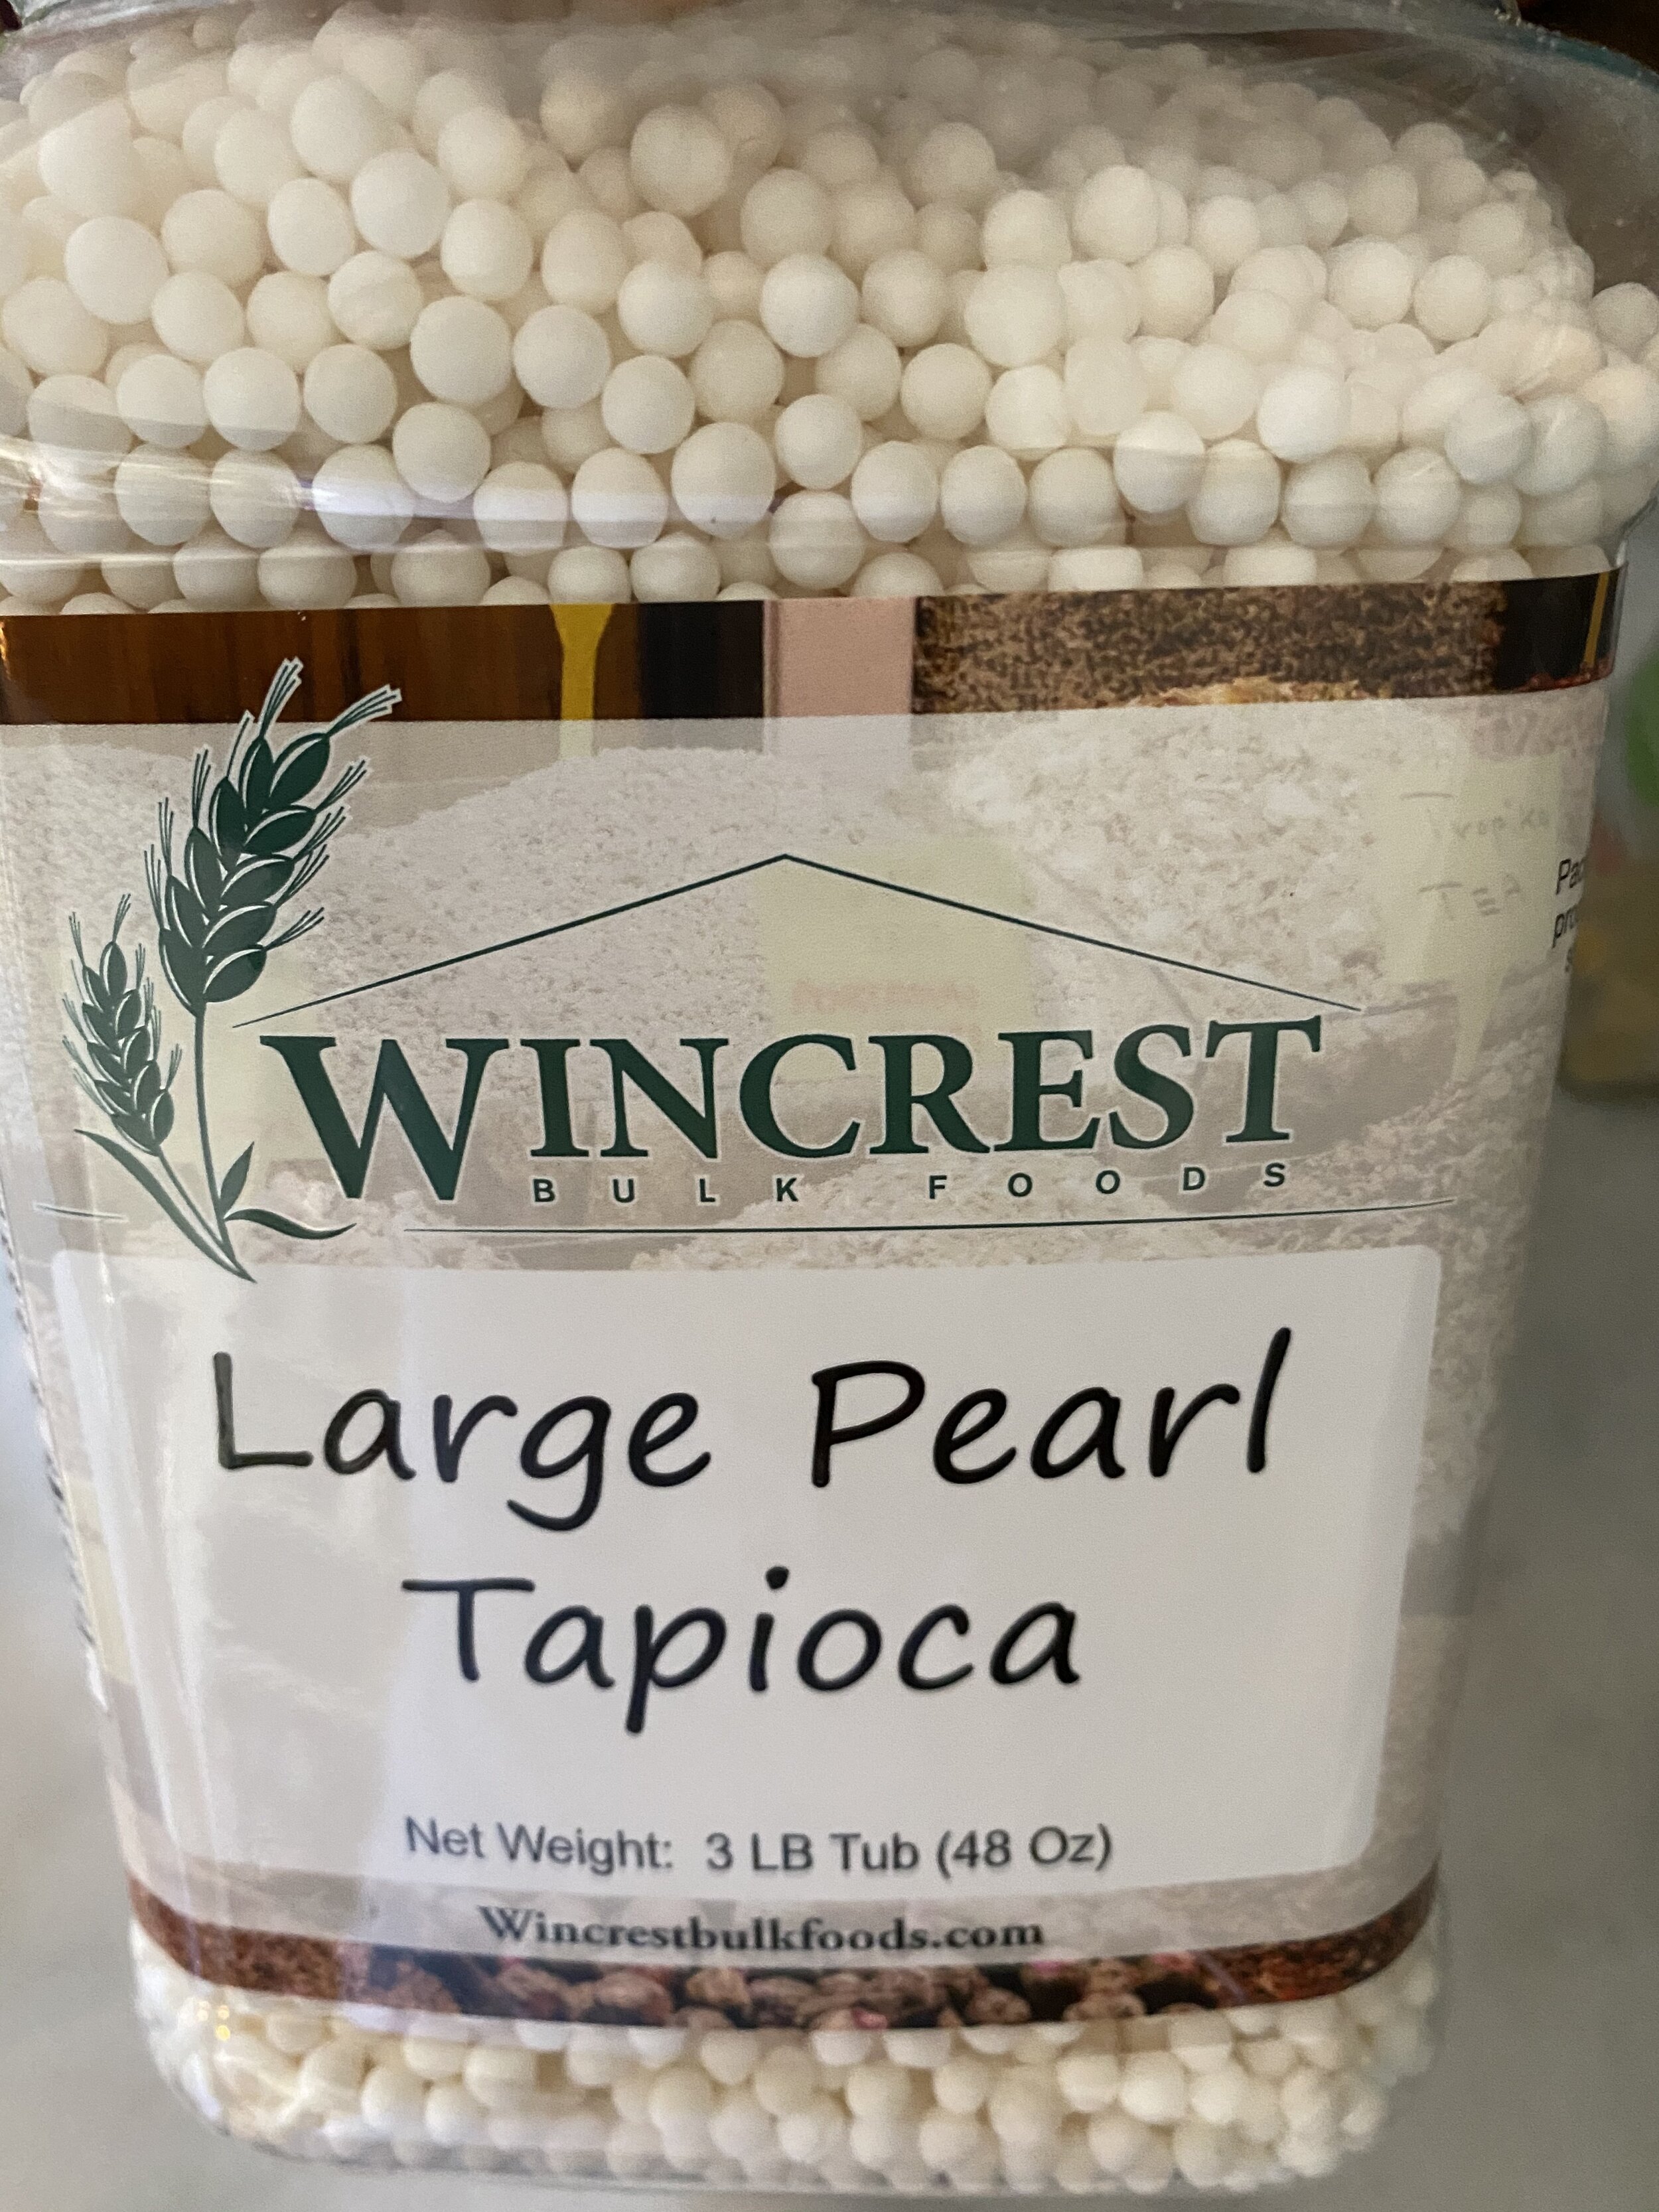
So you 100% NEED TO USE THE LARGE PEARLS. They do not get lost in the dough. I had to order mine online because I could not easily find them at a regular grocery store.

large tapioca pearls

Now if you do not care about it actually looking like salami, you do not have to use the pearls at all!! The only single thing those pearls do is recreate the fat bits in a non vegan salami. That is it. The taste and texture will be the same without them.

I am just tenacious and stubborn to a fault and would not dare post a vegan salami until I felt like it at least somewhat resembled a traditional salami.

This vegan salami recipe is pretty quick (mixing and baking that is) and easy to make. It does take some time for those pearls to soak, so keep that in mind when you go to make this vegan meat. You will need to soak the tapioca for about 4 hours. You will also need to allow for the VERY IMPORTANT REST TIME. And I yell this because you 100% have to let this salami rest before you go slicing into it. The texture depends on it.

I say this so you understand you will make vegan salami today and probably not eat it until tomorrow! But that is ok, good things come to those who wait, and this vegan salami is worth the wait.

It is also worth the savings. Store bought vegan meats are not very cheap. But if you make your own at home it will be pennies to the dollar you spend on pre-made vegan meats! That is reason enough for me to make my own vegan deli meats at home. They are so affordable and easy to make, once you start, there will be no looking back! Promise!

So go, make some vegan salami and stack it high on a cracker with a nice slice of vegan cheese, or on your favorite sandwich! It really is delicious and so easy to make your own vegan salami right at home!

IMG_9307.jpg

INGREDIENTS:

  • 16 oz of super firm tofu (the kind in vacuum sealed package)

  • 1 1/2 cups vital wheat gluten

  • 1/4 cup LARGE tapioca peals, plus hot water to soak them

  • 1/4 cup nutritional yeast

  • 1/4 cup tapioca or corn starch

  • 1/3 cup diced cooked beet (buy in a jar or tin, or you can wrap in foil and bake at 400 degrees until tender. After it has baked the peel easily comes off)

  • 2 tablespoons tomato paste

  • 1 tablespoons No Beef or Vegetable Better Than Bouillon. or some other vegan bouillon paste or powder

  • 2 teaspoons onion powder

  • 2 teaspoons minced garlic

  • 2 teaspoons dried mustard

  • 2 teaspoons sugar or monk fruit sweetener

  • 1-2 teaspoons black pepper

  • 1 teaspoon salt (optional)

  • 2 tablespoons neutral flavored oil (you can also use water instead)

  • 1-2 teaspoon liquid smoke

  • 1-2 teaspoons dried red pepper flakes

  • 1-2 tablespoons water if needed

*I use SUPER FIRM TOFU that is packaged in a sort of vacuum sealed wrapper. This tofu if much firmer than firm or extra firm and does not hold much water. Because of this you do not need to press this tofu AND it yields a much firmer seitan than regular or extra firm tofu. If you can only find firm or extra firm tofu then you will need to press it really well first, I suggest at least 30 minutes.

INSTRUCTIONS:

  1. In a medium sized bowl, add 1/4 cup of large tapioca pearls. Cover the pearls in HOT water. You can also add 1 teaspoon of bouillon if you like but don’t have to. Let the pearls soak for about 4 hours. Once they are done soaking, drain and set aside.

  2. Preheat oven to 350 degrees Fahrenheit

  3. Add the cooked beet to a food processor or high speed blender, and blend until the beet is well minced and broken down.

  4. Add the tofu (no need to press if using super firm) broken up into pieces into the food processor, or blender with the beet, and blend for a minute. You want to blend until the tofu iis good and broken down.

  5. Food Processor Instructions: Add all of the remaining ingredients and let the food processor run for a couple of minutes. You want the mixture to form a dough. Letting the processor run will help knead the dough. We want this seitan to be firm so we need it to knead for a bit. If you dough seems a bit too dry, you can add a tablespoons or of water, just don’t add too much more! You need a firm dough for this recipe.

  6. Blender Instructions: If you are using blender then break down the beet and tofu in the blender and get it as smooth as you can. Add the tofu and beet mixture to a bowl with the remaining ingredients and mix by hand. You will have to get the dough as mixed as you can then turn it out onto a clean surface to knead the dough by hand unit it comes together. You alternatively could add the tofu and beet mixture and remaining ingredients to a stand mixer with a dough hook attachment, and allow it to mix and knead that way.

  7. Once you have a smooth but firm dough, remove it from the food processor and place on a clean counter. Knead the dough with your hands for about a minute, forming a large rectangle shaped loaf with the dough. Try to stretch and flatten the dough out as much as you can.

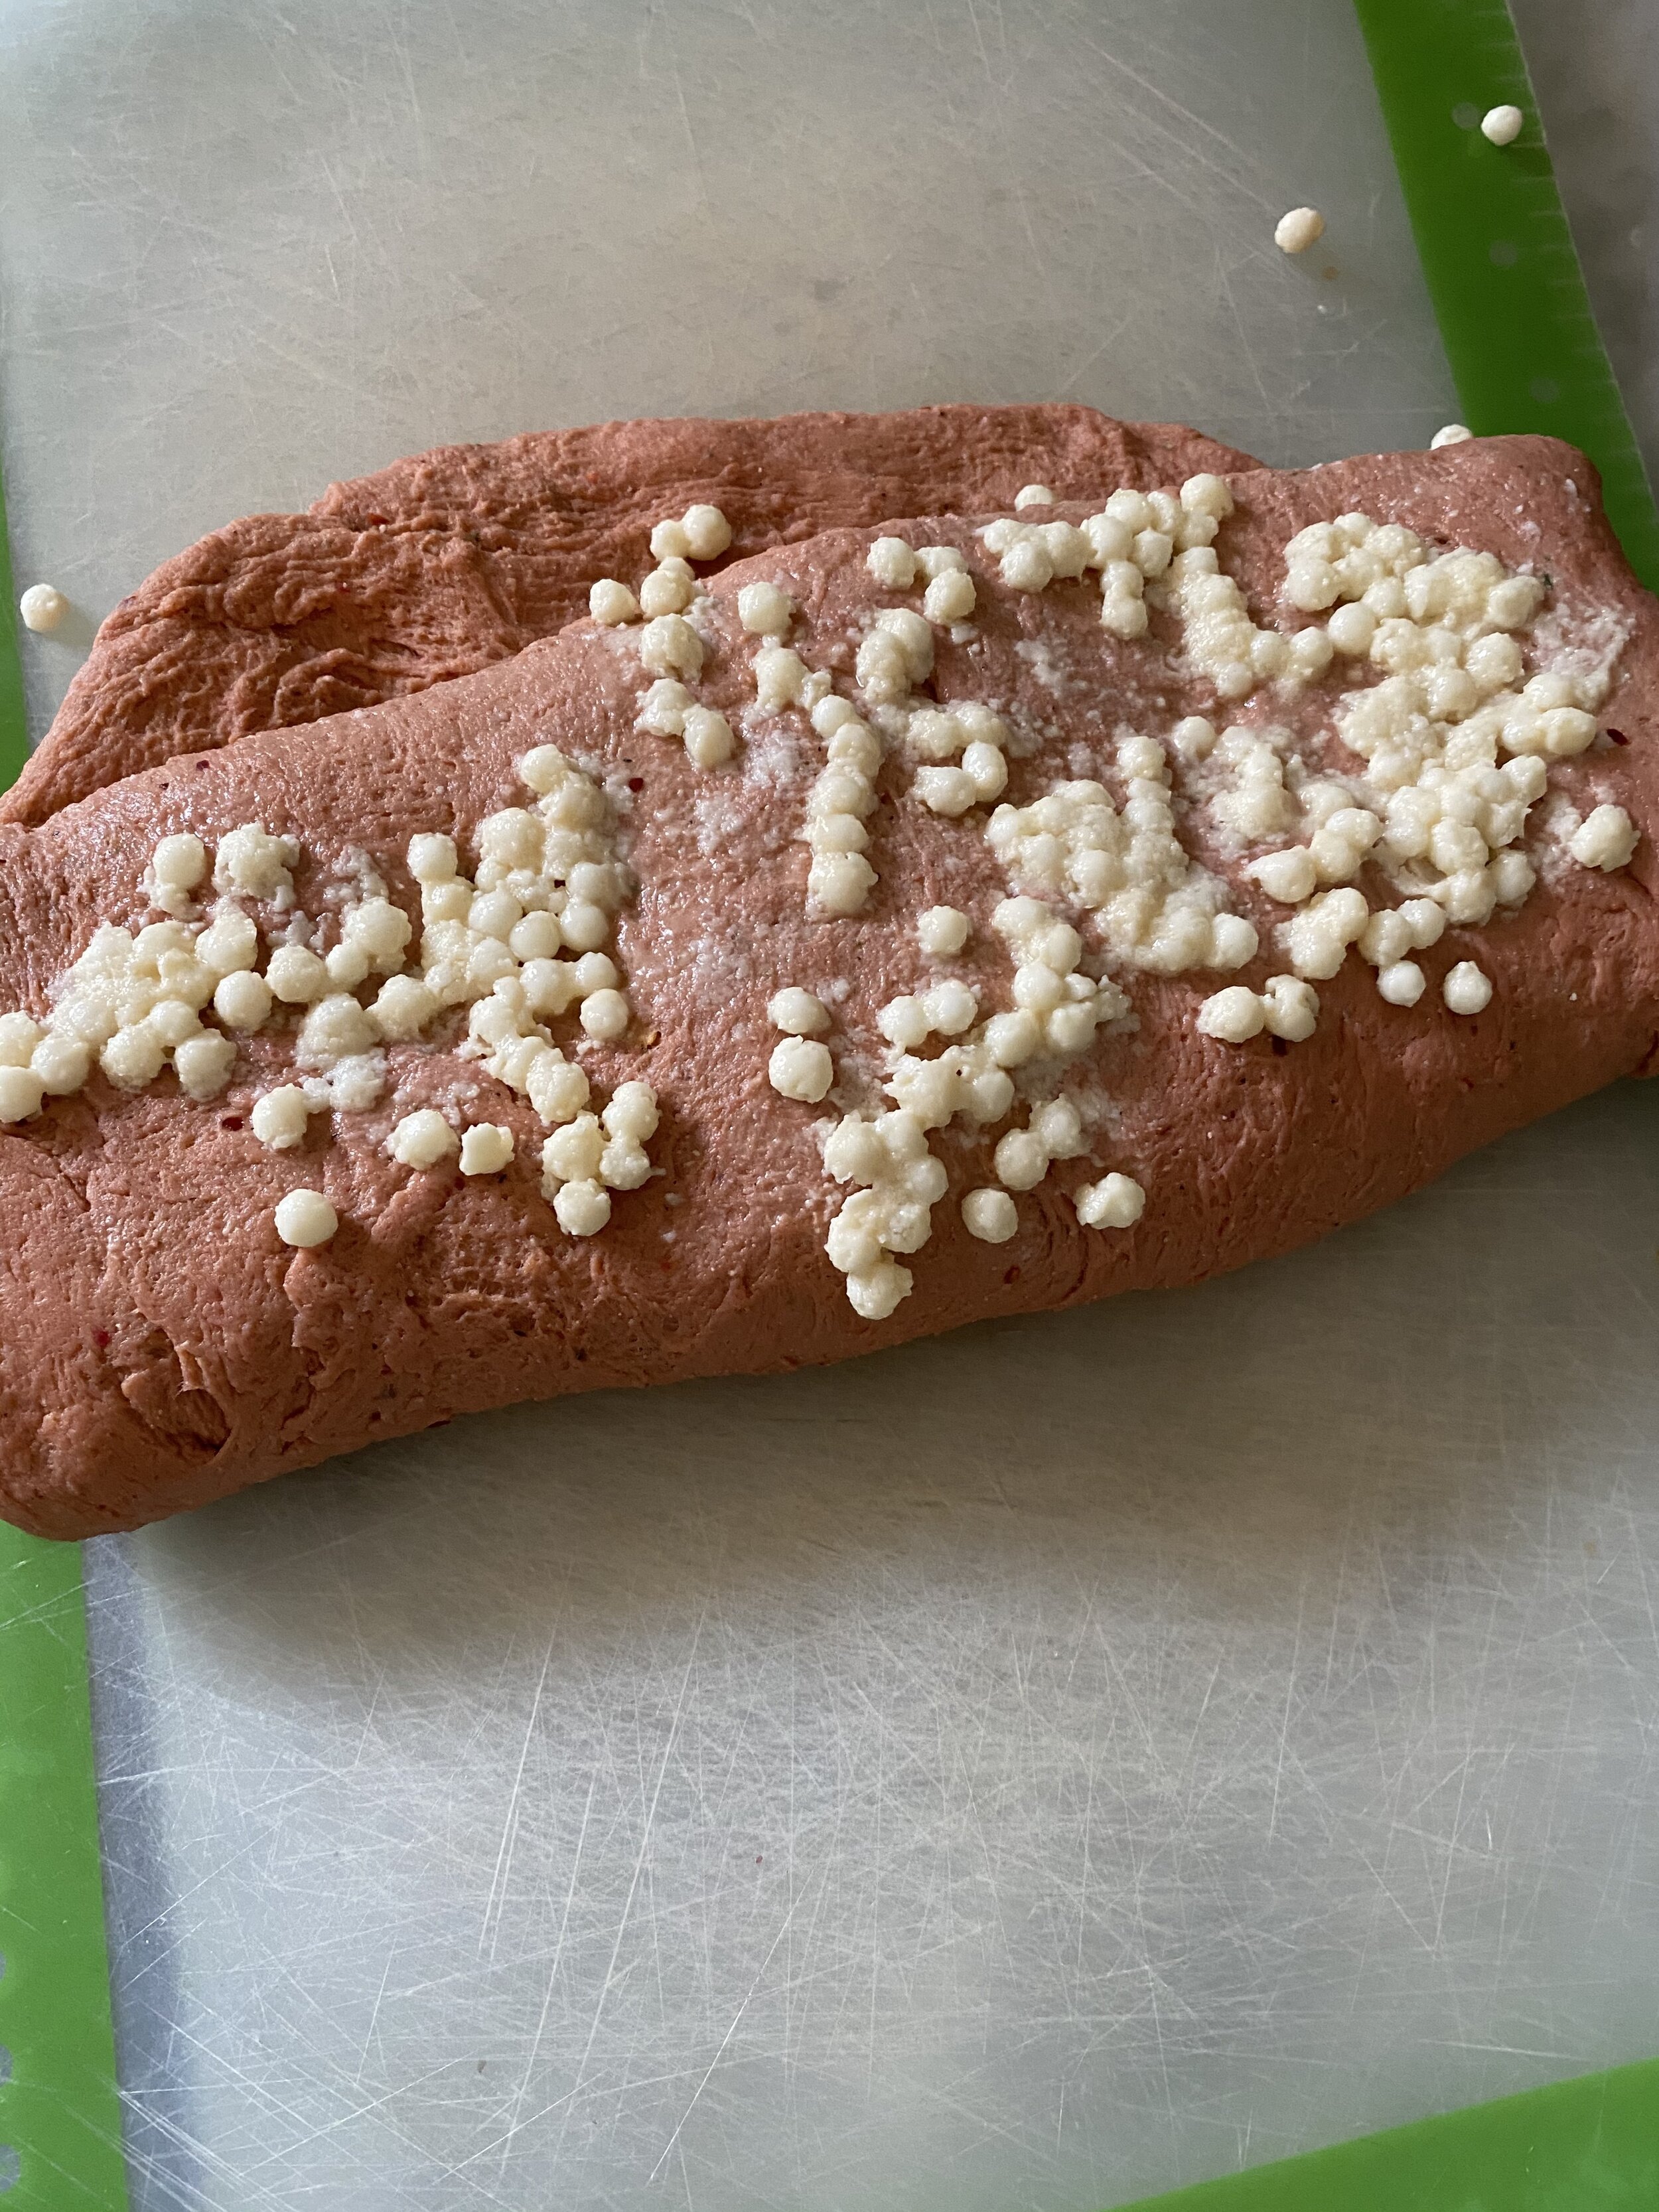
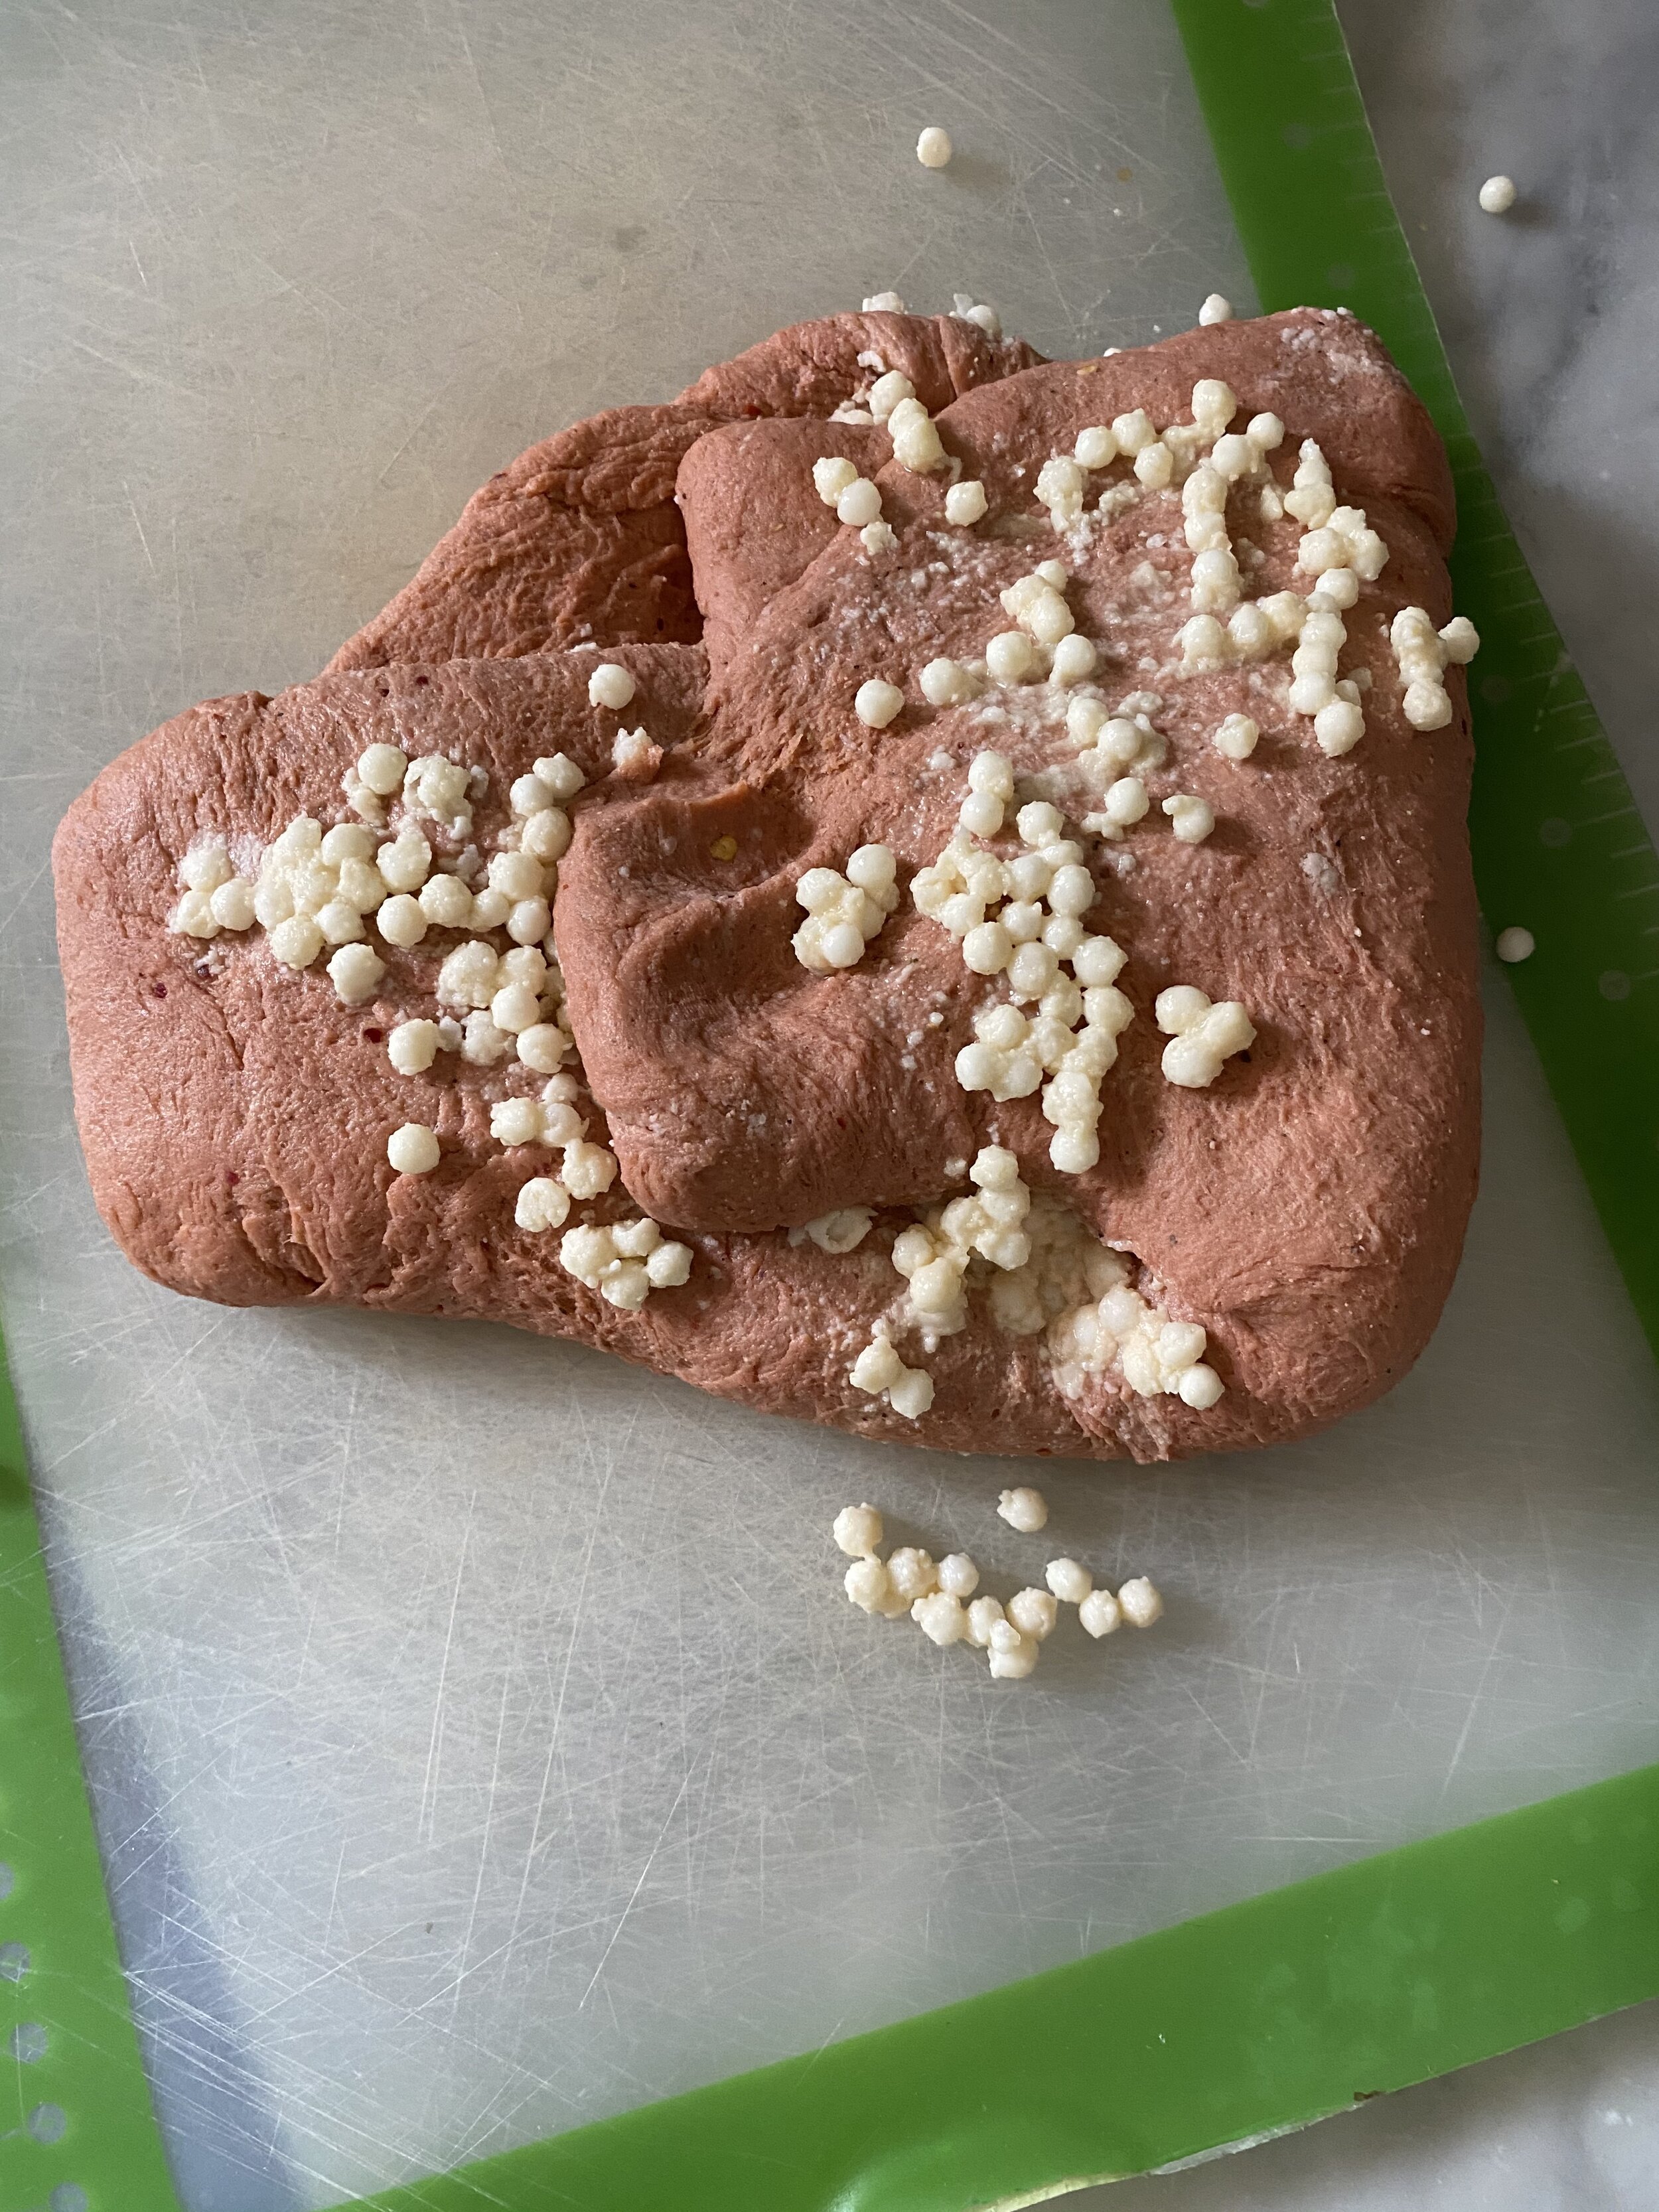
  8. Sprinkle and few tablespoons of the tapioca pearls evenly over the dough and press them in the best you can with your hands (they like to pop out of the springy dough.) Now fold the dough in half and sprinkle more pearls, pressing them in. fold again, adding more pearls, repeating this process until you can not fold the dough any more, and you are out of pearls ( as you fold pearls will spring out as mentioned above, its ok if you don’t get them all in there.)

  9. Once you have gotten all of the pearls (or as many as you can) into the dough, cut it in half. Begin kneading one piece at time by hand until the dough comes back together and is somewhat smooth.

  10. Shape each piece of dough into a 7 or 8 inch log. You will need to roll and pinch the dough to get it as smooth as you can. Adding the tapioca pearls makes getting the dough smooth a little more difficult than if you were making something like a pepperoni. But it will get smooth, I promise.

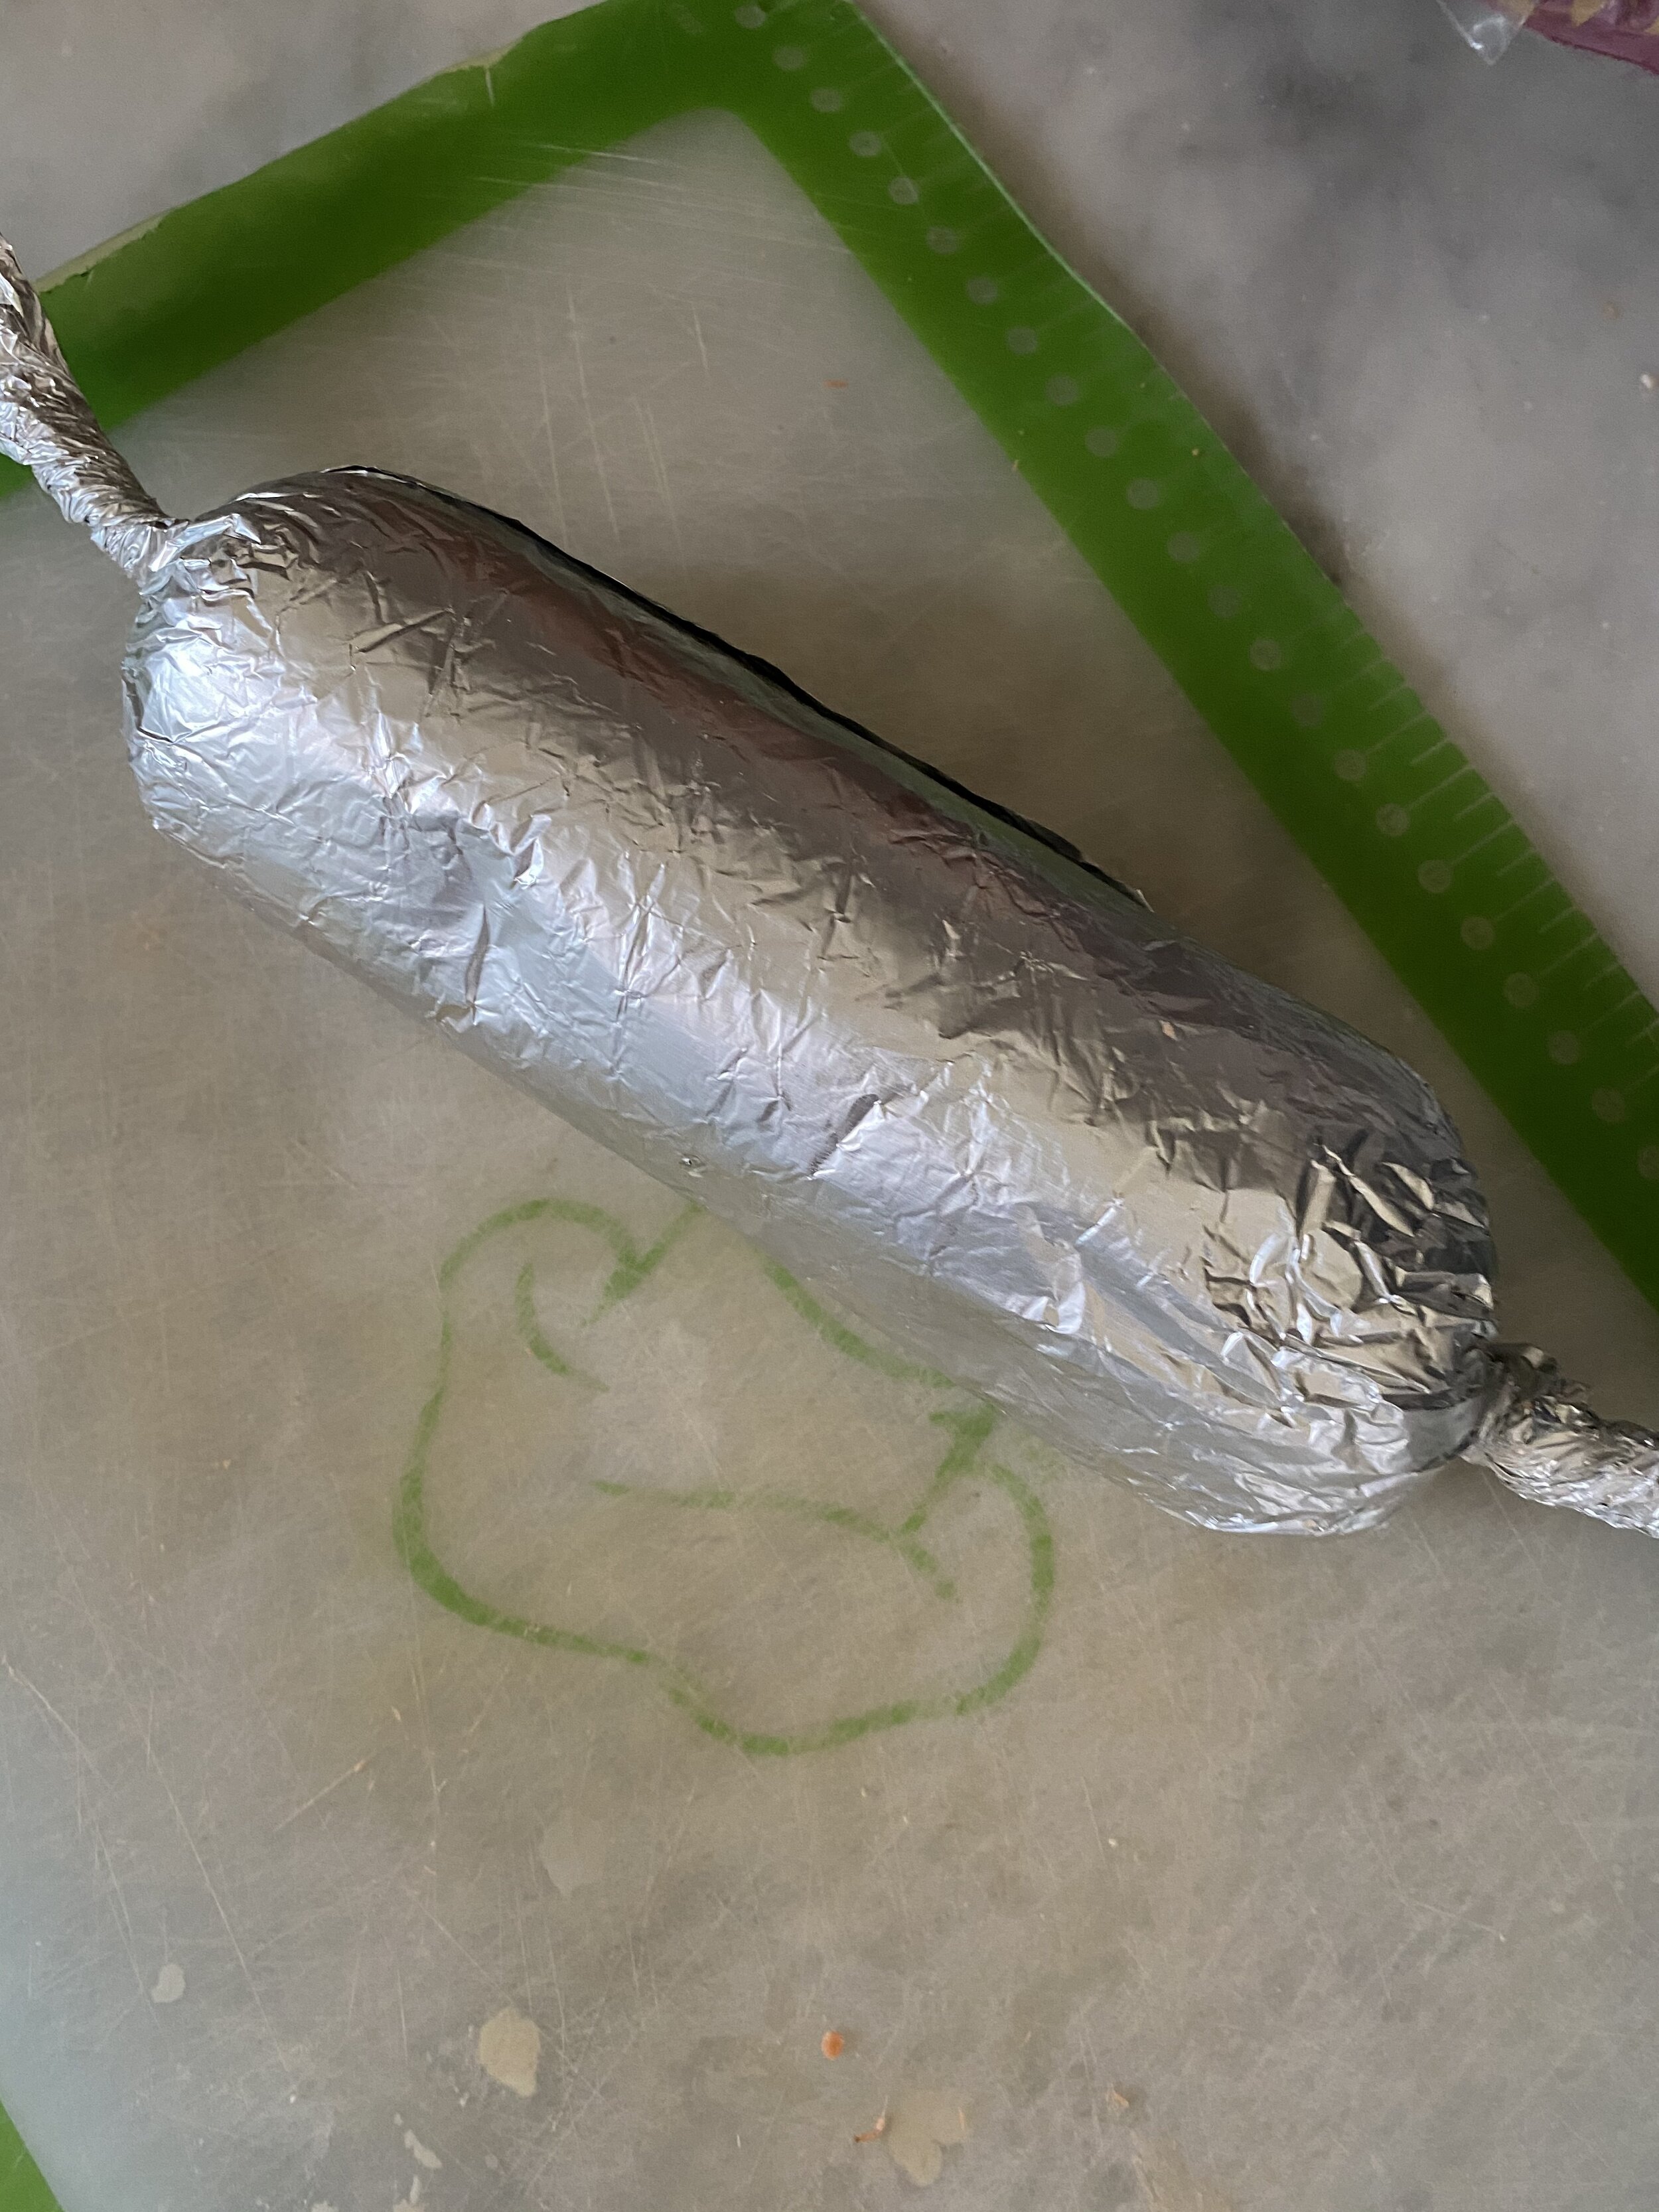
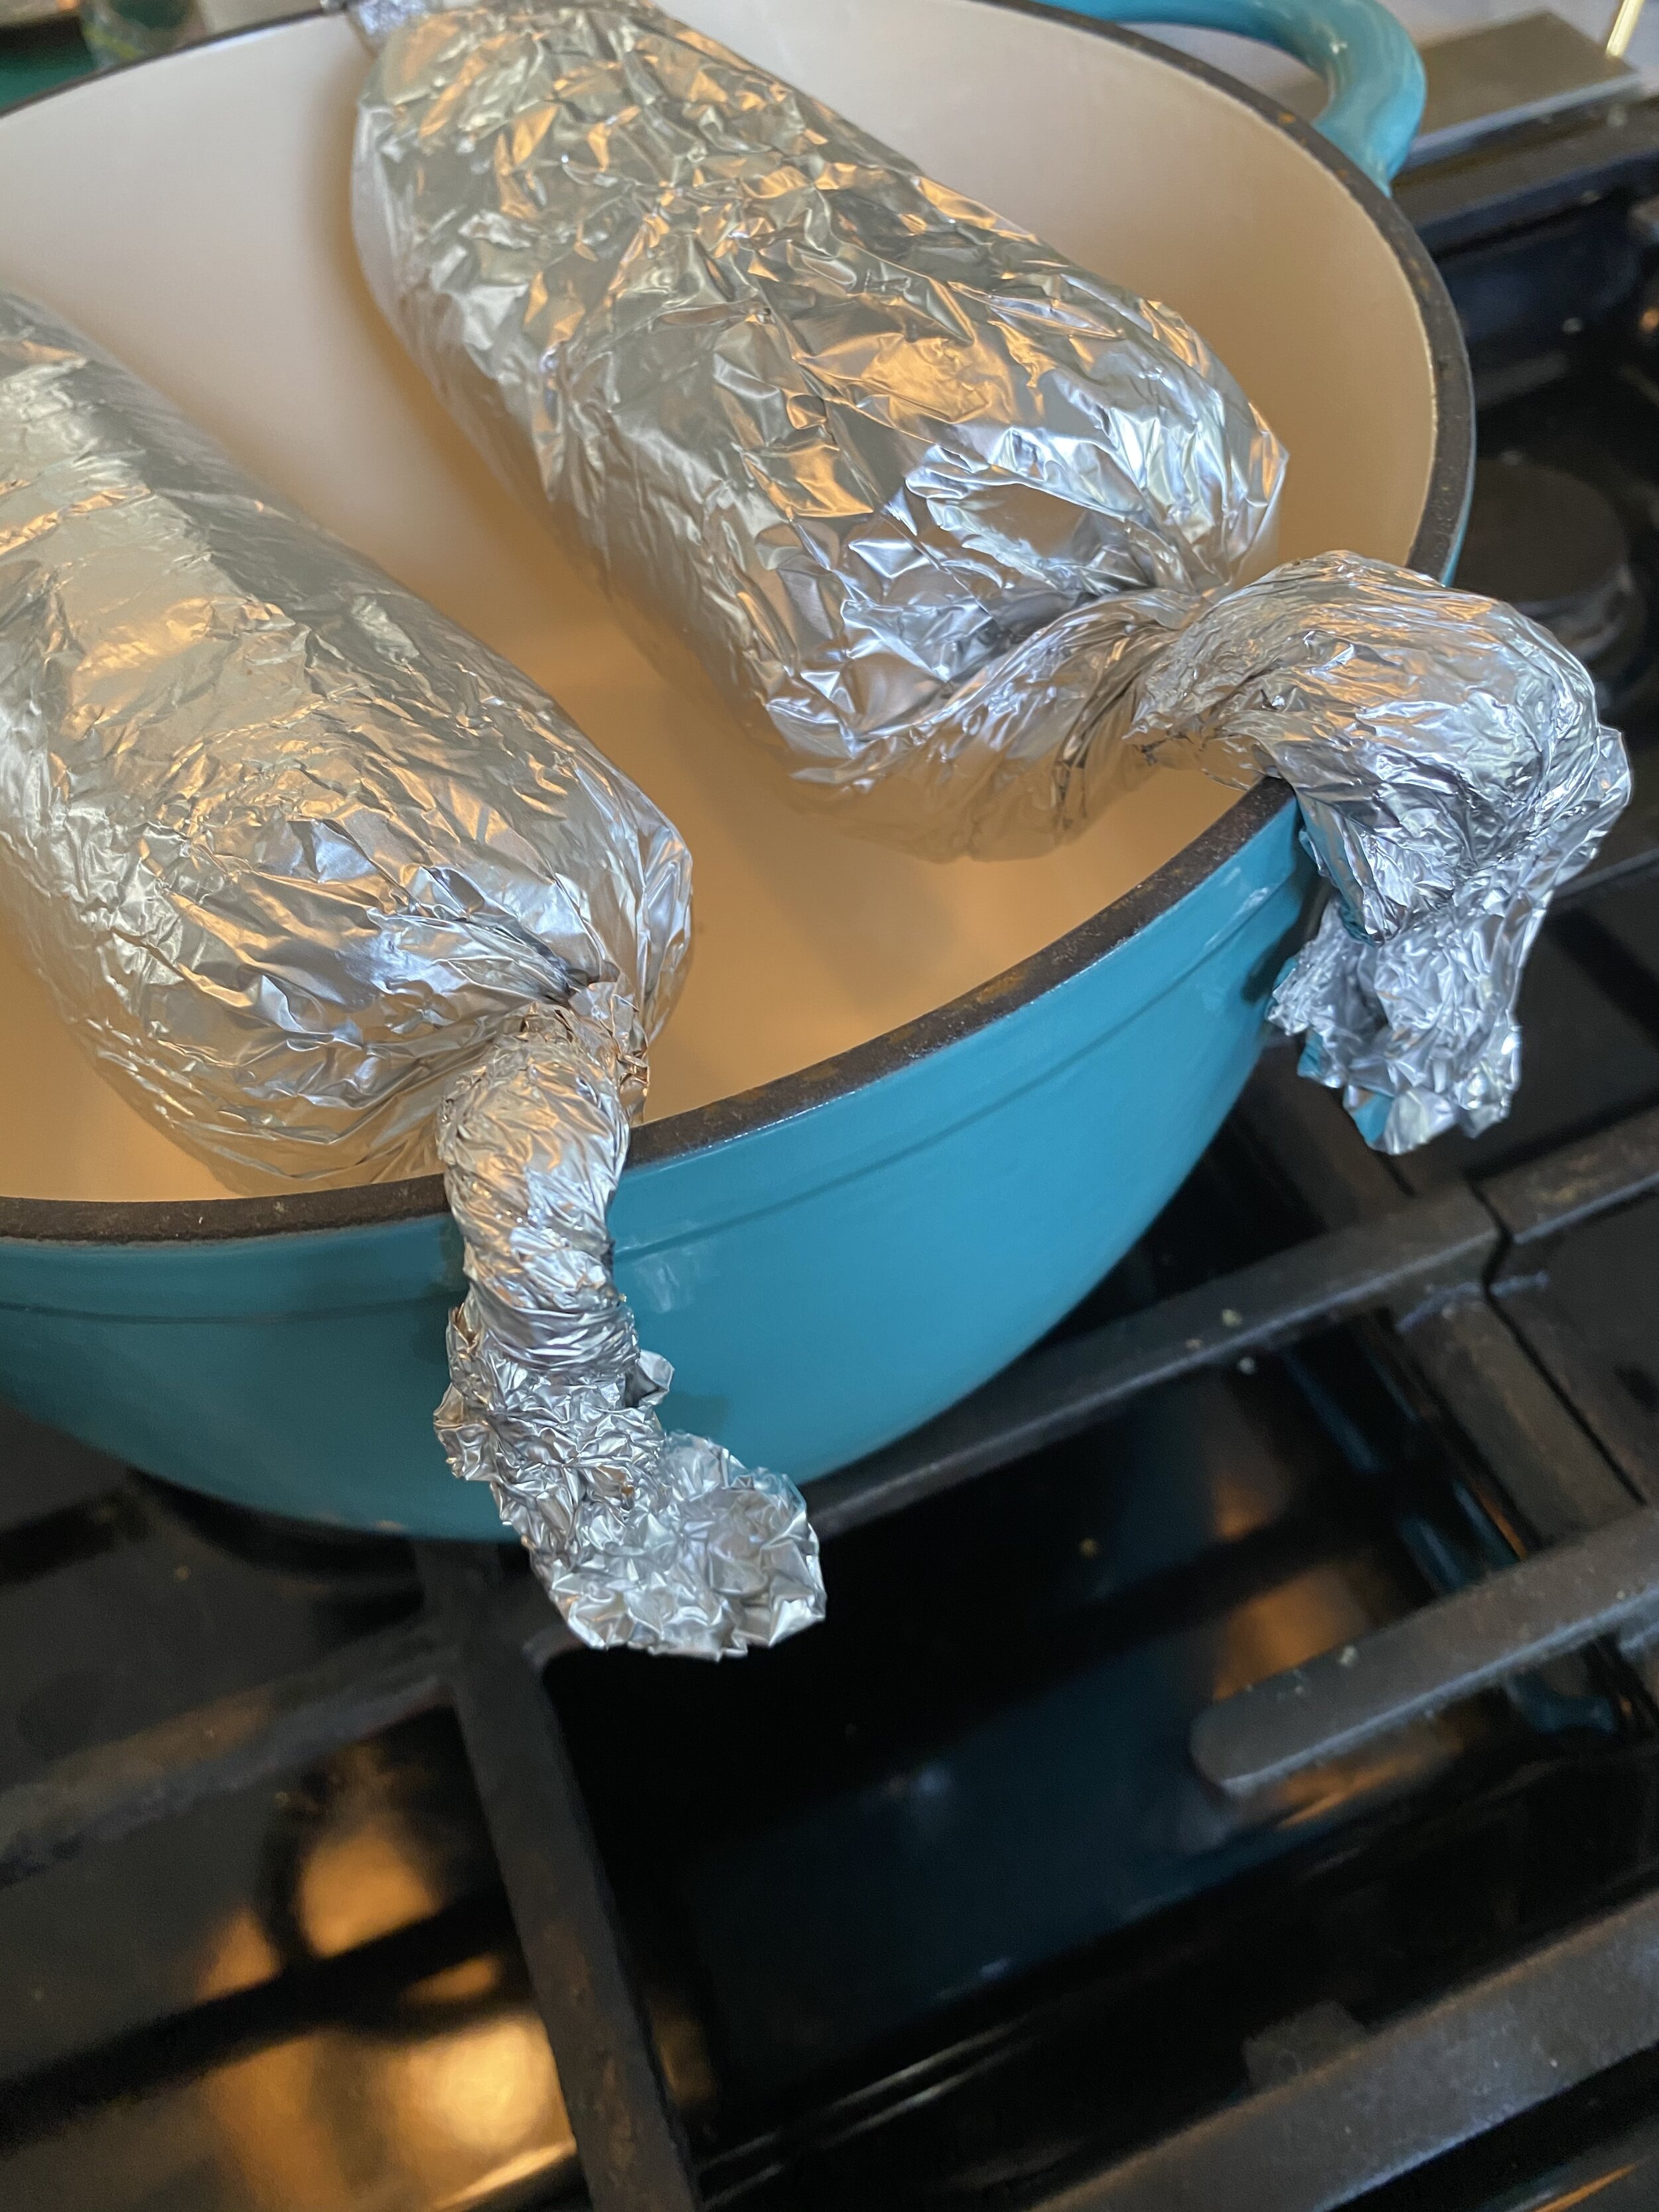
  11. Take two pieces of aluminum foil about 3x bigger than each log of dough, and lay it out flat. Coat the foil in spray oil or wipe it down with any oil you have. Place a log of seitan at one of the long ends of the foil and begin rolling. Once you have it rolled up tightly in the foil, twist up the ends of the foil nice and tight (see picture) like foil arms.

  12. Take a dutch oven, cast iron skillet, or even a baking dish, and use the foil ends to drape the salamis over the pot or pan. You want them suspended and not touching the bottom. If the salami is baked resting on a pan, the bottom tends to flatten a bit and brown while it bakes. This will help you keep a nice round shape without a water bath, and the bottom won’t brown!

  13. Place the pot or pan in the oven on the middle rack, and let the vegan salamis bake wrapped for 1 hour.

  14. Remove from the oven and allow to cool enough to open the foil. Allow to further cool at room temperature. Once cooled place in a zip lock bag or airtight container in the fridge.

  15. Leave the vegan salami in the fridge to rest for at least 6 hours. I normally just leave mine to rest over night. The salami MUST REST! Seitan will firm up only after it has a nice long rest in the fridge! If you want a firm sliceable vegan salami then you have to let it rest, y’all!

  16. Store rested vegan salami in the fridge for up to 10 days in an air tight container, or freeze for up to 6 months.

Trouble shooting issues with your vegan salami:

  1. If your vegan salami seems too doughy after it has rested, then you may not have kneaded it long enough. The longer you knead seitan dough the tougher / firmer it will get. Make sure to let the dough knead a few minutes. Also make sure you wrap that foil nice and tight!!!

  2. It also may be that your oven temp is off and is not the temperature it is registering. You can get an oven thermometer to check the real temp or next time just let it bake an extra 20 minutes.

  3. If you seitan seems bread like, with little holes in it after it has rested, once you slice it, then your oven may be cooking hotter than it registers or you maybe have cooked it too long. Again, can get an oven thermometer and check the temp, or just knock back the temp 20 degrees or so then next time you bake it.

If you like this recipe, then try these:

vegan flank steak

vegan flank steak

Vegan Tofu Sushi Cups

IMG_9287.jpg

I love sushi.

That said, with a family of 6 going out for sushi can be pricy.

Making sushi at home is something we have started doing more and more, but we are not experts around here by any means, and I am actually not very great at rolling it, so I don’t.

My 15 year old daughter is actually really good at rolling sushi, but can’t often be convinced since it is a bit time consuming to cut the ingredients and roll up enough sushi for 6 people.

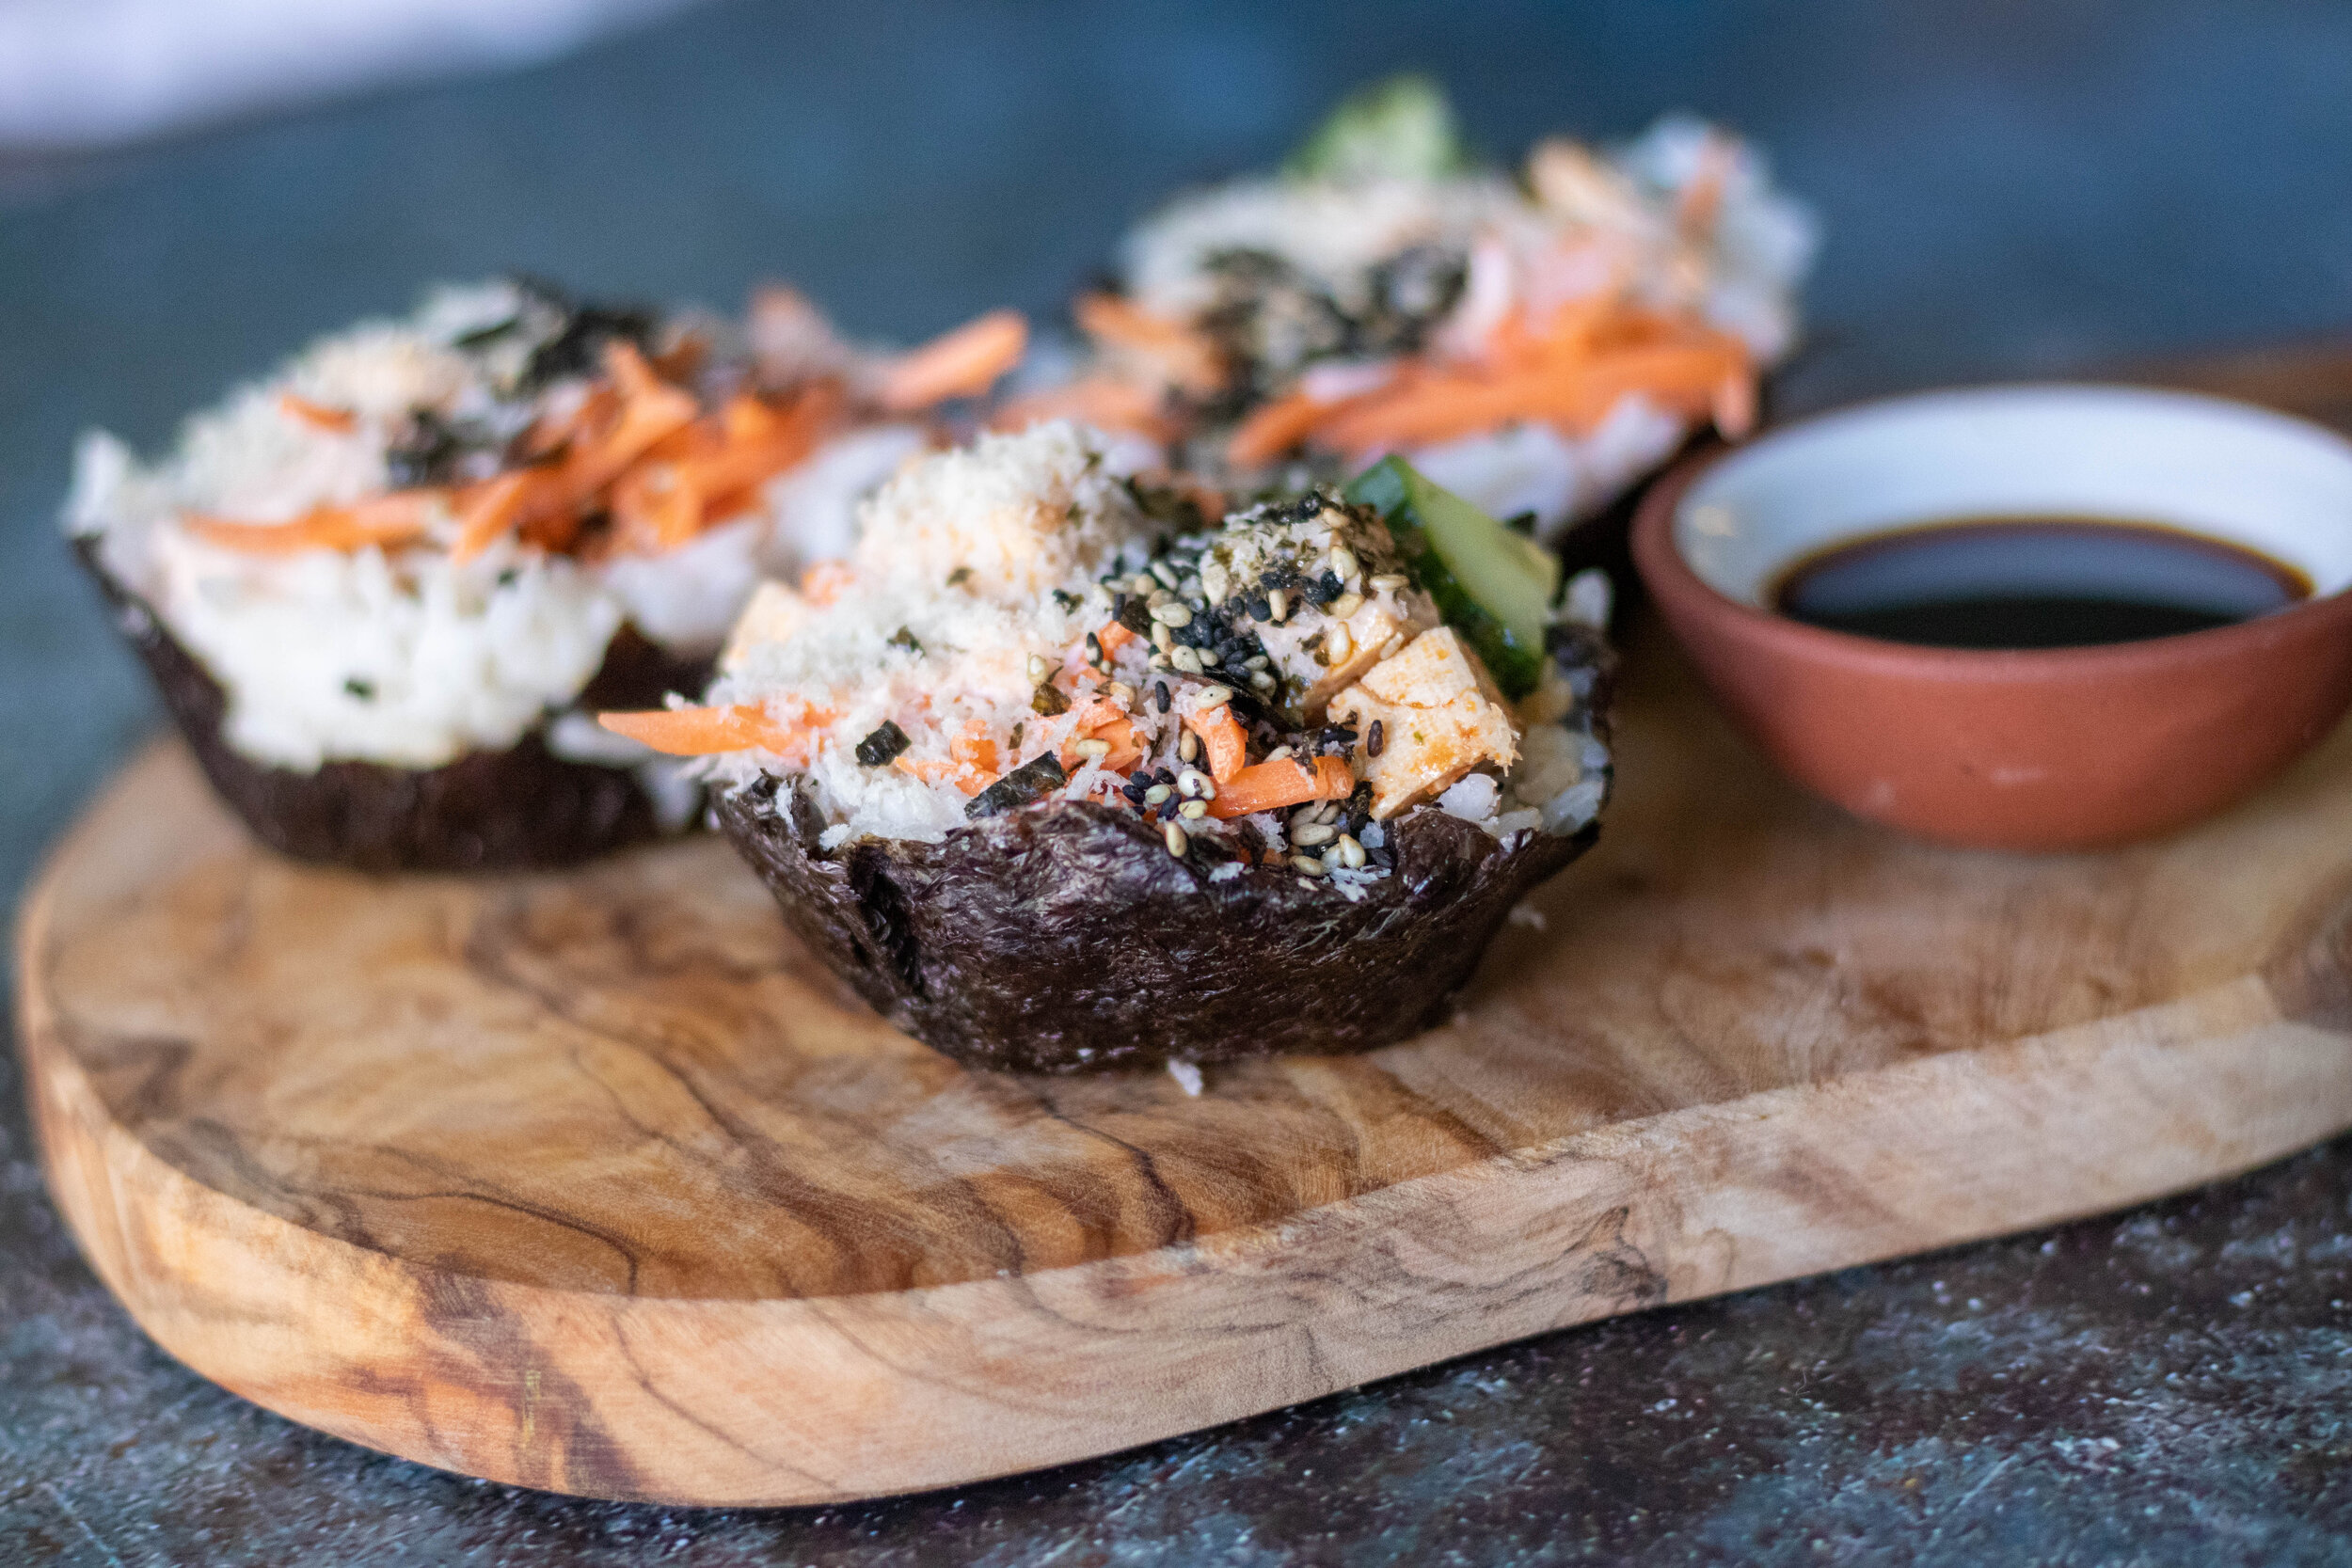
So, the other day when I was craving sushi but didn’t want to bother the teenager, I decide to use one of my favorite food hacks and make little sushi cups using a muffin tin.

This way we could get all the good stuff from sushi, all together in a cute little cup, without having to roll anything. I also didn’t have to bribe one of my kids to help, or go broke ordering take out.

I mean sushi burritos are thing now, so I guess this is like a sushi burrito, meets regular sushi rolls love child?!?!? Maybe that’s a stretch but its somewhere in between the two.

IMG_9273.jpg

I honestly have yet to try a sushi burrito because it just seem like too much. I like that sushi is small and bite sized and every bite is something exciting. So the appeal of a giant sushi burrito is lost on me. But if you love them, then by all means, eat those sushi burritos right up!

These cups are obviously bigger than a sushi roll, but way smaller than a burrito, so some happy medium that I am very satisfied with.

They are still single serving, can still be dipped in soy, or extra yum yum sauce, and will hold up the next day for your lunch box or leftover dinner.

You could also make smaller versions of these cups using a mini muffin tin and smaller pieces of nori, making some pretty cute party appetizer if you are also horrible at rolling sushi or do not have the tools required to roll it, like a sushi rolling mat!

These tofu vegan sushi cup are really easy to make, require little actual cooking, are light, but filling and delicious.

Feel free to swap out other veggies if you are not a fan of carrots or cucumbers. Those just happen to be our families agreed upon sushi faves.

The tofu requires no cooking but soaks up the marinade and has a little kick of spice that is extra delicious.

If you have a rice cooker than this recipe is so super easy. If not, just follow the stove stop directions on your package of sushi rice. Either way, waiting for the rice to cook is honestly the hardest part of this recipe!

And those are my favorite kind of recipes, easy and delicious!

IMG_9265.jpg

*You will need a 12 cup muffin tin for this recipe

INGREDIENTS:

  • 2 1/4 cups sushi rice

  • 3 sheets nori

  • 1/4 cup vegan panko crumbs

  • 1/2 block super firm tofu ( the kind that is vacuum sealed in little water)

  • 3 tablespoon soy sauce or coconut aminos

  • 2 teaspoons sesame oil

  • 3 teaspoons rice vinegar

  • 1 teaspoons Sriracha (optional)

  • 1 small English cucumber, finely diced

  • 1/2 cup matchstick carrots

  • 1/4 cup vegan cream cheese

  • furikake seasoning for topping

Vegan Yum Yum Sauce:

  • 1/2 cup vegan mayo

  • 1 tablespoon ketchup

  • 1-2 teaspoons rice vinegar

  • 1 teaspoon minced garlic

  • 2 teaspoons sugar or monk fruit sweetener

  • 1 teaspoon paprika

  • a few tablespoons of water as needed to thin out the sauce

IMG_9297.jpg

INSTRUCTIONS:

  1. Prepare rice according to package instructions. I use a rice cooker and it is the equivalent to 3 scoops of rice (the scoop that came with my cooker) and filling the water line to the 3. Once rice is done, allow it to cool enough that you can handle it with bare hands.

  2. Drain the tofu. If using super firm there is no need to press the tofu. If using firm or extra firm you will need to press the tofu for 15 minutes to remove as much liquid as you can.

  3. Dice the tofu into little 1/4 inch cubes. Mix the soy sauce, sesame oil, rice vinegar and Sriracha in a medium sized bowl along with the tofu. Let it marinate for at least 15-20 minutes (the longer the better if you have more time)

  4. Cut nori sheets into quarters. You will now have 12 squares of nori.

  5. Press a square of nori into each muffin cup. Using a large cookie scoop or 1/4 cup measuring cup, scoop out rice and press into each muffin cup on top of the nori sheet. Wet your hands (this helps the rice not stick to your hands so you can press it more easily) and press the rice to form a cup around the nori. Pop the muffin tin in the fridge for about 20 minutes. Take them out and carefully remove the rice and nori cups from the muffin tin.

  6. Add about 1 teaspoon of cream cheese to the bottom of each cup and spread it out using the back of a spoon.

  7. Dived the cucumber, carrots, and tofu (marinade drained first) evenly among the cups. I like to do this in little rows.

  8. Mix the ingredients for the yum yum sauce in a bowl. Make sure you have added enough water that it will drizzle over the cups. Drizzle the sauce over each cup.

  9. Sprinkle with panko.

  10. Top with a good shake of furikake or you can sprinkle with dulse flakes and sesame seeds to serve.

  11. Store any leftovers in an airtight container in the fridge for up to 3 days.

If you like this recipe, then try these:
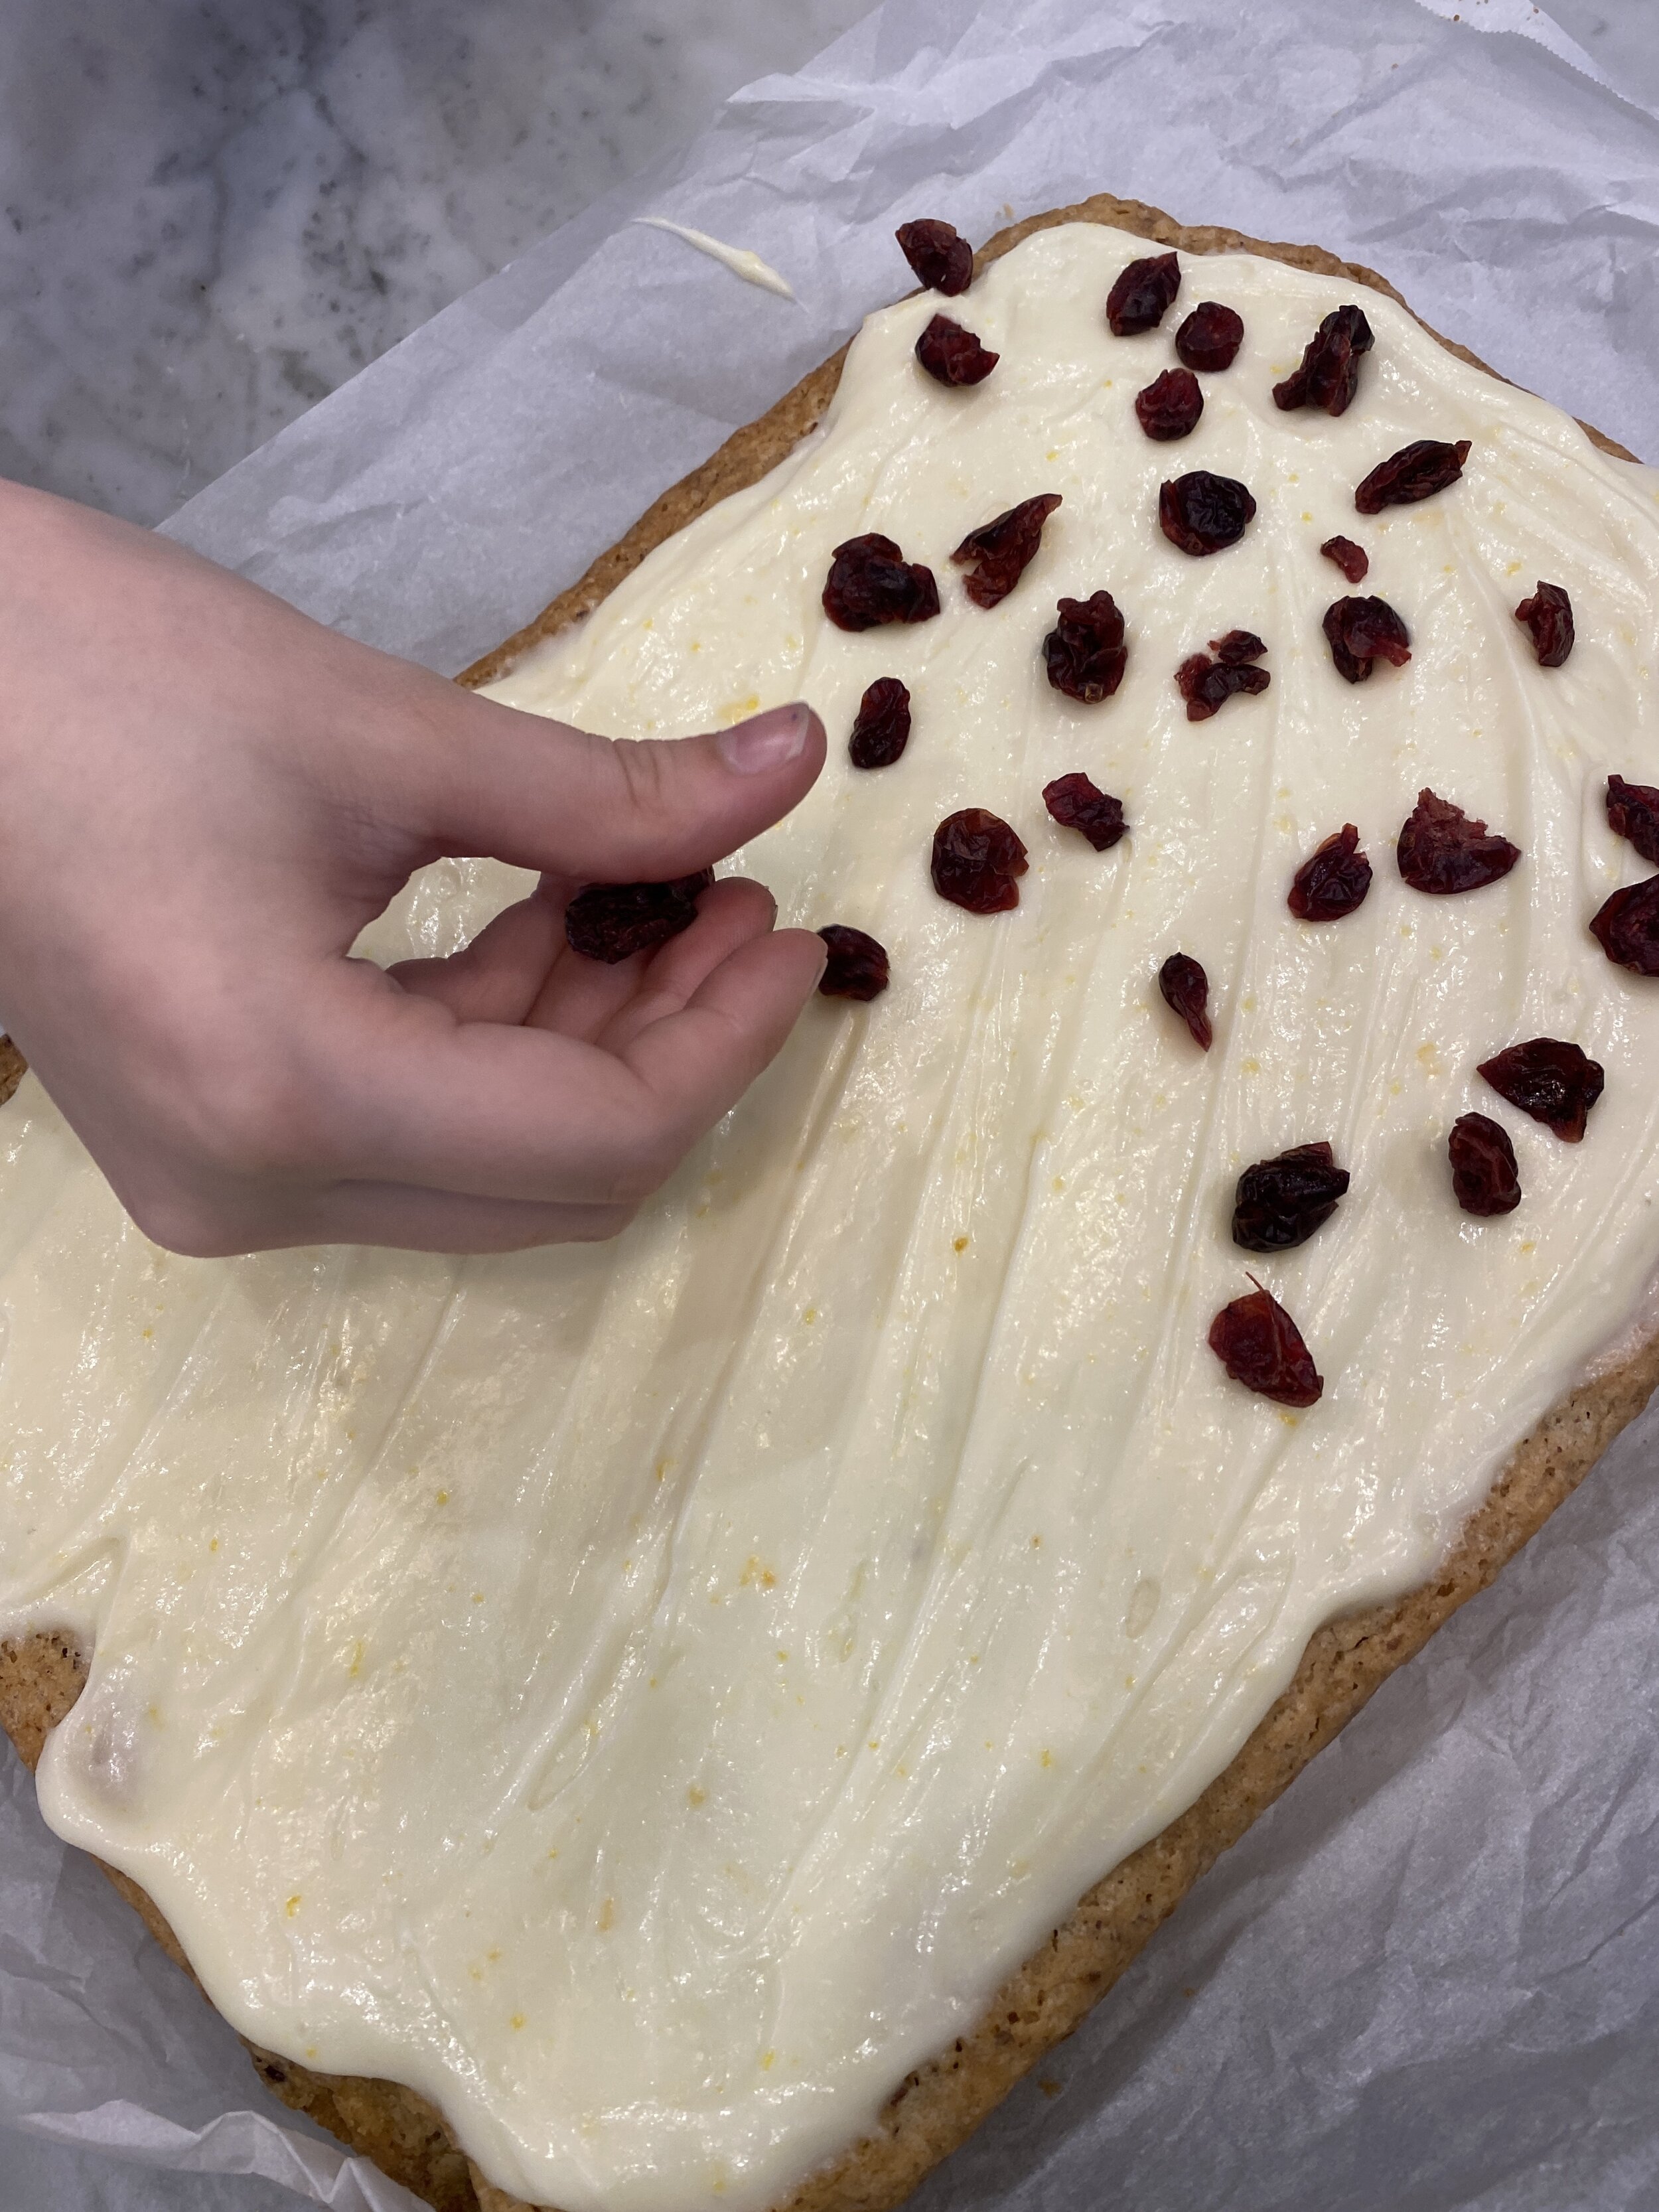
vegan flank steak

vegan flank steak

Vegan Carne Asada Queso Fries

IMG_9247.jpg

My love for carbs is strong, especially french fries.

I would chose salty over sweet every time and a potato over most other foods always.

Offer me loaded cheese fries and its game on.

I recently saw a recipe for carne asada queso fries and quickly decided that was a recipe I was 100% going to veganize it.

I have never made carne asada pre vegan so I am not sure how it compares but the flavors in this recipe are delicious and I am a big fan of the vegan flank steak marinated in the mix of citrus, garlic, and cilantro. This marinated flank steak would be delicious in lots of things, from tacos, quadrilles, nachos, or even topping a salad.

IMG_9258.jpg

I make serval different queso recipes, meaty queso, spicy queso, nut free queso, so if you are making these fries you don’t use the white queso I used in this recipe, you can check out all of queso recipes on the site and pick your fave. For this recipe I wanted a classic white queso with a little kick, so thats the one I made!

Fro the carne asada I had to create a vegan flank steak recipe that would easy enough for even a new vegan to make, and I wanted it to be fairly quick and fuss free. You will have to make the steak ahead of time and let it rest. So if you want these fries in your future, you will have to get the flank steak started early in the morning if you want to eat these fries later that night.

The flank steak bakes up quickly but requires at least a 4 hour rest. Once it has rested then you need to allow it to sit in the marinade for a few hours.

You only need half a batch of vegan flank steak for this recipe, so you can bake up a batch and freeze the other half for later. The vegan flank steak works great on its own for fajitas, tacos, nachos, sandwiches, whatever!! It so quick and easy to make and a staple I keep around now for recipes like these fries!

IMG_9243.jpg

We topped our vegan carne asada fries with and easy homemade guacamole, tomatoes, sour cream, and extra cilantro.

I also used frozen fries for this recipe. I used to always make homemade fries but recently I have just started buying Trader Joes frozen fries and been plenty happy with them.

I give deep frying, air frying, and baking instructions for the fries. I personally have not deep fried a french fry since I bough an air fryer a few years ago. It is maybe my favorite kitchen appliance next to my vitamix! Game changer y’all!

So if you are a fan of cheesy loaded fries, these vegan carne asada fries might be a new loaded fry for you to try and love. I know I am now a BIG fan of these!

IMG_9261.jpg

INGREDIENTS:

  • 4 russet potatoes (for making homemade fries. You can also use frozen fries)

  • 1/2 batch vegan queso

  • 2 avocados

  • juice from 1 lime

  • 1/2 teaspoon salt

  • vegan sour cream, diced onion, dicd tomatoes (all optional)

  • oil for frying, OR you can air fry or oven bake the fries

Vegan Carne Asada (Flank Steaks):

  • 2 vegan flank steaks (1/2 recipe)

  • 1 cup orange juice

  • juice from 2 limes

  • 1 tablespoon oil

  • 1 teaspoon salt

  • 1 teaspoon black pepper

  • 2 teaspoons minced garlic

  • 1 jalapeno, diced (optional)

  • 1/2 cup fresh cilantro, plus extra for garnish

IMG_9244.jpg

INSTRUCTIONS:

  1. To prepare the carne asada, fill a large zip lock bag or shallow baking dish with the ingredients listed above. The flank steak (that has been previously baked and rested) juice, herbs, and spices. Refrigerate for at least 2 hours but the longer the better.

  2. If you are making homemade fries, wash and cut the potatoes into fries, leaving the skin on the potatoes (or use frozen fries) If you wish to deep fry the fries, heat a large skillet with several inches of oil over medium heat. Once the oil is nice and hot add the fries in batches (do not over crowd the pan) until they get nice crispy. Remove the fries placing them on a cooling rack that is sitting on a paper towel lined baking sheet, and continue with remaining potatoes. I typically double fry mine (if using fresh potatoes.) This means that after I have fried all the potatoes once, I repeat with the already fried fries to get them extra crispy. You can also air fry the fries by misting them with oil and placing them in the air fryer at 400 degrees for 10-12 minutes. You can also oven bake the fries at 400 on a cookie sheet being sure to turn them a few times as they bake. Bake until nice and crispy.

  3. Make queso according to instructions. If it gets cold before you are ready to use it, you can reheat it in the pot and add a little more water to thin it back out. (it will thicken as it cools)

  4. Heat a grill over medium/ high heat. Spray the grates with some oil to help avoid sticking. Remove the steaks from the marinade place on the hot grill for about 5 minutes per side, or until you get some nice grill marks and char on the steaks.

  5. Once the steaks have cooled a bit, slice and cut into small bitesize cubes.

  6. Scoop 2 avocados out of the peal and into a bowl. Mash with a fork. Sprinkle salt and add the juice from one lime. Mix it all up.

  7. Top the fries with the vegan carne asada, queso, guac, vegan sour cream, diced tomatoes, onion, and extra cilantro to serve.

If you like this recipe, then try these:
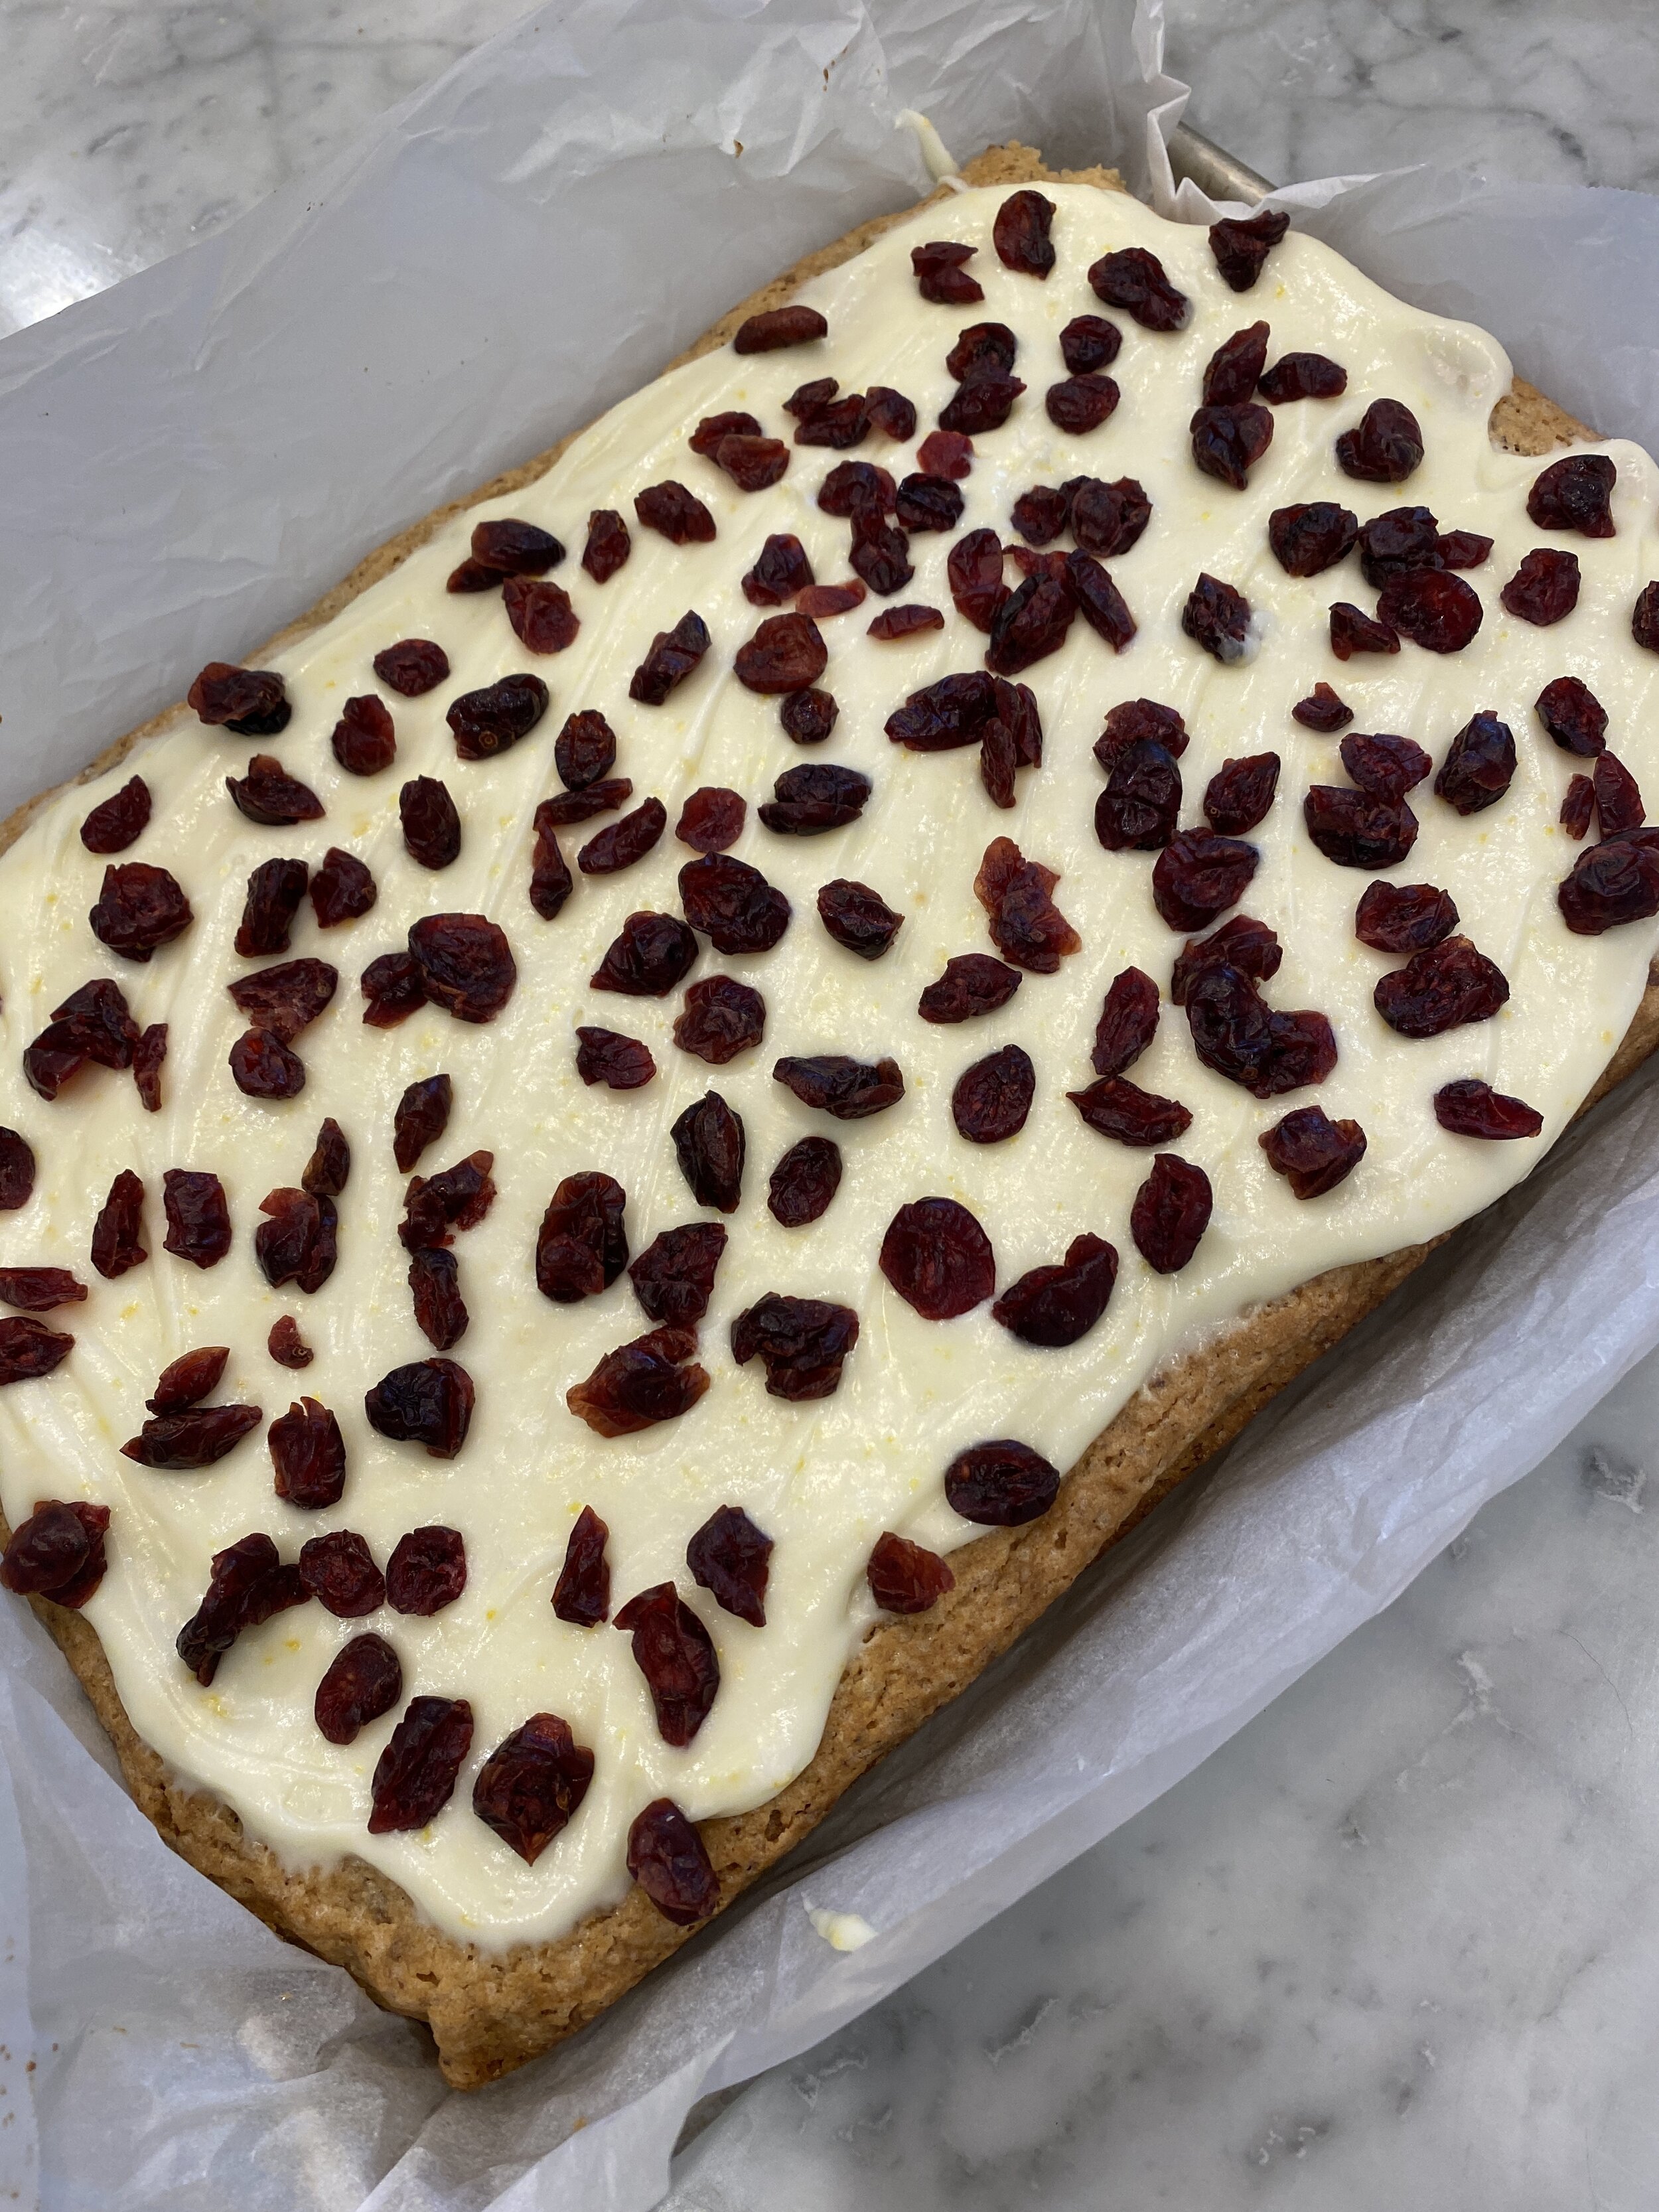
vegan flank steak

vegan flank steak

Vegan Flank Steak

vegan flank steak

vegan flank steak

Often I find myself waning to make vegan versions of old steak recipes I used to love.

Things like steak fajitas, steak and cheese quesadillas, steak tacos, and even beef pot pies.

In order to recreate these classic recipes I needed to make an easy all purpose “steak” that could be used in a variety of ways.

I opted to try my hand at a vegan flank steak because that way I could form it thin so it would cook quickly, and the rest time would be fairly short.

If you have tried my recipe for vegan baked chicken breast, this recipe is sort of the same. A quick and easy seitan recipe that freezes well and can be used in a variety of recipes.

If this is your first go at seitan, trust me when I tell you this recipes is EASY. Like so easy. Mix the dough up, form into a steak shape, bake for half an hour, and let rest. So, So, So easy, y’all!

I used super firm tofu and I explain why below. Please read the notes concerning your tofu choice and also trust me when I tell you if you can find super firm, it is your best option!

As a new addition for flavor in this recipe is used store bought sofrito. You can find sofrito in the Hispanic grocery isle in your local grocery store, or google a recipe to make your own. If you are not familiar with sofrito, it is basically a blend of vegetable herbs and spices used to flavor various dishes. It’s so good in so many recipes and worth including as a fridge staple to add a quick and easy punch of flavor to lots of dishes.

Please read the label…this is another example of thinking something is vegan that may not be. I originally googled Goya brand and read it was vegan. I bought AND used this brand for a while without reading the tiny print on the label. Later I was told it is in fact not vegan and contains pork. To say I was upset is an understatement.

I also apologize for my first version of the recipe stating I used a brand that is in fact NOT vegan.

Otherwise this recipe is pretty straightforward, basic, and tasty.

Making your own seitan at home will save you so much money over buying frozen pre-made seitan. It is easier than most people think and actually pretty healthy .

Vital wheat gluten has a good amount of protein per serving, as much as lean chicken, and using the super firm higher protein tofu adds even more protein to this flank steak recipe. Seitan is low calorie as well. So unless you have a wheat intolerance, seitan makes a great protein source or vegans and vegetarians.

So go forth and make vegan flank steak without fuss or worry you will mess it up. You probably won’t. And then go and make all those steak dishes you may have been missing!

Did somebody say steak fajitas!!!

vegan flank steak

vegan flank steak

INGREDIENTS:

  • 16 oz super firm tofu (the kind that is vacuum sealed not in a tray of water)

  • 1 cup vital wheat gluten

  • 2 tablespoons tomato paste

  • 3 tablespoons sofrito, tomato cooking base (make sure the brand is vegan, I used Goya at first because the internet said their products are vegan, then learned they are NOT)

  • 1/4 cup nutritional yeast

  • 1/4 cup corn or tapioca starch

  • 1 tablespoon No Beef, or Vegetable Better Than Bouillon

  • 1 teaspoon black pepper

  • 2 teaspoons minced garlic

  • 2 teaspoons onion powder

  • 2 tablespoons nurtural flavored oil

  • 1 -2 teaspoons liquid smoke

  • any all purpose seasoning you like for coating

***I use SUPER FIRM tofu in this recipe. The kinds that is high protein and vacuum sealed in very little water. This makes a big difference in the texture of this flank steak vs using even extra firm tofu. If you opt to use extra firm tofu you will need to press the tofu very well before using, making sure to remove as much water as possible.

INSTRUCTIONS:

Preheat oven to 350 degrees

  1. Break up the tofu and place it into a food processor with the regular metal blade. Run the processor for around a minute until the tofu is broken down.

  2. Add all of the remaining ingredients (just not the all purpose seasoning for coating ) and let the food processor run for a couple of minutes. You want the mixture to form a dough. Letting the processor run will help knead the dough. We want this seitan to be firm so we need it to knead for a bit.

  3. Once you have a smooth but firm dough, remove it from the food processor and place on a clean counter. Knead the dough with your hands for about a minute, Press the dough out into a large oval about 1/4 inch thick.

  4. Cut the dough into 4 pieces and sort of shape them into a flank “steak” like shape. (see photo above)

  5. Spray a cookie sheet with some oil or line it with aluminum foil and spray the foil. Place the “steaks” on the pan and spray the tops with some oil as well. Give them a generous sprinkle with whatever all purpose seasoning you like.

  6. Cover the baking sheet tightly in another large piece of foil. We do this to allow the seitan to steam inside the pan and not dry out!

  7. Place on a baking sheet in the oven on the middle rack. Bake sealed for 20 minutes. After 20 minutes carefully open up the foil, and continue baking for another 10 minutes.

  8. Remove finished flank “steaks” and let cool at room temp. Seal the foil back up and place the “steaks” in the fridge to rest for at least 6 hours. This step is important to get the texture we are trying achieve. If you try and serve it before it rests it will not be nearly as firm.

  9. You can slice and reheat the streaks in a pan to use for tacos, fajitas, sandwiches. You can grill the steaks or reheat it the oven covered with foil at 350 degrees.

  10. The flank “steaks” can be refrigerated for up to 10 days and frozen for up to 6 months in air tight container or freezer zip lock bag.

If you like this recipe, then try these:
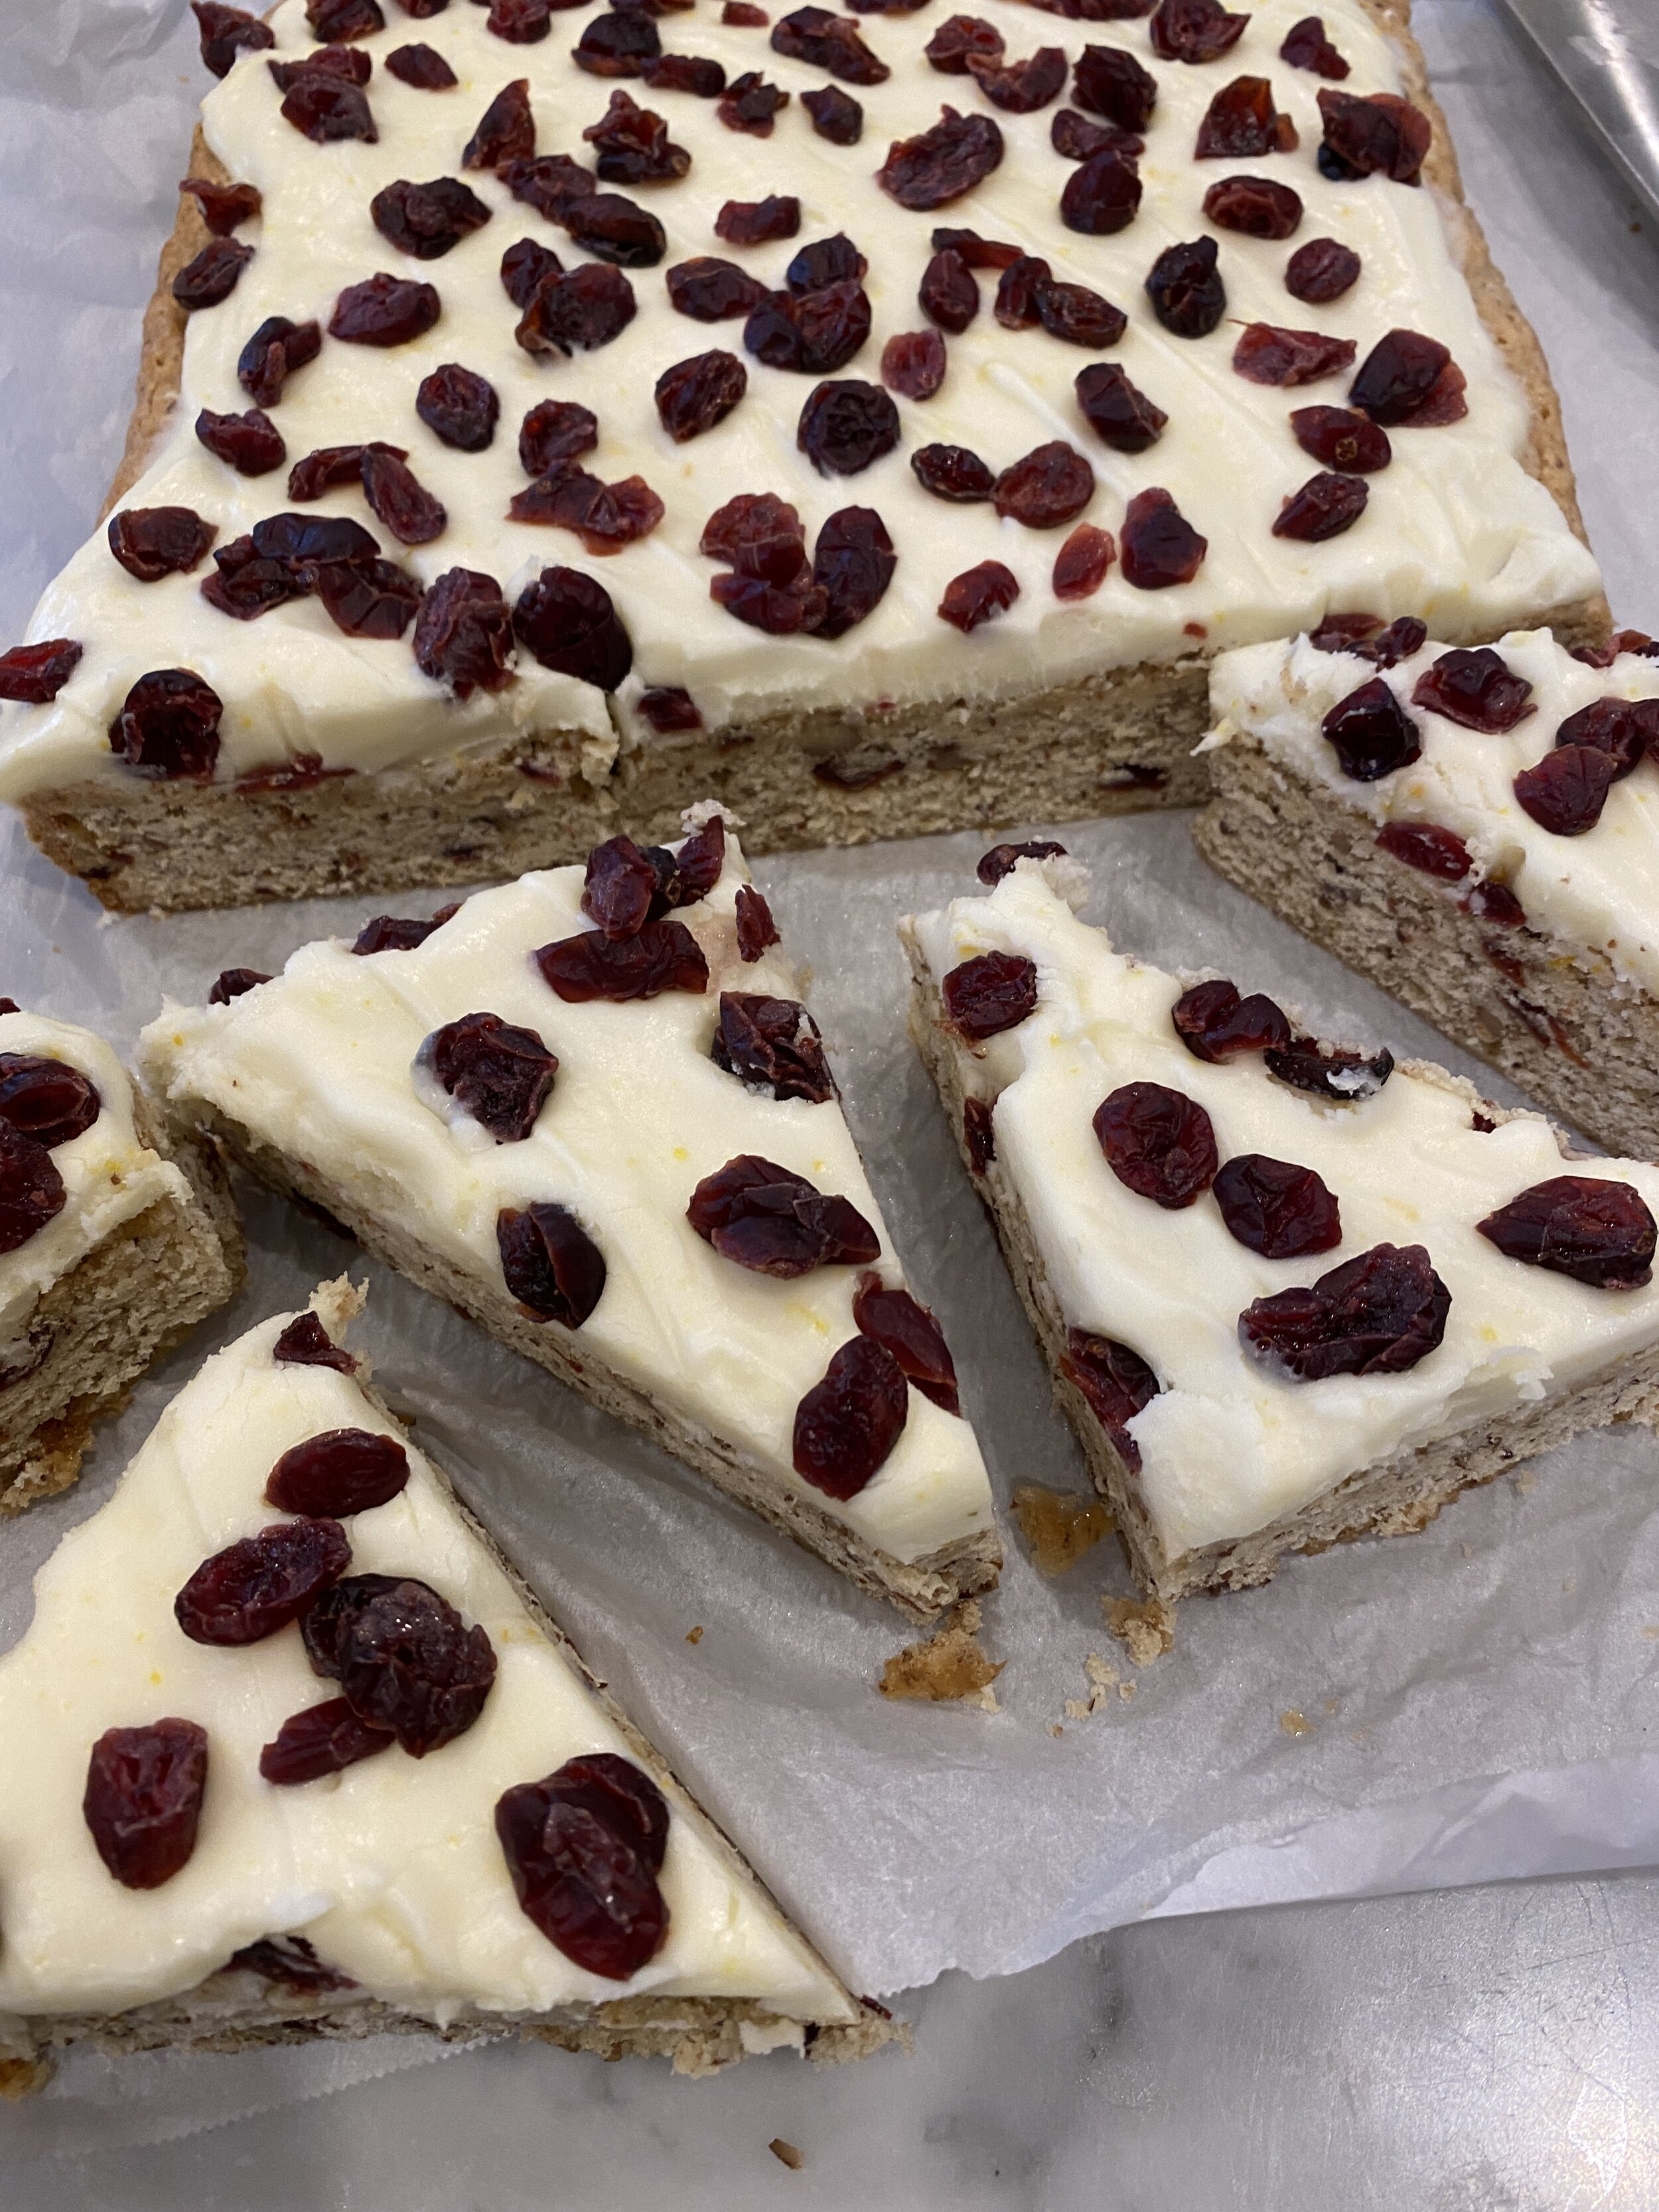
vegan flank steak

vegan flank steak

Vegan Fried Dill Pickles

vegan fried dill pickles

vegan fried dill pickles

Sometimes you eat a certain food and you can remember forever the first time you had it.

That is fried dill pickles for me.

I ate my first batch of fried dill pickles in high school at a place called the Pizza Farm. And after just one bite, I declared they would be one of my most favorite food for forever!

I was raised by southern parents and spent a lot of time with my Grandmama when I was a kid. She canned all kinds of things because they lived on a farm. She also pickled a lot of things and made some of the best dill pickles I have ever eaten in my life.

IMG_9153.jpg

We also fry just about anything in the south!

I have always loved a good dill pickle, pickled okra, pickled green beans, pickles asparagus. But y’all, when I ate my first FRIED dill pickle I think it almost blew my mind.

Now 25 years later and they are still one of my favorite things. Sadly they are normally not vegan if you are ordering them out.
The obvious and easiest solution is making your own easy vegan fried dill pickles at home!!

Seriously!! They take hardly any time at all and so, so, so, so crispy, tangy, and delicious!

And don’t forget the vegan ranch! Nothing goes better with a batch of vegan fried dill pickles than a side of cool, creamy, vegan ranch!

If you have never eating an crispy fried pickle or think I am crazy for suggesting it, you just have to trust me here. They are seriously one of the best things, and I feel like if you love dill pickles there is no way you would not love them crispy fried and dipped in some ranch!

vegan fried dill pickles

vegan fried dill pickles

INGREDIENTS:

  • 2 cups sliced dill pickles

  • 1/2 cup unsweetened almond or oat milk

  • 1/2 cup vegan plain yogurt or sour cream

  • 1/2 cup all purpose flour

  • 1/2 cup corn meal

  • 1/4 cup corn starch

  • 1 teaspoons salt

  • 1 teaspoon all purpose seasoning of your choice

  • neutral flavored oil for frying

  • Vegan ranch for dipping

vegan fried dill pickles

vegan fried dill pickles

INSTRUCTIONS:

  1. Slice 2 cups worth of dill pickles into thin pickle chips

  2. Whisk the plant milk along with the yogurt or sour cream in a medium sized bowl.

  3. In a sperate medium sized bowl, whisk the flour, corn meal, starch, and seasoning.

  4. Begin by dipping the pickles chips into the the milk mixture. Next dip them into the dry mix making sure to get a nice coating. Repeat with remaining pickles.

  5. Heat an iron skillet or any high sided skillet with a few inches of oil over medium heat.

  6. Prepare a cookie sheet lined with paper towels and a cooling rack on top.

  7. Once the oil is nice and hot (you can poke a chopstick or wooden skewer touching the bottom of the pan, if little bubbles form around the chopstick then the oil is ready) add a handful of pickles to the pan, just make sure not to over crowd them or they will stick together. Let the pickles fry on each side until golden brown.

  8. Place the finished vegan fried dill pickles on the cooling rack and continue frying the remaining pickles.

  9. Serve the vegan fried dill pickles hot, with a side of vegan ranch.

If you like this recipe, then try these:

vegan fired dill pickles

vegan fired dill pickles

Vegan Cheesy Tuna Noodle Casserole

vegan cheesy tuna noodle casserole

vegan cheesy tuna noodle casserole

When I was a kid we pretty much lived off of Hamburger Helper. My dad grocery shopped and cooked, but mostly easy convenient foods, and stuff from a can.

In his defense it was the late 80s, early 90’s and boxed foods like hamburger helper were all the rage.

Affordable, easy, and deliciously comforting.

We never ate a lot of Tuna Helper but once my dad remarried, my stepmom added some new dishes to the mix, like her famous tuna casserole.

IMG_9097.jpg

I think because I had been living off of Hamburger Helper for so long, any change was a welcome change. Especially when she made her tuna and rice casserole.

Like most southern casseroles it involved a few cans of “cream of” soup, cheese, a starch and a protein. Her casserole was rice, tuna, cream of mushroom, and cheese. And to top it all off, she microwaved it.

Say what you want, but I ate my weight in that casserole growing up, and even when I was grown, she often would make it when I came to visit until we went vegetarian and eventually vegan.

Now despite my affection for this nostalgic classic, my own kids were never fans. So when I decided I was craving some tuna casserole, I decided I would take a chapter out of the old Tuna Helper book, and but would veganize it, but also change it up. I would try to convince my kids that they LOVE vegan tuna NOODLE casserole…since they were not buying the tuna rice combo.

IMG_9102.jpg

So how does one recreate a tuna, noodle, cheesy casserole when vegan, you may be asking?!?

Its easy, y'all! Jackfruit in a can (in brine) is great at mimicking lots of meats, and when you shred it, the texture is super tuna-y. Next all you need is a super, easy, all purpose vegan cheese sauce, and a box of macaroni! Sprinkle on a crunchy topping, and you are good to go.

This vegan tuna noodle casserole is so quick and easy, and surprisingly every single person in my family ate it up, even the four year old, who mostly only currently eats beige carbs. ( I mean if I thought I could get away with it I could live off the same diet as she is currently attempting)

This vegan tuna noodle casserole recipe actually makes a LOT, but will freeze well. You can very easily half this recipe if you do not need a giant 9x13 pan of casserole. Or you can make the full recipe and eat on it all week. We just happen to have a large family and extra kids over all of the time so it’s my habit to make extra, knowing it will get eaten eventually!

So if you used to eat a lot of box casserole mixes or even a homemade non vegan tuna noodle casserole and have been craving it, this recipe might be the answer. Quick and easy vegan comfort food is always my favorite!

vegan cheesy tuna noodle casserole

vegan cheesy tuna noodle casserole

  • INGREDIENTS:

This recipe makes a full 9x13 casserole dish, making it good for pot lucks or larger gatherings. You can easily half this recipe and bake it in a smaller dish. I often bake a large one and freeze half for later.

  • 3 cups dried macaroni, or ribbon noodles

  • 2 cans jackfruit in brine, drained and rinsed

  • 1 large yellow onion

  • 2 teaspoons vegan butter

  • 2-3 teaspoons dulse flakes (optional)

  • 2 teaspoons minced garlic

  • 2 teaspoon dijon mustard

  • 1/2 cup vegan sour cream

  • 2 cups vegan panko bread crumbs

  • 1 tablespoon nutritional yeast

  • 1 teaspoon salt

Cheese Sauce:

  • 1 cup cashews (plus water for soaking)

  • 2 cups water

  • 1/4 cup sauerkraut (cabbage only, no liquid)

  • 1 teaspoon salt

  • 3 tablespoons nutritional yeast

  • 3 tablespoons tapioca or corn starch

  • 1 teaspoon turmeric

  • 2 teaspoons smoky paprika

  • 1 tablespoons apple cider vinegar

DIRECTIONS:

Preheat oven to 350 degrees

  1. Boil noodles according to package directions in a large pot or dutch oven. Drain and set aside.

  2. Add cashews to a microwave safe container and cover in water. Heat on high for three minutes. Drain the water. Add the the softened cashews along with remaining cheese sauce ingredients to a high speed blender, and blend until the mixture is completely smooth and there are no more bits of cashew floating around. If you have something small like a bullet blender, you may have to blend in batches. Set aside.

  3. Shred the pieces of jackfruit between your fingers or with a knife ( heads up, using your fingers is faster and easier.) Finely dice the onion.

  4. Heat the pot you boiled the noodles in over medium heat. Add the butter, onion, jackfruit and garlic. Cook unit the onions are translucent.

  5. Add the blended cheese sauce to pot with the onions and jackfruit and reduce the heat to medium/ low. Cook for a few minutes, stirring continuously until the vegan cheese sauce begins to thicken. Once it thickens, add the drained noodles back to the pot. Add the sour cream, and dijon mustard, and give it all a good stir.

  6. Transfer the mixture to a 9x13 baking dish. Mix the panko bread crumbs, salt, and nutritional yeast together and sprinkle on the top of the casserole. Give it a spray with a little cooking oil and pop it in the oven on the middle rack.

  7. Bake for 25-30 minutes or unit the breadcrumbs begin to get golden brown. You can garnish with fresh parsley or diced green onions to serve.

If you like this recipe, then try these:

vegan cheesy tuna noodle casserole

vegan cheesy tuna noodle casserole

Vegan Spaghetti Squash Boats with Meatballs

Vegan Spaghetti Squash and Meatball Boats

Vegan Spaghetti Squash and Meatball Boats

At some point in my adult life I decided in my mind that I hated spaghetti squash.

I have no actual memory of ever actually eating a spaghetti squash or how it was prepared, I just decided I did not like them, and I would never cook one. Period.

Then recently I saw a spaghetti squash recipe in a magazine that looked amazing. Weird, I know…I hate spaghetti squash. This made me question myself and my stern stance on this noodle imposter squash.

So I decided I would buy a few and try to veganize the recipe I saw. I mean I am grown lady now and should be open to trying something again..right?!?!!? But the more I thought about that recipe, the more I knew my kids would 100% reject it ,and if I were going to try to sell the family on a squash as spaghetti, it better at least involve a vegan meatballs some vegan gooey cheese. Those are two things my family normally agrees on!

IMG_9076.jpg

So I did just that. I made a batch of easy vegan meatballs, I used beyond meat but you can use any meatball you make. Seitan meatballs, lentil meatballs, or frozen meatballs. Whatever is easy and your preference.

I still want to try and veagnize the original recipe I saw, but a vegetable stuffed with more vegetables is gonna be a slow roll in this house. Baby steps, y’all.

As far as the squash goes, I don’t know why I thought I didn’t like it.?!?! Because once its covered in meatball laden sauce, and gooey vegan mozzarella, it is delicious, super filling, and a nice change from pasta! Not that I have anything against pasta, I mean I LOVE CARBS….but I need to get behind this being a healthier option.

I think these vegan spaghetti squash boats would work well for entertaining. As long as you use a gluten free meat substitute, these boats should be pretty allergy friendly ( you can make the cheese sauce with sunflower seeds instead of cashews, too,) healthy and delicious!!

Plus y’all, any food baked as a boat always just seems more fun! And if you thought you didn’t like spaghetti squash too, maybe this recipe can change your mind. It did mine!

Vegan Spaghetti Squash and Meatball Boats

Vegan Spaghetti Squash and Meatball Boats

This recipe will make enough for 2 large spaghetti squash or you can use I squash and have leftover marinara and cheese sauce. The cheese sauce can be refrigerated for up to one week and used on lots of things. The leftover pasta sauce could be refrigerated or frozen. 1 Squash typically serves 4.

INGREDIENTS:

  • 1-2 large spagetti squash

  • 1 pound vegan ground “beef” ( we used Beyond Beef)

  • 2 teaspoons minced garlic

  • 1 teaspoon dried thyme

  • 1 teaspoon dried oregano

  • 1 teaspoons salt

  • 1/2 teaspoon black pepper

  • 1/4 cup vegan bread crumbs

  • 1 tablespoon corn or tapioca starch, or one flax egg

  • 1 batch Marinara sauce or use store-bought if you prefer

  • 1/2 batch of easy vegan all purpose cheese sauce

Homemade Marinara Sauce:

  • 1 yellow onion, diced

  • 1 (28 ounce) can crushed tomatoes

  • 1 (14.4 oz) can diced tomatoes

  • 1/3 red wine (optional)

  • 2 teaspoons crushed garlic

  • 1 teaspoon salt

  • 2 teaspoons Italian seasoning

INSTRUCTIONS:

Preheat oven to 400 degrees

  1. Prepare the meatballs by mixing the vegan ground “meat” in a bowl with the starch, bread crumbs, garlic and ssteaonings. Using a small 1 inch scoop or a a small spoon, scoop out mixture and roll into small meatballs. Place them on a parchment lined baking sheet and pop them in the oven to bake for about 20-25 minutes or until cooked through.

  2. Carefully cut the spaghetti squash in half length wise (you will need a good knife as they can be kind of tough to cut.) Line a baking sheet with parchment paper and turn the squash halves upside down on the pan. Bake for 30-35 minutes in the same oven as the meatballs.

  3. If you are making homemade marinara sauce, add the onions and garlic to medium sized sauce pan with a teaspoons of oil over medium heat. Sauté the onion and garlic until the onion is translucent. Add the tomatoes, wine, and seasoning and let simmer on low heat, stirring occasionally.

  4. Once the meatballs are done, add them to the pot with the sauce and let them simmer a bit.

  5. Once the squash is tender remove it from the oven and let it cool a bit. Once cool, scrape the seeds and stringy part off the top. Once they are cleaned up, use a fork and scrape the “spaghetti” strands loose.

  6. Prepare the cheese sauce according to directions.

  7. To make the spaghetti squash boats, leave the squash on the the pan you baked them on. Scoop some sauce and meatballs right into the squash. Top with some of the cheese sauce and pop the pan back in the oven until the cheese sauce is bubbling and beginning to brown.

  8. To serve, you can cut each boat in half after it has cooled a bit. We consider 1/2 of a boat a serving. But you could also cut each boat into thirds if you are serving children.

If you like this recipe, then try these:

Vegan Spaghetti Squash and Meatball Boats

Vegan Spaghetti Squash and Meatball Boats

Vegan Beer Battered Crispy Fish Sandwich

IMG_9051.jpg

When I was in college I ate a lot of McDonald’s fish filet sandwiches.

I am not proud of this but, I was young, and broke, and loved that dang sandwich.

Once I was older and had more money, fish and chips, or a fried fish fillet sandwich was one of my go to orders on any menu that had it.

Then we went vegan and I missed fried fish, plain and simple.

And then one day I learned the magic a can of BANANA BLOSSOMS can yield, it was a game changer.

IMG_0515.jpg

I probably had not had a fish sandwich or fried fish in over 5 years when I discovered this vegan secret.

The first step was finding the banana blossoms. Easy enough if you have an Asian market near by, but can also be easily ordered online, as well. (that said they are WAY cheaper at the Asian market than they are online)

I paid less than $2.50 a can for these blossoms. So between the “fish” fillets, buns, and toppings, you can feed 4-6 people for maybe around $10. You really can’t beat that!

For this recipe I also made a quick batch of vegan no rise hamburger buns. They are cheap and easy to make and are done start to finish in less than an hour!!

I used a beer batter for my fried vegan fish fillets, but you can use seltzer water if beer isn’t your thing. If it is your thing, then you are gonna extra love this sandwich!

These banana blossoms fry up fast and get extra crispy, perfect for this vegan fish sandwich, vegan fish and chips, or even vegan fish tacos.

The blossoms flake and full apart like fish, and with the help of some seaweed flakes and Old Bay for flavor, they make for the most convincing mock vegan fish!

So if you have yet to jump on the banana blossom bandwagon and have been missing some crispy fried fish or a crispy fish sandwich, this is your answer!


INGREDIENTS:

The Fish Filets:

  • 2 cans banana blossoms in brine

  • 2 tablespoons dulse flakes

  • 1 and 1/2 cup all purpose flour

  • 1 teaspoon salt

  • 1 teaspoon old bay seasoning (optional)

  • 3 teaspoons baking powder

  • 1 can (12 oz) cold beer, any beer is fine as long as it is not a dark thick beer

  • oil for frying

Sandwich Makings:

Vegan Tartar Sauce:

  • 1/2 cup vegan mayo

  • 1 tablespoon apple cider vinegar

  • 2 teaspoons lemon juice

  • 2 - 3 tablespoons diced dill pickles

  • 1 teaspoon sugar

  • 1 teaspoon dijon mustard

  • salt and pepper to taste

  • 2 teaspoons fresh dill

  • optional: 1 - 2 teaspoons capers

IMG_9065.jpg

INSTRUCTIONS:

  1. If making homemade no rise hamburger buns for this recipes, do that first. They are pretty easy, and start to finish take less than an hour.

  2. Drain cans of banana blossoms and carefully remove the blossoms, laying them out on a paper towel to remove some liquid. They can easily fall apart so be careful. I found that only a few blossoms in each can were fully in tact. I simply took all of the loose leaves from each can and stacked them back together to resemble full blossoms. I have only been able to find one brand of blossoms on Amazon. I am uncertain if this is an issue with all canned banana blossoms, but stacking the leaves back together worked just fine for me.

  3. Transfer the blossoms to a shallow baking dish and sprinkle with the 2 teaspoons of dulce flakes and a dash of salt.

  4. For the batter, whisk together the flour, baking powder, 1 teaspoon salt, old bay, and the entire can of cold beer in a medium sized bowl. The batter will be thick.

  5. To make the tartar sauce, whisk all of the ingredients together in a medium sized bowl and set aside.

  6. Heat a deep skillet with a few inches of oil over medium/ high heat.

  7. While the oil is heating, begin carefully dipping the blossoms into the batter. For any blossoms that you had to reassemble, place them into the batter, and using a spoon, cover the top in batter. This will help keep the blossom in tact vs attempting to dip them. Carefully transfer the blossoms to the hot oil. TIP: if you are not sure if the oil is hot enough, place a chopstick into the oil, if tiny bubbles form around the chopstick, the oil is ready!

  8. Fry each blossom for a minute or two on each side, or until they are golden brown. If they seem to be browning too quickly, reduce your heat a bit. Transfer the finished blossoms to a wire cooling rack that has been placed on top of a paper towel lined cookie sheet.

  9. Build the sandwiches by spreading the vegan tarter sauce on both sides of the buns. Add a vegan fish fillet to each bun, along with some sliced pickles, a slice of cheese and some lettuce to serve.

If you like this recipe, then try these:

IMG_9048-Edit.jpg