Breads

Easy Vegan Artisan Bread

IMG_0383.jpg

I love the smell of fresh bread baking, so tend to bake bread often.

This bread in particular is so simple and yields 3 nice big loaves. I like to bake some up on the weekend and have fresh bread throughout the week.

You can also easily freeze the loaves you don’t use for later. Feel free to add herbs or spices to the dough if you feel like jazzing up your bread with some extra flavor.

If you are new to bread baking, this recipes is so simple, so don’t be afraid to give it at try. Once you start baking your own bread, there is no turning back!


Ingredients:

  • 7 cups all purpose flour, plus extra for dusting

  • 2 packets dry active yeast (or 5 teaspoons)

  • 3 cups of warm water , around 100 degrees Fahrenheit

  • 1 tablespoon salt


Instructions:

  1. In the bowl of your stand mixer, or if mixing by hand, in a large mixing bowl, combine yeast, warm water, salt and flour. There is no need to allow the yeast to proof. If using a stand mixer, attach the dough hook and mix the dough for a few minutes. You do not have to allow it to knead for long. It will be a little stickier that other bread doughs you may have made. You may have to sprinkle the dough with a little extra flour to pull it out of the bowl. If mixing by hand, stir with a wooden spoon or your hands until the ingredients are well combined, then turn the dough out onto a clean, floured surface. Knead dough by hand for a few minutes.

  2. Form the dough into a ball (again you may need a little flour on you hands to do this) and place it in a large, lightly greased bowl. Cover with plastic wrap and place in a warm place to allow the dough to rise, and double in size. This should take about one hour. I typically place mine inside of my oven (tuned off or set to a bread proof setting if you have one)

  3. Once the dough has doubled in size, divided it into three equal pieces. The dough will be sticky so you will need to dust it, and your hands in extra flour to be able to handle it. Holdng a portion of dough in your hands, form a ball while rotating the dough, pulling and tucking the dough to the underside of the ball to stretch the dough on top. The top should be smooth and even, while the underside will not be so pretty. It does not have to be perfect, you are just trying to make a nice smooth ball out of the dough. Dust more flour on the top, and using a sharp knife make three slashes across the top of the dough. The flour will make it easier to cut through the sticky dough. Place the finished ball on a piece of parchment paper on top of a cutting board. Repeat with the other 2 portions of dough.

  4. Preheat your oven to 450 degrees with one rack in the center of the oven, and one rack at the bottom. Place a few baking sheets, or baking stones in the oven as it heats. You need to be able to fit the three loaves on whatever pans you choose, so keep that in mind. On the bottom rack place a shallow baking pan or jelly roll pan. It just needs to be deep enough to hold 1 cup of water.

  5. Once the oven is done heating, carefuly slide the dough and parchment paper off of the cutting board, onto the heated pans. Then carefully add 1 cup of water to the pan you placed on the bottom rack of the oven. Quickly close the oven. The steam from the water will help crisp the bread.

  6. Let the bread bake for about 30 minutes. Once it is browning on top, and sounds hollow when you tap the top, it’s done.

  7. Allow the loaves to cool. You can freeze a loaf or 2 in large freezer bags if not using right away.

Spiced Apple and Pecan Stuffed Vegan Challah

IMG_9488.jpg

I have been baking and stuffing challah bread for what seems like forever.

This spiced apple and pecan stuffing has long been a favorite for fall, and the High Holidays.

This vegan challah bread is just as beautiful as it is delicious, and is sure to impress anyone who gets the privilege of tasting it.

Stuffed with fall spices apples, pecans and dates, this vegan challah is my favorite for Rosh Hashanah!

If you have never made challah, then by all means, you must! It’s not nearly as intimidating as it may seem, and the stuffing possibilities are endless!

Be sure to read the instructions on the challah very well. It is a common mistake to think you are measuring the liquid of the aquafaba, not the whipped product,  (the recipe states to measure the whipped product but it still tends to be an issue for people, and I am often asked) BUT you need to measure out THE WHIPPED PRODUCT in the recipe not the liquid before you have whipped it!!!

Making vegan challah is easier than most people think, and the whipped aquafaba in the recipe severs as an excellent egg replacer in a bread that normally has 3 to 4 eggs.

Braiding challah is also easier than you may think but practice will improve your braids over time. I made sure to link my favorite braiding link so you can learn all kinds of fancy challah braids, from 3 to 5 strands and even a round holiday braid!

So if you are looking for a vegan High Holiday Challah, or just a delicious vegan fall bread, this may just be what you are looking for!


Challah

Follow the recipe for my basic Challah Y'all, Vegan Challah. You will follow the instructions through the first rise, then follow the below instructions for stuffing and braiding.

Filling Ingredients:

  • 2 large green apples

  • 1 cup chopped peans

  • 1/3 cup chopped dates, or raisins

  • 1/4 cup brown sugar

  • 2 tablespoons granulated sugar

  • 2 teaspoons cinnamon

  • pinch of salt

  • 1 teaspoon ground ginger

  • 1/4 teaspoons nutmeg

  • 1 teaspoon vanilla extract

Instructions

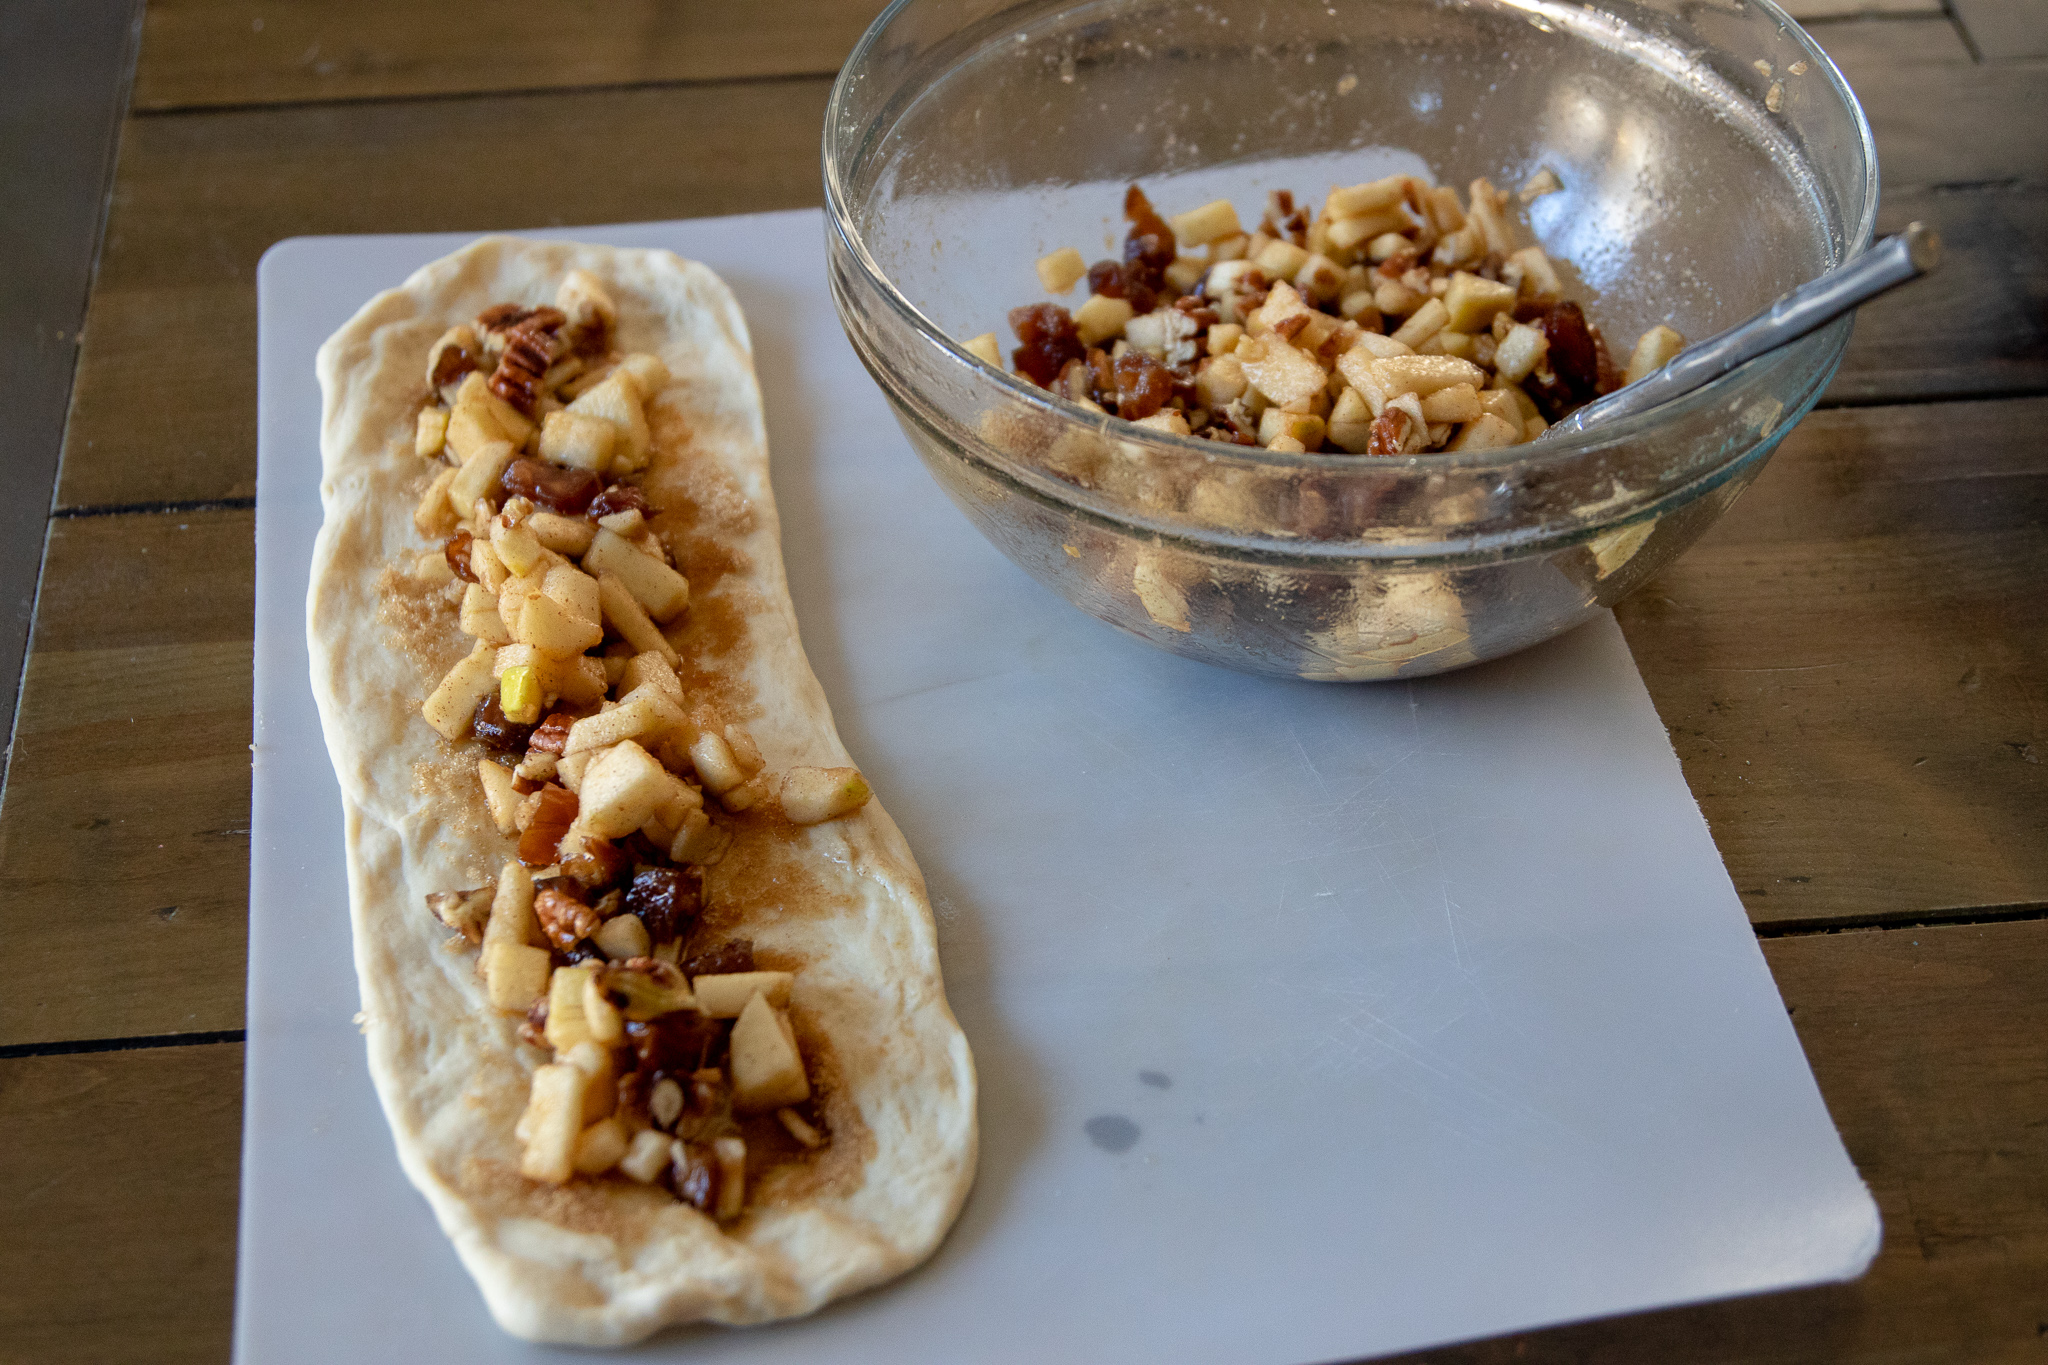
  1. Peel apples and finely dice them. You want pretty small pieces so they will fit in the challah braids, and cook through while baking. Next, chop pecans, and dates. Add fruit and nuts along with remaining filling ingredients into a bowl, and stir well.

  2. Once Challah has completed its first rise, remove from oven and separate dough in half. This recipe will yield 2 stuffed challah loaves.

  3. Cut each half into thirds. (each loaf will have three pieces of dough. Work with one loaf at a time, leaving the other three pieces of dough covered in a bowl until you are ready to use them)

  4. Take one piece of dough in you hand and begin to stretch it both length wise, and width wise and the same, time, letting gravity help with the length. You want the dough to be about 12 inches long, and maybe 4 inches wide. Once you have it stretched length wise, you can put it on a floured counter top and press it to get it the width stretched.

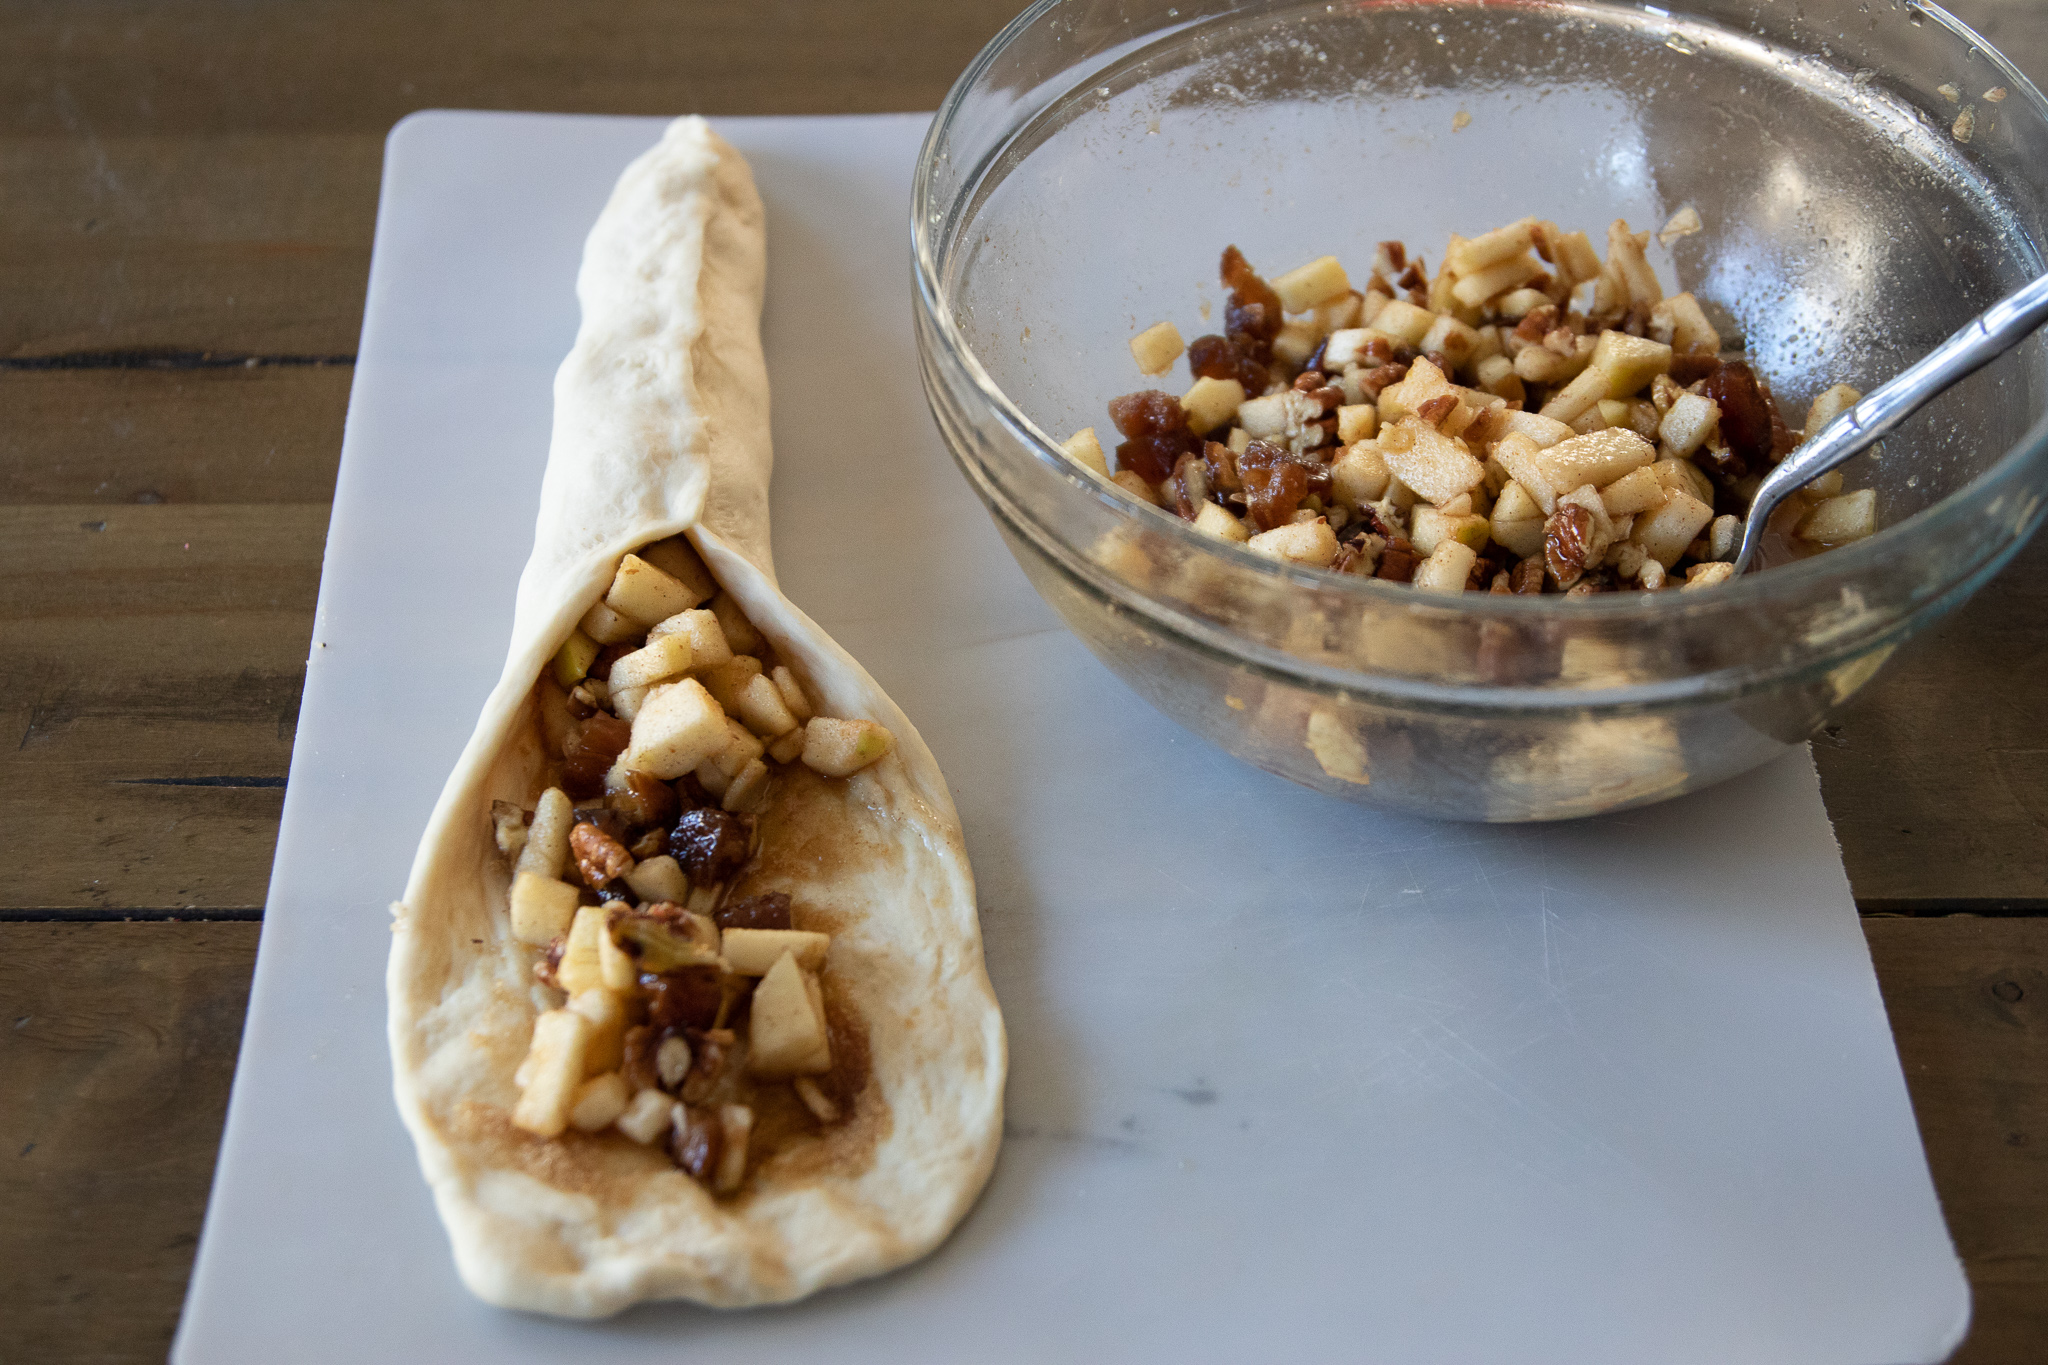
  5. Once your dough is the correct size, divide the apple filling in half. Then each half into thirds. This will give you 6 equal portions of filling for each strand of dough. Scoop a portion of filling into a row down the middle of a strand of dough. The filling will produce a liquid from the apples at the bottom of the bowl. Avoid scooping up any of this liquid with the filling. If the dough is wet it will not want to stick and seal. Now pull up the edges of the dough and pinch them together to seal the seam.

  6. Repeat with the other two strands.

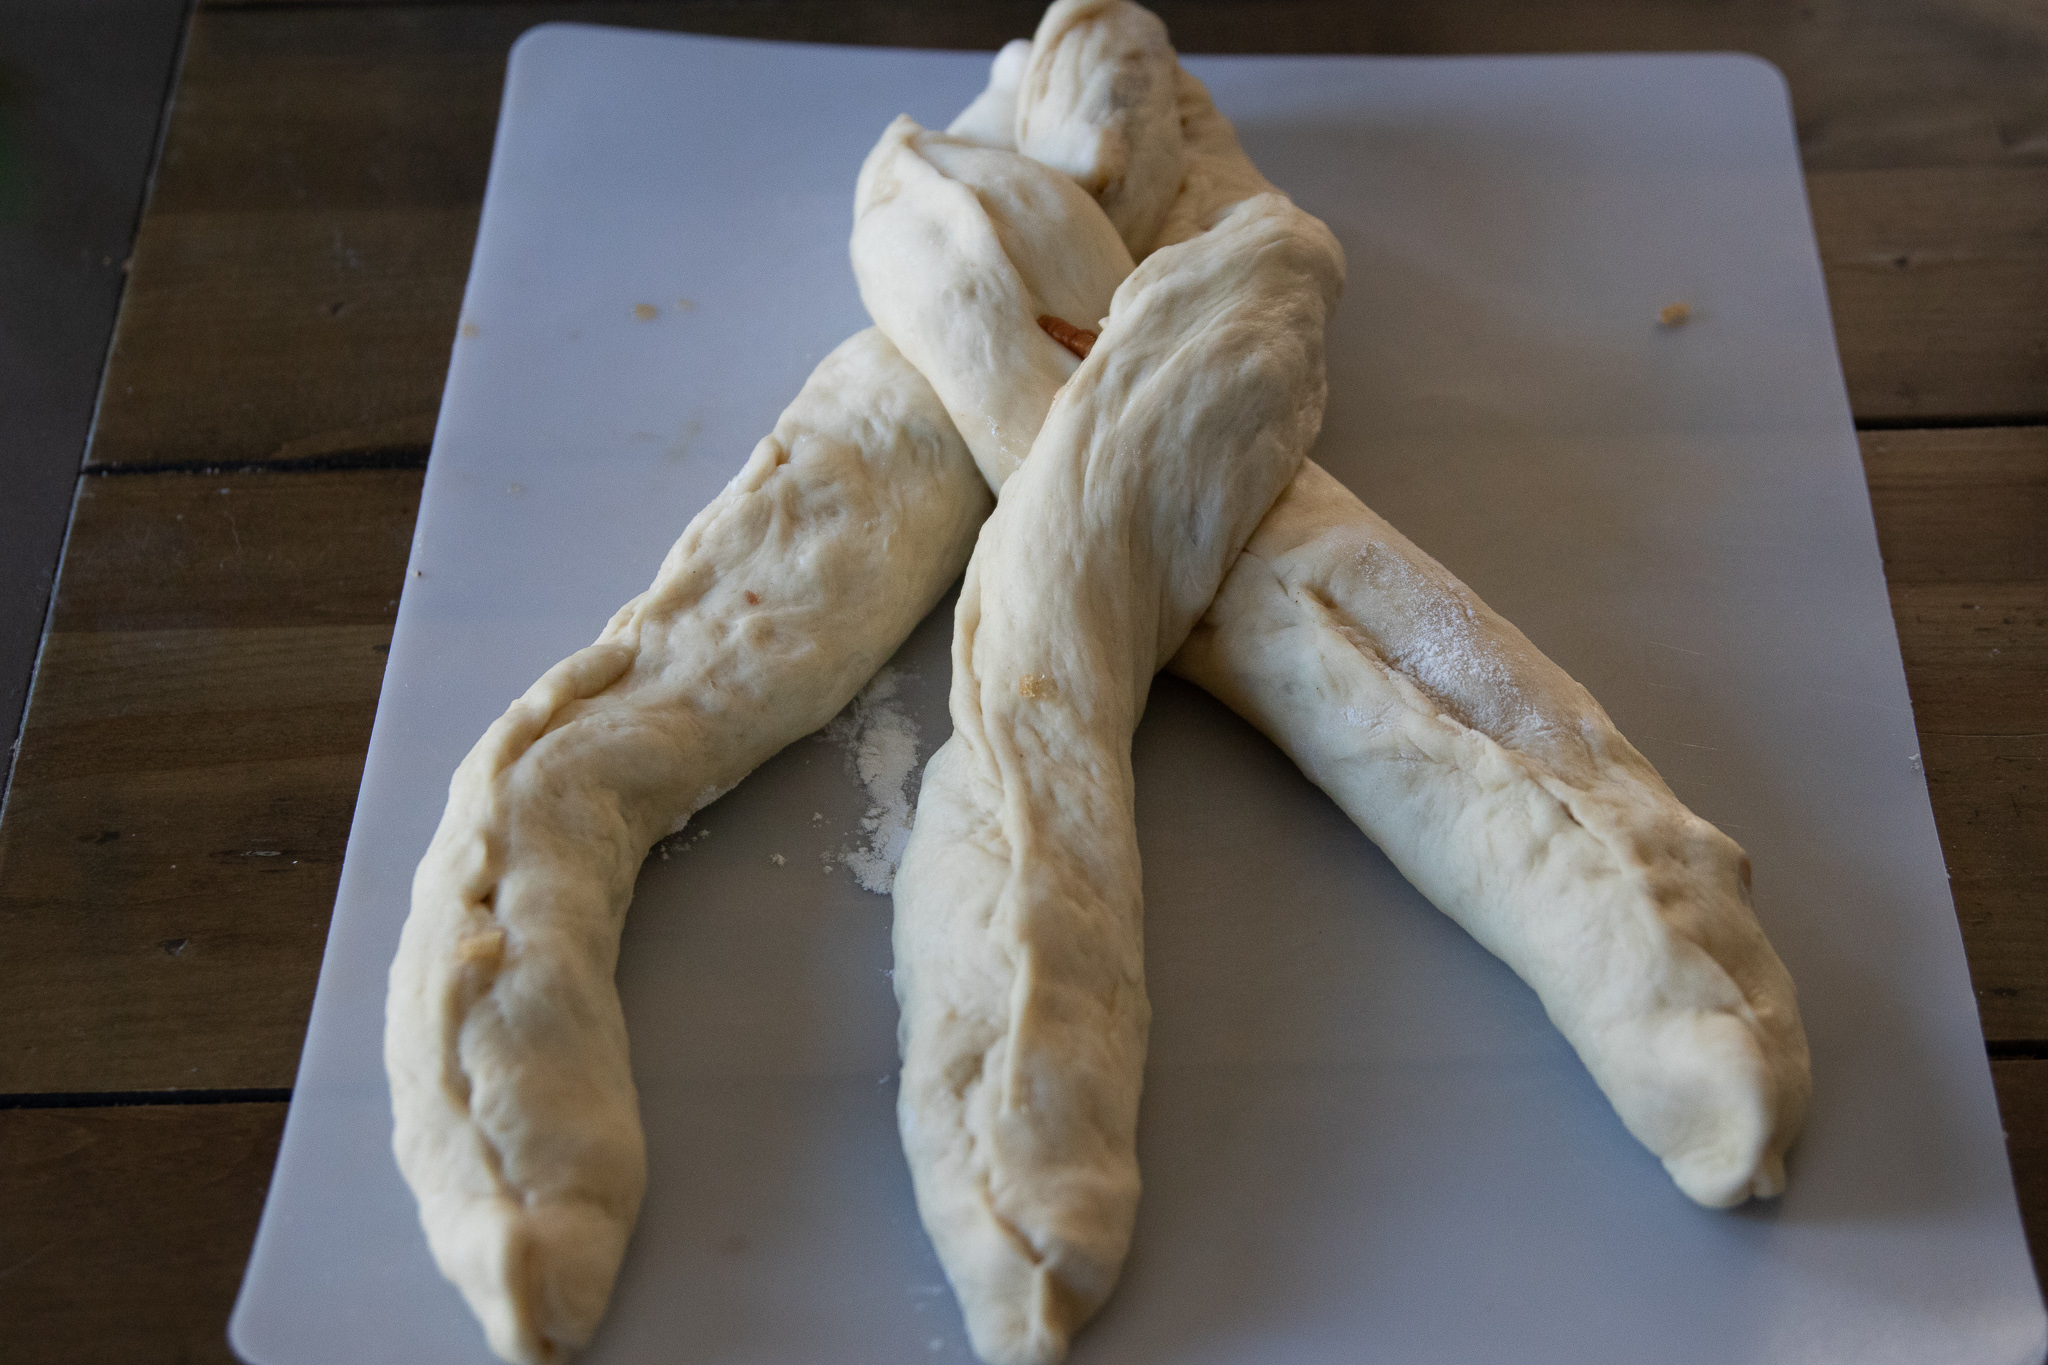
  7. Once all three strands are stuffed, and formed, carefully braid the three pieces together. If the seams begin to open, add a little flour to them and pinch them back and continue braiding. Tuck both ends of the loaf under when done braiding. Once again I will refer you to Tori Avey's challah braiding guide if you are unfamiliar with braiding challah! She does a fantastic job showing all the different ways to braid your bread, plus she has some really great recipes on her site.

  8. Repeat with the second loaf, and place both stuffed loaves on a baking sheet, and back in the oven to rise again for about 45 minutes. Once they have risen, remove from oven and pre-heat to 350.

  9. Brush tops of challah with some of your left over whipped aquafaba and sprinkle with a little sugar.

  10. Bake both loaves for about 35 - 45 minutes. You can tap the tops to see if they sound a little hallow. It is hard to tell when stuffed challahs are done when there are wet ingredients inside, so if they do not seem cooked through after 35 minutes, let them keep cooking for 5 - 10 more minutes.

  11. Remove challah from the oven, and allow to cool before cutting.

IMG_9457.jpg

Perfect Vegan Cornbread

Nothing goes better with a hot bowl of soup, chili, or beans than some homemade cornbread. My mom has always used mayo in her cornbread in place of eggs, so swapping out for vegan mayo was an easy fix. Using oat milk will help you get a darker color…

Nothing goes better with a hot bowl of soup, chili, or beans than some homemade cornbread. My mom has always used mayo in her cornbread in place of eggs, so swapping out for vegan mayo was an easy fix. Using oat milk will help you get a darker color in vegan baked goods, but use whatever plant based milk you have on hand. You can easily bake these up in a muffin tin as well, if you prefer corn muffins to regular cornbread.

Ingredients:

  • 1 cup cornmeal

  • 1 cup all purpose flour

  • 2 teaspoons baking powder

  • 1 teaspoon salt

  • 1/4 cup sugar

  • 2 tablespoons melted vegan butter

  • 1/4 cup vegan mayo (the mayo acts as an egg replacer in this recipe)

  • 1 cup plant based milk

Cooking Instructions:

preheat oven to 425 degrees

  1. Mix together dry ingredient in a large bowl.

  2. Next, add in wet ingredients and mix well.

  3. Add a few teaspoons melted butter or oil to a small cast-iron skillet or baking pan before adding the batter. If using a cast iron skillet, place it in the oven as it preheats. Pouring the batter into a hot pan will help it form a nice crispy edge.

  4. Let cornbread bake for 20-25 minutes or until a toothpick poked in the middle comes out clean.

IMG_1034.jpg

Vegan No Rise Hamburger Buns

IMG_7853.jpg

I am not sure why it is so hard to find vegan buns at the grocery store but it is!

Either they have egg or dairy in them, or if they are vegan, they are full of not so healthy ingredients.

It’s pretty frustrating to be perfectly honest!

So I adapted a no rise bun recipe that I used to make all the time, and made it vegan.

These buns take hardly any time and are so delicious. you can easily shape them into hot dog buns as well or even make them smaller and use them as dinner rolls!

They do not require a ton of ingredients, and you will know exactly what is going into your bread!! I am always amazed at just how many ingredients are in store bought bread and buns!!

These vegan no rise hamburger buns are cheap and easy to make, and freeze well, too! And for me, thats a perfect recipe!


INGREDIENTS:

  • 3 1/2 cups of all purpose flour

  • 2 tablespoons active dry yeast

  • 1 cup plus 3 tablespoons warm water (110 to 115 degrees)

  • 1/4 cup white sugar

  • 1 teapsoon salt

  • 1/3 cup neutral oil. I use refined coconut.

  • 1 flax egg


COOKING INSTRUCTIONS:

  1. In a glass bowl, add yeast, water, and 1 tablespoon of sugar. Let sit for 10 minutes until the yeast becomes foamy.

  2. If using a stand mixer, add flour, salt, and remaining sugar to the mixer bowl. Once yeast is ready, mix in flax egg, and oil to the the yeast mixture. Add the wet ingredients to the dry ingredients.

  3. Mix on medium speed for 5 minutes. If the mixture is too dry, you can add a tablespoon more of water. If it seems too wet add a tablespoon more flour. The dough should be soft but not sticking to the sides of the mixer.

  4. If mixing by hand, follow above instructions for combining ingredients. Once the dough is mixed, pour out on a clean counter top. and kneed by hand for 5 minutes.

  5. Once dough is ready, divide into 9 equal pieces. If you want smaller buns, divide into 12 equal pieces. Form a disk shape with each piece of dough, but do not flatten them out. Place on a parchment lined cookie sheet.

  6. Allow buns to rest for 10 minutes while you pre heat the oven to 425 degrees. Once the oven is ready, place buns inside and bake for 10 - 15 minutes. If the buns are not browning evenly, you can rotate the baking sheet halfway through baking. You can also brush them with some vegan butter to help them brown.

  7. Once buns are finished baking, allow to cool before serving.

  8. You can freeze any left over buns in a freezer zip lock bag for up to a month

yields 9-12 buns 

If you liked this recipe, try these:

Vegan Pretzel Buns

Vegan Garlic Challah Rolls

Easy Vegan Sandwich Bread


Soft Vegan Challah Pretzels with Vegan Cheese Sauce

IMG_9578.jpg

Bread, in any an all forms is my favorite food.

I had to do a brief stint gluten free when our last daughter was born and we were trying to sort out her allergies. I actually had to give up dairy, wheat, and soy and it was giving up bread that did me in. I never touched dairy again, but bread, she’s my love language.

So obviously I needed to sort out an easy and delicious vegan soft pretzels recipe pretty quickly because soft pretzels are in my top 5 favorite breads. I mean come on, they are buttery, salty, soft, warm perfection.

I decided our vegan challah dough would work perfectly for creating the perfect vegan soft pretzel and I wasn’t wrong.

Don’t be intimidated by the aquafaba. It’s just bean cooking liquid and if you whip it up it acts like egg whites, which works really well in place of eggs in baked good!! I typically just use a can of chickpea liquid but any canned bean liquid will work!

And the cheese sauce!! Don’t forget the cheese sauce! There are only two suitable pretzel dips as far as I am concerned, spicy mustard or cheese sauce. Period. No further discussion on the matter. So I have added a recipe for a really quick and easy vegan cheddar cheese sauce in case you are not in a mustard mood! You are welcome.

So go make some soft pretzels! I promise your friends or family will be happy to help you eat them, or you can hoard them for yourself. I won’t judge you!


INGREDIENTS:

  • 4 cups all purpose flour

  • 1 1/4 cup whipped aquafaba (measure the whipped product, not the bean liquid)

  • 1/3 cup sugar

  • 1/2 cup oil (I use grape seed but you can use any neutral oil you like)

  • 4 1/2 teaspoons dry active yeast

  • 1 tablespoon sugar

  • 1 tablespoon salt

  • 1 cup hot water. I just use hot water from the tap, you don't want it too hot or the yeast will die, and it will not activate

  • 2 tablespoons baking soda ( This is for the water you dip the pretzels dough in before baking)

Cheese Sauce:

  • 1/2 cup cashews

  • 1 cup water

  • 2 tablespoons nutritional yeast

  • 1/2 teapsoon tumeric

  • 1/2 teaspoon smoked paprkia

  • 1 teapsoon dijon mustard

  • 2 1/2 tablespoons tapioca starch

  • 1 teaspoons light miso paste

  • 2 teaspoons apple cider vinegar

COOKING INSTRUCTIONS:

  1. In a large glass bowl mix hot water, yeast, and 1 tablespoon sugar.

  2. Let the that sit for 10 minutes to activate, or until the mixture is super foamy at the top.

  3. In a stand mixer add the yeast mixture, aquafaba, sugar, oil, salt, and 2 cups of flour. (you can mix by hand, just mix the above, and add remaining flour slowly. You will need to knead it for the same amount of time. It's a good workout though!

  4. Mix until all of the ingredients are incorporated, then add in the remaining flour. I typically will hand mix the first 2 cups of flour in, or use my paddle attachment and replace with the dough hook when I add the remaining flour.

  5. The dough should come together and not be sticky, if it seems sticky you can add 1/4 more flour a little at at time until the dough comes together. Your goal is smooth, and elastic-y dough, not sticky.

  6. Let the dough kneed in the mixer on low/medium speed for 10 minutes. The dough should be smooth at this point and have a sort of bounce back if you poke it.

  7. Form dough into a nice ball, and place in a lightly greased glass bowl. Cover the bowl with a damp kitchen towel, and place inside your oven turned off, OR on the bread proof setting if your oven has one.

  8. Bring a small pot of water to a boil and place in the bottom of the oven. The heat and steam from the water will help the dough to rise.

  9. Let dough rise about an hour, or until the dough has doubled in size.

  10. Remove dough from bowl and split in half. Next, evenly divide each half into 8 equal pieces.

  11. Rolling the dough pieces between both hands, form ropes that are about 12 inches long with each piece of dough.

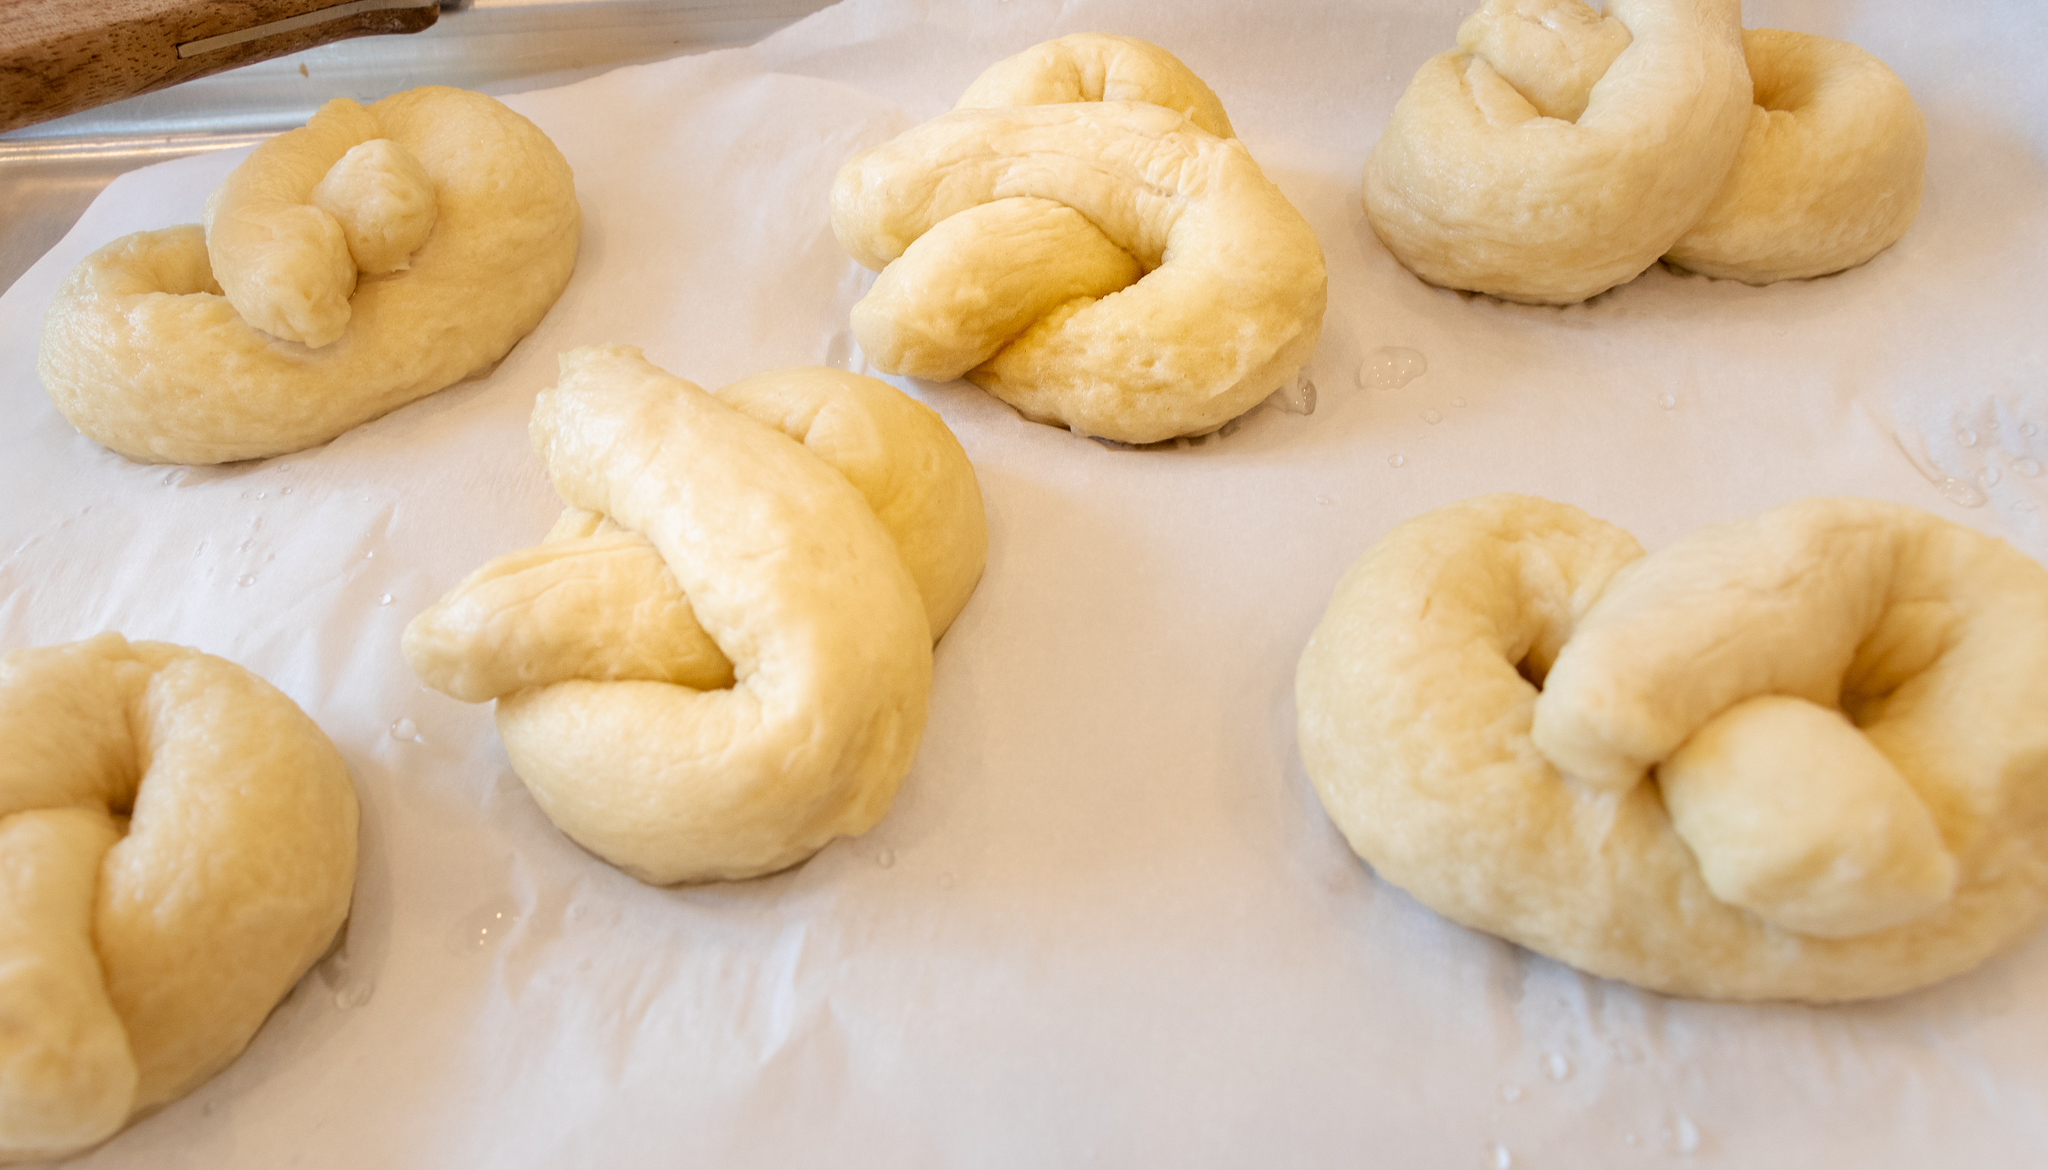
  12. Take each rope and make a U shape. Take the tops of the U, cross then twist them once. Now bring the crossed dough over the bottom of the U. ( the pictures will help if this is confusing.)

  13. Allow pretzels to rest for about 15 mintues. While this is happening bring a large pot of water to a boil. Preheat oven to 400 degrees. Once pretzels are done resting, add 2 tablespoons of baking soda to the water.

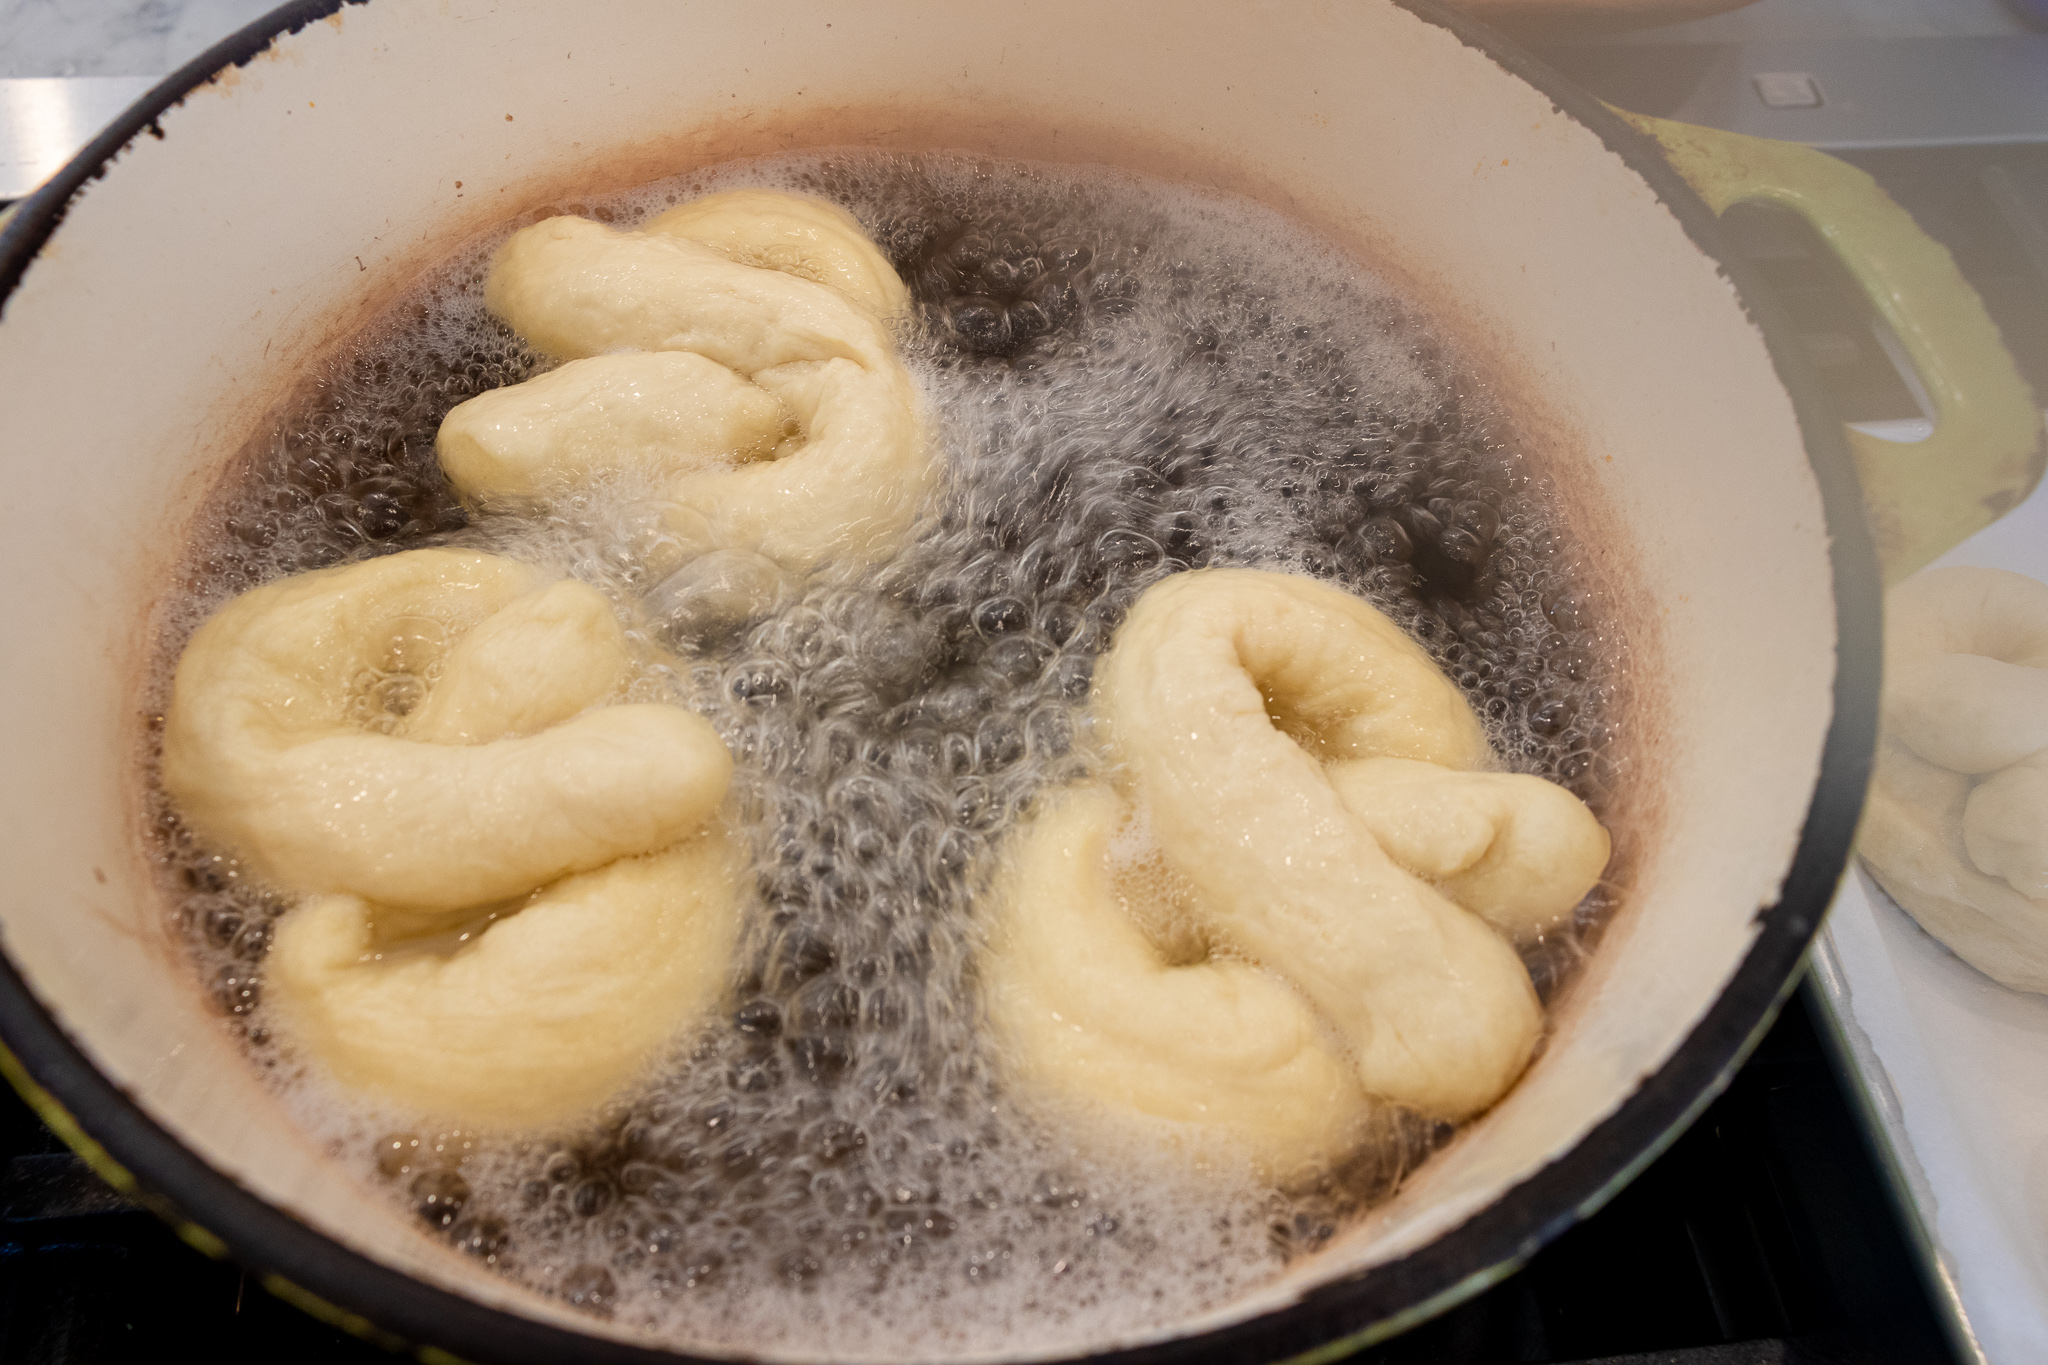
  14. Add pretzels 2-3 at a time into the water for about 30 seconds. You will need to flip them half way through. Just use a slotted spoon and gently turn them over in the water. Return them to a parchment lined cookie sheet once they come out of the water.

  15. Brush pretzels with leftover aquafaba, and sprinkle with some corse sea salt before putting in the oven.

  16. Bake pretzels for 15- 20 minutes. I normally move my top rack to the highest position for this. That way they get nice a brown. You will need to keep a close eye on them, and if they brown really quickly, move them to a lower rack for the remainder of the bake time.

  17. Once done allow to cool on pan while you prepare the cheese sauce.

Cheese sauce:

  1. Place cashews in microwave safe container and cover with water. Microwave for 3 minutes.

  2. Drain water from cashews, then add all ingredients to a high speed blender or food processor.

  3. Blend until completely smooth.

  4. Pour mixture into a pot, and cook on medium heat, stirring the WHOLE time with a whisk.

  5. As soon as the cheese starts to thicken remove from heat. If it gets to thick, add a little more water and it will thin back out.


Cheese sauce will last about a week in the fridge, pretzels can be stored in airtight container at room temperature.

Yields 16 pretzels 


Beyond Meatball Stuffed Challah

IMG_9190.jpg

 The only thing better than vegan challah may just be stuffed vegan challah! And the only thing better than a meatball sub may just be a whole loaf of soft, delicious bread ,stuffed with cheesy, saucy, meatballs.

You read that correctly! Soft, fluffy, perfect vegan challah, stuffed with vegan meatballs, marinara, mozzarella.

It’s saucy, “meaty”, gooey, vegan cheesy magic, all wrapped into a warm fluffy challah bread.

It’s a meatball sandwich you can eat without worrying about the meatballs falling out the back and into your lap, and that will feed a whole family ( or maybe still just you if you are extra hungry!) This recipe actually makes 2 loaves so you can be stingy and there will still be one to share!

I promise vegan challah is easier than it may seem, and I also promise stuffing it with vegan meatballs (or anything else for the matter) is not that hard either!

We used Beyond Brand Meat for the meatballs because it is my favorite brand to use. You can use whatever is handy or easy to find. You can also use pre-made vegan meatballs if that is easier for you. I like Trader Joes brand if going that route!

For the cheese you can use store bought vegan mozzarella or fry your hand at making your own. We have serval mozzarella recipes on the the site. This vegan mozzarella cheese stick recipe can be molded in a bowl then easily shredded for this recipe. It shreds, slices, and melts really well!

This recipe hands down my favorite stuffed challah to make and eat! If you love challah and you love meatball subs, then this is gonna be your favorite too. I have zero doubts!


Challah

Follow the recipe for my basic Challah Y'all, Vegan Challah. You will follow the instructions through the first rise, then follow the below instructions for stuffing and braiding.

INGREDIENTS:

  • 4 thawed Beyond Meat Burgers or 1 lb of vegan ground mince

  • 1/4 cup panko bread crumbs

  • 1 teaspoon minced garlic

  • 1 teaspoon Italian seasoning (a mix of thyme, sage, basil, marjoram, rosemary, and oregano) if you do not have Italian seasoning feel free to add a combo of any of the listed spices

  • 1 teaspoon tomato paste

  • 1 flax egg

  • 1 bag vegan mozzarella shreds, like Follow Your Heart brand


Sauce

  • 1 onion, diced

  • 1 carrot, diced

  • 1 28 ounce can crushed tomatoes

  • 1/3 cup red wine (optional)

  • 2 teaspoons crushed garlic

  • 1 teaspoon salt

  • 2 teaspoons Italian seasoning

COOKING INSTRUCTIONS:


Meatballs

  1. Mix thawed burgers, panko bread crumbs, garlic, spices, and flax egg together in a bowl.

  2. Once well combined, form meatballs with a small scoop, or spoon, and place them on a baking pan. You can line the pan with parchment paper for easier clean up.

  3. Bake at 350 degrees for 30 minutes.

Sauce

  1. Sauté onions and carrots in 1 teaspoon of oil until onions are translucent with 1 teaspoon of salt in a large pot for 5 minutes.

  2. Add the wine, and let it cook for 2 minutes.

  3. Add the remaining ingredients, and let the sauce simmer for 30 minutes.

  4. Add the cooked meatballs, and let simmer in the sauce for 15 minutes.

Stuffing the Challah

  1. Once Challah has completed its first rise, remove from oven and separate dough in half. This recipe will yield 2 stuffed challah loaves.

  2. Cut each half into thirds. (each loaf will have three pieces of dough. Work with one loaf at a time, leaving the other three pieces of dough covered in a bowl until you are ready to use them)

  3. Take one piece of dough in you hand and begin to stretch it both length wise, and width wise and the same, time, letting gravity help with the length. You want the dough to be about 12 inches long, and maybe 4 inches wide. Once you have it stretched length wise, you can put it on a floured counter top and press it to get it the width stretched.

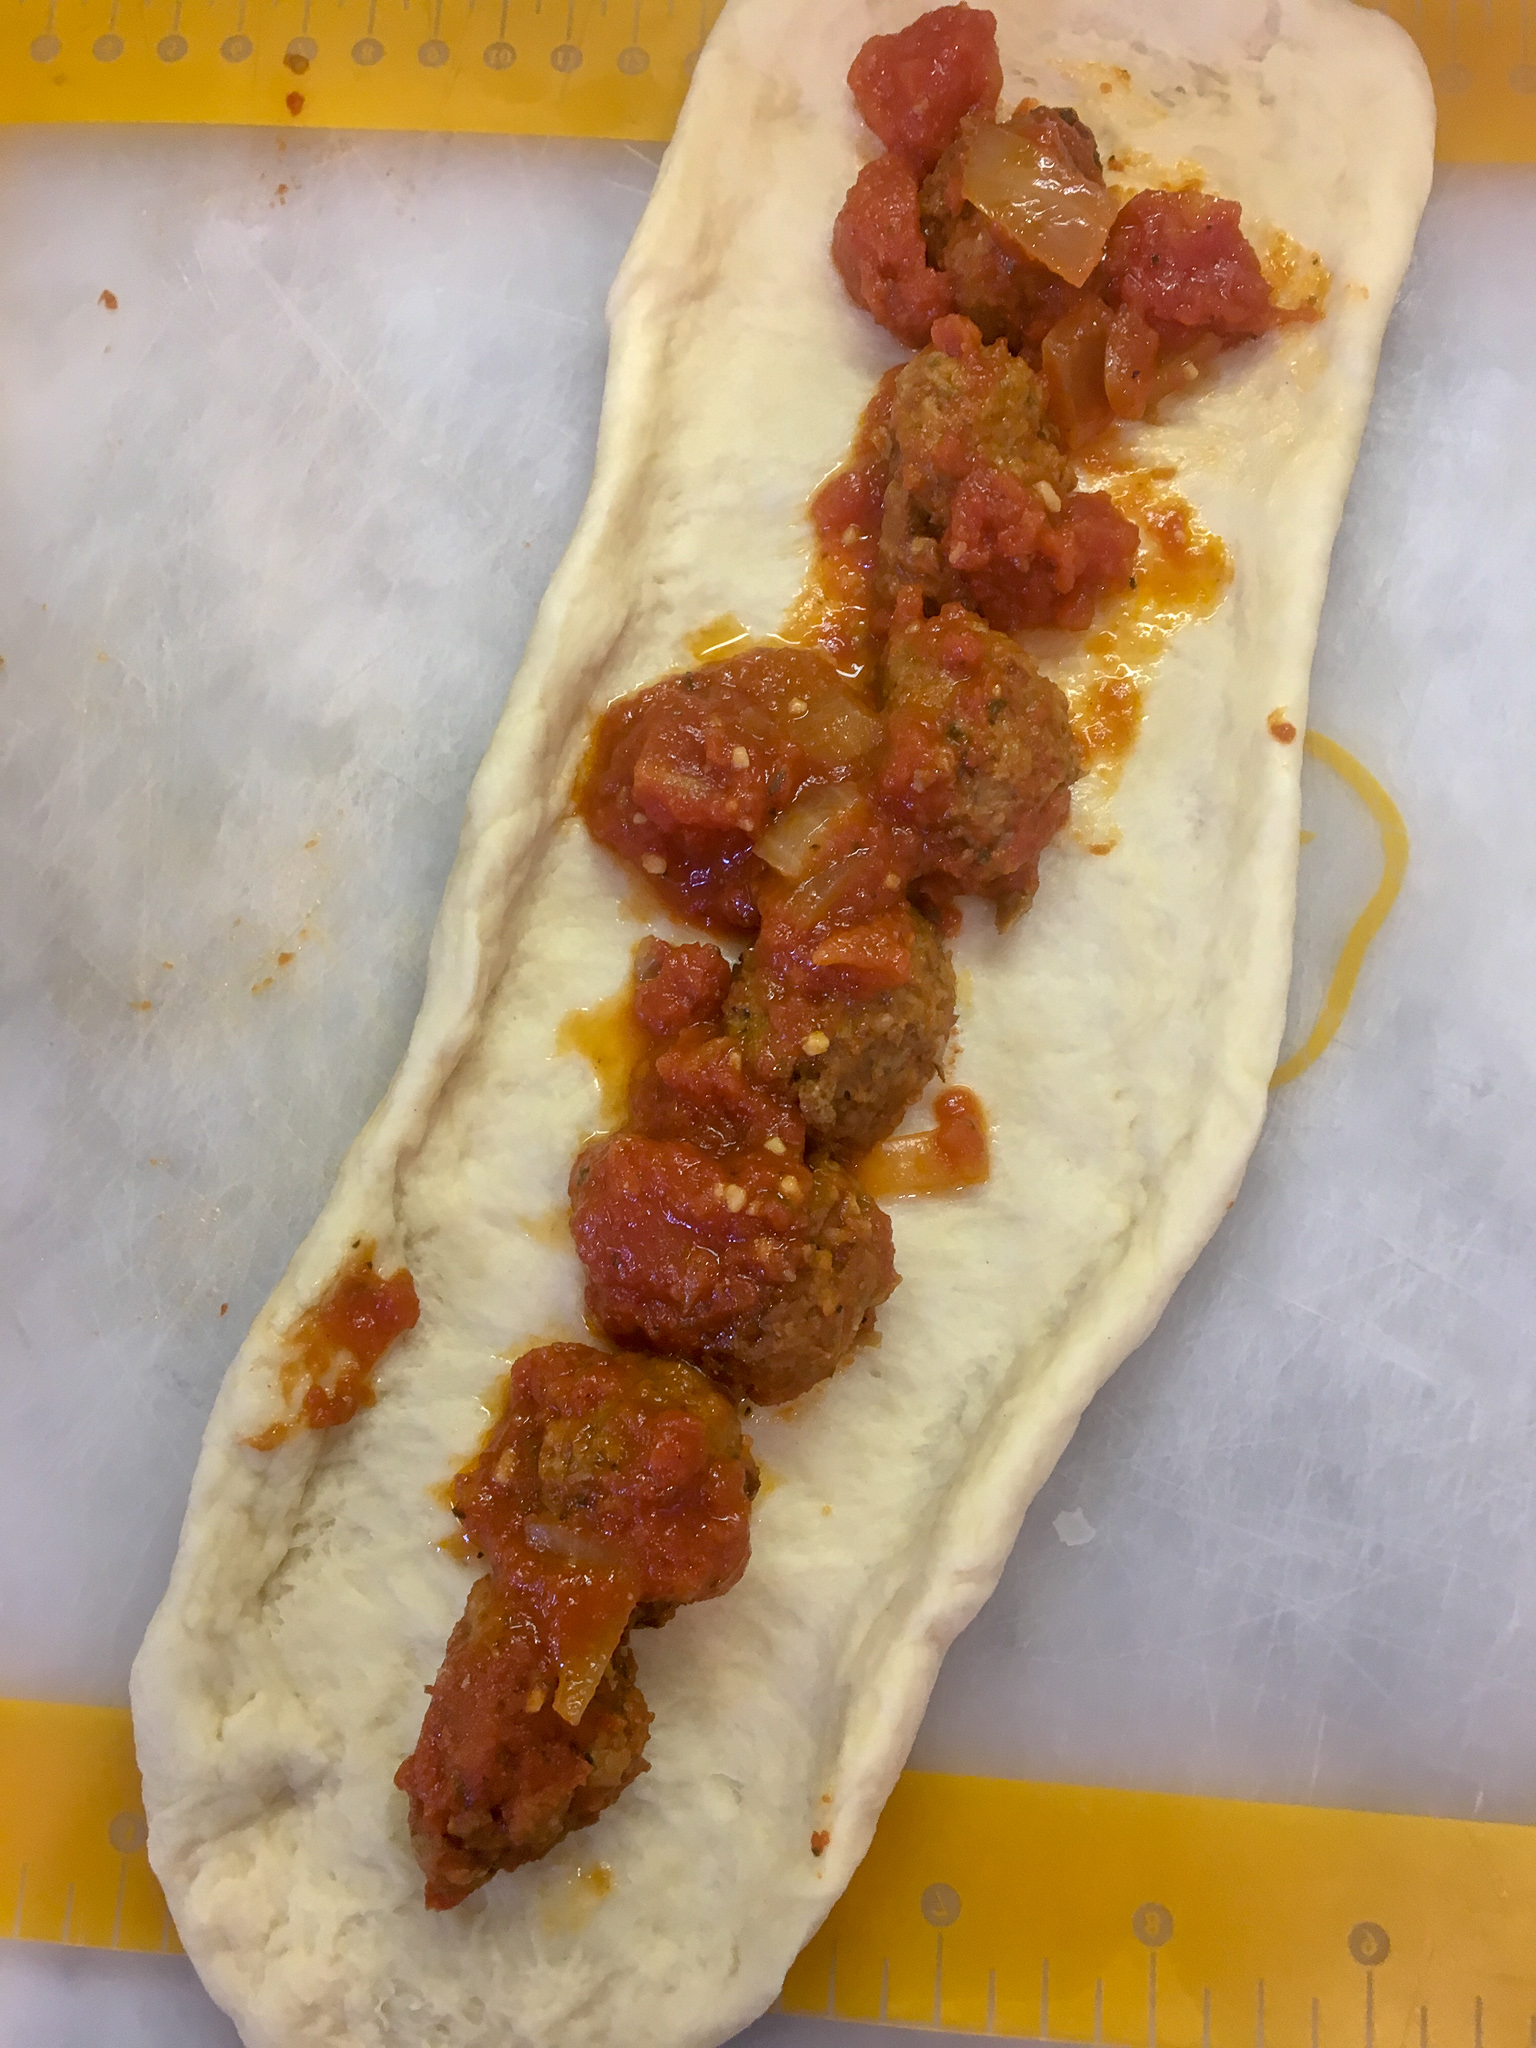
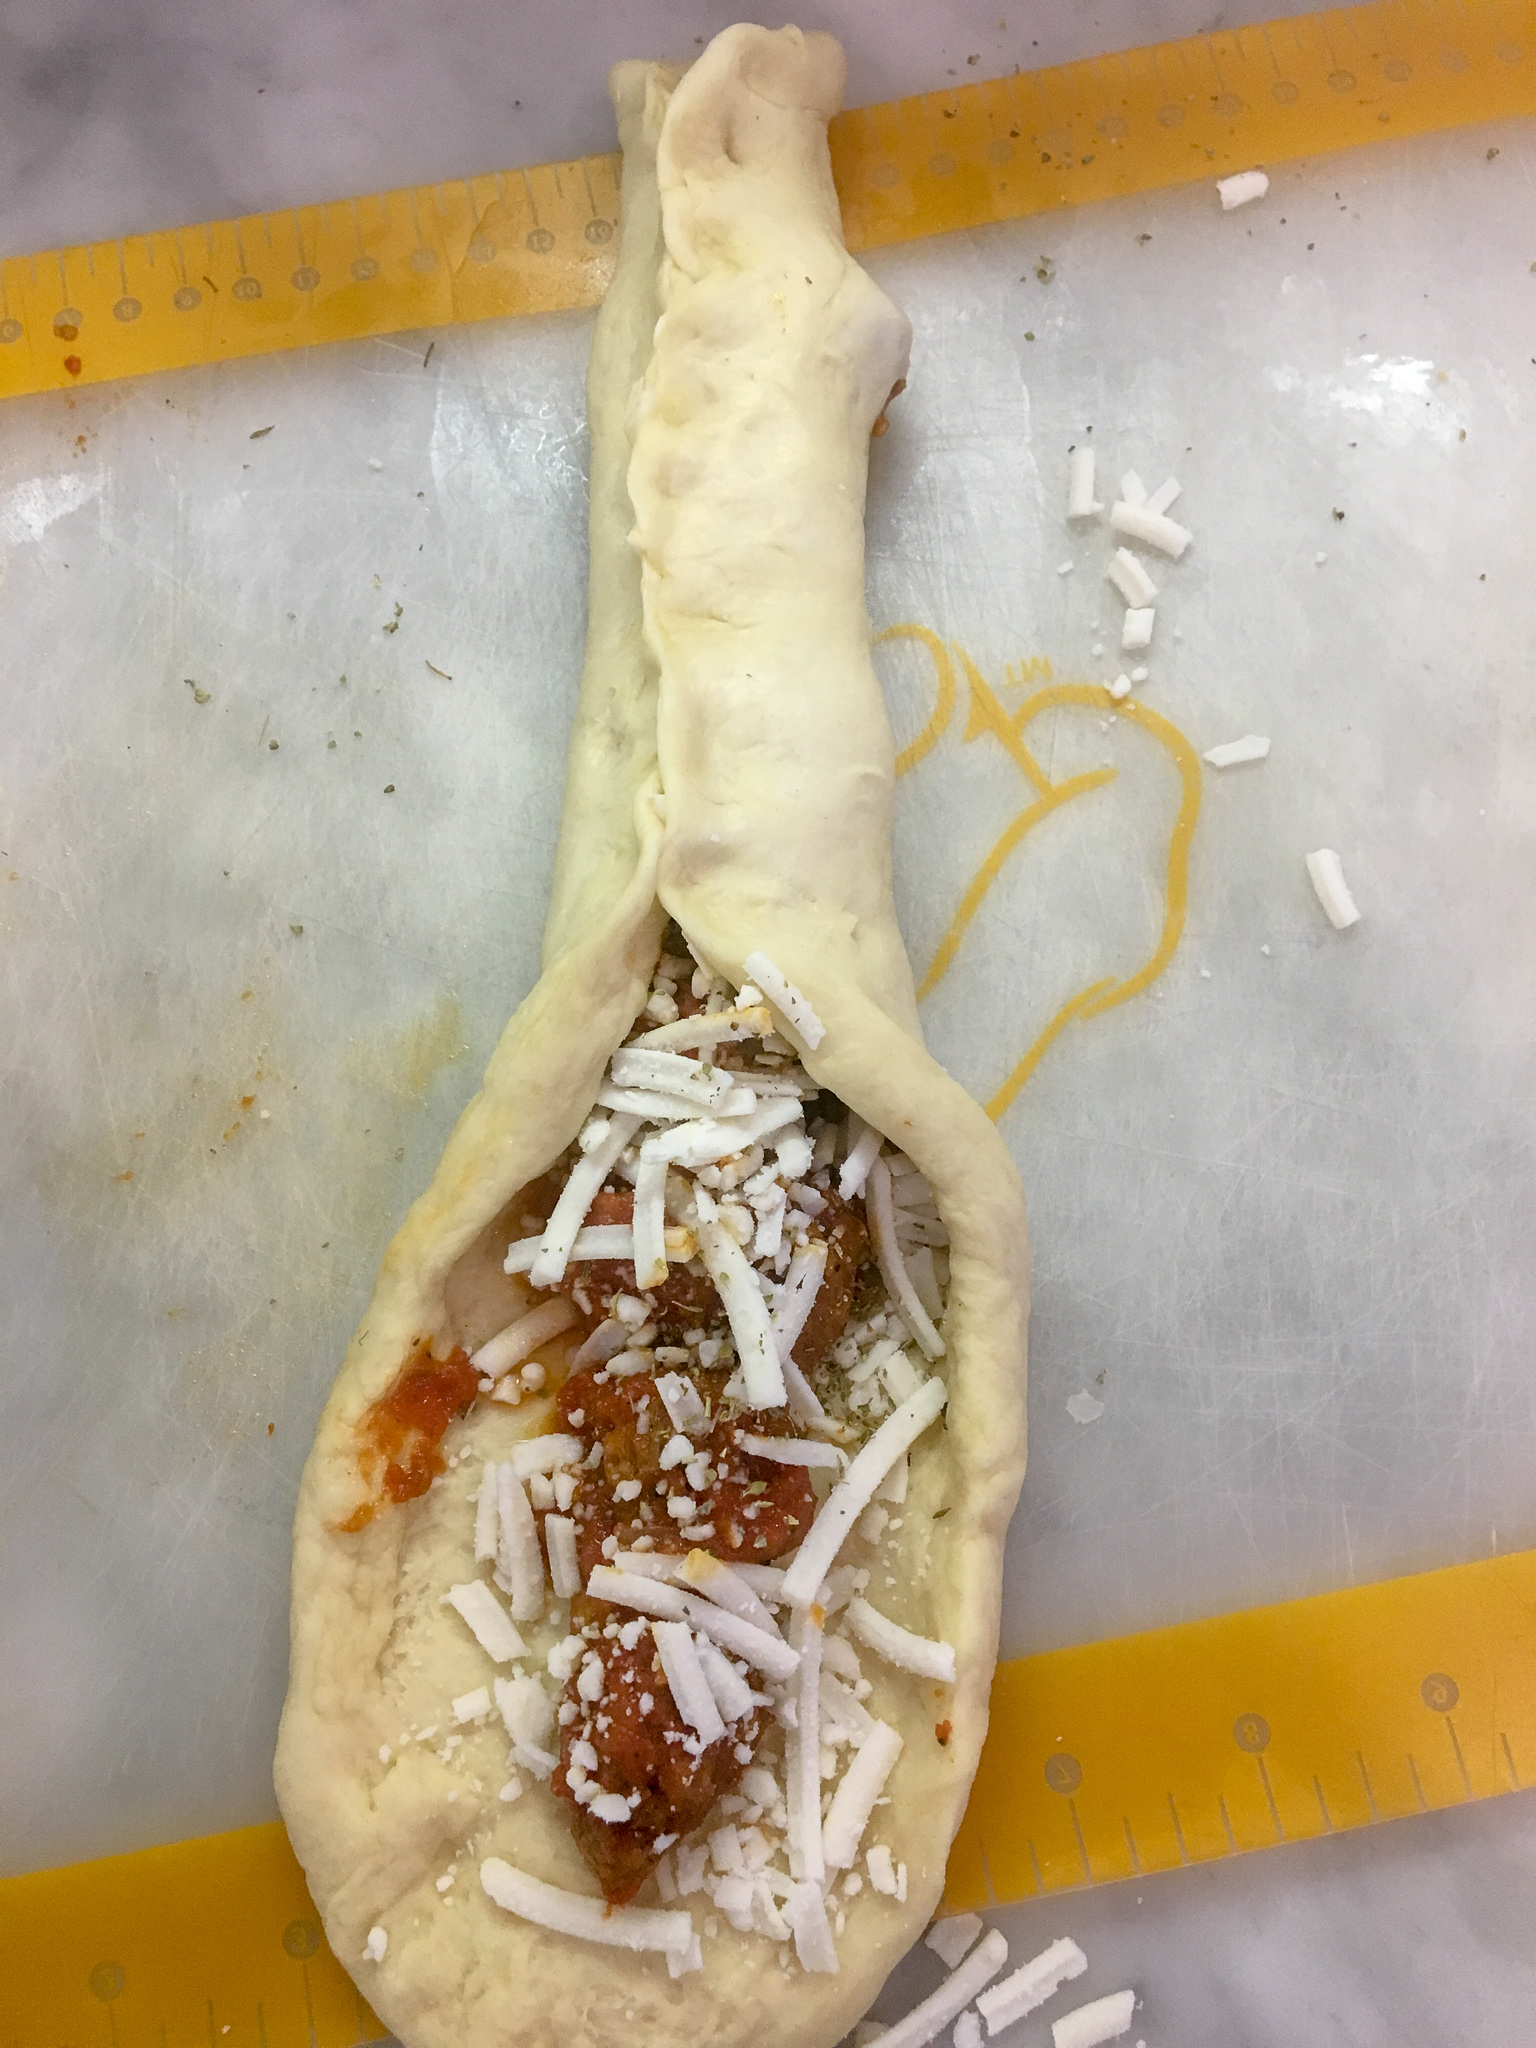
  4. Once your dough is the correct size, begin adding the meatballs in a row, it works best if you cut them in half. You can add a LITTLE sauce, but if the dough becomes wet on the edges, it WILL NOT seal together when pinched. So do not over fill. Sprinkle with vegan cheese shreds. Save the extra sauce for dipping, later.

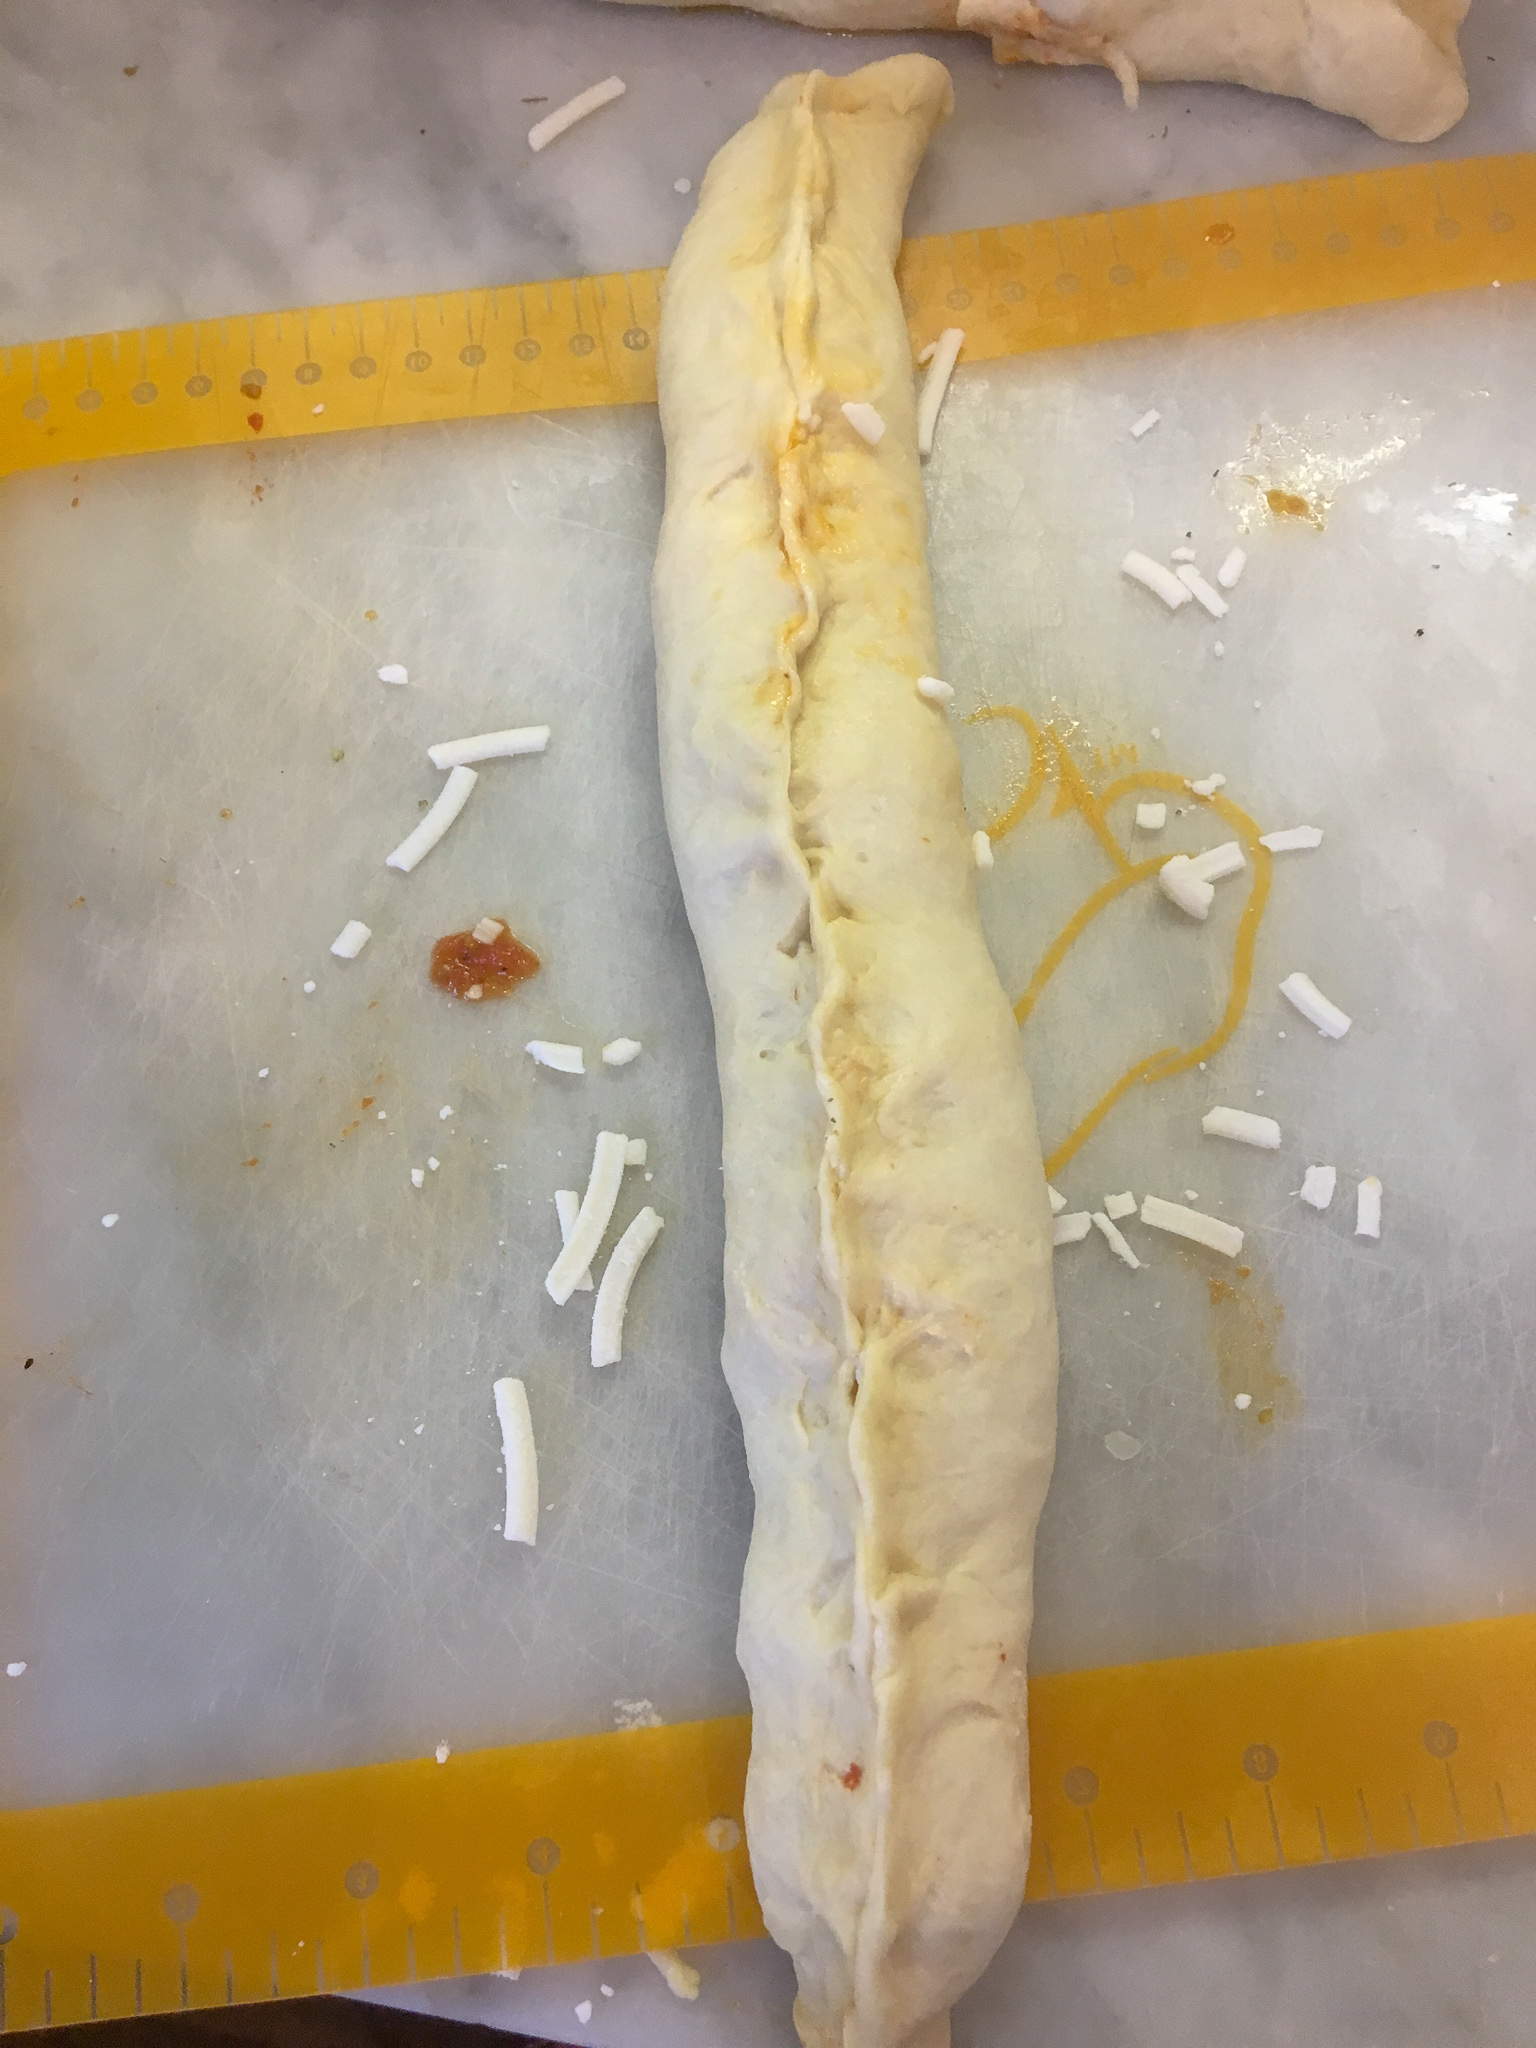
  5. Once stuffed, bring the outside edges together, and pinch to seal.

  6. Repeat with the other two strands.

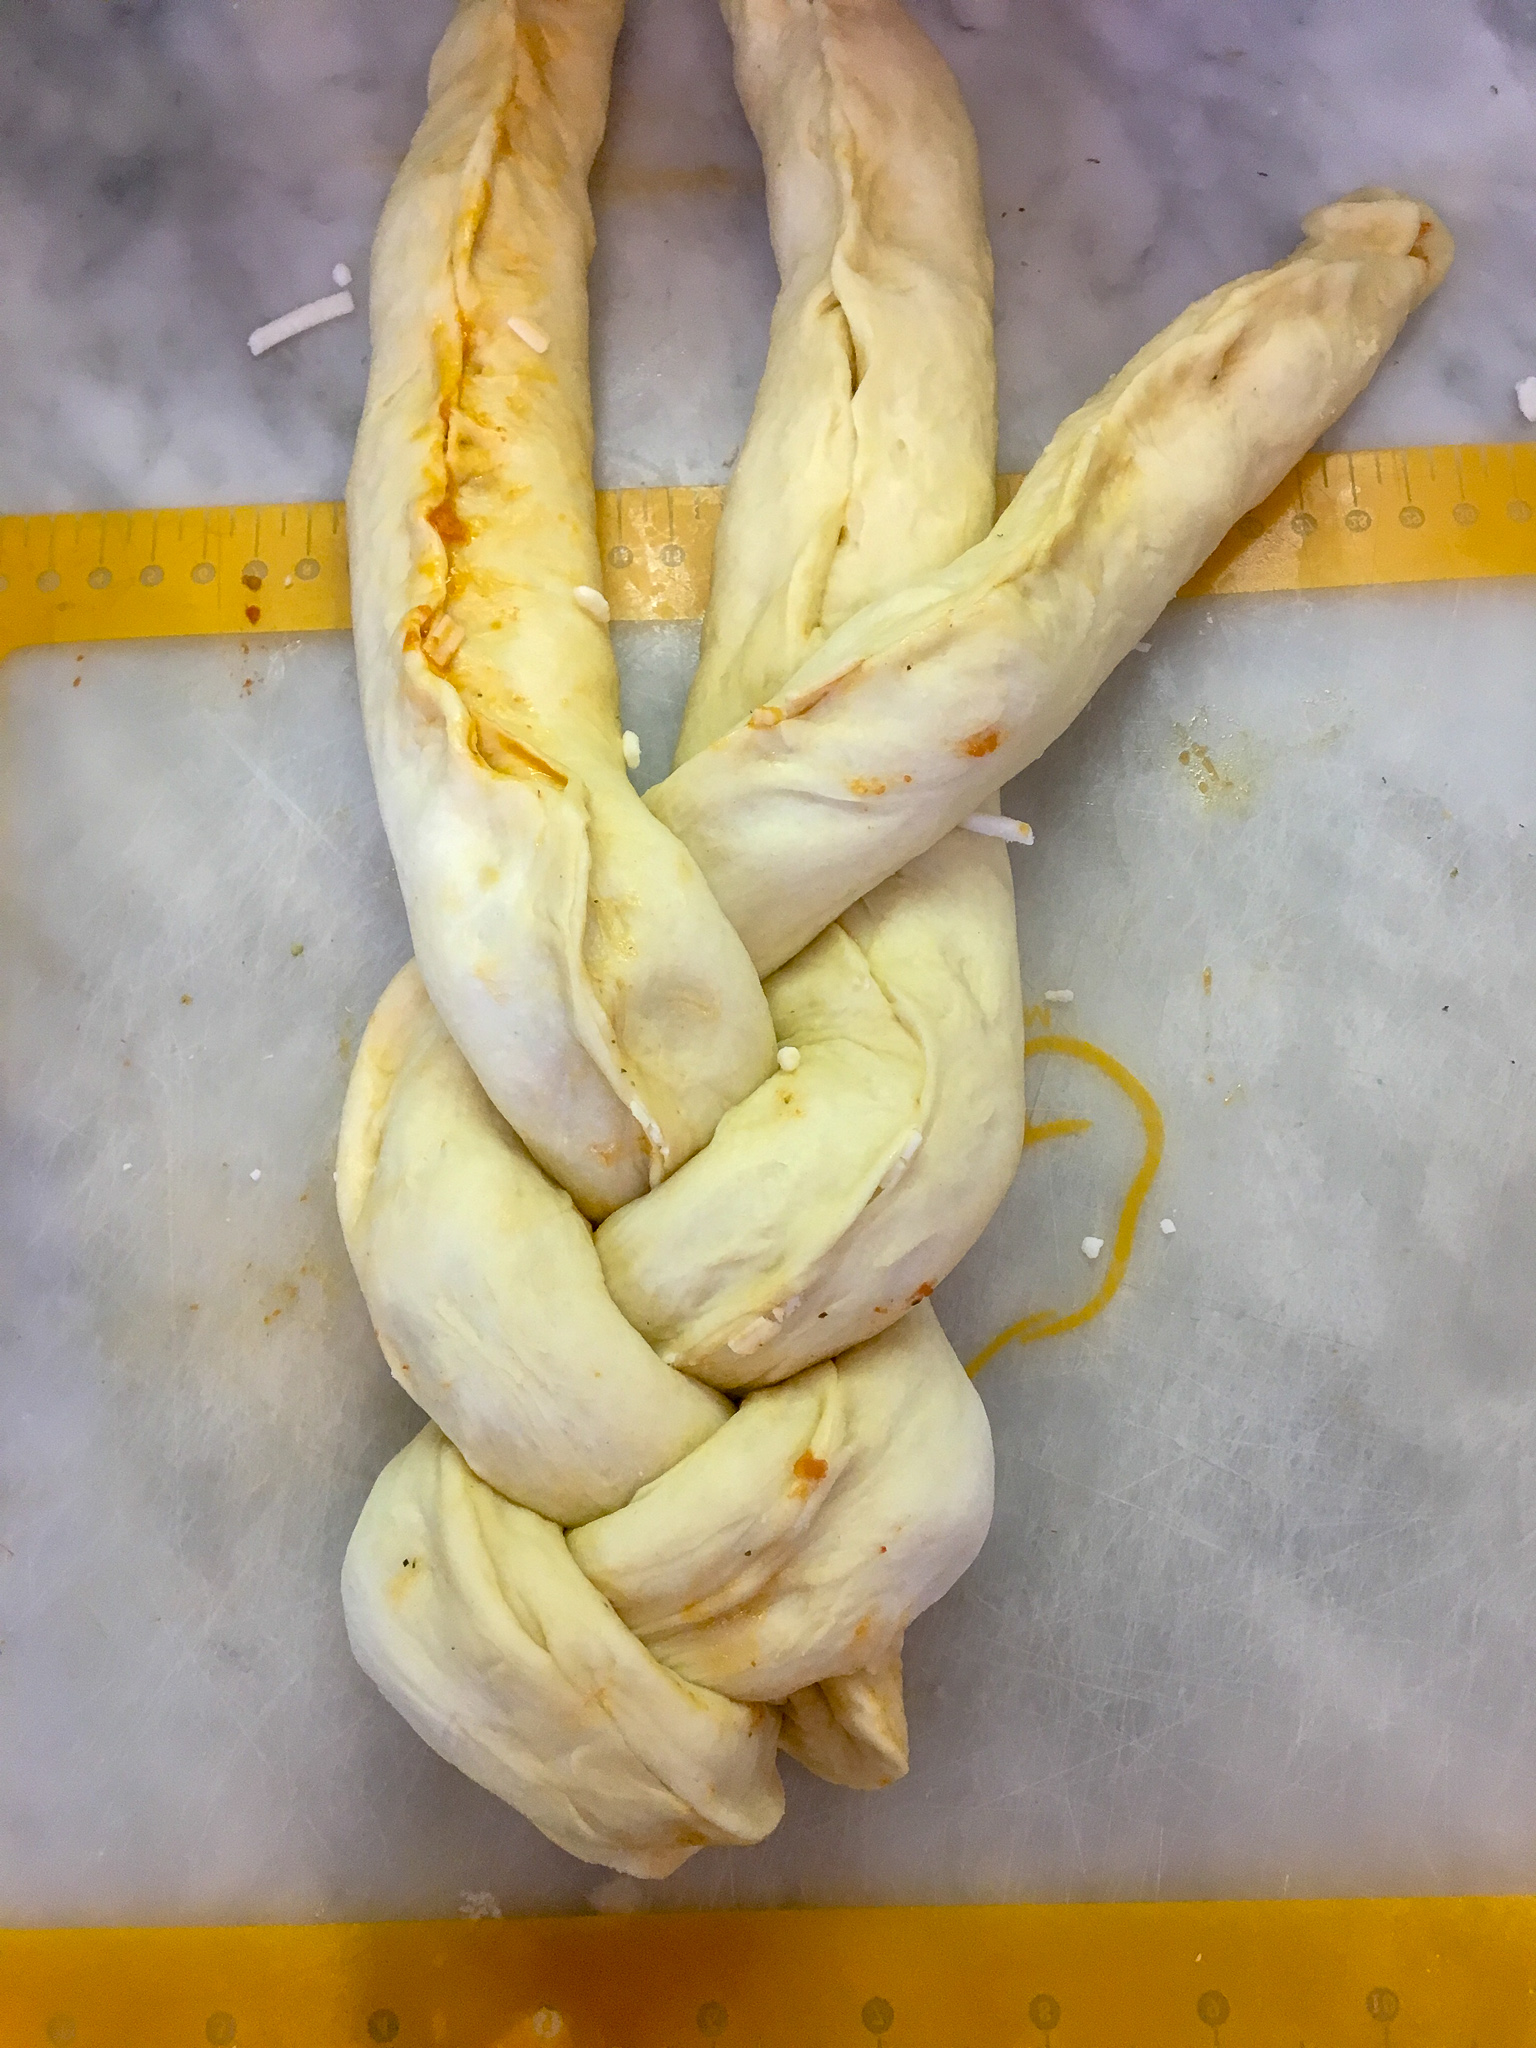
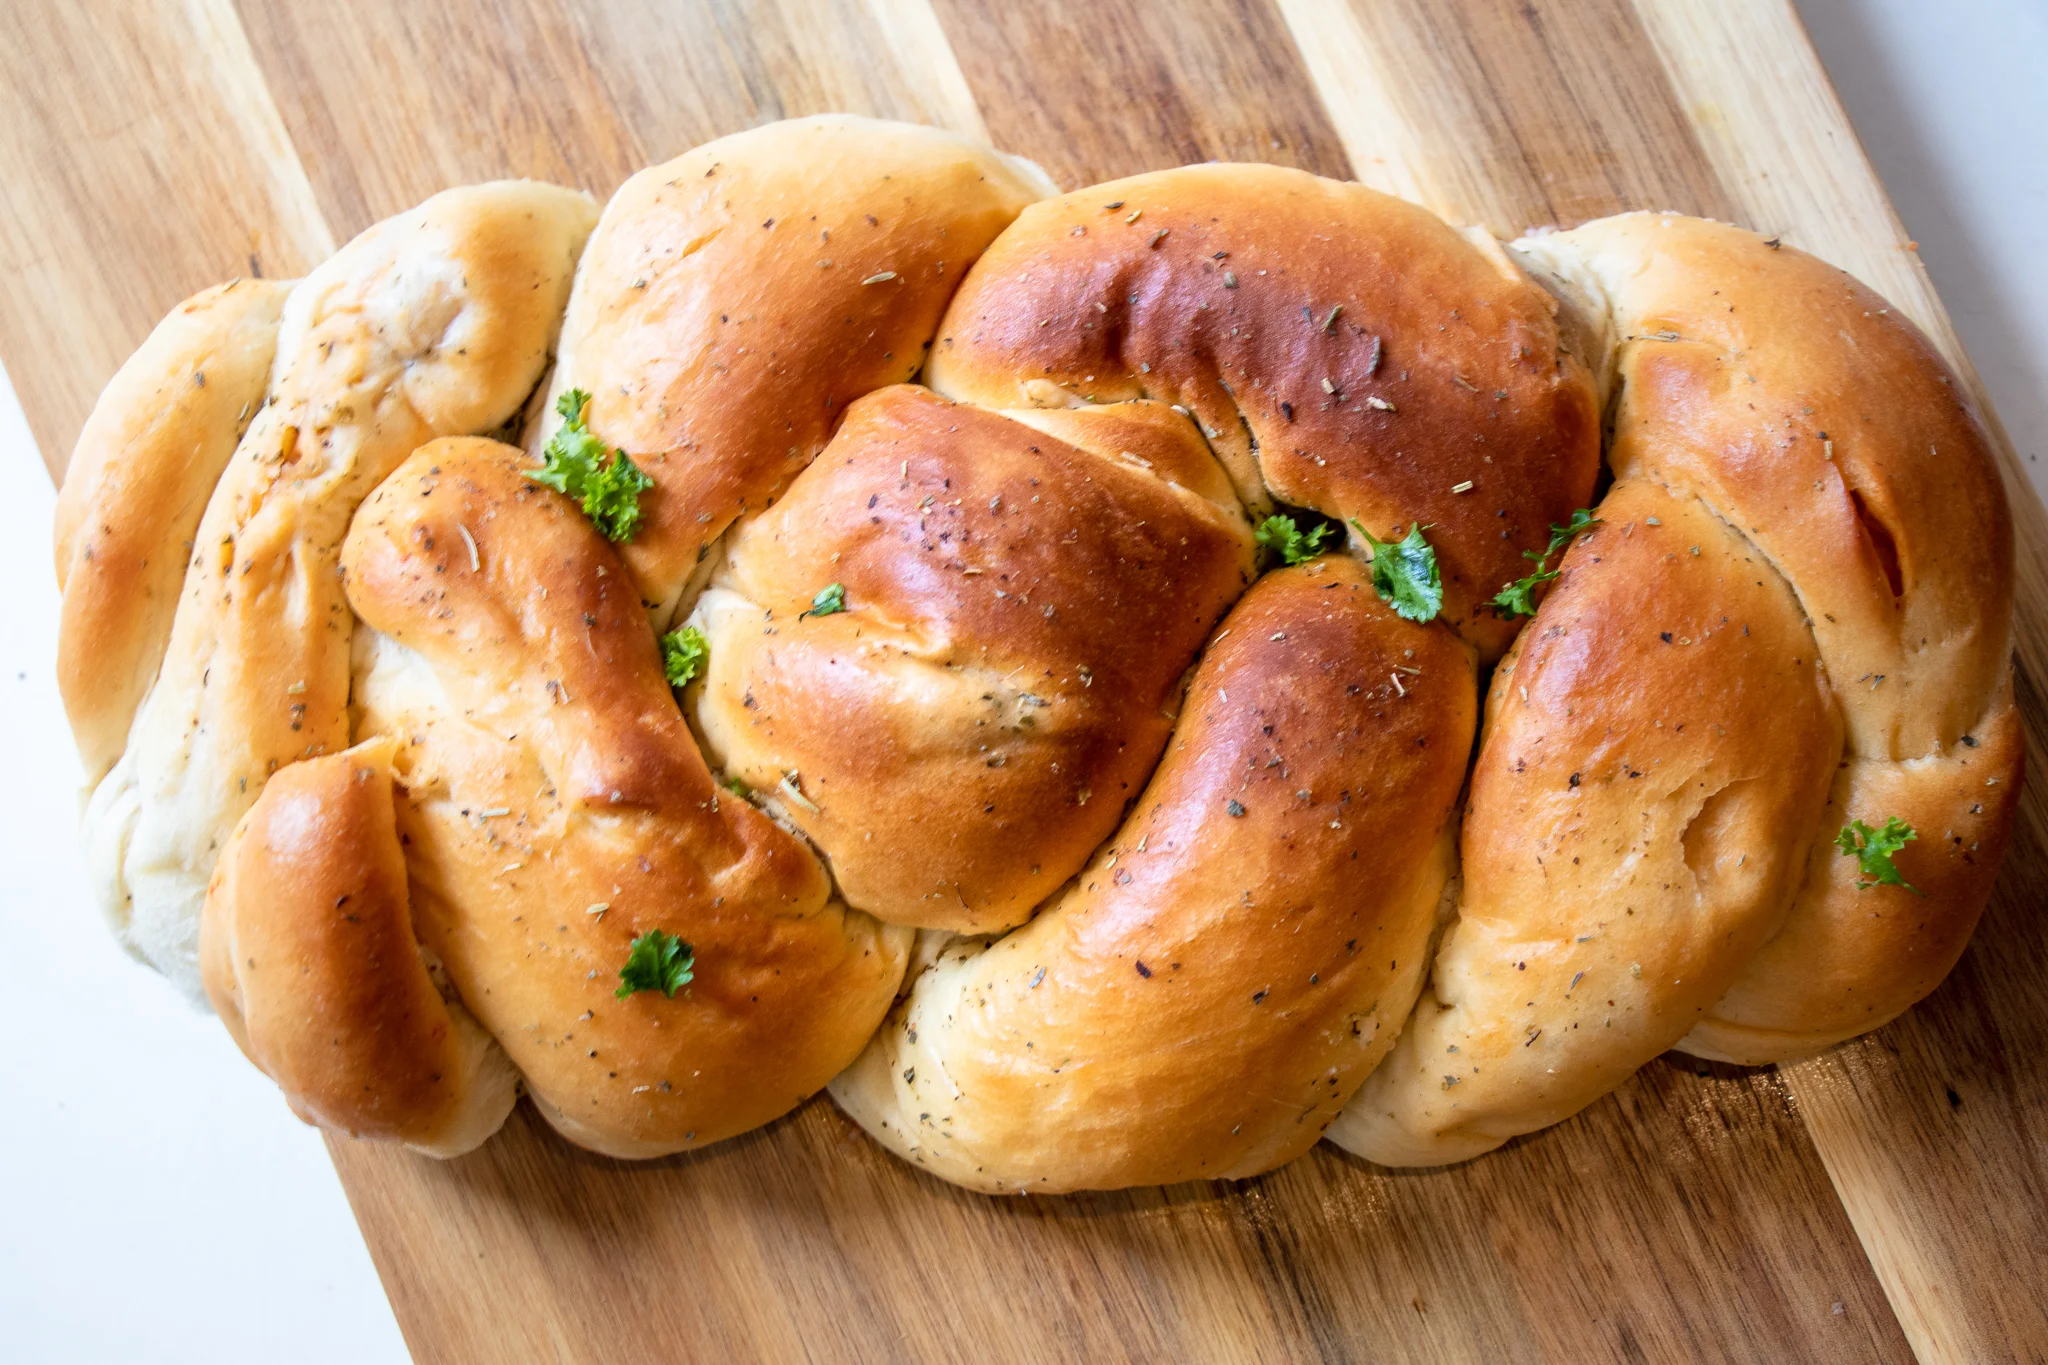
  7. Once all three strands are stuffed, and formed, carefully braid the three pieces together. If the seams begin to open, pinch them back and continue braiding. Tuck both ends of the loaf under when done braiding. Once again I will refer you to Tori Avey's challah braiding guide if you are unfamiliar with braiding challah! She does a fantastic job showing all the different ways to braid your bread, plus she has some really great recipes on her site.

  8. Repeat with the second loaf, and place both stuffed loaves on a baking sheet, and back in the oven to rise again for about 45 mintues. Once they have risen, remove from oven and pre-heat to 350.

  9. Brush tops of challah with some vegan butter.

  10. Bake both loaves for about 35 - 45 minutes. You can tap the tops to see if they sound a little hallow. It is hard to tell when stuffed challahs are done when there are wet ingredients inside, so if they do not seem cooked through after 35 minutes, let them keep cooking for 5 - 10 more minutes.

  11. Remove challah from the oven, and allow to cool some before cutting. Serve with reserved sauce for dipping.

IMG_9183.jpg
IMG_9186.jpg

Basic Aquafaba

IMG_8218.jpg

I get A LOT of questions concerning aquabfaba in our recipes.

Aquafaba quite simply is just the cooking liquid from beans. You can use canned aquafaba or liquid from dry beans you have cooked.

You can use liquid from any bean actually, but I prefer the mild flavor of the liquid from chickpeas or any white bean.

I like to use aquafaba in the whipped form. When the liquid from the beans is whipped with a stabilizer like cream of tarter or even salt, the result will be light and fluffy peaks like if you were to whip egg whites!

This means you can use whipped aquafaba in place of eggs in many recipes to add a nice airy lightness. I often use it in cakes, or even casseroles that normally call for many eggs. You will still need a binder like a starch in some cases, like in the instance of a casserole. For those recipes I will often use whipped aquafaba and a few starch eggs, or prepackaged egg replacer.

When referring to aquafaba on this website, I am referring the the whipped product not just the liquid, unless otherwise stated in the recipe.

So, if a recipe calls for 1 cup of aquafaba, it is calling for 1 cup of the fluffy white whip, not one cup of chickpea liquid, pre-whipped. This tends to be one of the biggest mistakes or misunderstandings I have had people encounter in reading the recipes. They tend to want to measure the liquid not the whip. You must first whip the entire can of liquid then measure out the whip.

You will typically have left overs, as one can of chickpea liquid will whip up a more than a few cups of aquafaba.

You can store any leftovers in you fridge. The aquafaba will deflate in the the fridge and turn back to its liquid from, but will easily whip back up, and should keep for a few days.


INGREDIENTS:

  • Juice from one can of chickpeas

  • 1/4 teaspoon cream of tartar or salt


INSTRUCTIONS:

You can use a stand mixer or a hand mixer for this. 

Add liquid from chickpeas, and cream of tartar to your bowl. Whip until the aquafaba is thick, and fluffy, resembling whipped egg whites. 

1/4 cup of aquafaba is equal to one egg in recipes 


Challah Y'all, Vegan Challah

IMG_8171.jpg

Have you ever had challah? Well if not, I can not urge you enough to try my most favorite bread on the planet. Challah Y'all , its delicious!

Traditional challah bread is often made with eggs, and braided. It is often served at shabbat dinner on Friday nights.

If you already love challah, but thought you couldn’t have it since going vegan or plant based, guess what, you sure can!


I used to actually make challah bread every week for our synagogue, and later began baking, and selling it weekly in our neighborhood. This was when we were vegetarian and we used eggs. It was old hat and I could bake it in my sleep.

But, once we went vegan the challah baking stopped. It didn’t have any clue how to make this bread without eggs .As a new vegan I was stuck thinking I could never bake like we once did! Let me tell you that is 100% false. Because once I discovered the magic of whipped aquafaba, my world was changed! And thank goodness because I couldn't imagine a world where I could not eat challah!

Whipping up the liquid from a can of chickpeas to form a vegan egg white substitute is truly brilliant. Seriously, I want to hug the genius who discovered this because it has been life changing in the vegan world! I would have never dreamed replacing 4 eggs in bread recipe with whipped pea liquid would have ever worked, but work it did, and it works very well, actually!

I often stuff the braids with various fillings, from savory vegan meatballs and marinara, to dessert challahs stuffed with things like chocolate and peanut butter. You name it, and I have probably tried to stuff it into challah over the years! The possibilities are endless!! I have several stuffed challah recipes on the site with instructions on how to stuff and braid your bread if you are feeling adventurous, and want to give it a go! I really urge you to try it once you get the hang of traditional challah!


But y’all, seriously nothing beats the smell and taste of a fresh loaf of warm traditional challah, just pulled out of the oven. Perfectly shiny and crisp on top, soft and fluffy in the middle. It really is beautiful loaf of bread. It is one of my favorite parts of shabbat and I so thankful I finally found a way to make it vegan!

This recipe will yield 2 nice big loaves of bread and let me tell you, day old challah is the best bread in world for making french toast! Trust me!!!

So what are you waiting for? It’t time to bake some perfect vegan challah, y’all!


  • 4 cups all purpose flour

  • 1 1/4 cup aquafaba (please follow link for recipe and instructions, as we are referring to the WHIPPED product in this recipes, and are measuring the product in its whipped state)

  • 1/3 cup sugar

  • 1/2 cup oil (I use grape seed but you can use any neutral oil you like)

  • 4 1/2 teaspoons dry active yeast

  • 1 tablespoon sugar

  • 1 tablespoon salt

  • 1 cup hot water. I just use hot water from the tap, you don't want it too hot or the yeast will die and it will not activate.


COOKING INSTRUCTIONS:

  1. In a large glass bowl mix hot water, yeast, and 1 tablespoon sugar.

  2. Let that sit for 10 minutes to activate, or until the mixture is super foamy at the top.

  3. In a stand mixer, add the yeast mixture, aquafaba, sugar, oil, salt, and 2 cups of flour. You can mix by hand, just mix the above, and add remaining flour slowly. You will need to knead it for the same amount of time. It's a good workout though!

  4. Mix until all of the ingredients are incorporated then add in the remaining flour. I typically will hand mix the first 2 cups of flour, or use my paddle attachment and replace with the dough hook when I add the remaining flour.

  5. The dough should come together and not be sticky. If it seems sticky, you can add 1/4 more flour, a little at at time, until the dough comes together. Your goal is smooth, and elastic-y dough, not sticky.

  6. Let the dough kneed in the mixer on low/medium speed for about 10 minutes. The dough should be smooth at this point and have a sort of bounce back if you poke it.

  7. Form dough into a nice ball, and place in a lightly greased glass bowl. Cover the bowl with a damp kitchen towel, and place inside your oven turned off, or on the bread proof setting if your oven has one.

  8. Bring a small pot of water to a boil and place in the bottom of the oven. The heat and steam from the water will help the dough to rise.

  9. Let dough rise about an hour, or until the dough has doubled in size.

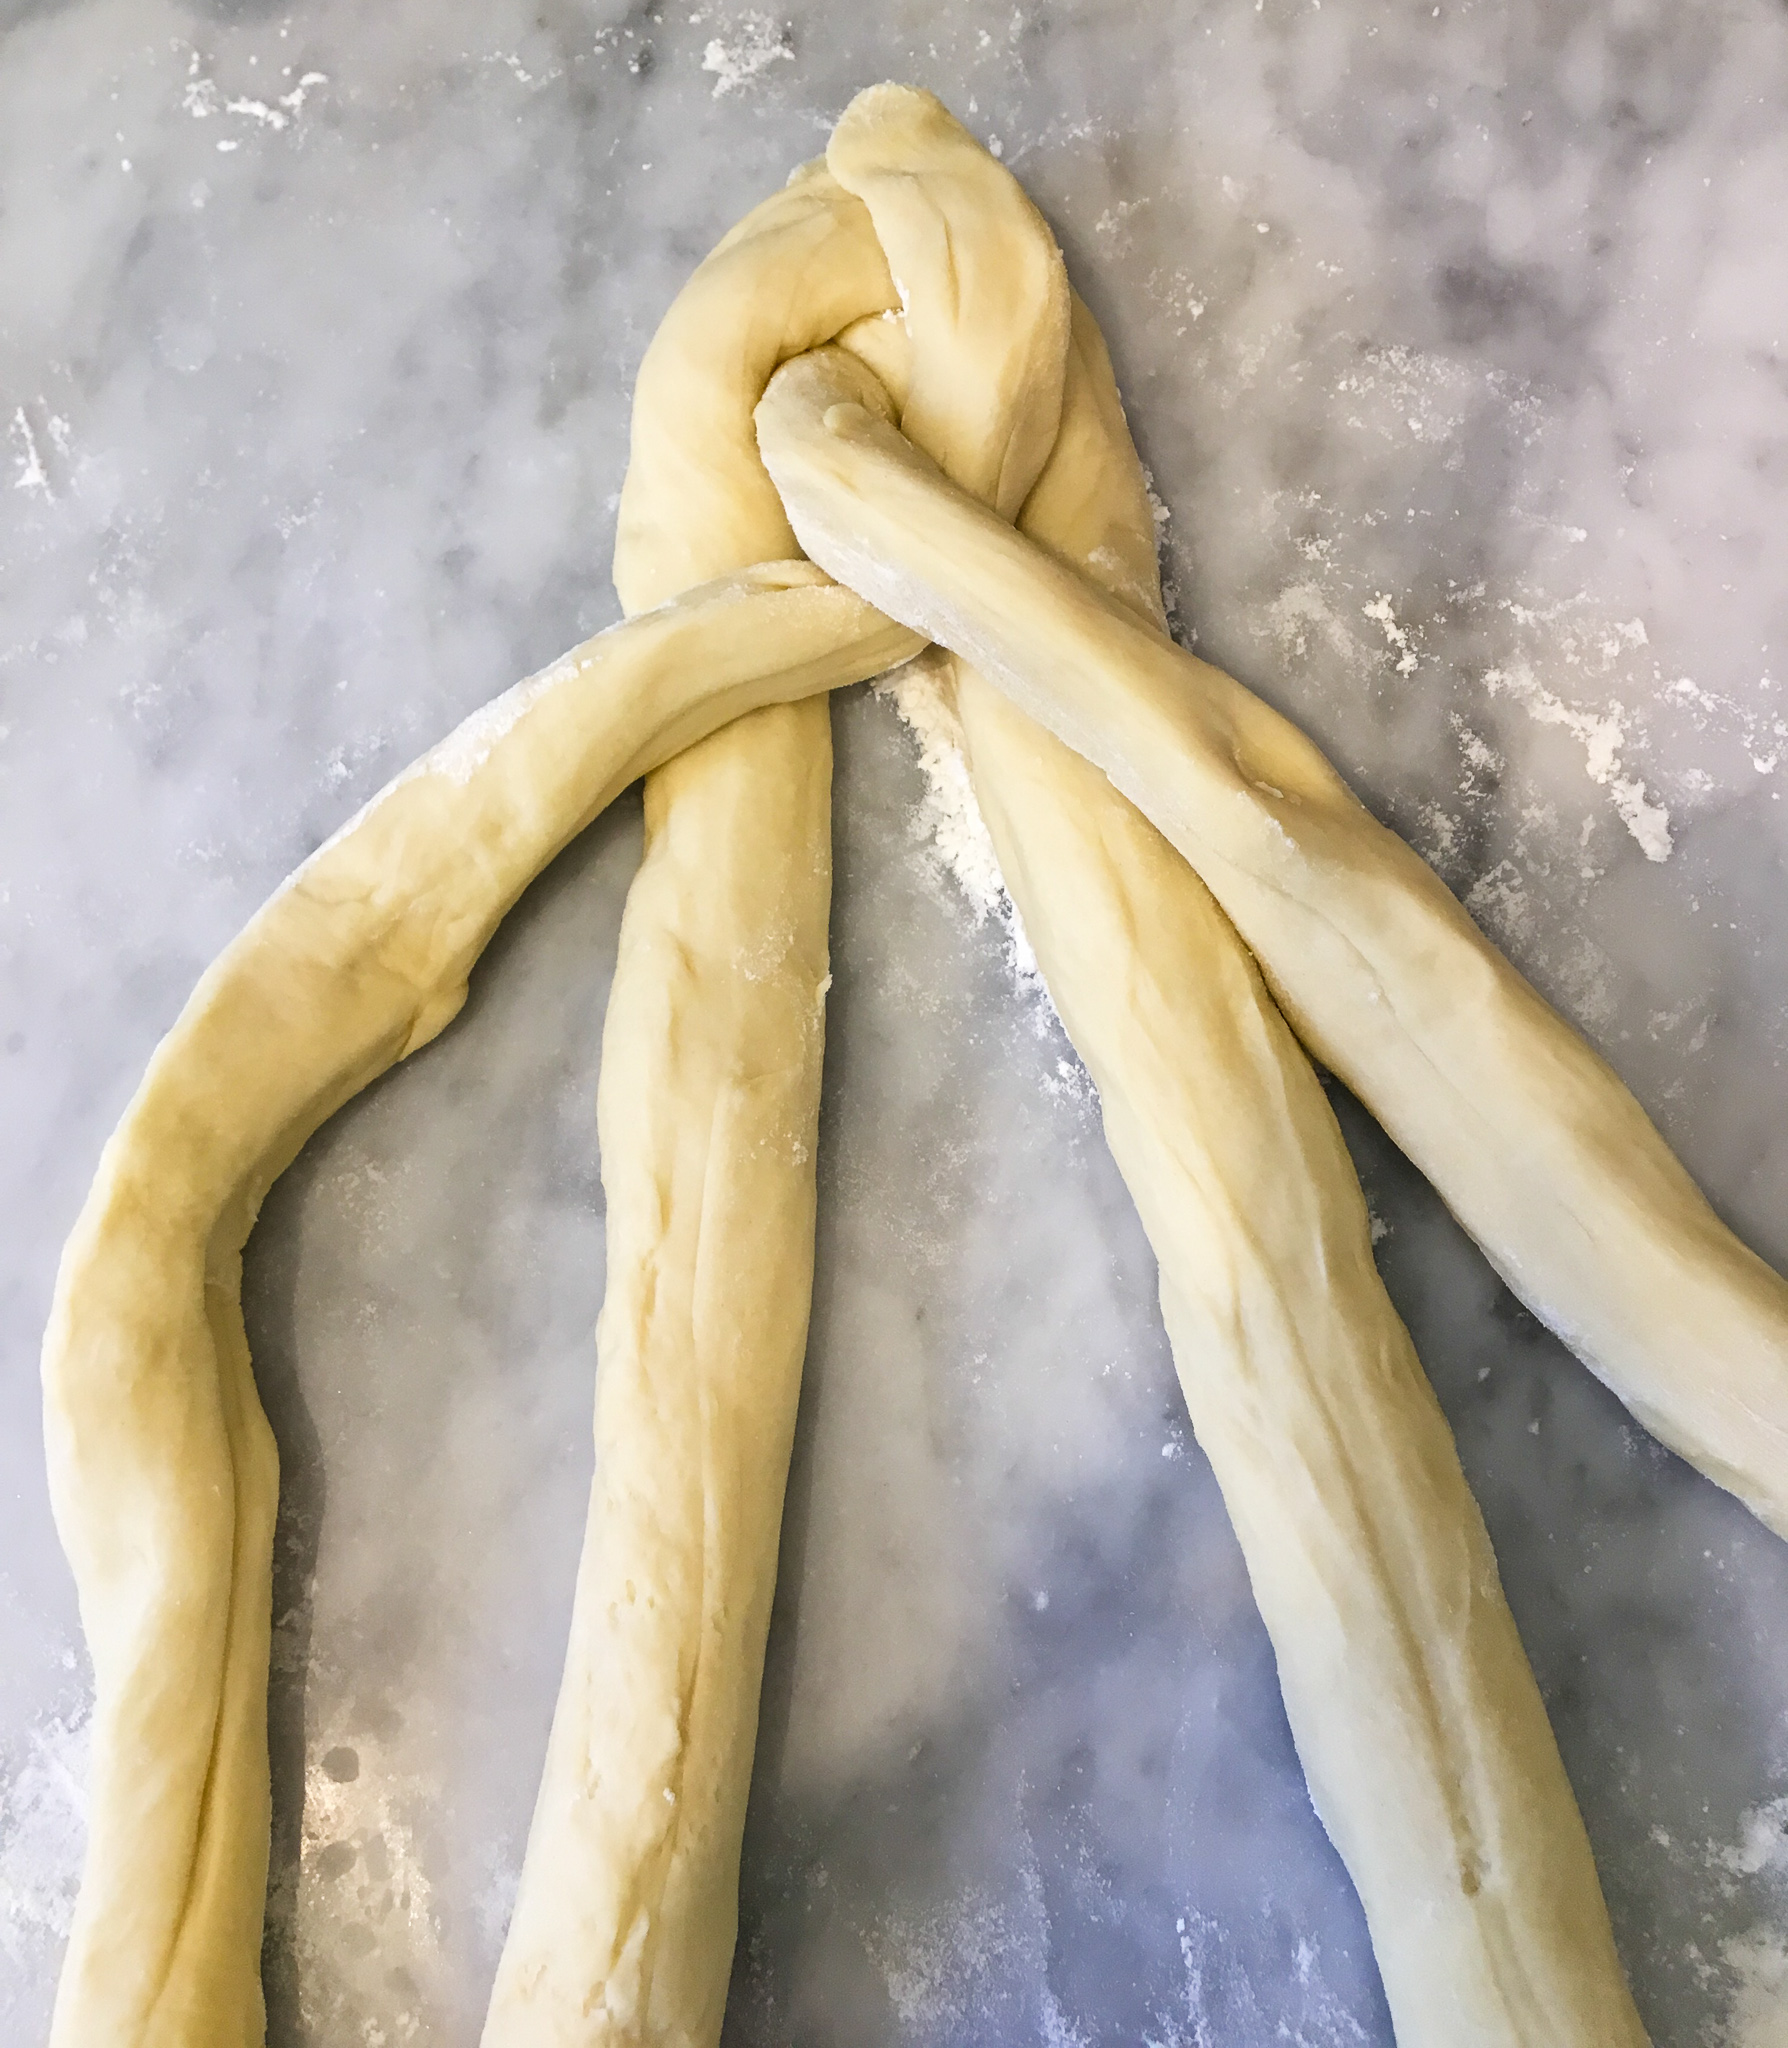
  10. Remove dough from oven, and on a clean lightly floured work surface, divide the dough in half, and braid each loaf. Tori Avey has a wonderful guide on challah braiding that you can check out, or follow the pictures below for a 4 strand braid.

  11. Place both challah loaves on a cookie sheet, and cover with a damp towel. You may need two cookie sheets. You don't want the loaves touching or they will stick together as they bake. Place challah back in the oven and allow the loaves to rise again for about an hour.

  12. Once loaves have risen, remove from oven, and preheat oven to 350 degrees.

  13. You can either brush the loaves with vegan butter, or you can make an aquafaba wash with 3 tablespoons of the left over aquafaba, and a splash of maple syrup. This will help the loaves to brown. Whichever method you choose, brush the loaves before placing them in the oven, and brush a few more times throughout baking.

  14. Loaves will need to bake around 20 - 30 minutes, depending on the oven. Keep an eye on them and once they begin to brown all over, give them a tap with your finger. If they sound hollow, they are done!

  15. Let Challah cool on a wire cooling rack before serving.

IMG_8487.jpg

Separate your dough into 4 equal pieces and begin forming "ropes" with them. Let gravity help with this. The dough will stretch out as you work on lengthening the ropes.

IMG_8488.jpg

Begin on the far right, weaving your rope over, under, over...

IMG_8489.jpg

Now repeat starting at the far right again, always going over, under, over. ALWAYS start right. ALWAYS over, under, over.

When you are done tuck, the ends of the braid under the loaf.

Just a heads up, this bread will make THE BEST french toast you have ever made! Challah y'all!

IMG_8165.jpg


Fluffy Vegan Southern Biscuits

Fluffy Vegan Southern Biscuits that will make you want to slap your grandma.

I was raised in the south. Both of my parents were born in raised in Alabama and my mom grew up on a farm. Most of my childhood memories involving my Grandmother are in her kitchen or watching the occasional episode of Hee Haw, but mostly in the kitchen. My grandmother cooked three meals a day and every one of them included homemade biscuits or cornbread. She taught any of her grandkids that were willing to learn how to make her biscuits, and it is my most cherished recipe. I have adapted my grandmothers recipe to make our biscuits vegan. My grandmother always used buttermilk but we have added just a little vinegar to our plant based milk to make it curdle and give it that butter milky zip. I also use vegan butter instead of shortening like she used, and I am pretty sure if she were alive I would get an ear full about that! But for the most part, I make them just like she taught us, and they are perfect as far as I am concerned. A light, fluffy, buttery, southern staple that any good southerner ( or anyone who knows anything about anything) should be baking up all the time. My Grandmother would be so proud to know that a little piece of her kitchen was making its way to so many people. I just wish she were alive so I could tell he how much everything she taught me has meant to me, and how she helped shape me into who I am now, and so I could give her one more hug. I love you Grandmama.

INGREDIENTS:

  • 3 cups of all purpose flour plus 1/2 cup flour

  • 2 tablespoons baking powder

  • 1 1/2 teaspoons salt

  • 1/2 cup of vegan butter like Earth Balance

  • 1 1/2 cups plant based milk, I prefer almond or oat milk for baking

  • 1 tablespoon white or apple cider vinegar

COOKING INSTRUCTIONS:

PREHEAT OVEN TO 450 DEGREES

  1. Add 3 cups of flour, baking powder and salt to bowl and mix with a whisk, making sure it is mixed well.

  2. Add the butter using your hands to mix it into the dry ingredients, using your fingers to break up the butter until the mixture becomes crumbly.

  3. Pour vinegar into the milk and let it sit for a few minutes. Now add milk into the mixture, again using your hands, mix the milk in. THIS IS IMPORTANT: do NOT over mix. You want everything combined, but stop once you get to the point that the dough can be handled. It will likely still be sticky, but the less you mix it, the fluffier the biscuits!

  4. Sprinkle some of the remaining 1/2 cup of flour onto a clean work surface. Sprinkle enough flour over your dough to be able to handle it.

  5. Gently pat the dough out on your floured surface until it's about an inch or so thick. Using a biscuit cutter or glass , cut circles out of the dough, patting down the scraps until all of the dough is used.

  6. Place biscuits together on a backing sheet. It helps them to rise if they are touching.

  7. Bake biscuits for 10-15 minutes. Once they begin to brown on top check them by pulling one away to see if they are baked through.

These are perfect topped with Chicken Fried Seitan, vegan butter, jam, jelly, or tofu scramble. 

IF you like this recipe, then try these:

Vegan Angel Biscuits

Vegan Deluxe Biscuits and Gravy

The Jax Biscuit Sandwich