I love the smell of fresh bread baking, so tend to bake bread often. This bread in particular is so simple and yields 2 nice big loaves. I like to bake some up on the weekend and have fresh bread throughout the week. You can also easily freeze the loaves you don’t use for later.
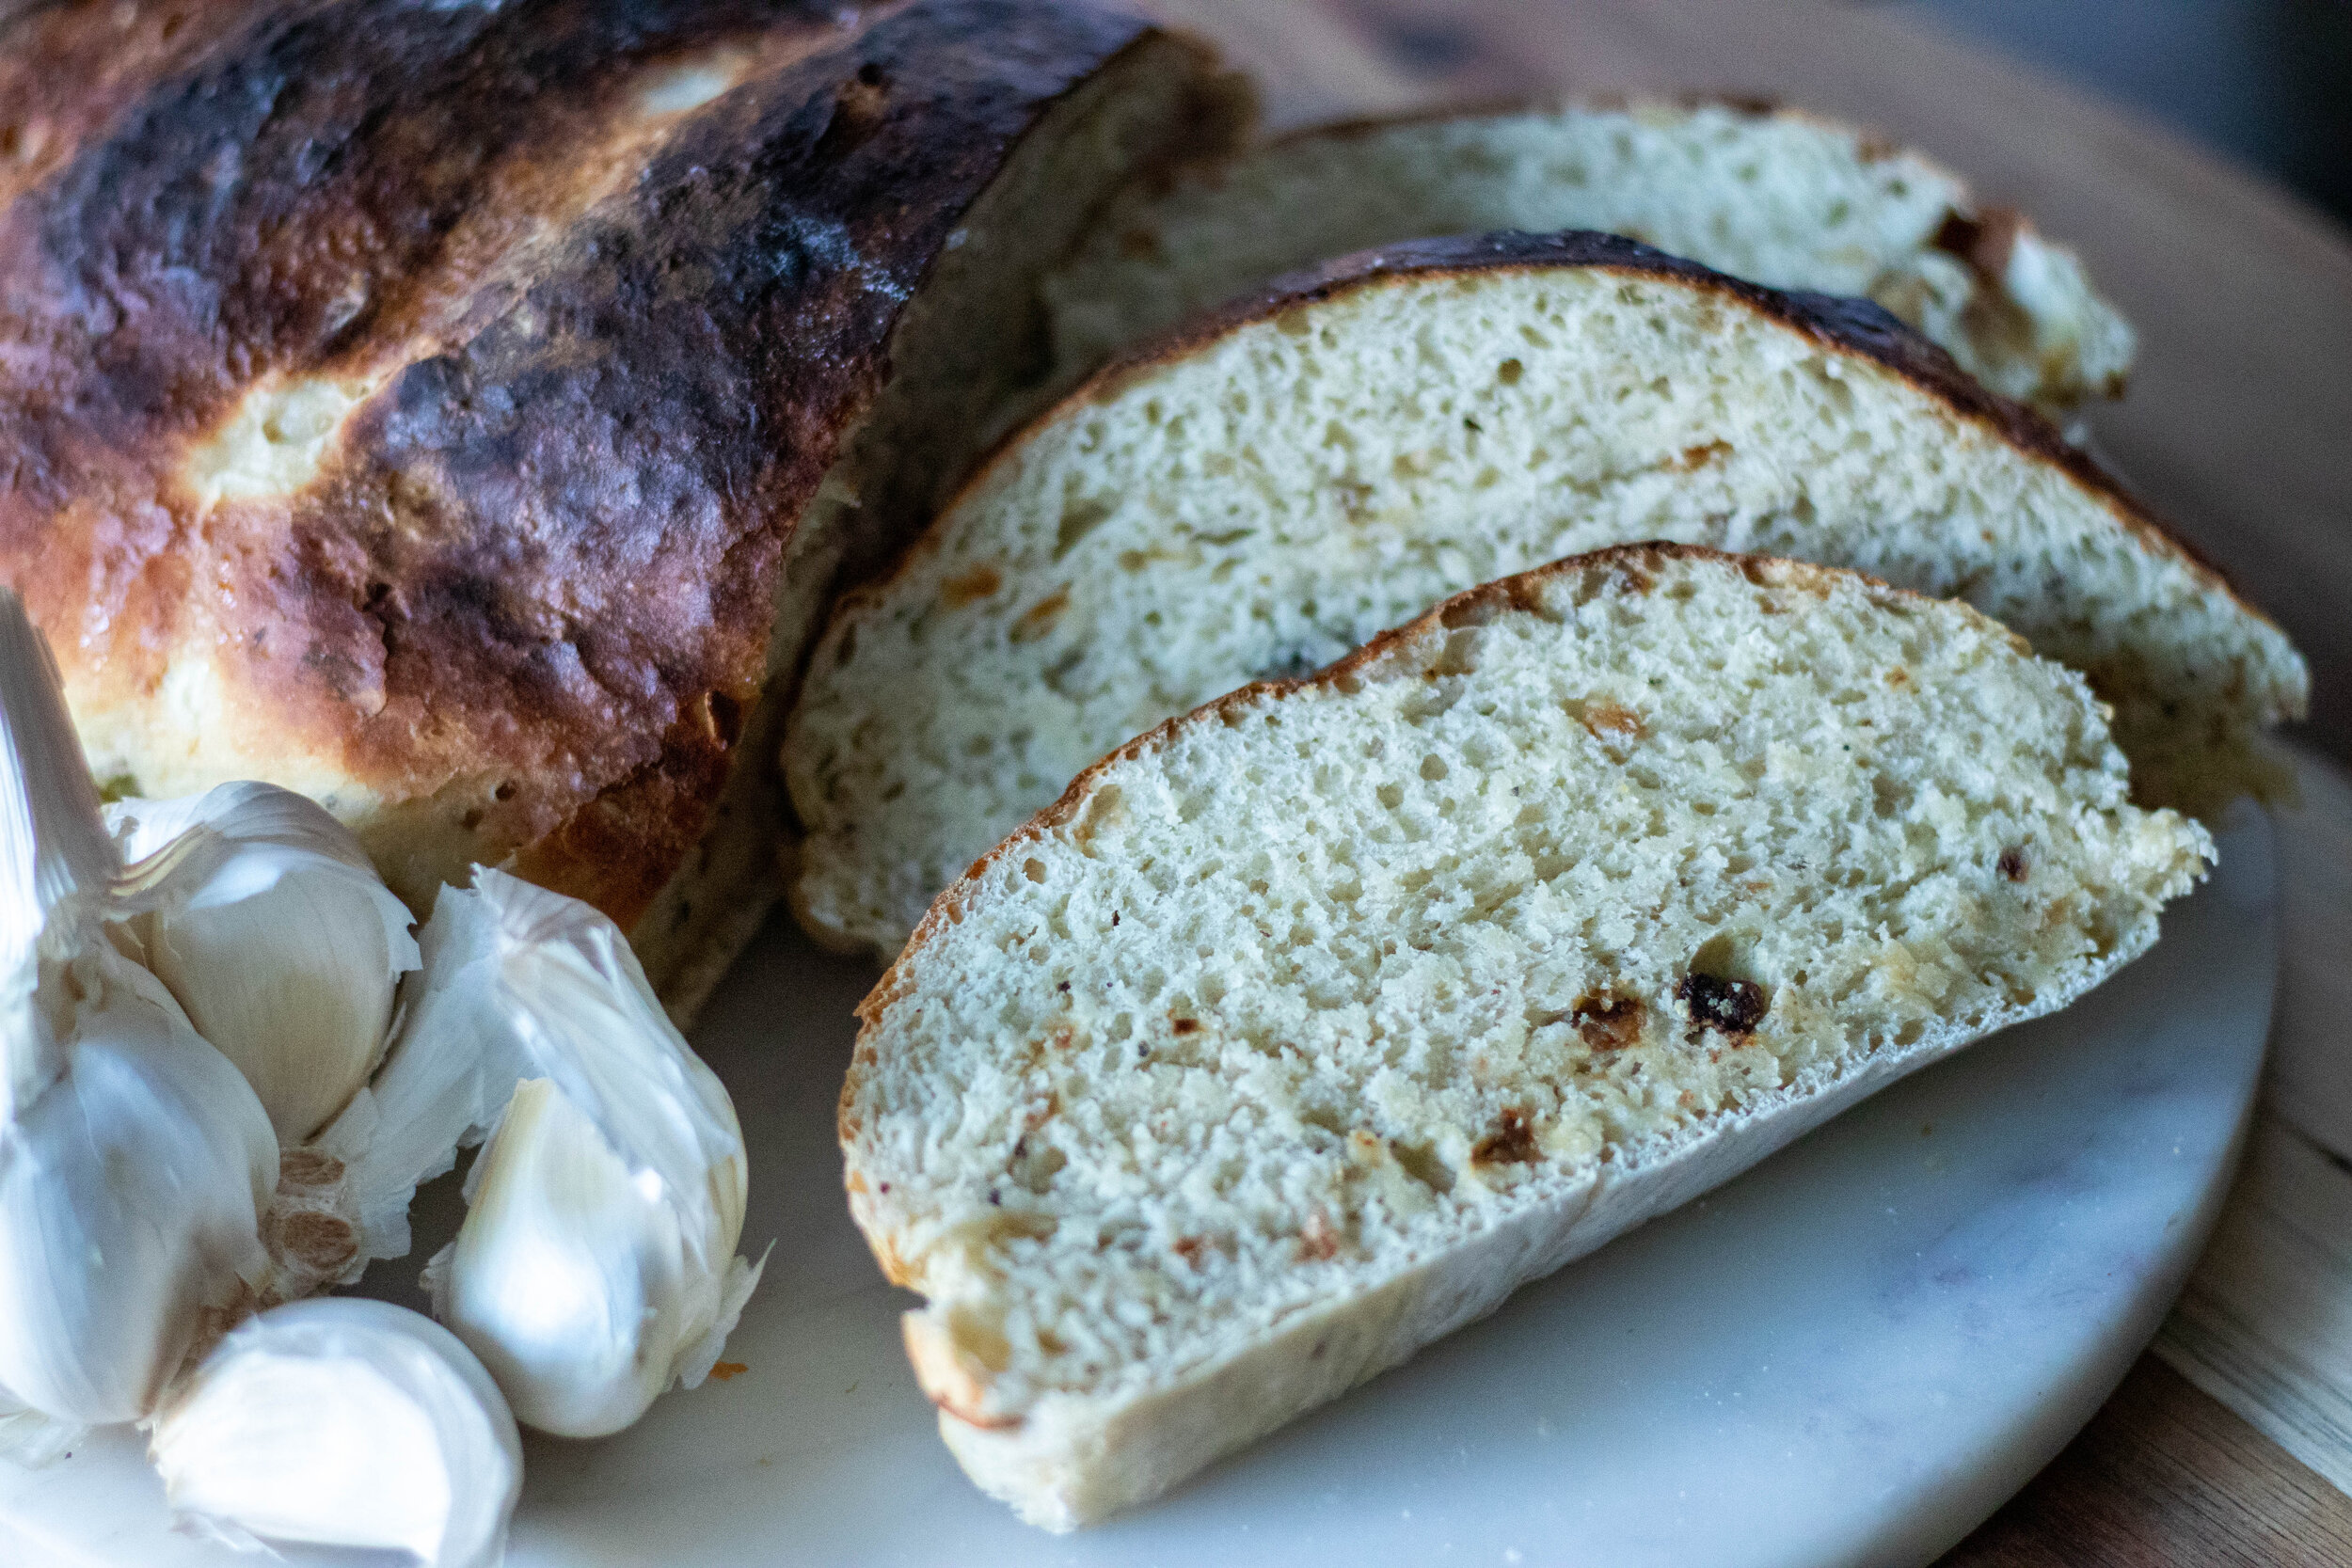
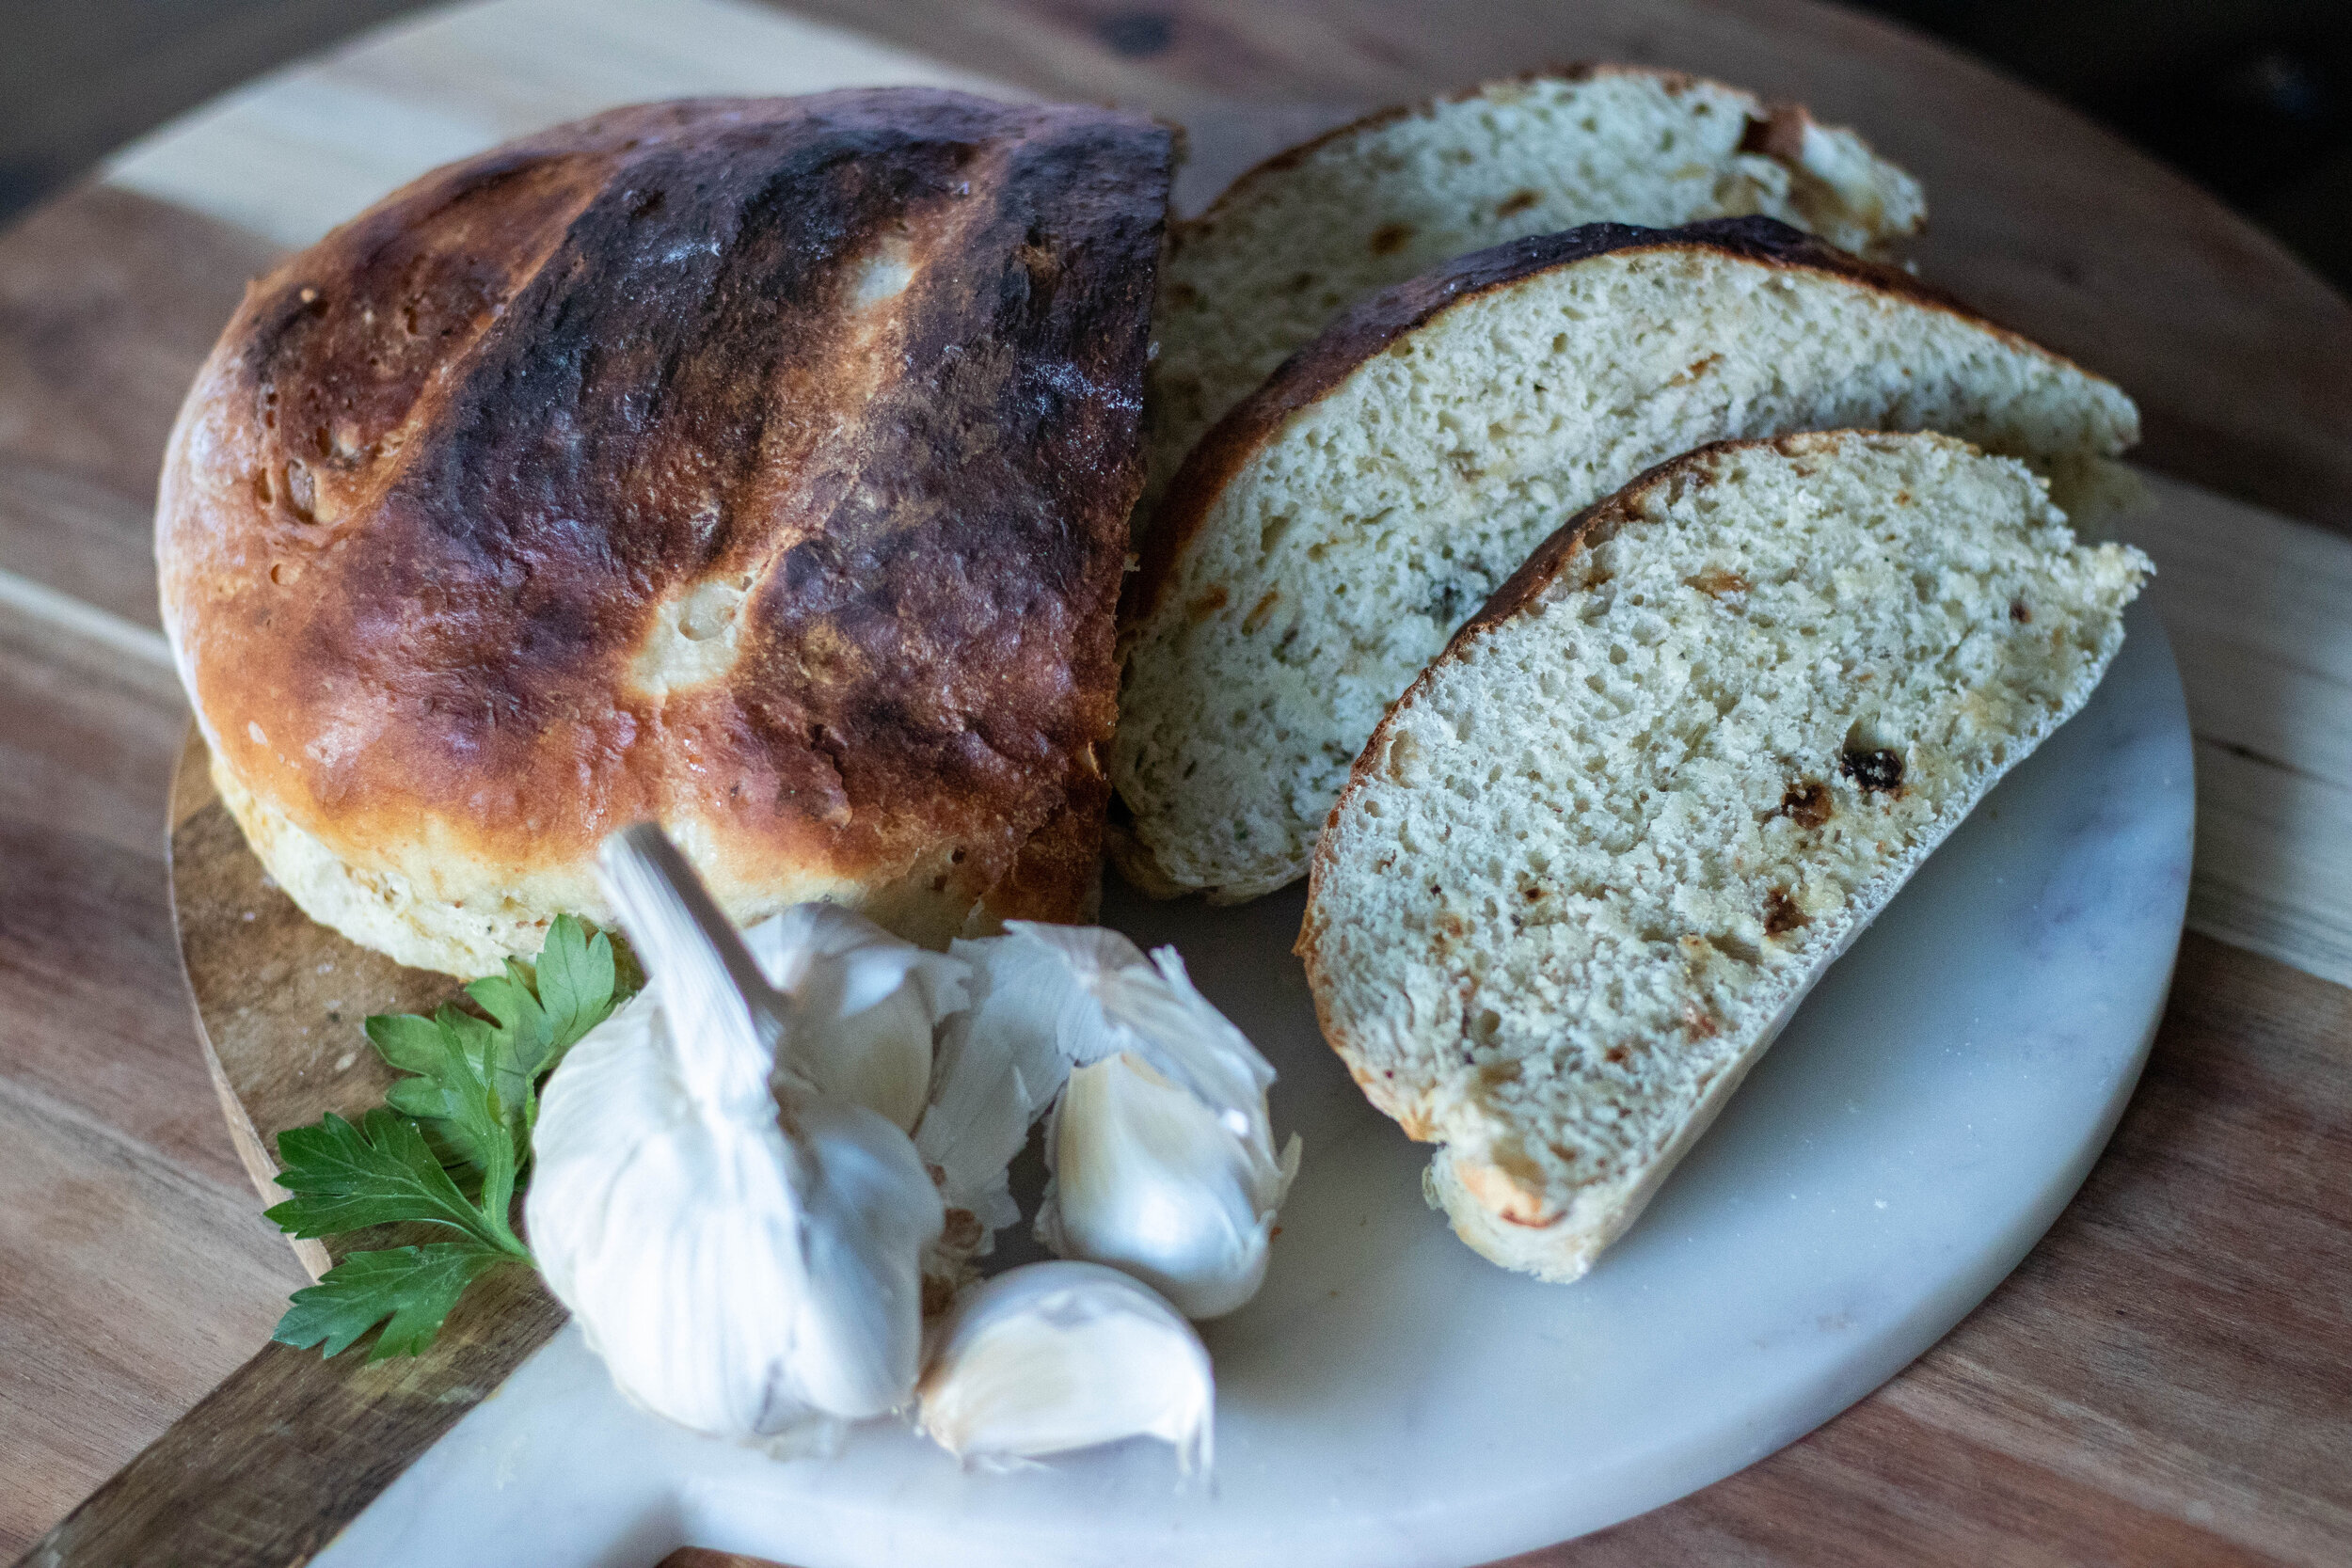
We decided to add herbs and fresh roasted garlic cloves to the dough for a perfectly savory, flavorful, quick and easy artisan bread. If you are new to bread baking, this recipes is so simple, so don’t be afraid to give it at try. Once you start baking your own bread, there is no turning back!
You can either peel your own garlic (warming it’s a lot) or look for a bag of pre-peeled fresh garlic cloves in the produce section of you local grocery store. I can always find the 6oz bags and just to make it simple, I roast and add the whole bag. Roasting the garlic gives it a sweet flavor that is perfect for this bread.
For the herb blend we used Herbs de Provenc , which is just a blend of herbs including lavender, and I am a huge fan. if you don’t have any on hand, feel free to use whatever combo of herbs you like that will compliment the garlic. Thyme, rosemary, parsley, oregano, sage, fennel, whatever you are feeling! Or you can just use the garlic and noting else if you prefer. I promise it will still be delicious!
Don’t let bread baking intimidate you. Its actually very easy and this bread is one of the easiest! Nothing beats the taste and smell of fresh baked bread. Its far less expensive to bake your own as well so really you can’t lose.
Ingredients:
7 cups all purpose flour, plus extra for dusting
2 packets dry active yeast (or 5 teaspoons)
3 cups of warm water , around 100 degrees Fahrenheit
1 tablespoon salt
2 teaspoons Herbs de Provence
6 oz of peeled garlic cloves ( I buy a 6oz bag or already peeled cloves in my produce section)
Instructions:
Heat oven to 400 degrees. Place the peeled garlic cloves onto a baking sheet and pop them in the oven on the top rack for 15-20 minutes or until the garlic begins to brown and becomes fragrant. Allow to cool while you prepare the dough.
In the bowl of your stand mixer, or if mixing by hand, in a large mixing bowl, combine yeast, warm water, salt and flour, herbs, and garlic cloves. There is no need to allow the yeast to proof. If using a stand mixer, attach the dough hook and mix the dough for a few minutes. You do not have to allow it to knead for long. It will be a little stickier that other bread doughs you may have made. You may have to sprinkle the dough with a little extra flour to pull it out of the bowl. If mixing by hand, stir with a wooden spoon or your hands until the ingredients are well combined, then turn the dough out onto a clean, floured surface. Knead dough by hand for a few minutes.
Form the dough into a ball (again you may need a little flour on you hands to do this) and place it in a large, lightly greased bowl. Cover with plastic wrap and place in a warm place to allow the dough to rise, and double in size. This should take about one hour. I typically place mine inside of my oven (tuned off or set to a bread proof setting if you have one)
Once the dough has doubled in size, divided it into two equal pieces. The dough will be sticky so you will need to dust it, and your hands in extra flour to be able to handle it. Holdng a portion of dough in your hands, form a ball while rotating the dough, pulling and tucking the dough to the underside of the ball to stretch the dough on top. The top should be smooth and even, while the underside will not be so pretty. It does not have to be perfect, you are just trying to make a nice smooth oval shape out of the dough. Dust more flour on the top, and using a sharp knife make three slashes across the top of the dough. The flour will make it easier to cut through the sticky dough. Place the finished dough on a piece of parchment paper on top of a cutting board. Repeat with the other 2nd portion of dough.
Preheat your oven to 450 degrees with one rack in the center of the oven, and one rack at the bottom. Place a few baking sheets, or baking stones in the oven as it heats. You need to be able to fit the three loaves on whatever pans you choose, so keep that in mind. On the bottom rack place a shallow baking pan or jelly roll pan. It just needs to be deep enough to hold 1 cup of water.
Once the oven is done heating, carefuly slide the dough and parchment paper off of the cutting board, onto the heated pans. Then carefully add 1 cup of water to the pan you placed on the bottom rack of the oven. Quickly close the oven. The steam from the water will help crisp the bread.
Let the bread bake for about 30 minutes. Once it is browning on top, and sounds hollow when you tap the top, it’s done.
Allow the loaves to cool. You can freeze the bread in a large freezer bags if not using right away.