vegan cheese

Vegan Pimento Cheese Deviled Eggs

vegan pimento cheese deviled eggs 1

I love deviled eggs.

Pre vegan they were seriously one of my most favorite things.

And, I am pretty sure my mom or aunts could win any deviled egg making contest there ever was.

I can not remember a single family holiday or get together that did not include a plate of deviled eggs.

Pretty early on in our crossover to a vegan diet, I discovered the magic of agar agar powder, and the mind blowing magic of vegan deviled eggs.

vegan pimento cheese deviled eggs 2

Just about all recipes out there use the same base. Vegan milk, agar, and Kala Namak, sulfur salt. The salt and agar come together to make a realistic looking, tasting, and even smelling egg!! Kitchen science at its finest!!!

Before you ask if you can skip the salt, let me tell you it is the ingredient that makes these vegan eggs taste and smell like eggs. I strongly recommend you find some at a local spice shop, or click the link I provided and order some online. It is a vegan egg game changer. I use it in my tofu egg salad, tofu scramble and even sprinkle it on my Just Eggs.

To make a traditional vegan deviled egg I use tofu as the filling and it works amazingly. I have served vegan deviled eggs to so many non vegan friends and family who truly could not believe they were not a real egg!! And that is exactly what you want when veganizing/replicating any classic recipe!

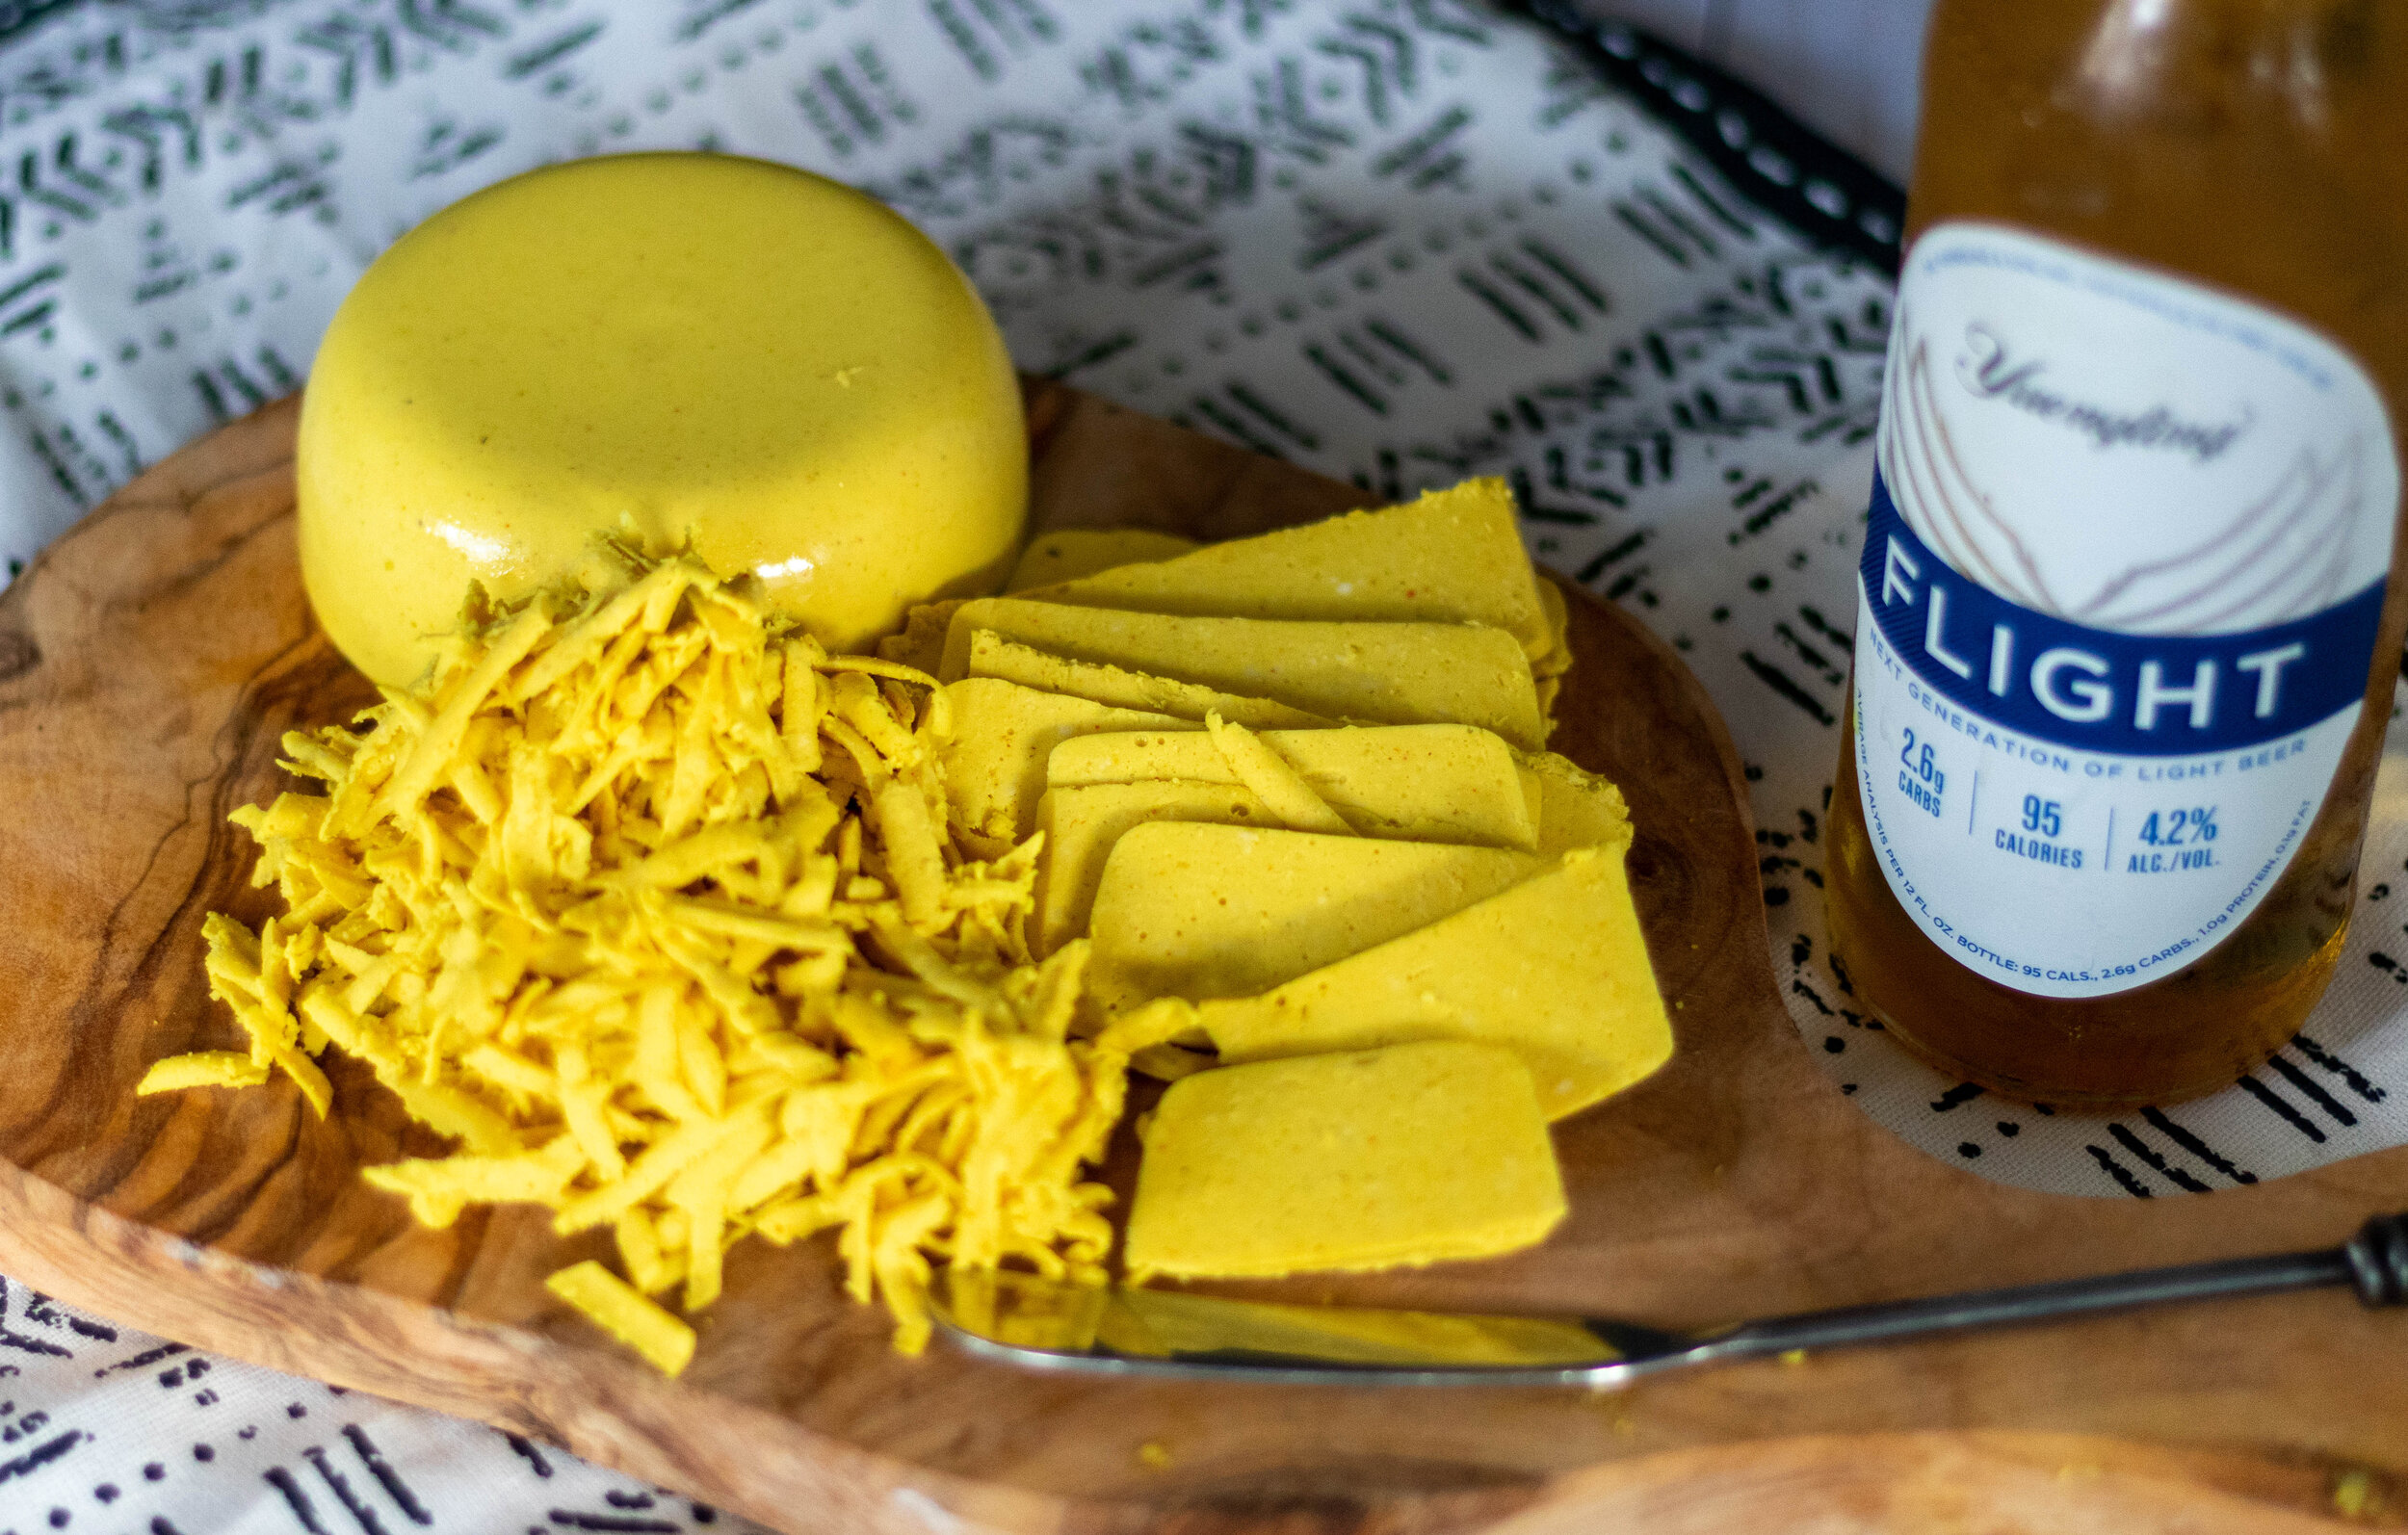
In the south, pimento cheese is just as much of a pot luck staple as a deviled egg is.

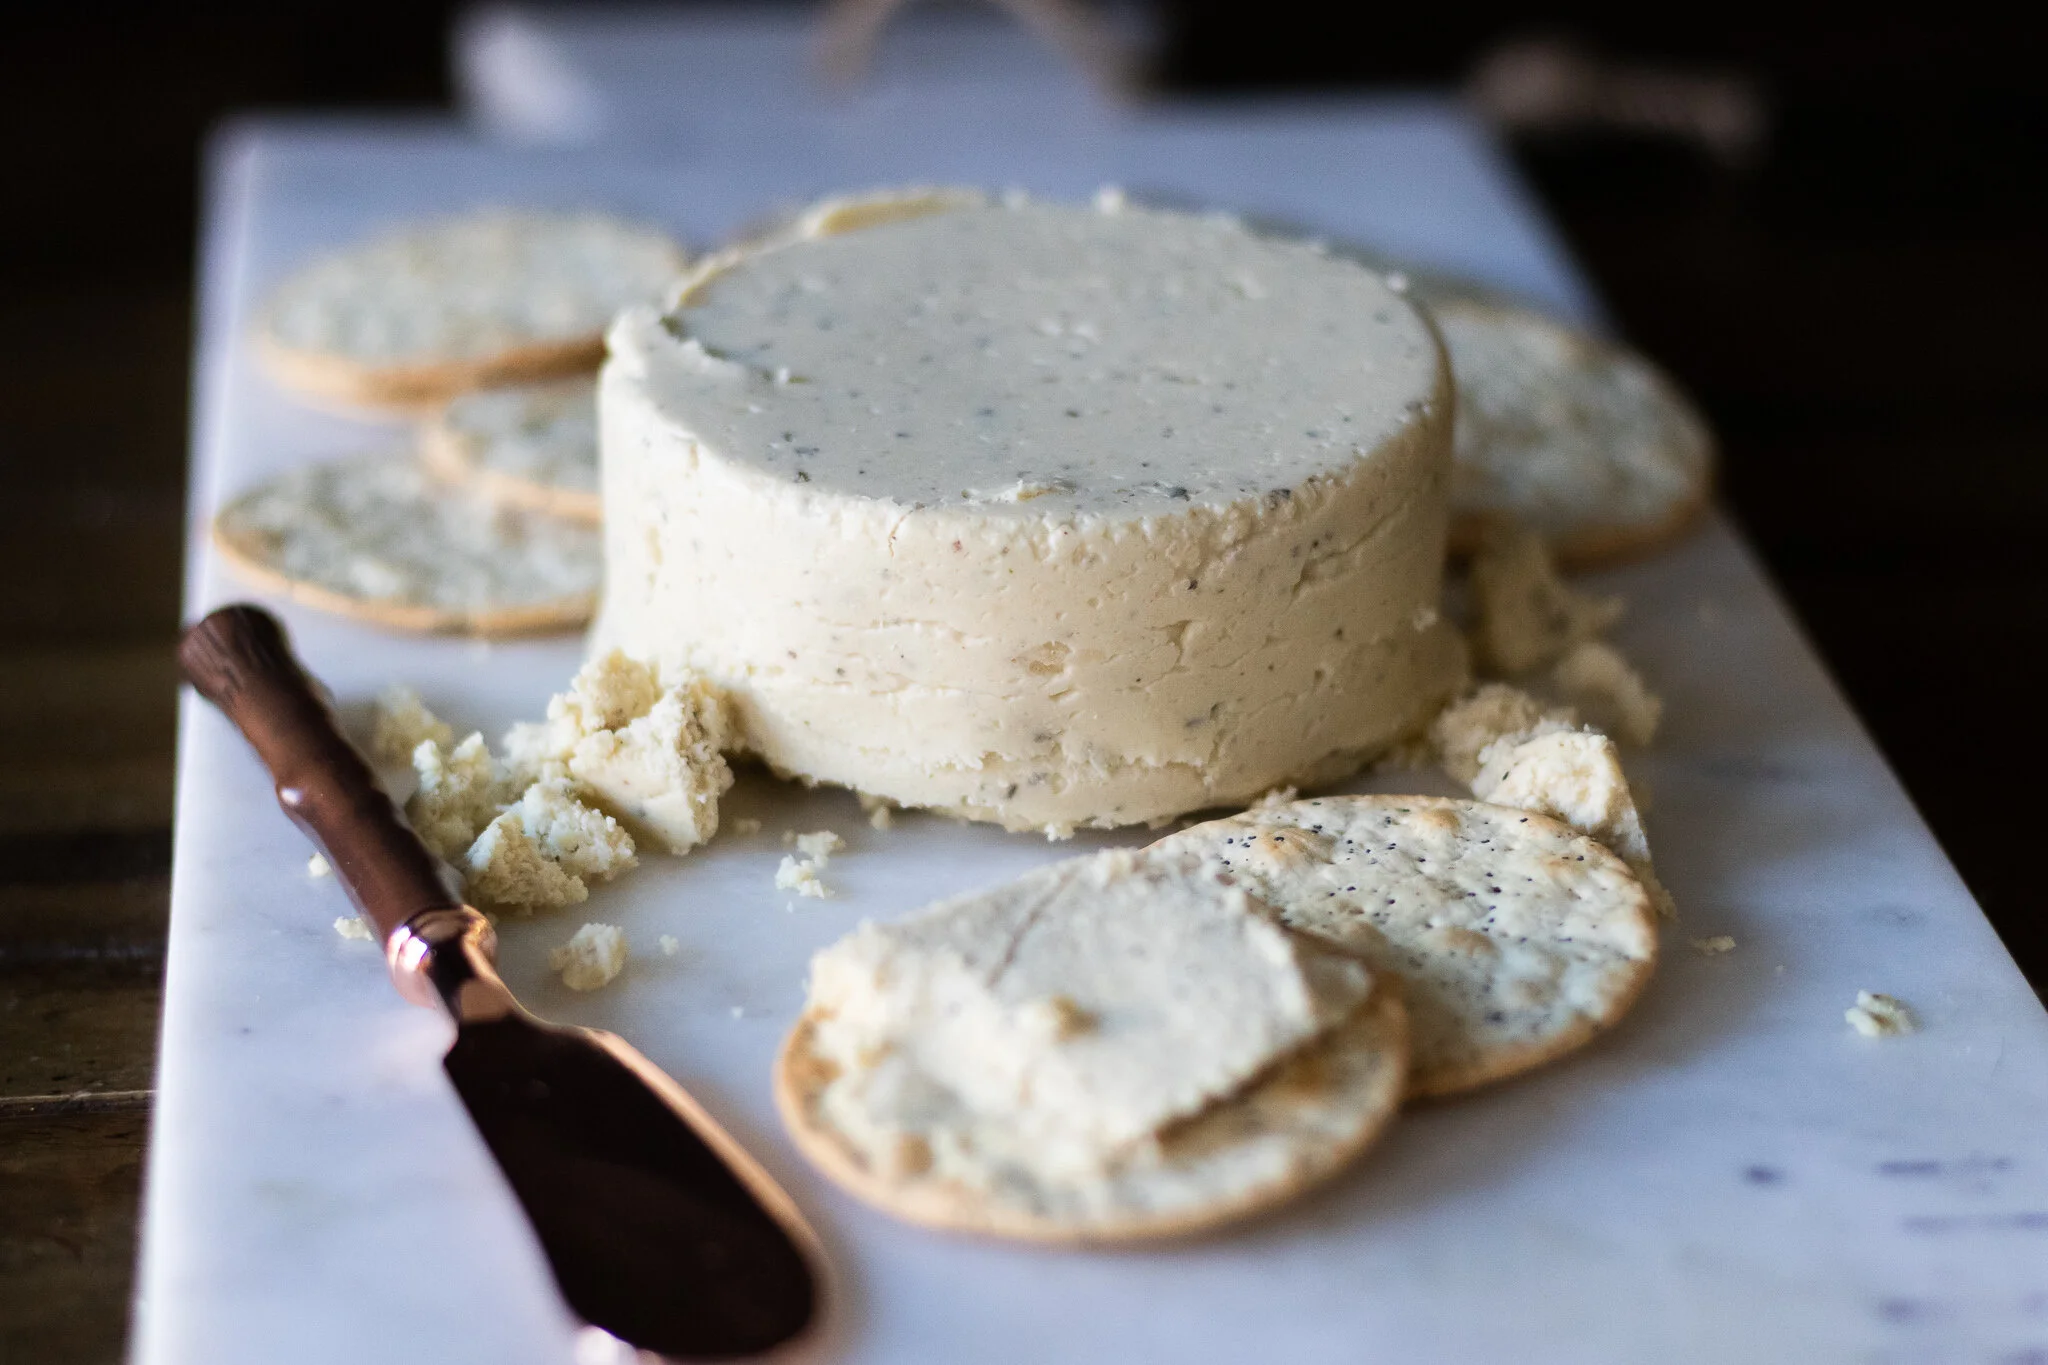
I whip up a batch of vegan pimento cheese just about every week for sandwiches, or snacking with crackers and raw veggies.

vegan pimento cheese

Vegan pimento cheese deviled eggs are also an already pretty popular southern staple, so I am not sure why this one took me so long!!

When I decided to make these I was a little stumped on the filling. Did I want to add some of my original deviled egg filling to the pimento cheese mix or just the cheese?

I decided nope to the original filling, it didn’t need it. I could just add some Kala Namak to the pimento cheese mixture to give it a nice eggy kick, and be done with it!

vegan pimento cheese deviled eggs 3

These vegan pimento cheese deviled eggs are delicious, actually really easy to make, pretty, and once again would probably fool even a non vegan.

I mean talk about party tricks! Bring a tray of these to your next party, or pot luck and you will quickly be known as everyones favorite vegan magician!


INGREDIENTS:

EGG WHITES:

  • 2 cups unsweetened almond or soy milk

  • 1 tablespoon agar powder ( we use this brand)

  • 1/4 teaspoon Kala Namak

PIMENTO CHEESE:

  • 1/3 cup vegan cream cheese, homemade or store-bought

  • 2 tablespoons of vegan mayo

  • 2-3 table spoons diced pimentos, drained

  • 1/4 of a small onion diced

  • 1/2 teaspoon garlic powder

  • 1 teaspoon all purpose greek seasoning (optional)

  • 1/2 teaspoon dried mustard

  • 1/2 to 1 teaspoon Kala Namak salt (add a little at time and give it taste to make sure the flavor is not over powering. A little goes a long way)

  • salt and pepper to taste

vegan pimento cheese deviled eggs 4

INSTRUCTIONS:

You will either need a silicon egg mold or a deviled egg serving tray, the kind with egg shaped divots, to form the egg whites. If you use the serving tray the eggs will be pretty shallow, but it still works.

  1. Prepare the pimento cheese by mixing all of the ingredients in a medium bowl until well combined. Give it a little taste and add more Kala Namak if you feel like it needs it.

  2. In a small sauce pan, whisk together almond milk, agar, and Indian black salt. Heat the mixture over medium heat until it comes to a simmer, then remove from the heat.

  3. Transfer the mixture to a pyrex, or glass bowl, and allow to cool on the counter top. Let the mixture sit until it appears to be thickening but is still liquid, and pourable, stirring occasionally. I have found if you pour the mixture into the molds too soon, while it is still very hot, the milk solids will separate and sink to the bottom, and the water will be left at the top. This is not an appetizing egg!

  4. Once the mixture is ready, pour it into the eggs molds and pop them in the fridge for about half an hour, or until they are nice and solid.

  5. Once the vegan egg whites are solid they should pop right out of the mold. Take a little spoon and carefully scoop out a divot from the center or the egg. This creates a little spot for extra pimento cheese to sit in.

  6. Fill each vegan egg white with a few teaspoons of vegan pimento cheese. Garnish with a little dried parsley or dill to serve.

  7. Store leftovers in the refrigerator for about 3-4 days in an airtight container.

If you like this recipe, then try these:

vegan pimento cheese deviled eggs 5

Vegan Cheese, Bacon, and Jalapeño Stuffed Bread

IMG_8524.jpg

Bread, check.

Vegan cheese, check.

Vegan bacon, check.

A little spice, check.

To sum it up, this is a perfect meal in my opinion.

I love carbs, I love vegan cheese, I love bacon, and I love a little pepper spice to top it all off.

I recently saw a similar thing done, but it was not vegan. But like most things, you can easily make it vegan and not be left out of the stuffed cheesy bread party. I mean anything they can make we can make vegan these days.

I started with a loaf of artisan bread and sliced it up to create little pockets for the filling. Then mixed up the vegan cheesy, gooey, filling and piped it right in. Easy peasy. Then sprinkled some more vegan cheese on it and baked it right up until it was bubbly, and gooey and crispy and ready to shove in my face.

I actually made this for lunch for my kids and had leftovers the next day, but I think it would work well for a party, or movie night snack as well.

IMG_8535.jpg

If you are not into vegan bacon you could always slice up some vegan pepperoni and dip the bites into some marinara! Then it would basically be pizza bread. I mean come on! I would eat that all day. I would dip it just they way it is in marinara because I love red sauce.

You can buy some vegan cheeses at the store or check out the site from homemade versions of all the cheeses you need to make this vegan stuffed cheesy bread.

And if you are not a fan of spice, leave out the peppers. You do what you want to do here. Your bread, your rules.

IMG_8529.jpg

INGREDIENTS:

  • 1 round artisan bread loaf, store-bought or homemade

  • 10-12 slices vegan bacon, I used lifelight

  • 1 (8 oz) container of vegan cream cheese, or 8 oz homemade

  • 1/2 cup vegansour cream

  • 1-2 teaspoon minced garlic

  • 1 teaspoon onion salt

  • 3 tablespoons vegan mayo

  • 1 cup shredded vegan cheddar cheese

  • 1 cup shredded vegan mozzarella cheese

  • 1 jalapeño seeded and finely diced

INSTRUCTIONS:

Preheat oven to 400 degrees

  1. Finely dice the bacon and cook it unit crispy in a small skillet. Let it cool.

  2. Cut the round bread loaf in a cross hatch pattern as deeply as you can without cutting through the bottom. I suggest using a sharp serrated knife. Place on a baking sheet lined with parchment paper.

  3. In a medium bowl mix the garlic, cream cheese, mayo, sour cream, bacon, jalapeños, and half a cup of each shredded cheese.

  4. Fill a piping bag, or zip lock bag with one corner tip cut off, with the cheese mixture. Pipe the mixture into each opening you cut in the bread, making sure to try fill each gap fully with the mixture.

  5. Sprinkle the top of the bread with remaining shredded cheese.

  6. Bake on the middle rack for 20- 25 minutes or until all of the cheese is gooey, bubbly, melty. Garnish with extra pepper slices and bacon if you like.

If you like this recipe, then try these:

IMG_8531.jpg

Sliceable Vegan Beer Cheddar

IMG_8242.jpg

I love vegan cheese. All kinds of vegan cheese.

I also love beer. All kinds of beer.

In the summer months when I am too hot and lazy to cook, I could live off of vegan cheese and crackers, and maybe some raw veggies and fruit for good measure. Ya know, just so I don’t feel guilty and all that.

In the past I have made a beer cheese dip, and a beer cheese and potato soup so that I could combine my two of my favorite things. But its far too hot right now in Florida for soup.

So that got me thinking, why not just make a sliceable vegan beer cheese so I could eat it as a summer meal or snack, with a nice cold beer. Like, seriously, what took me so long for this one.

So I did just that. I made an easy quick set, agar cheddar, with cashews and my favorite light lager, Yuengling Flight. And don’t judge my love of light beer, at 95 calories, I’ll take it. It’s crisp and delicious, AND it’s still swimsuit season, so gotta watch it. I eat a TON so can’t be drinking all my calories.

This vegan beer cheese is good on cracker, nachos, in beer cheese soup if its not summer and as hot as the surface of the sun where you live, it would make a tasty quesadilla, grilled cheese, and would probably be good on pizza, too.

Agar firms up starting at room temp and will firm up more once cold. It also melts back down once it gets warm as does coconut oil, and that’s why we use it. I am often asked if another oil will work in these cheese recipes, and they will not. You need an oil that solidifies once cold to help the cheese set up nice an firm. Agar on its own has a more gelatinous texture. So it needs a little help from its coconutty friends. If you use filtered or refined coconut oil, there will be NO coconut flavor. So make sure you do that.

Also if you can not eat cashews or want to save a few bucks, sunflower seeds will work in this recipe as well. Same measurements, same instructions!

So if you love cheese and beer, then just go ahead and make yourself a batch of this magic! And just go ahead and drink the leftover beer while you wait for the cheese to set up. No judgments here!!

IMG_8233.jpg

INGREDIENTS:

  • 1/2 cups plus 2 tablespoons dry cashews (or sunflower seeds)

  • 1/4 cup nutritional yeast

  • 1/2 teaspoon garlic powder

  • 2 teaspoons paprika

  • 1 teaspoon ground turmeric

  • 1 teaspoon salt

  • 1 cup lager beer

  • 3/4 cups unsweetened plant milk

  • 2 tablespoons agar powder

  • 1/4 cup triple filtered coconut oil

  • 2 tablespoons sauerkraut

IMG_8232.jpg

INSRUCTIONS:

  1. In a food processor add the cashews and pulse until broken down. Next add the nutritional yeast, salt, garlic, paprika, sauerkraut, oil, and turmeric. Blend until the ingredients are combined. DO NOT OVER PULSE. You don’t want to end up with cashew butter.

  2. In a medium sized sauce pan, combine beer, milk, agar, and bring to a boil. Reduce heat and simmer for 5 minutes. You want the mixture to thicken to a thin pudding like consistency. Because of the beer, the mixture is going to pretty foamy and bubbly. Thats ok. As long as it simmers for about 5 minutes it will be fine. Just keep stirring with rubber spatula.

  3. Add the liquid mixture to the nut mixture in the food processor and blend. Mix for a few minutes until all of the ingredients are well incorporated, and smooth.

  4. Pour the cheese mixture into 2 - 3 ramekins or small bowls, and let cool uncovered in the refrigerator for serval hours to firm up.

  5. Store in an air tight container for up to one week in the refrigerator.

If you like this recipe, then try these:

IMG_8247.jpg

Easy Vegan Cream Cheese

Easy Vegan Cream Cheese

Give me all the vegan cream cheese!

I love bagels, I love cheese cake, I love cream cheese danish, I love cream cheese frosting.

I can not imagine a world where I can not eat cream cheese!

This being said, vegan cream cheese can be expensive. I have a few brands I love, but I do not love the price!

I have made several variations of vegan cream cheese over the years and have never been too impressed. I mean, plenty of the recipes I tried might have tasted fine, but if they were cashew heavy, I wasn't saving a whole lot of money making my own. If they were tofu based, they tasted too much like tofu to me.

So fast forward to now, and me trying to fall asleep, but being distracted by planning out my next morning’s breakfast. Yes, this is something I do most nights…go to sleep thinking about what I will eat when I wake up. It’s a problem….Anyways, I was thinking about a carrot lox ( carrot lox is sooo easy by the way, follow the link to our simple but delicious recipe) bagel and vegan cream cheese, except it’s Passover at this moment and I can’t have a bagel. So I settled on a carrot lox matzah BUT it is also currently a pandemic, and I have not found vegan cream cheese at a store in weeks. The odds were stacked against me here.

BUT, I had a thought! I could wake up and try a NEW vegan cream cheese recipe idea. I could take the parts I like about different brands and different recipes of cream cheese I have liked, and try to make a perfect homemade cream cheese that won’t cost me an arm and a leg!!!

I decided to MIX cashews and tofu. I could get the cheesy, creamy element from the nuts but use way less, and I could get the texture that I like the tofu without it being all tofu. Surely it would work!!

And it did! This cream cheese is better than any other I have tried to make, in my opinion. I used like a quarter of the nuts I used to use when making just a cashew based cream cheese, and the nuts mixed with the tofu cut the raw tofu flavor, while yielding a perfect texture!

If you allergic to nuts you can sub out the cashews with sunflower seeds! This works well in just about any cashew cheese recipe!

I also add sauerkraut because y’all, I add it to almost all of my vegan cheese. It is a really easy and healthy way to give your vegan cheeses a fermented, tangy kick. Trust me with this. Once you try it, you will ALWAYS add sauerkraut to all of your vegan cheeses. Soft cheese, hard cheese, cheese sauces. Just start looking at sauerkraut as a vegan staple. Even if you would never eat it on its own, its a vegan cheese secret weapon.

So if you have been looking for an easy and delicious vegan cream cheese recipe, I think I have all you need right here!! I do hope you love it as much as I do.

Easy Vegan Cream Cheese Ingredients

INGREDIENTS:

  • 1 block super firm tofu, 16oz (the the kind that is vacuum sealed in little water)

  • 1/2 cup cashews or sunflower seeds if you have an allergy

  • 2 tablespoons sauerkraut, not the juice

  • 1-2 tablespoons apple cider vinegar

  • 1/4 cup refined/filtered coconut oil, melted

  • 1 teaspoon salt

  • 2 tablespoons nutritional yeast

Easy Vegan Cream Cheese

INSTRUCTIONS:

  1. Begin by adding the cashews to a microwave safe container. Cover the nuts in water and microwave on high for 3 minutes. If you do not have a microwave you will need to soak the cashews in water for at least a few hours. Drain the liquid from the microwaved/soaked cashews.

  2. You will need a high speed blender, or a food processor for this recipe. Add all of the ingredients to the blender or processor. Blend on high, using your blender’s plunger to move the ingredients around, or use a rubber spatula to scrape down the sides serval times during the process to make sure everything is getting nice and blended up. Depending on the machine you are using, the amount of time you need to blend will vary. The goal is a nice creamy and smooth consistency. I use a vitamix and it takes several minutes. I use the plunger pieces to keep pushing the ingredients down into the blender and moving them around. I also pause the blending several times and scrape down the sides.

  3. Taste the mixture. If you want it to have more tang you can add another teaspoon or so of vinegar.

  4. Store the cream cheese in an airtight container in the fridge for up to a week. You can also freeze this cream cheese.

  5. You can mix in diced green onions or chives, diced berries, cinnamon and a few pinches or sugar, anything you like!

Easy Vegan Cream Cheese on Matzah

If you like this recipe, then try these:

Vegan Pimento Cheddar Cheese with Coconut Milk

Vegan Coconut Cheddar Cheese with Coconut Milk

I love experimenting with different vegan cheese flavors and bases. I really love using coconut milk because it’s easy and affordable.

I am often asked if these cheeses have a strong coconut flavor and the answer is, not really. I always used refined coconut oil which has little to no coconut flavor at all, and all of the spices and other ingredients in the cheese mask the flavor of the milk very well.

I love to make homemade pimento cheese and often do! I have always just made a vegan cheddar using coconut milk to make it, or in a pinch have bought some vegan cheddar shreds. BUT, how much more delicious is my pimento cheese spread now going to be when I use this vegan pimento cheddar to make the spread!! Double pimento and double delicious.

We added jarred red peppers to our recipe and can be used interchangeably with pimentos if you do not have any on hand. I normally have one or the other and just use what I have.

This is a quick set cheese and is so simple to make, there is no reason to keep overpaying for store bought vegan cheese! You can have delicious vegan cheese, start to finish in about 2 hours, and for a quarter of the grocery store price!

Vegan Pimento Cheddar Cheese with Coconut Milk

INGREDIENTS:

  • 1 can full fat coconut milk

  • 2 tablespoons agar powder

  • 2 teaspoons light miso paste

  • 2 tablespoons apple cider vinegar

  • 1 teaspoon salt

  • 1/4 cup plus 1 tablespoon nutritional yeast

  • 1 teaspoon turmeric

  • 2 teaspoons smoked paprika

  • 1/4 cup diced red jarred red peppers or pimentos

  • 1/4 cup refined coconut oil

INSTRUCTIONS

  1. If using a jarred red pepper, remove a piece from the jar and pat it with a paper towel to remove some of the liquid. Next coarsely chop the pepper. If using pimentos, line a bowl with paper towels and put the 1/4 cup pimentos in the bowl to try and draw out some of their liquid.

  2. In a food processor or high speed blender, add all of the ingredients EXCEPT the milk, and agar and peppers/ pimentos.

  3. Pulse a few times to mix it all up.

  4. Add the milk, and agar to a medium sauce pan and bring to a boil. Reduce heat and simmer until mixture thickens to the constancy of a thin pudding. This only takes a few minutes.

  5. Add the milk mixture to the ingredients in the food processor, and mix for about a minute.

  6. Drop the peppers/ pimentos int the mix and process for a minute until they are all chopped up and incorporated. The mixture will quickly begin to thicken as agar begins to solidify at room temperature.

  7. Transfer to the mixture to several small bowls or cheese molds. I can fill three small bowls with this recipe.

  8. Allow the cheese to harden in the refrigerator uncovered for a few hours.

  9. Store in an airtight container in the fridge for about a week or so.

  10. This cheese will shred and make a pretty tasty pimento cheese spread!

Vegan Pimento Cheddar Cheese with Coconut Milk

If you like this recipe, then try these:

Vegan Pimento Cheddar Cheese with Coconut Milk

Vegan White Stilton with Peaches

Vegan White Stilton with Peaches

I make a lot of vegan cheese. It’s easier than most people think, fairly quick, and really affordable to make your own.

All you need are some basic ingredients that you can find at your local super market, plus some agar agar powder. Agar is a vegan gelatin make from seaweed and what is used to solidify the cheese. You can find agar on amazon, or your local Asian food store. It is also pretty inexpensive for the amount of cheese you will get from one bag!

Although vegan cheese options have come a long way over the years in super markets, I can still only find flavors like cheddar, mozzarella, and a few varieties of cheese slices.

If you are like me and miss more artisan style cheeses, you best bet is to start making your own! Like this vegan peach stilton!! I used to impatiently wait for Trader Joe’s to put out their seasonal stilton’s, peach being my most favorite. Traditional Stilton is a milder cheese and a little crumbly. It often is made with different fruits. I personally love the subtle sweetness of the peaches mixed with the tanginess of the cheese. Its perfect for snacking with crackers or adding to a salad.

Recently my friends Brad and Mike ( you will be learning more about them very soon as we have a super fun project in the works for the site) gave us a a jar or homemade spiced peaches. I think there was some kind of booze in the jar along with some delicious fall spices. I was told not to open them for several more weeks, so they found their way to the back of my pantry and were forgotten about. So when I finally found them again recently, I knew exactly what I was going to make with them!!

You can use any canned or jarred peaches you can find. You just need two halves. They are normally canned that way. You could also substitute the peaches with pears very easily if you are not a fan of peaches.

Listen, don’t let a new or unfamiliar ingredient intimate you! This cheese is so quick and easy to make and pretty fool proof! You will be so amazed at how easy it was to make and how delicious home made vegan cheese is! And if you are on the fence about making a fruity cheese, don’t be. It is soooooo good!! Hooray for Stilton and thanks Trader Joe’s for your never ending inspiration!

Vegan White Stilton with Peaches

INGREDIENTS:

  • 1 can of full fat coconut milk or cream

  • 2 tablespoons agar agar powder

  • 1 tablespoon lemon juice or apple cider vinegar

  • 2 teaspoons miso paste

  • 1 teaspoons of salt

  • 1/4 cup nutritional yeast

  • 2 tablespoons tapioca starch

  • 1/4 cup sauerkraut (no juice, just cabbage)

  • 1/4 melted cup refined coconut oil

  • 2 halves of jarred or canned peaches ( we used homemade canned spiced peaches)

Vegan White Stilton with Peaches

INSTRUCTIONS:

  1. In a food processor or high speed blender, add all of the ingredients EXCEPT the milk, agar, and peaches.

  2. Pulse a few times to mix it all up.

  3. Now add the milk and agar to a medium sauce pan and bring to a boil. Reduce heat and simmer until mixture thickens to the consistency of a thin pudding.

  4. Add the milk mixture to the ingredients in the food processor, and mix for about a minute. The mixture will quickly begin to thicken as agar begins to solidify at room temperature.

  5. Use a paper towel to pat off as much liquid from the peaches as you can. Finely dice the peaches and fold them into the cheese mixture with a rubber spatula. Don’t blend them! It will mince them up too much.

  6. Transfer to the mixture to a few ramekins or small bowls. You should be able to fill 2 or 3 small bowls.

  7. Place bowls uncovered in the fridge for a few hours, or until the cheese has fully hardened and is a sliceable consistency.

If you like this recipe, try these:

 
Vegan White Stilton with Peaches

Creamy Vegan Cheddar Mac and Cheese

Creamy Vegan Mac n Cheese

Who doesn’t love Mac and Cheese?!?!? If you don’t, then maybe this is not the recipe blog for you after all, and you should move on. Ok, I’m kidding, please don’t leave, just maybe you should give vegan Mac and Cheese another try.

Maybe you just tried a bad recipe. This recipe is not bad. This recipe is creamy, smoky, and gooey. It’s vegan Mac and Cheese perfection. It’s quick and easy too.

If you happen to have an allergy or aversion to cashews, you can sub them out for 1 cup of sunflower seeds. If you don’t like a smoky cheddar as much, just cut back a bit on the paprika and skip the liquid smoke. I love smoky cheddar so I always add the smoke!

You can also pour this Creamy Vegan Cheddar Mac and Cheese into a casserole dish, top it with some vegan butter and bread crumbs and bake it at 350 for a about 20 minutes for the perfect baked Vegan Mac and Cheese.

Trust me, leave the boxed macaroni and cheese right on the grocery shelf where you found it, and go home and make this. its almost just a quick and about 10,000 times more tasty! I promise! Pinky promise, cross my heart, and all that jazz!


INGREDIENTS:

  • 1 cup cashews (plus water for heating)

  • 2 cups water

  • 1/3 cup sauerkraut, cabbage not juice

  • 2 teaspoons light miso paste

  • 1 tablespoon apple cider vinegar

  • 1 teaspoon salt

  • 1/4 cup tapioca or corn starch

  • 1/4 cup nutritional yeast

  • 1 1/2 teaspoons turmeric

  • 1-2 teaspoons smoked paprika

  • optional 1 teaspoon liquid smoke, if you want a smokier mac

  • 16 oz package macaroni noodle, I like to use the fatter ones with ridges to help hold the cheese

  • 1 tablespoon vegan butter

  • splash of plant milk, optional

Creamy Vegan Mac n Cheese

INSTRUCTIONS:

  1. Cook noodles according to packing instructions in a large pot. Drain, return to pot and mix in the butter. Set aside.

  2. Cover cashews in water and microwave on hight for three minutes or soak in hot water for serval hours. Drain.

  3. Add cashews and all remaining ingredients, including 2 cups of water, to a high speed blender or food processor.

  4. Process and blend on high until the mixture is completely smooth (no lumps at all).

  5. Transfer the mixture to a medium size pot and cook on medium heat, stirring with a whisk continually until the mixture thickens.

  6. Once the cheese sauce gets to a thick, almost stretchy, gooey consistency, remove it from the heat and pour over the mac. Mix well. If it seems too thick you can add a splash of plant milk. Reheat the mac and cheese on the stove top to heat the noodles back up and serve.

Creamy Vegan Mac n Cheese

If you like this recipe, try these:

 
Creamy Vegan Mac n Cheese

Baked Vegan Brie in Puff Pastry with Cranberries and Almonds

Baked Vegan Brie in Puff Pastry with Cranberries and Almonds

Brie baked in bread, or Brie En Croute, is one of my favorite ways to eat vegan brie! I mean seriously, it’s cheese baked inside of flakey puff pastry.

Carbs and cheese are my love languages, so this recipe speaks to me on all the levels. The vegan brie is cashew based and comes together rather quickly. It does however take some time to firm up in the fridge, so I suggest making the brie a day or two in advance if you are planning on making and serving this dish.

I used raspberry jam in this recipe but you can use whatever jam you like or even cranberry sauce.

This dish is beautiful and so tasty. This brie gets rather creamy and gooey once baked inside or the pastry and is delicious served with fruit or crackers. I like to just eat it with a fork, but maybe that would be frowned upon if serving at a party. Bwahahhaha, I’ll try to keep my manners in check.

I think this recipe would be beautiful and impressive for any holiday party or any gathering, or you can just make it for yourself, fork in hand and zero judgment!


INGREDIENTS:

VEGAN BRIE:

  • 1 cup unsalted, unroasted cashews (plus water for soaking)

  • 1 cup water

  • 1/3 cup refined coconut oil

  • 1/3 cup sauerkraut, without the juice

  • 1 tablespoon apple cider vinegar

  • 2 tablespoons tapioca starch

  • 2 teaspoons agar powder

  • 1 teaspoon salt

  • 2 tablespoons nutritional yeast

  • cheese cloth

BRIE IN PUFF PASTRY:

  • 1 puff pasty, Pepperidge Farm brand is vegan

  • 1 six inch round of vegan brie

  • 3 tablespoons raspberry jam

  • 1/4 cup dried cranberries

  • 1/4-1/3 cup sliced almonds

  • 2 tablespoons plant milk mixed with 1 tablespoon maple syrup

Baked Vegan Brie in Puff Pastry with Cranberries and Almonds

INSTRUCTIONS:

  1. For the Brie: Place cashews in a microwave safe container and cover in water. Microwave for 3 minutes. You can also cover in hot water, and let them soak for a few hours if you do not have a microwave.

  2. Drain cashews, and add them along with remaining ingredients to a high speed blender or food processor. Blend until COMPLETELY smooth. If you are using a food processor, add the nuts first and try to break them down a bit before adding everything else.

  3. Transfer mixture to a medium size sauce pan, over medium heat, and stir continuously until the mixture becomes thick and bubbly. This will only take a few minutes.

  4. Line a 6 inch cake pan, or similarly sized shallow bowl, with a piece of cheese cloth that is large enough that it hangs a good bit over the sides of the bowl. Pour the mixture into the bowl and cover with the excess cheese cloth that is hanging over the sides. Place in the refrigerate for at least 4 - 5 hours to allow cheese to firm up.

  5. Once the Brie is done, thaw puff pastry according to package instructions.

  6. Preheat oven to 350 degrees

  7. Roll puff pastry out into a 12 inch x 12 inch square on a floured surface.

  8. Smear the jam in the middle of the puff pastry square and place the wheel of brie on top of the jam.

  9. Place the dried cranberries and almonds piled up on top of the brie.

  10. Carefully take each corner of the puff pastry dough and fold it over the top of the brie. Just one corner at a time until the cheese is covered. Brush the top with the milk/maple mixture. This will help the puff pastry to brown. You could also just give it a light spray with some cooking oil.

  11. Place the brie on a baking sheet and into the preheated oven for about 25 minutes or until the pastry is golden brown and flakey.

  12. Allow the the brie to cool some before cutting into it . Serve with crackers and or fruit.

If you like this recipe, try these:

 
Baked Vegan Brie in Puff Pastry with Cranberries and Almonds

Sun-dried Tomato and Garlic Cheese with Coconut Milk

IMG_4944.jpg

If you have yet to dive into vegan cheese making, let me urge you to start right now! Seriously! It is not hard at all, errrr maybe I should say difficult because these agar cheeses are actually hard or firm enough to slice, or shred!! They also only take like 10 minutes to mix up and only a few hours to firm up in the fridge!

We use agar agar powder to solidify these cheeses. Agar agar is just a vegan gelatin made from a type of seaweed. Noting too weird, and it can be easily found online on Amazon or even in you local Asian food market. Don’t let an ingredient you may not be familiar with scare you off! Just get some, and keep some on hand. I promise once you make your first batch of vegan cheese, it wont be your last!

I love experimenting with different vegan cheese flavors and bases. I really love using coconut milk because it’s easy and affordable. Unlike nut cheeses were you have to soak nuts and own a pretty powerful blender or food processor to break them down, with coconut milk cheeses you simply have to open the can! And of course a can of coconut milk is way cheaper than cashews! Not to mention these cheeses are more allergy friendly.

Don’t get me wrong, I love a cashew based vegan cheese and have plenty of those recipes on the site as well, but most of the time I opt for for a coconut base because of how easy and affordable they are!

This cheese recipe will yield about 3 “wheels” of cheese depending on the size mold you use. So you can’t beat the price compared to store bought cheeses. You will often pay over $5 for a vegan store-bought cheese, where here you may spend $5 and end up with 3Xs what you would get for the same price at the store!

Making you own cheese at home also means you can make any flavor you can dream up. We have dozens upon dozens on the site if you are stumped for ideas. But really, there are soooo many options!

I am often asked if these cheeses have a strong coconut flavor and the answer is, not really. I always used refined coconut oil which has little to no coconut flavor at all, and all of the spices and other ingredients in the cheese mask the flavor of the milk very well.

I love this particular cheese because sun-dried tomatoes and garlic together are a favorite of mine. This vegan cheese will slice, shred, and even melt, making it perfect for serving with cracker, on sandwiches, salads, or just snacking! This is a quick set cheese and is so simple to make, there is no reason to keep overpaying for store bought vegan cheese! You can have delicious vegan cheese, start to finish in about 2 hours, and for a quarter of the grocery store price!


INGREDIENTS:

  • 1 can of full fat coconut milk or cream

  • 2 tablespoon of apple cider vinegar or lemon juice

  • 2 teaspoons miso paste

  • 1 teaspoons of salt

  • 1/4 cup nutritional yeast

  • 1/4 melted cup refined coconut oil

  • 2 tablespoons agar powder

  • 1/4 cup sun-dried tomatoes

  • 2 teaspoons minced garlic


COOKING INSTRUCTIONS:

  1. In a food processor or high speed blender, add all of the ingredients EXCEPT the milk, and agar.

  2. Pulse a few times to mix it all up.

  3. Now add the milk, and agar to a medium sauce pan and bring to a boil. Reduce heat and simmer until mixture thickens to the constancy of a thin pudding.

  4. Add the milk mixture to the ingredients in the food processor, and mix for about a minute. The mixture will quickly begin to thicken as agar begins to solidify at room temperature.

  5. Transfer to the mixture to a few ramekins or small bowls. You should be able to fill 2 or 3 small bowls.

  6. Allow the cheese to harden in the refrigerator uncovered for about several hours.

  7. Once the cheese is set, store in an airtight container in the fridge for about a week.

IMG_4940.jpg
IMG_4942.jpg

easy vegan coconut milk cheese with sun-dried tomatoes and garlic using agar agar

Smoky Coconut Milk Chile Cheddar Cheese

Vegan Smokey Chile Cheddar Cheese sliced

I love experimenting with different vegan cheese flavors and bases. I really love using coconut milk because it’s easy and affordable.

I am often asked if these cheeses have a strong coconut flavor and the answer is, not really. I always used refined coconut oil which has little to no coconut flavor at all, and all of the spices and other ingredients in the cheese mask the flavor of the milk very well.

I love this particular chile cheddar for its deep smokey, peppery flavor without a lot of heat. You could always bump up the heat in this cheese by adding a few slashes of your favorite hot sauce. My kids and husband are not big fans of eye watering, nose running pepper heat, so this cheese has all the flavor without any of the pain.

We added reconstituted dried chiles and a can of small green chiles for the perfect smokey and tangy combo. This vegan cheese will slice, shred, and even remelt, making it perfect for quesadillas, enchiladas, tacos, sandwiches, or just snacking!

This is a quick set cheese and is so simple to make, there is no reason to keep overpaying for store bought vegan cheese! You can have delicious vegan cheese, start to finish in about 2 hours, and for a quarter of the grocery store price!


INGREDIENTS:

  • 1 can full fat coconut milk

  • 2 tablespoons agar powder

  • 2 teaspoons light miso paste

  • 2 tablespoons apple cider vinegar

  • 1 teaspoon salt

  • 1/4 cup plus 1 tablespoon nutritional yeast

  • 1 teaspoon turmeric

  • 2 teaspoons smoked paprika

  • 1 small can green chiles (4 oz can)

  • 2 dried chili peppers

  • 1/4 cup refined coconut oil

  • optional: a few shakes of your favorite hot sauce

Vegan Smokey Chile Cheddar Cheese on a cracker

INSTRUCTIONS:

  1. Place dried chiles in a medium sized bowl. Pour enough boiling water over the peppers to cover and place a plate on top of the bowl. Let the peppers soak for about 20 minutes

  2. In a food processor or high speed blender, add all of the ingredients EXCEPT the milk, and agar and peppers.

  3. Pulse a few times to mix it all up.

  4. After the peppers are done soaking and have softened, remove from the water. Cut the pepper open and remove the stem and the seeds. I just run a paper towel down the inside of the peppers to wipe out the seeds.

  5. Drop the whole peppers into the food processor. Open the green chiles and dump them onto several folded up paper towels or a clean kitchen towel just to absorb some of the liquid. Add them to the food processor as well. Pulse until the peppers are broken down.

  6. Now add the milk, and agar to a medium sauce pan and bring to a boil. Reduce heat and simmer until mixture thickens to the constancy of a thin pudding. This only takes a few minutes.

  7. Add the milk mixture to the ingredients in the food processor, and mix for about a minute. The mixture will quickly begin to thicken as agar begins to solidify at room temperature.

  8. Transfer to the mixture to several small bowls or cheese molds. I can fill three small bowls with this recipe.

  9. Allow the cheese to harden in the refrigerator uncovered for a few hours.

  10. Store in an airtight container in the fridge for about a week or so.

If you like this recipe, try these:

Coconut Milk Colby Jack Cheese

Coconut Milk Pepper Jack

Smokey Cashew Cheddar

A cheese board with vegan coconut chile cheddar cheese surrounded by chiles and crackers

smokey coconut milk chile cheddar vegan cheese

Easy Vegan All Purpose Cheese Sauce

Vegan cheese sauce dripping from a spoon into a copper pot

One of the most basic and useful recipes I have, is this one. Seriously, it is vegan recipe that first gave me hope that I could do this! I could give up cheese, and survive to tell about it!

This easy vegan all purpose cheese sauce is something I almost always have on hand. It is a very convincing, ooey, gooey, white cheese. It keep well in the fridge and comes together in just minutes!

The base is cashews which work really well for substituting dairy. They break down super well and are extra creamy making them a popular ingredient in vegan cheeses.

If you are allergic to nuts, you can easily sub them out with sunflower or pumpkin seeds!! It works just fine!

You can use this vegan cheese sauce for pizza, pastas, grilled cheese, seriously so many different things.

The longer you cook it, the thicker and stretchier making it work really well as a quick vegan mozzarella. I actually perfect this cheese sauce on pizza and I make a LOT of vegan cheeses, including shredded mozzarella and soft mozzarella. This sauce is just so quick and so delicious I see no need to make things harder than they need to be!

The spice profile is pretty basic and can be changed up depending on what you are using it for.

Also check out our cashew queso recipe. It has a nice spicy kick and works well for quesadillas, and enchiladas, and tacos.


INGREDIENTS:

  • 1 cup cashews

  • 2 cups water, plus water for soaking nuts

  • 4 tablespoons tapioca starch

  • 1/4 cup Sauerkraut, no juice

  • 3-4 tablespoons nutritional yeast (I tend to lean towards being more heavy handed with the nutritional yeast. Adjust to your taste)

  • 1 teaspoon minced garlic

  • 1 teaspoon salt

  • 1 tablespoon apple cider vinegar


INSTRUCTIONS:

  1. Place cashews in a microwave safe container and cover in water. Microwave for 3 minutes. Drain water and rinse. If you do not have a microwave, you can boil them in a pot of water for 5 minutes or you can soak them for a few hours in hot water.

  2. Add drained cashews, 2 cups clean water, and remaining ingredients to a high speed blender and process until the mixture is totally and completely smooth. This may take a minute or two of blending.

  3. Transfer mixture to a medium sized pot over medium heat. Heat the mixture for a few minutes, stirring continuously with a whisk until the mixture begins to thicken. Once desired consistency, remove from heat. If it gets too thick, you can add a little more water to thin it back out.

  4. Depending on what I am using the sauce for, depends on how thick I will allow it to get. If using it for pizza, then I will let it get pretty thick so I can dollop it on top of the pizza. If using it in a lasagna or in enchiladas, I will keep it at a thick pudding constancy so it’s easier to spread. You can use it as an alfredo sauce, just keep it on the thinner side. Feel free to add any extra spices depending on what you are using it for!


You can use this sauce for:

pizza, lasagna, enchiladas, as an alfredo sauce, stuffed shells, calzones, quesadillas, mac and cheese, cheese spread for sandwiches, grilled cheese, just to name a few

If you like this recipe, try these:

Cashew Queso

“Meaty” Cheddar Queso

Spicy Vegan Queso, Nut Free


My favorite vegan cookbook is “Veganize It!” by Robin Robertson. I adapted and made some changes to her recipe for cashew pizza “cheese” to create this basic all purpose cheese sauce. If you are in the market for some great vegan cook books, be sure to check her’s out. Find a copy of Vegaize It at amazon or a local bookstore. I can not praise this woman enough.

Easy all purpose cashew based vegan cheese sauce. Perfect for vegan pizza, pasta, or sandwiches!

The Perfect Vegan Lasagna

IMG_1757.jpg

If you have been looking for the perfect, cheesy, gooey, saucy, vegan lasagna, look no further! Layers of noodles, tofu ricotta, homemade marinara, and the perfect vegan mozzarella sauce make this lasagna the best vegan lasagna I have had, hands down!

It’s my go to dish to bake up for all of our non vegan friends and family, because no one ever even knows its vegan! We are house divided where lasagna is concerned, some preferring veggie lasagna, and others a classic “meaty” lasagna. So I have given instruction on making this lasagna 2 ways! Because two kinds of lasagna are always better than one!! Right?!?!?

If you are looking for a mini version that is perfect for meal prep, check out the links below for our Muffin cup lasagna, and ourLasagna stuffed peppers!! The lasagna cups are perfect for easy meal prep. Just bake them in a muffin tin and freeze. Pop out what you need later and reheat!! Easy Peasy!

I am telling you, you will never want to use store bought shredded mozzarella again after using this perfect cheese sauce. It’s super easy to whip up, and gets ooey gooey, bubbly, and browns. Its magic and it is staple in our house for so many recipes! Sometimes, like right now with this vegan lasagna, the secret is in the sauce!

So bake up a pan for yourself, and one for a neighbor or friend. They will be so thankful for a night off from cooking and so impressed that this lasagna is actually vegan! I always say the way to convince someone that vegan food is just a delicious, if not more, than the non vegan version is by sharing it!!


INGREDIENTS:

  • 1 box lasagna noodles (regular or gluten free) DO NOT BOIL THE NOODLES. We will be using them dry in the recipe. This works fine, and there is no need to boil them first. Do not use “no boil” noodles. They typically contain eggs. Just use regular lasagna noodles.

Tofu Ricotta:

  • 1 package extra firm tofu, drained

  • 2 tablespoons nutritional yeast

  • Juice from 1/2 lemon

  • 2 teaspoons miso paste

  • 1 teaspoon minced garlic

  • 1/2 onion

  • 1/2 teaspoon of salt

1. Add the onion to a high speed blender or food processor and blend for a minute to mince up. Add remaining ingredients and blend until completely smooth.


White Cheese Sauce:

  • 1 cup of cashews (soaked in hot water a few hours, or coved in water and microwaved 3 minutes)

  • 2 cups of water

  • 2 teaspoons minced garlic

  • 1 tablespoon apple cider vinegar

  • 1 teaspoon salt

  • 1/4 cup corn, or tapioca starch

  • 2 tablespoons nutritional yeast

1.Drain cashews. Add cashews and remaining ingredients to a high speed blender or food processor and blend until completely smooth and liquified. Make sure there are no little bits of cashews left.

2. Add the mixture to a medium sized sauce pan and heat over medium heat, whisking continuously. The mixture will go from liquid to thick very quickly so do not stop stirring! You want the cheese sauce to be the constancy of a thick pudding. If it gets clumpy or too thick, you can add a little more water to the pan and it will thin back out.

IMG_9853.JPG

The Sauce:

  • 1 28 oz can crushed tomatoes

  • 1 14.5 oz can diced tomatoes drained

  • 1 carrot, diced

  • 1 yellow onion, diced

  • 1 bell pepper, diced (optional)

  • 1 cup diced mushrooms (optional)

  • 4 cups raw spinach (optional)

  • 2 cloves crushed garlic

  • 1 teaspoon dried thyme

  • 1 teaspoon dried oregano

  • salt and pepper to taste

  • splash or 2 of red wine (optional)

“Meaty” option:

If you would rather have a ‘meaty” sauce, you could omit the carrot, pepper, and mushroom, spinach, and add a bag of meatless crumbles, or even use 2-3 Beyond Beef brand burgers. Simply thaw them ,and cook as you would ground meat before adding to the sauce.

  1. In a large sauce pan, sauté all of the veggies and garlic in a few teaspoons of oil until tender. if using spinach, add it last and let it cook down for a few minutes to evaporate some of the liquid.

  2. Add Wine and let cook for a minute

  3. Add both cans of tomatoes, and spices, and let the sauce simmer for 15-20 minutes.


INSTRUCTIONS:

Preheat oven to 350 degrees

  1. Start by adding a little sauce to the bottom of a 9x13 baking dish.

  2. Add a layer of noodles. Next, spread a nice sized scoop of tofu ricotta over the noodles, followed by marinara, then a layer of cheese sauce.

  3. Repeat layers until you have used up all of the ingredients.

  4. Make sure the top layer is the white cheese sauce. You can add some Italian seasoning to the cheese sauce if you like before you bake.

  5. Cover with foil a and bake at 350 degrees for 45- 60 minutes. Remove the foil after about 20 minutes so the top can begin to brown . If you have filled the pan to the top you might want to put it on a baking sheet, incase it decides to bubble over.

  6. Let lasagna cool a bit before before cutting, and serving.

If you like this recipe, try these:

Muffin Cup Vegan Lasagna

Vegan Lasagna Stuffed Peppers


Vegan Coconut Kimcheese (Kimchi Cheese)

IMG_0797.jpg

I can eat an entire jar of kimchi by myself in a week, and often do.

I can also eat my weight in vegan cheese if given the chance. So for me, mixing the two was a no brainer, and so I introduce to you KIMCHEESE!

I often add sauerkraut to my vegan cheese recipes to give them that cheesy zip, and kimchi works just as well!

This cheese is tangy, spicy, quick and easy, but most importantly it is DELICIOUS! Even my husband who swears he does not like kimchi, inhaled this one!

Vegan cheese making is really so easy, especially quick set agar cheeses like this one. The mix up in minutes and are set in a few hours.

There is not a replacement for the coconut oil in this cheese, however. It is a key ingredient in helping solidify this kimchee vegan cheese. Agar is a vegan gelatin and on its own, the texture is not firm enough for my liking. The coconut milk solidifies once cold and helps get a nice firm texture, and aids in the remelting of the cheese once cooked.

This vegan cheese will shred, slice and melt, so It will work beautifully for snacking, salads, or even the best grilled cheese you may ever eat! If you can not find agar powder locally, check our pantry staples for a link to order on amazon prime!


Ingredients:

  • 1 can of full fat coconut milk or cream

  • 2 tablespoons apple cider vinegar

  • 2 teaspoons miso paste

  • 1 teaspoons of salt

  • 2 tablespoons nutritional yeast

  • 1/4 cup triple refined coconut oil, melted

  • 2 tablespoons plus 1 teaspoon agar powder

  • 3 tablespoons arrow root or tapioca starch

  • 3/4 cups vegan kimchi


Instructions:

  1. In a food processor or high speed blender, add all of the ingredients EXCEPT the milk, agar, and kimchi.

  2. Pulse until everything is all mixed up.

  3. Next, add the milk and agar powder to a medium sauce pan, and bring to a boil. Reduce heat and simmer for about 2 minutes, until mixture thickens to the consistency of a thin pudding.

  4. Add the milk mixture to the ingredients in the food processor and mix for about a minute. The mixture will quickly begin to thicken as the agar begins to solidify at room temperature. Once everything is well mixed, add the kimchi and just pulse a few times to get it all chopped up, and mixed in.

  5. Transfer to the mixture to a few ramekins or small bowls. You should be able to fill 2 or 3 small bowls.

  6. Allow the cheese to harden in the refrigerator uncovered for several hours.

  7. Once the cheese is set, store in an airtight container in the fridge for about a week.

Vegan Brie with Cranberries and Candied Pecans

Of all the cheeses I missed when we went vegan, brie was at the top of the list. Especially baked brie. This recipe is actually really simple and straightforward. It does not require sitting out for 48 hours like some other vegan brie recipes I’ve s…

Of all the cheeses I missed when we went vegan, brie was at the top of the list. Especially baked brie. This recipe is actually really simple and straightforward. It does not require sitting out for 48 hours like some other vegan brie recipes I’ve seen. It works perfectly for baking and makes a beautiful dish for entertaining. The sauerkraut in the recipe tends to throw people, but it helps give this brie that cheesy tang, so don’t skip that ingredient. If you don’t care for cranberries, you could always top it with any fruit compote or jam you like. No matter what you top this vegan brie with, it is creamy, dreamy, vegan cheese heaven.

Ingredients:

  • 1 cup unsalted, unroasted cashews (plus water for soaking)

  • 1 cup water

  • 1/3 cup refined coconut oil

  • 1/3 cup sauerkraut, without the juice

  • 1 tablespoon apple cider vinegar

  • 2 tablespoons tapioca starch

  • 2 teaspoons agar powder

  • 1 teaspoon salt

  • 2 tablespoons nutritional yeast

  • cheese cloth

Cranberries:

  • 1 cup fresh cranberries

  • 1/2 cup sugar

  • 1/2 cup water

Candied Pecans:

  • 1 cup peans

  • 3 tablespoons maple syrup

  • 2 tablespoons brown sugar

  • pinch of salt

  • salt

Instructions:

  1. For the Brie: Place cashews in a microwave safe container and cover in water. Microwave for 3 minutes. You can also cover in hot water, and let them soak for a few hours if you do not have a microwave.

  2. Drain cashews, and add them along with remaining ingredients to a high speed blender or food processor. Blend until COMPLETELY smooth. If you are using a food processor, add the nuts first and try to break them down a bit before adding everything else.

  3. Transfer mixture to a medium size sauce pan, over medium heat, and stir continuously until the mixture becomes thick and bubbly. This will only take a few minutes.

  4. Line a 6 inch cake pan, or similarly sized shallow bowl, with a piece of cheese cloth that is large enough that it hangs a good bit over the sides of the bowl. Pour the mixture into the bowl and cover with the excess cheese cloth that is hanging over the sides. Place in the refrigerate for at least 4 - 5 hours to allow cheese to firm up.

  5. For the Cranberries: Add cranberries, water, and sugar to a medium sized pot. Heat on medium heat, until the cranberries begin to burst. Lower the temp to low heat, and begin mashing the berries with the back of a wooden spoon, or a handheld potato masher. Let the mixture simmer, stirring regularly for about 10 minutes, or until the mixture has thickened. Set aside and let cool.

  6. For the candied pecans: Heat a skillet over medium heat. Add the pecans, brown sugar, and maple syrup to the pan. Continuously move the nuts around the pan for about 5 minutes to allow all of the sugars to melt and caramelize. If you don’t keep the nuts moving, they will quickly burn. Pour finished nuts on a parchment lined cookie sheet and sprinkle with a little salt. Allow pecans to cool and harden.

  7. Brie baking instructions: preheat oven to 350 degrees. Carefully unwrap cheese from the cheese cloth. Place the brie in a pan or baking dish that you wish to serve it in. It will be too soft to transfer once it is baked. Top the brie with the cranberries sauce and bake for 10 - 12 minutes. Once the brie is out of the oven, garnish the top with candied pecans and some fresh rosemary. Serve with fresh bread, crackers, cut up veggies, or sliced fruit.

IMG_0334.jpg

Vegan Gorgonzola and Balsamic Glazed Chips

IMG_9538-2.jpg

As much as I love french fires, my love for loaded chips is probably just as equal.

Lets be real, offer me a fried potato of any kind and I will eat it.

That being said, this recipe is my all time favorite chip recipe. A local restaurant we used to frequent served a non vegan version of these chips, and I was obsessed.

It took me a while to get a convincing vegan gorgonzola sauce, but once I did, it was game on. The sauce can actually be used in all kinds or recipes and should! We used cashews to get a super creamy and convincingly cheesy texture and added the right amount of lemon, vinegar, and dijon to give it that gorgonzola zip.

The homemade balsamic is sweet and tangy as well, pairing really well with the creamy cheese sauce.

These chips are salty, tangy, sweet, and perfect. You can top them with chives, but we like to chop up cilantro stems and sprinkle on top for a bright, fresh contrast!

I promise you, these will be one of your new favorite chips, too!


Ingredients:

  • 4 - 6 russet potatoes

  • 1/2 cup balsamic vinegar

  • 1 - 2 tablespoons agave

  • oil for frying (air fryer instructions also given)

  • optional: chives or chopped cilantro for garnish

Gorgonzola Cheese Sauce

  • 1/2 cups cashews, soaked in hot water for a few hours, or covered in water and microwaved for 3 minutes.

  • 1 cup water (this is used to process the cashews, not for soaking)

  • 2 tablespoons nutritional yeast

  • 2 tablespoons tapioca or corn starch

  • juice from 1 lemon

  • 1 teaspoon dijon mustard

  • 2 teaspoons apple cider vinegar

  • 1 teaspoon light miso paste

  • 1/2 teaspoon salt

  • 1/2 cup plant based milk

  • 1 tablespoon vegan butter

IMG_9525-2.jpg
IMG_9548-2.jpg

Instructions:

  1. Wash Potatoes but do not peel. Using a kitchen mandoline, slice the potatoes on the thinnest setting. You can also use your food processor with the slice attachment, or use the side of box grater that has one horizontal blade. Whatever you use, you want a super thin slice.

  2. IF USING AN AIR FRYER: Toss the potatoes in a teaspoon of oil and a few shakes of some salt, then add them in batches to your basket. Cook on 360 degrees for 15 minutes. Half way through cooking, move the chips around in the basket; they like to stick together so you may have to peel some apart. Continue cooking for another 15 minutes or until all of the slices are crisp like a chip.

  3. IF PAN FRYING: Fill a large skillet with a few inches of your preferred oil for frying. Heat the pan on medium heat until the oil is sizzling. Begin adding chips in batches and allow to cook for several minutes until they are browning and crisp. Place finished chips on a wire cooling rack that you have placed on a paper-towel-lined baking sheet. Lightly salt the chips.

  4. Add balsamic and agave to small sauce pan. Bring mixture to a boil, then reduce heat to low and allow to simmer for about 10 minutes. You can start with 1 tablespoon of agave and if the glaze is not sweet enough for you, add more. It will thicken some as it sits, so if it is too thick and sticky when you are ready to use it, add a few splashes of balsamic vinegar back in and whisk.

  5. To prepare the cheese sauce, drain the cashews and add them along with remaining cheese sauce ingredients, minus the milk and butter, to a high speed blender or food processor. Blend on high until mixture is completely smooth.

  6. Transfer mixture to a sauce pan and heat on med/low heat. Whisk the sauce as it is cooking. Once the sauce begins to thicken, add in the milk and butter, and cook for one more minute. If the sauce gets too thick, you can always add a little more milk to thin it out.

  7. To serve, pile chips on a plate. Drizzle with cheese sauce, balsamic glaze, and sprinkle with diced chives or cilantro.

serves 4-6


Coconut Milk Pepper Jack

IMG_9451-2.jpg

Making vegan cheese is easier than most people think.

Especially cheeses using canned coconut milk and agar powder. Agar is a vegan gelatin that begins to set up a room temperature, so this cheese is super quick, and easy.

You can typically find agar powder at asian markets, or online. The addition of the chili peppers gives this cheese nice kick of flavor and spice, making it a nice alternative to traditional pepper jack.

So if you have never tried making your own vegan cheese, give it a go!! You will probably be surprised how easy and delicious it is!


INGREDIENTS:

  • 1 can of full fat coconut milk or cream

  • 2 tablespoon of lemon juice

  • 2 teaspoons miso paste

  • 1 teaspoons of salt

  • 1/4 cup nutritional yeast

  • 1/4 melted cup triple refined coconut oil

  • 2 tablespoons agar powder

  • 3 tablespoons arrow root or tapioca starch

  • 1 4oz can of green chilis

  • optional: 1/4 teaspoon cayenne pepper, or a splash of hot sauce for more heat


INSTRUCTIONS:

  1. In a food processor or high speed blender, add all of the ingredients EXCEPT the milk, agar, and chili peppers.

  2. Pulse a few times to mix everything up.

  3. Line a small bowl with a few paper towels, pour chilis into the bowl. The paper towels will absorb some of the liquid from the peppers. Set aside.

  4. Now add the milk and agar powder to a medium sauce pan, and bring to a boil. Reduce heat and simmer for about 2 minutes, until mixture thickens to the consistency of a thin pudding.

  5. Add the milk mixture to the ingredients in the food processor and mix for about a minute. The mixture will quickly begin to thicken as the agar begins to solidify at room temperature. Once everything is well mixed, add the chilis and just pulse a few times.

  6. Transfer to the mixture to a few ramekins or small bowls. You should be able to fill 2 or 3 small bowls.

  7. Allow the cheese to harden in the refrigerator uncovered for several hours.

  8. Once the cheese is set, store in an airtight container in the fridge for about a week.

Pumpkin Spice Vegan Cheese Ball

IMG_8556.jpg

Sweet vegan cheese ball you say?!? Well I say yes!

Even though most cheese balls are savory does not mean you can’t make them sweet.

The base is the same, the spices are just different. So why not think outside of the box and make some sweet versions for your next cheese board.

A sweet cheese ball is perfect for spreading on fruit, cookies, or sweet biscuits.

My all time favorite fall flavor is pumpkin spice and that includes in the form of a creamy sweet vegan cheese ball.

This cheese ball has the right amount of pumpkin pie spice, maple sweetness and of course pumpkin puree! We also gave it a little drizzle of maple icing because why not!

If you are serving a cheese board, or just need a quick fall dessert or snack, give this one a whirl. If you love all things pumpkin spice, I think you will LOVE this cheese ball.


INGREDIENTS:

  • 1 cup cashews soaked in hot water for a few hours or microwaved for 3 minutes then drained

  • 1/2 cup refined coconut oil

  • 1/4 cup canned pumpkin or pumpkin puree

  • 1 teaspoon vanilla extract

  • 3 tablespoons maple syrup or maple butter

  • 1/4 teaspoon salt

  • 1 teaspoon cinnamon

  • 1 teaspoon pumpkin pie spice

  • A few graham crackers (Nabisco brand is honey free)

Icing drizzle:

  • 1/4 cup powdered sugar

  • 1/2 teaspoon pumpkin pie spice

  • A few drops of maple syrup to thin out the icing


INSTRUCTIONS:

  1. Add all of the ingredients to a food processor, or high speed blender, and blend until the mixture becomes completely smooth.

  2. Crush the graham crackers into a fine crumb. I normally just put them in a zip lock bag use a rolling pin to crush them.

  3. Line 2 small bowls, or ramekins, with a pieces of plastic wrap. You want a piece big enough that it will hang a good bit over the sides. Sprinkle some of the crushed graham crackers on the bottom of the bowls.

  4. Divide mixture evenly into the bowls. Now take the plastic wrap hanging over the edges, bring together and twist to seal up the cheese. Allow to harden in the fridge for 3 - 4 hours to firm up.

  5. Once cheese is ready, whisk together the icing ingredients. If the mixute gets too thin, add some more powdered sugar.

  6. Remove both cheese balls from the bowls, and plastic wrap. Drizzle tops with icing.

  7. Put cheese balls in an airtight container and store in the fridge for up to 5 days.

    Serve with fruit or graham crackers

Vegan Chili and Cheese Loaded Baked Potatoes

IMG_0248.jpg

We eat a lot of baked potatoes in our house!

They are cheap, filling, and tasty. I mean after all carbs are my love language, and potatoes and bread top the list of favorite carbs!

So the only thing better than a buttery baked potato, is a baked potato covered the THE BEST VEGAN CHILI, a perfect vegan cheddar queso, sour cream, and onions!

Y’all!! This is one of my all time favorite easy comfort foods to throw together on a busy week night. I try and always freeze any leftover chili so I will have some on hand for an occasion such as this. I also like to bake up some potatoes on a weekend so they are ready to go on busy weeknights! Just reheat and top!!! Easy peasy.

So if loaded baked potatoes are your jam, you gotta make this loaded baked potato. Just know you are gonna want to pour that vegan cheddar queso on just about everything, so you might want to double the batch.


NGREDIENTS:

  • 4 - 6 russet potatoes

  • 2 cups The Best Vegan Chili

  • 2 -3 teaspoons vegan butter

  • salt and pepper to taste

  • garlic powder to taste

  • vegan cheddar queso

  • optional toppings, vegan sour cream, diced onions, chives

Vegan Cheddar Queso:

  • 1/2 cups cashews soaked overnight or covered in water and microwaved for 3 minutes, then drained

  • 1 cup water

  • 2 tablespoons corn starch or tapioca starch

  • 1 teaspoon light miso paste

  • 1/2 tablespoon apple cider vinegar

  • 2 tablespoons nutritional yeast

  • 1/2 teaspoon tumeric

  • 1 teaspoon smoke paprika

  • 1/2 teaspoon salt

  • 1/2 small can of green chilis

INSTRUCTIONS:

Preheat oven to 400 degrees

  1. Wash potatoes. You will also need 4 - 6 pieces of aluminum foil large enough to wrap around each potato.

  2. Add 1/2 teaspoon of butter to the middle of each piece of foil. Place potato on top of butter, and poke a sharp knife into each potato a few times. Sprinkle with garlic powder, salt and pepper, and tightly wrap foil around the potatoes.

  3. Place potatoes on a baking sheet, and bake for about 30-40 minutes, depending on size of potatoes. When you can easily poke a knife into the potatoes, they are done.

  4. While potatoes are baking, make the cheese sauce by adding all of the ingredients except the chilis to high speed blender or food processor, and blend until completely smooth.

  5. Transfer the cheese mixture to a medium pot, and heat on medium/ low heat, whisking continuously until the cheese begins to thicken to a queso constancy. This only takes a few minutes. If it gets too thick, you can add a little more water to thin it back out. Add the chilis and stir.

  6. Allow potatoes to cool a little before carefully unwrapping the foil (careful not to burn yourself.)

  7. Top the potatoes with 1/4- 1/2 cup vegan chili, some cheddar queso, and whatever toppings you like to serve.

serves 4-6


Coconut Milk Cheddar Cheese Shapes

IMG_0286.jpg

I love experimenting with different vegan cheese flavors and bases. I really love using coconut milk because it’s easy and affordable.

I am often asked if these cheeses have a strong coconut flavor and the answer is, not really. I always used refined coconut oil which has little to no coconut flavor at all, and all of the spices and other ingredients in the cheese mask the flavor of the milk very well.

I also love making my kids easy and healthy snacks that are a allergy friendly alternative.

What kid doesn’t love to get to play with their food, and with these vegan cheddar shapes it 100% encouraged.

You can make any shape you like using whatever cookie cutters you happen to have on hand.

You can also easily mold this cheese in small bowls and slice or shred it for any recipe calling for cheddar cheese.

Agar powder is simply a vegan gelatin made from seaweed and can be found at Asian markets or online.

It sets up once it cools off but will melt once you heat it.

So don’t be afraid to make your own dairy free cheese!! it’s so easy , cheap and actually really delicious. And in this case, pretty fun too!


INGREDIENTS:

  • 1 can full fat coconut milk

  • 2 tablespoons agar powder

  • 2 teaspoons light miso paste

  • 2 tablespoons lemon juice

  • 1 teaspoon salt

  • 1/4 cup plus 1 tablespoon nutritional yeast

  • 3 tablespoons tapioca starch

  • 1 teaspoon turmeric

  • 2 teaspoons smoked paprika

  • 1/4 cup refined coconut oil


COOKING INSTRUCTIONS:

  1. In a food processor or high speed blender, add all of the ingredients EXCEPT the milk, and agar.

  2. Pulse a few times to mix it all up.

  3. Now add the milk, and agar to a medium sauce pan and bring to a boil. Reduce heat and simmer until mixture thickens to the constancy of a thin pudding. This only takes a few minutes.

  4. Add the milk mixture to the ingredients in the food processor, and mix for about a minute. The mixture will quickly begin to thicken as agar begins to solidify at room temperature.

  5. Transfer to the mixture to a 9x13 pan, or high sided baking pan.

  6. Allow the cheese to harden in the refrigerator uncovered for about an hour.

  7. Once the cheese is set, cut shapes using your favorite cookie cutters. You use the scrap pieces for tacos, soups and chili, on salads, whatever! It will also remelt, so you could use it in quesadillas, nachos, or any other recipe that calls for melty cheese.

  8. Store in an airtight container in the fridge for up to a week.

Vegan Chili Cheese Fries

IMG_0273.jpg

How do I love fries, let me count the ways….

I love them any way you give them to me!! I love them plain, I love them waffled, curly, seasoned, and most of all, I love them loaded with chili and cheese.

I don’t mean to toot my own horn, but I make a mean chili! My mom makes the best non vegan chili so once I became vegan I just swapped the meat for cauliflower and really changed nothing else. (ok that’s a lie, I added cocoa powder, but thats it, I swear!)

I also make a crazy good cheddar cheese sauce using cashews. It’s great as a dip, a filling for quesadillas, or a grilled cheese, and 100% the best cheese for chili cheese fries. So flipping good!

You can buy frozen fries and I won’t judge you. You can normally find a few bags of Trader Joe’s frozen fries in my freezer. But for this recipe, I always make my own. If I am going to eat chili cheese fries, I want THE BEST chili cheese fries, so the requires homemade fries in my mind. They are really not hard to make and far superior to frozen every single time!!!

I also suggest making chili and freezing any leftovers specifically for future fries. I will make for a quick dinner! Just thaw the chili, reheat, whip up a batch of cheese and fry some potatoes! TA-DA, dinner is ready!! I always have leftover chili and freeze with visions of future chili cheese fries.

I love comfort food and fries are my favorite of all the foods!


INGREDIENTS:

  • 4 russet potatoes

  • 2 cups of The Best Vegan Chili

  • 2 cups vegan cheddar queso

  • vegan sour cream, diced onion, or green onions (optional toppings)

  • oil for frying, OR you can oven bake them

Vegan Cheddar Queso:

  • 1/2 cups cashews soaked overnight, or covered in water and microwaved for 3 minutes then drained

  • 1 cup water

  • 2 tablespoons corn starch or tapioca starch

  • 1 teaspoon light miso paste

  • 1/2 tablespoon apple cider vinegar

  • 2 tablespoons nutritional yeast

  • 1/2 teaspoon tumeric

  • 1 teaspoon smoke paprika

  • 1/2 teaspoon salt

  • 1/2 small can of green chilis


INSTRUCTIONS:

  1. Wash the potatoes, peels on.

  2. Cut potatoes into fries.

  3. FOR FRYING THE POTATOES, heat a few inches of oil in a deep skillet (I use a cast iron skillet)on medium heat.Once the oil is nice and hot, start adding small batches of the fries to the oil. Allow them to fry until nice a crisp, about 5 minutes. Once they are done frying, remove from oil and place on a wire cooking rack with some paper towels underneath. This will help them stay crispy while you finish frying the rest.

  4. FOR OVEN BAKING, preheat oven to 400 degrees, Lightly coat fries in a few teaspoons of oil and place them on a cookies sheet lined with parchment paper. Make sure the fries are not over crowded. Sprinkle with salt and bake for about 15 minutes or until the fries seem crispy on one side. Take the cookie sheet out of the oven, and turn the fries with a spatula or a pair of metal tongs. Put the fires back in the oven for another 15 minutes, or until the fries seem fully crisp.

  5. TO MAKE THE CHEESE SAUCE add all of the ingredients except the chilis to a high speed blender or food processor, and blend until completely smooth.

  6. Transfer the cheese mixture to a medium pot and heat on medium/ low heat, whisking continuously until the cheese begins to thicken to a queso consistency. If it gets too thick, you can add a little more water to thin it back out. Add the chilis and stir.

  7. Portion fries between 4 - 6 plates, top with chili, cheese sauce, and whatever toppings you like.

serves 4-6