Thanksgiving recipes

Vegan Cranberry Stuffed Turkey Roast

IMG_9346.jpg

Thanksgiving is my most favorite holiday. Hands down.

I love everything about it. The family and friends, the weather, and alllllllll of the food.

I have made many seitan roast over the years for the holidays. Some stuffed, some not, some with crispy skin, some without. But never yet had I made a vegan holiday roast that was stuffed with crispy skin.

I have no idea why not, but I knew this year it was exactly what we needed and what I was going to make. A vegan stuffed turkey roast with crispy skin!

And trust me, making your own vegan holiday roast is probably WAY easier than you may think. Making seitan is actually pretty easy and super affordable!

IMG_9349.jpg

You can stuff a seitan roast with just about anything, but one of my favorite foods in the whole word is cranberry sauce.

I can not imagine a holiday meal without a side of whole cranberry sauce, so that is what I deiced I would use in my vegan turkey stuffing this year.

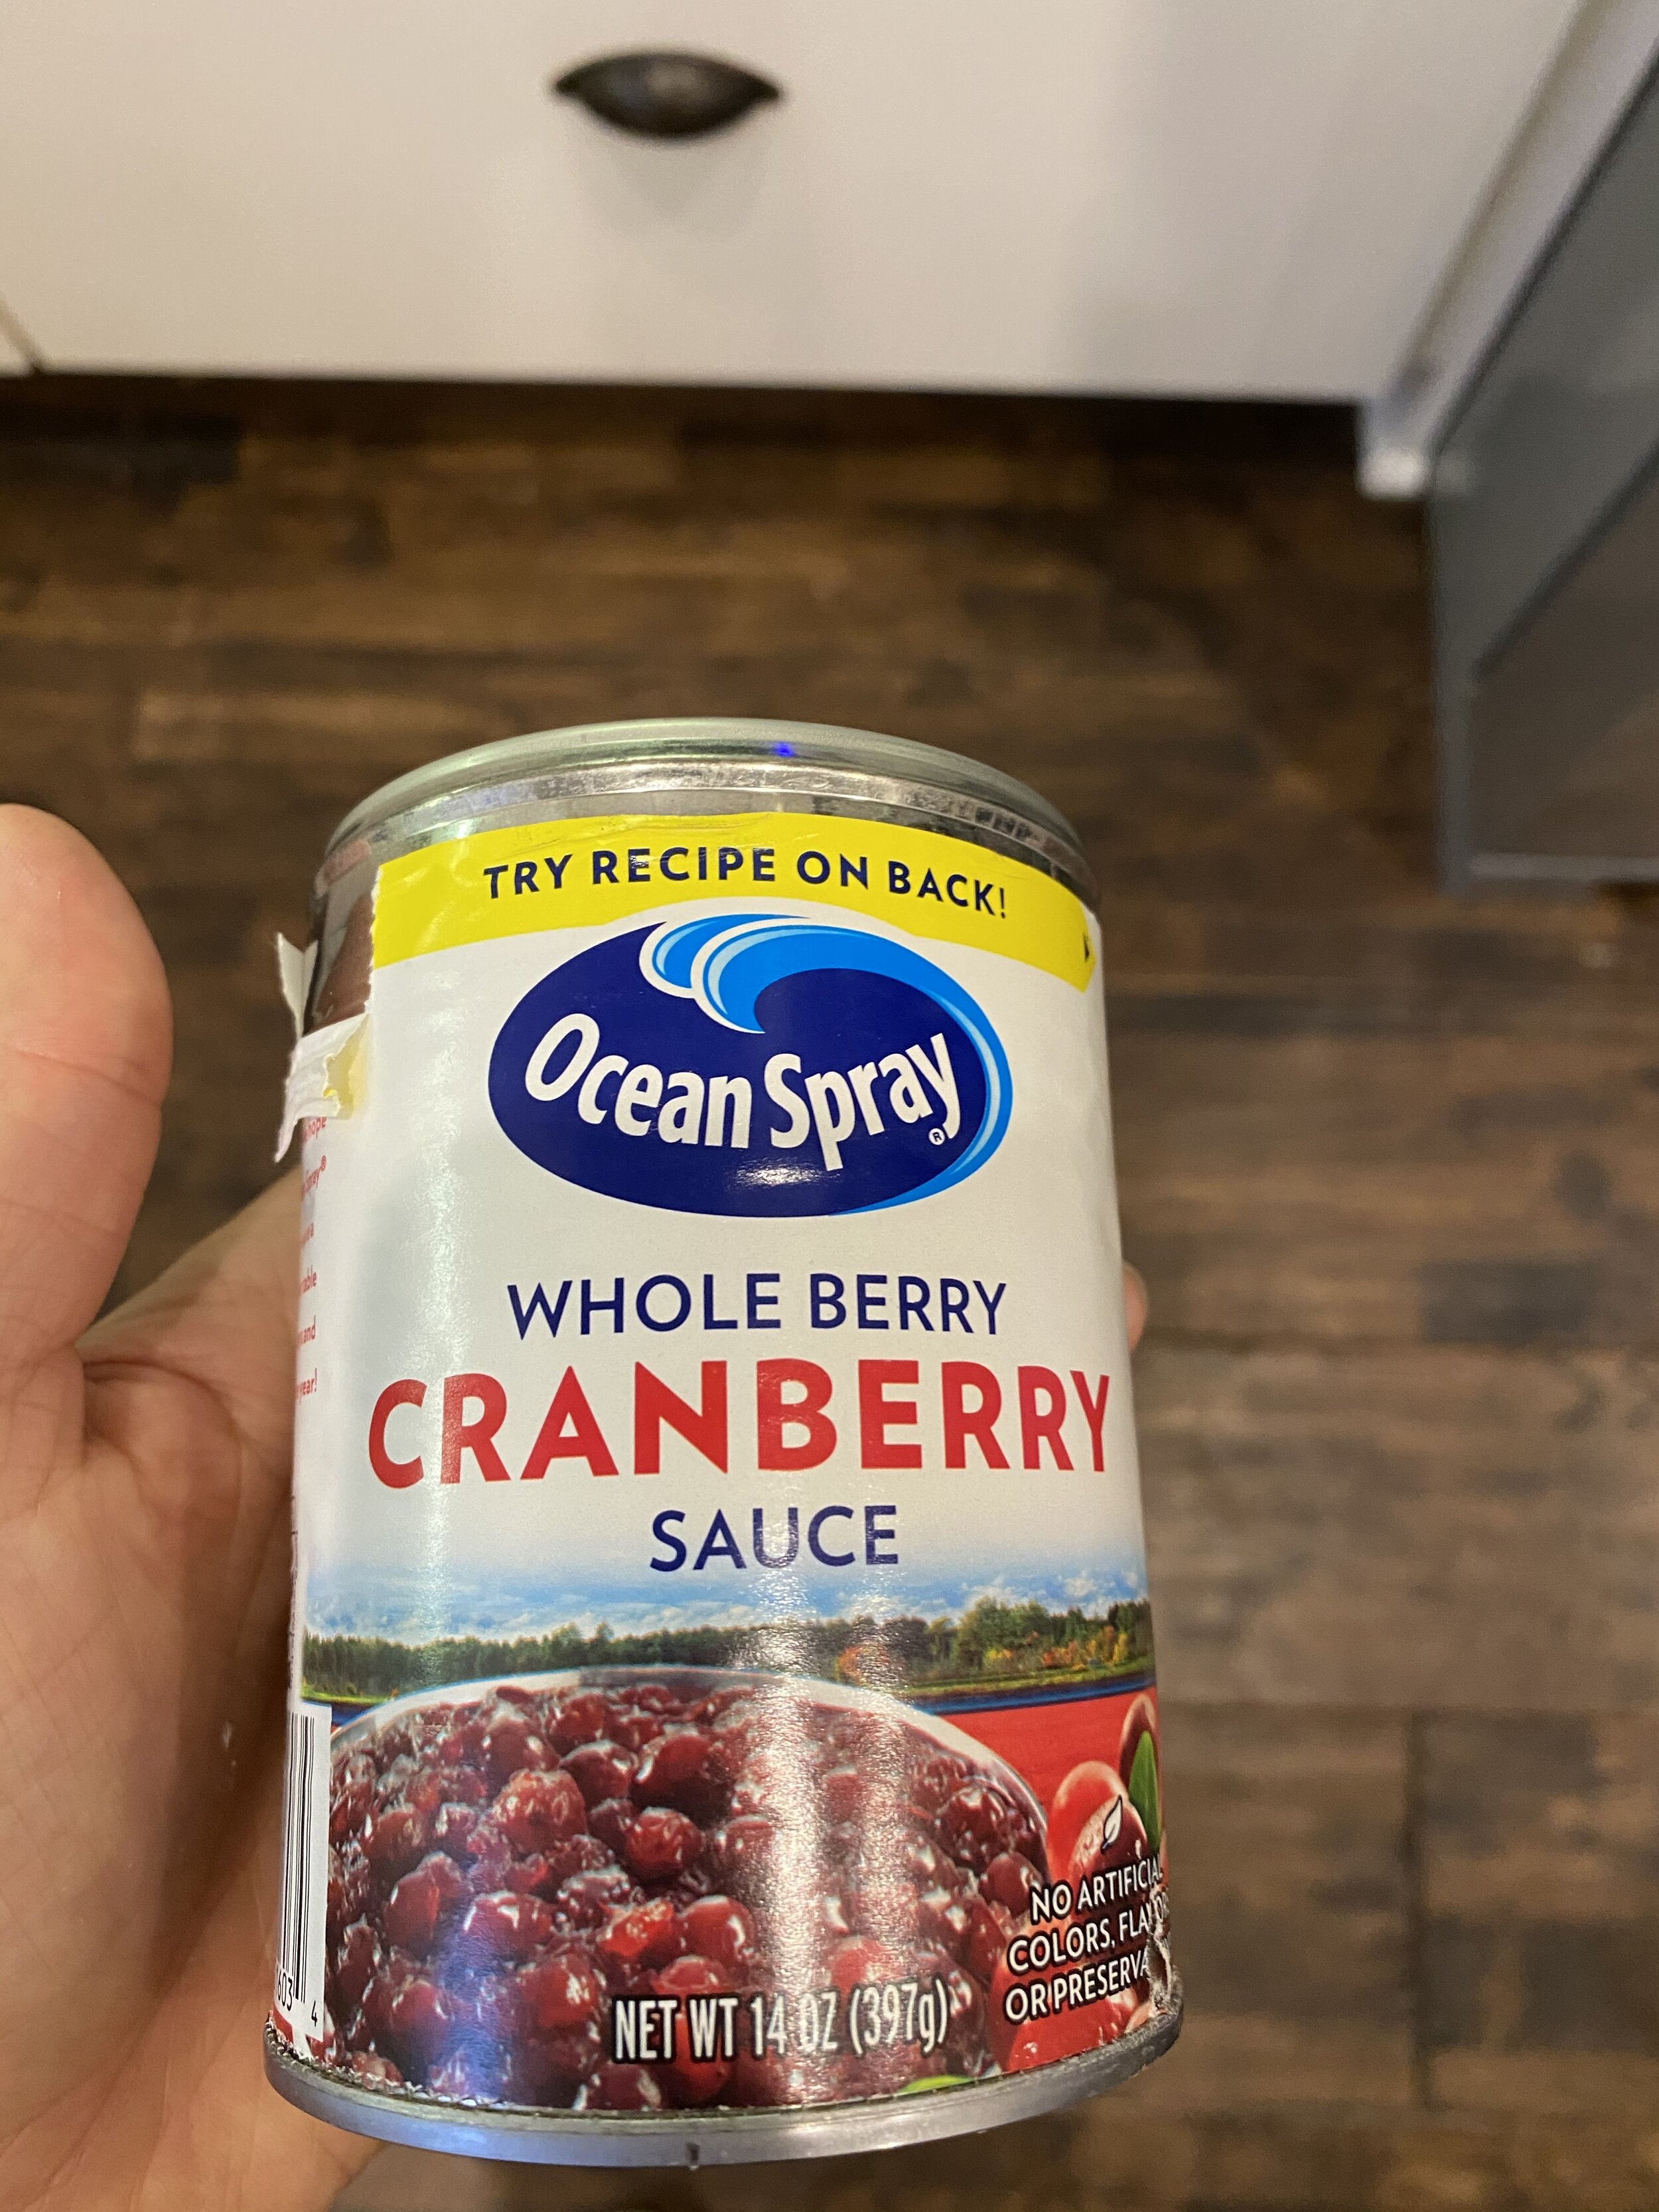
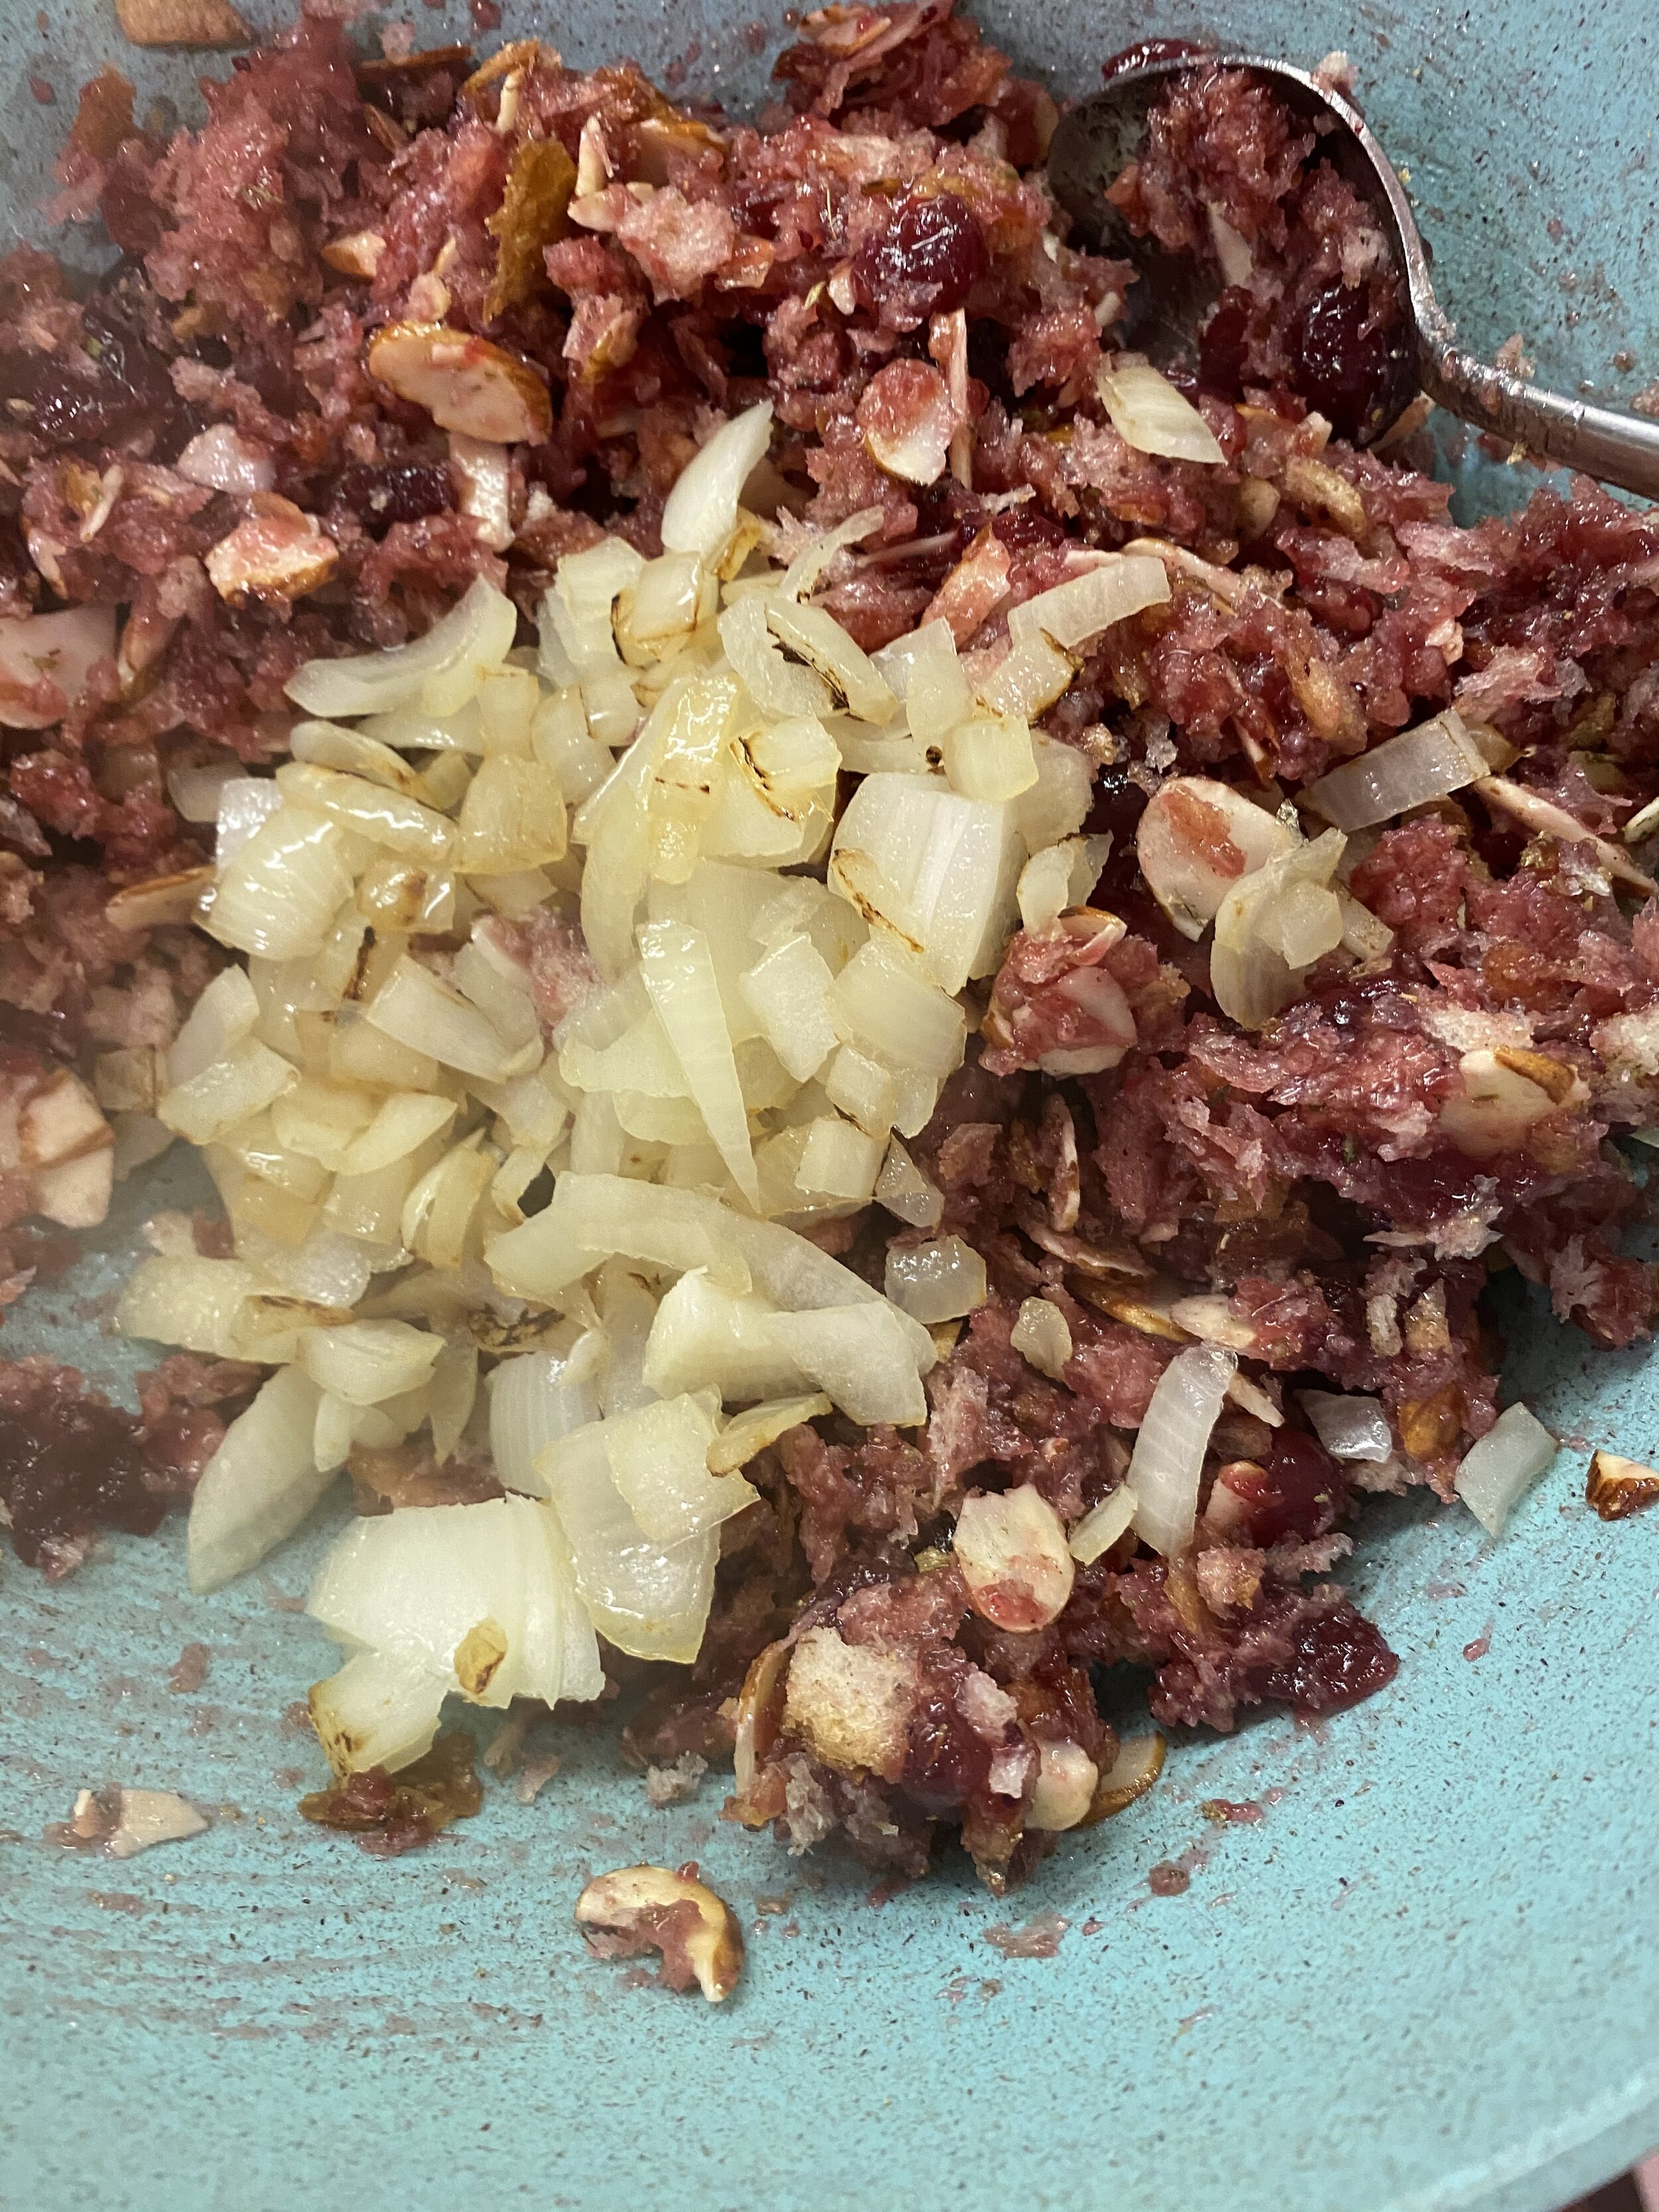
I started with some stale, few day old sourdough slices, added some onion, almonds, herbs, and to make things simple, whole cranberry sauce from a can. There is no shame in using canned cranberry sauce, especially when you can not find fresh cranberries.

In October, in Florida (when I was testing this recipe) there were no fresh cranberries to be found. If it is cranberry season when you are making this, then I have a super easy recipe for some fresh homemade cranberry sauce! By all means do whichever you like or is readily available at the time.

IMG_9329.jpg

Adding a crispy skin to your seitan breast is as easy as soaking a few sheets of rice paper and draping them over before you bake. They make such a nice thin, convincing skin on you vegan turkey and are so easy to work with! You can skip the skin part if you don’t have any rice paper or just are not into that. If you do, just mist the dough with some oil and sprinkle with your favorite seasoning before wrapping in foil and baking. The method for baking otherwise would remain the same as if you were adding the skin!

If you can not have tofu or are soy free you can check out another easy vegan turkey breast with jackfruit on our site. You could easily make that seitan recipe and stuff it with this stuffing, or make it as is and not stuff it!

There are so many other vegan meat options that would suit any holiday dinner on our website if this one does not appeal to you. Just check the meat substitute category for lots of options or even our Fall and Winter Holiday Menu E-Book. It is a full holiday meal menu start to finish! A main dish, side, deserts, and even cocktaisl. It is also loaded with video content to help you along while you are cooking!

Just know that you don’t have to settle on an overpriced, not very tasty, store bought roast this holiday season. You can make your own, super affordable, vegan stuffed turkey holiday roast right at home, and it is actually pretty easy to do! Don’t let seitan making intimidate you because it is actually really, really, easy to make!

So go, stuff a vegan turkey roast, and have the very best homemade holiday season!

Happy Holidays, Y’all!1

IMG_9358.jpg

INGREDIENTS:

  • 16oz block super firm tofu (the kind that is vacuum sealed in little water)

  • 1 cup vital wheat gluten

  • 1/2-3/4 cups water

  • 1/4 cup nutritional yeast

  • 2 tablespoons neutral flavored oil ( you can replace with water if you are oil free)

  • 2 tablespoons tapioca starch or corn starch

  • 2 teaspoons onion powder

  • 1-2 teaspoons garlic powder

  • 1/2 teaspoon sage

  • 1 teaspoon rosemary

  • 1 tablespoon No Chicken Better Than Bouillon

  • 1 teaspoon liquid smoke

  • 1 teaspoon salt optional if you feel like the bouillon is not salty enough

STUFFING:

  • 1 can whole cranberry sauce

  • 3 large slices stale bread (I used sour dough)

  • 1/3 cup sliced almonds or any chopped nut your prefer.

  • 1 small yellow onion finely diced

  • 2 teaspoons minced garlic

  • 1-2 teaspoons No Chicken Better Than Bouillon

  • 2 teaspoons dried sage

  • 2 teaspoons onion powder

  • 1 teaspoon black pepper

  • 1-2 teaspoons dried thyme

  • 1-2 teaspoons dried rosemary

Rice Paper Skin:

  • 2 tablespoons white wine (or water if you don’t want to use wine)

  • 3 tablespoons water

  • 2 teaspoons Herbs de Provence or you can use a mix of rosemary, thyme and some sage.

  • 1 teaspoon Vegetable Better than Bouillon

  • 3 sheets rice paper

*I used high protein tofu in a vacuum sealed package and this what I strongly advise using. It is much firmer than regular firm tofu and has less moisture and a more chewy texture. If you opt to use regular firm tofu you will need to press it first and remove as much liquid as possible. You may need to adjust the amount of water in the recipet as well. Add the water last, adding just enough to accomplish a firm dough.

INSTRUCTIONS:

Preheat oven to 350 degrees

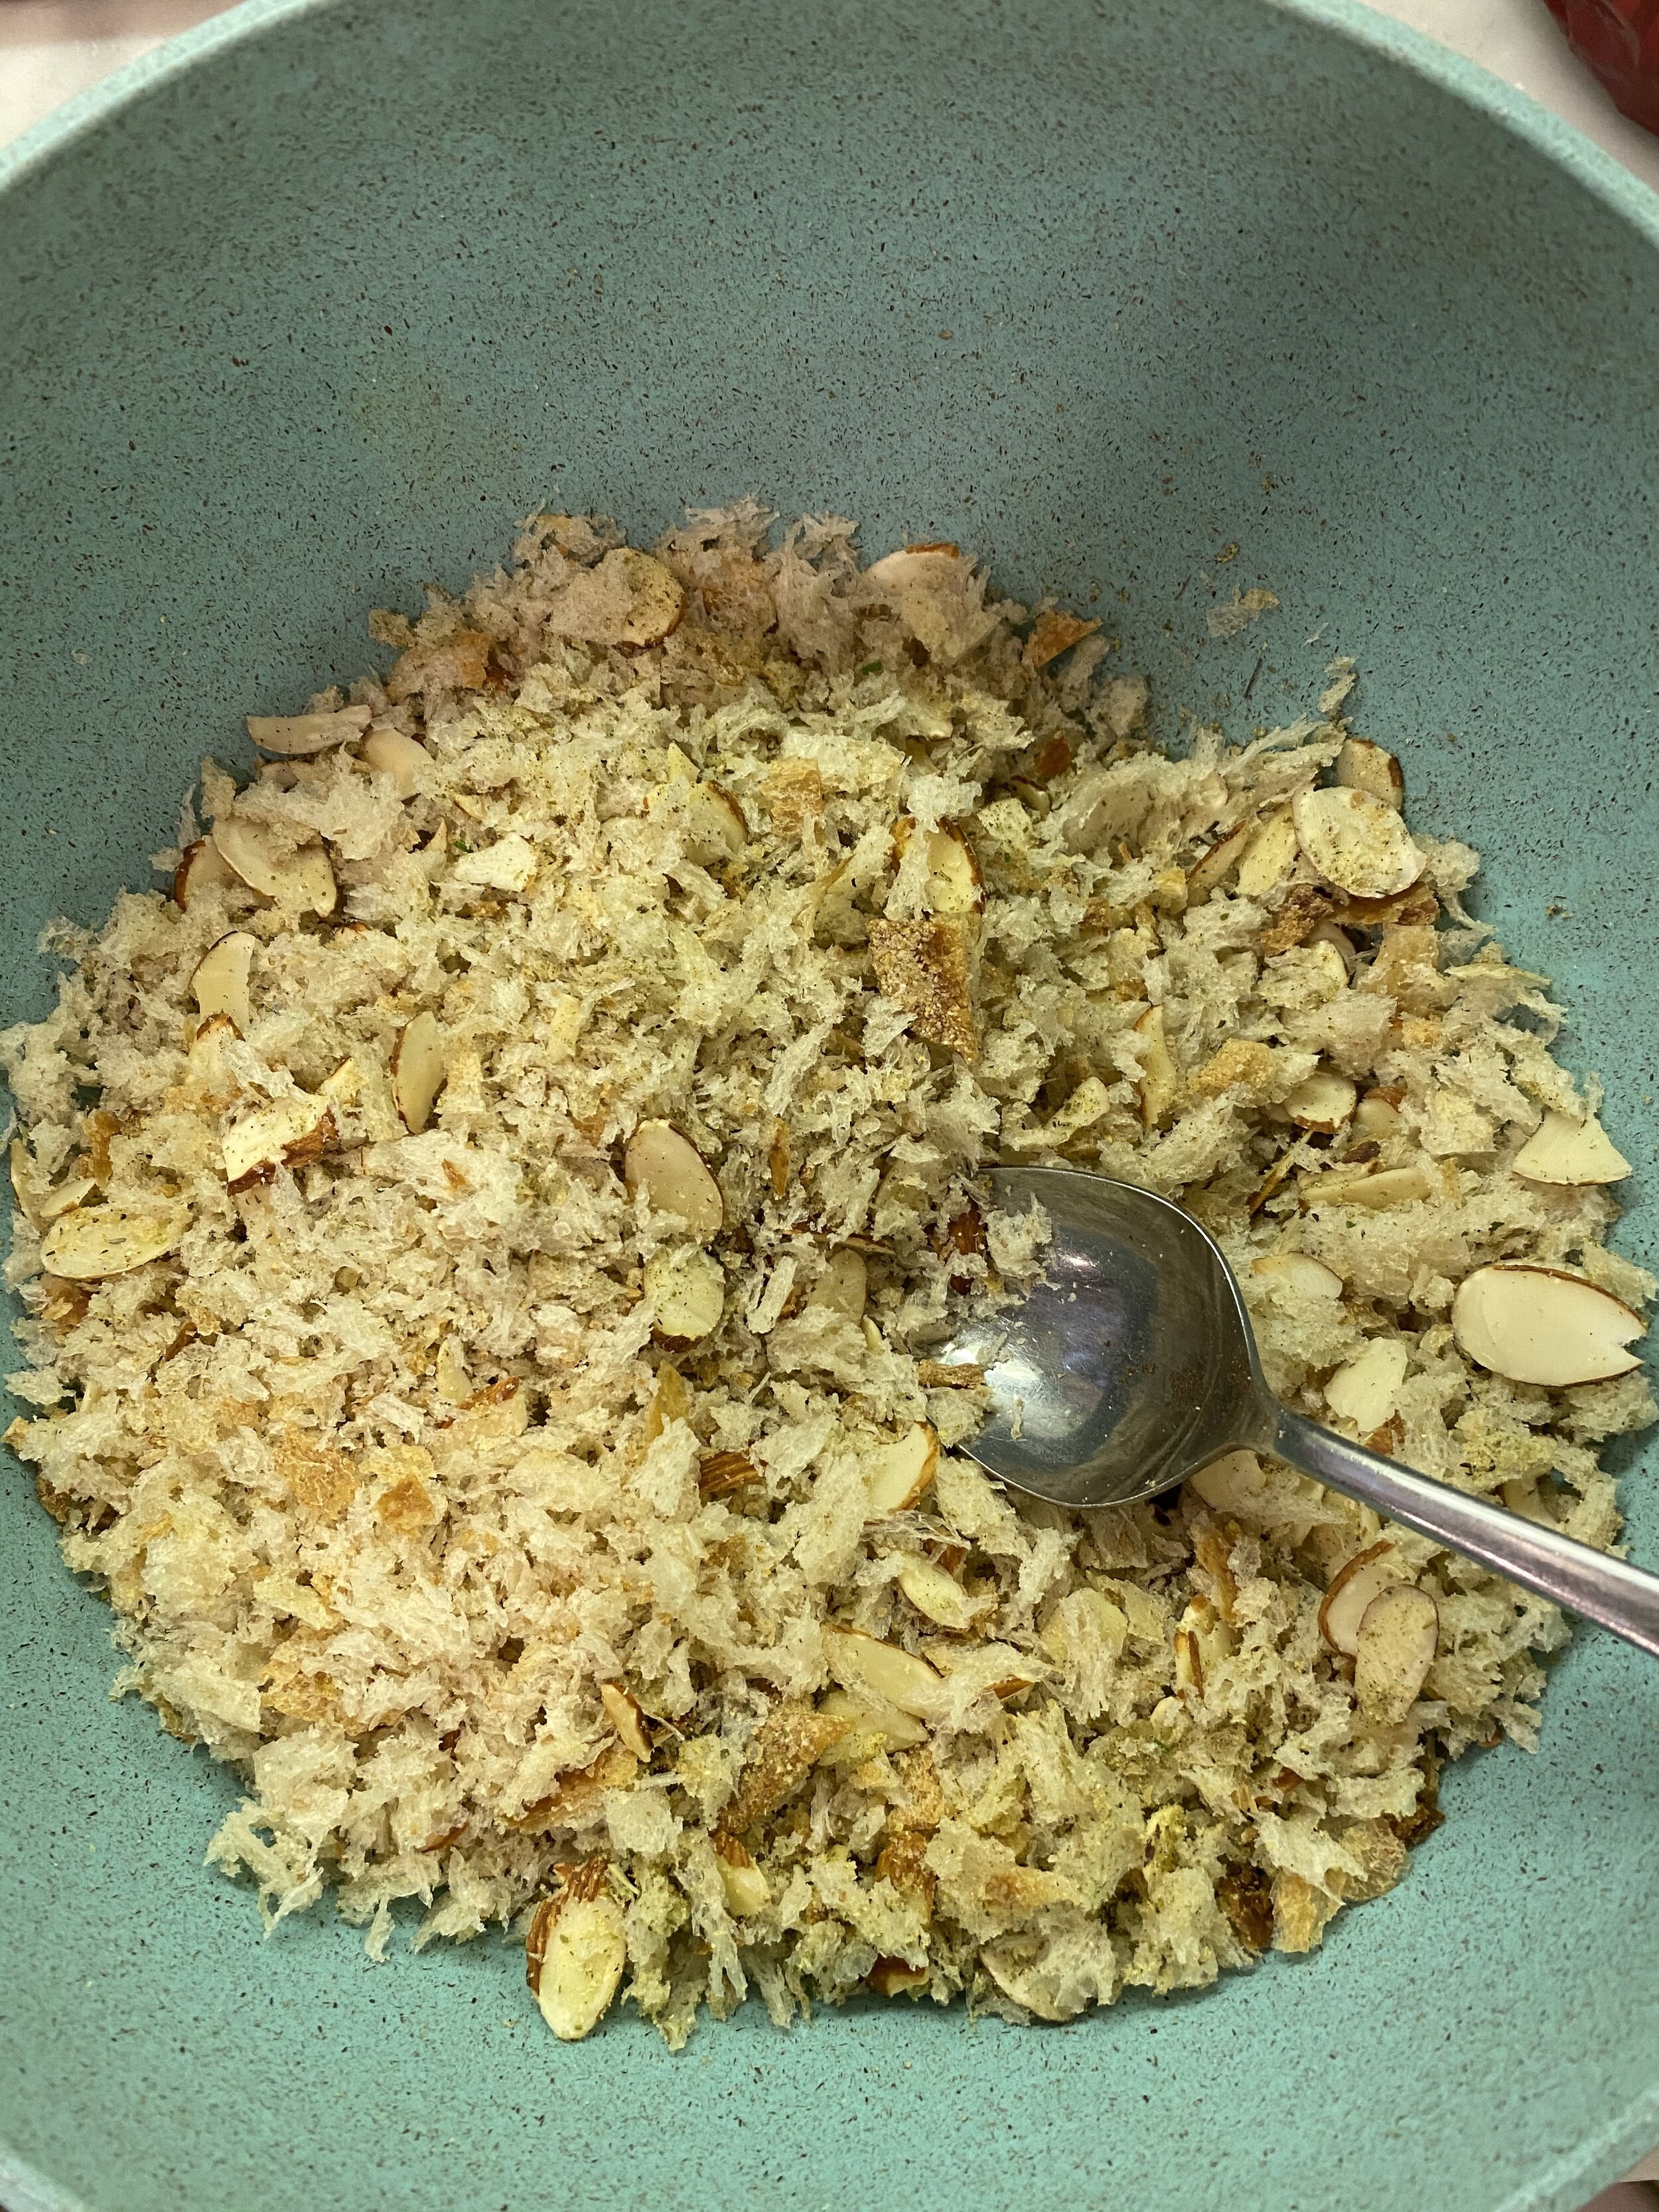
  1. The Stuffing: Take the stale bread and place it in a food processor or blender and bread it down to a crumb.

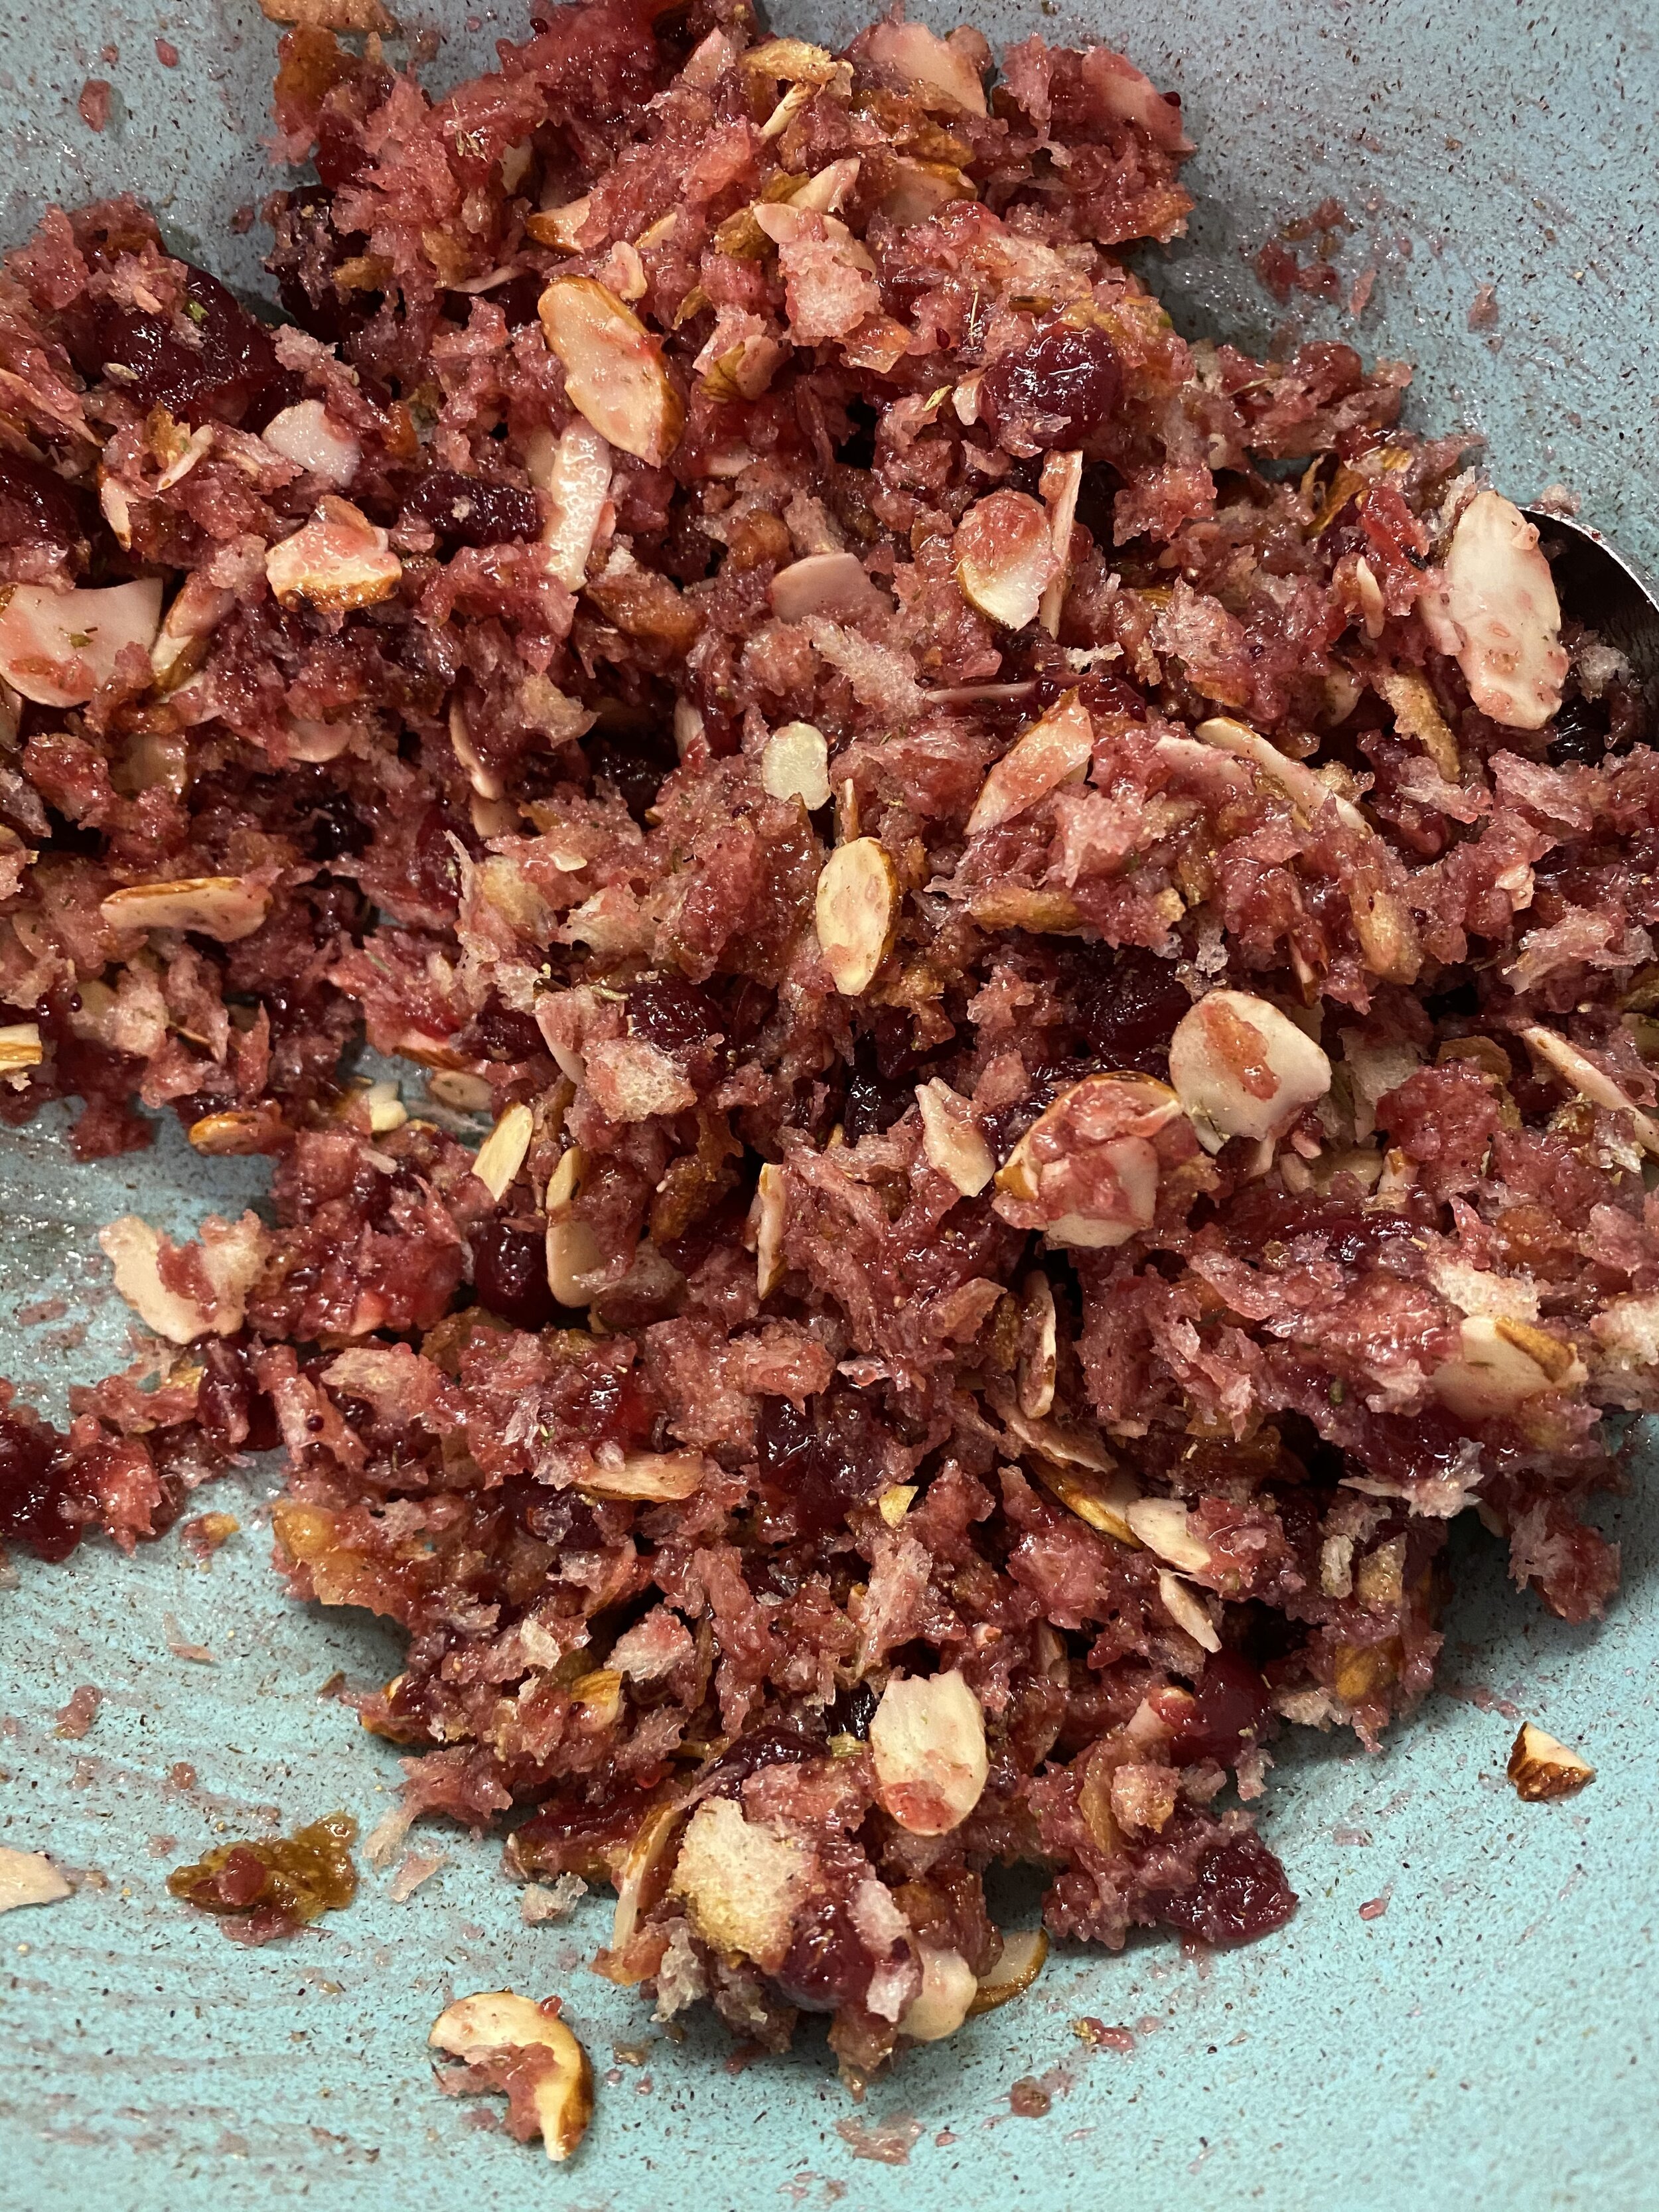
  2. Finely dice the onion and give it a sauté in a pan with a little oil. Cook until translucent. Add it along with the bread crumbs, all of the seasoning, and the full can of cranberry sauce to a medium size bowl, and mix well. You can taste the filling after you mix it up and add more seasoning if you feel like you need it. Set aside.

  3. The Turkey Breast: Break up the tofu and place it into a food processor with the regular metal blade. Run the processor for around a minute until the tofu is broken down.

  4. Add all of the remaining ingredients and let the food processor run for a couple of minutes. You want the mixture to form a dough. Letting the processor run will help knead the dough. We want this seitan to be firm so we need it to knead for a bit. If you dough seems a bit too dry, you can add another few tablespoons of water, just don’t add too much more! I start at 1/2 cup and work from there.

  5. If you do not have a food processor you can break down the tofu in a blender, then mix the remaining ingredient together by hand in a bowl. You will have knead the dough very well by hand on a clean surface for several minutes.

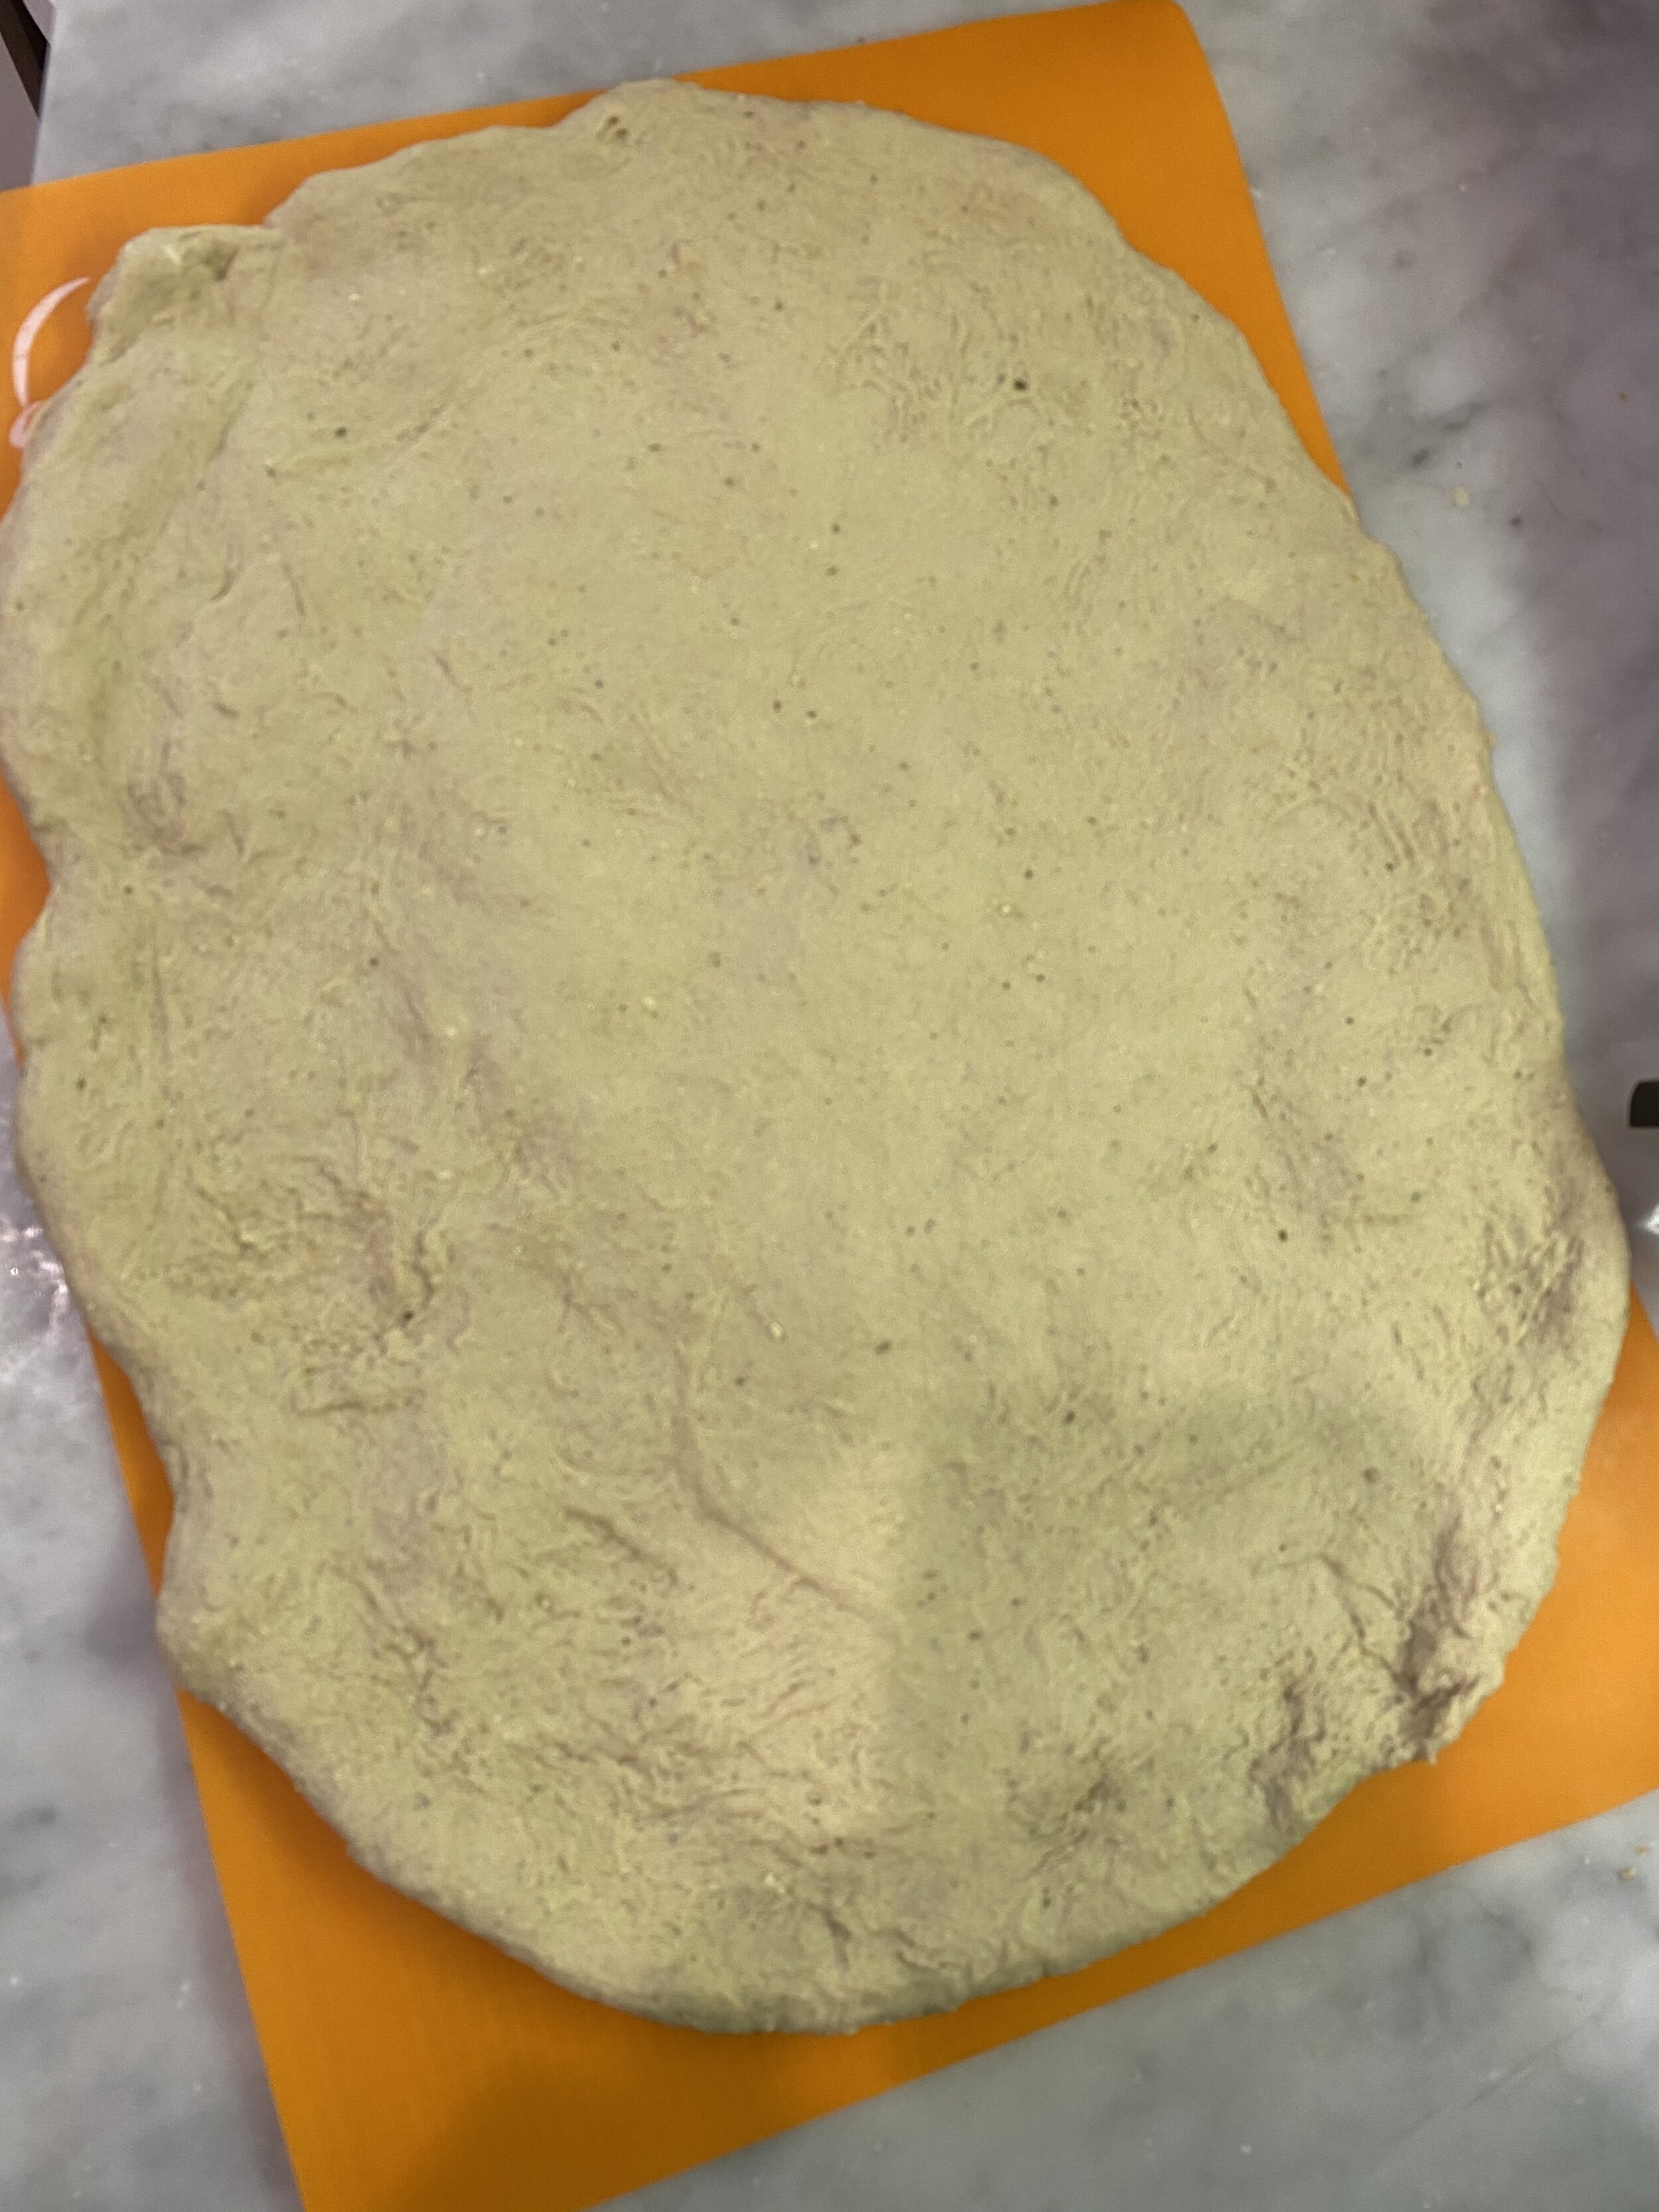
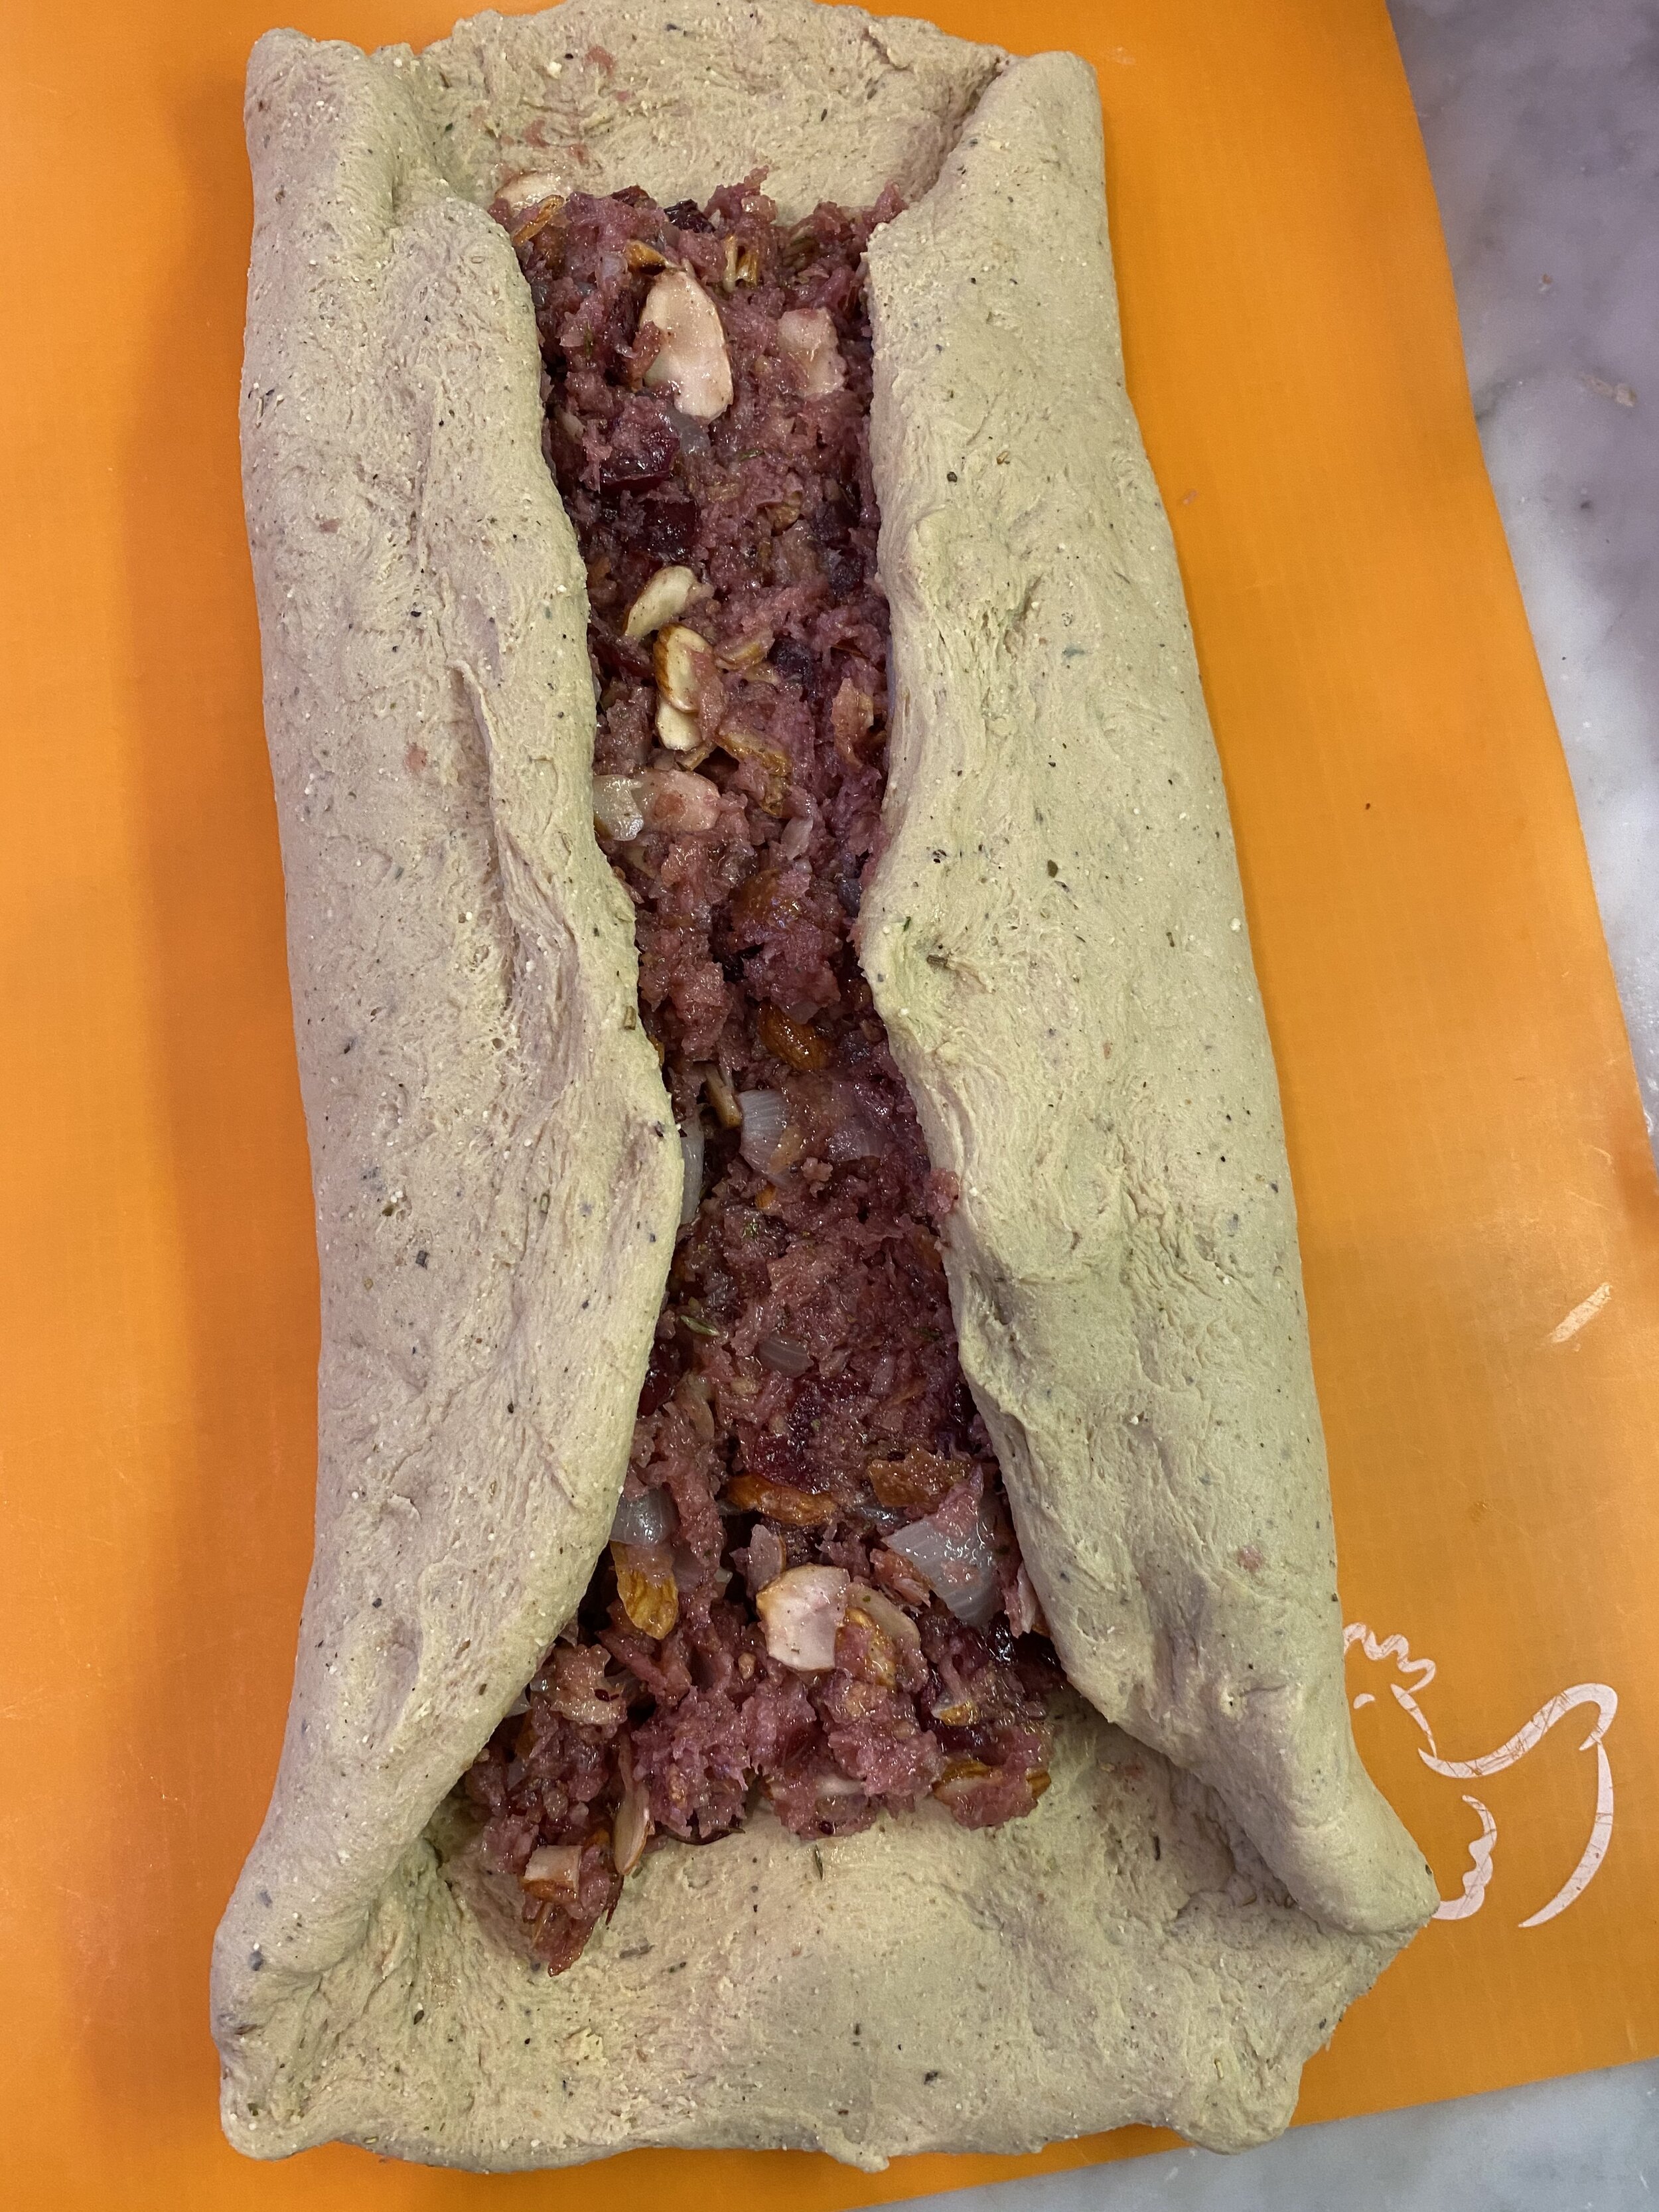
  6. Once you have a smooth but firm dough, remove it from the food processor and place on a clean counter. Knead the dough with your hands for about a minute, forming a large rectangle shaped the dough (see above picture.)

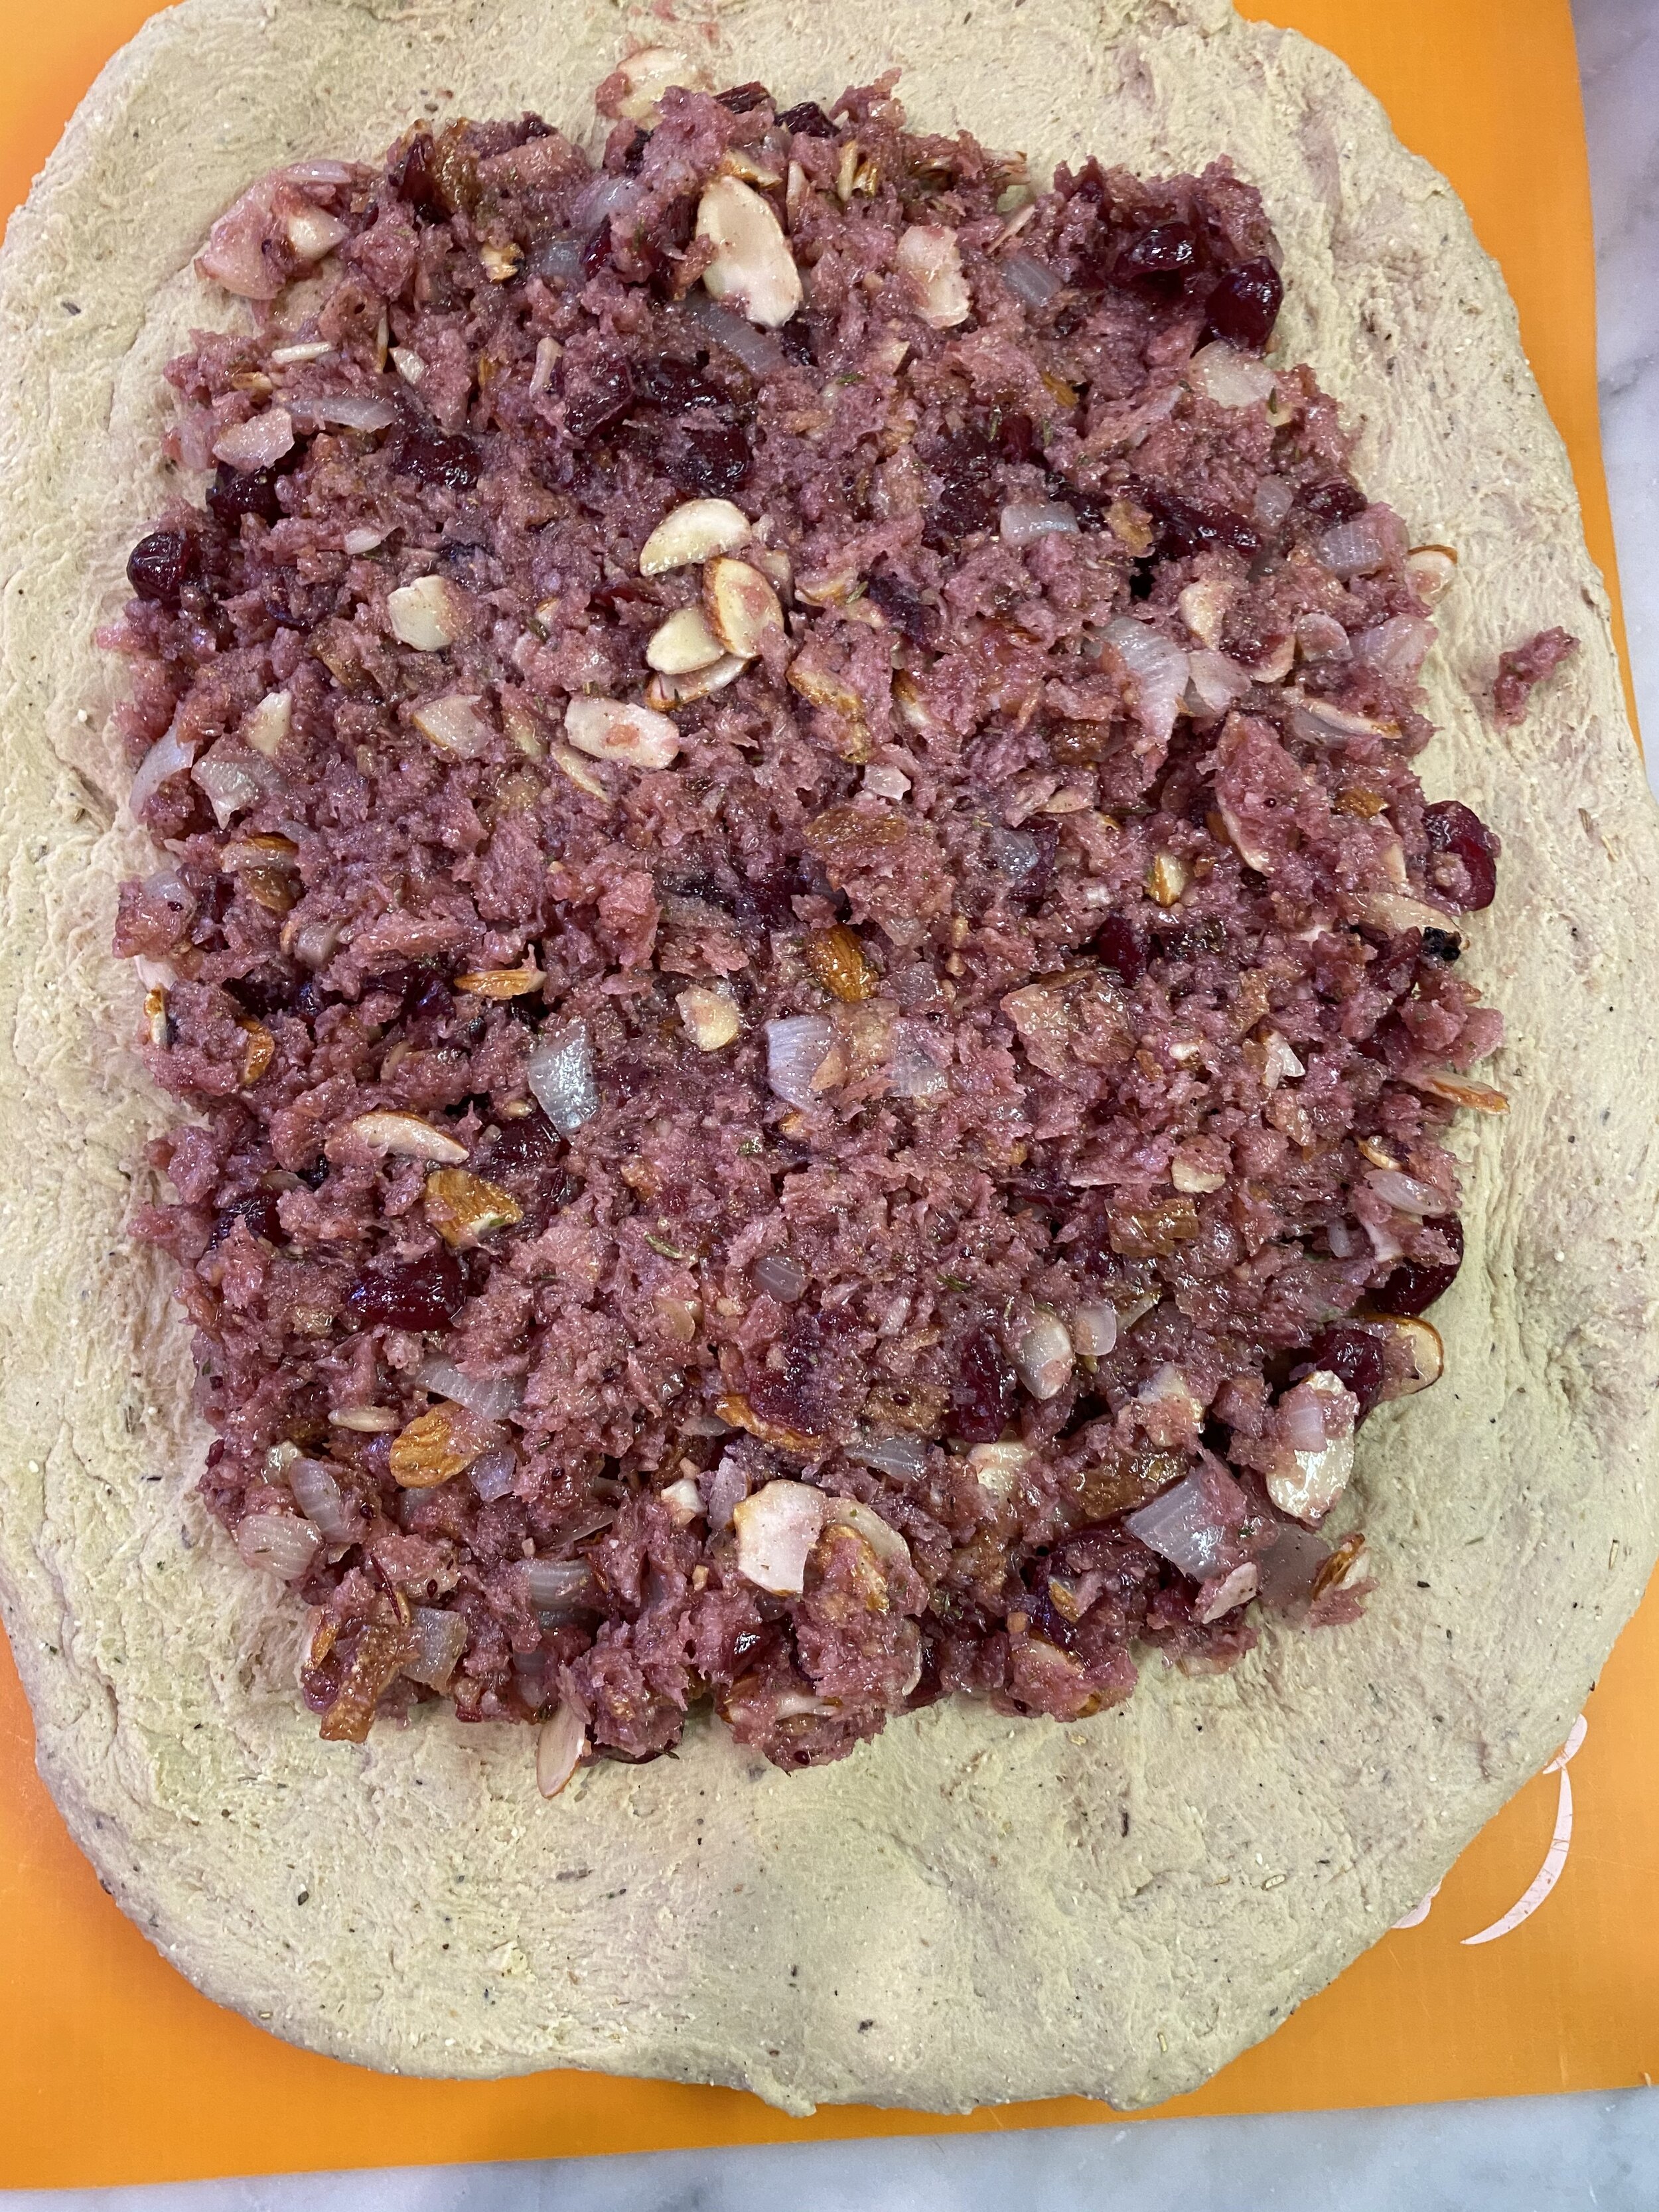
  7. Scoop the stuffing into the center of the dough and spread it out in an even layer leaving an inch or so border around the edge of the rectangle untouched by the filling. It is important to not let the stuffing touch that outside edge of dough! Wet dough does not like to stick together and tends to rip!! If you fill like you have too much stuffing then take a bit out. This will vary deepening on the size of bread slices you used You don’t want to overstuff the roast.

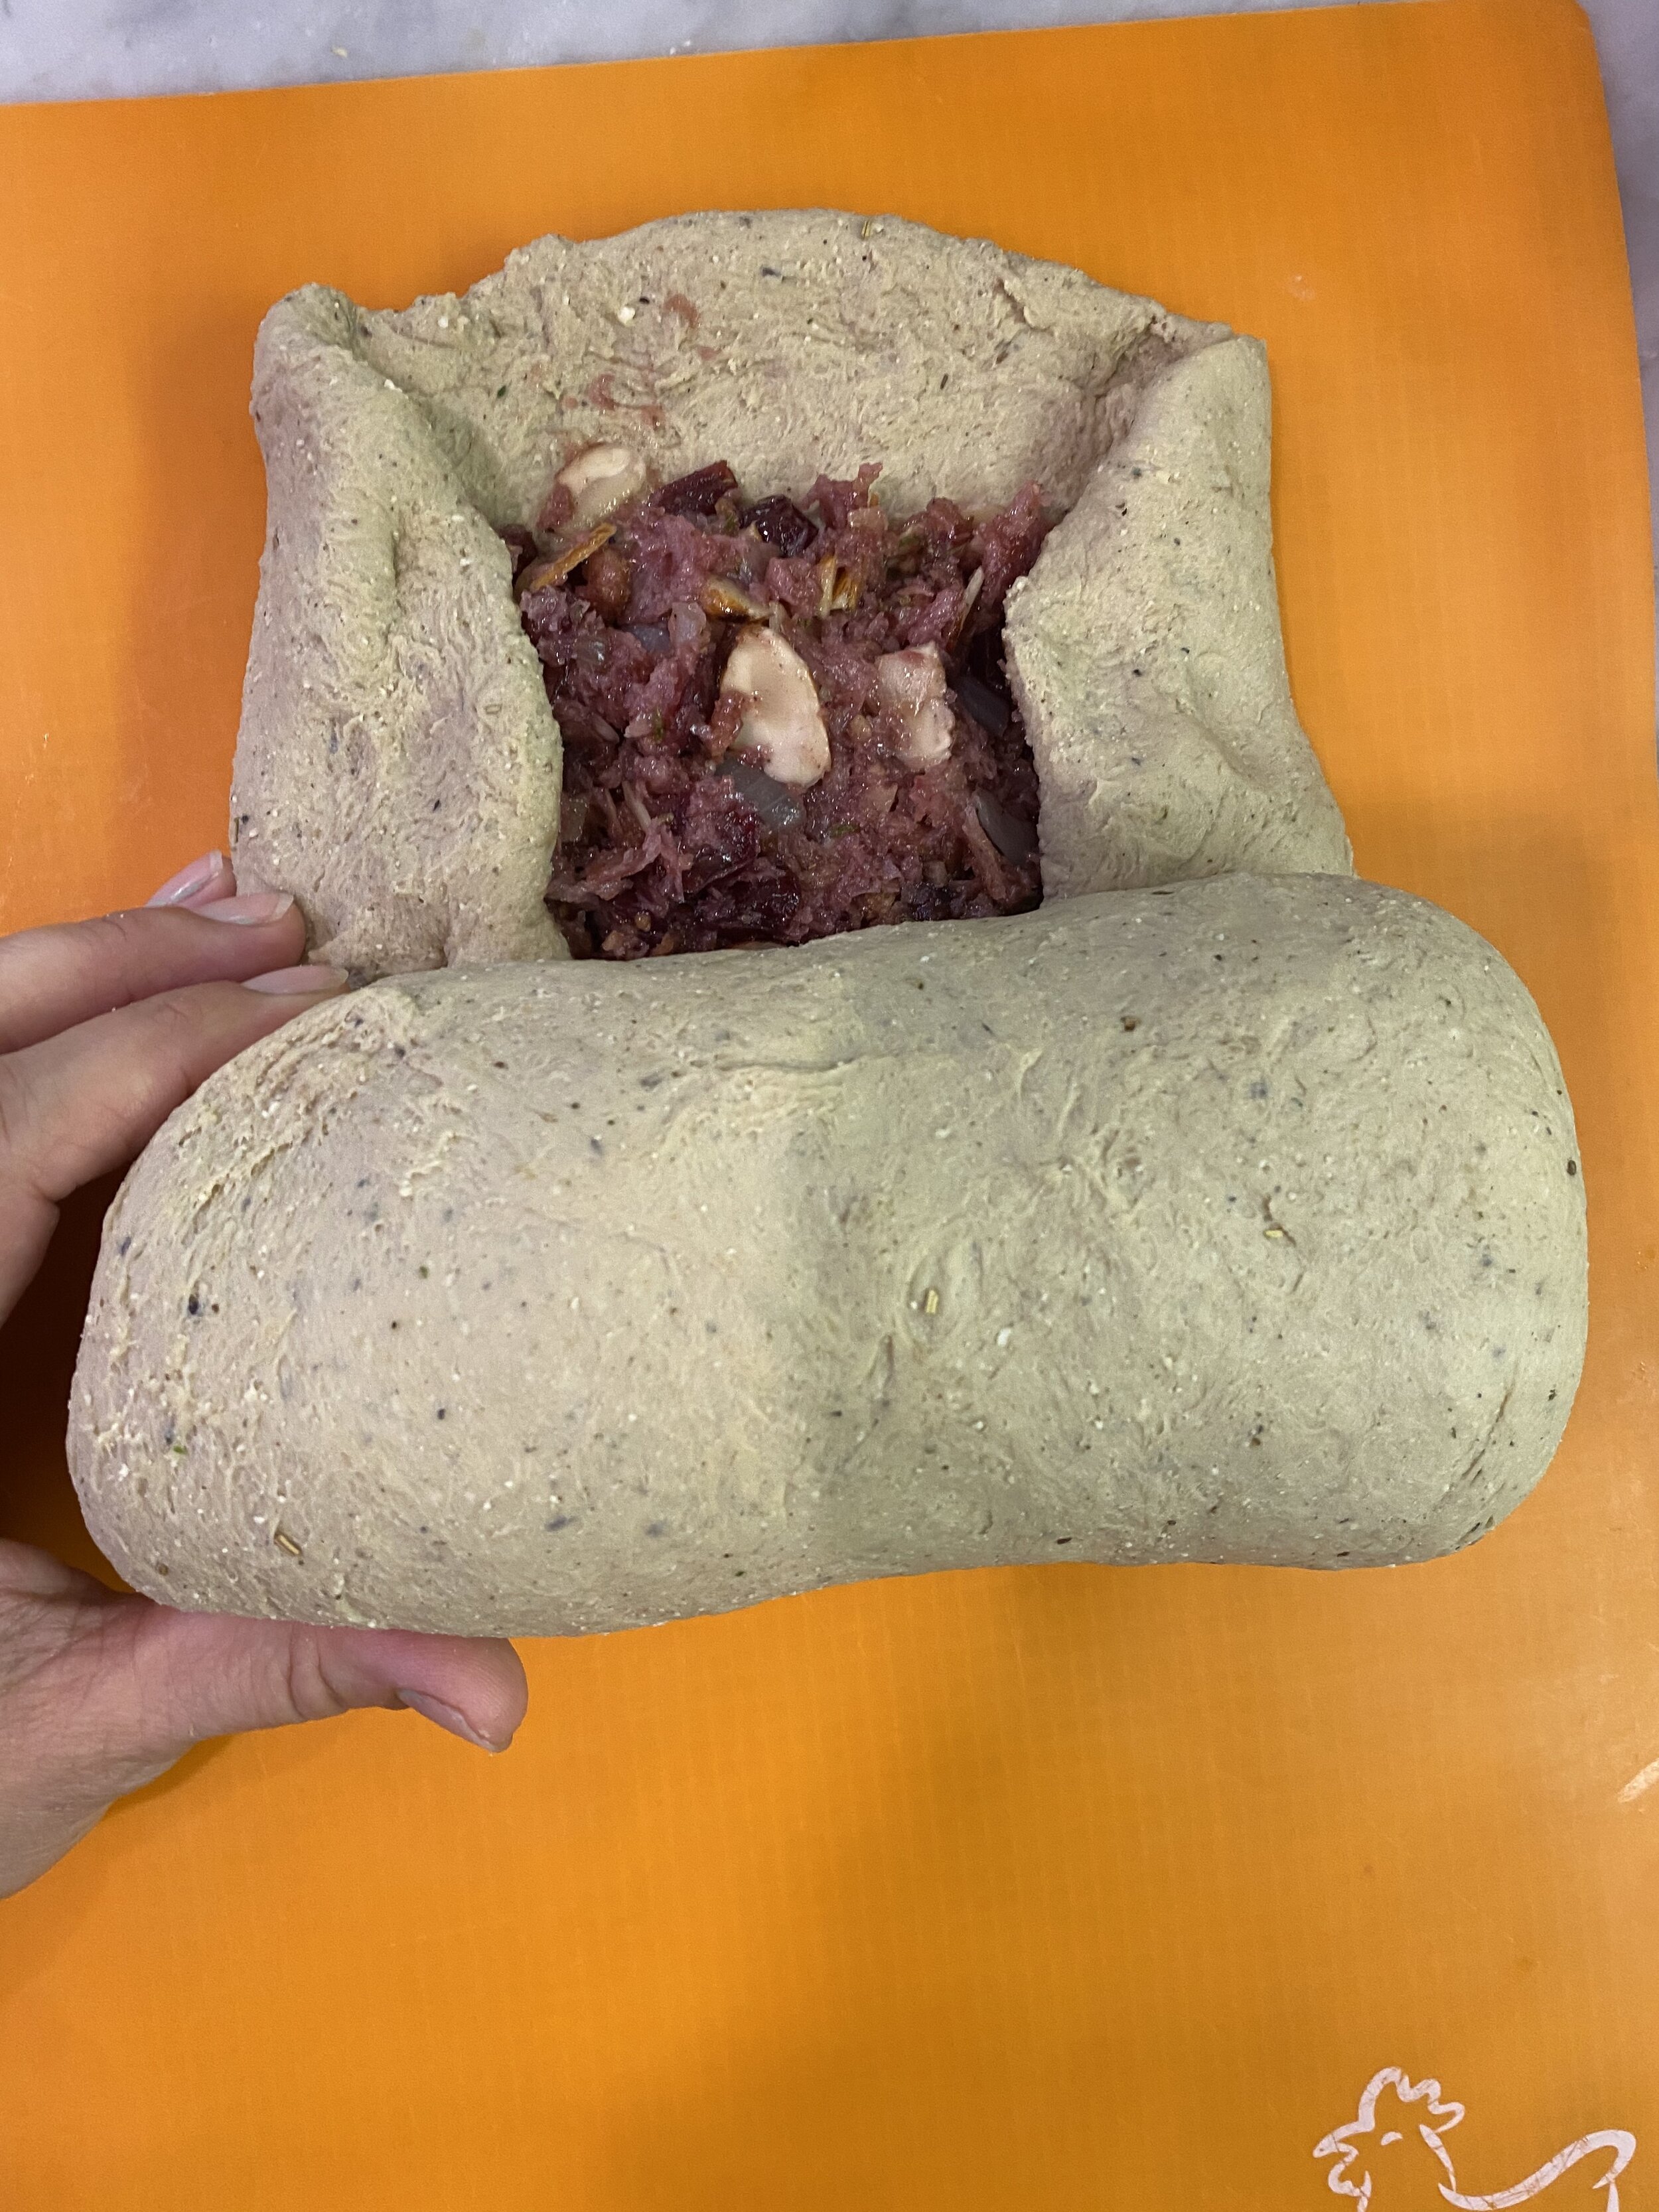
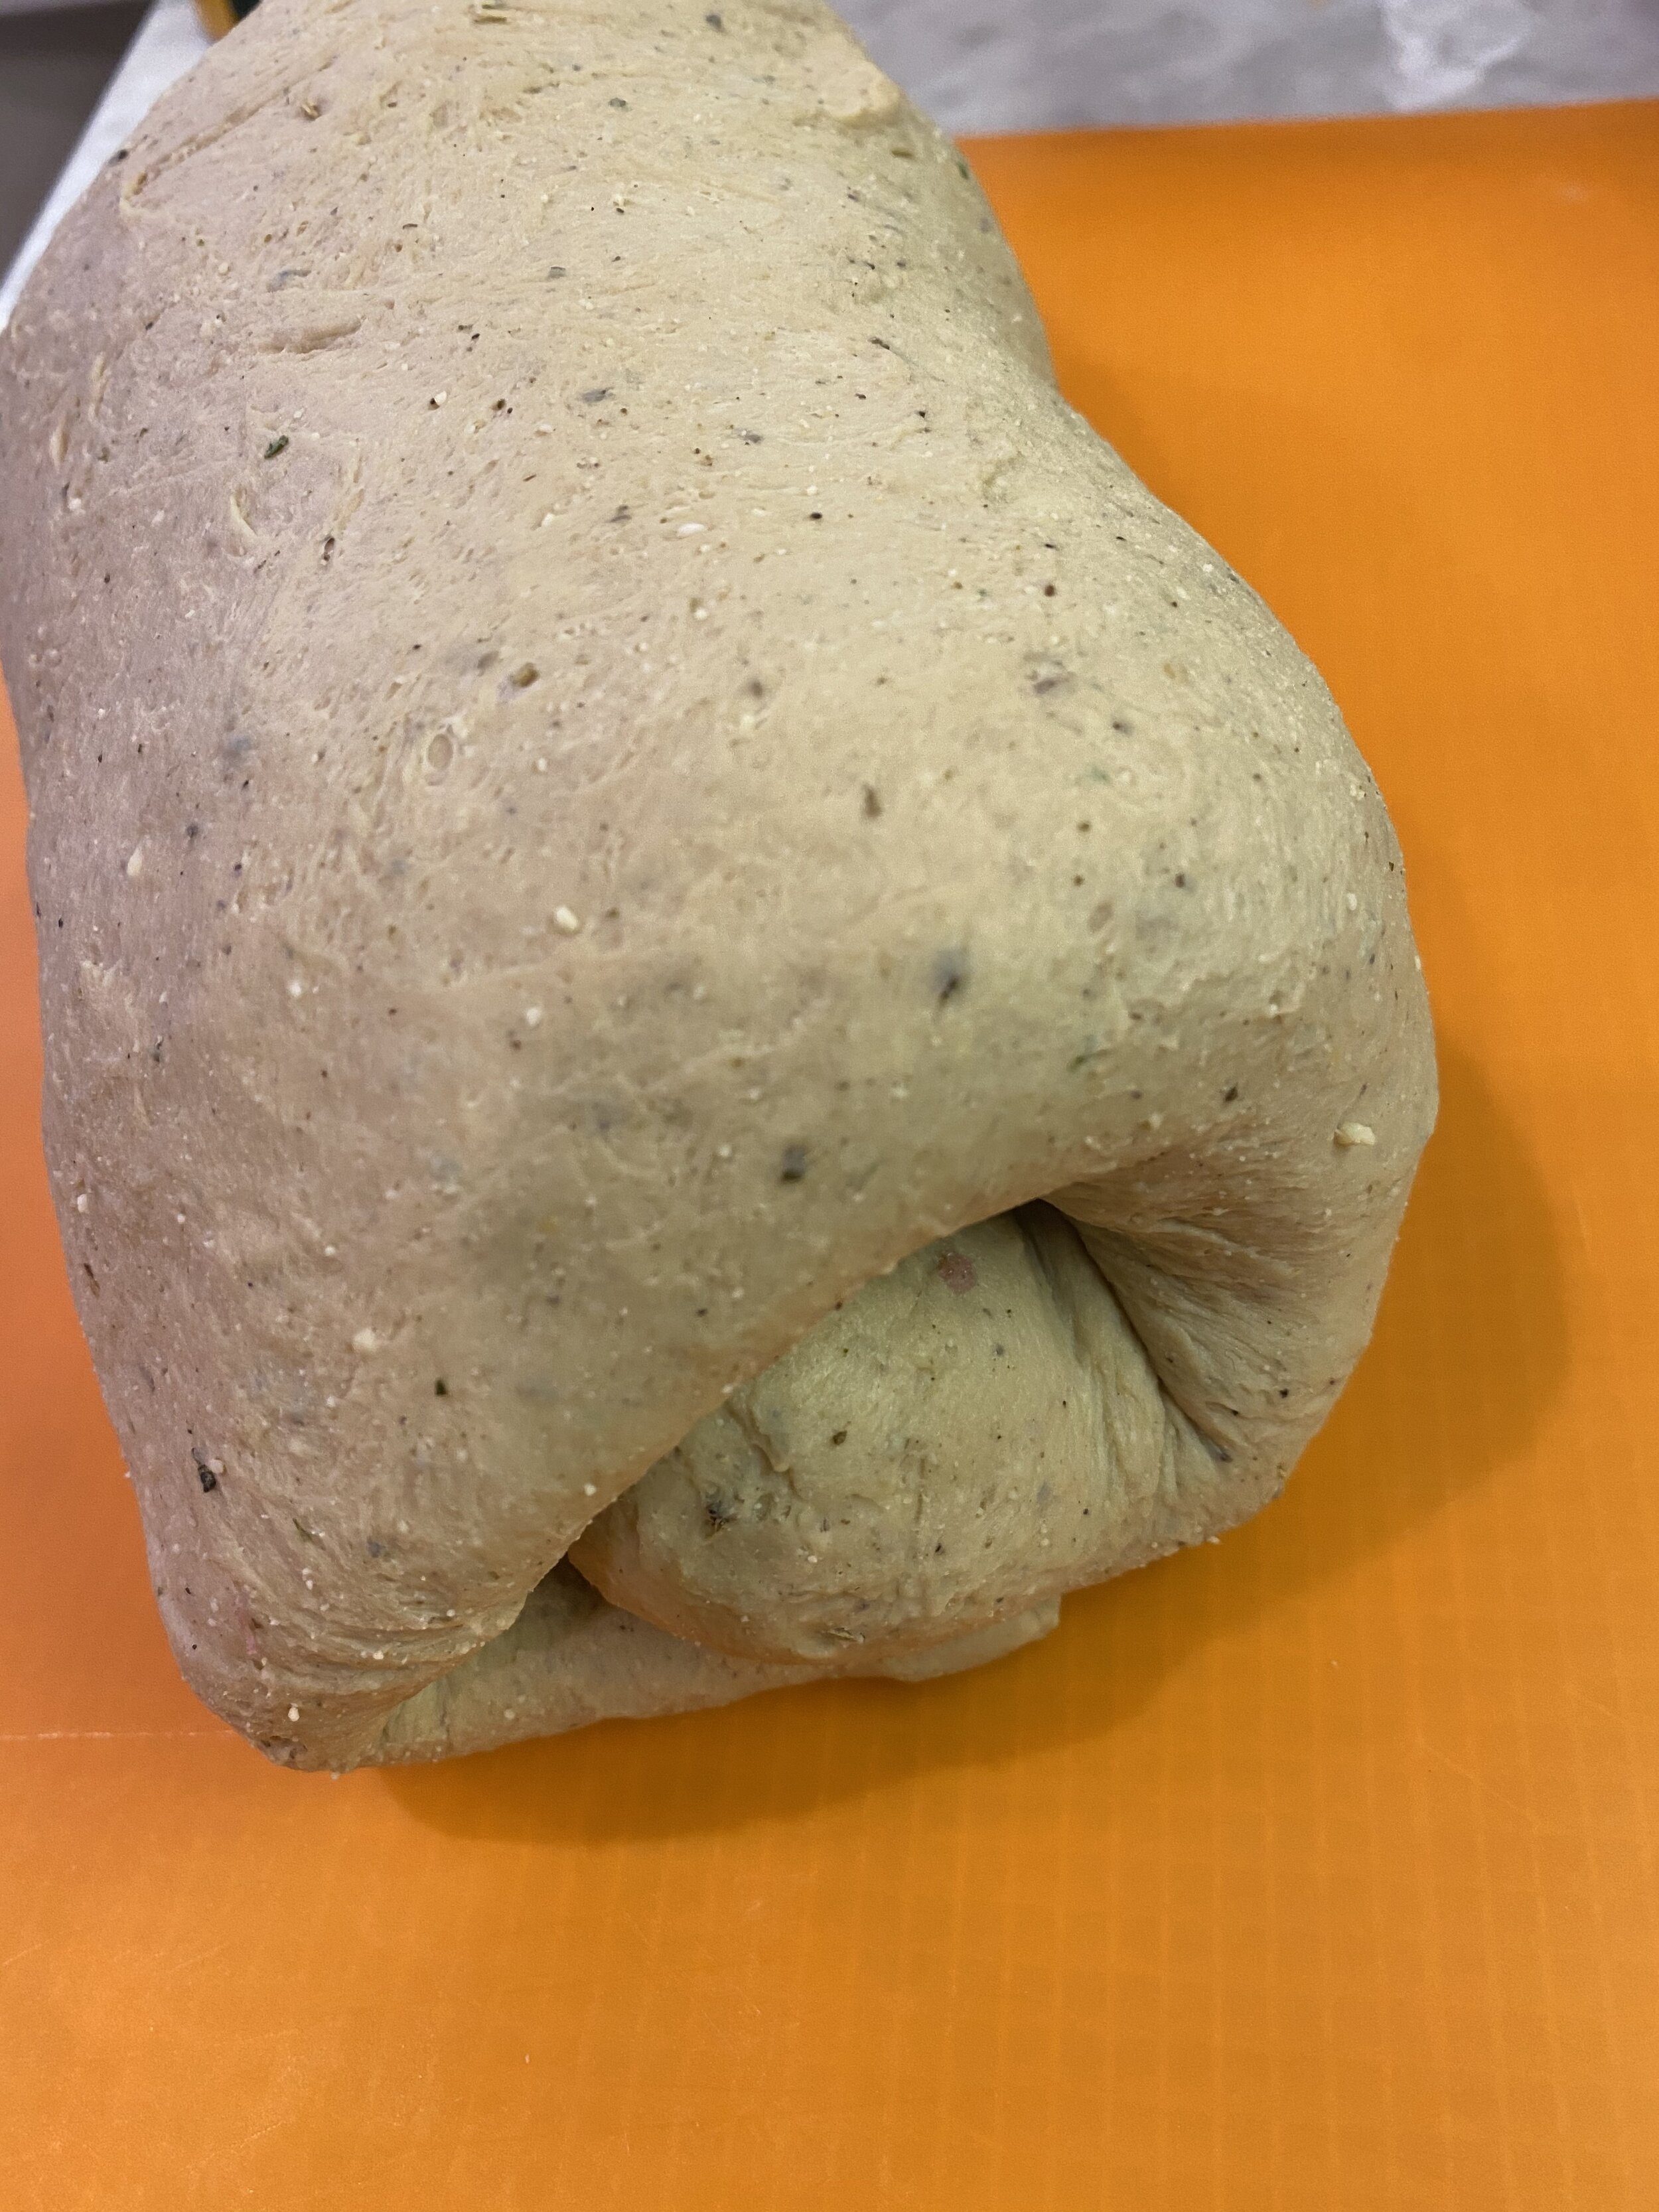
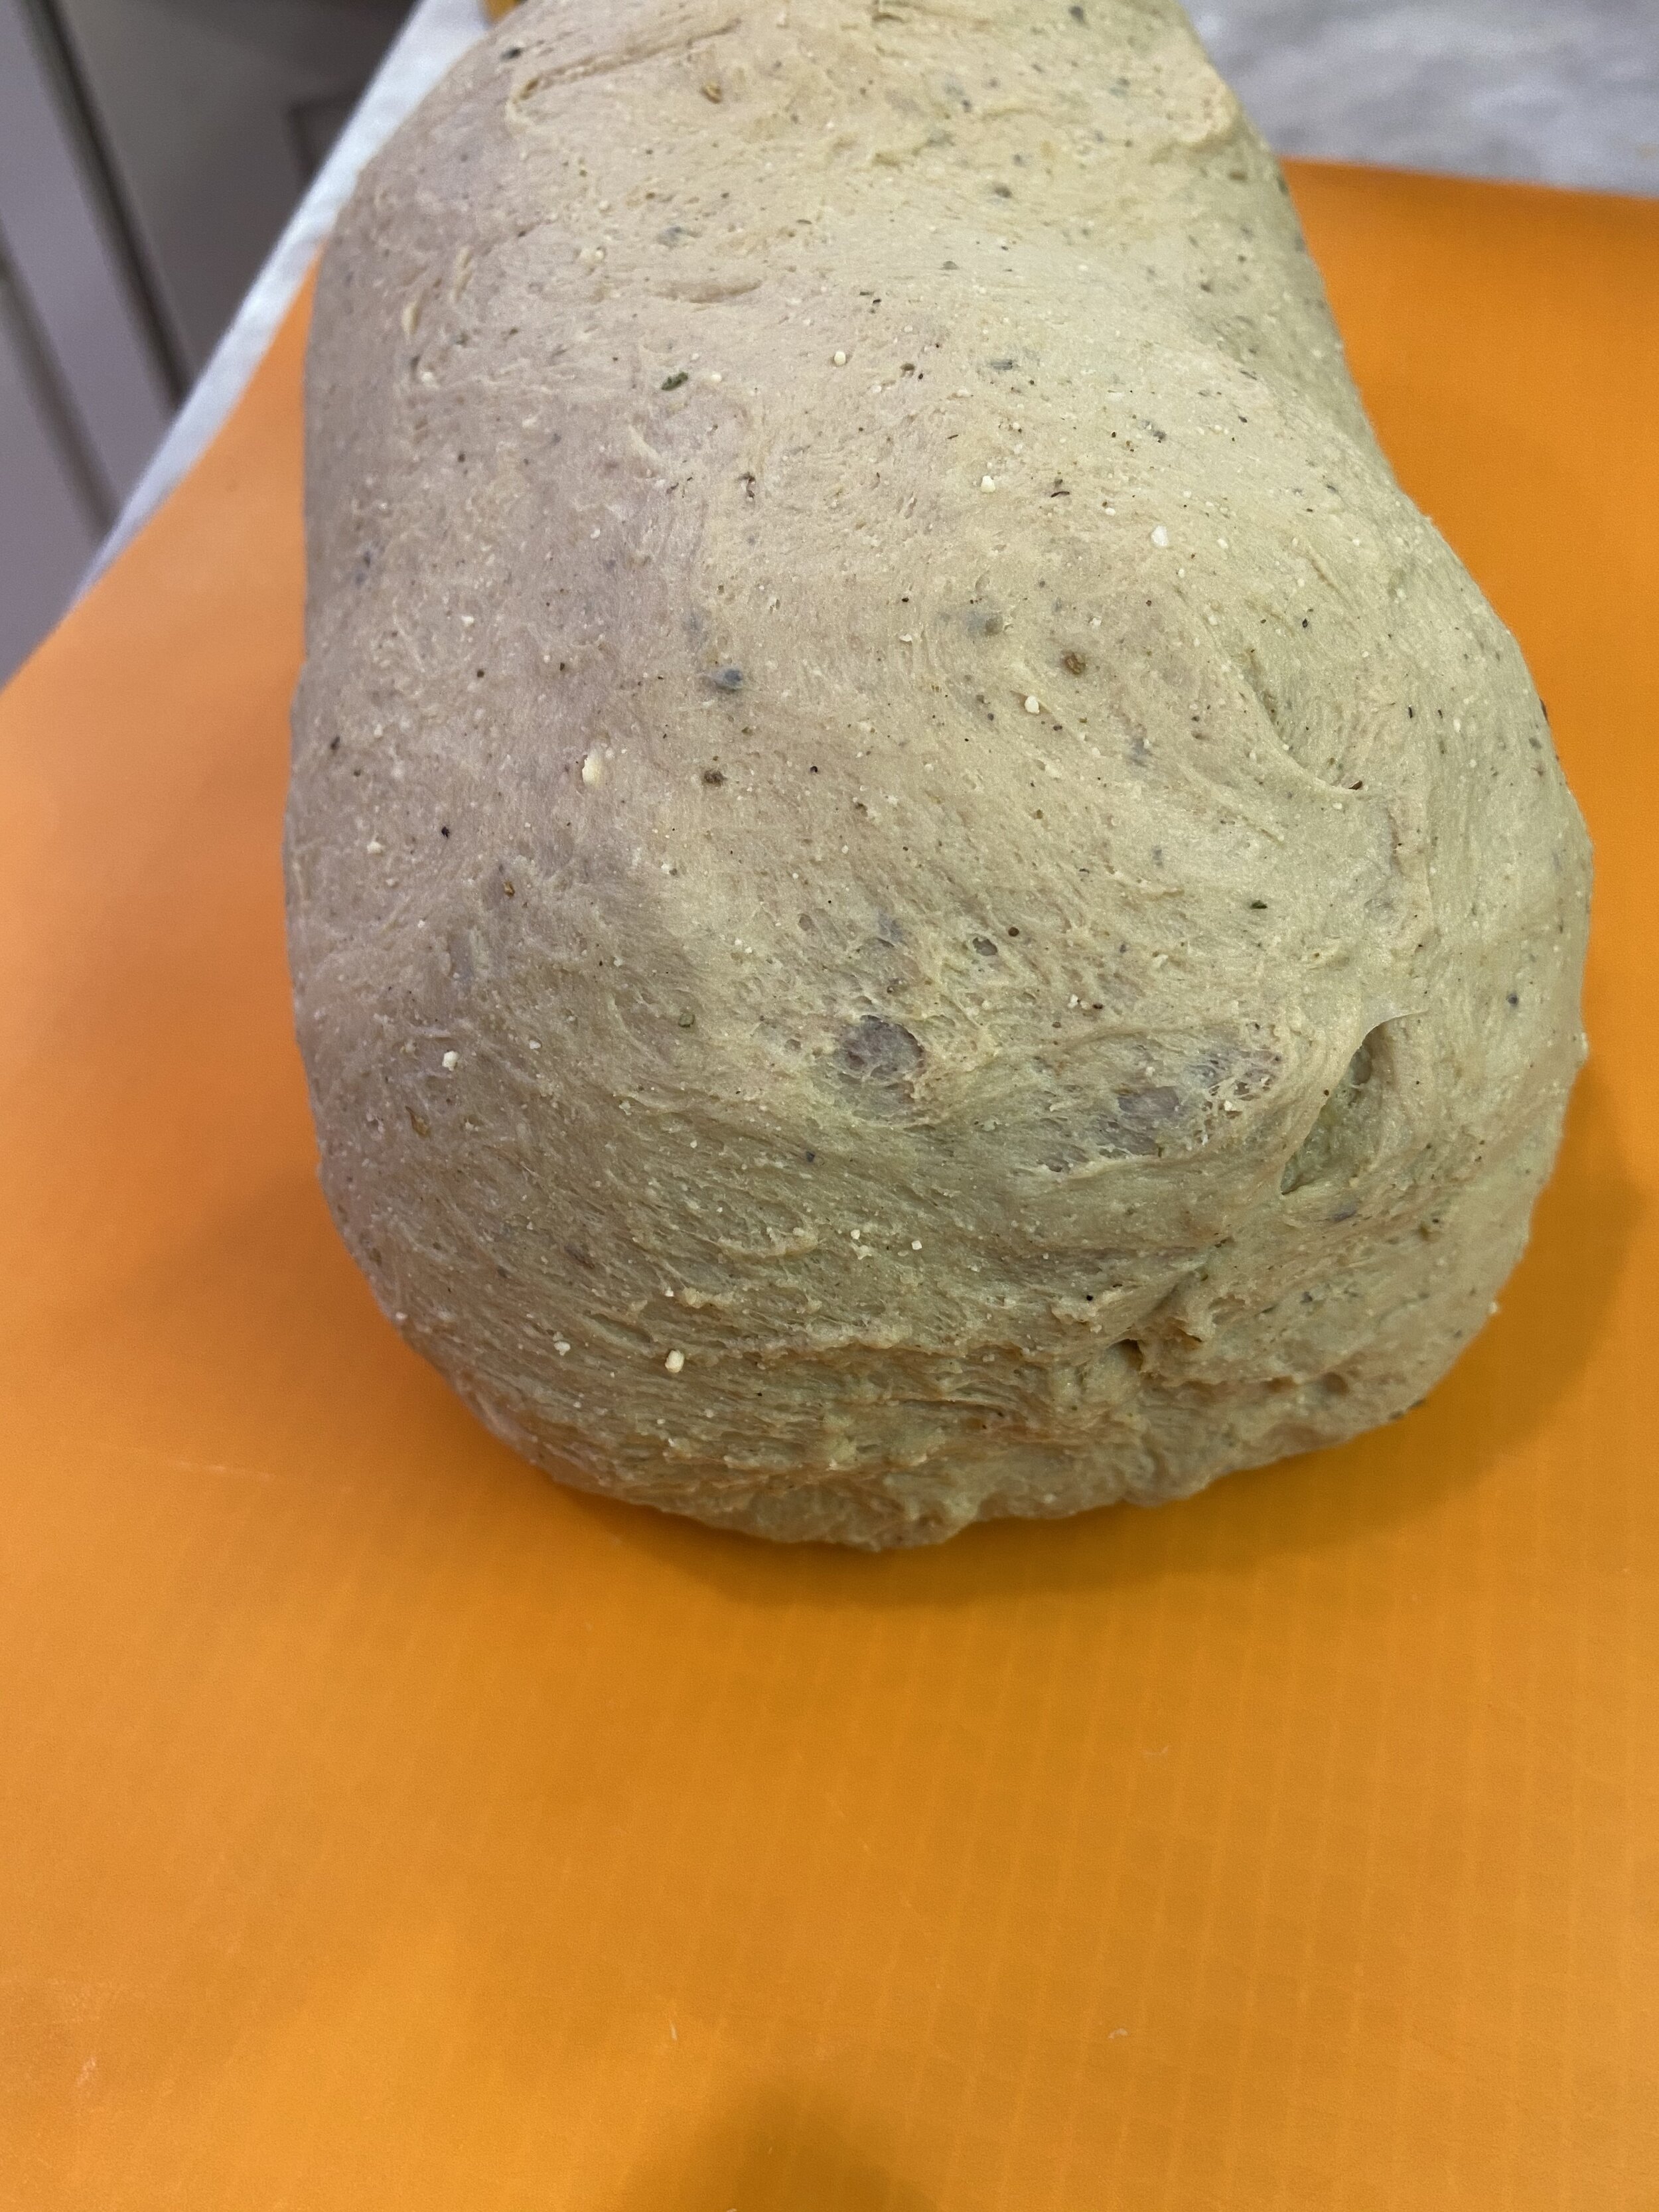
  8. Fold up the longer sides over the filling, then begin rolling the vegan turkey roast from one of the short ends as tightly as you can while keeping the filling from all squishing out! Once the roast is all rolled up, use your fingers to pinch and smooth out the ends and the underside seam. Just be careful not to rip any holes in the dough while pinching it!

  9. Take a piece of aluminum foil about 3 times the size of your roast. Spray or brush it well with some oil.

  10. Add all of the ingredients for the rice paper skin, except the rice paper, to a shallow dish or pie pan and whisk. Place one sheet of rice paper into the liquid and let it sit there until it becomes completely soft. This takes several minutes. Gently lift the rice paper from the dish and place it in the middle of the foil repeat with a second piece of rice paper and kind of overlap it a bit on the first piece. Place the “turkey” roast on top of the paper and fold the edges of the rice paper up around the roast. Continue with the other 2 pieces of rice paper just the same as the first, draping each one over the top of the roast and tucking or pressing the edges of the paper around the roast. The paper should be very soft and sticky, and cling well to the roast.

  11. Spray the top of the vegan turkey, and all over the rice paper with some oil or you can brush it. This step is needed to help prevent the rice paper from sticking to the foil.

  12. Fold up the foil around the roast making a nice tight pouch Place the pouch on a cookie sheet and into the oven on the middle rack.

  13. Allow the vegan turkey roast to bake wrapped in the foil for 30 minutes. After 30 minutes CAREFULLY open up the foil. The rice paper may have stuck a little, just gently pull the foil back. If it sticking a lot you can spray a little oil into the foil pouch as you are pulling it back and tends to help it pull away. Some rips in the skin is ok, it won’t really be noticeable! Just smooth it back down with a spoon in any spots it ripped. Allow the vegan turkey roast to bake an additional 30 minutes unwrapped.

  14. Remove the roast from the oven and let cool a bit at room temperature. Loosly recover the roast and place into the fridge to rest for AT LEAST 6 HOURS. THE BREAST MUST REST!!! Seitan requires a rest to firm up and get that meat like texture we are trying to accomplish. If you do not allow the breast to rest you will likely not be pleased with the texture!

  15. After you have allowed the vegan turkey roast to REST, you can reheat it in the oven at 350 degrees. Place the roast on a baking sheet with a piece of foil lightly draped over the top. Let the roast heat for about 20 mintues or so to heat through. After about 20 minutes uncover the roast and brush the skin with some vegan butter. Let it bake for another 10 minutes or until the top is golden brown and crispy.

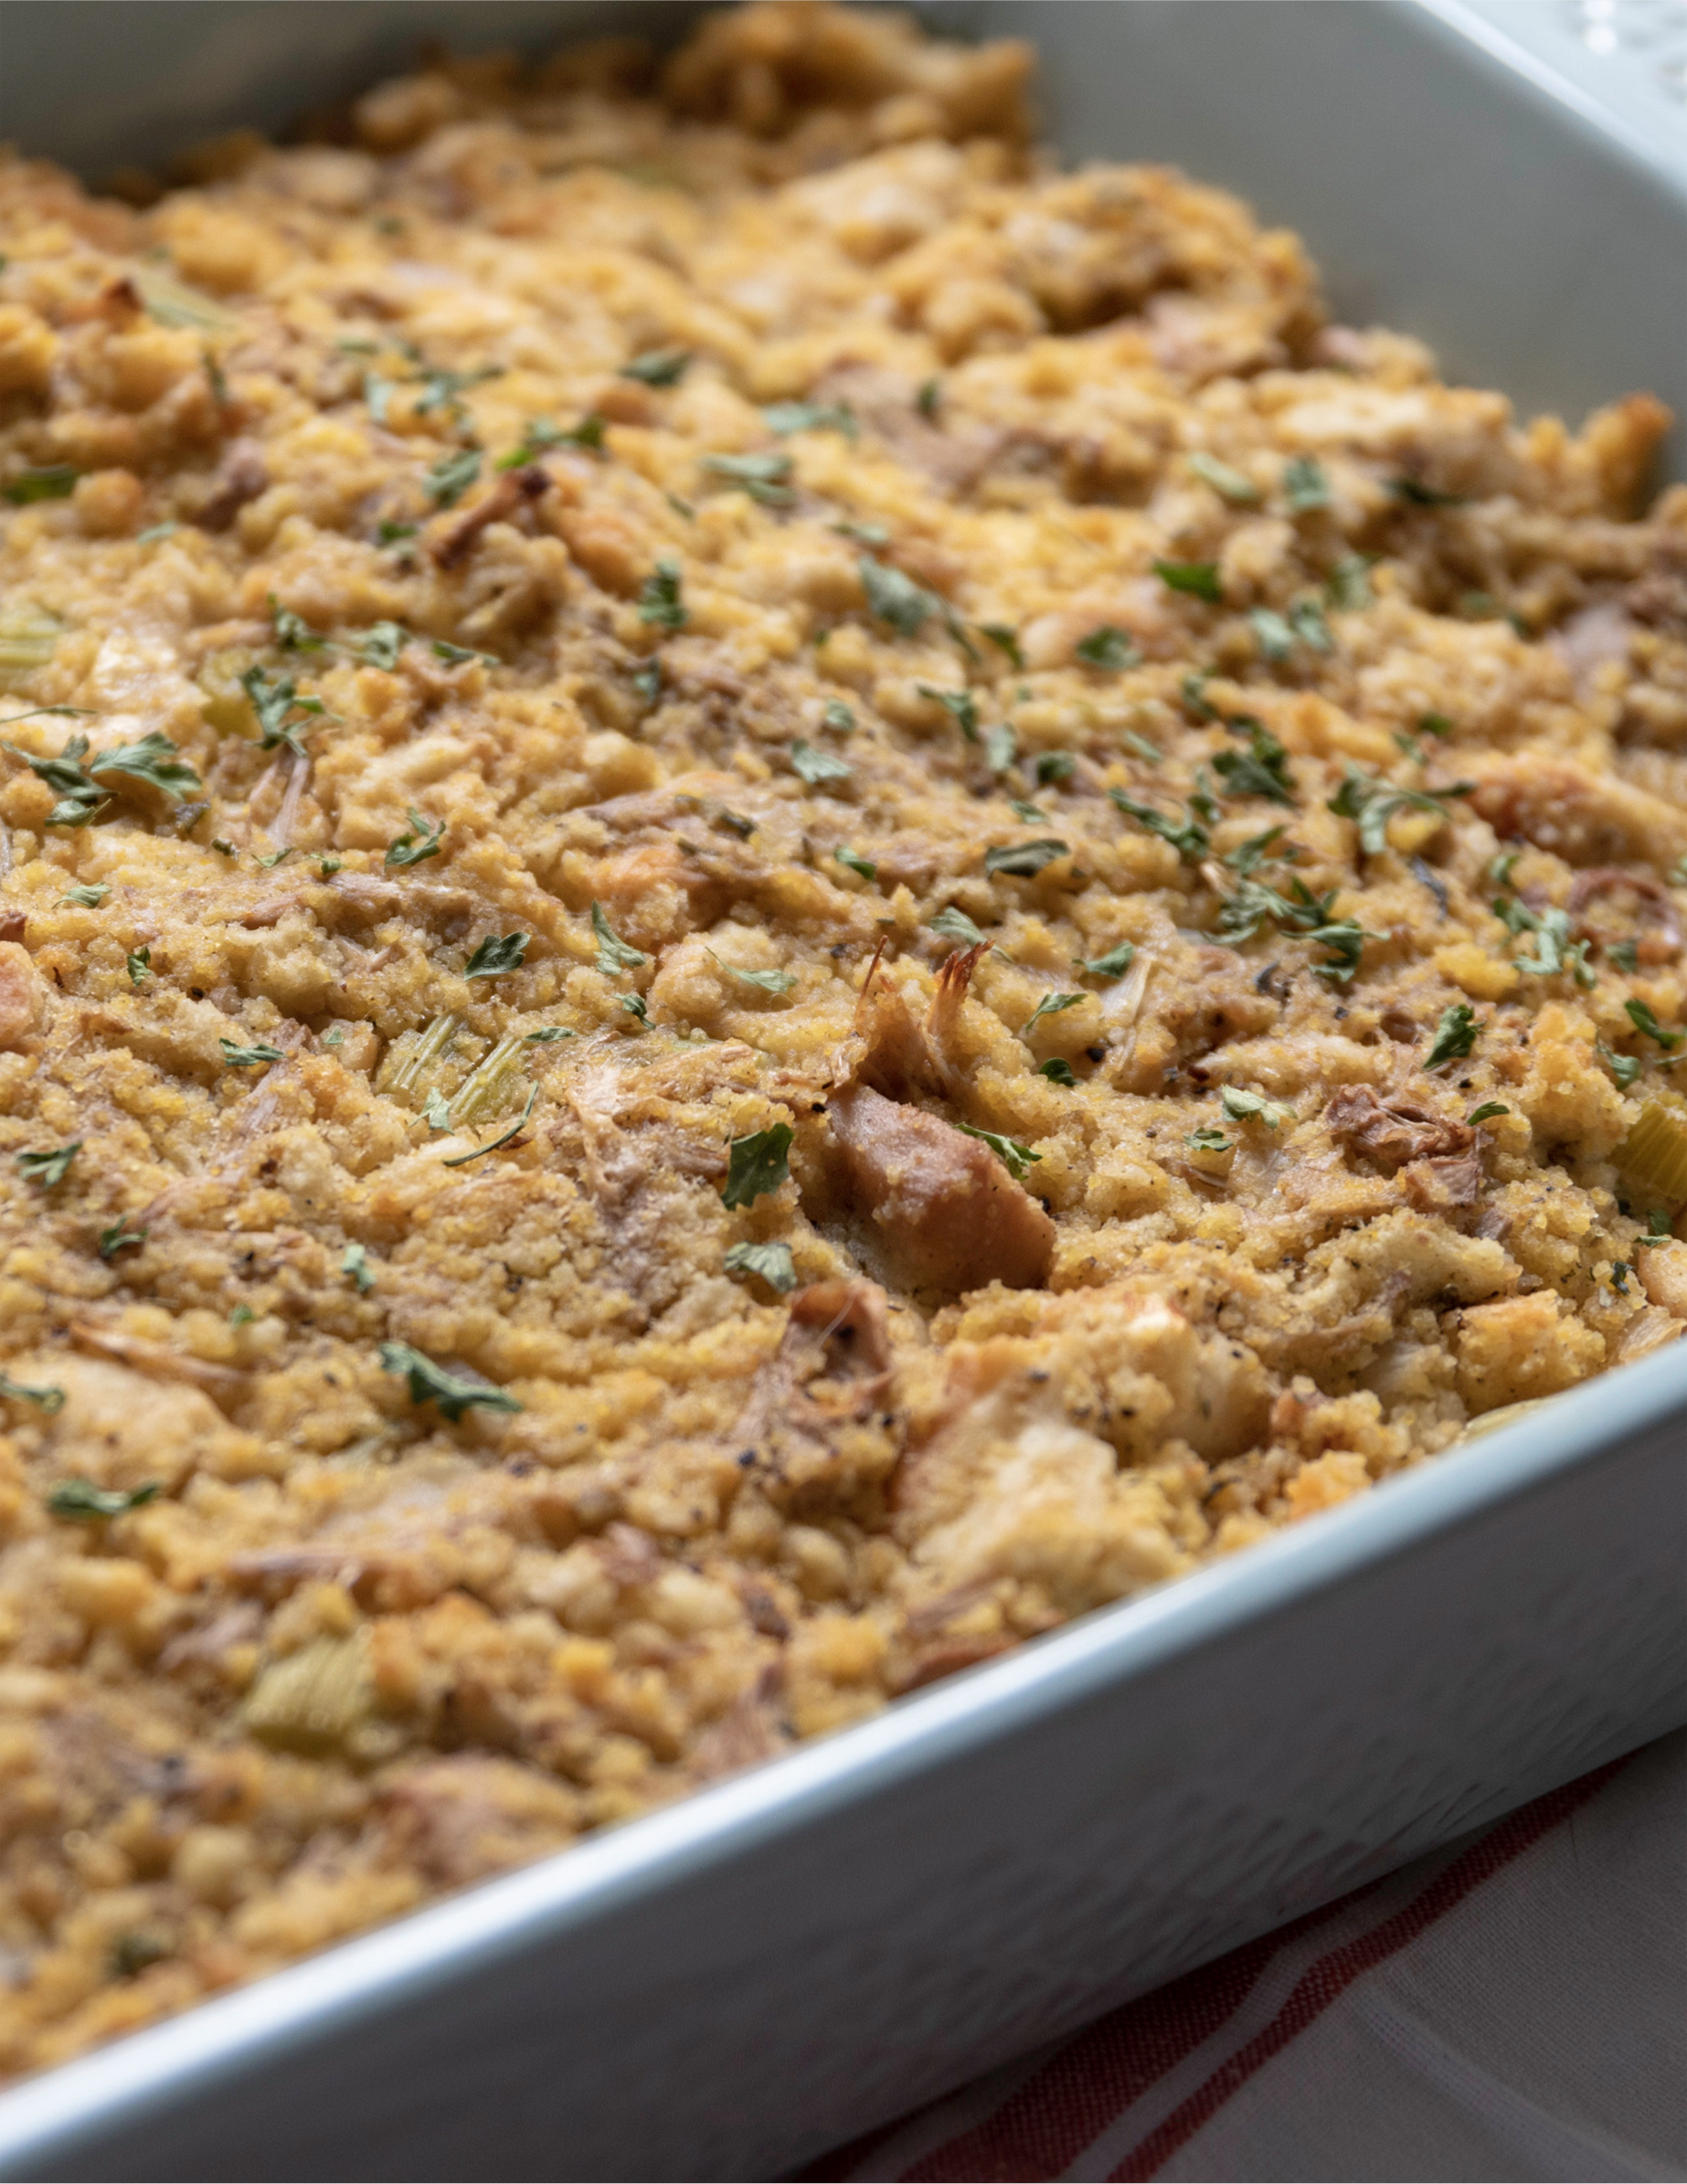
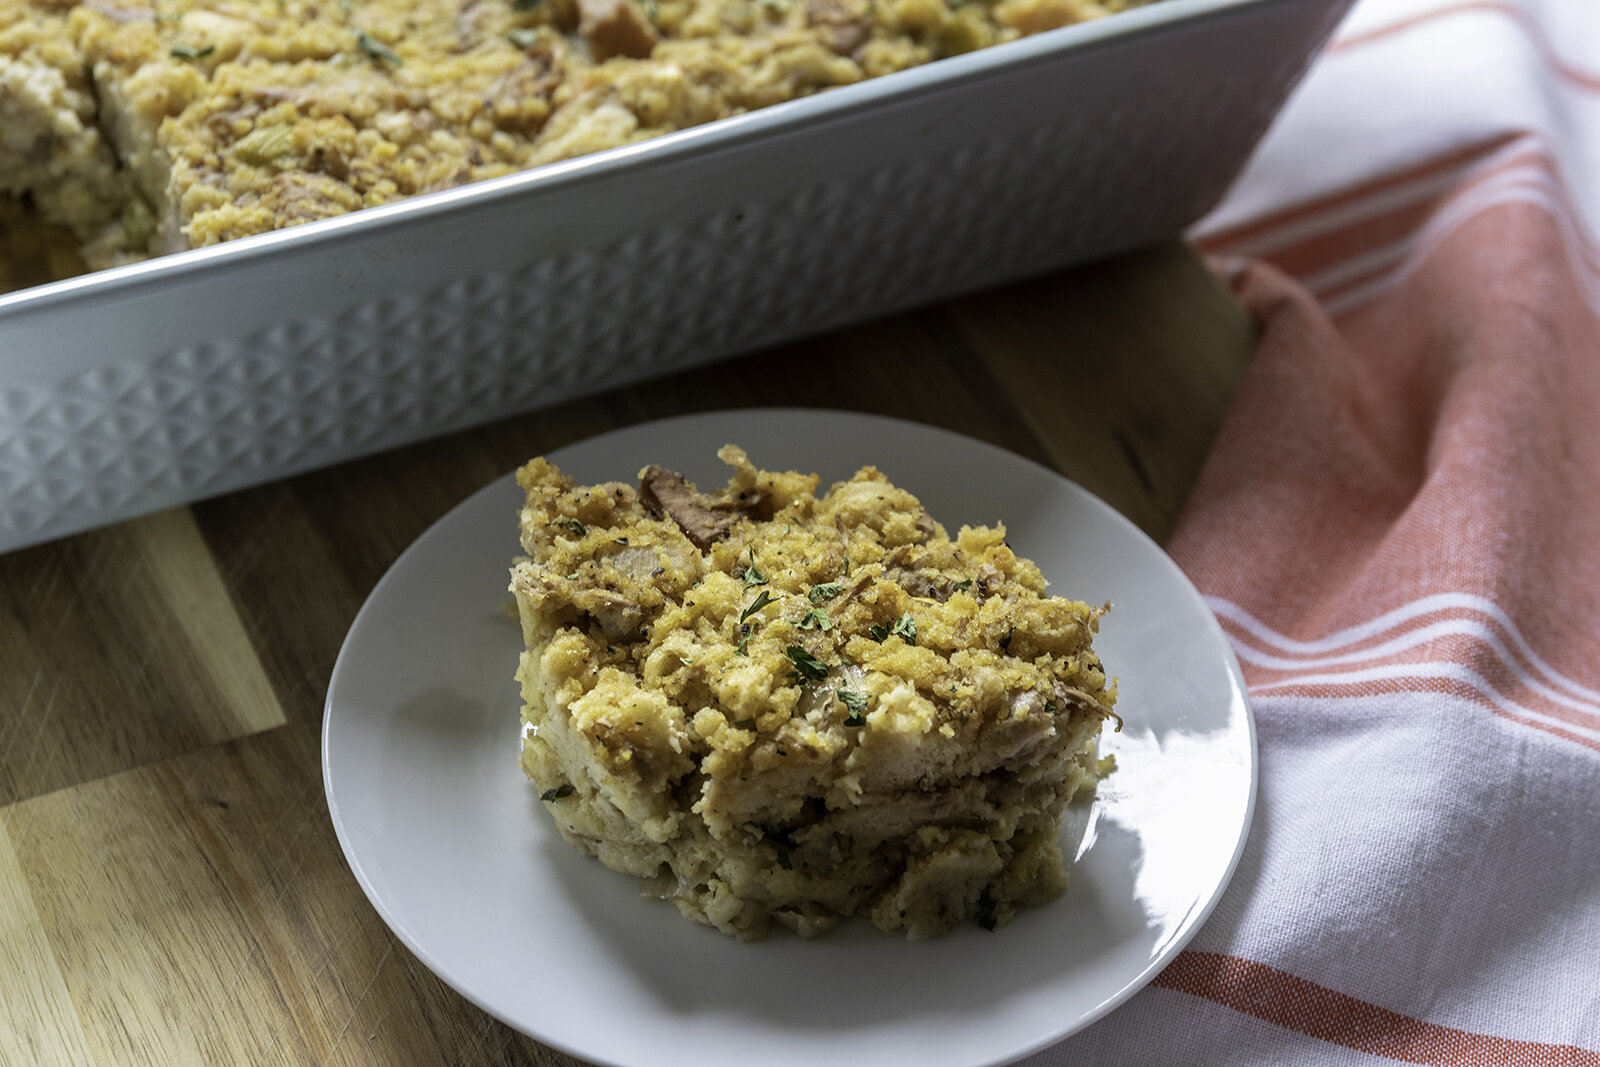
  16. Slice to serve with your favorite side dishes and extra cranberry sauce!!

TROUBLE SHOOTING:

  • If your turkey roast comes out looking bready once you slice it, and has little holes throughout it, you likely have an oven baking hotter than it is registering. You can get an over thermometer to check the temp, or knock the temp back 20 degrees the next time you bake it. You can also let it bake for 40 minutes wrapped up, and unwrapped for 20 minutes.

  • You may have also not kneaded the dough long enough. Make sure you let it knead for a minute or two. The longer seitan knead the firmer it will be and we want a rather firm seitan for this recipe.

  • If your roast forms a “skin bubble” that defates after you have let it rest, then you likely did not wrap the foil tightly enough. Make sure it is wrapped tightly!

  • If the rice paper is sticking too badly to your foil you can first wrap the roast in parchment paper sprayed with oil then in the foil. I have always just wrapped it right in the foil but have had people claim this is their method and that it works well.

If you like this recipe, then try these:

vegan flank steak

vegan flank steak

Vegan Green Bean Casserole Cups

Vegan Green Bean Casserole Cups

Since I was a kid, green bean casserole has long been my favorite holiday side. My mom made it every holiday without fail.

Once we went vegan I was on a mission to recreate a convincing cream of mushroom soup so I could make vegan green bean casserole among other classic dishes that require the non vegan “soup” from a can. Cashews work really well for this. They are super creamy once broken down and with just a little starch and a few other ingredients and you are left with a delicious vegan homemade cream of mushroom soup.

This year I wanted to try something a little different with my green bean casserole. I am pretty obsessed with making single serving meals in muffin tins. I have made stuffing, lasagna, quiche, rice cups for Banh Mi filling just to name a few. You name it, and I have probably tried to turn it into a single serving cup.

I also love using crescent roll dough for all kinds of things. A lot of brands are vegan, you just need to read the label. More often than not it’s the non organic brands that are vegan. The organic brands tend to add butter. So it only seemed natural that I could use the crescent dough for the shell of these green bean casserole cups since they are another holiday meal favorite side. I would just marry the two and cross my fingers that it turned out.

Well, it really did! Not only are these vegan green bean casserole cups adorable, and a creative twist on the original classic, they are extra delicious nestled into a “buttery” crescent crust! So instead of making a traditional vegan green bean casserole this year, maybe try these, I think you may love them as much as we do!

INGREDIENTS:

You will need a muffin tin for this recipe. The recipe yields 12 cups

  • 1 lb fresh green beans

  • 1/2 cup finely diced button mushrooms (itty bitty pieces)

  • 2 tubes vegan crescent roll dough

  • 1 cup crispy fried onions (not all brands are vegan, read the label)

  • 1/2 cup cashews (plus water for soaking)

  • 1 cup water

  • 2 tablespoons tapioca or corn starch

  • 2 tablespoons nutritional yeast

  • 2 teaspoons apple cider vinegar

  • 1 teaspoon salt

  • 1 teaspoon onion powsder

  • 1/2 tesaspoon black pepper

Vegan Green Bean Casserole Cups

INSTRUCTIONS:

  1. Wash green beans, and snap or cut them into thirds. They have to fit in a muffin tin, so the pieces need to be pretty small.

  2. Fill a medium pot with water and bring it to a boil. Add the green beans and let them cook for about 5 minutes, just until they are tender. Drain and set aside.

  3. Cover cashews in water in a microwave safe container. Microwave them on hight for 3 minutes then drain. If you do not have a microwave you can soak them in hot water for a few hours, or even boil them in a small pot for several minutes.

  4. Add cashews, 1 cup of water, starch, nutritional yeast, onion powder, vinegar, salt, and pepper to a high speed blender or food processor. Blend on high until the mixture is COMPLETELY smooth and there are no bits of cashews left.

  5. Heat a large pot over medium heat. Add the mushrooms and a sprinkle of salt and let them cook for several mintues until cooked through. Pour the cashew mixture into the same pot with the mushrooms and heat, whisking continuously until the mixture thickens. You want the the mixture kind of thick , about the consistency of pudding. Mix in the drained green beans and 1/2 cup of crispy onions into the pot, and set aside to cool.

  6. Preheat oven to 350 degrees. Open up both cans of crescent rolls. On a clean surface roll out each can so the precut seams press together and seal, and you have on large square piece of dough (I do one can at a time, and aim for a square shape vs a rectangle) cut the square into 6 equal pieces. Kind of eyeball how big the squares will have to be to fit in the tin. Muffin tin sizes can vary, so you may have little dough left over, as you don’t want to over fill each cup with dough. You just want the piece of dough to fill the space of the cup. Spray a muffin tin with some cooking oil if things tend to stick. I have a ceramic muffin pan and typically don’t need to spray it. Fit a square of dough into each muffin cup, pressing it in to fit and making sure the dough goes all the way up the sides of the cup.

  7. Pop the dough filled pan into the oven for about 5 minutes, you just want the dough to pre cook a bit. Remove from the oven and using the back of a spoon, press the dough that has puffed up, back down into the cups. Divide the green bean mixture between each muffin cup. Sprinkle more crispy onions on top, and pop back into the oven on the middle rack for 20-25 minutes. Once you see the edges of crescent begin to brown, they should be done.

  8. Remove from the oven and allow to cool a bit before removing the green bean cups from the tin and serving.

If you like this recipe, try these:

 
Vegan Green Bean Casserole Cups

Southern Vegan Cornbread Dressing with Jackfruit or Seitan

Southern Cornbread Dressing with Jackfruit

In the south we grew up eating dressing at Thanksgiving, NOT stuffing. I don’t think I even had stuffing until I was a teenager at a friends house, and I am pretty sure it was Stovetop. Dressing is normally made of cornbread, shredded chicken (sometime oysters, but that was too fancy for my family) onion, celery, and spices.

I promise you I could live off of cornbread dressing. If cornbread dressing and stuffing got into a fist fight, all of my money would be on the dressing. It reigns supreme in our house, hands down.

So once we were vegan I didn’t know what to do. I actually ended up making stuffing (gasp) the fist few holidays because I was a new vegan and at a loss. So when I deiced to create our Fall and Winter Holiday Recipe E-Book, I knew I had to do my family proud (mostly my husband because this is favorite thing) and finally veganize this southern family classic.

I actually adapted my husbands MawMaws recipe and made it vegan by using jackfruit in place of the chicken and starch to bind it. Otherwise it is pretty much the same and it tuned out sooooooo delicious!

I actually managed to recreate every favorite holiday recipe we ever enjoyed before we went vegan and put them in our Fall and Winter Holiday Recipe book. A main dish, sides, desserts, and even cocktails. This recipe is in the e-book along with 17 more to create a full classic holiday vegan menu!

So if you are looking for more classic holiday recipes for you next Thanksgiving, Hanukkah, Christmas, or New Years, check it out!! And if you want to fight me over which is better, dressing or stuffing, make this recipe first, then decide. I just might convert you!


INGREDIENTS:

  • 1 pan vegan cornbread

  • 2 cups vegetable broth

  • 2 cups plant based milk

  • 2 tbsp corn starch

  • 1/4 cup vegan mayo

  • 2 tsp dried sage

  • 1 tsp dried thyme

  • 5 vegan biscuits (day old)

  • 4 - 5 stalks of celery

  • 1 large onion

  • 1 can jackfruit in brine (you can also use 4 easy vegan chicken breast, chopped into very small pieces)

  • 2 tsp Vegetable Better Than Bouillon

  • 1 tbsp vegan butter

  • 1 tsp salt

  • 1/2 tsp black pepper

86eats-fall-winter-vegan-holiday-menu.jpeg

Our Fall & Winter Holiday E-BOOK contains 18 familiar and comforting recipes that will serve as a guide to plant-based/vegan menu planning during Thanksgiving, Christmas, Hanukkah, or whatever you celebrate this time of year. This menu includes a main dish, sides, desserts, and cocktails that you can use as a complete dinner menu, or you can pick and choose recipes to take along to a pot-luck or cocktail party. In addition to the downloadable ebook, you will get access to more than 20 minutes of complimentary video content that will walk you through some of the trickier parts of a few of the recipes.

INSTRUCTIONS

  1. Bake cornbread and biscuits according to instructions. You can do this a day or two ahead of time. The biscuits work better if they are a day or two old.

  2. Crumble biscuits and cornbread into a large bowl. You can use a fork to break up the corn bread in the pan you baked it in. You want both the cornbread and biscuits to be a pretty fine crumble.

  3. Drain and rinse the jackfruit. Shred between your fingers, or chop it up.

  4. Finely dice the onions and celery. Heat a medium skillet on medium heat and melt the butter. Add the jackfruit, onions, celery, and Better Than Bouillon, and cook until the onions are translucent.

  5. In a large bowl, add all of the dry ingredients, mix well, then add in the wet ingredients and continue mixing until well incorporated.

  6. Transfer the mixture to a prepared 9x13 baking dish and bake on a middle oven rack for about 35 - 40 minutes. You’ll want a tooth pick to come out clean when poked in the center.

  7. Allow it to cool a bit before serving. Add fresh or dried parsley to garnish if desired.

If you like this recipe, try these:

Vegan Eggnog Cake

Savory Cranberry Meatballs with Mashed Potatoes

Vegan Brie with Cranberries and Candied Pecans

Southern Cornbread Dressing with Jackfruit

Classic southern cornbread dressing with jackfruit, perfect for vegan thanksgiving

Vegan Candied Pecan Maple Spice Cake

Vegan Candied Pecan Maple Spice Cake

I want to tell you a short story about how this cake is the product of a couple epic fails. One of those happy accidents, or maybe one of those Hail Mary passes in baking where you think you are done but give it one last shot, fingers crossed.

Why am I telling you this? Well in hopes of encouraging you. To let you know that even food bloggers have their fare share of kitchen disasters just like everyone else. And even though I bake all the time, and like to toot my own horn at veganizing just about any recipe I find that I want to try, sometimes I fail and fail hard.

I found a beautiful fall cake in a magazine that I could not wait to turn vegan. It never even crossed mind that it could go south the way it did.

Whenever adding fruit to a baked good you add moisture, and it does not always work in your favor. Long story short I ended up with three super dense, 9 inch pancakes instead of cakes.

I then came to the conclusion that I would not waist any more of my time on that cake and would just make a fall inspired spice cake for the delicious looking frosting in the original cake. It called for cool whip but I was convinced I could make a butter cream that was close. I was SO wrong.

Once again, certain fruits and butter cream only end in disaster. Thus the candied pecans stepped in, along with a maple butter cream, and I am not lying when I say this is now hands down my favorite cake on the website.

Its fluffy with the right amount of spice, the butter cream has a hint of maple and the candied pecans are the perfect sweet and salty crunch the cake needed. This cake would work beautifully for Thanksgiving or any fall gathering.

And remember, when a recipe seems like a failure, its not the end of the story. Just shake it off and keep baking. Something delicious may just come out of all the mess. Happy fall y'all !


Ingredients:

  • 2 1/2 cups all purpose white flour

  • 1 1/2 cups sugar

  • 1 tablespoon baking powder

  • 2 teaspoons ground cinnamon

  • 1/2 teaspoon nutmeg

  • 1/2 teaspoon ground ginger

  • 1 teaspoon salt

  • 1 1/4 cup aquafaba (whipped chickpea liquid, you are measuring out the WHIPPED aquafaba - not the liquid)

  • 1 cup oat or almond milk

  • 2 teaspoons vanilla extract

  • 1 1/4 cup vegan butter

Spiced Maple Buttercream:

  • 1/2 cup vegan butter

  • 1/2 cup shortening

  • 3 cups powdered sugar

  • 2 tablespoons maple syrup

  • 1-2 teaspoons cinnamon

  • 1 teaspoon ground nutmeg

  • 1 teaspoons vanilla extract

Candied Pecans:

  • 1 cup pecan halves

  • 2 teaspoons vegan butter

  • 2 tablespoon brown sugar

  • 1/2 teaspoon cinnamon

  • 2 teaspoons maple syrup

  • pinch of salt

Vegan Candied Pecan Maple Spice Cake

Instructions:

preheat oven to 350 degrees

  1. Prepare (2) 8 inch cake pans by first coating with a thin layer of vegan butter, then lightly dusting pans with flour.

  2. Prepare the aquafaba according to instructions. (follow link to recipe and instructions)

  3. In the bowl of your stand mixer, or a large bowl if using a hand mixer, whisk together all of your dry cake ingredients.

  4. Add the butter, and all of the milk into the dry ingredients. Cream on medium speed for a few minutes until completely smooth. Add vanilla and mix for a few more seconds.

  5. Next, with a spatula, gently fold in the aquafaba, careful not to over mix. You do not want to deflate the aquafaba. If you do, your cake will not be as fluffy.

  6. Evenly divide batter between the 2 prepared pans and bake cakes for 40 -45 minutes, or until a toothpick inserted in the center comes out clean.

  7. While the cakes are cooking, prepare the candied pecans by heating a small skillet on medium heat. Melt the butter, next adding the pecans, brown sugar, maple syrup, cinnamon, and salt. Lower the heat a bit and continue moving the pecans around the pan with a spoon while the sugar melts, and begins to get sticky. The nuts and sugar can burn quickly, so be sure to keep the pecans moving until the sugar becomes fully melted and looks like caramel. This can take between 5 and 10 minutes depending on the pan. Once pecans are done, pour them out onto a plastic cutting board or a piece of wax paper allowing them to cool, and the sugar to harden. Once they have cooled you can break them apart and into pieces. Set the pecans aside.

  8. Allow cakes to cool in the pans on a wire cooling rack for about 20 minutes.

  9. While cakes are cooling, prepare the frosting by mixing together the butter and shortening in your stand mixer or using an electric hand mixer. Add in the vanilla, spices, and maple syrup. Continue mixing until well incorporated. Slowly begin beating in the powdered sugar. If the frosting seems too stiff, add a few teaspoons of milk at a time until it has reached a spreadable constancy.

  10. Once cakes have cooled for 20 minutes, turn them out onto the cooling rack to cool completely. Once cakes are completely cooled, begin frosting by adding a layer of buttercream on one cake layer, and spreading evenly to the edges. Sprinkle half of the candied pecans evenly on the first layer. Place second cake layer on top and cover the cake with remaining buttercream and sprinkle with remaining candied pecans.

  11. Slice to serve. Store cake in an airtight container.

If you like this recipe, try these:

Vegan Coca-Cola Cake

Vegan Chocolate Peanut Butter Dream Cake

Vegan Lime Mojito Cupcakes

Vegan Candied Pecan Maple Spice Cake

Vegan Candied Pecan Maple Spice Cake

Vegan spice cake with maple frosting and candied pecans