bread

Quick Vegan Onion Rolls

IMG_9405.jpg

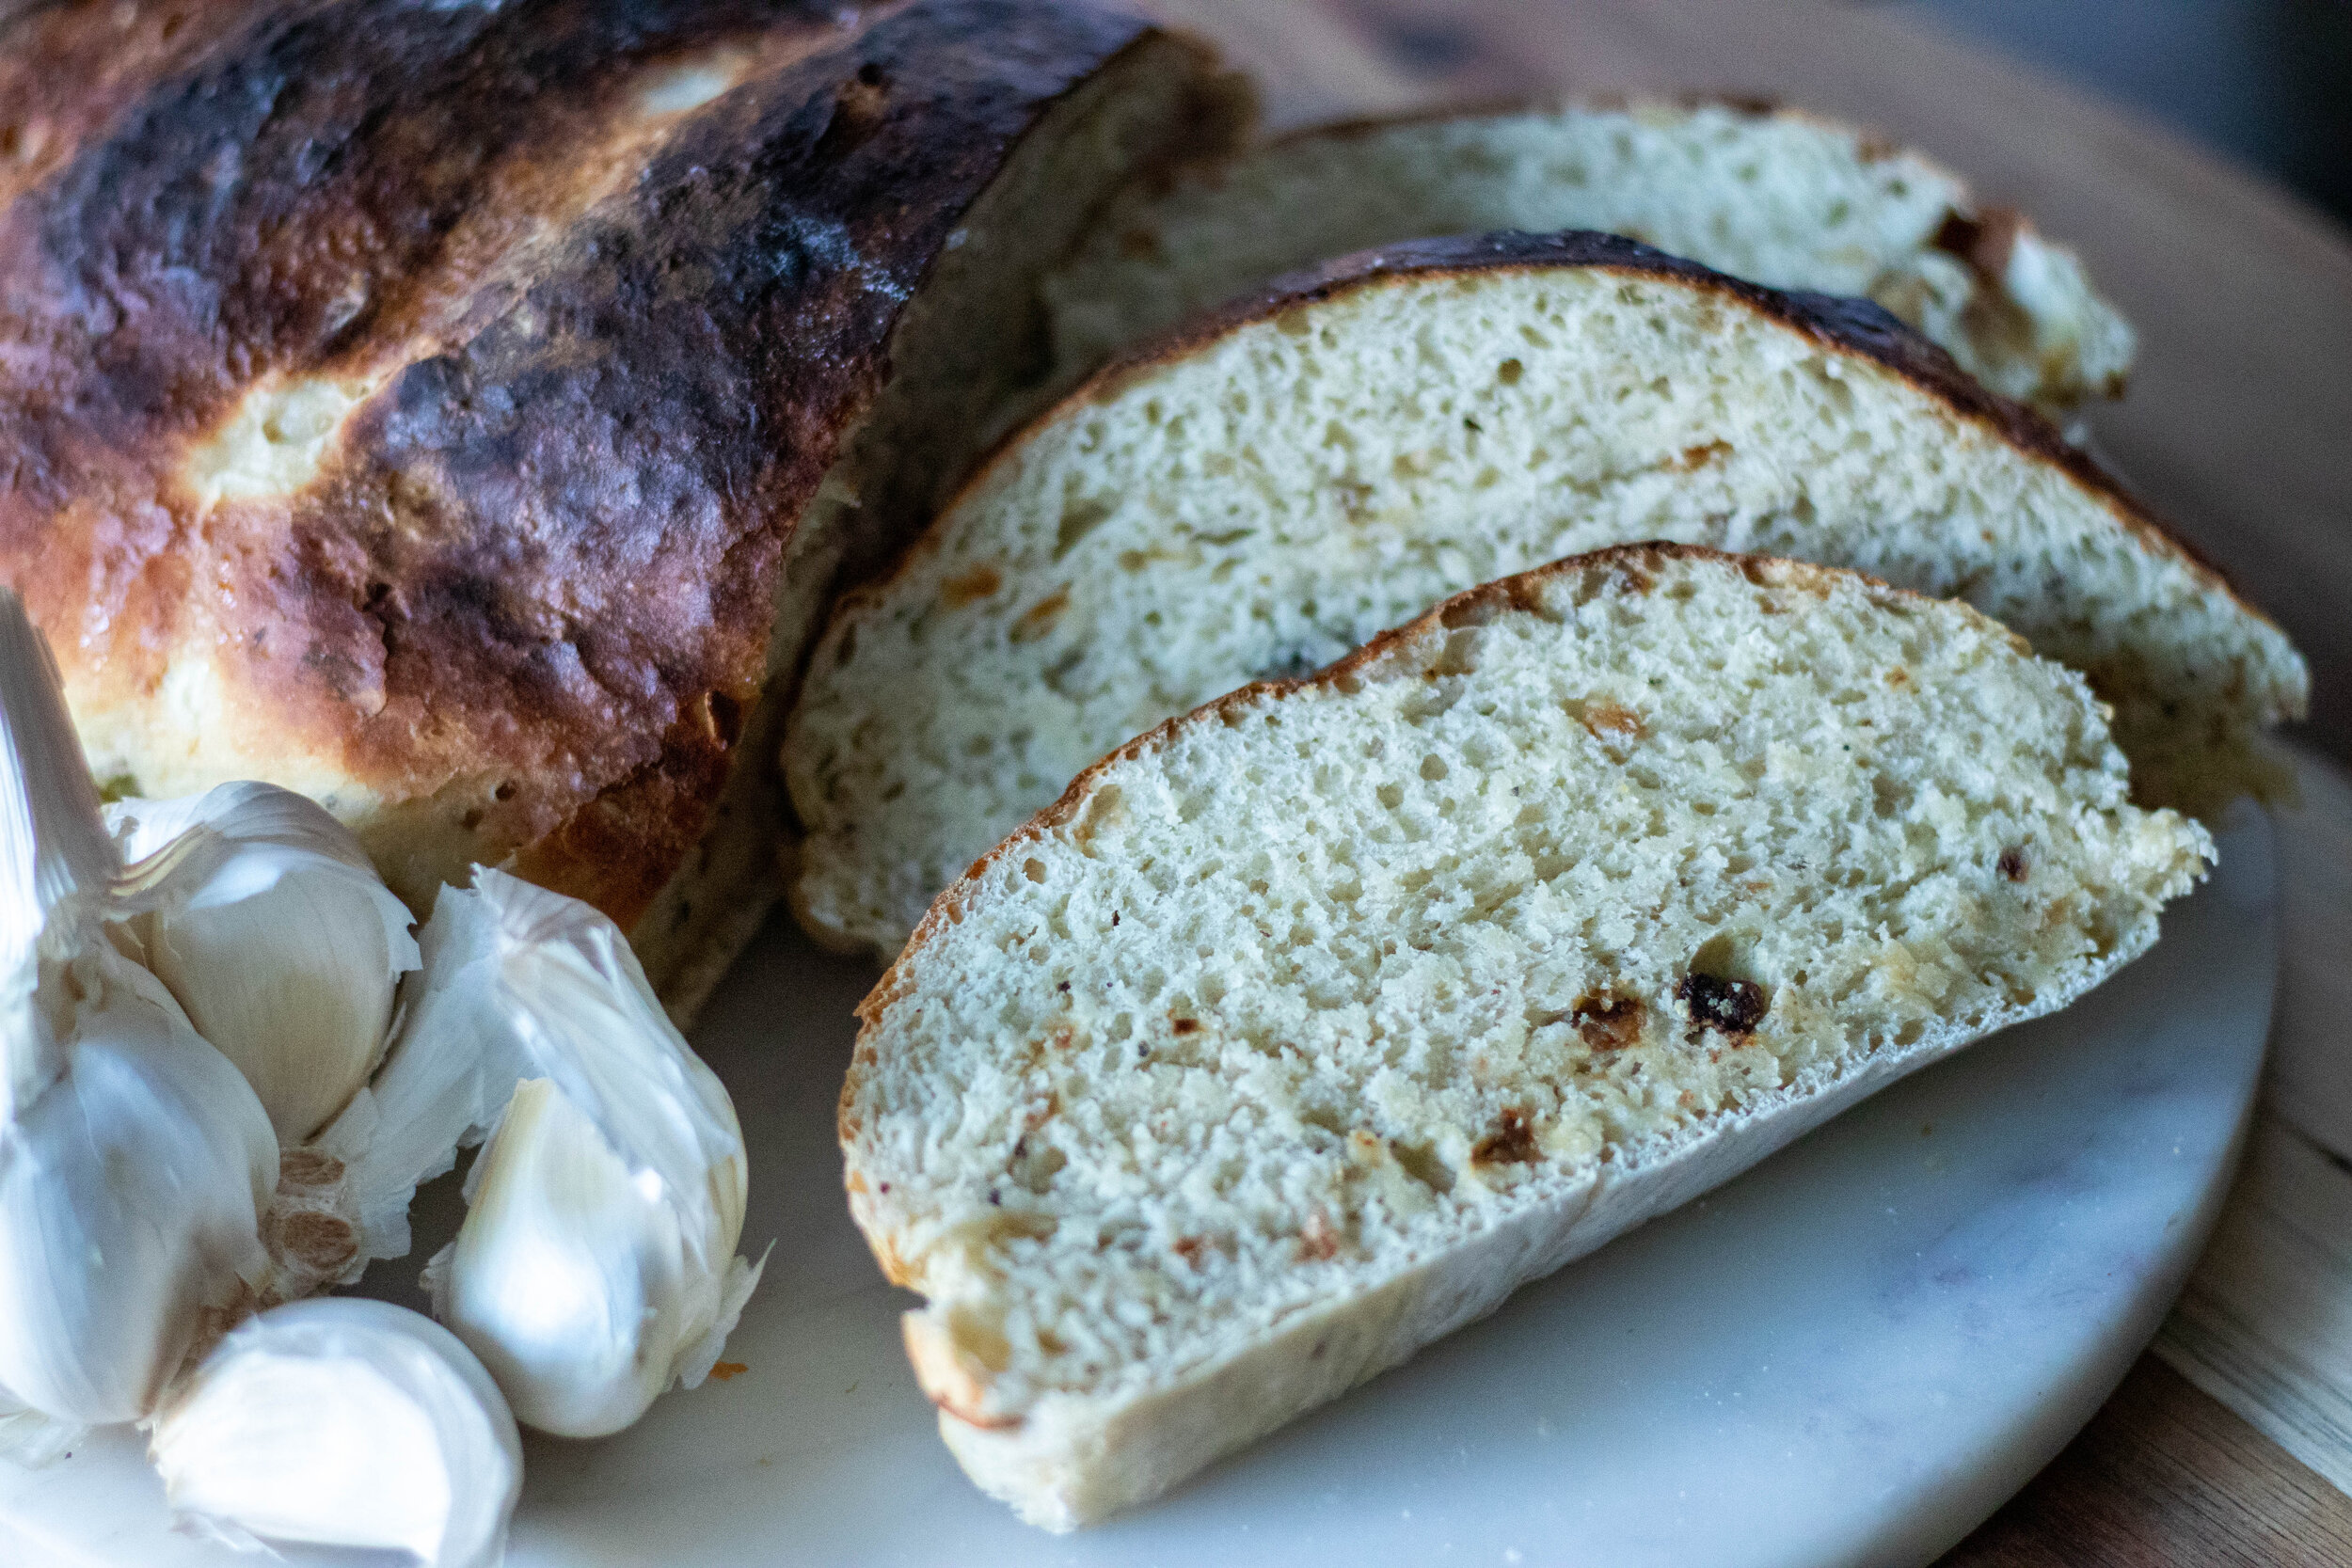
I love bread. I love all carbs really, but I really love bread.

Yeast bread is not always quick to make, but these rolls are!! Glory glory!

Most yeast dough requires at least an hour to rise, and then normally another half hour to full hour for a second rise.

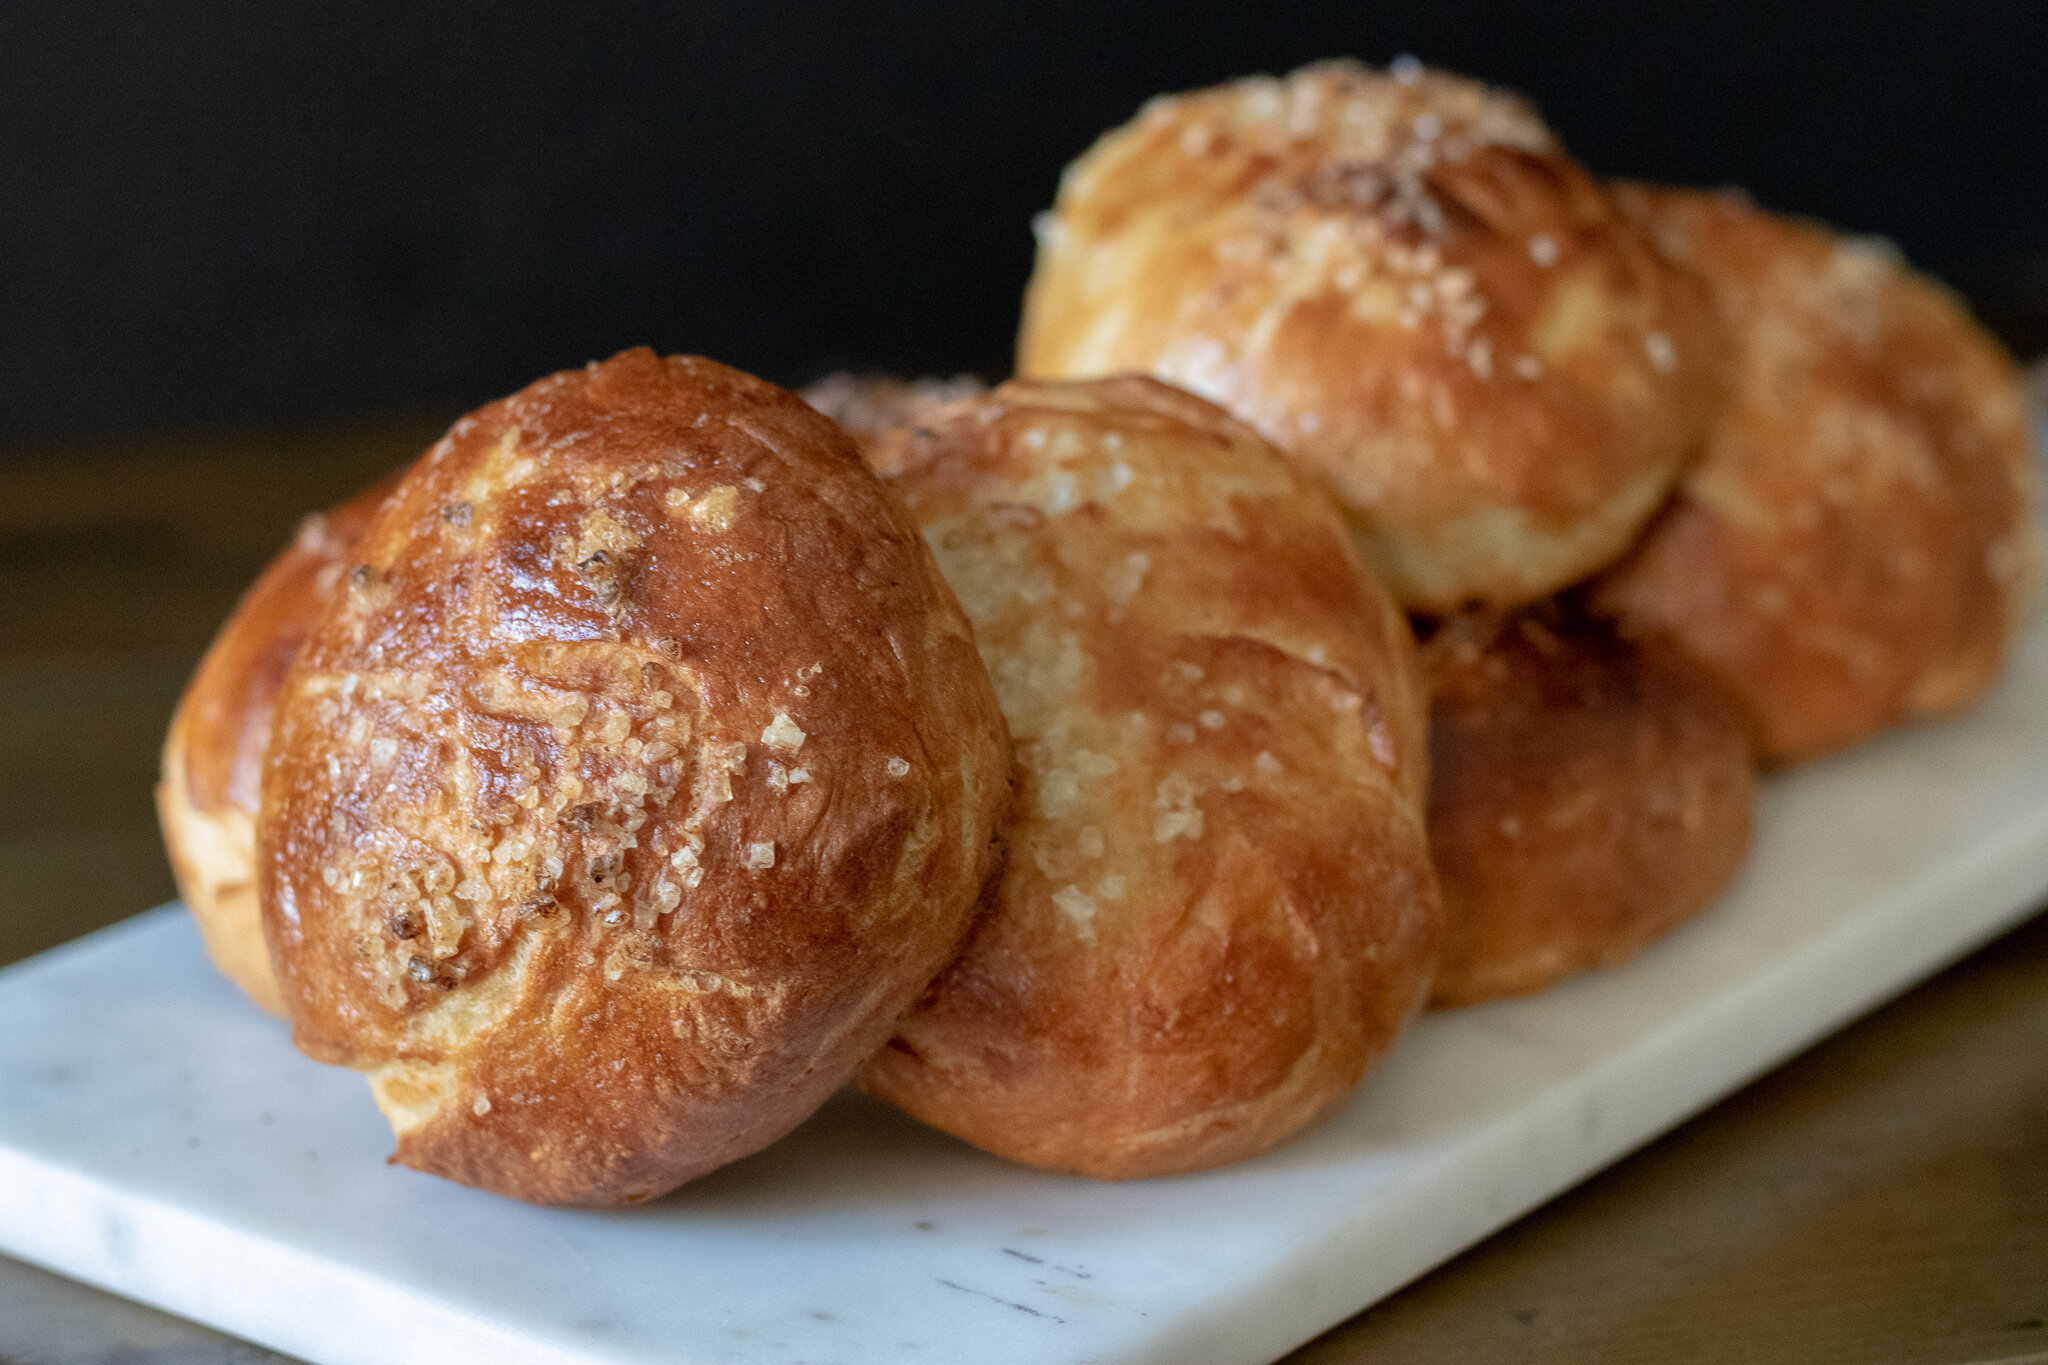
These vegan onion rolls only require a 10 minute rest and they are in the oven!!

This means you can have homemade onion rolls start to finish in less than an hour.

Truth be told I made these rolls because I was attempting to veganize an Arby’s big beef and cheddar and that my friends required and onion bun! Because the big beef and cheddar is served on an onion bun I had not choice but to make my own, because all of the ones I have found at the bakery are not vegan.

When I was a kid my favorite sandwich was a turkey and cheeses with mayo on an onion roll. So now I plan on making these rolls on a regular basis! My sandwich game just got sooooo good, y’all!!!

So if you are new to bread making or have been doing it for eons, these rolls are so easy and really tasty. And if you have been missing eating an Arby’s big beef and cheddar on an onion bun, I am only here to help!!


INGREDIENTS:

  • 3 1/2 cups all purpose flour

  • 2 tablespoons active dry yeast

  • 1 cup plus 3 tablespoons hot water, around 100-110 degrees

  • 1/3 cup sugar

  • 1-2 teaspoons salt

  • 2 teaspoons onion powder

  • 1 flax egg or starch egg (1 tablespoon flax meal or starch, 3 tablespoons water mixed)

  • 1/3 cup neutral flavored oil, I used grape seed oil

  • 1/2 a medium yellow onion, very finely diced


INSTRUCTIONS:

  1. In a medium sized skillet, add the onions with a teaspoon oil. Sprinkle a little salt and sauté the onions over medium heat until the are soft and begin to brown. Allow to cool.

  2. In a glass bowl, add yeast, water, and 1 tablespoon of sugar. Let sit for 10 minutes until the yeast becomes foamy. If the yeast does not bubble and foam you may have killed the yeast. The water must be warm but if its too hot it kills the yeast. I use hot tap water from the faucet.

  3. If using a stand mixer, add flour, salt, and remaining sugar to the mixer bowl. Once yeast is ready, mix in flax egg, and oil to the the yeast mixture. Add the wet ingredients to the dry ingredients.

  4. Mix on medium speed for 5 minutes. If the mixture is too dry, you can add a tablespoon more of water. If it seems too wet add a tablespoon more flour. The dough should be soft but not sticking to the sides of the mixer.

  5. If mixing by hand, follow above instructions for combining ingredients. Once the dough is mixed, pour out on a clean counter top. and kneed by hand for 5 minutes.

  6. Once dough is ready, divide into 9 equal pieces. If you want smaller buns, divide into 12 equal pieces. Form a disk shape with each piece of dough, but do not flatten them out. Place on a parchment lined cookie sheet. Divide the onions equally between the rolls, pressing them into the tops. You can brush the tops with 1 teaspoons of maple syrup mixed with 1/4 cup of milk to help the rolls brown.

  7. Allow buns to rest for 10 minutes while you pre heat the oven to 425 degrees. Once the oven is ready, place buns inside and bake for 10 - 15 minutes. If the buns are not browning evenly, you can rotate the baking sheet halfway through baking.

  8. Once buns are finished baking, allow to cool before serving.

  9. You can freeze any left over buns in a freezer zip lock bag for up to a month.

If you like this recipe, then try these:

Easy Vegan Bread Bowls

Easy Vegan Bread Bowls

Carbs, carbs, glorious, delicious, most perfect food. Oh how I love you!

If I am going to eat soup, I want bread.

If I am going to eat pasta, I want bread.

Don’t even think of showing me a meatball and not also giving me some bread.

I LOVE bread. I LOVE carbs. Plain and simple, and I don’t even feel a little bad about it.

So bread bowls are just about the smartest bread food there ever was. It’s a bowl…..and it’s bread.

It’s bread that is actually made to hold your food. Ummmm, it does not get much better than that.

Listen, don’t be intimidated by bread making. It’s actually super easy and will save you a ton of money! It also makes your house smell really good, so that is an added bonus. This recipe is pretty basic, and pretty close to our artisan bread recipe, just shaped into bowls!

You can make this right in a stand mixer, but if you don’t have one, no worries, you are just gonna get yourself a little workout!! The bonus is you will burn some calories kneading the dough, so don’t have to feel badly about all the carbs you are about to cram in your face.

If you are at loss for what to serve up in these beautiful bowls, head over to our soup category under recipes for tons of ideas, or fill themwith our classic macaroni and cheese , or be a little extra and fill them with Spinach and Artichoke Mac and Cheese. Carbs inside of carbs, with an added bonus of CHEESE!!!

Spaghetti in a bread bowl???? Yes, yes and YES! We like to pile up Beyond Meatballs inside of these beauties and cover them in our all purpose cheese sauce. Like a meatball sub but totally better!!!

So get to bakin, then you can decide with you want to fill these bread bowls with. There are no wrong answers. I think next time I bake some I will use one as a quaso bowl. That way when its all gone, I can just eat the gooey, cheesy, bread.

Carbs for life!

Easy Vegan Bread Bowls

INGREDIENTS:

  • 6 1/2 cups all purpose flour

  • 1 1/2 tablespoons dry active yeast

  • 3 cups hot water

  • 2 tablespoons sugar

  • 2 tablespoons neutral oil

  • 1 tablespoon salt


INSTRUCTIONS

  1. In large bowl add hot water around 110 degrees. I just run my tap water until it is nice and hot, if you get the water too hot it will kill the yeast. Add the yeast and sugar and let sit for about 10 minutes, or until it is frothy and bubbly at top.

  2. If using a stand mixer, attach the bread hook. Add the flour, salt and oil. Once the yeast mixture is ready add it to the bowl. I like to use a large spoon to fold everything together before starting the mixer. It cuts down and flour flying everywhere and making a huge mess. (live and learn.) Turn the mixer on medium speed and allow the dough to mix for about 5 minutes. If it seems too sticky and wet and isn’t forming a dough ball, add some flour a few tablespoons at a time. If it seem too dry and isn’t coming together, a little water a few tablespoons at a time. You want a soft dough but not so sticky you can not handle it.

  3. If you do not have a stand mixer, combine all ingredients in a large bowl as stated above and mix well. Once all of the ingredients are incorporated turn the dough out to a clean floured surface and knead by hand for 5 minutes. Again the dough should be soft but able to handle without it being too sticky.

  4. Once dough has been kneaded, form it into a ball place it in bowl that has been lightly coasted in oil. Cover the bowl wth a kitchen towel or plastic kitchen wrap and place in the oven, turned off, or on the bread proof stetting if you have one. Allow the dough to double in size. The amount of time will vary depending on weather and temperature but should take between 30 to 45 minutes.

  5. Once the dough has doubled in size, turn it out onto a clean, floured surface. Divide the dough evenly into 6-8 pieces, depending on how big you want your bowls. Form each each piece into a round ball shape. Place the dough balls on a parchment lined baking sheet at least three inches apart. I like to use 2 baking sheets just to avoid over crowding and to prevent the bread bowls from sticking together as they bake. Pop the baking sheets back in the oven for about 20 minutes. After 20 minutes remove from oven.

  6. Preheat oven to 500 degrees.

  7. You can mix a few teaspoons of maple syrup with 1/4 of water and brush the tops of the bread bowls before baking to help them brown. I like to sprinkle mine with coarse sea salt. You can also sprinkle them with sesame seeds, or even everything bagel seasoning. You can also leave them plain.

  8. Place the baking sheets into the oven and reduce heat to 425 degrees. Bake the bread bowls for 10-15 minutes or until the tops are browning and the bread bowls sound hollow when you tap them.

  9. Remove from oven and allow to cool completely before storing in an airtight container until use.

To use the bowls, cut the tops with a sharp knife and hollow out the inside. Fill with soup, stew, spaghetti, meatballs, Mac and cheese, or whatever you like.


Easy Vegan Bread Bowls

If you like this recipe, then try these:

Vegan Beyond Meatball Filled Bread Bowls

Vegan Beyond Meatball Filled Bread Bowls

Roasted Garlic and Herb Artisan Bread

Roasted Garlic and Herb Artisan Bread

I love the smell of fresh bread baking, so tend to bake bread often. This bread in particular is so simple and yields 2 nice big loaves. I like to bake some up on the weekend and have fresh bread throughout the week. You can also easily freeze the loaves you don’t use for later.

We decided to add herbs and fresh roasted garlic cloves to the dough for a perfectly savory, flavorful, quick and easy artisan bread. If you are new to bread baking, this recipes is so simple, so don’t be afraid to give it at try. Once you start baking your own bread, there is no turning back!

You can either peel your own garlic (warming it’s a lot) or look for a bag of pre-peeled fresh garlic cloves in the produce section of you local grocery store. I can always find the 6oz bags and just to make it simple, I roast and add the whole bag. Roasting the garlic gives it a sweet flavor that is perfect for this bread.

For the herb blend we used Herbs de Provenc , which is just a blend of herbs including lavender, and I am a huge fan. if you don’t have any on hand, feel free to use whatever combo of herbs you like that will compliment the garlic. Thyme, rosemary, parsley, oregano, sage, fennel, whatever you are feeling! Or you can just use the garlic and noting else if you prefer. I promise it will still be delicious!

Don’t let bread baking intimidate you. Its actually very easy and this bread is one of the easiest! Nothing beats the taste and smell of fresh baked bread. Its far less expensive to bake your own as well so really you can’t lose.


Ingredients:

  • 7 cups all purpose flour, plus extra for dusting

  • 2 packets dry active yeast (or 5 teaspoons)

  • 3 cups of warm water , around 100 degrees Fahrenheit

  • 1 tablespoon salt

  • 2 teaspoons Herbs de Provence

  • 6 oz of peeled garlic cloves ( I buy a 6oz bag or already peeled cloves in my produce section)


Instructions:

  1. Heat oven to 400 degrees. Place the peeled garlic cloves onto a baking sheet and pop them in the oven on the top rack for 15-20 minutes or until the garlic begins to brown and becomes fragrant. Allow to cool while you prepare the dough.

  2. In the bowl of your stand mixer, or if mixing by hand, in a large mixing bowl, combine yeast, warm water, salt and flour, herbs, and garlic cloves. There is no need to allow the yeast to proof. If using a stand mixer, attach the dough hook and mix the dough for a few minutes. You do not have to allow it to knead for long. It will be a little stickier that other bread doughs you may have made. You may have to sprinkle the dough with a little extra flour to pull it out of the bowl. If mixing by hand, stir with a wooden spoon or your hands until the ingredients are well combined, then turn the dough out onto a clean, floured surface. Knead dough by hand for a few minutes.

  3. Form the dough into a ball (again you may need a little flour on you hands to do this) and place it in a large, lightly greased bowl. Cover with plastic wrap and place in a warm place to allow the dough to rise, and double in size. This should take about one hour. I typically place mine inside of my oven (tuned off or set to a bread proof setting if you have one)

  4. Once the dough has doubled in size, divided it into two equal pieces. The dough will be sticky so you will need to dust it, and your hands in extra flour to be able to handle it. Holdng a portion of dough in your hands, form a ball while rotating the dough, pulling and tucking the dough to the underside of the ball to stretch the dough on top. The top should be smooth and even, while the underside will not be so pretty. It does not have to be perfect, you are just trying to make a nice smooth oval shape out of the dough. Dust more flour on the top, and using a sharp knife make three slashes across the top of the dough. The flour will make it easier to cut through the sticky dough. Place the finished dough on a piece of parchment paper on top of a cutting board. Repeat with the other 2nd portion of dough.

  5. Preheat your oven to 450 degrees with one rack in the center of the oven, and one rack at the bottom. Place a few baking sheets, or baking stones in the oven as it heats. You need to be able to fit the three loaves on whatever pans you choose, so keep that in mind. On the bottom rack place a shallow baking pan or jelly roll pan. It just needs to be deep enough to hold 1 cup of water.

  6. Once the oven is done heating, carefuly slide the dough and parchment paper off of the cutting board, onto the heated pans. Then carefully add 1 cup of water to the pan you placed on the bottom rack of the oven. Quickly close the oven. The steam from the water will help crisp the bread.

  7. Let the bread bake for about 30 minutes. Once it is browning on top, and sounds hollow when you tap the top, it’s done.

  8. Allow the loaves to cool. You can freeze the bread in a large freezer bags if not using right away.

IIf you like this recipe, try these:

 
Roasted Garlic and Herb Artisan Bread Sliced

Vegan Pumpkin Spice Monkey Bread

Vegan pumpkin spice monkey bread

It’s fall y’all, well maybe not here in Florida. We don’t actually get fall. We get summer, a little bit cooler summer, a month of “ summer winter”, and back to summer.

That being said, I tend to force the feeling in our house, and pretend there are actually leaves falling in crispy fall air by baking up all things autumn. That includes all things pumpkin.

I have attempted monkey bread several times with epic failure and then I discover my error was the dough. I had made all previous attempts with a biscuit type dough instead of a simple yeast dough. So I took our artisan bread dough recipe and jazzed it up a little, and it was like instant monkey magic.

I know there seems to be a lot of ingredients in this bread but most are staples in my house anyways. You will use almost one full can of pumpkin puree. This recipe seems complicated at first, but it’s not.

The hardest, or most time consuming part is rolling all the little dough balls, but if you have kids, this is your chance to have them help you in the kitchen. My kids love helping with this!

This bread is perfect to take to a pot luck or party because you literally just pull pieces off, no cutting required! Its sweet, nutty, gooey, and most importantly, it taste like fall! Even if you live in a place that doesn’t really offer you all of the seasons! So if you love monkey bread and fall flavors, this recipe is a must try! Pumpkin spice for life!


INGREDIENTS:

  • 6 cups all purpose flour

  • 1/2 cup plus 2 tablespoons pumpkin puree

  • 1 and 1/3 cup water

  • 1/3 cup sugar

  • 4 teaspoons active dry yeast

  • 1 teaspoon salt

  • 2 teaspoon cinnamon

  • 2 teaspoons pumpkin pie spice ( or you can add 1/2 teaspoon each nutmeg, allspice, ginger, and clove)

  • 2 teaspoons vanilla extract

Coating For Dough

  • 3 tablespoons vegan butter

  • 2 tablespoons pumpkin puree

  • 2 tablespoons maple syrup or agave

  • 3/4 cups sugar

  • 1-2 teaspoons cinnamon

  • 1/2 cup chopped pecans or walnuts

Glaze

  • 2 tablespoons pumpkin puree

  • 2 cups powdered sugar

  • 1 teaspoons cinnamon

  • teaspoon milk if you need to thin the mixture out some

Vegan pumpkin spice monkey bread

INSTRUCTIONS:

  1. In the bowl of stand mixer, add all of the ingredients for the dough. If you do not have a stand mixer, add all of the ingredients to a large bowl.

  2. Use a spoon to mix the ingredients together, well. If using a stand mixer, attach the dough hook and let the mixer run on medium speed for a few minutes to knead the dough. If mixing by hand, make sure are the ingredients are mixed well, then knead the dough by hand for several minutes on a clean floured surface. If you dough seems too dry and is not coming together you can add a few extra tablespoons of water, if it seems too sticky, add a few tablespoons of four.

  3. Place the dough in a lightly greased bowl and cover with plastic wrap or a kitchen towel. Place the dough in a warm place and allow it to double in size. This take about an hour.

  4. Coat an angle food cake, fluted pan ( a round cake pan with a hole in the middle. Not a bunt pan. you want smooth sides) with some vegan butter.

  5. Melt 3 tablespoons of butter, then add 2 tablespoons pumpkin puree, and 2 tablespoon maple syrup . Mix well. In a shallow dish combine the 3/4 cups of sugar and 1- 2 teaspoons of cinnamon. Once dough has risen pinch of pieces and roll golf ball size balls with the dough. Coat each ball in the butter, pumpkin mixture then roll them in the sugar and cinnamon. Place balls into the pan in a single layer. Sprinkle 1/4 cup of the chopped nuts over the first layer of dough, then repeat another layer of dough balls and cover with remaining nuts. You should have two layers of dough balls stacked into the pan.

  6. Cover the cake pan with a kitchen towel and allow the dough to rise once more. This should only take about half and hour.

  7. Preheat oven to 350 degrees. Place the pan on the center rack of the oven and bake for 30-35 minutes or until a cake tester or skewer inserted into the center of the bread comes out clean.

  8. Let the monkey bread cool for about 10 minutes on a wire cooling rack, then run a knife carefully around the edges. Flip the pan carefully onto a plate. Mix up the ingredients for the glaze and drizzle over the monkey bread. Serve warm or at room temperature.

  9. Store leftovers in an airtight container at room temperature or in the fridge.

If you like this recipe, try these:

Pumpkin Butter

Pumpkin Spice Vegan Pop-Tarts

Pumpkin Spice Cashew Creamer

Vegan pumpkin spice monkey bread

Vegan pumpkin spice monkey bread

Easy Homemade Vegan Bagels

IMG_1379.jpg

Warm, chewy on the outside, soft on the inside, fresh, homemade bagels! Yes, Yes, and YES!

Seriously, y'all, fresh homemade bagels are so easy to make, plus you get to top them with whatever you want!

Vegan cheese, sesame seeds, Trader Joe’s everything bagel seasoning, raisins, cinnamon, jalapeños, chocolate chips…whatever y’all want! I normally let each of my kids pick a flavor and try to accommodate. Everyone loves homemade bagel day in your house.

Bagels freeze really well, so make yourself a double batch on the weekend, and next week’s breakfast just got a lot easier, and a whole lot more tasty!

If you don’t believe me, I have left photo proof of our two year old digging into a fresh everything bagel that she slyly snatched as we were trying to photograph them. I mean she just did the thing the rest of us wanted to do. But who can blame her.

They are that good! And if y’all can’t do gluten, don’t worry! Our friends over at Not That Kind of Vegan took this recipe and turned it gluten free, so go check out their recipe !! Now everyone can have their bagel and eat it too!!

And if you are feeling super extra, you can give making your own easy homemade cream cheese a try. Super easy, cheaper than store bought and soooo good!!! We made ours with tofu and cashews to give it the perfect texture and taste!! And if you are feeling really super duper extra, you can make a quick batch of carrot lox to top it all off with!

IMG_7105.jpg

Ingredients:

  • 4 cups all purpose flour

  • 1 tablespoon dry active yeast

  • 1 and 1/2 cups warm water

  • 1 tablespoon white sugar

  • 3 teaspoons salt

  • optional toppings: everything bagel seasoning, sesame seeds, salt, poppy seeds, shredded cheese, or anything else you can think of!

Boiling liquid:

  • Enough water to fill a large pot

  • 2 teaspoons baking soda

IMG_1352.jpg

Instructions:

  1. In a large bowl add water, yeast, and 1 tablespoon of sugar. You want the water warm but not too hot. It needs to be around 100 degrees. Much hotter and it will kill the yeast. I just use hot water from the tap. Let the mixture sit for about 10 minutes until it is nice and foamy.

  2. Add the yeast mixture along with the remaining ingredients to a stand mixer. You can either use the paddle attachment to get everything mixed up, or mix it by hand before attaching the dough hook. Allow the dough to knead on medium speed for about 10 minutes. It needs to knead for this long! I promise. If you do not have a stand mixer then you can mix the ingredients by hand and knead for about 15 minutes. Baking and a workout at the same time! Heck yes! Look at you burning those bagel calories before you even eat one!

  3. Pull off a piece of dough and stretch it. You want it to make a “windowpane” that you can see through, but does not rip. That’s when you are done kneading!

  4. Place dough in large bowl and cover with plastic wrap or a damp kitchen towel. Allow dough to rise for about an hour. It will grow but not quite double in size.

  5. Once dough has risen, divide into 8 equal pieces. Form a ball with each piece and poke a hole in the middle using your finger. Stretch the ring of dough out a bit and place on a parchment lined baking sheet.

  6. Preheat your oven to 375 degrees.

  7. Bring a large pot of water to a boil. Once boiling, add 2 teaspoons of baking soda. Add 1 or 2 bagels at a time and allow to boil on each side for about 45 seconds. Remove the bagel from the water and place back on the parchment lined baking sheet.

  8. Sprinkle bagel with desired toppings while the bagel are still wet and the toppings will stick.

  9. Bake bagels for 25 - 30 minutes. You can brush the bagels with a 1/2 cup whipped aquafaba mixed with 2 tablespoons of maple syrup, or melted vegan butter. This just helps the bagels brown. You do not have to brush them with anything.

  10. Allow bagels to cool on a the baking pan before storing in an airtight container at room temperature.

  11. Serve with vegan cream cheese, carrot lox, or even our delicious vegan egg salad

You can freeze the bagels for up to a few months. You can also split the dough into 16 pieces if you want smaller bagels.

IMG_1357.jpg
IMG_1363.jpg

Easy Vegan Artisan Bread

IMG_0383.jpg

I love the smell of fresh bread baking, so tend to bake bread often.

This bread in particular is so simple and yields 3 nice big loaves. I like to bake some up on the weekend and have fresh bread throughout the week.

You can also easily freeze the loaves you don’t use for later. Feel free to add herbs or spices to the dough if you feel like jazzing up your bread with some extra flavor.

If you are new to bread baking, this recipes is so simple, so don’t be afraid to give it at try. Once you start baking your own bread, there is no turning back!


Ingredients:

  • 7 cups all purpose flour, plus extra for dusting

  • 2 packets dry active yeast (or 5 teaspoons)

  • 3 cups of warm water , around 100 degrees Fahrenheit

  • 1 tablespoon salt


Instructions:

  1. In the bowl of your stand mixer, or if mixing by hand, in a large mixing bowl, combine yeast, warm water, salt and flour. There is no need to allow the yeast to proof. If using a stand mixer, attach the dough hook and mix the dough for a few minutes. You do not have to allow it to knead for long. It will be a little stickier that other bread doughs you may have made. You may have to sprinkle the dough with a little extra flour to pull it out of the bowl. If mixing by hand, stir with a wooden spoon or your hands until the ingredients are well combined, then turn the dough out onto a clean, floured surface. Knead dough by hand for a few minutes.

  2. Form the dough into a ball (again you may need a little flour on you hands to do this) and place it in a large, lightly greased bowl. Cover with plastic wrap and place in a warm place to allow the dough to rise, and double in size. This should take about one hour. I typically place mine inside of my oven (tuned off or set to a bread proof setting if you have one)

  3. Once the dough has doubled in size, divided it into three equal pieces. The dough will be sticky so you will need to dust it, and your hands in extra flour to be able to handle it. Holdng a portion of dough in your hands, form a ball while rotating the dough, pulling and tucking the dough to the underside of the ball to stretch the dough on top. The top should be smooth and even, while the underside will not be so pretty. It does not have to be perfect, you are just trying to make a nice smooth ball out of the dough. Dust more flour on the top, and using a sharp knife make three slashes across the top of the dough. The flour will make it easier to cut through the sticky dough. Place the finished ball on a piece of parchment paper on top of a cutting board. Repeat with the other 2 portions of dough.

  4. Preheat your oven to 450 degrees with one rack in the center of the oven, and one rack at the bottom. Place a few baking sheets, or baking stones in the oven as it heats. You need to be able to fit the three loaves on whatever pans you choose, so keep that in mind. On the bottom rack place a shallow baking pan or jelly roll pan. It just needs to be deep enough to hold 1 cup of water.

  5. Once the oven is done heating, carefuly slide the dough and parchment paper off of the cutting board, onto the heated pans. Then carefully add 1 cup of water to the pan you placed on the bottom rack of the oven. Quickly close the oven. The steam from the water will help crisp the bread.

  6. Let the bread bake for about 30 minutes. Once it is browning on top, and sounds hollow when you tap the top, it’s done.

  7. Allow the loaves to cool. You can freeze a loaf or 2 in large freezer bags if not using right away.

Spiced Apple and Pecan Stuffed Vegan Challah

IMG_9488.jpg

I have been baking and stuffing challah bread for what seems like forever.

This spiced apple and pecan stuffing has long been a favorite for fall, and the High Holidays.

This vegan challah bread is just as beautiful as it is delicious, and is sure to impress anyone who gets the privilege of tasting it.

Stuffed with fall spices apples, pecans and dates, this vegan challah is my favorite for Rosh Hashanah!

If you have never made challah, then by all means, you must! It’s not nearly as intimidating as it may seem, and the stuffing possibilities are endless!

Be sure to read the instructions on the challah very well. It is a common mistake to think you are measuring the liquid of the aquafaba, not the whipped product,  (the recipe states to measure the whipped product but it still tends to be an issue for people, and I am often asked) BUT you need to measure out THE WHIPPED PRODUCT in the recipe not the liquid before you have whipped it!!!

Making vegan challah is easier than most people think, and the whipped aquafaba in the recipe severs as an excellent egg replacer in a bread that normally has 3 to 4 eggs.

Braiding challah is also easier than you may think but practice will improve your braids over time. I made sure to link my favorite braiding link so you can learn all kinds of fancy challah braids, from 3 to 5 strands and even a round holiday braid!

So if you are looking for a vegan High Holiday Challah, or just a delicious vegan fall bread, this may just be what you are looking for!


Challah

Follow the recipe for my basic Challah Y'all, Vegan Challah. You will follow the instructions through the first rise, then follow the below instructions for stuffing and braiding.

Filling Ingredients:

  • 2 large green apples

  • 1 cup chopped peans

  • 1/3 cup chopped dates, or raisins

  • 1/4 cup brown sugar

  • 2 tablespoons granulated sugar

  • 2 teaspoons cinnamon

  • pinch of salt

  • 1 teaspoon ground ginger

  • 1/4 teaspoons nutmeg

  • 1 teaspoon vanilla extract

Instructions

  1. Peel apples and finely dice them. You want pretty small pieces so they will fit in the challah braids, and cook through while baking. Next, chop pecans, and dates. Add fruit and nuts along with remaining filling ingredients into a bowl, and stir well.

  2. Once Challah has completed its first rise, remove from oven and separate dough in half. This recipe will yield 2 stuffed challah loaves.

  3. Cut each half into thirds. (each loaf will have three pieces of dough. Work with one loaf at a time, leaving the other three pieces of dough covered in a bowl until you are ready to use them)

  4. Take one piece of dough in you hand and begin to stretch it both length wise, and width wise and the same, time, letting gravity help with the length. You want the dough to be about 12 inches long, and maybe 4 inches wide. Once you have it stretched length wise, you can put it on a floured counter top and press it to get it the width stretched.

  5. Once your dough is the correct size, divide the apple filling in half. Then each half into thirds. This will give you 6 equal portions of filling for each strand of dough. Scoop a portion of filling into a row down the middle of a strand of dough. The filling will produce a liquid from the apples at the bottom of the bowl. Avoid scooping up any of this liquid with the filling. If the dough is wet it will not want to stick and seal. Now pull up the edges of the dough and pinch them together to seal the seam.

  6. Repeat with the other two strands.

  7. Once all three strands are stuffed, and formed, carefully braid the three pieces together. If the seams begin to open, add a little flour to them and pinch them back and continue braiding. Tuck both ends of the loaf under when done braiding. Once again I will refer you to Tori Avey's challah braiding guide if you are unfamiliar with braiding challah! She does a fantastic job showing all the different ways to braid your bread, plus she has some really great recipes on her site.

  8. Repeat with the second loaf, and place both stuffed loaves on a baking sheet, and back in the oven to rise again for about 45 minutes. Once they have risen, remove from oven and pre-heat to 350.

  9. Brush tops of challah with some of your left over whipped aquafaba and sprinkle with a little sugar.

  10. Bake both loaves for about 35 - 45 minutes. You can tap the tops to see if they sound a little hallow. It is hard to tell when stuffed challahs are done when there are wet ingredients inside, so if they do not seem cooked through after 35 minutes, let them keep cooking for 5 - 10 more minutes.

  11. Remove challah from the oven, and allow to cool before cutting.

IMG_9457.jpg