Desserts

Dairy Free Oreo Truffles

These little treats are so yummy and unbelievably easy to whip up. My mother in law was the first to introduce me to the original version of Oreo truffles (or Oreo balls, as some people refer to them) but they are so easy to adapt to make dairy fre…


These little treats are so yummy and unbelievably easy to whip up. My mother in law was the first to introduce me to the original version of Oreo truffles (or Oreo balls, as some people refer to them) but they are so easy to adapt to make dairy free or vegan.. You can also use any flavor or Oreo cookie you like! These Oreo truffles are the perfect easy dessert for the holidays, birthday parties, and pot lucks!

Ingredients:

  • 1 family size pack of Oreo cookies (1 lb pack)

  • 1 container of dairy free/vegan cream cheese (I use Kite Hill)

  • 1 cup of vegan chocolate, chopped, or vegan chocolate chips

  • 1 teaspoon coconut oil, or vegan butter

  • optional: sprinkles ,or cookie crumbles for topping

Instructions:

  1. Toss Oreos into a food processor or high speed blender, and break them down until they are a fine crumbs. You may have to do this in batches to get them nice and broken down.

  2. In a large bowl, mix the cookie crumbs with the container of cream cheese until it’s all combined, and resembles a thick dough.

  3. Using a 1 inch cookie scoop or small spoon, portion the mixture and roll into 1 inch balls. Place the dough balls on a parchment lined cookies sheet and pop them in the freezer or 15 to 20 minutes.

  4. Add whatever chocolate you are using to microwave safe bowl, along with the teaspoon of oil or butter. Microwave in 30 second intervals, stirring in between, until all of the bits of chocolate are melted.

  5. Remove oreo balls from the freezer and begin dipping, and coating them in the melted chocolate, returning them to your cookie sheet. If adding sprinkles or cookie crumbles, go ahead and all them while the chocolate is still wet. Once all of the Oreo balls are coated, pop them back in you freezer for 20 minutes to let the chocolate set.

  6. Store finished Oreo truffles in an airtight container in the fridge.

yields around 3 1/2 dozen Oreo truffles

IMG_9758.jpg

Spiced Apple and Pecan Stuffed Vegan Challah

IMG_9488.jpg

I have been baking and stuffing challah bread for what seems like forever.

This spiced apple and pecan stuffing has long been a favorite for fall, and the High Holidays.

This vegan challah bread is just as beautiful as it is delicious, and is sure to impress anyone who gets the privilege of tasting it.

Stuffed with fall spices apples, pecans and dates, this vegan challah is my favorite for Rosh Hashanah!

If you have never made challah, then by all means, you must! It’s not nearly as intimidating as it may seem, and the stuffing possibilities are endless!

Be sure to read the instructions on the challah very well. It is a common mistake to think you are measuring the liquid of the aquafaba, not the whipped product,  (the recipe states to measure the whipped product but it still tends to be an issue for people, and I am often asked) BUT you need to measure out THE WHIPPED PRODUCT in the recipe not the liquid before you have whipped it!!!

Making vegan challah is easier than most people think, and the whipped aquafaba in the recipe severs as an excellent egg replacer in a bread that normally has 3 to 4 eggs.

Braiding challah is also easier than you may think but practice will improve your braids over time. I made sure to link my favorite braiding link so you can learn all kinds of fancy challah braids, from 3 to 5 strands and even a round holiday braid!

So if you are looking for a vegan High Holiday Challah, or just a delicious vegan fall bread, this may just be what you are looking for!


Challah

Follow the recipe for my basic Challah Y'all, Vegan Challah. You will follow the instructions through the first rise, then follow the below instructions for stuffing and braiding.

Filling Ingredients:

  • 2 large green apples

  • 1 cup chopped peans

  • 1/3 cup chopped dates, or raisins

  • 1/4 cup brown sugar

  • 2 tablespoons granulated sugar

  • 2 teaspoons cinnamon

  • pinch of salt

  • 1 teaspoon ground ginger

  • 1/4 teaspoons nutmeg

  • 1 teaspoon vanilla extract

Instructions

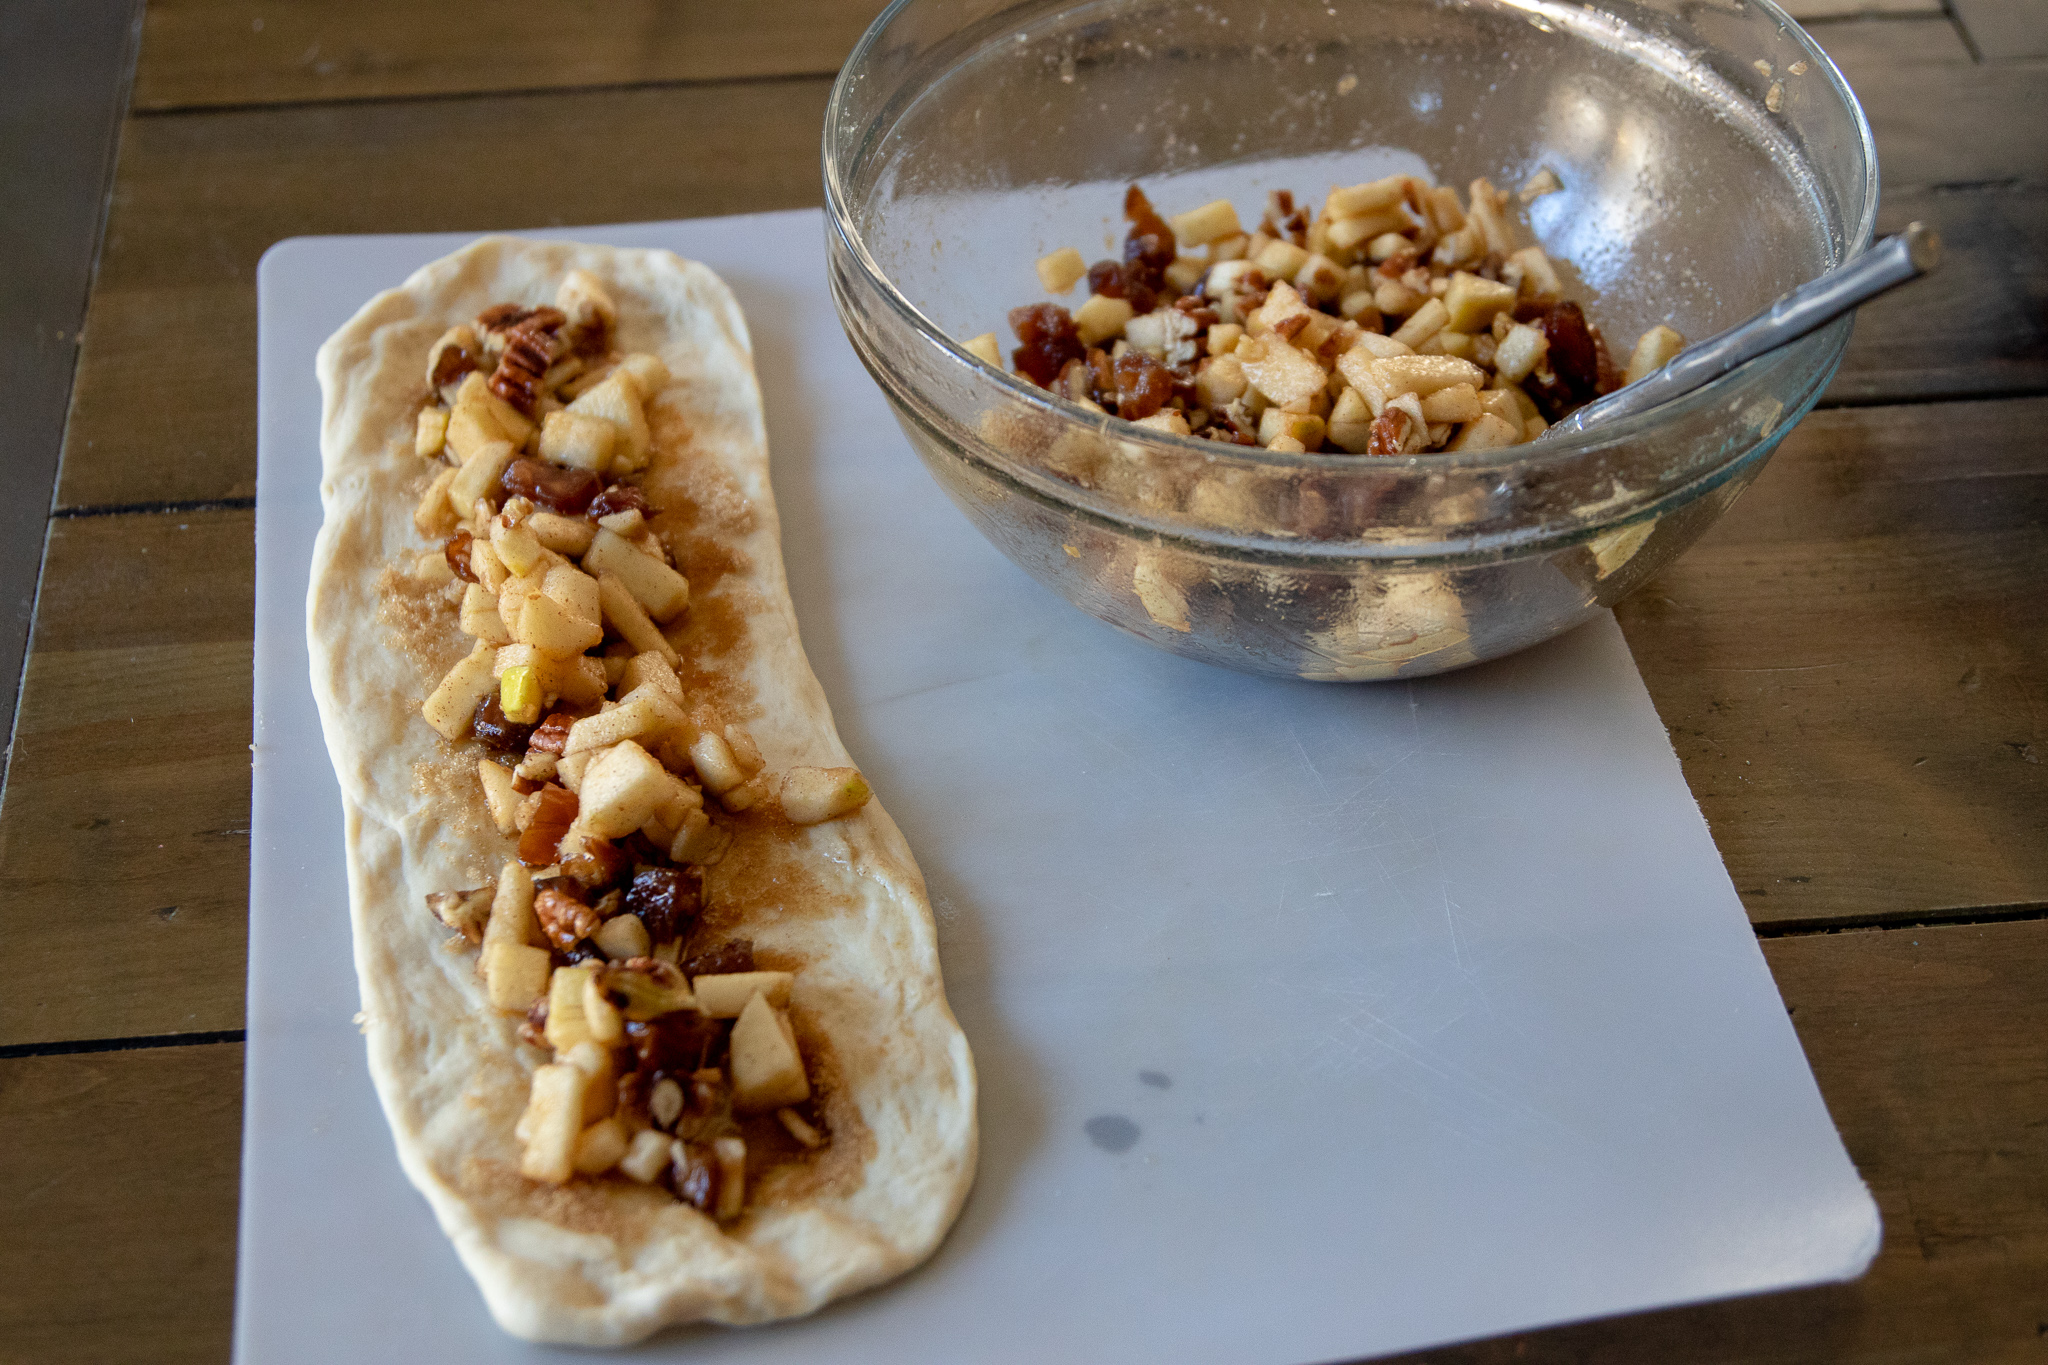
  1. Peel apples and finely dice them. You want pretty small pieces so they will fit in the challah braids, and cook through while baking. Next, chop pecans, and dates. Add fruit and nuts along with remaining filling ingredients into a bowl, and stir well.

  2. Once Challah has completed its first rise, remove from oven and separate dough in half. This recipe will yield 2 stuffed challah loaves.

  3. Cut each half into thirds. (each loaf will have three pieces of dough. Work with one loaf at a time, leaving the other three pieces of dough covered in a bowl until you are ready to use them)

  4. Take one piece of dough in you hand and begin to stretch it both length wise, and width wise and the same, time, letting gravity help with the length. You want the dough to be about 12 inches long, and maybe 4 inches wide. Once you have it stretched length wise, you can put it on a floured counter top and press it to get it the width stretched.

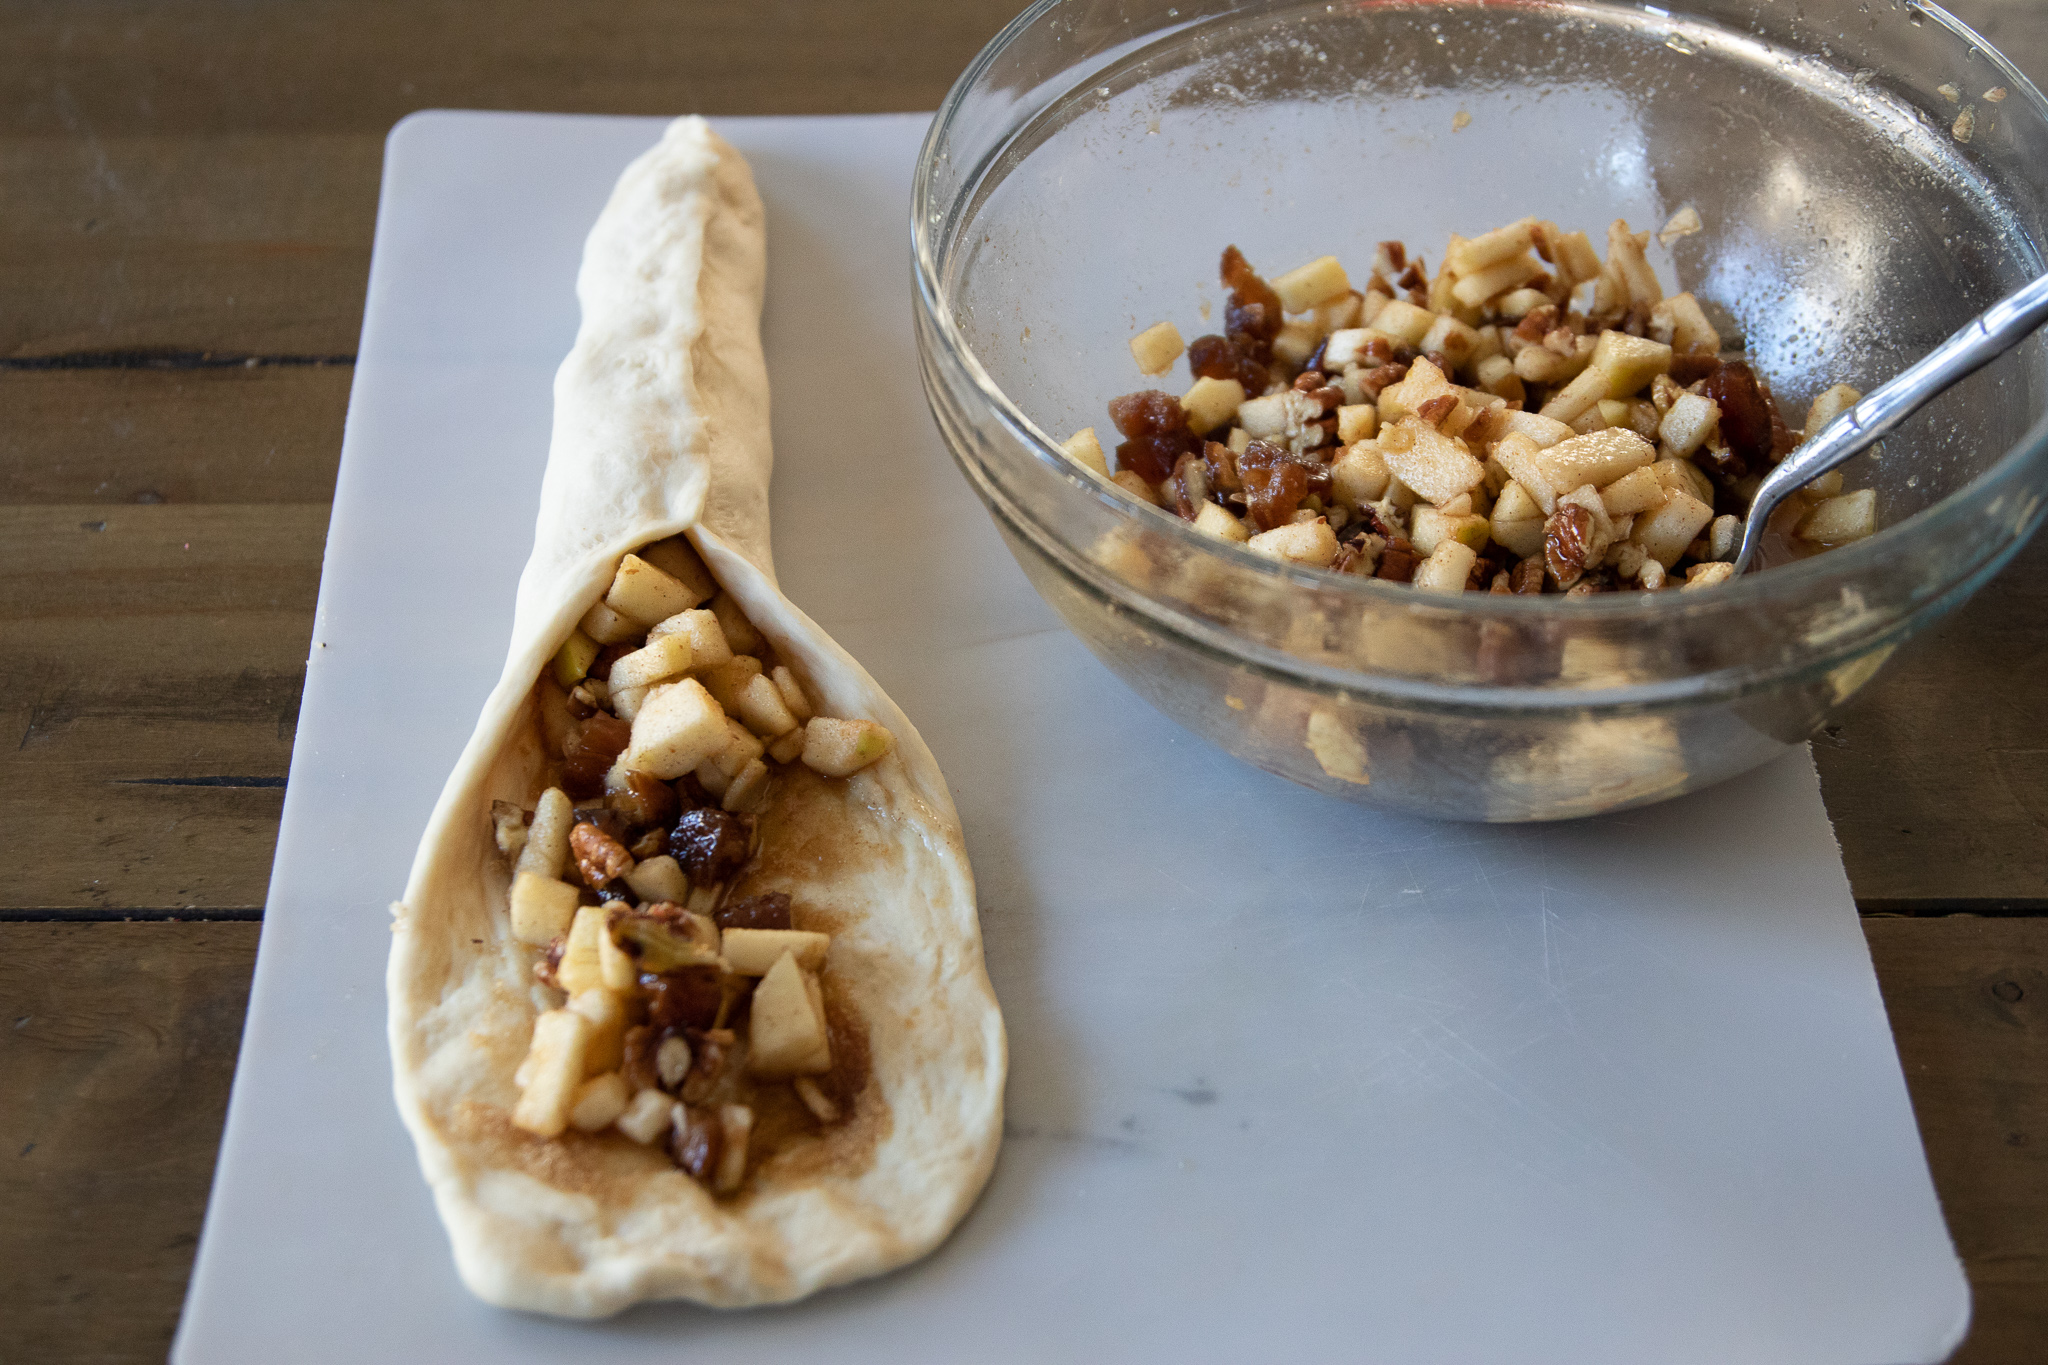
  5. Once your dough is the correct size, divide the apple filling in half. Then each half into thirds. This will give you 6 equal portions of filling for each strand of dough. Scoop a portion of filling into a row down the middle of a strand of dough. The filling will produce a liquid from the apples at the bottom of the bowl. Avoid scooping up any of this liquid with the filling. If the dough is wet it will not want to stick and seal. Now pull up the edges of the dough and pinch them together to seal the seam.

  6. Repeat with the other two strands.

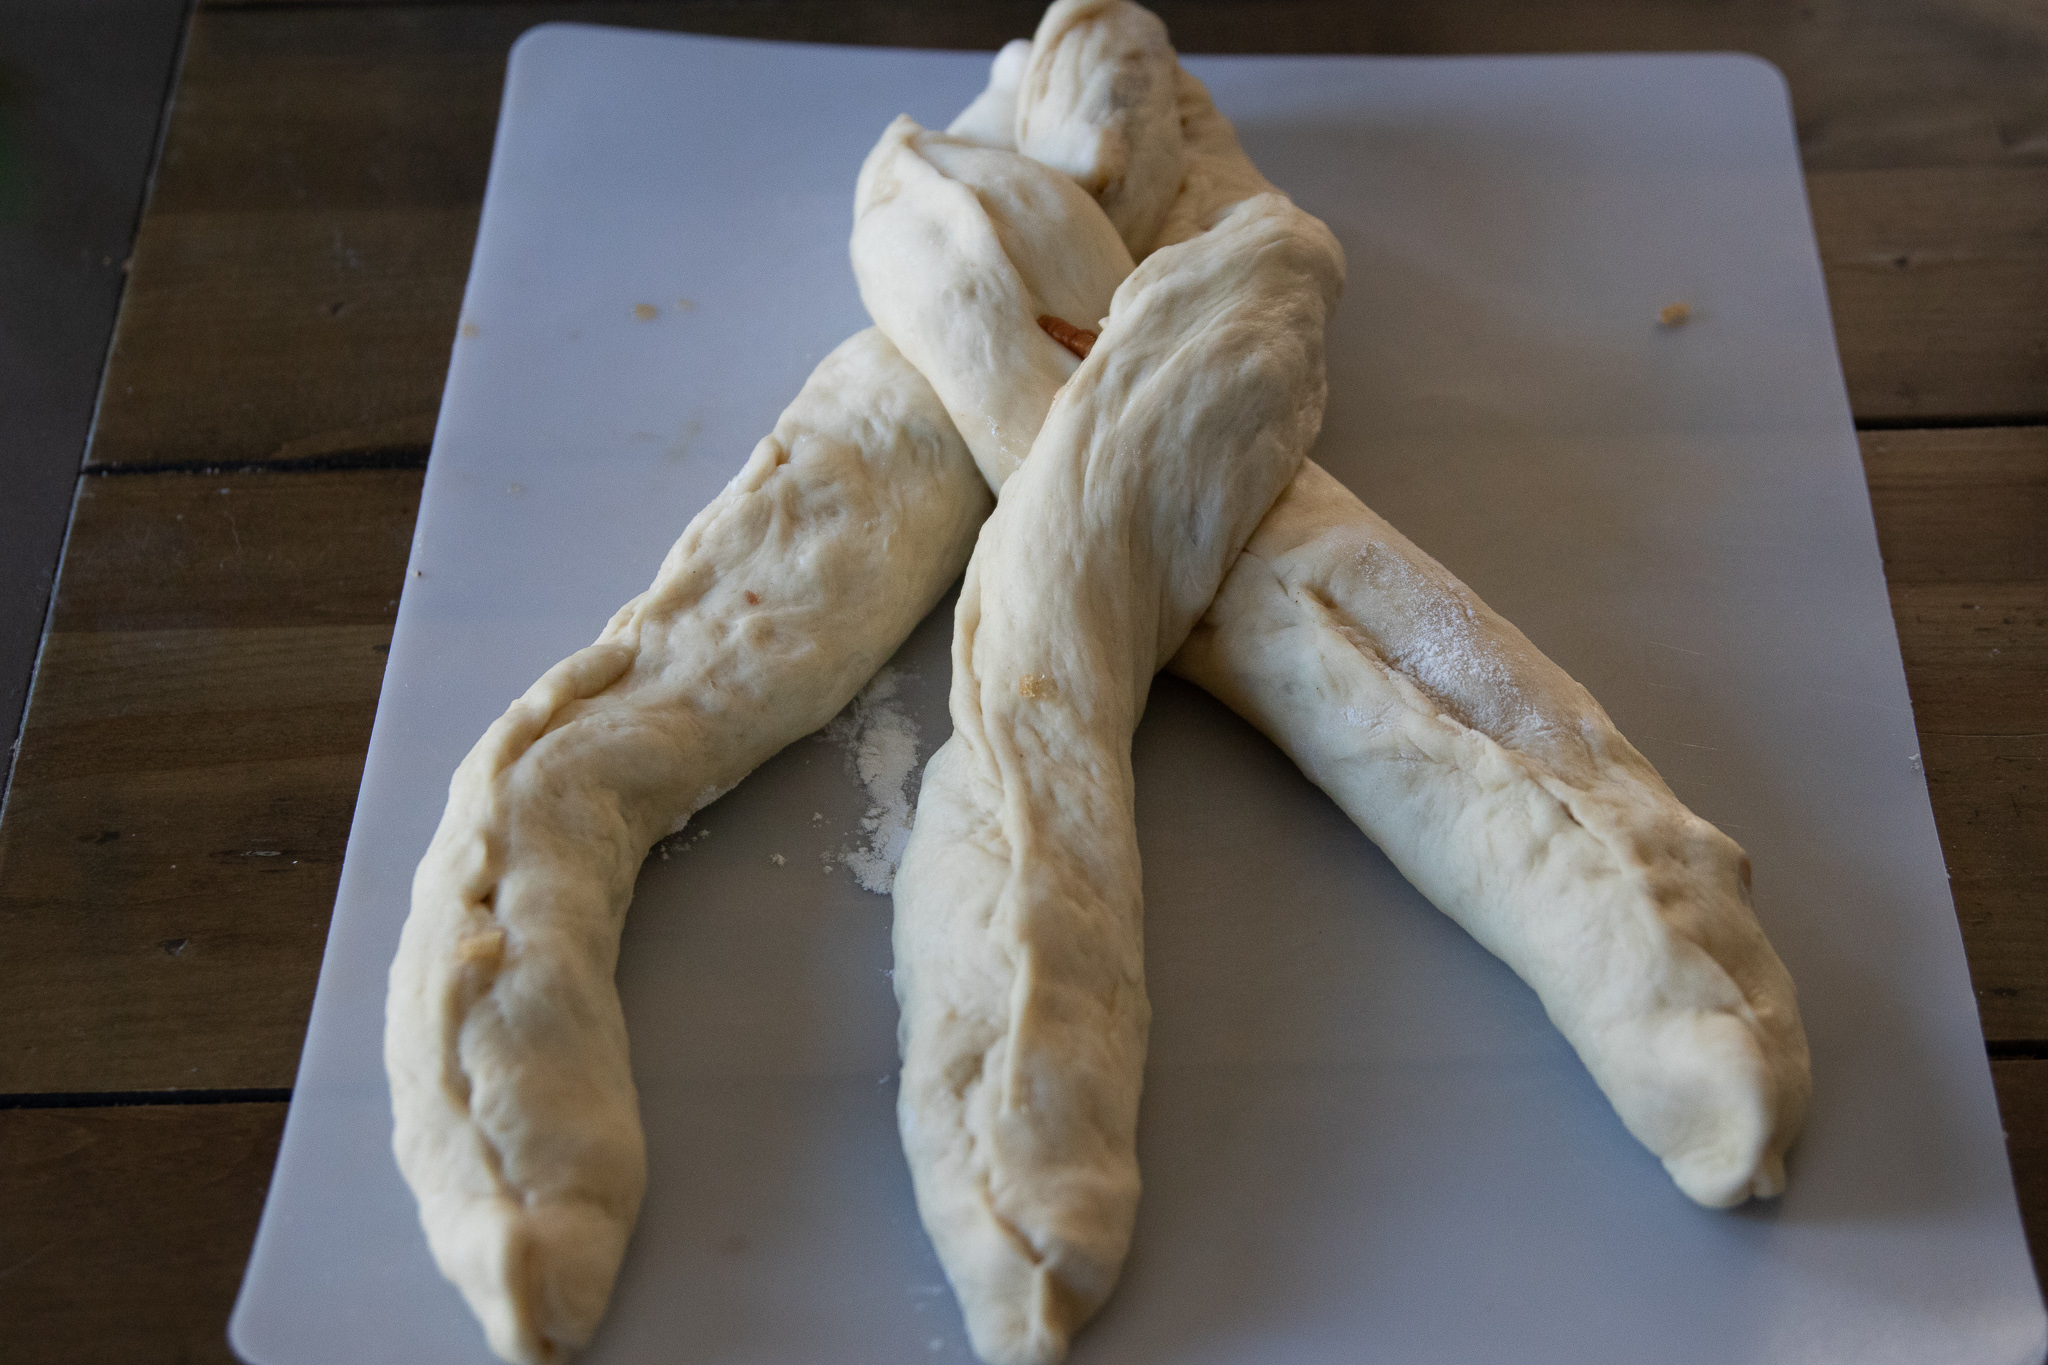
  7. Once all three strands are stuffed, and formed, carefully braid the three pieces together. If the seams begin to open, add a little flour to them and pinch them back and continue braiding. Tuck both ends of the loaf under when done braiding. Once again I will refer you to Tori Avey's challah braiding guide if you are unfamiliar with braiding challah! She does a fantastic job showing all the different ways to braid your bread, plus she has some really great recipes on her site.

  8. Repeat with the second loaf, and place both stuffed loaves on a baking sheet, and back in the oven to rise again for about 45 minutes. Once they have risen, remove from oven and pre-heat to 350.

  9. Brush tops of challah with some of your left over whipped aquafaba and sprinkle with a little sugar.

  10. Bake both loaves for about 35 - 45 minutes. You can tap the tops to see if they sound a little hallow. It is hard to tell when stuffed challahs are done when there are wet ingredients inside, so if they do not seem cooked through after 35 minutes, let them keep cooking for 5 - 10 more minutes.

  11. Remove challah from the oven, and allow to cool before cutting.

IMG_9457.jpg

Pumpkin Spice Vegan Cheese Ball

IMG_8556.jpg

Sweet vegan cheese ball you say?!? Well I say yes!

Even though most cheese balls are savory does not mean you can’t make them sweet.

The base is the same, the spices are just different. So why not think outside of the box and make some sweet versions for your next cheese board.

A sweet cheese ball is perfect for spreading on fruit, cookies, or sweet biscuits.

My all time favorite fall flavor is pumpkin spice and that includes in the form of a creamy sweet vegan cheese ball.

This cheese ball has the right amount of pumpkin pie spice, maple sweetness and of course pumpkin puree! We also gave it a little drizzle of maple icing because why not!

If you are serving a cheese board, or just need a quick fall dessert or snack, give this one a whirl. If you love all things pumpkin spice, I think you will LOVE this cheese ball.


INGREDIENTS:

  • 1 cup cashews soaked in hot water for a few hours or microwaved for 3 minutes then drained

  • 1/2 cup refined coconut oil

  • 1/4 cup canned pumpkin or pumpkin puree

  • 1 teaspoon vanilla extract

  • 3 tablespoons maple syrup or maple butter

  • 1/4 teaspoon salt

  • 1 teaspoon cinnamon

  • 1 teaspoon pumpkin pie spice

  • A few graham crackers (Nabisco brand is honey free)

Icing drizzle:

  • 1/4 cup powdered sugar

  • 1/2 teaspoon pumpkin pie spice

  • A few drops of maple syrup to thin out the icing


INSTRUCTIONS:

  1. Add all of the ingredients to a food processor, or high speed blender, and blend until the mixture becomes completely smooth.

  2. Crush the graham crackers into a fine crumb. I normally just put them in a zip lock bag use a rolling pin to crush them.

  3. Line 2 small bowls, or ramekins, with a pieces of plastic wrap. You want a piece big enough that it will hang a good bit over the sides. Sprinkle some of the crushed graham crackers on the bottom of the bowls.

  4. Divide mixture evenly into the bowls. Now take the plastic wrap hanging over the edges, bring together and twist to seal up the cheese. Allow to harden in the fridge for 3 - 4 hours to firm up.

  5. Once cheese is ready, whisk together the icing ingredients. If the mixute gets too thin, add some more powdered sugar.

  6. Remove both cheese balls from the bowls, and plastic wrap. Drizzle tops with icing.

  7. Put cheese balls in an airtight container and store in the fridge for up to 5 days.

    Serve with fruit or graham crackers

Pumpkin Spice Vegan Pop-Tarts

IMG_8501.jpg

I LOVE pop tarts! Love them. Over the years I have tried several variations of dough and filling.

I settled on this dough because the little bit of extra butter gives them a nice flakey crust, somewhere between a pop tart, and a toaster strudel.

I make all kinds of pop-tarts, but around September I am all in for all things pumpkin spice. I know, I know, she’s so “basic” or whatever the kids are saying these days. But y’all, I love pumpkin everything. Pumpkin pie being my all time fave, and these are a close second and an acceptable breakfast pie, if you will.

If you are in the “I hate all things pumpkin camp” I am baffled BUT accept your personal taste and can offer you other vegan pop- tart flavors on the site. I have chocolate, strawberry, and even lemon lavender. Something for maybe everyone?!

Just know that however you deiced to make them, they are surprising easy to make, and so good that you will probably want to just go ahead and make a double batch!

We have a family of 6 so these do not last!!! They keep well and will reheat nicely, too.

So if you have never made a homemade vegan pop-tart before, nows the time!


INGREDIENTS:

  • 1 cup whole wheat flour

  • 1 cup all purpose flour

  • 3/4 cup vegan butter

  • a pinch of salt

  • 3 - 4 tablespoons ice water

  • 3 tablespoons Pumpkin Butter

  • 1/4 cup powdered sugar

  • a drizzle of maple syrup

  • 1/4 teaspoon pumpkin pie spice


INSTRUCTIONS:

  1. Preheat oven to 350.

  2. Add both cups of flour, butter, and salt to a food processor and pulse until well combined.

  3. Add in the water, one tablespoon at a time until a soft dough has formed.

  4. Roll the dough out on a flour dusted, smooth surface to a 1/8 of an inch thick rectangle. You can trim up the edges with a sharp knife and save the scrap dough.

  5. Once the dough is trimmed and even, cut 3 inch by 5 inch rectangles from the dough, give or take. Be sure when you are calculating how many you can cut, to have a even number. Each pop tart needs 2 rectangles. Roll out any scrap dough and repeat the process.

  6. Scoop a teaspoon of pumpkin butter onto a rectangle, and smear it around a bit in the middle, carefully to not get too close to the edges.

  7. Top the pumpkin butter covered piece of dough with another rectangle of dough, and use a fork to press, and seal the edges. (for step by step pictures of the process, check out our Strawberry Pop-Tart recipe)

  8. Place pop tarts on a parchment lined baking sheet, or lightly spray one with cooking oil and bake for 20 - 25 minutes.

  9. While pop tarts are baking, mix together the powdered sugar with just a few drops of maple syrup, just enough to thin it out. Add the pumpkin pie spice and stir. If it is too thin, you can add a little more powdered sugar to thicken it back up. You want a spreadable consistency.

  10. Once pop tarts have cooled a bit, spread the icing and serve.

Yields 8 pop tarts.

IMG_8513.jpg

Triple Chocolate Vegan Pop-Tarts

When I was a kid, I lived off of pop-tarts. Cherry or chocolate being my faves, blueberry being the only one I never liked but would eat anyways.

It was the 80s-90s and pop-tarts were THE breakfast food, until Toaster Strudel came along and tried to steal pop-tart’s thunder.

We will just say my dad was a couponing, economical man, and there was no way he was going to buy us a box of 4 toaster strudels for the price of two boxes of pop-tarts, no matter how hard we begged! So we remained a loyal pop-tart eating and loving family forever more.

Then I grew up and had kids of my own and became semi health conscience. Even before we were vegan, I rarely bought my kids pop-tarts because “they are bad for you.” I mean its not a lie, but lets just say I have loosened the reigns over the years where letting my kids eat “junk” food is concerned.

That said I still prefer to make them homemade version of that junk food because I still want them eating the best possible version of the junk food they can. For starters it has to be free of animal products, high fructose corn syrup, and as many preservatives I can avoid. I won’t withhold sugar from my kids. You get one life and you have to live it! I feel like moderate sugar is ok and pop-tarts need to be consumed because they are delicious and sprinkles make everyone fricking happy! They already can’t eat so many things that they wish they could because we are vegan. Everything in moderation and all of that.

It is actually really easy to make a healthier, vegan version of pop-tarts at home and fill them with whatever you like, even if you like blueberries ( but seriously, there are way better choices than blueberry!) The dough is easy to make and work with, and they bake up really fast! If you have ever made easy pie dough, it’s basically that!

So if you have been without pop-tarts for far too long, the wait is over. And if you grew up eating them every day like I did, these will surely bring a smile to your face. I mean come on, who doesn’t want an excuse to eat chocolate for breakfast every now and again!


INGREDIENTS:

The Dough

  • 1 3/4 cups all purpose flour

  • 1/2 cup cocoa powder

  • 2/3 cups vegan butter

  • a pinch of salt

  • 2 tablespoons white sugar

  • 3 - 4 tablespoons ice water

  • sprinkles for topping (optional)

The Filling

  • 3 tablespoons brown sugar

  • 2 tablespoons cocoa powder

  • 1/3 cup of plant based milk

  • 3 oz vegan chocolate chips or chopped chocolate

  • pinch of salt

The Glaze

  • 1/4 cup powdered sugar

  • 1 teaspoon cocoa powder

  • a few drops of plant based milk

COOKING INSTRUCTIONS:

  1. Preheat oven to 350.

  2. Prepare your filling adding half of the chopped chocolate, and the remaining ingredients to a small sauce pan. Bring to a boil, then reduce heat to simmer. Cook for 5 minutes to allow sauce to thicken. Remove from heat, and stir in the remaining chopped chocolate. Set aside to cool.

  3. To make the dough, add flour, cocoa, butter, and salt to a food processor. Pulse until well combined.

  4. Add in the water one tablespoon at a time until a soft dough has formed. Pop dough in the fridge for 10-15 minutes.

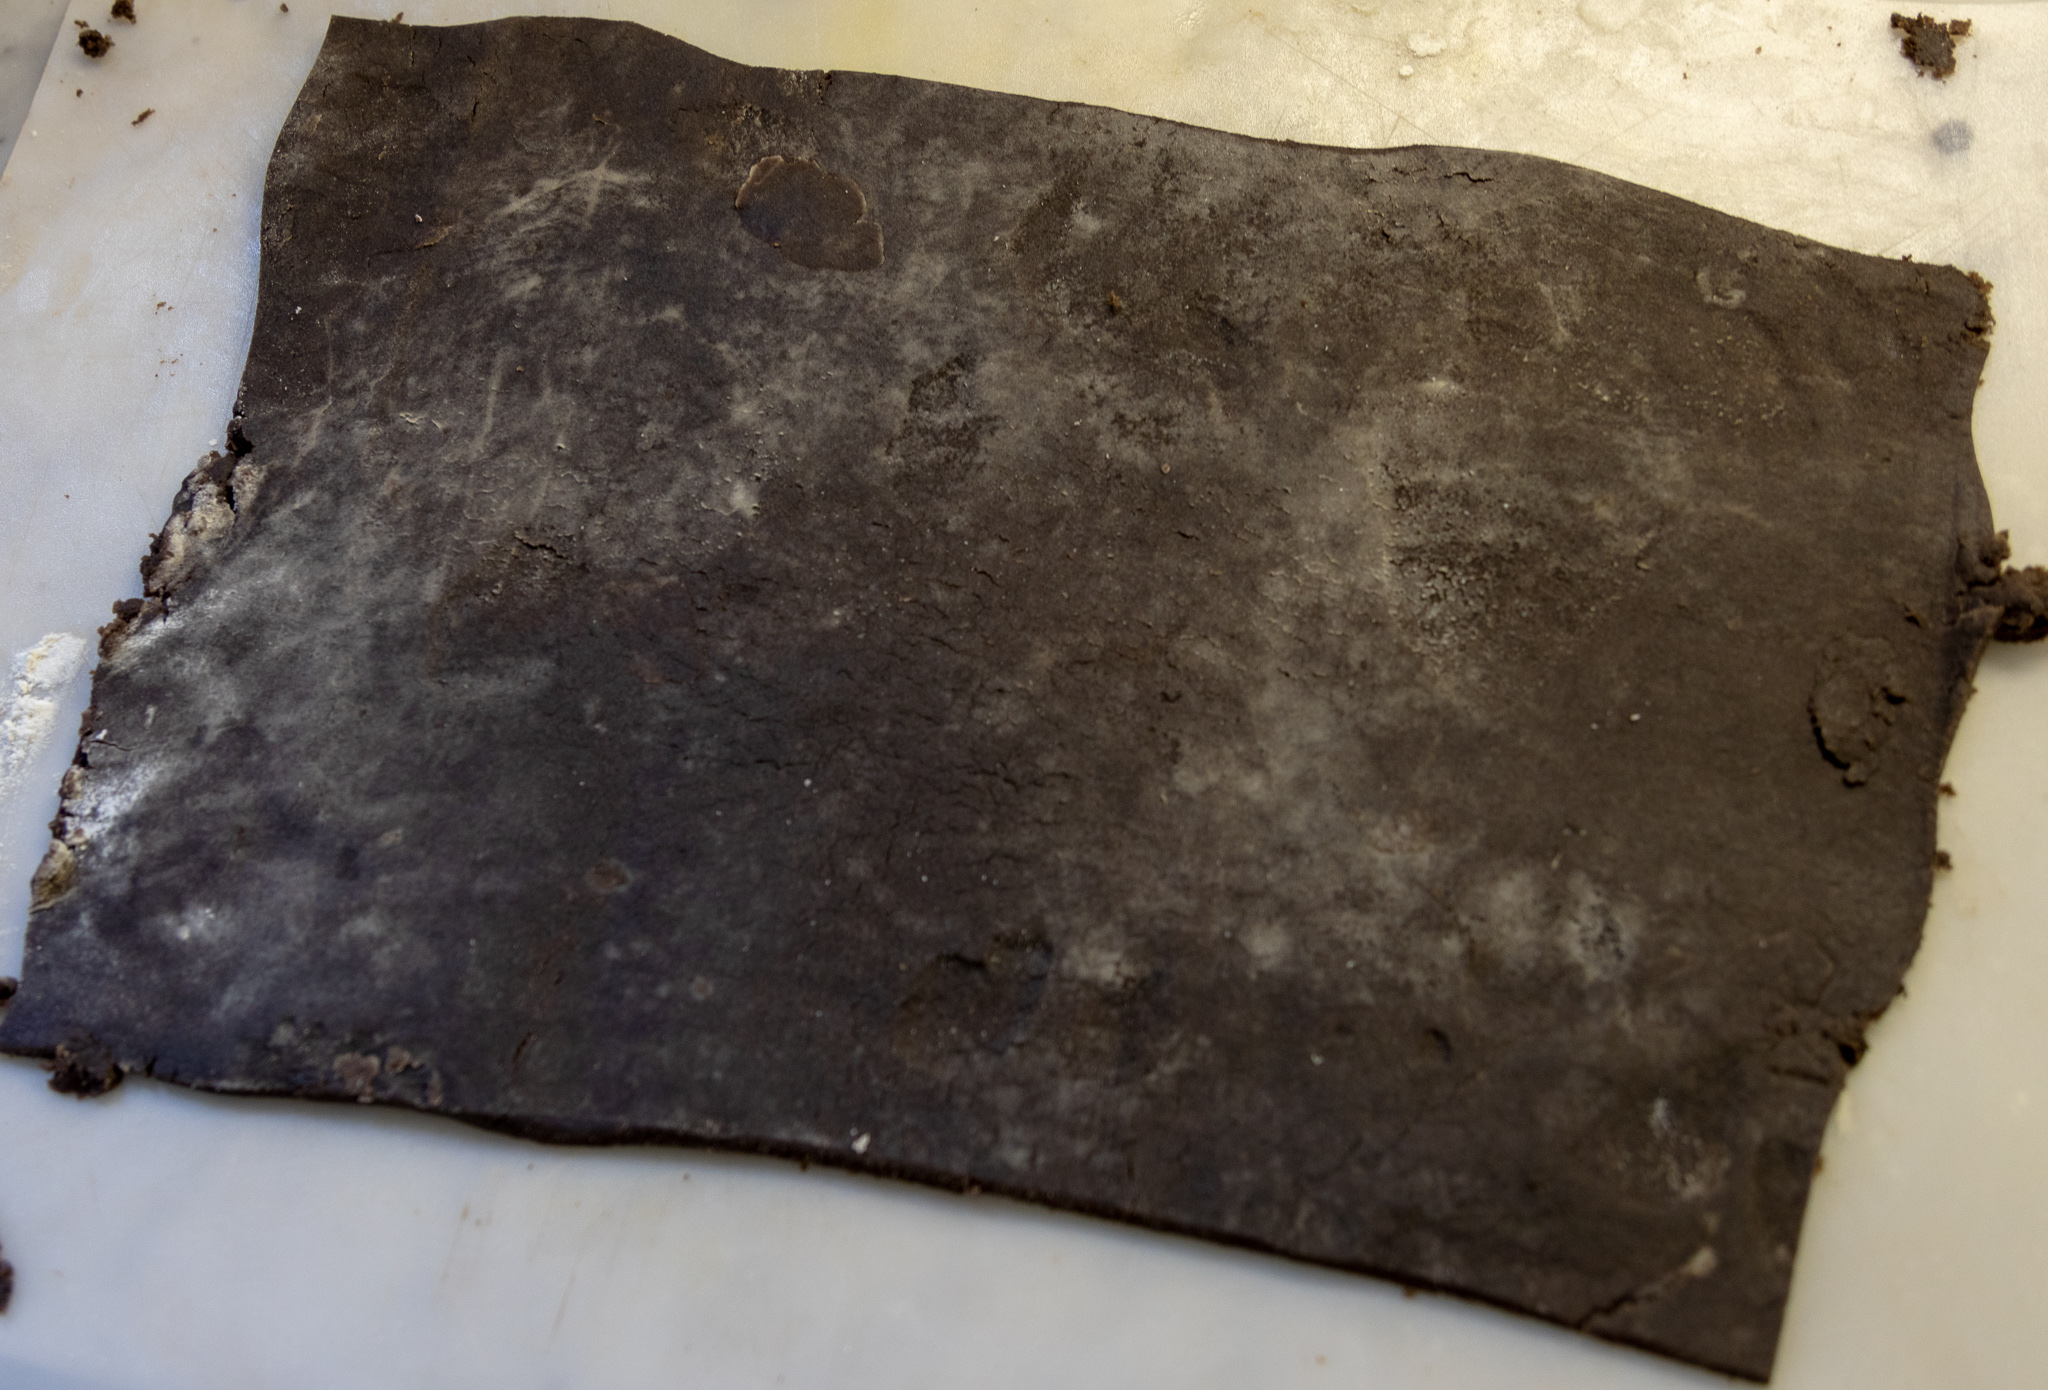
  5. Roll the dough out on a flour dusted, smooth surface to a 1/8 of an inch thick rectangle. You can trim up the edges with a sharp knife, and save the scrap dough.

  6. Once the dough is trimmed and even, cut 3 inch by 5 inch rectangles from the dough, give or take. Be sure when you are calculating how many you can cut, to have a even number. Each pop-tart needs 2 rectangles. Roll out any scrap dough and repeat the process.

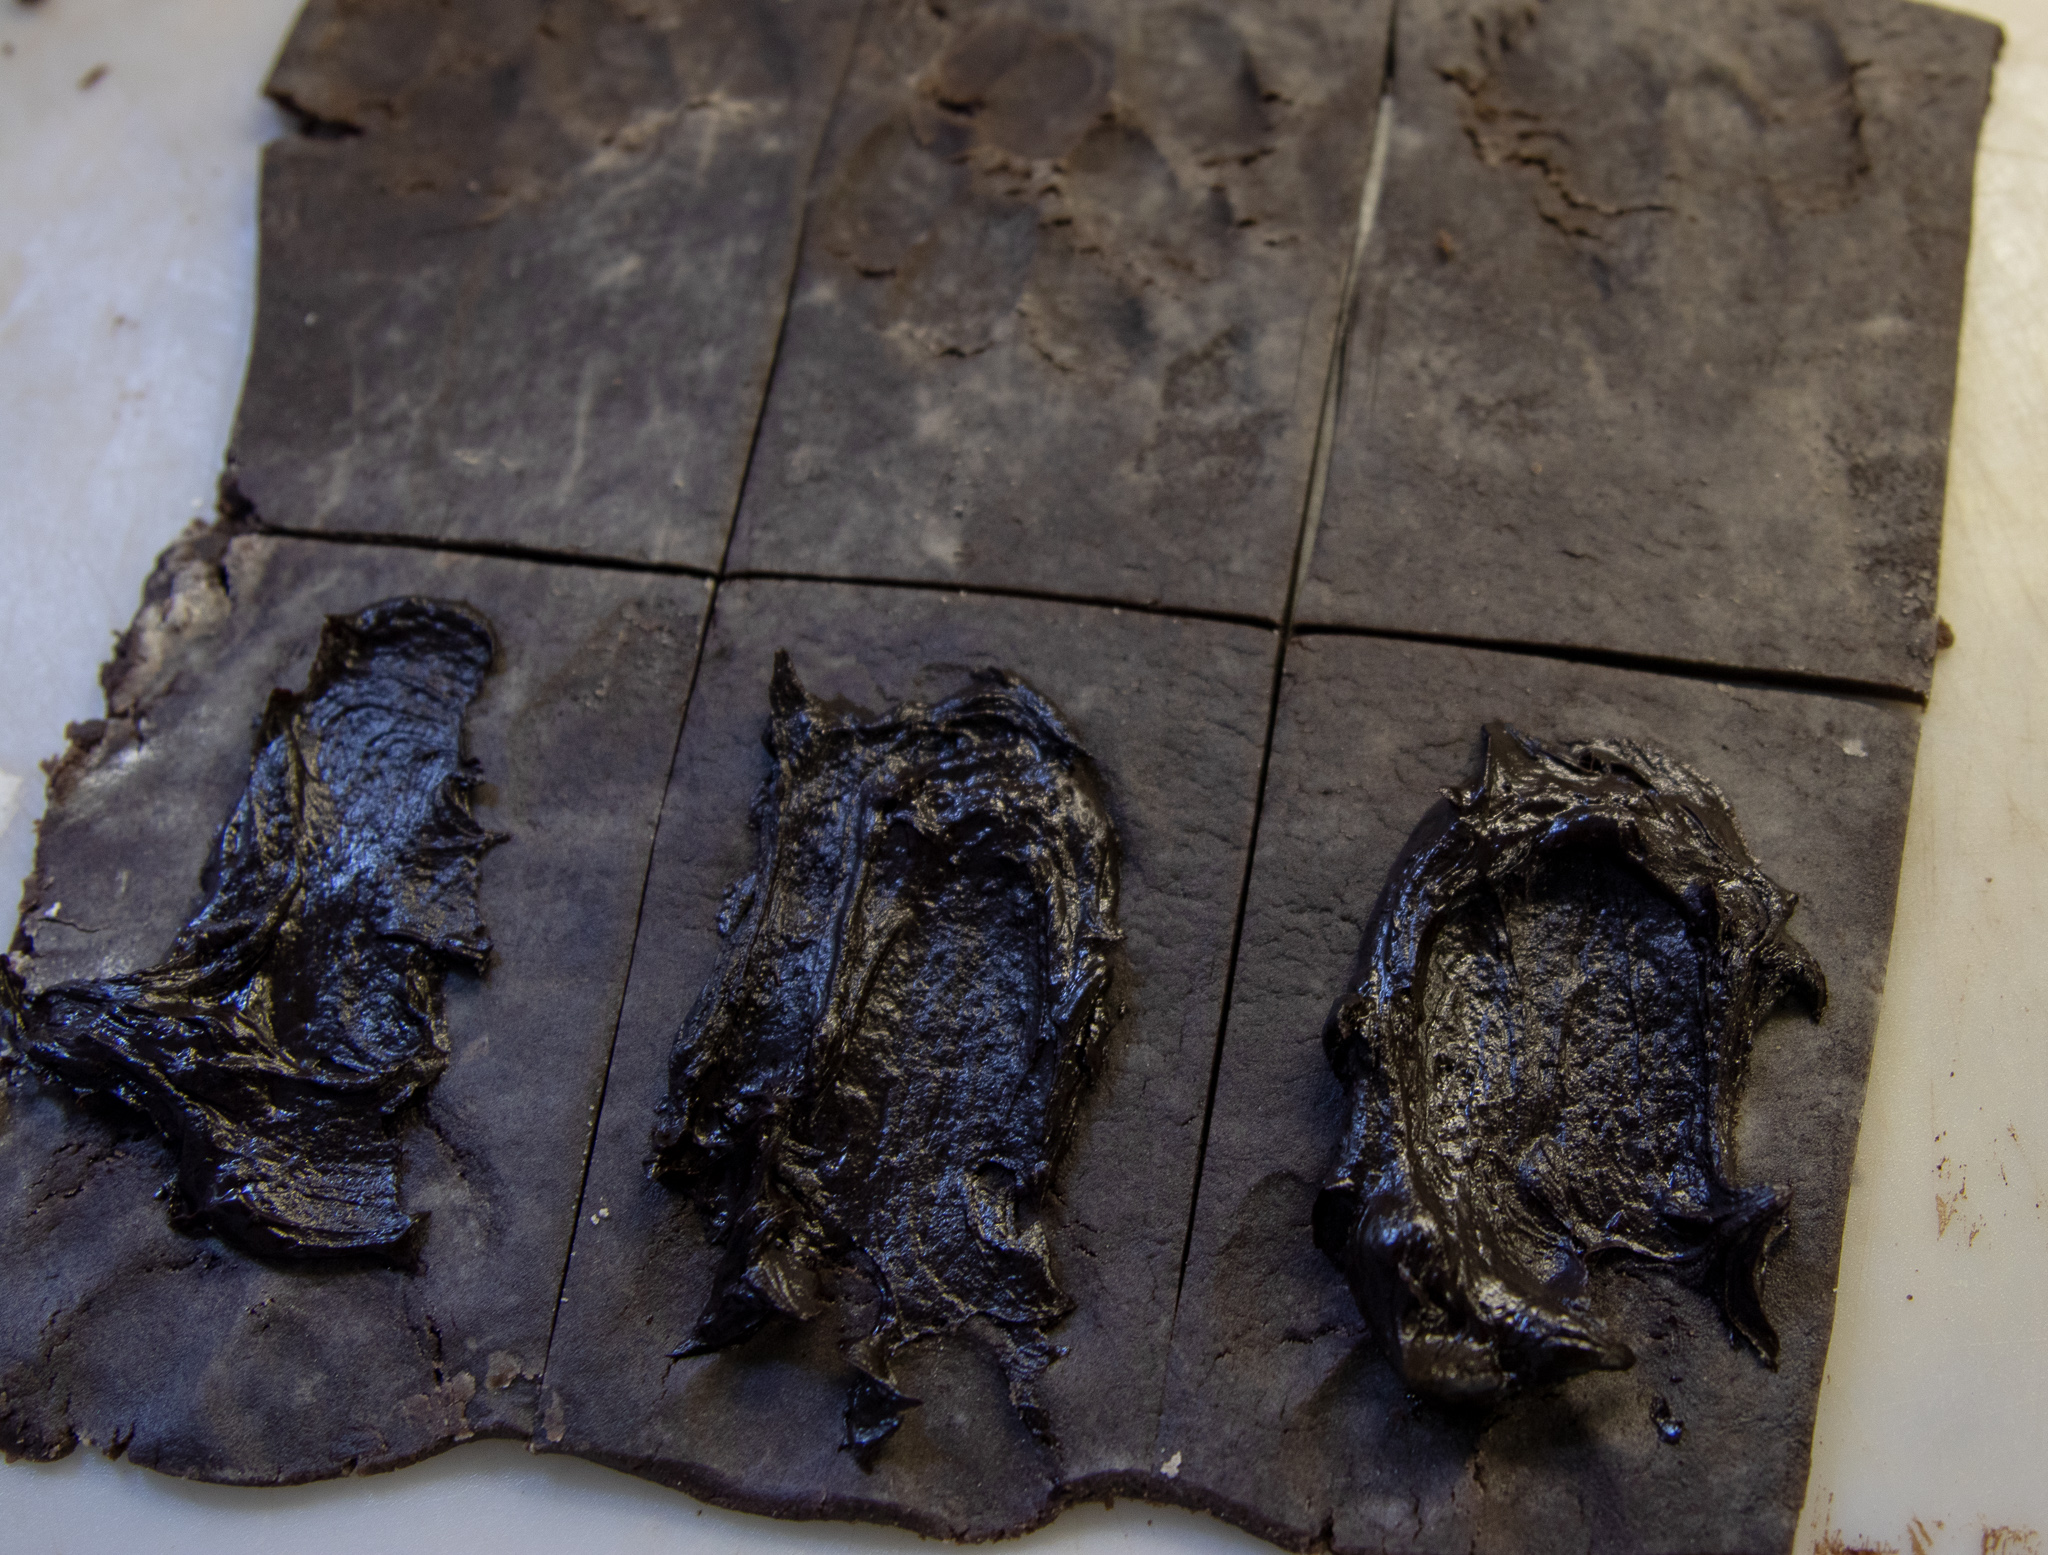
  7. Scoop a teaspoon of chocolate filling onto a rectangle, and smear it around a bit in the middle, careful to not get too close to the edges.

  8. Top the chocolate filled piece of dough with another rectangle of dough. I use a spatula to lift the rectangle and place on top. Use a fork to press, and seal the edges.

  9. Place pop-tarts on a parchment lined baking sheet, or lightly spray one with cooking oil and bake for 20 - 25 minutes.

  10. While pop-tarts are baking, mix together the glaze. If it is too thin you can add a little more powdered sugar to thicken it back up. You want a spreadable consistency.

  11. Once pop-tarts have cooled a bit, spread the icing and serve. You can also top with sprinkles.

Yields 8-10 pop-tarts

IMG_7870.jpg

Classic Vegan Cranberry Scone

I love to bake, but my 12 year old daughter love to bake more. One of our favorite things to do together is veganize our favorite old treats.

These scones are super simple to whip up. So simple that our daughter did the baking on these beauties.

We mixed in dried cranberries but you could mix in any dry fruit, nut, or even chocolate chips. You could also leave out fruit or nuts and add some almond or vanilla extract for a simple yet still delicious vegan scone.

If a 12 year old can bake up a perfect batch of these cranberry scones, so can you!

Ingredients:

  • 2 cups of all purpose flour

  • 8 tablespoons vegan butter

  • 1/3 cup sugar plus 1 teaspoon

  • 1/2 cup plain vegan yogurt, I used Kite Hill plain almond yogurt

  • 1 flax egg

  • 1 teaspoon baking powder

  • 1/4 teaspoon baking soda

  • 1/2 teaspoon salt

  • 1/2 cup dried cranberries

Optional Icing:

  • 1/3 cup powdered sugar

  • 1 tablespoon diary free milk

  • 1/8 teaspoon vanilla extract

Instructions:

Preheat oven to 400 degrees

  1. In a medium bowl, combine 1/3 cup of sugar, flour, baking soda, baking powder, and salt. Mix well.

  2. Add the butter, and using your hands, work in the butter until the mixture seem coarse and sort of crumbly. Add the cranberries to the mix.

  3. In a small bowl whisk the yogurt and flax egg.

  4. Add yogurt mixture to the dry mixture, and stir unitl combined. Knead until a smooth dough comes together. It will seem dry and crumbly at first, but it will come together as you keep kneading.

  5. Once it has come together, form a disk with the dough about 7-8 inches wide, and 3/4 of an inch thick. Sprinkle 1 teaspoon of sugar on the dough, then cut the circle into 8 triangles.

  6. Place scones onto a parchment paper lined baking sheet, and bake for 15-20 minutes. You can brush them with a little plant based milk before popping them into the oven to help them brown. We used oat milk, as it browns nicely, but you can use what you have. They are done once they are light brown on top, and firm in the middle.

  7. Allow scones to cool. You can optionally top them with an icing drizzle once cooled. Just whisk the sugar and milk and drizzle over the tops of the scones.

  8. Store in an airtight container at room temperature.

yields 8 scones 

Vegan Glazed Yeast Donuts

Vegan Glazed Yeast Donuts

Who doesn’t love a donut, am I right?

I mean I guess maybe you could dislike donuts, but I am really going to need you to explain, because I am confused!

I grew up eating Krispy Kreme in a small town where every weekend someone would stand at a stop light selling Krispy Kremes as a band, camp, church, footballs, whatever fundraiser! You could always get boxes of red light intersection donuts. Does anyone else know what I am talking about? It was a thing, and I didn't hate it! My parents were far more willing to buy us a box of donuts if it benefited our high school marching band.


So after going vegan my heart was broken to never again get to pull up to a Krispy Kreme when the HOT sign was lit. I could never again dress my kids up for Krispy Kreme’s Pirate day and get a free donut. I was SAD.

Now don’t lecture me about how they are not good for you. I am perfectly aware. But they are delicious and sometimes it’s ok to eat a bad for you thing. It’s not like I am only eating donuts and hate vegetables.

But no matter what, I could not live in a donut-less world. I would not!

So I set out to make a perfectly glazed vegan yeast donut that would make me no longer miss Krispy Kreme every time I drove by and saw the HOT light shinning and taunting me.


And I did! These donuts are the best vegan yeast donuts I have had. Not to toot my own horn, but it’s the truth. If you don’t believe me, then make a batch and see for yourself! Are there better glazed vegan donuts out there somewhere? Maybe, I have not found them where I live. I am always on the hunt for vegan donuts where we travel. I want all the donuts, all the time. But, seriously there is no need to search the internet high and low for a better recipe if you want to make them on your own. This one is perfect.

You can glaze them, dip them in chocolate, cover them in powdered sugar, dip them in coconut. Whatever your little donut loving heart desires. We have even covered them in vegan maple bacon, and filled them with jelly for Hanukkah.

So, may all you vegan donut dreams come true, now! Mine sure have. And we no longer have to be sad when passing a school fundraiser at an intersection selling boxes of Krispy Kreme. I still might hand them a 5 and pass on the donuts. After all they are just trying to go band camp.


INGREDIENTS:

The Donuts

  • 4 cups all purpose flour

  • 3/4 cups aquafaba (we are using and measuring the whipped product, not the liquid, follow link for instructions)

  • 1/2 cup plus 2 tablespoons melted vegan butter

  • 1/4 cup sugar

  • 2 and 1/4 teaspoon dry active yeast

  • 1 cup plus 2 tablespoons plant based milk

  • 1/2 teaspoon salt

  • 2-3 cups of oil for frying, I use grapeseed but you could use whatever oil you normally fry with


The Glaze

  • 3 cups powdered sugar

  • 1/4 cup melted vegan butter

  • 1 teaspoon vanilla extract

  • 1/2 cup plant based milk, give or take

Vegan Glazed Yeast Donuts

COOKING INSTRUCTIONS: 

  1. Heat milk in microwave for 30 - 45 seconds. You want it warm, but not boiling hot.

  2. Add the warm milk, yeast, and sugar to the bowl of your stand mixer. If you do not have a stand mixer, add the contents to a large bowl. Let sit for 5 minutes to activate the yeast.

  3. After 5 minutes add the aquafaba, and melted butter to the mix. Next add the flour, and salt, and mix for 5 minutes on medium speed if using the stand mixer. If not using a stand mixer, then mix the ingredients together well in a bowl, then transfer to a floured counter top, and kneed the dough by hand for 5 minutes. The consistency of the dough should be soft, but not sticky.

  4. After the dough has been kneaded, place it in a lightly greased bowl and cover with plastic wrap. Pop it in the oven. You are NOT turning the oven on, just leaving it there to rise. If your oven has a dough proof setting you can turn that on. Leave dough to rise for one hour, or until it has doubled in size.

  5. Once the dough has finished rising, transfer to a lightly floured countertop. I like to divide the dough in half and work it in two batches. It makes it easier to roll out. Roll out one half of the dough to about 1/4 inch thick. Using a 3 inch circle biscuit or cookie cutter (or donut cutter if you have one) begin cutting circles. You will need to find something small to cut the center out with. We used the lid to our vanilla extract. Roll back out the scrap dough and continue cutting. Repeat with other half of dough. You should have a total of 2 dozen donuts.

  6. Place donuts on cookies sheets, and let rest for about 15 - 20 minutes. They will become bigger as they rest.

  7. While they are resting, heat 2 - 3 inches of oil in a deep skillet or medium sized pot.

  8. Once oil is hot, begin adding the donuts to the oil, 2 or 3 at a time. Fry the donuts for about one minute on each side. If you don't have enough oil in the pan, and they are hitting the bottom, they will easily burn. So make sure to use enough oil!

  9. Allow donuts to cool on a wire cooling rack, placed on top of a paper-towel-lined cookie sheet.

  10. Once all donuts are done frying, mix all of the ingredients for the glaze. If you find the glaze too thick, you can always thin it with some more milk.

  11. Dip one side of the donut in the glaze and place back on the wire rack to allow the excess glaze to drip off.

  12. It will only take a few minutes for the glaze to set, and for you to be stuffing your face with delicious glazed donut perfection!

Yields two dozen donuts.

Vegan Strawberry Pop-Tarts

IMG_9515-2.jpg

I LOVE pop tarts! Love them. Over the years I have tried several variations of dough and filling.

I settled on this dough because the little bit of extra butter gives them a nice flakey crust, somewhere between a pop tart, and a toaster strudel.

If you don't like strawberries then I'm baffled, but its your pop tart, so fill it with any flavor jam you like. You can fill them with nut butter, maple butter, sweet vegan cream cheese....anything you want!

Just know that however you deiced to make them, they are surprising easy to make, and so good that you will probably want to just go ahead and make a double batch!

We have a family of 6 so these do not last!!! They keep well and will reheat nicely, too.

So if you have never made a homemade vegan pop-tart before, nows the time!


INGREDIENTS:

  • 1 cup whole wheat flour

  • 1 cup all purpose flour

  • 3/4 cup vegan butter

  • a pinch of salt

  • 3 - 4 tablespoons ice water

  • 3 tablespoons Strawberry jam

  • 1/4 cup powdered sugar

COOKING INSTRUCTIONS: 

  1. Preheat oven to 350.

  2. Add both cups of flour, butter, and salt to a food processor and pulse until well combined.

  3. Add in the water, one tablespoon at a time until a soft dough has formed.

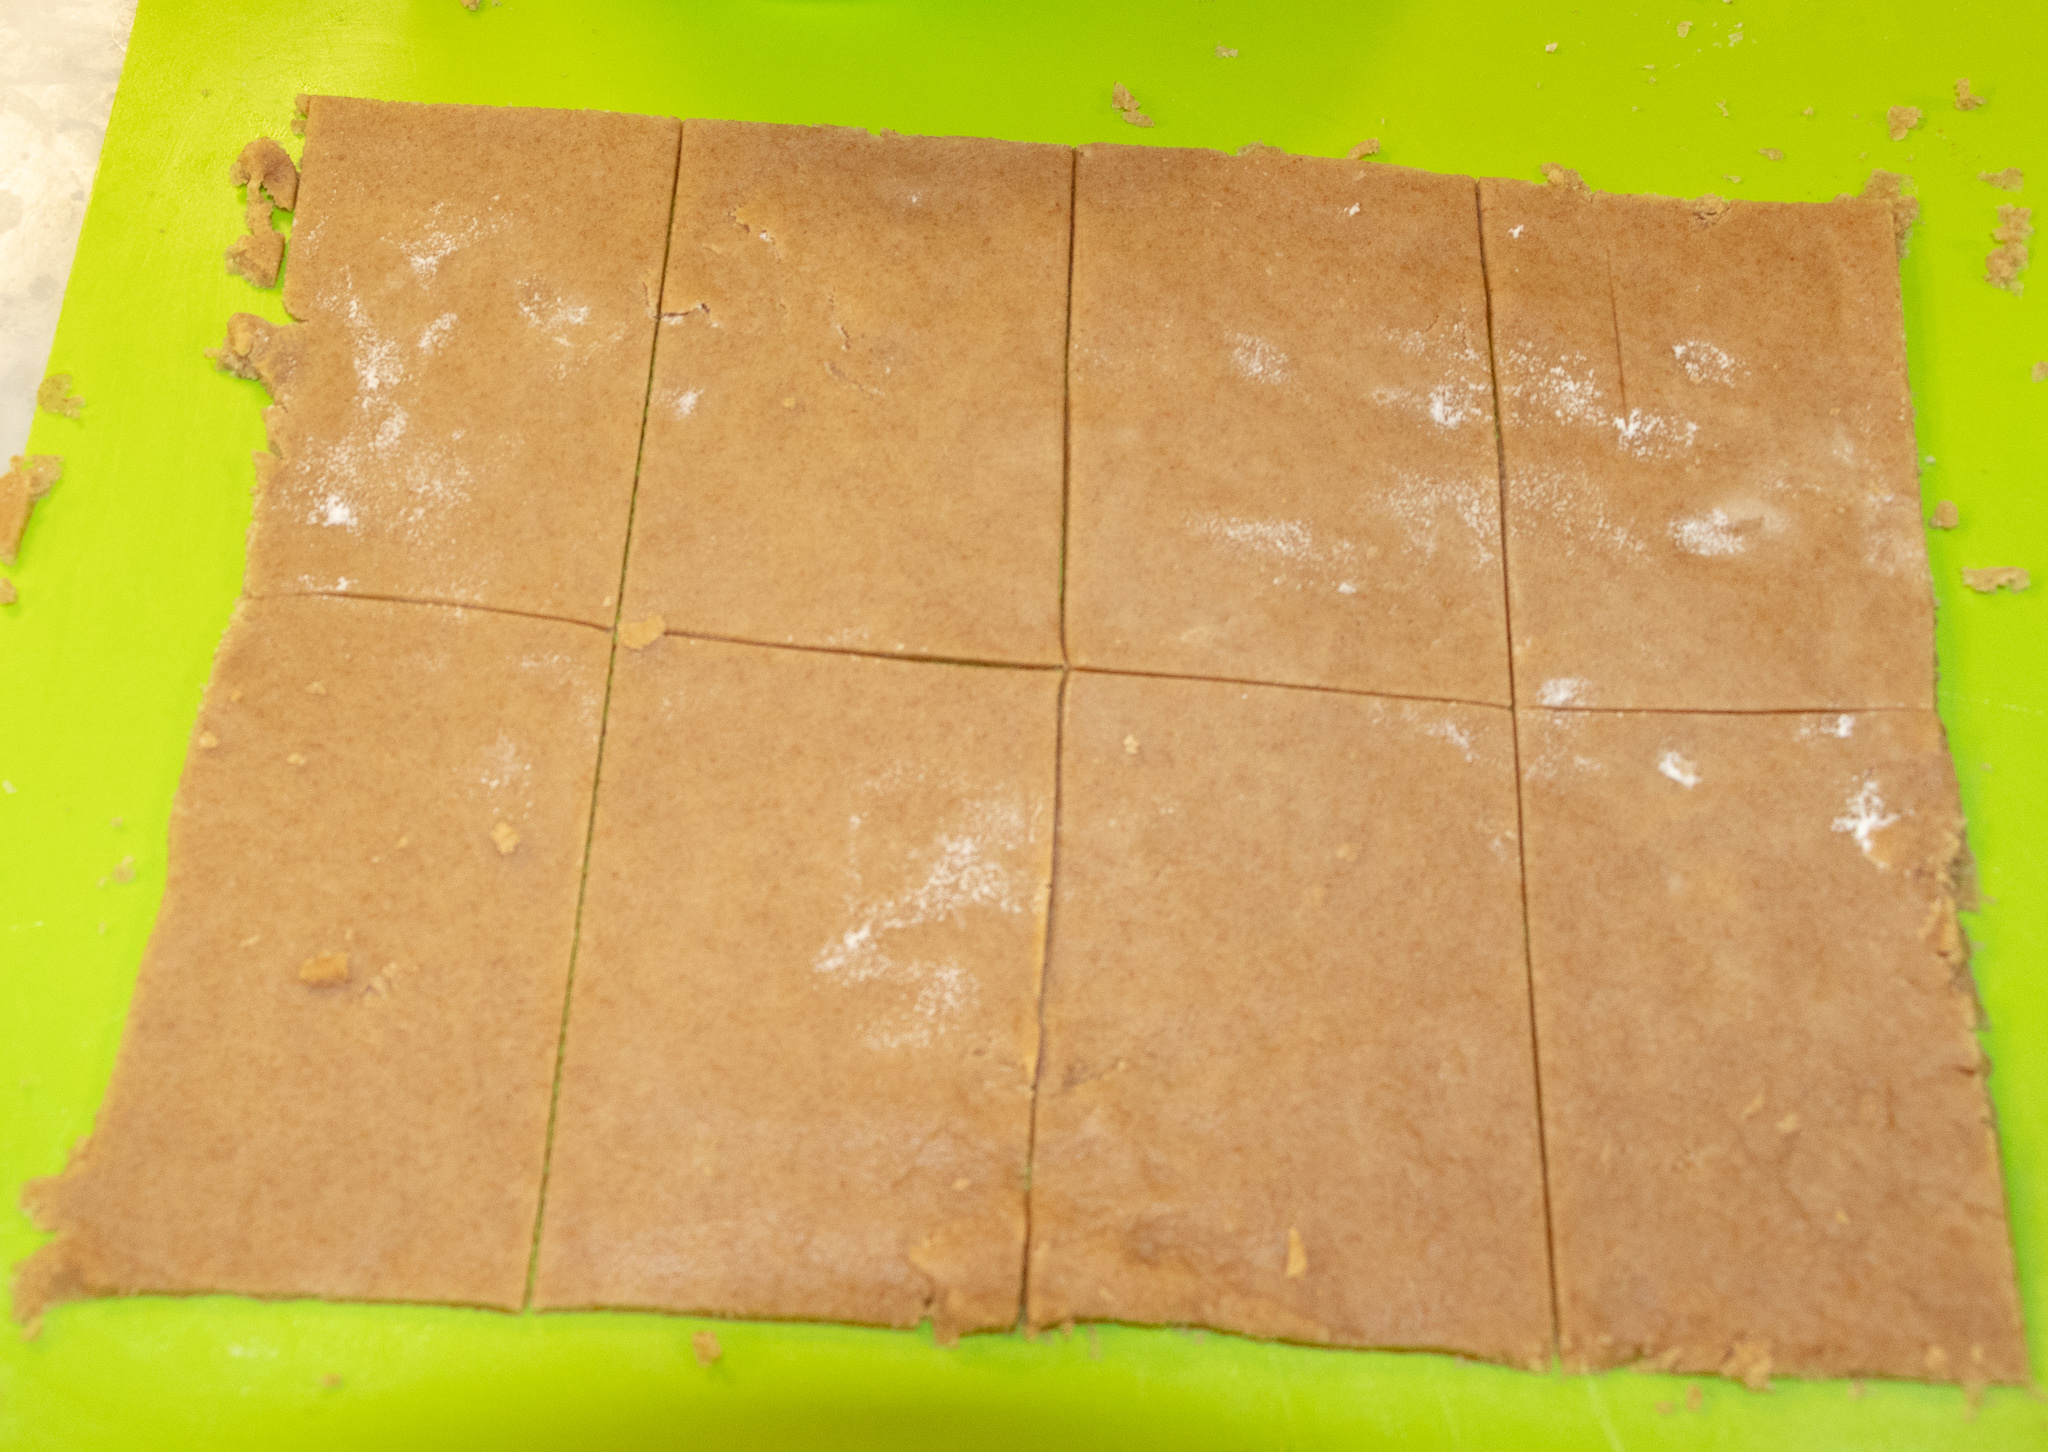
  4. Roll the dough out on a flour dusted, smooth surface to a 1/8 of an inch thick rectangle. You can trim up the edges with a sharp knife, and save the scrap dough.

  5. Once the dough is trimmed and even, cut 3 inch by 5 inch rectangles from the dough, give or take. Be sure when you are calculating how many you can cut, to have a even number. Each pop tart needs 2 rectangles. Roll out any scrap dough and repeat the process.

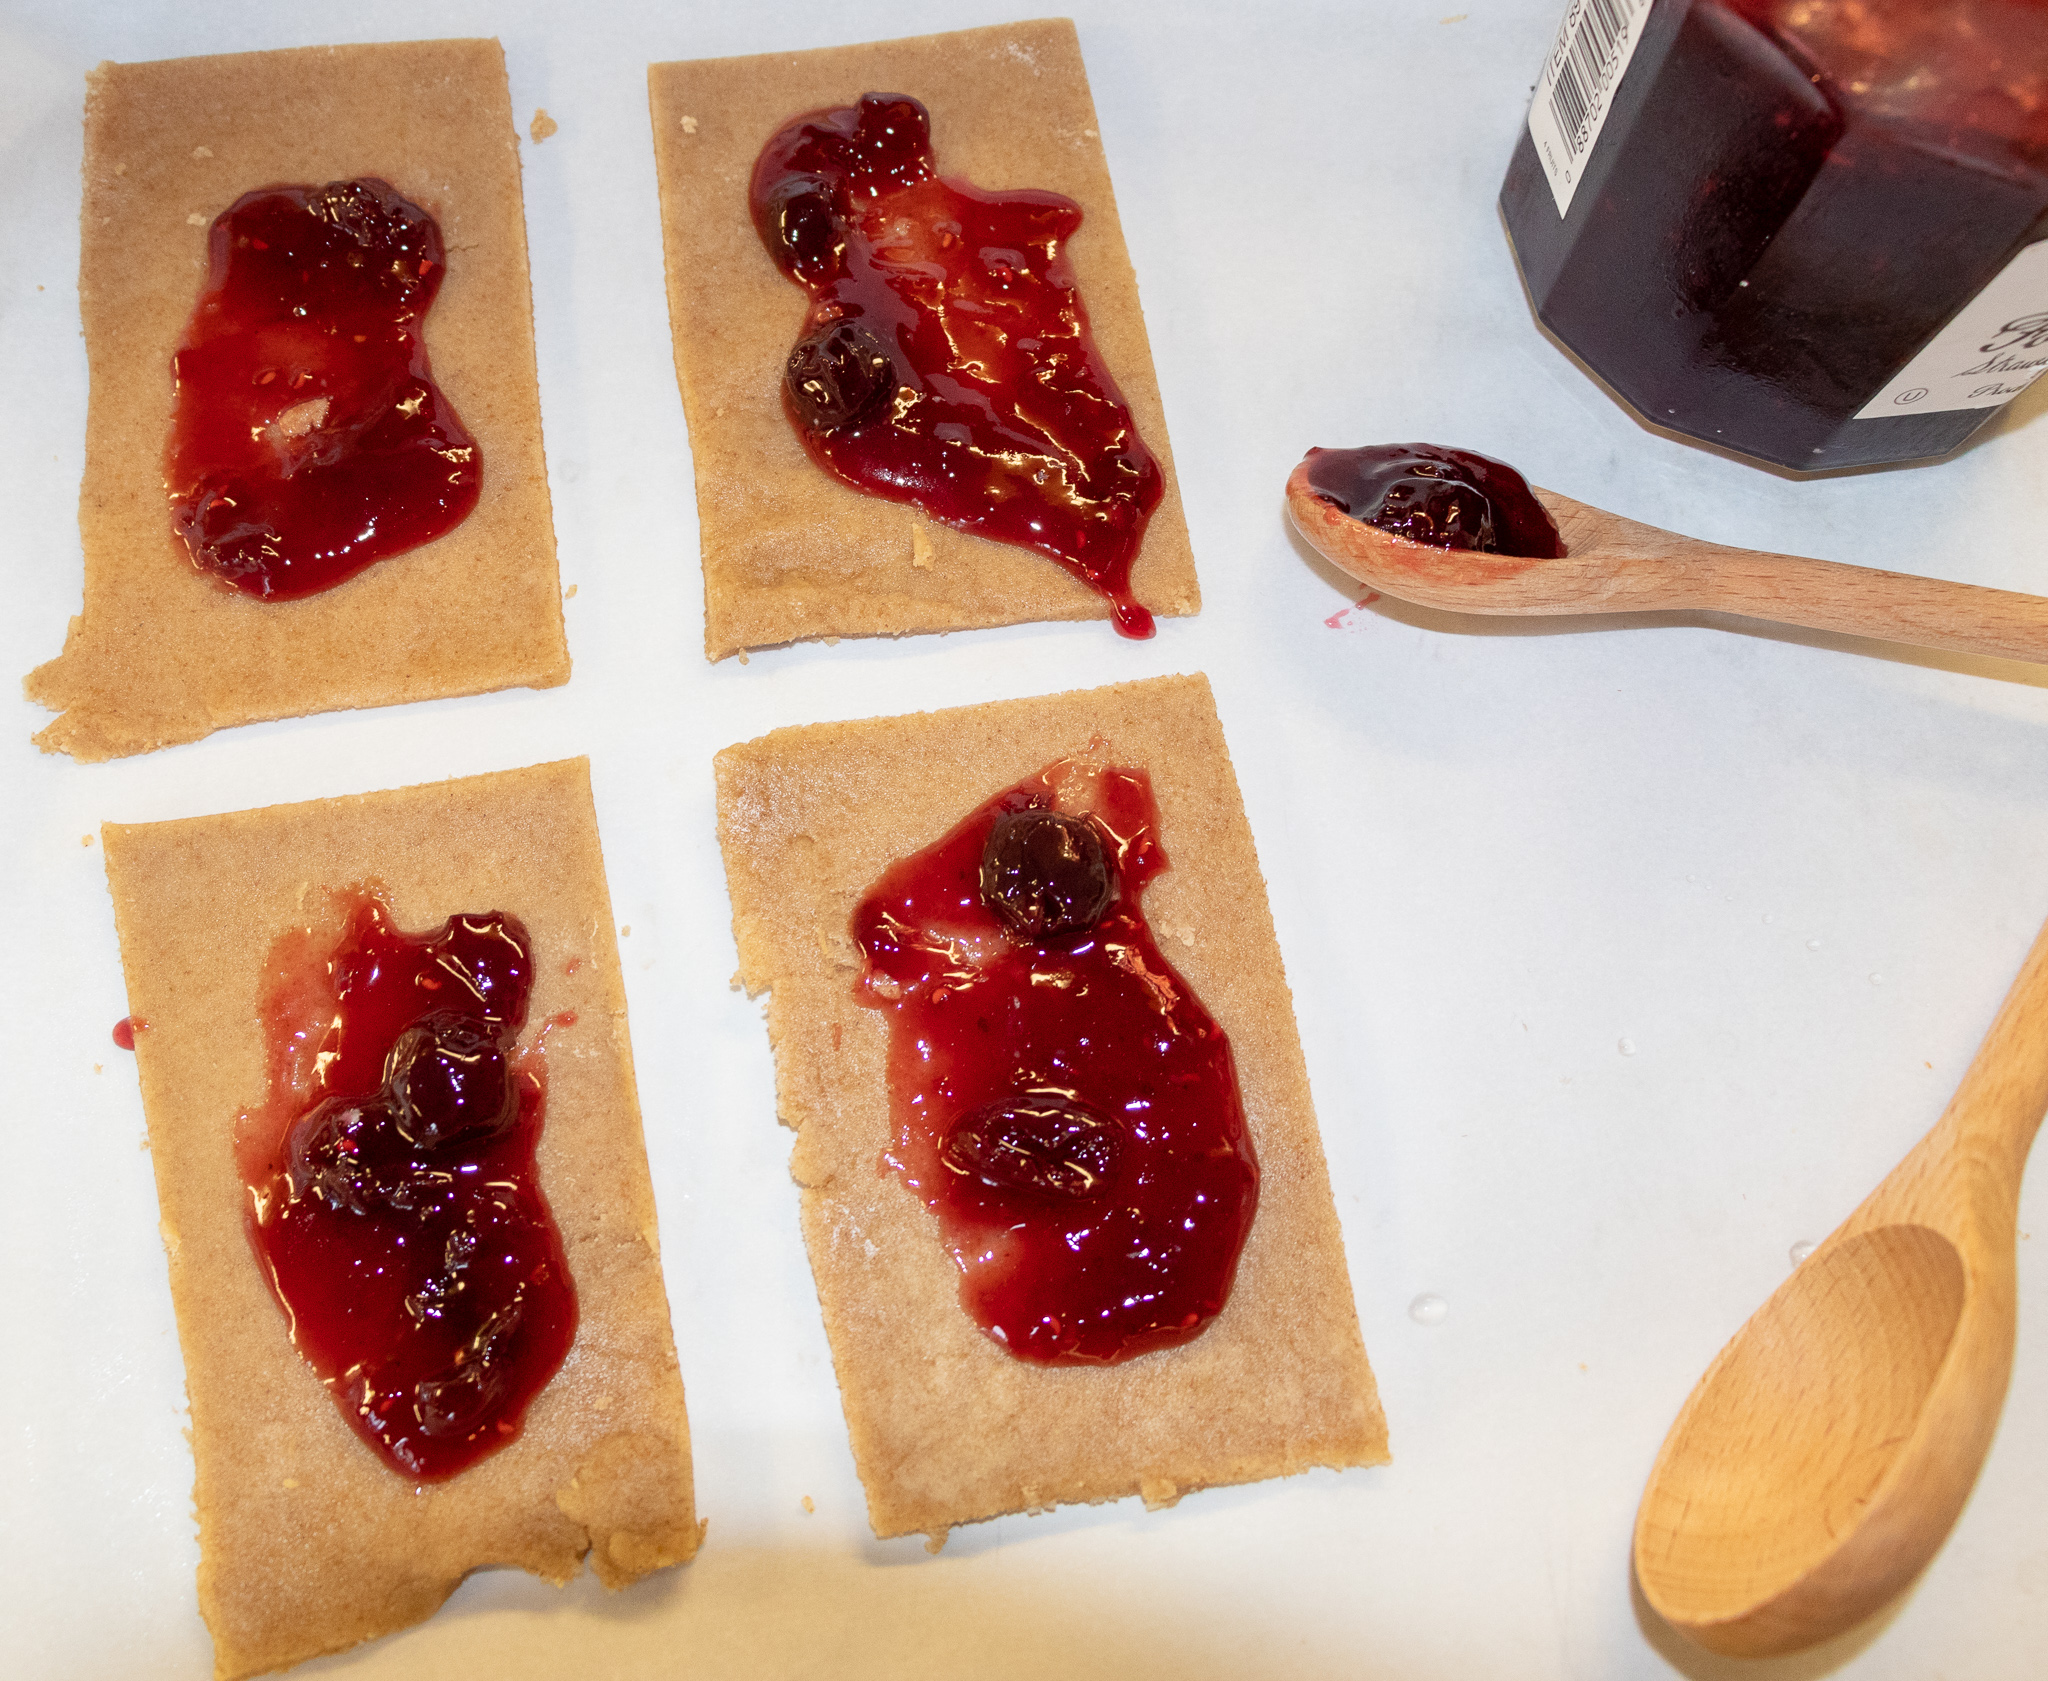
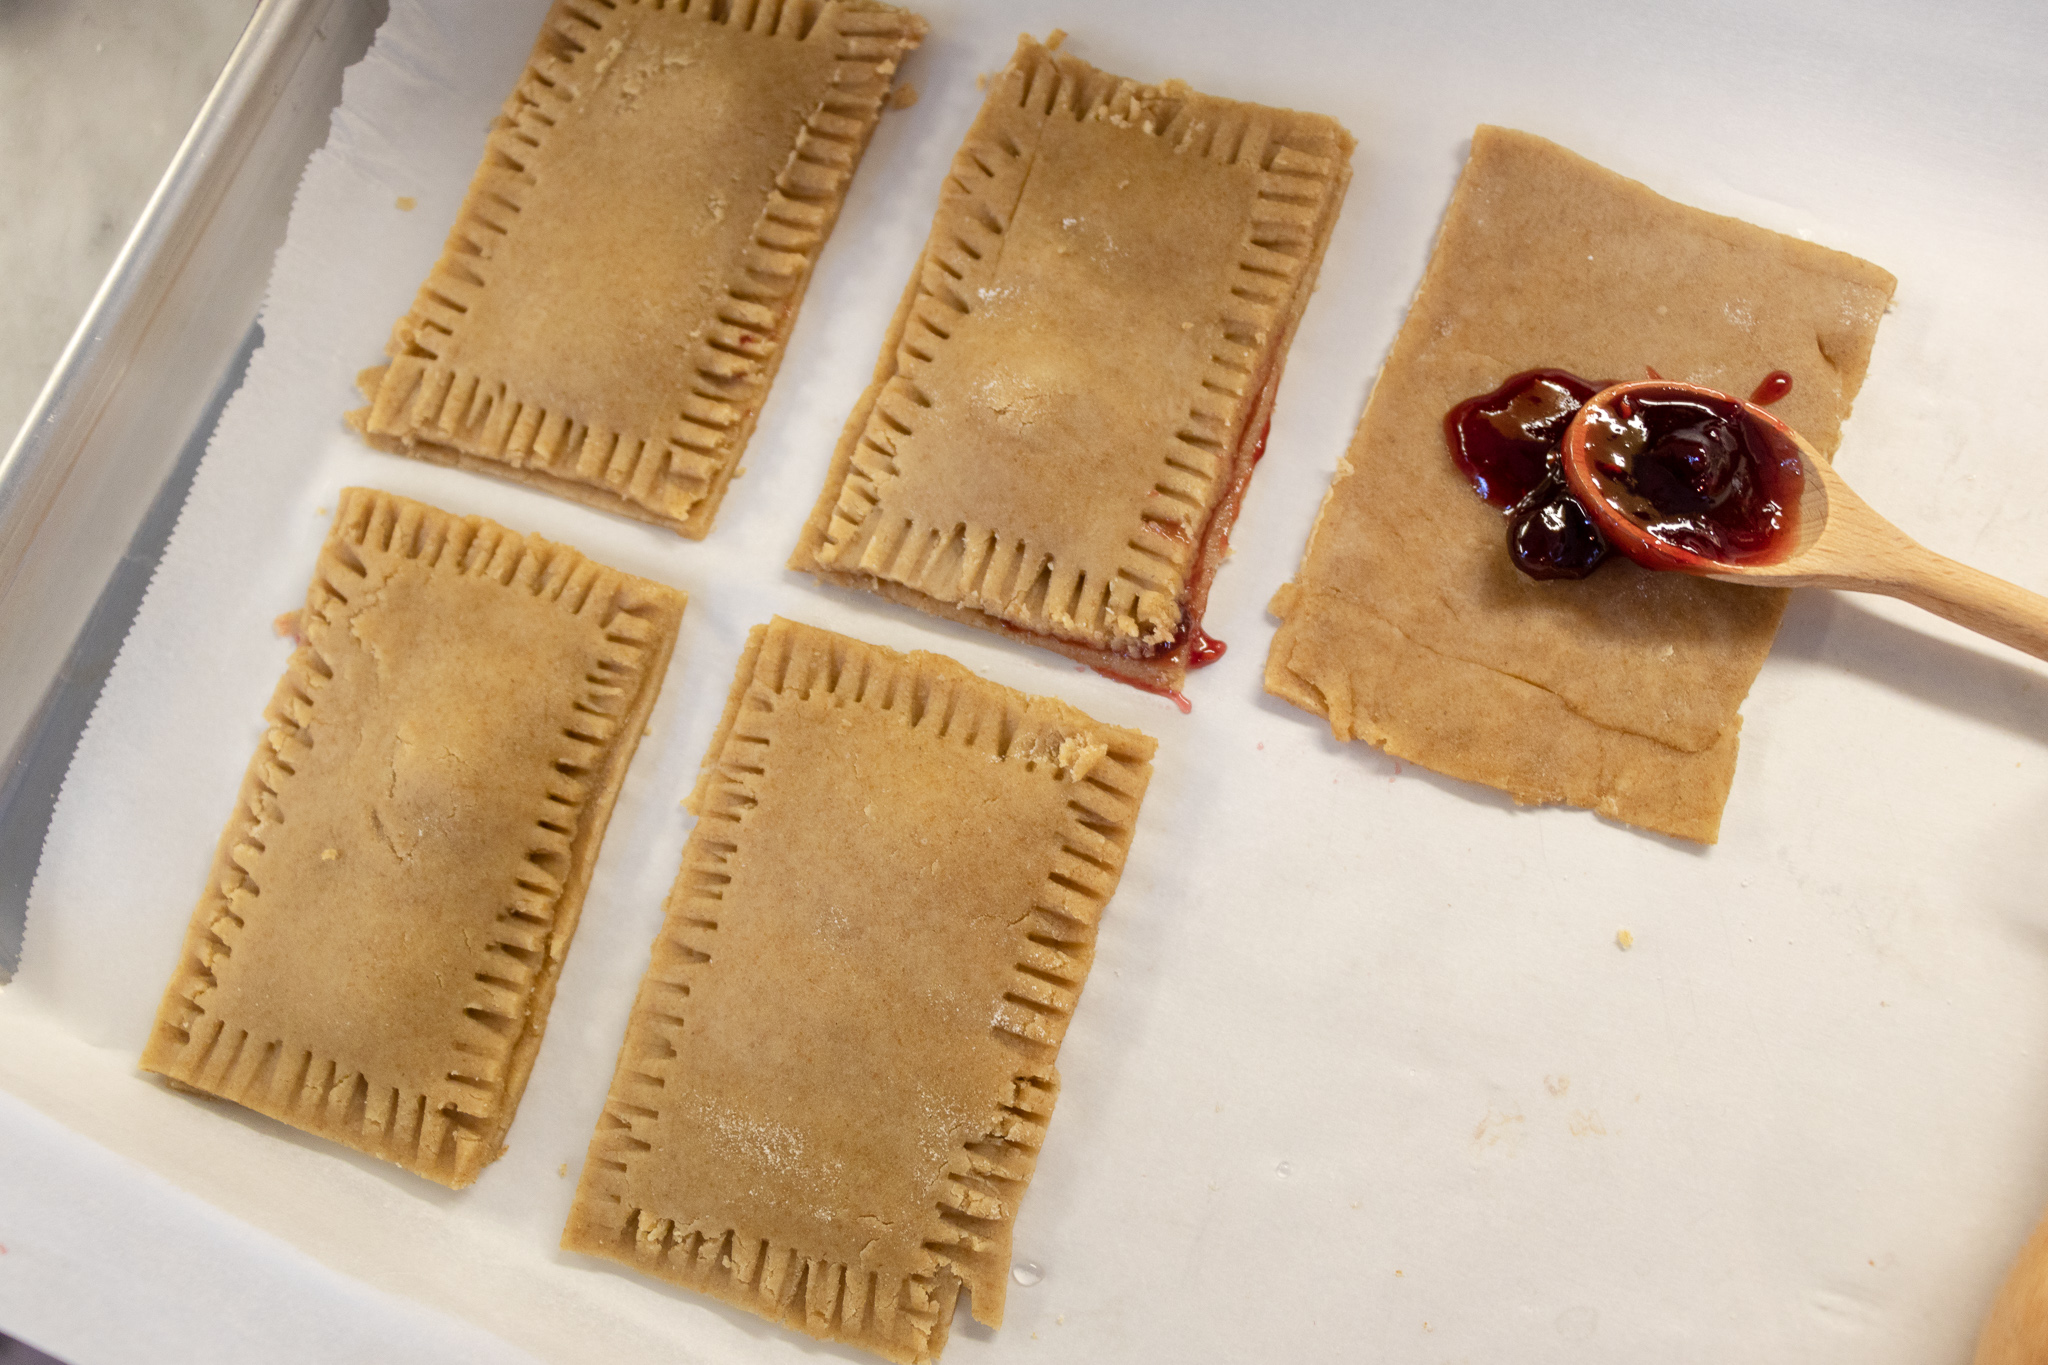
  6. Scoop a teaspoon of strawberry jam onto a rectangle, and smear it around a bit in the middle, carefully to not get too close to the edges. ( this is where you are allowed to laugh at my careless smearing in the above picture..and notice in the next picture how that jam oozed out the sides when I pressed the edges of dough together....the whole do as I say, not as I do thing absolutely applies here)

  7. Top the jam covered piece of dough with another rectangle of dough, and use a fork to press, and seal the edges.

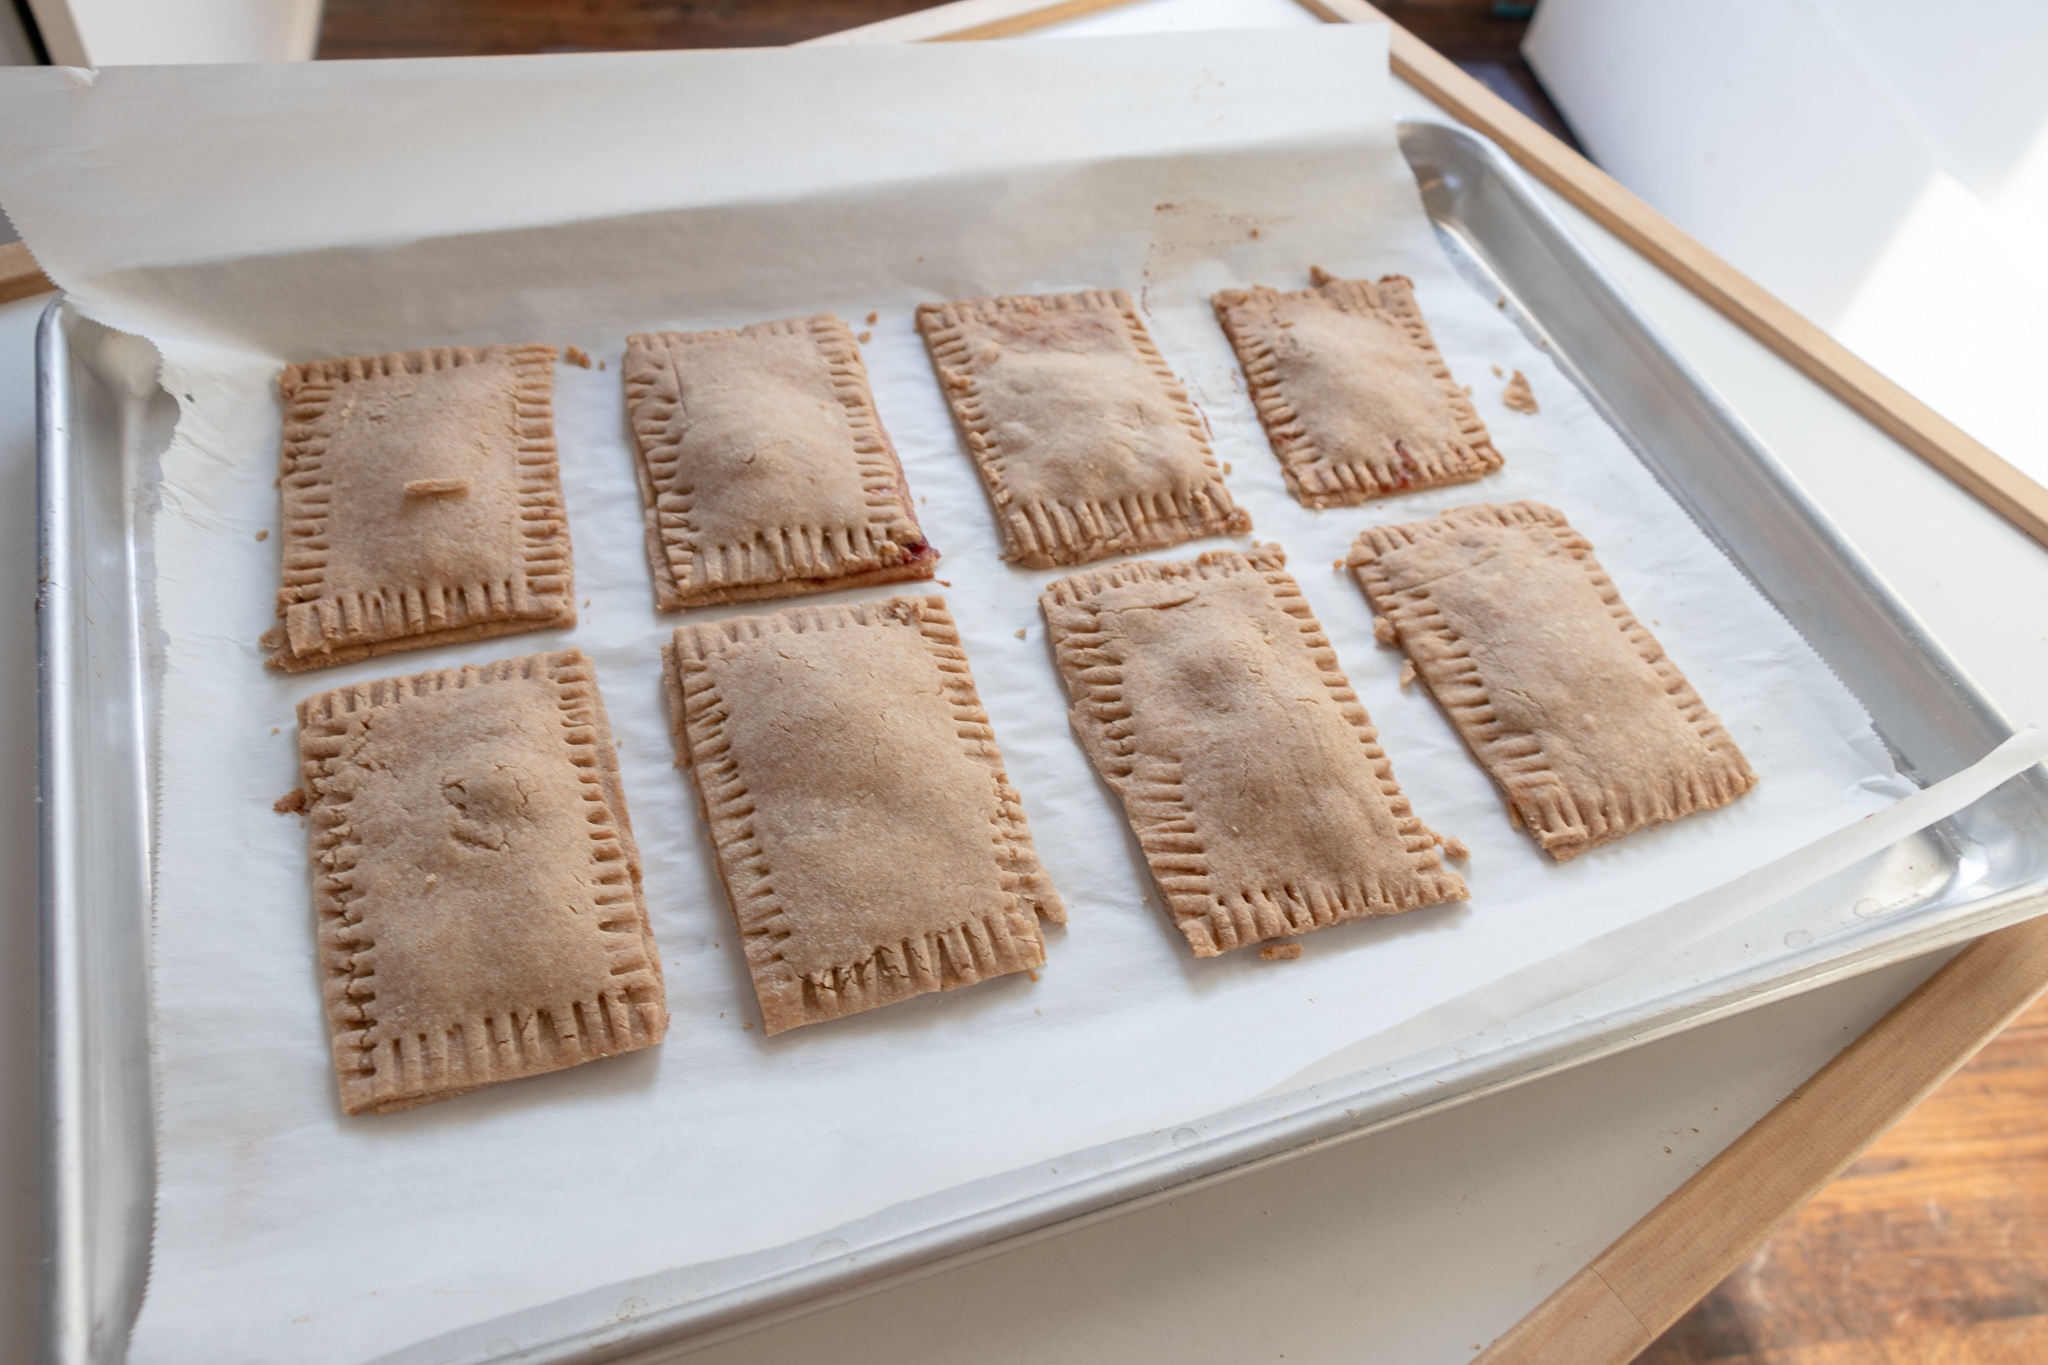
  8. Place pop tarts on a parchment lined baking sheet, or lightly spray one with cooking oil and bake for 20-25 minutes.

  9. While pop tarts are baking, mix together the powdered sugar with 1 teaspoon of jam and 1/2 teaspoon of water. If it is too thin you can add a little more powdered sugar to thicken it back up. You want a spreadable consistency.

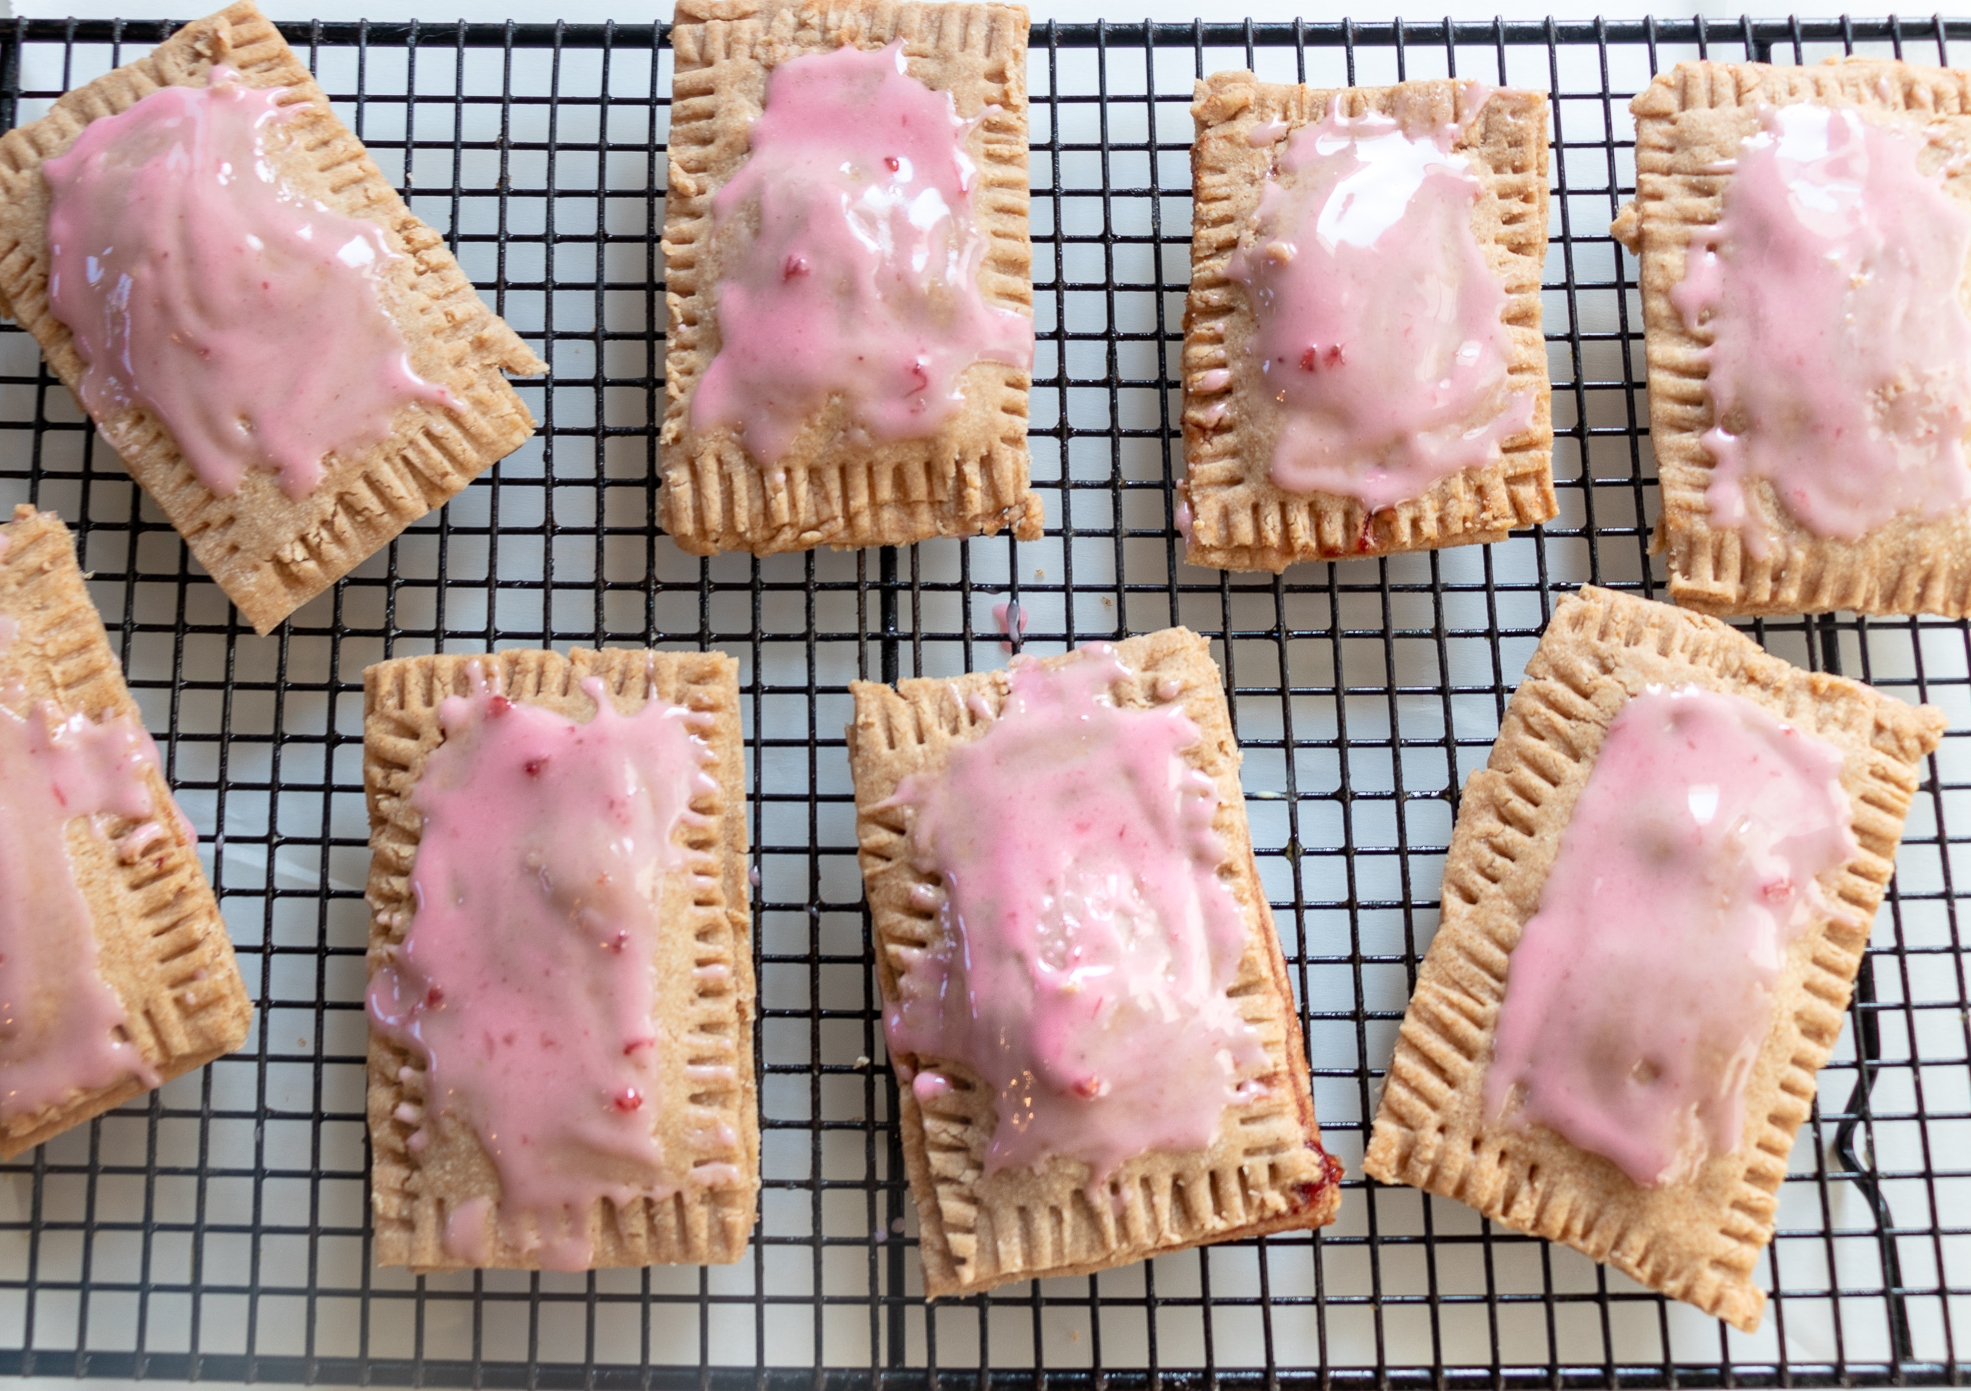
  10. Once pop tarts have cooled a bit, spread the icing and serve.

Yields 8 pop tarts.

Chocolate, Peanut Butter, Banana "Nice cream"

Banana "nice cream" is a pretty popular frozen treat these days. As it should be. It could not be easier to whip a batch of this yummy, and healthy frozen treat! I like to freeze our over-ripe bananas so that I always have some on hand when I get an…

Banana "nice cream" is a pretty popular frozen treat these days. As it should be. It could not be easier to whip a batch of this yummy, and healthy frozen treat! I like to freeze our over-ripe bananas so that I always have some on hand when I get an ice cream craving. You can easily omit the chocolate and nut butter, and add some fresh strawberries or other fruit to the mix!

INGREDIENTS:

  • 5 - 6  sliced, frozen bananas
  • 1/4 cup plant based milk
  • 1/4 cup cocoa powder
  • 1/4  cup nut butter
  • vegan chocolate chips or coconut for sprinkling (optional)

INSTRUCTIONS:

  1. Place all ingredients into a high speed blender or food processor, and blend until completely creamy. You will likely have to pause blending to scrape sides, or move the mixture around a little with a spoon to get it to fully blend. If it still seems too thick, you can add a tiny bit more milk. Just don't add too much, because you want the mixture thick.
  2. Seve right away with whatever toppings you like.

Serves about 4.

Vegan Chocolate Chip Cannoli

IMG_9427-2.jpg

Holy Cannoli! It’s vegan cannoli!

I mean if you didn’t know this is a thing, it’s totally a thing! And they are so flipping delicious.

It was actually our 13 year old daughter who decided she wanted to make vegan cannoli. Ya’ll, she is 13! So if she can do it, you can too!

The shells take a little time but are worth it! So worth it! We don’t have a cannoli tube/maker, so made one out of foil. If you plan on making them often, I suggest investing in the the tube. But making your own totally works!


We also used tofu for the filling. We made it into a sweet tofu ricotta and it is super delicious! I love using tofu to make sweet and savory ricottas. The texture is creamy perfection and the chocolate chips add just the right bite.

You could dip your finished cannoli in chocolate, sprinkles, pistachios, whatever. We just wanted to give you the basic recipe and beyond that, get as creative as you want.


Just remember to fill the shells when you are ready to eat them. They tend to get a little soggy if you fill them and let them sit for extended period of time.

So, go forth and make cannoli! Just because you are vegan does not mean you cant’t enjoy the same treats as everyone else. Cannoli included!!


The Dough:

  • 2 cups all purpose flour

  • 1 tablespoon sugar

  • 1/4 teaspoon salt

  • 2 tablespoons plus 2 teaspoons vegan butter, like Earth Balance

  • 1 egg replacement , we used store bought powdered egg replacement for this recipe

  • 1/2 cup dry white wine

  • enough oil for frying.

The Filling:

  • 1 package firm organic tofu (drained)

  • 1/2 cup powdered sugar

  • Juice from one lemon

  • 1 teaspoon cinnamon

  • 1/4 teaspoon salt

  • 1 teaspoon vanilla

  • 1/4 cup mini vegan chocolate chips


Instructions for the Dough:

  1. In a medium sized bowl, mix dry ingredients.

  2. Add in the cold vegan butter to the dry ingredients. Using your hands, mix the butter in until you have a rice like, crumble.

  3. Add the flax egg, and wine, and work mixture with your hands until a soft dough has formed. If it seems too dry, add another teaspoon or two of wine until it comes together.

  4. Flatten dough into a disk, and wrap in plastic wrap. Pop the dough in the fridge to rest while you make the filling.

Instructions for Filling:

  1. Add all of the filling ingredients EXCEPT the chocolate chips to a high speed blender, or food processor. Mix on high until filling becomes completely smooth.

  2. Once smooth, fold in the chocolate chips with a spoon. Place in fridge until ready to use.

Making the Cannoli:

  1. Remove dough from the fridge, and roll it out to about 1/8 of of an inch thick. You want the dough very thin.

  2. Cut 3-4 inch circles from the dough with a circle cookie cutter, or the rim of a drinking glass.

  3. You should be able to get about 20 circles from the dough.

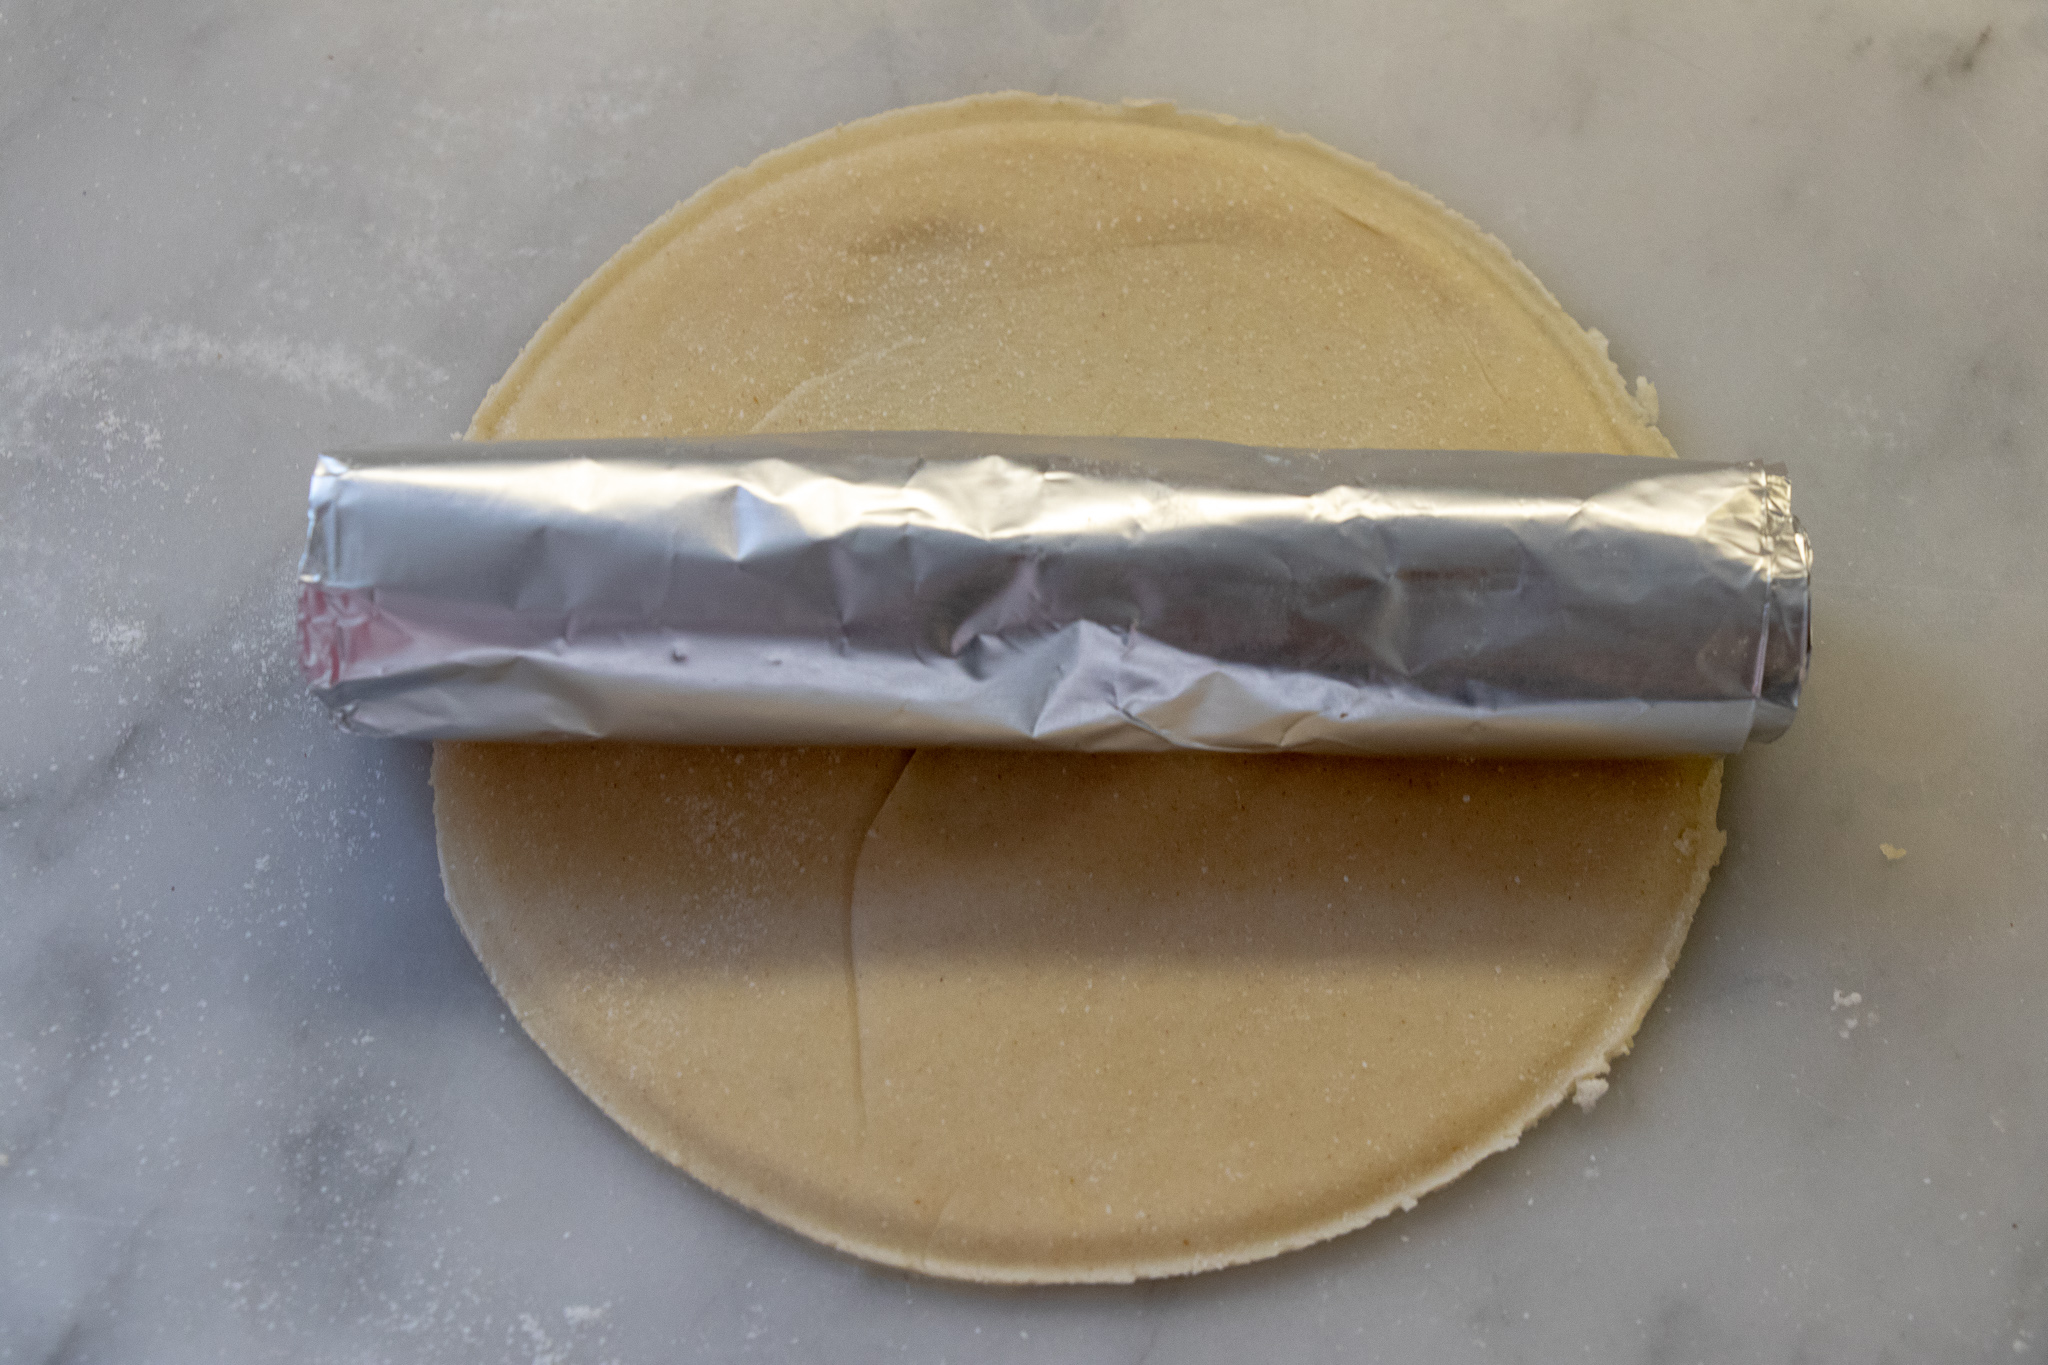
  4. You will need a cannoli mold, OR you can make some with some aluminum foil (pictured above.) Take 4 sheets of foil, you want tear the foil at about 4 inches. So your sheets will be 4x12 inches. Start rolling the first sheet at the short end into a tight tube. Begin rolling that tube into another sheet, and so on, until all sheets of foil have been used up. Now you have a foil tube. You can make 3 or 4 tubes to make frying a little faster. The tubes get very hot so you will have to wait for them to cool each time before you start another batch.

  5. Heat a deep skillet (I just used a small/medium cast iron skillet) with an inch or two oil on medium heat.

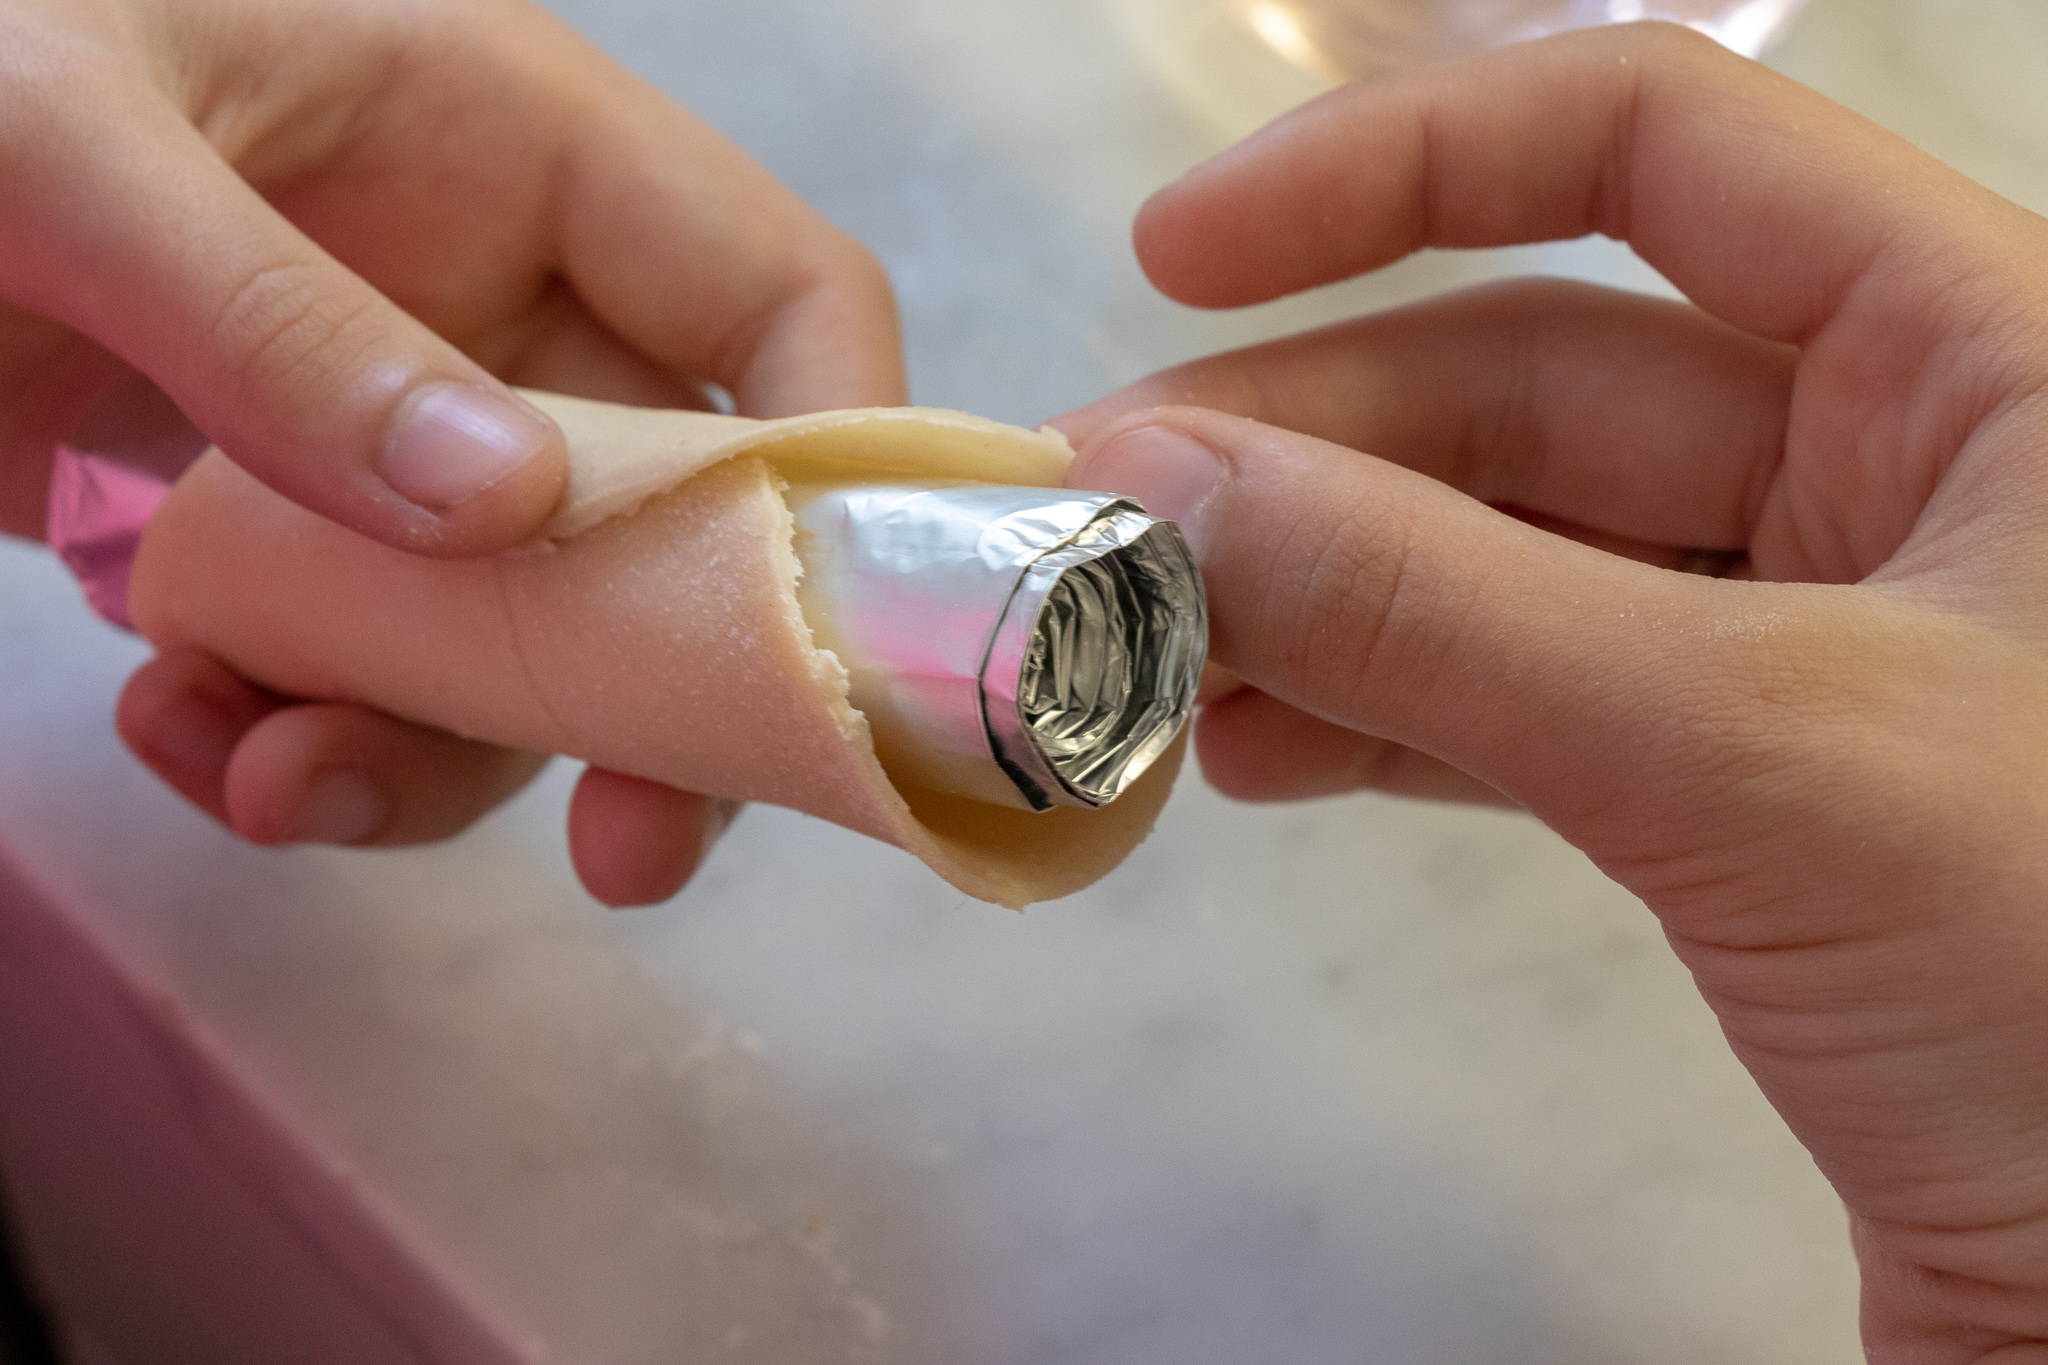
  6. Take a circle of dough and wrap it around your mold. Brush the dough with a tiny bit of water at the seams to help seal them. Use your fingers to flare out the edges just a tiny bit.

  7. Take some metal tongs, and place the cannoli into the hot oil. Let cook for 15 to 20 seconds on one side, then turn it. It will begin to brown instantly. You only need to cook each one for a minute or less. Be carful because the foil tubes will hold oil. When you pick the cannoli up out of the pan, hold it vertically above the pan with your tongs, and allow the extra oil to come out before placing on a wire cooling rack.

  8. After a minute or so, allowing the cannoli to cool, grab the tube with the tongs in one hand, use a paper towel in the the other hand to help you carefully pull the cannoli off the tube. I like to place the still hot foil tubes on a plate, and stick them in the freezer for a few mintues to let them cool enough to handle before starting the next batch of cannoli shells.

  9. Repeat this process until you have fried all of the dough.

  10. Once all of the cannoli shells are done and cooled, fill a piping bag, or large zip lock with the filling. If using a zip lock, snip a corner with some scissors. Pipe the filling into the shells, and dust with some powdered sugar.

 The shells will store well at room temperature, so if not serving immediately, wait to fill the shells until ready to serve. 

IMG_9409.jpg

Southern Vegan Banana Pudding

IMG_8660.jpg

I am from the south, and in the south we eat banana pudding...not with cool whip, not with cream cheese, but with nilla wafers, bananas, vanilla pudding, and meringue. Anything else, and my Grandmama might have slapped you. Pre vegan, I made banana pudding all the time. Every holiday, every party. So naturally it was one of the first recipes I attempted to veganize. I won't lie, it took me MANY attempts, and a 12 year old baking wonder of a daughter to get it right. She perfected the vegan wafer, while I worked on the pudding. Topped with the most delicious aquafaba meringue, and you have a banana pudding your own southern Grandmama might be willing to try.

INGREDIENTS:

  • 5 - 6 ripe bananas, sliced

Vegan vanilla wafers

  • 2 1/2 cups all purpose flour
  • 1 cup vegan butter
  • 1 cup powdered sugar
  • 1/2 cup white sugar
  • 1 teaspoon salt 
  • 1 tablespoon vanilla extract
  • 1/2 cup plant based milk (oat milk works really well when wanting baked goods to brown, but any plant based milk will work)

Pudding

  • 3 1/2 cups almond milk, divided
  • 1/4 cup corn starch
  • 3/4 cups white sugar
  • 2 teaspoons vanilla extract
  • 1/2 teaspoon salt 

Meringue

  • Liquid from 1 can of chick peas
  • 2/3 cups sugar
  • 1/4 teaspoon cream of tarter

COOKING INSTRUCTIONS:

Cookies

  1. Preheat oven to 350 degrees.
  2. With an electric hand mixer, beat the butter, and both sugars, until soft and creamy.
  3. Add in the milk and vanilla, and mix into the sugar and butter . The batter will look weird, and separated, but will come back together, don't worry.
  4. Beat in the flour and salt a little at time until well mixed.
  5. Pour batter into piping bag, or a zip lock bag with a hole cut in the corner, and pipe one inch circles onto a cookie sheet lined with parchment paper.
  6. Bake cookies for 20-25 minutes.

Pudding

  1. In a medium sized pot, add 3 cups milk, vanilla extract, salt, and sugar.
  2. Heat on medium heat, and whisk until the sugar is disoloved.
  3. In a small bowl, whisk the remaining 1/2 cup of milk, and corn starch together until well combined, adding mixture to the pot.
  4. Whisk well, and continue stirring, letting the mixture simmer until it begins to thicken. Once it thickens, let simmer a few more mintues, and then remove from the heat.
  5. It may still seem a little thin, but will get thicker in the fridge.

Meringue

  1. Microwave the sugar and chickpea liquid for 30 seconds, stir and repeat in 30 second intervals, until the sugar is dissolved.
  2. Add the liquid, and cream of tarter to a stand mixer. If you do not have a stand mixer just make sure the mixture is in a nice big bowl, and use an electric hand mixer.
  3. Beat the mixture on high until it thickens, and stiff peaks form. You want it to look like a fluffy, glossy, perfect cloud of meringue! This can take up to 10 minutes, so don't give up if nothing happens for a while. It will get there.

Layering the pudding

  1. In medium sized glass serving bowl, one that can go into an oven, start by adding some pudding to the bottom, then a single layer of wafers, and finally a layer of bananas.
  2. Repeat layering until all ingredients are gone, then top with a thick layer of meringue.
  3. Turn oven to broil, and place pudding inside, keeping the oven door OPEN. You will have to watch the pudding the whole time because it only takes a second for it to burn to a crisp. Trust me, I've lived it.
  4. It will only take a few seconds for the peaks to begin to brown. Once they do, remove from the oven and let cool before serving. 
  5. Serve warm, or refrigerate for a bit if you prefer it cold.
IMG_8667.jpg

Grilled Peaches with Maple and Vegan Ricotta

IMG_8625.jpg

These grilled peaches are such an easy, and delicious summer dessert. The warm sweet, and tart peaches, paired with the creamy maple ricotta is summer perfection.

My daughter adores all things peaches and peach season happens to coincide with grilling season. So since I I grill any chance I can get, it was an obvious choice to throw some peaches onto the grill and top them with some easy tofu ricotta.

We decided to give the peaches a drizzle of maple and top them with some sliced almonds for a nice crunchy contrast and truly they are just there perfect healthy, easy, summer time dessert!

If you can’t find any peaches I am certain this would also be just as tasty with a nectarine.

So, the next time you are grilling up dinner, toss on a few peaches, whip up some quick tofu ricotta, and dessert is done in minutes.


INGREDIENTS:

  • 4 - 6 peaches

  • 1 package firm tofu

  • 3 tablespoons maple syrup

  • 1 lemon

  • 1/4 teaspoon salt

  • 1 teaspoon cinnamon

  • 1 teaspoon vanilla extract

  • 1/4 cup sliced almonds (optional)

  • More maple for drizzling


COOKING INSTRUCTIONS:

  1. Prepare peaches by rinsing with skin on. Cut peaches in half and remove pit.

  2. In a blender, or food processor, add drained tofu with juice from 1 lemon, maple syrup, vanilla, salt, and cinnamon. Process until completely smooth.

  3. Spray grates of grill with cooking oil, and heat.

  4. Spray or brush the cut side of the peaches with a little oil, and place face side down on the heated grill.

  5. Grill peaches for about 10 minutes, or until nice grill marks have formed.

  6. Flip peaches, and grill the other side for about 5 minutes.

  7. Remove from grill, and let cool for a few minutes.

  8. Add a scoop of the tofu ricotta in the dips of the peaches, sprinkle with almonds, and drizzle with maple syrup to serve.

Serves 4-6


Black and White Vegan Chocolate Cheese Ball

This sweet and creamy chocolate cheese ball is perfect for serving with fruit or cookies at your next get together. It is also makes for a great anytime snack, or dessert. Cheese balls don't always have to be savory, and this one proves it!

This sweet and creamy chocolate cheese ball is perfect for serving with fruit or cookies at your next get together. It is also makes for a great anytime snack, or dessert. Cheese balls don't always have to be savory, and this one proves it!

INGREDIENTS:

  • 1 cup cashews soaked in hot water for a few hours or microwaved for 3 minutes then drained
  • 1/2 cup refined coconut oil 
  • 1 teaspoon vanilla extract
  • 1/4 cup maple syrup or maple butter
  • 1/4 teaspoon salt
  • 1/2 teaspoon cinnamon (optional)
  • 2 - 3 tablespoons plant based milk
  • 1/2 cup mini chocolate chips (if you only have regular, give them a pulse in the food processor first to break them up a bit)

Chocolate coating

  • 3 tablespoons cocoa powder 
  • 3 tablespoons refined coconut oil
  • 2 tablespoons maple syrup

COOKING INSTRUCTIONS:

  1. Add all of the ingredients except the chocolate chips to a food processor, and blend until it becomes completely smooth. You may need to add the third tablespoon of milk if it seems too thick.
  2. Add the chocolate chips and fold in with a spoon.
  3. Line 2 small bowls, or ramekins, with a pieces of plastic wrap. You want a piece big enough that it will hang a good bit over the sides. 
  4. Divide mixture evenly into the bowls. Now take the plastic wrap hanging over the edges, bring together and twist to seal up the cheese. Allow to harden in the fridge for 3 - 4 hours to firm up.
  5. Once cheese is ready, whisk together the chocolate coating ingredients until smooth.
  6. Remove both cheese balls from the bowls, and plastic wrap. Dip the bottom halves into the chocolate coating. It will instantly begin to harden because the cheese is cold. 
  7. Put cheese balls in an airtight container and store in the fridge for up to 5 days.

serve with fruit or cookies 

Vegan Soft Frosted Sugar Cookies

IMG_8513.jpg

Before we went vegan, soft iced sugar cookies from the grocery store bakery were my kids favorite.

The thing they would beg for, and I would say no, and they would beg and I would say no, and they would beg some more….and if you have kids you might be very familiar with this grocery store scenario.

I would normally only cave on holidays or special occasions, but once we went vegan, that all changed.

Our daughter Peyton is a baking wonder and decided a few years back to try her hand at baking her favorite old cookies, and as usual, she nailed it. And now is cookie baking hero to her sisters and brother.

We made our first batch for the 4th of July but you could decorate them any way like for any holiday or a random Monday.

These vegan sugar cookies are soft and buttery, and have the perfect amount of frosting on top. It’s no wonder my kids love them so much, I love them just as much.

And if my at the time 12 year old can bake up a batch of cookies this perfect and beautiful, I am pretty sure you can too!


INGREDIENTS:

  • 3 cups all purpose flour

  • 1/2 teaspoon baking powder

  • 1/2 teaspoon baking soda

  • 1/4 teaspoons of salt

  • 1/2 cup vegan butter

  • 1 cup white sugar

  • 1 teaspoon vanilla extract

  • 2 egg replacers (in this recipe we use store bought powdered egg replacer)

  • 3/4 cups vegan plain yogurt


Frosting

  • 1/3 cup vegan butter

  • 1/4 cup vegan shortening

  • 4 cups powdered sugar

  • 1/2 teaspoon vanilla

  • 1/2 teaspoon lemon extract (optional, you can use 1 full teaspoon vanilla if leaving this out)

  • 2 - 3 tablespoons plant based milk

COOKING INSTRUCTIONS:

  1. For the cookies, mix all dry ingredients together in a bowl.

  2. In another bowl beat together butter, and sugar until just combined.

  3. Mix the yogurt, egg replacer, and vanilla with the butter and sugar.

  4. Slowly add the dry ingredients to the wet, about 1/2 cup at a time, until well combined.

  5. Divide the dough in half, wrapping in plastic wrap, and refrigerate for 2 - 3 hours.

  6. Once dough is ready, roll it out to 1/4 inch thickness and cut circles with a 2 inch cookie cutter, or using the rim of a small glass.

  7. Bake at 425 degrees for 6 - 7 minutes, depending on the oven. They will still be very soft, but not doughy. Do not let them over bake!

  8. Let cookies cool and prepare frosting.

Frosting

  1. Beat the butter and shortening together with an electric mixer.

  2. Add in the vanilla extract and salt.

  3. Slowly beat in the powdered sugar.

  4. Add just enough milk to get the icing to a spreadable consistency.

  5. Spread frosting on cookies, and cover with sprinkles.

IMG_8551.jpg

Basic Aquafaba

IMG_8218.jpg

I get A LOT of questions concerning aquabfaba in our recipes.

Aquafaba quite simply is just the cooking liquid from beans. You can use canned aquafaba or liquid from dry beans you have cooked.

You can use liquid from any bean actually, but I prefer the mild flavor of the liquid from chickpeas or any white bean.

I like to use aquafaba in the whipped form. When the liquid from the beans is whipped with a stabilizer like cream of tarter or even salt, the result will be light and fluffy peaks like if you were to whip egg whites!

This means you can use whipped aquafaba in place of eggs in many recipes to add a nice airy lightness. I often use it in cakes, or even casseroles that normally call for many eggs. You will still need a binder like a starch in some cases, like in the instance of a casserole. For those recipes I will often use whipped aquafaba and a few starch eggs, or prepackaged egg replacer.

When referring to aquafaba on this website, I am referring the the whipped product not just the liquid, unless otherwise stated in the recipe.

So, if a recipe calls for 1 cup of aquafaba, it is calling for 1 cup of the fluffy white whip, not one cup of chickpea liquid, pre-whipped. This tends to be one of the biggest mistakes or misunderstandings I have had people encounter in reading the recipes. They tend to want to measure the liquid not the whip. You must first whip the entire can of liquid then measure out the whip.

You will typically have left overs, as one can of chickpea liquid will whip up a more than a few cups of aquafaba.

You can store any leftovers in you fridge. The aquafaba will deflate in the the fridge and turn back to its liquid from, but will easily whip back up, and should keep for a few days.


INGREDIENTS:

  • Juice from one can of chickpeas

  • 1/4 teaspoon cream of tartar or salt


INSTRUCTIONS:

You can use a stand mixer or a hand mixer for this. 

Add liquid from chickpeas, and cream of tartar to your bowl. Whip until the aquafaba is thick, and fluffy, resembling whipped egg whites. 

1/4 cup of aquafaba is equal to one egg in recipes 


Guilt Free Chocolate Chip Cookie Dough Balls

IMG_8156.jpg

Edible cookie dough has become all the rage lately.

Regular and vegan versions are gracing grocery store shelves all over, along with dessert hummus these days.

But, why spend a ton of money on something you can make quickly and easily at home. Also you can make it much healthier and pretty guilt free!

These protein packed cookie dough bites are the perfect guilt free treat. Loaded with chickpeas, rolled oats, and nut butter, they come together in just a few minutes, making them the perfect solution when you are craving something sweet without any regrets.

You can roll them into perfect bite size portions, or even eat it right out of the bowl with no judgment and zero guilt!! Hooray for healthy desserts to help keep you on track that the whole family will love!


INGREDIENTS:

  • 1 can of chickpeas, drianed and rinsed (15 oz can)

  • 1 cup old fashioned rolled oats divided in half

  • 3 tablespoons maple syrup

  • 3 tablespoons nut butter (peanut, almond, cashew, sun butter)

  • 1/4 teaspoon salt

  • 1/3 cups vegan chocolate chips, like Enjoy Life brand


INSTRUCTIONS:

  1. Add chickpeas, 1/2 cup rolled oats, maple syrup, nut butter, and salt to a food processor.

  2. Blend until the mixture becomes mostly smooth. It will be a little gritty from the oats.

  3. Transfer mixture to a bowl and fold in the chocolate chips and remaining 1/2 rolled oats.

  4. Scoop out dough with small spoon or cookie scoop, and roll into bite size balls.

  5. Store in the refrigerator in an airtight container.

Vegan Fried Dough Dippers (funnel cake fries)

IMG_7837.jpg

INGREDIENTS:

  • 1 and 1/2 cups plant based milk
  • 1 and 1/2 cups all purpose flour
  • 1 teaspoon baking powder
  • 2 tablespoons sugar
  • 1/4 teaspoon salt
  • 1 teaspoon vanilla extract
  • powdered sugar for sprinkling

COOKING INSTRUCTIONS:

  1. Whisk the dry ingredients together, then mix in milk and vanilla.
  2. Put batter into a quirt bottle (I used an old school ketchup bottle from the dollar tree) or a zip lock bag with a small hole cut in the corner, so the batter can come out.
  3. Heat a half inch of oil suitable for frying in a pan until it is sizzling hot. (I use grape seed oil, but you can use peanut, or canola, whatever you normally use for frying)
  4. Squirt out batter into a squiggle or any other shape you want, and let the dough fry just a minute or two on each side.
  5. The dough will fry quickly, so once it begins to bubble, and the bubbles pop, its ready to flip.
  6. Put finished dough on a cooling rack or paper towel- lined plate.
  7. Sprinkle with powdered sugar and serve with your favorite dip.

Easy chocolate dip

Option 1:

Melt 1/4 to 1/2 cup of vegan chocolate chips with 1-2 teaspoons of coconut oil in a microwave safe bowl. Heat for 30 seconds at at time, stirring well each time until fully melted

Option 2:

Mix 3 tablespoons melted coconut oil with 2 tablespoons cocoa powder, and a few teaspoons powdered sugar. Stir well until the sauce is completely smooth.